You mentioned earlier that your testing phase was over and it’s easy to get things mixed up. Additionally, some things have changed since PL 9 was first released.
Should you now use PL 9.4, please post an example. – It’s difficult to follow you.
You mentioned earlier that your testing phase was over and it’s easy to get things mixed up. Additionally, some things have changed since PL 9 was first released.
Should you now use PL 9.4, please post an example. – It’s difficult to follow you.
I have no idea why you refer to my testing phase being over…
I could literally test on another computer or buy full version in the meantime after I saw all the answers (and that’s what I did).
So I use the latest version if that makes a difference for you…
So may I ask what it changes in all that context, please?
Great - and welcome to PL 9.4 !
![]()
Could you please post a practical example instead of the theoretical discussion? That would help me better understand what you hope to achieve with “intersect”.
Yes, I had tried to follow your writing (post #18), just that it doesn’t make sense to me.
Please note, I’m not defending DxO’s current solution, but like to understand YOUR problem.
.
You may like to check out "Invert Shape" - bug or user error? and get some ideas with a bunch of “solutions” on different images.
As a long time hobbyist photo editor who has never used masks extensively I can attest to the complexity of full featured masking regardless of the software. I’m just now exploring the possibilities in PhotoLab 9 and I’m pretty impressed with what it can do but still having a hard time getting my head around it all. I do not think this is DxO’s fault. The more capable that masking and layering features are the more complicated it gets. It is like dealing with multiple interacting dimensions each with its own peculiar parameters.
I have found that even after I watch or read a tutorial I still get lost when attempting an edit and have to refer back to the tutorial. For me, the only thing that is going to help that is repetition and a defined work flow.
My example is the quote from DxO User Guide: Edit pictures with the Customize tab – PhotoLab
Local Adjustments → The intersection method
So I’m glad you don’t get it, since they don’t get it too.
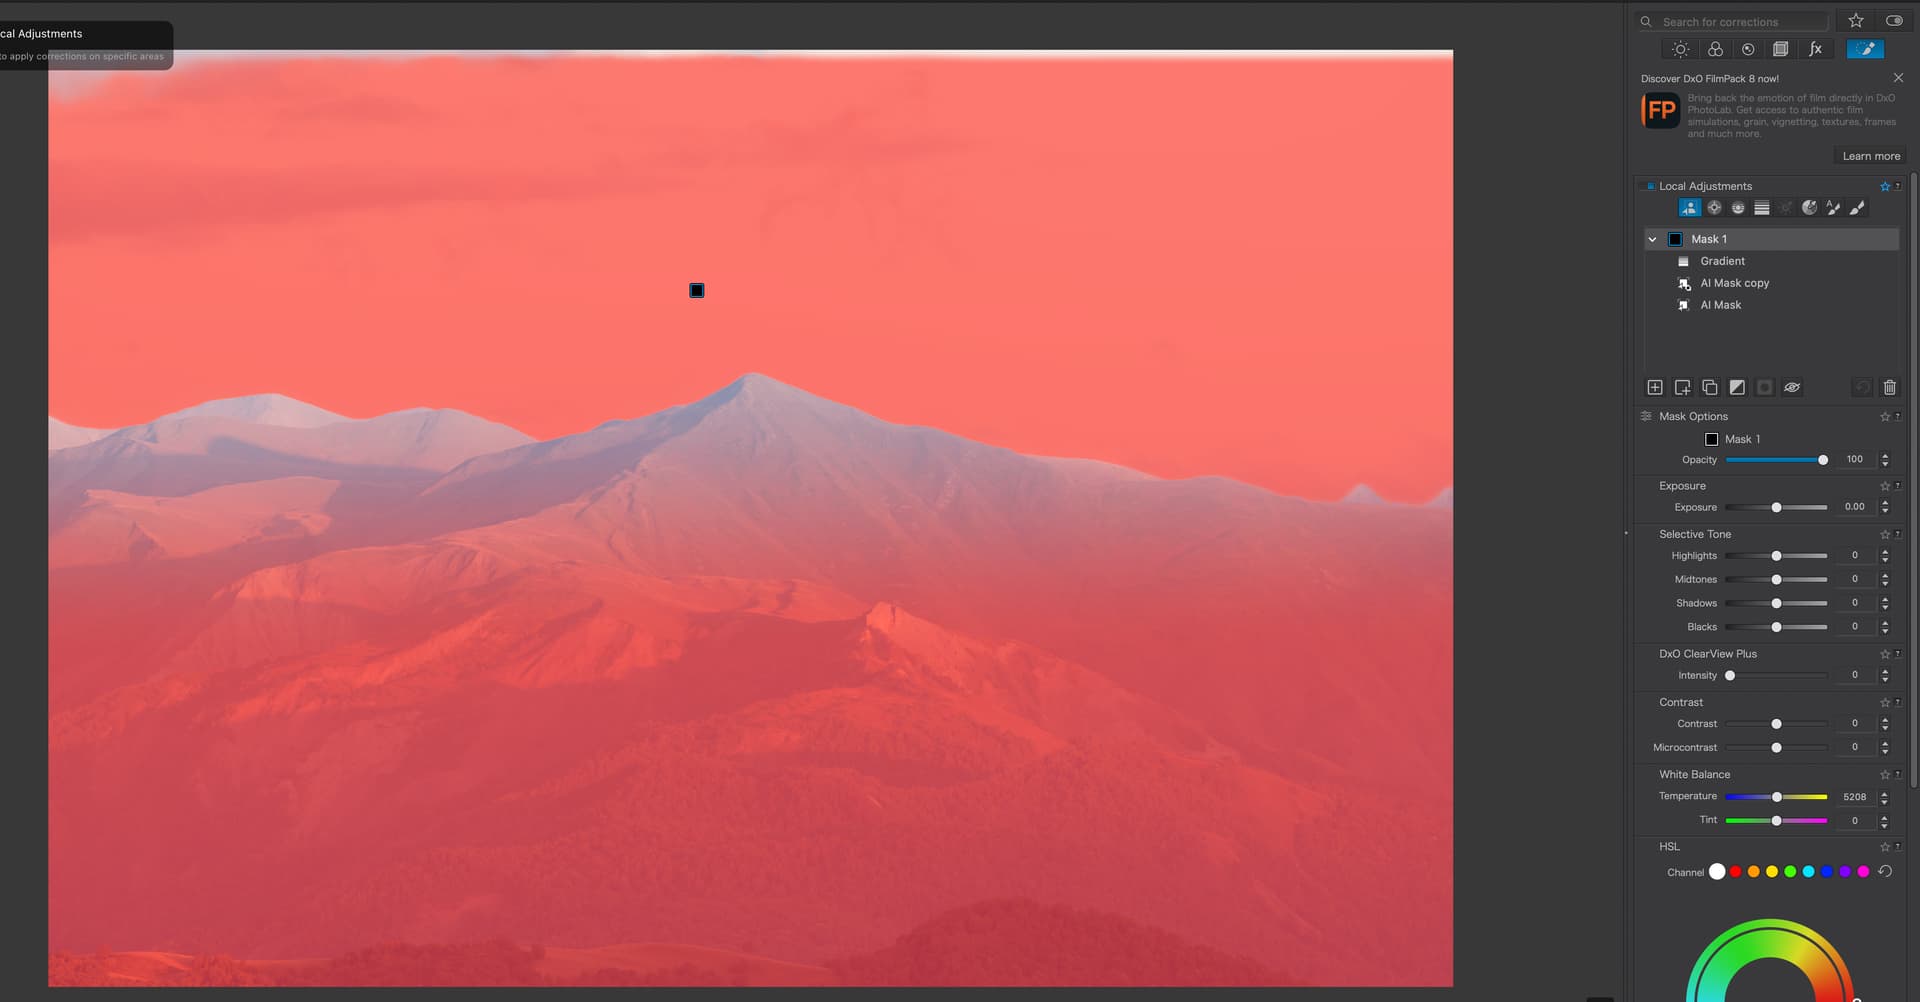
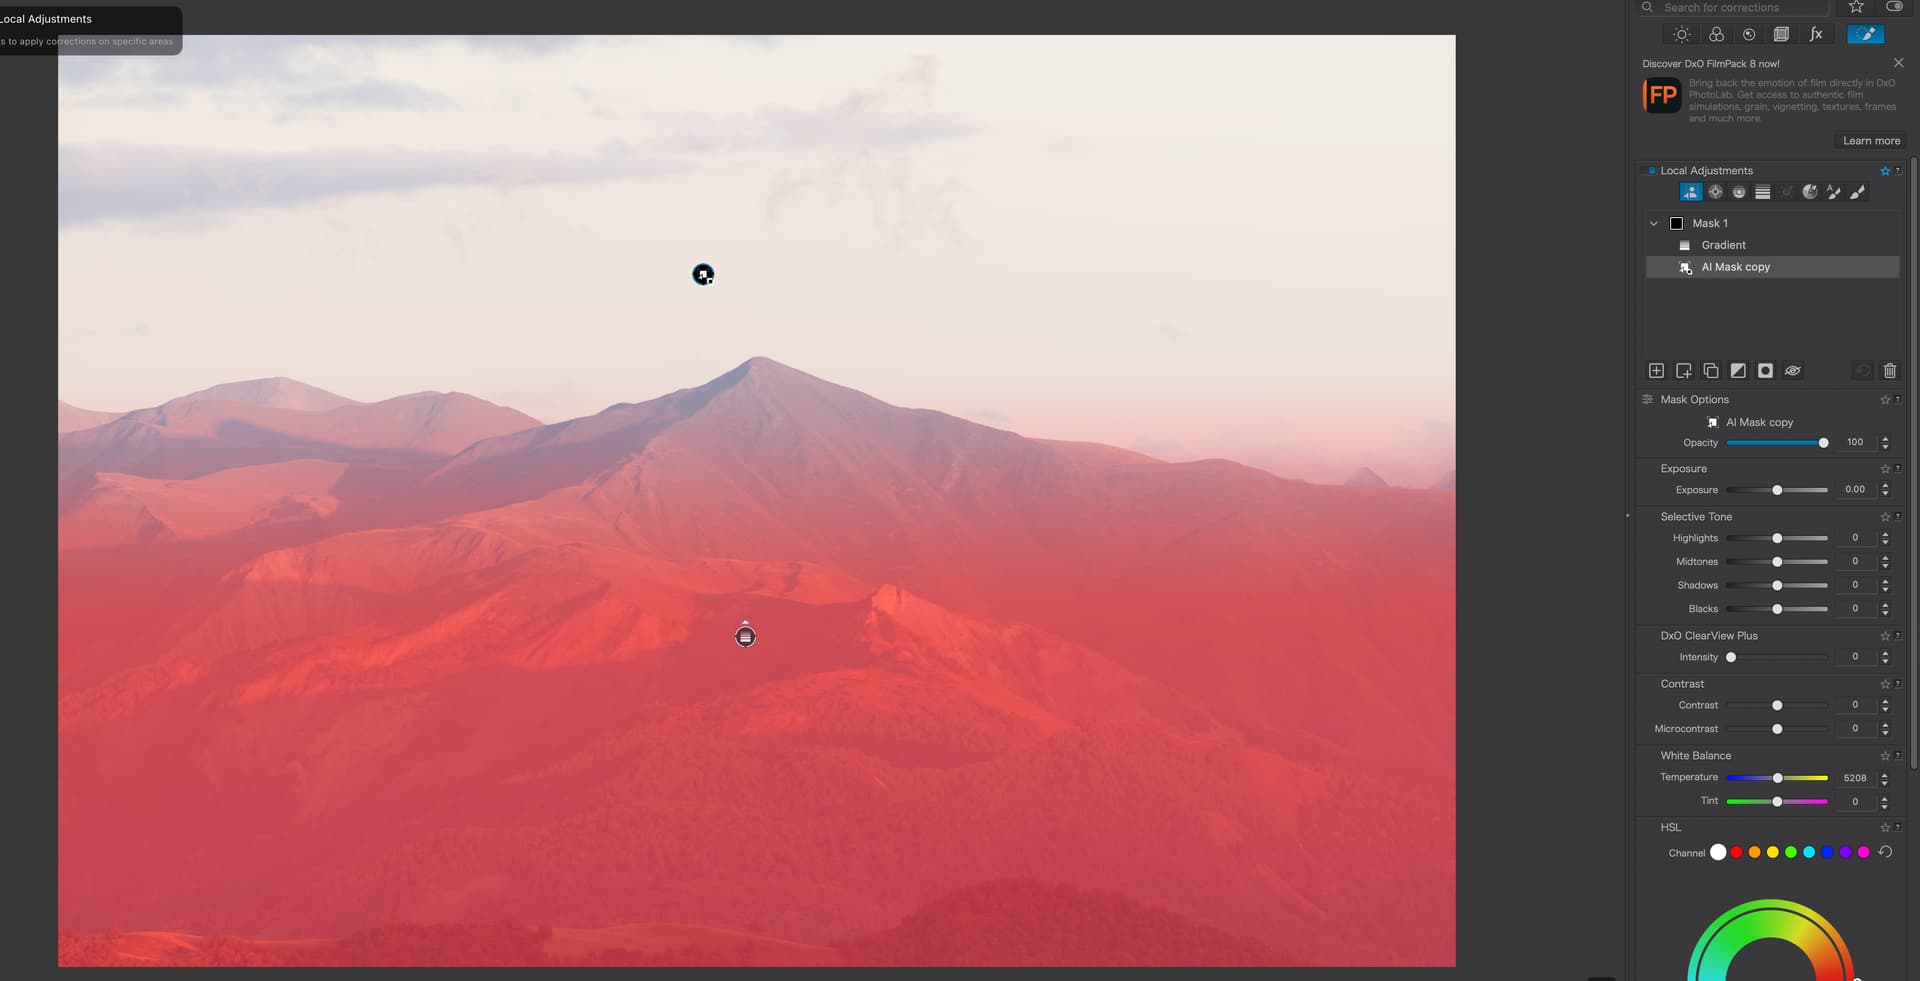
As far as I understand it you have 1 mask with 3 sub masks
The way it works for me is that you end up with mask covering:
Screens from my side:
Now I remove sub mask nr 2 (the duplicate, invert, invert), so I have:
and I got exactly the same, so what’s the point of the 2nd mask?
I remove the mask nr 1 (sky mask), so I have:
And the graduated filter goes beyond the landscape into the sky, so again the Duplicate mask has 0 point
If there was an option to intersect then the gradient would no go beyond the landscape, since it could only work with pixels belonging to landscape.
PS As explained - yes, I can achieve the end result but in a inverse way rather than actual which not efficient but also requires additional planning rather than just editing ![]() **
**
Which I think is** devastating for such an amazing software. User-friendliness is really bad including Use Guide which is objectively wrong about intersecting.
…and if I may make a suggestion: Experiment a lot. That’s the only way to truly understand how things work. Focus initially on things that interest you (and don’t overwhelm yourself).
have fun
Yes, I found the part “The intersection method” (I must have only skimmed those explanations).
“7. Draw the Graduated Filter from the bottom of the image upward — the hidden corrections will gradually reappear.”
The last part of the sentence is correct insofar as the “hidden” corrections (which I referred to as “excluded from selection”) are visible again.
However, this should not be confused with a graduated filter, which would “restore” the duplicates, whereas the filter mainly fills the gap created by the duplicates (inverted mask & inverted shape).
Local Adjustments → The intersection method
So I’m glad you don’t get it, since they don’t get it too.
If you call it “Intersection” or not is irrelevant. DxO used it as an example “to let(s) you refine how smoothly your corrections blend into the image.” – Disabling both AI masks contradicts their example.
Screens from my side:
…
…
…
And the graduated filter goes beyond the landscape into the sky, so again the Duplicate mask has 0 pointIf there was an option to intersect then the gradient would no go beyond the landscape, since it could only work with pixels belonging to landscape.
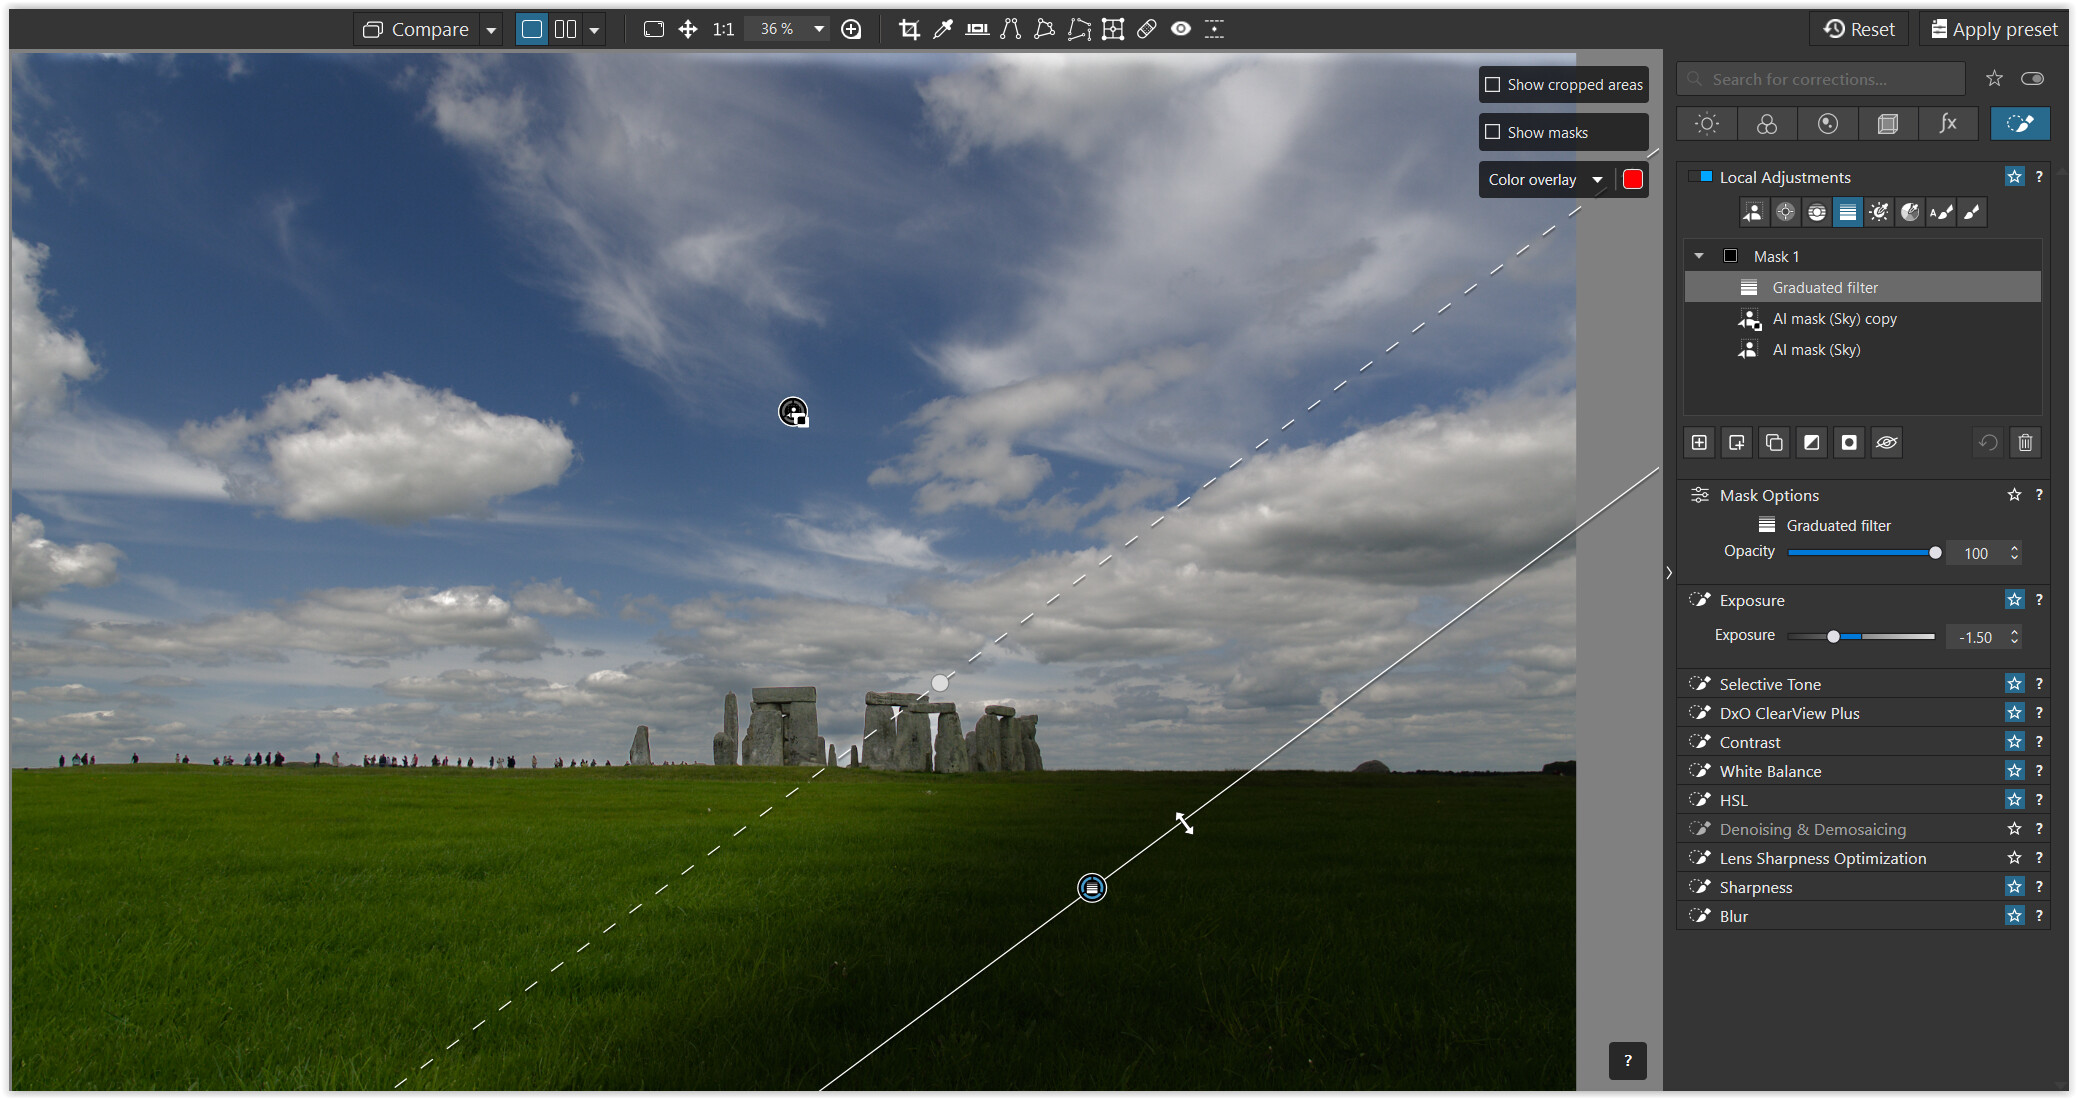
DxO’s example works. The upper part of the gradient, with its decreasing adjustment goes partly over the top of the skyline and merges seamlessly with the already adjusted sky – thus avoiding harsh or uneven edges.
The gradient intersects (overlaps) with the sky. Don’t you think that’s a good solution?
.
I’ve attached a screenshot with a slanted graduated filter.
→ The part that overlaps the sky is not visible.
@Wolfgang
I understood from your initial post how to make the specific case work. Thank you.
Alternately, applying the Invert Mask and Shape tools to the Luminosity mask and placing it above the AI subject mask also appears to provide the same results. Why this works took a bit of pondering…
From the user guide:
7. Invert Mask: applies the selected mask or sub-mask and its corrections to the opposite area of the image (everything except where the mask is located)*
8. Invert Shape: the corrections applied to the selected mask or sub-mask become invisible, but the sliders keep their current values*
What “invisible” means was not clear to me.
Best as I can figure from this effort…
When a specific submask is created an intensity value is created reflecting the amount of the LA adjustment that is “revealed” for each pixel. Where the intensity value is 0, or low, the effect is is not really “concealed”, but rather a “neutral” in that it allows the intensity values from any underlying sub mask(s) to “pass through”.
The “Invert Mask” toggle inverts this action but keeps “reveal” and “pass through” behaviors.
The “Invert Shape” tools toggles the “reveal” to a true “conceal” in that it blocks, or does not “pass through” the adjustment intensity values from the underlying layers.
When both the “Invert Shape” and “Invert Mask” are used in combination, the effect is to block (conceal) the adjustment intensity values from the undying layers for the non-selected mask areas. This works clearly when the sub mask edges are distinct as in most AI masks. But how to take advantage of this using masks that are more graduated (i.e. CP, CL, GF, Luminosity, Hue) is a work in progress for me.
The “reveal” and “conceal” interactions only apply to the submasks within an individual "Mask. Separate “Masks” is not affected.
If this is what you are trying to explain, then Thank you. I “think” I’ve worked it out.
I will still keep my “vote’ in favor of changes because the explanations are weak and UI does a poor job of showing the status of the “Invert Mask” and Invert Shape” toggles for each sub mask. The little box/circle needs to be larger or color coded for visibility.
So may I ask once again what is the Duplicate, Reverse mask, Reverse shape sub-mask for?
Gradient will do exactly the same without this mask.
@swmurray and …
I had to read your post a few times and I think you worked it out.
There are several possibilities to learn and understand.
Personally, I’m not a big fan of written user manuals for software, but I use them as a (necessary) fallback to look up details and/or when something is completely new to me.
The quality of the video content depends very much on the presenter, on whether he/she is competent and can convey the content in a didactic and “simple” way. Then I’m all in.
When it comes to understanding and “acquiring” information, I prefer hands-on experience. Since I’m active in this forum, I pick up on questions and examples from other users and try them out. And if they prove ‘worthwhile’, I share them.
… and placing it above the AI subject mask …
The new submasks are displayed at the top by default, making them easier to find in a full stack as well as in the non-scalable local customization window. But you can place your submasks in any order as long they belong to the same Mask.
The Mask and it’s submask contain the same set / combination of adjustments.
What “invisible” means was not clear to me.
You don’t see the effect.
When a specific submask is created an intensity value is created reflecting the amount of the LA adjustment that is “revealed” for each pixel. Where the intensity value is 0, or low, the effect is is not really “concealed”, but rather a “neutral” in that it allows the intensity values from any underlying sub mask(s) to “pass through”.
Yes. In PhotoLab, you can adjust the opacity of the mask as well as individual submasks. The latter involves an overlay, whereas layers in a pixel editor can typically be combined in modes such as Multiply or Soft Light etc.
The “Invert Mask” toggle inverts this action but keeps “reveal” and “pass through” behaviors.
Invert mask applies your settings to the part not covered by the initial submask.
The “Invert Shape” tools toggles the “reveal” to a true “conceal” in that it blocks, or does not “pass through” the adjustment intensity values from the underlying layers.
Invert shape hides / excludes the submask from the selection, regardless of other settings. In DxO speech: “it protects” a certain area.
When both the “Invert Shape” and “Invert Mask” are used in combination, the effect is to block (conceal) the adjustment intensity values from the und(erl)ying layers for the non-selected mask areas.
Yes.
This works clearly when the sub mask edges are distinct as in most AI masks. But how to take advantage of this using masks that are more graduated (i.e. CP, CL, GF, Luminosity, Hue) is a work in progress for me.
It’s the same. Apply “negative” (= Invert shape !) CP, CL, GF e.g. on top of a submask (e.g. with exposure adjustments …) and you obtain soft(er) edges from your exclusion. – Btw, negative CP and CL can be added directly by holding down the ALT key (Windows). If the GF for some reason appears in a new Mask, use Invert shape on it and move it into the Mask you have been working on.
→ Here an example with a “negative” GF
→ Here (first screenshot) I excluded the man’s hand with a “negative” CP from the underlying CL (unfortunately not so obvious with the colored mask overlay).
With Luminosity mask I just tried … You can also tackle e.g. the blue of the sky and turn down the exposure, while applying a new mask to the white clouds and excluding them from the generously selected sky (= Invert shape).
In that case you work with two different luminance mask selections, e.g. if for some reason you didn’t set it up correctly from the start (yes, a bad example).
With Hue masks you should be able to do similar stuff. Experiment yourself (to complicated to descibe here). – Remember, that you can combine all different LA tools.
The “reveal” and “conceal” interactions only apply to the submasks within an individual "Mask. Separate “Masks” is not affected.
Each mask 1, 2, 3, etc., is a individual container for its submasks. You can enable/disable the container instead of the individual submasks. When you move the mouse pointer over the container, the effective mask for it’s submasks is displayed.
Remember, each Mask (container) can hold one common set / combination of adjustments.
You can duplicate the “container” to enhance your customizations. Or you reuse carefully edited submasks / selections to then experiment with different adjustments.
→ Here …
Just experiment …
(ed)
please read my too long answer to @swmurray
If anyone like me first time using this thing after lightroom took me more than hour to understand simple thing any masking tool can be used to subtract from existing mask if create sub-mask and hold Alt key before applying new mask then it turns into subtraction mask.
Ahhh - That’s interesting !
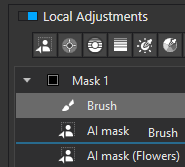
That led me to some experimentation, which led me to discover that individual sub-masks can be dragged/dropped to new positions within the mask.
Like this - where I’m moving the Brush sub-mask;
As I understand it, tho, there’s no point in doing so (within the same mask) - because, as the Help text states; “Stacking order of the layers has no impact …”
There’s gotta be a better name/label for this function (?!)
“Invert Shape” provides absolutely no useful indication of its purpose whatsoever !
How are new users supposed to understand all the intricacies of LA masks ???
True for stacking order of masks (which they seem to call also ‘layers’). It’s also true for submasks, unless ‘invert shape’ is used, in which case the analogous statement is false. Note that ‘invert shape’ action is inactive for masks, since removing one set of corrections from another set of corrections wouldn’t make sense.
The ‘within mask’ can be dropped – you can move submasks also to another mask. I often forget to use shift-click and then have to move the submask to another mask (so that I don’t have to duplicate or later synchronize the corrections).
Note that moving the last submask of a mask to another mask will also remove the source mask, since each mask (layer, unit of correction) must contain at least one submask.
You can also copy masks or submasks using the Alt key (Windows).
Maybe it should be called ‘Deselect’ or ‘Unselect’?
English is not my native language…
Unfortunately ‘Remove a selection’ is already used in AI mask toolset.
From the mid-1970s until 2002 my career was in the graphic arts. I ran process/stat cameras, “stripped”negatives, made printing plates, used Xacto knives to cut and paste up typeset copy etc etc. The term we used for what “Invert Shape” performs was “Knockout”. I asked MacroBrain to define the term:
In the era of analog graphic arts and traditional prepress, a knockout refers to the process of masking out an area of a background color so that a foreground object (like text or a shape) can print directly onto the white paper underneath.
Because printing inks (specifically CMYK process inks) are somewhat translucent, printing one color directly over another would result in a blend. For example, blue text printed over a yellow background would appear green. A knockout prevents this by “cutting a hole” in the yellow background exactly in the shape of the blue text.
How it Works in the Analog Workflow
Before digital layout software, this was a manual, physical process involving film and light-sensitive materials:
1. The Base Layer: A sheet of film (the “flat”) would contain the background color.
2. The Mask: A “high-contrast” negative of the foreground element (the text or logo) was created.
3. The Exposure: When the printing plate was made, the mask would block light in specific areas, ensuring no background ink would be applied to the paper where the foreground element was intended to go.
I like this name - short, creative, and quite intuitive ![]()
I think the name “Invert Mask” would be appropriate.
Well, within Mask 1, 2, 3… it’s “for convenience” (presumably).
Maybe you want to sort the sub-masks to make them quicker to recognize (or to better remember later), like which exclusion belongs to which sub-mask / tool.