The term “Invert Mask” is already used and does something different than “Invert Shape”. Maybe “Revert Mask”? But again, English is not native to me.
Meanwhile PL9.6 has been released with AI Mask diffusion added, and many more…
The term “Invert Mask” is already used and does something different than “Invert Shape”. Maybe “Revert Mask”? But again, English is not native to me.
Meanwhile PL9.6 has been released with AI Mask diffusion added, and many more…
Yes, I remember that term → see …
Yes ! - MUCH better than the obtuse “Invert Shape” - - and especially as (according to @calvingrinder) “Knockout” has precedence as a term in graphic arts.
Hi guys!
Well, after all these years of using PhotoLab, I finally have to throw my hands up and admit to not “getting” how to use the new AI masks.
Simple task…
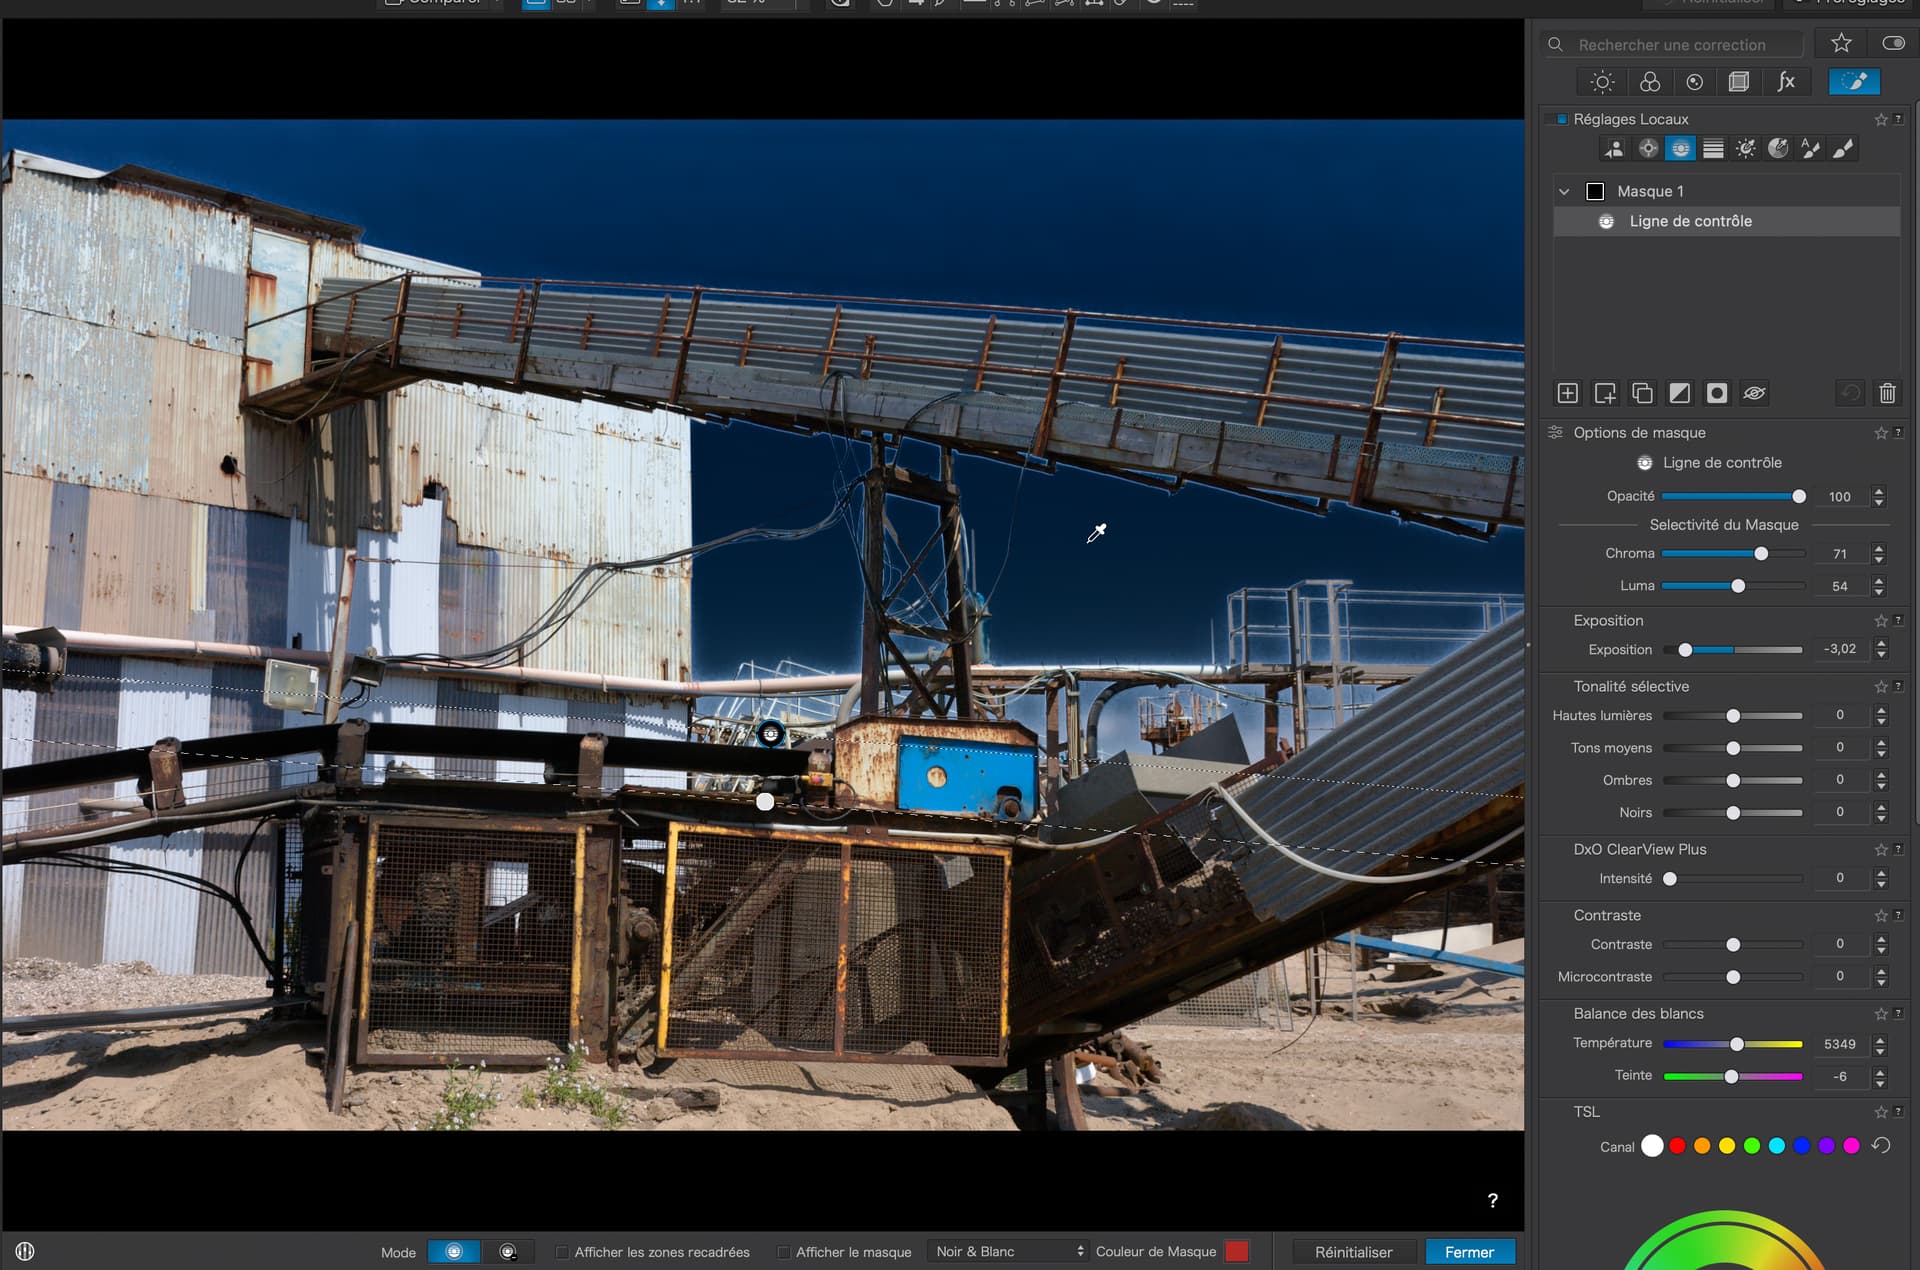
Select sky for darkening.
Old method, use Control Line…
Not perfect but just for demonstration.
New method, use Sky AI mask…
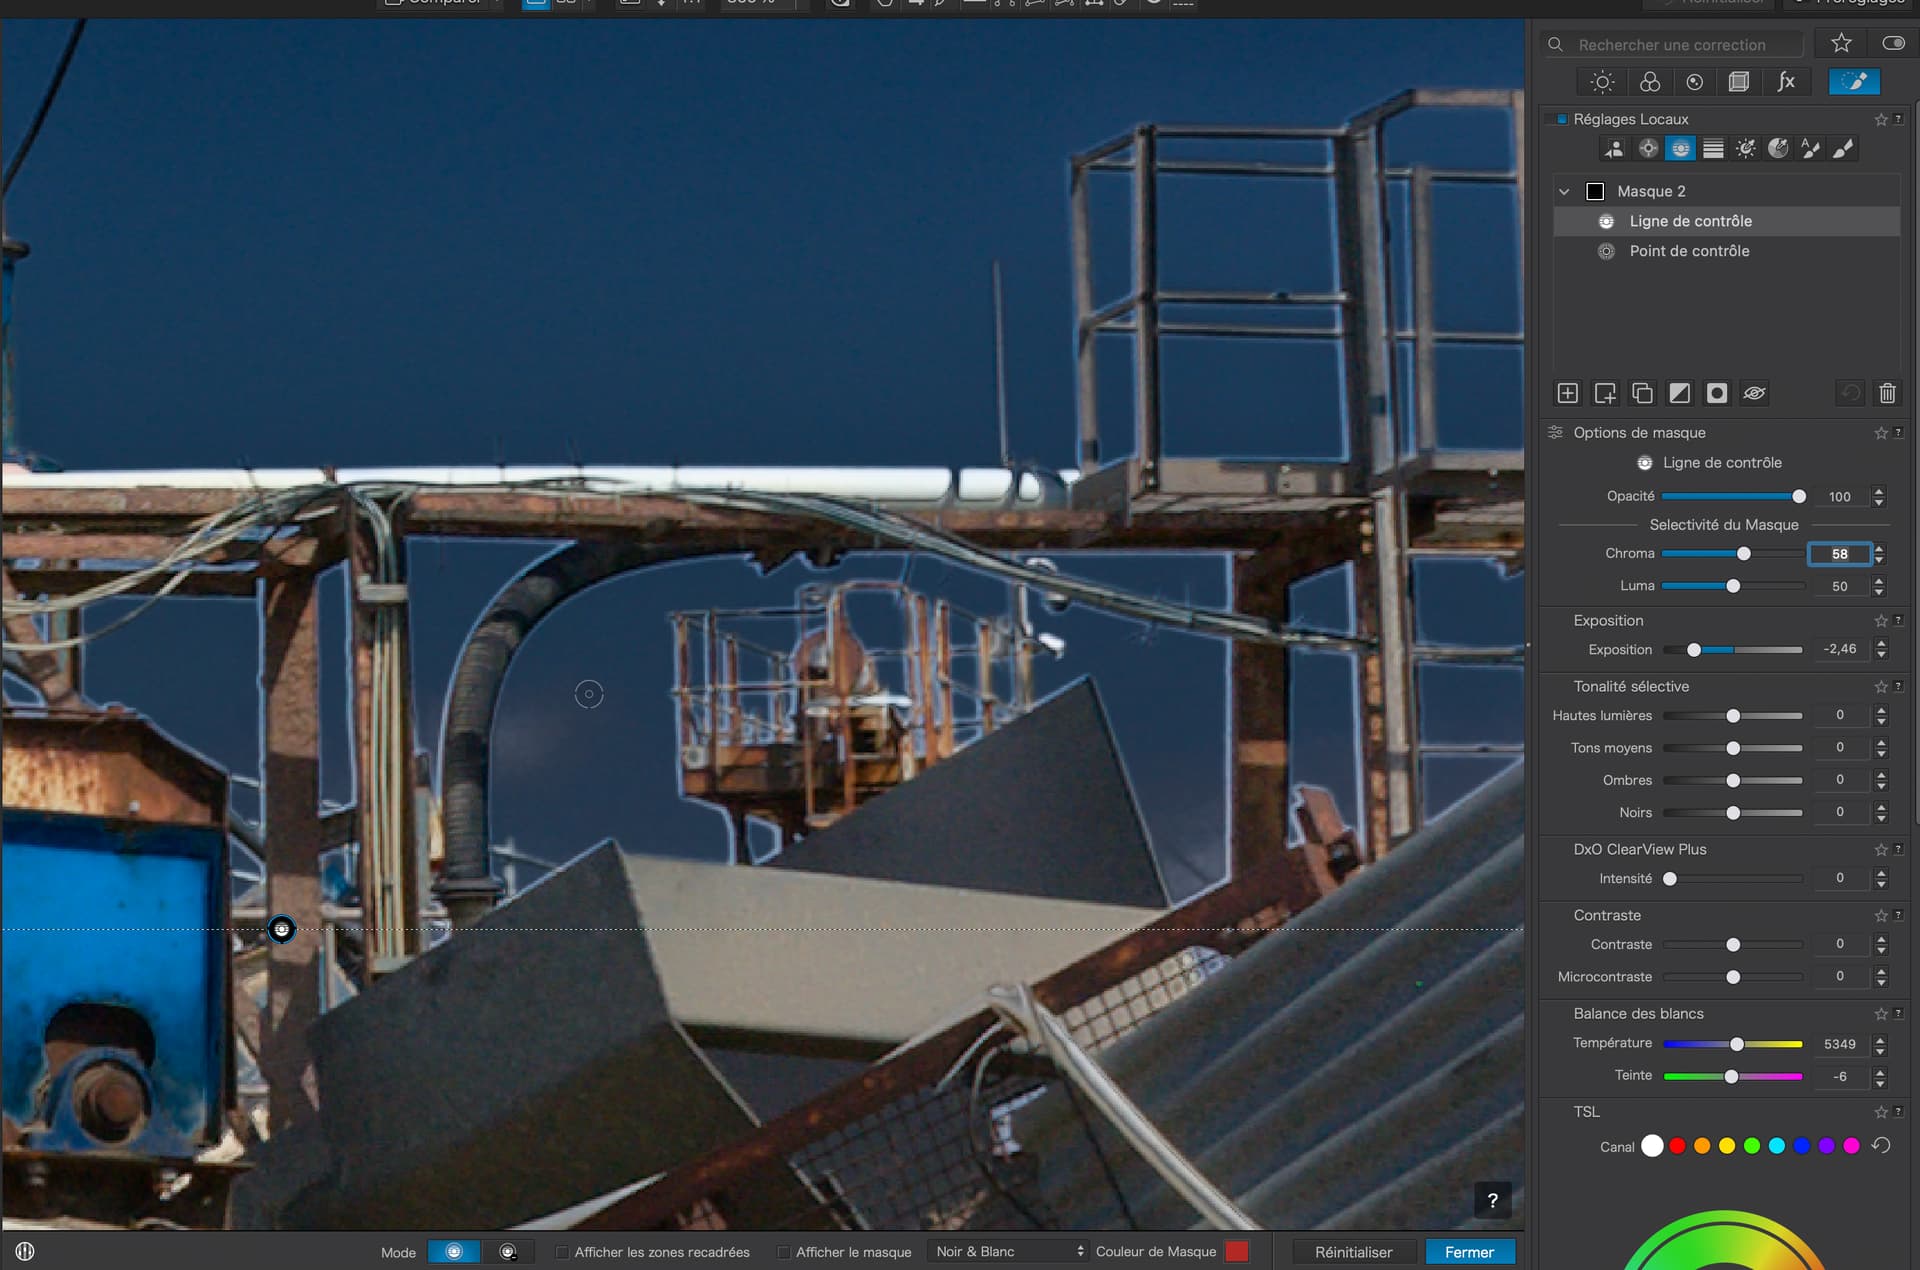
Problem. Lots of “contained” areas that get omitted from sky area.
Question - how to add enclosed areas?
I must say, after all these years of using and teaching PhotoLab, I am somewhat shocked at how unintuitive and poorly documented this all is.
Hi Joanna,
I also use the old method for this style of selection.
PL can’t find the sky between structures or tree branches.
There is still a little work for DxO.
Why not add Control Point submasks?
Standard way to deal with sky looking through tree branches.
AI Sky mask has many other features, which caused me not to use it.
In your case I would perhaps try some of the following: negative highlights, say -20 while adding some midtones, HSL Luminance for chosen blue range, Saturation=-15 + Vibrancy=+40, CVP=25 or less, if “dirt” is amplified too much. But it’s not that bad in the original…
Be aware that this forum is full of AI bots that write things that has nothing to do with the topic or conversation.
The simple answer was already provided - it’s first implementation and right now it’s useless for me.
Nevertheless I need to give them a huge credit for “old” ways since control line and control point have extreme quality of selection but you just need to click number of times rather than one time.
Like ???
Yep - me too … And it’s not helped by obtuse feature labels like “Invert Shape” !
I’m wondering;
I just checked the User-Guide - thinking that perhaps there was a lot of detailed explanation therein that I’d missed … … but, nope !
Edit: Correction - I’ve found some more interesting info … Click here (PLv9 User Guide) and search for “Invert Shape”
I checked this assertion - and (somewhat to my surprise) that’s correct … Apols for doubting you @Wlodek !
So, is it the case that a “shape inverted” sub-mask must be (in visual sequence) above the sub-mask that it’s negating ?
I attempted to create a scenario to test this question for myself - plus to see what happens when I place another sub-mask above the “shape inverted” sub-mask … but I just managed to get myself thoroughly confused !!
Again;
???
That looks really interesting, but … I don’t understand what you did !
May I bother you to provide a bit more explanation - perhaps with screenshots of your LA settings (?)
I actually know and am well acquainted with “the old ways” and have had good success in using them for things like this.
My hope was to try and get a grip on how the AI stuff is meant to work.But, so far, I find myself needing an instruction manual to interpret the instructions for that.
Indeed.
- Invert Shape: the corrections applied to the selected mask or sub-mask become invisible, but the sliders keep their current values
Could we have that again in English (or even French)?
Even though the Control Line and Control Point are pretty good at what they do, we still end up with “fringing” between high contrast neighbours…
Which can be partially solved with a Luminosity Mask on the transition…
… but this is very fiddly and fussy. But, at least, it works a lot better than any, so called, AI kludge.
It’s probably easier to understand if you try it yourself, and this wasn’t a complex set of masks.
From that post, create two gradient sub-masks in this order.
From the top down to below half way.
From the left to past half way.
Now you can see from the screenshots what settings created the results by looking at the ‘knobs’ that denote each mask on the canvas.
The first is purely additive. The two gradients both contribute to the covered area; the top half and the left half.
In the second, I inverted the left-to-right gradient. Inverting that makes it effectively a right-to-left gradient which, as before, is additive to the top-to-bottom one.
In the third, instead of inverting the left-to-right gradient in its own right, I instead shape inverted it. As such, the original left-to-right gradient now knocks out the top-to-bottom one.
Actually only while writing this have I realised this is the perfect illustration of invert versus shape invert.
Hi John,
No, not necessarily above. In my (constructed) example I simply placed them above, since DxO adds the newest submask to the top by default. – Within the same (master) Mask, you can move the submasks as you wish without affecting the result.
.
about the infamous “Invert shape”
When you “Invert (a) mask”, you apply your adjustments to the area that was not selected before.
Whereas when you “Invert shape”, you exclude an area from adjustment, regardless of shown settings.
If you now combine “Invert Mask” and “Invert Shape,” you instruct the app to apply your adjustments to the previously unselected area, while simultaneously excluding it from any adjustments. → The behavior is as if you had never adjusted the previously unselected area. …
.
Does that make sense? Probably not … or maybe it does?
Imagine you want to exclude a specific area/part, but for some reason it’s much easier to select “the other side” first, invert the mask to then exclude it by “Invert shape”.
Why is it so ?!
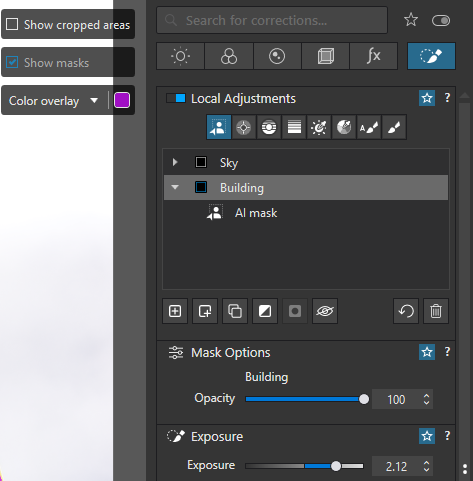
When I create a new NON-AI mask;
Initially, when the mask is created, the selected “Color overlay” is displayed … to show the area-of-impact of the applied mask … and the “Show masks” option is disabled (it cannot be switched off).
Once I apply any correction to the mask (say, a change to Exposure) then the “Show masks” option is enabled, and it can be switched off.
However, it does not work (for me, at least) in the same way with AI masks … Instead;
Initially, when the mask is created, the selected “Color overlay” is displayed … to show the area-of-impact of the applied mask … and the “Show masks” option is disabled (it cannot be switched off) … Same as for NON-AI masks.
But, even after applying a correction to the AI-mask, the “Show masks” option remains disabled, and it cannot be switched off.
Why ?
Try again. When you adjust something the mask overlay is automatically turned off.
With the AI mask “Add a selection” active and your mouse over the preview you get a mask overlay to indicate your (temporary) selection.
Yes, that’s the behaviour I’m seeing, Wolfgang … Except that (unlike for NON-AI masks), the “Color overlay” option cannot be switched OFF - including after making an adjustment to a LA correction slider.
You can see that here;
Whereas, for a NON-AI mask;
It seems that, for AI-masks, it’s not possible to ever have this option switched OFF … I guess that’s to enable the addition of additional selections/areas to the AI-mask (?)
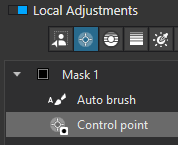
No, that’s not the case for “shape inverted” masks …
I have re-checked and confirmed this with test as follows;
With the “shape inverted” Control-point above the Auto-brush - it cancels out (a selected part of) the Auto-brushed area
BUT, with the “shape inverted” Control-point below the Auto-brush - it does not.
So, for “shape inverted” masks it seems that stack-order does matter.
Hi John, to quickly reply – you are right!
I have conducted several tests and will try to compile this using screenshots, taking into account the mask overlays.
back again …
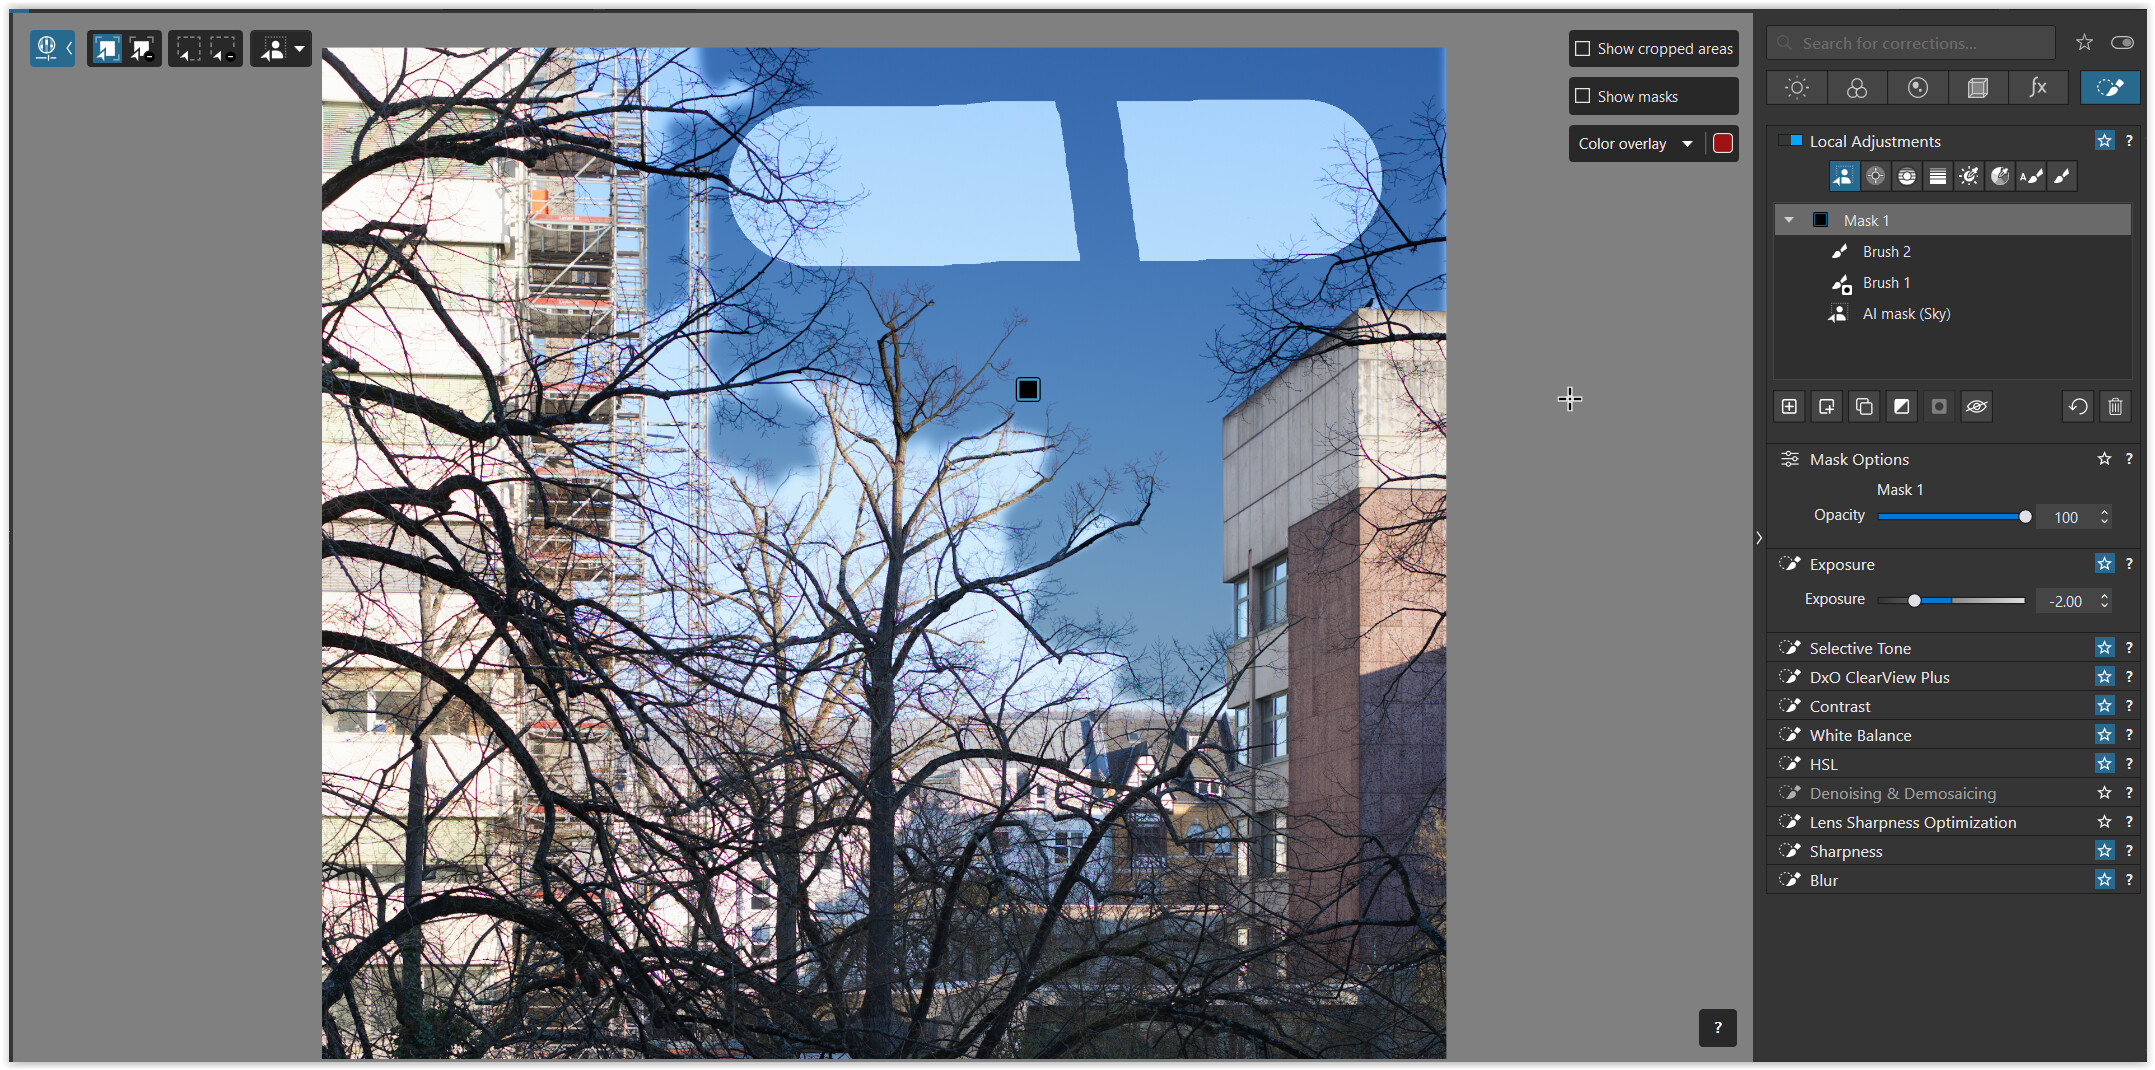
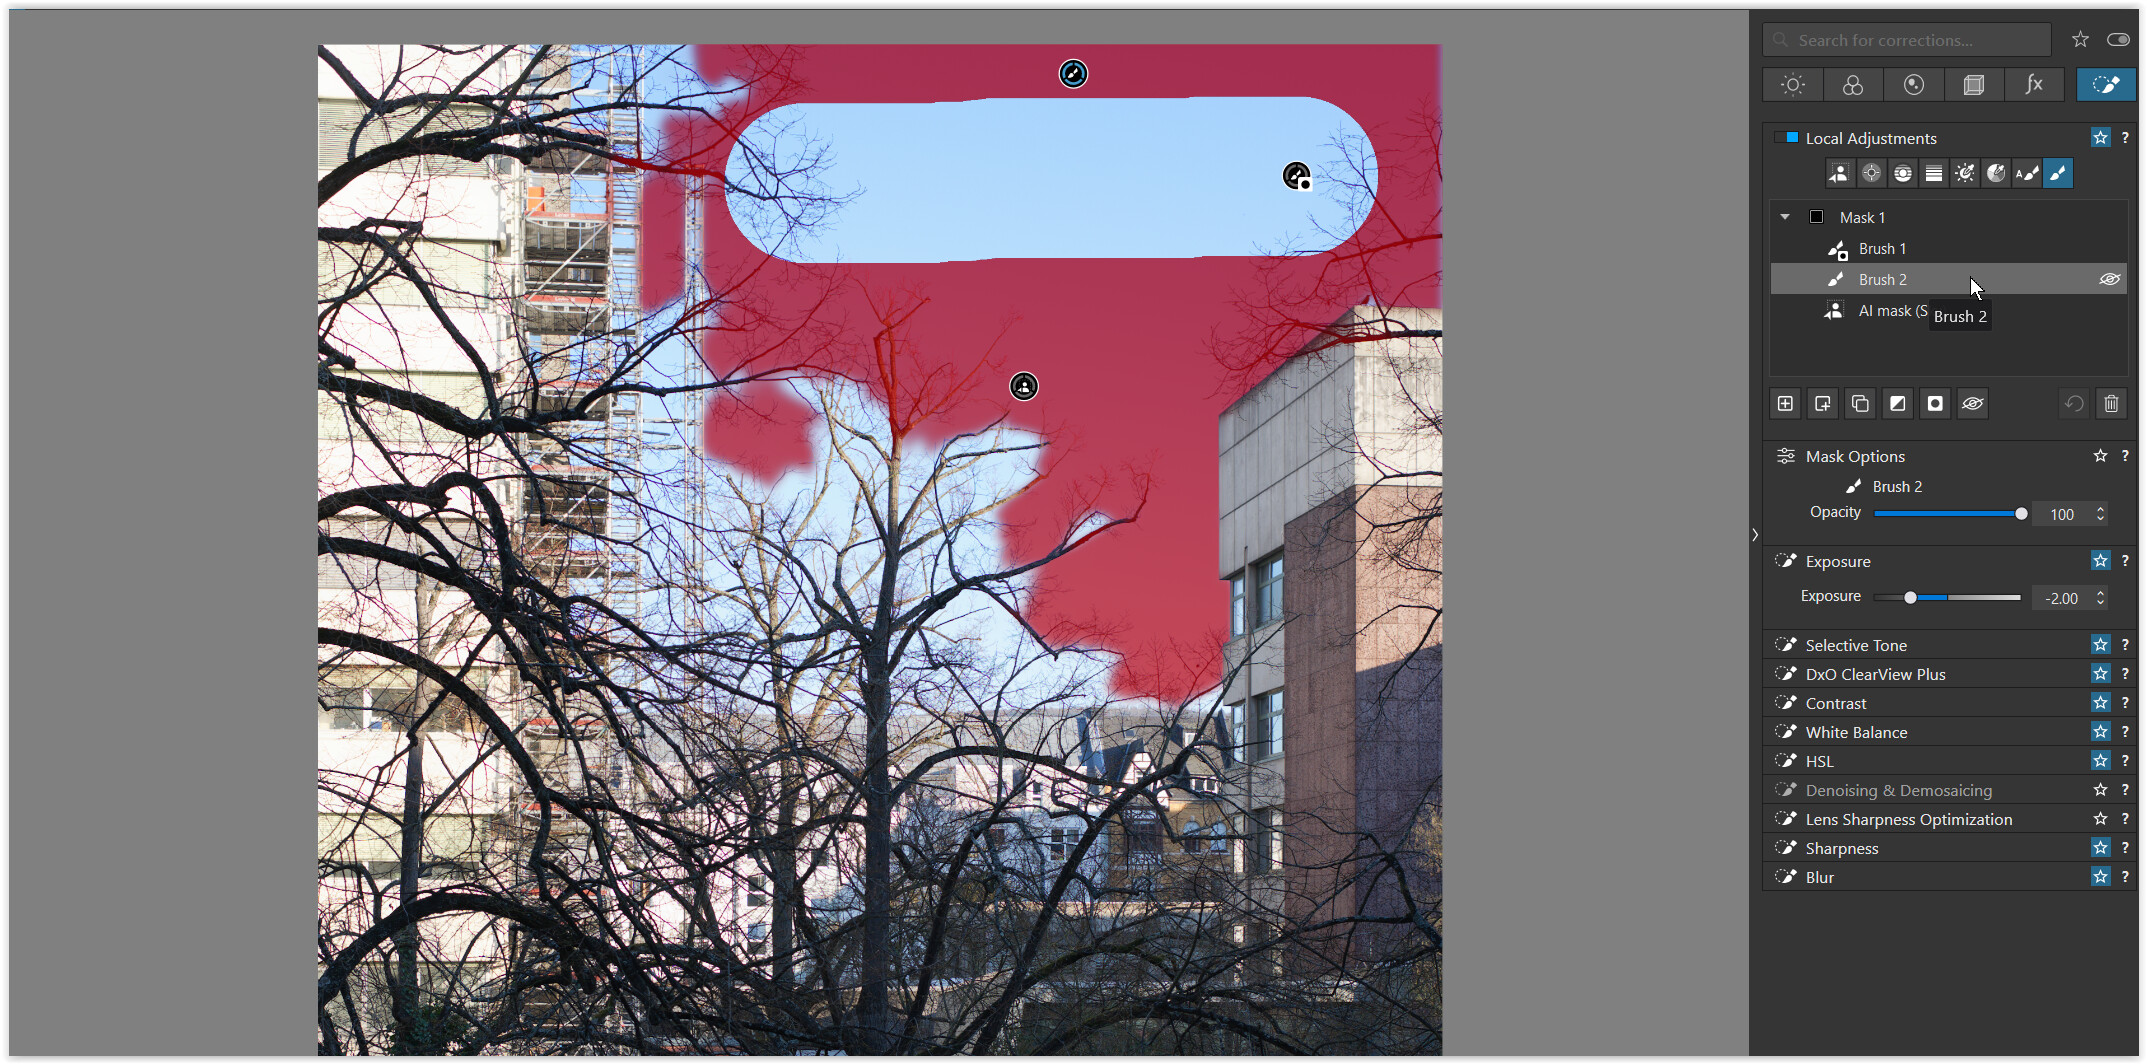
AI mask (Sky) / selection dimmed with Exposure -2.00
AI mask (Sky) → mask overlay
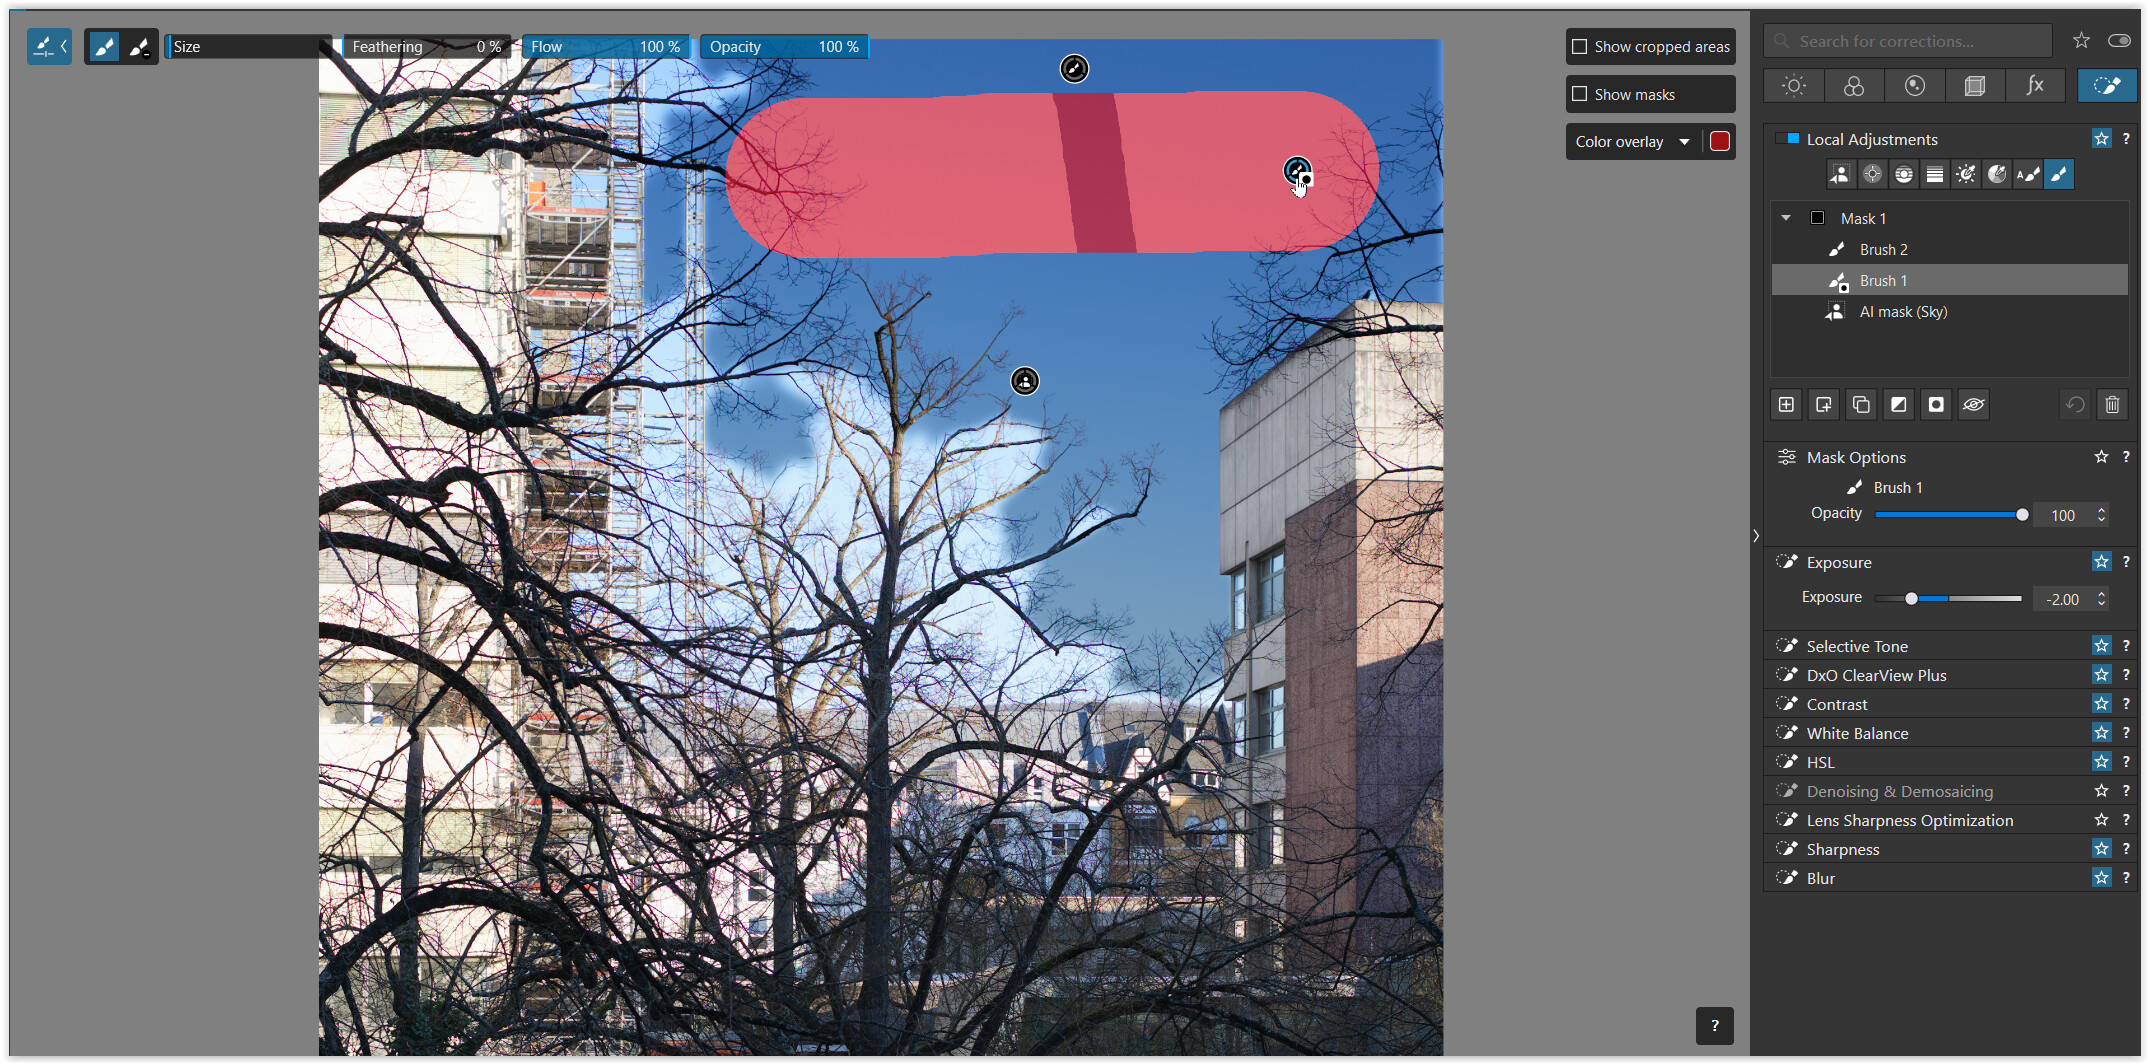
Brush 1 → Invert Shape
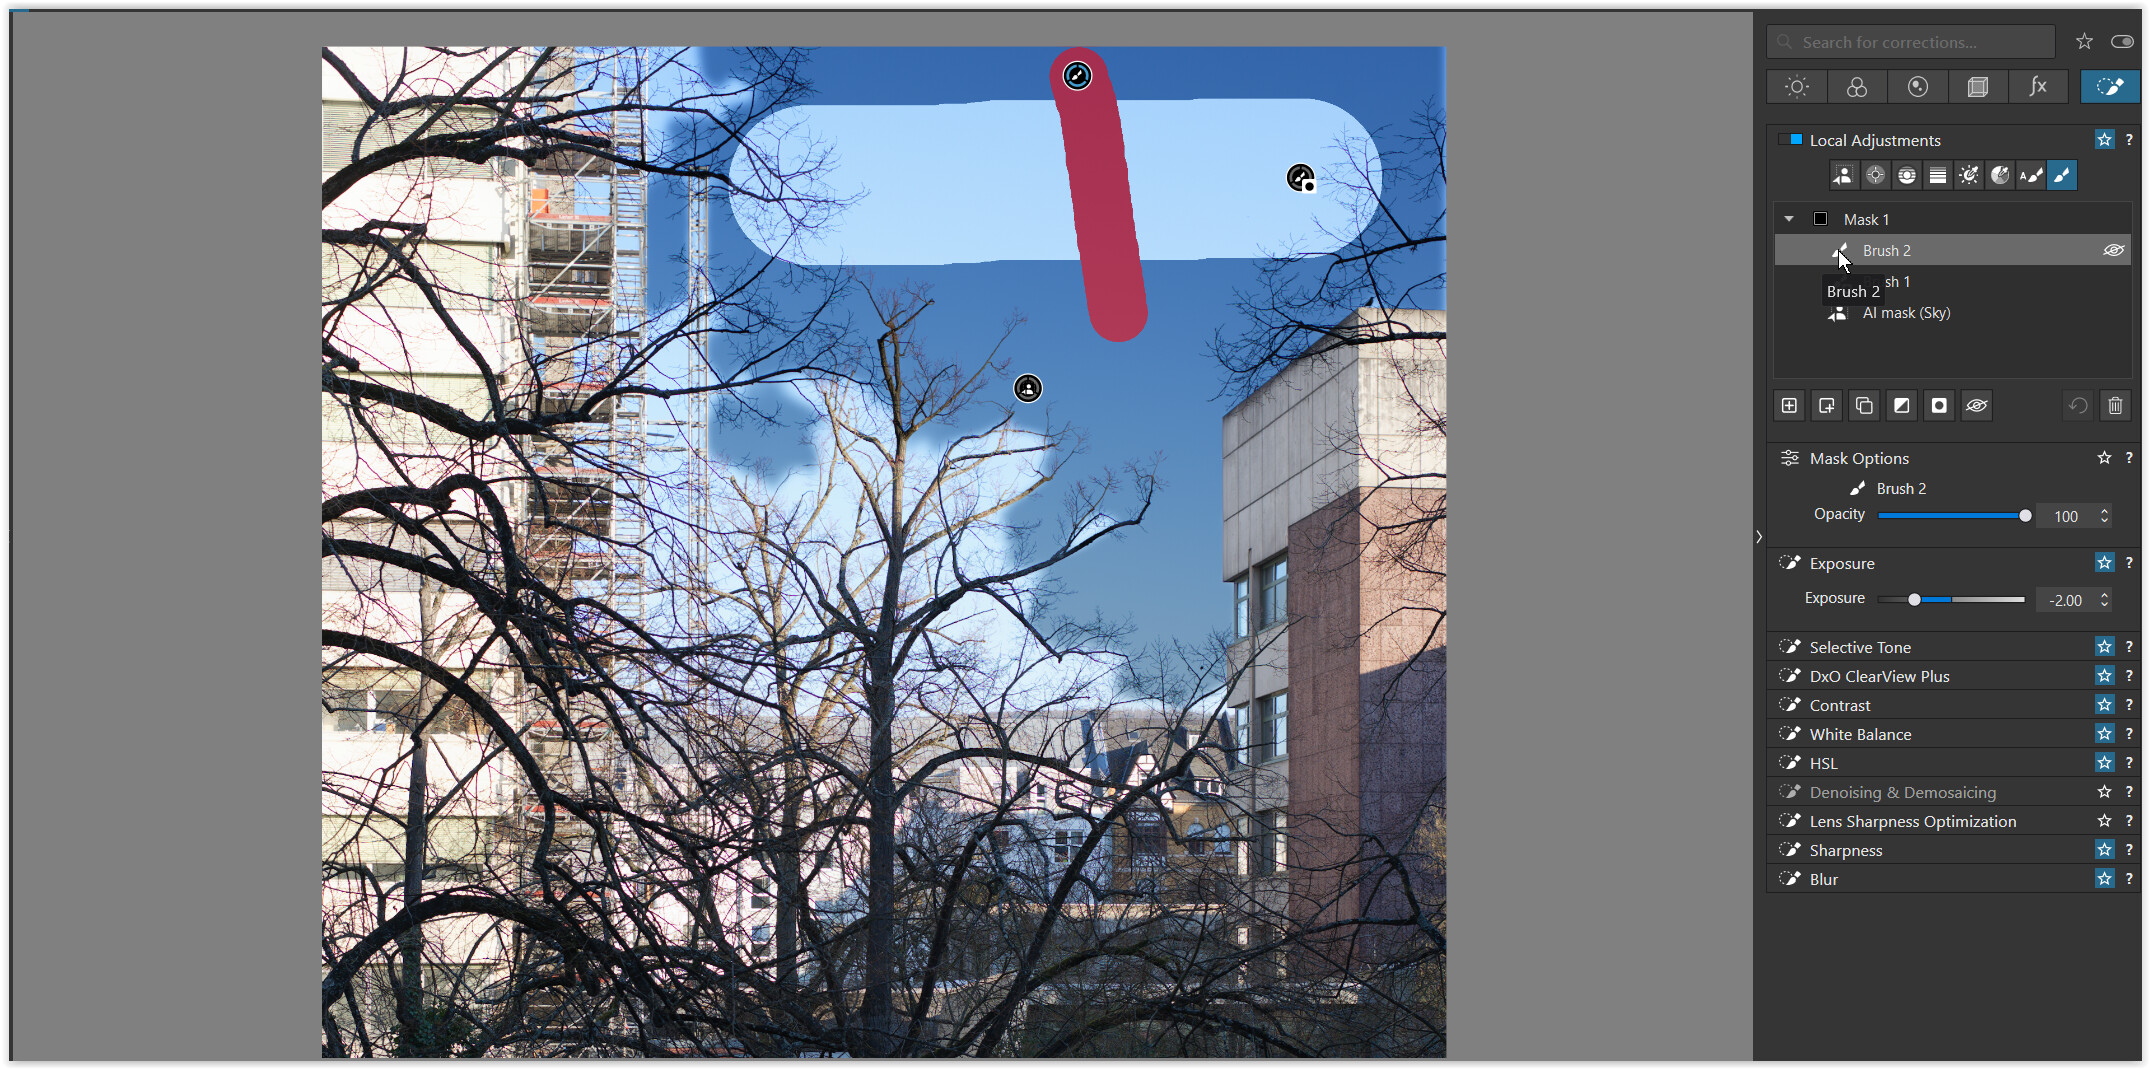
Brush 2 → re-added to the AI mask (Sky) selection
Brush 2 → the same as before, but with mouse over the mask’s gizmo
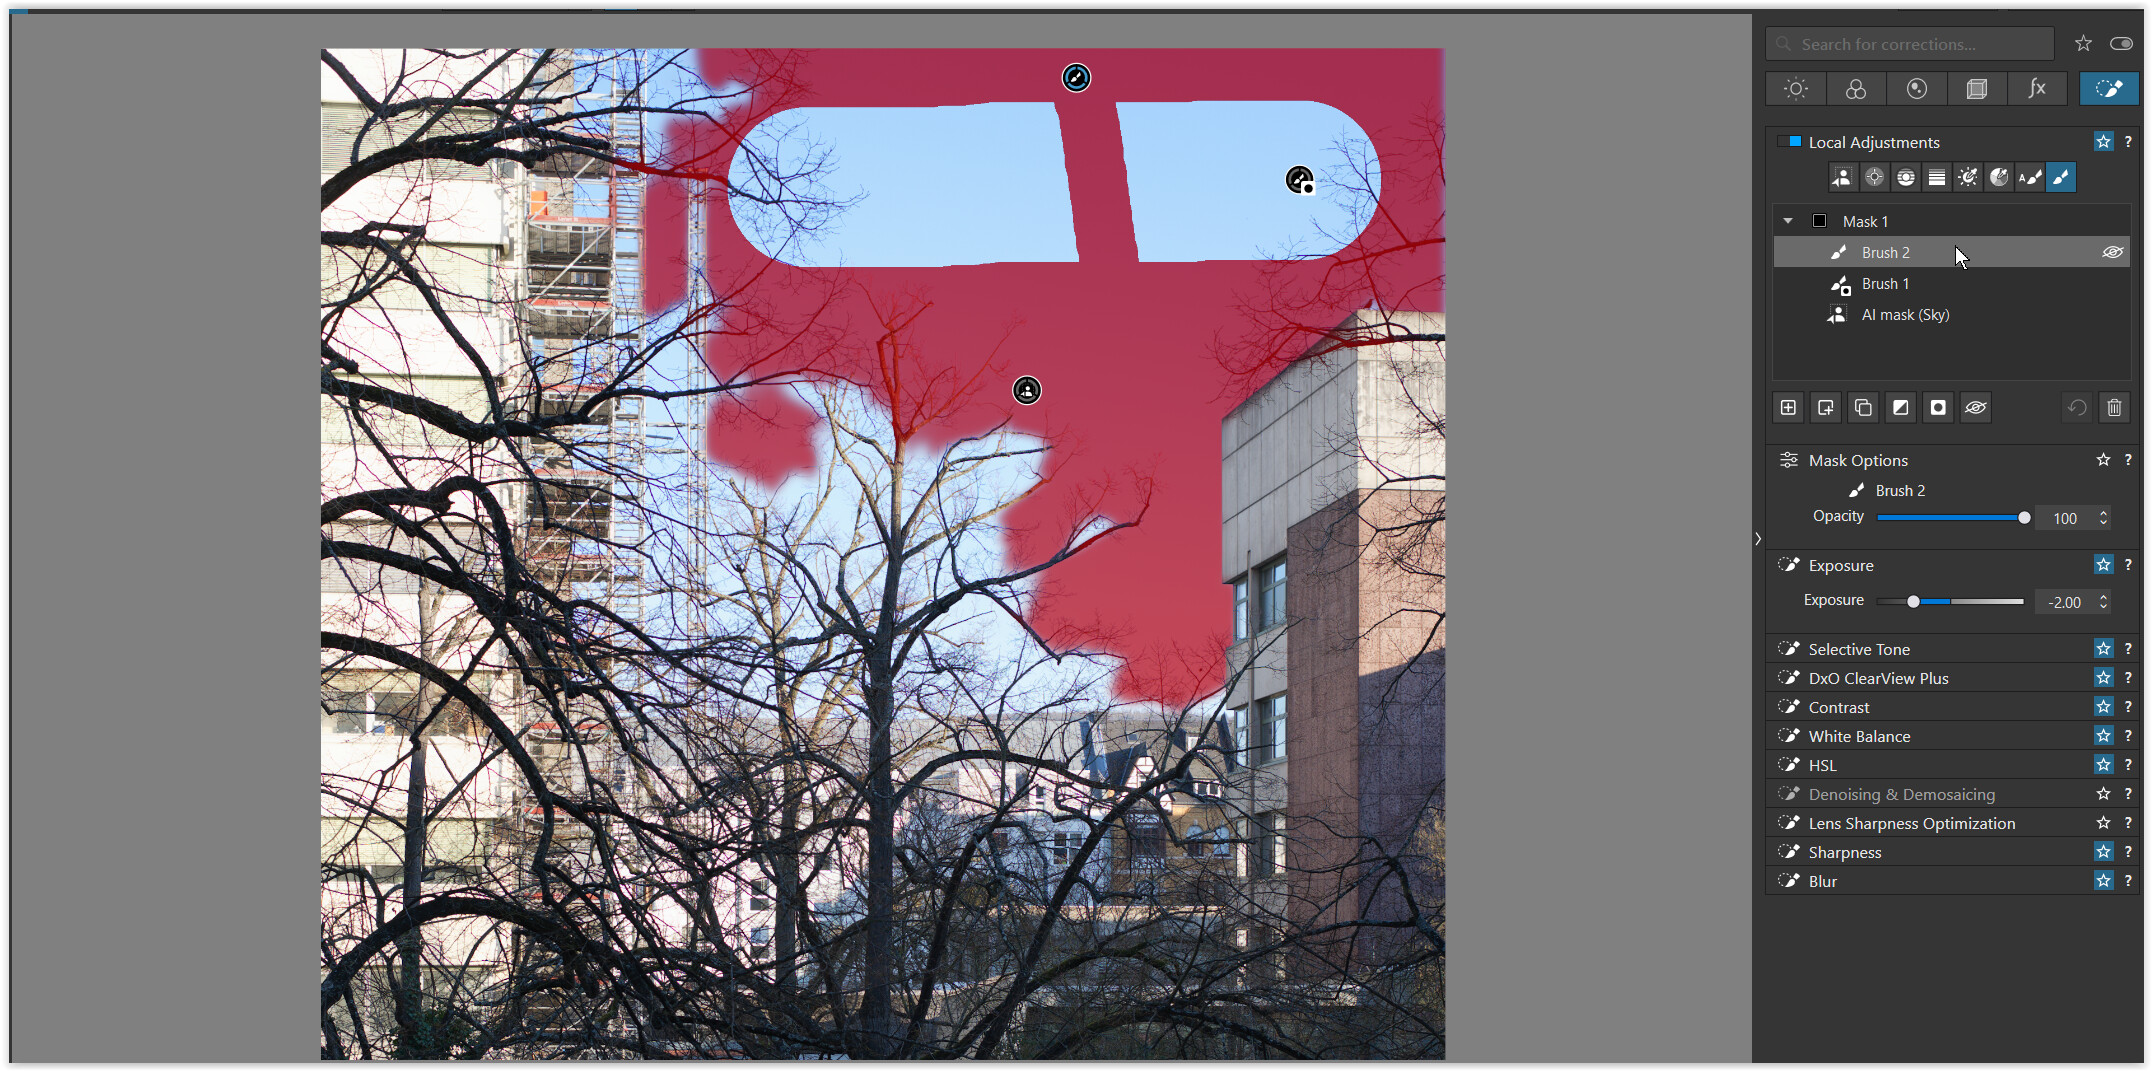
Brush 2 → the same again, but now with mouse over the mask description
Brush 2 → moved below Brush 1 Invert Shape
Brush 1 Invert Shape → moved below AI mask (Sky)
.