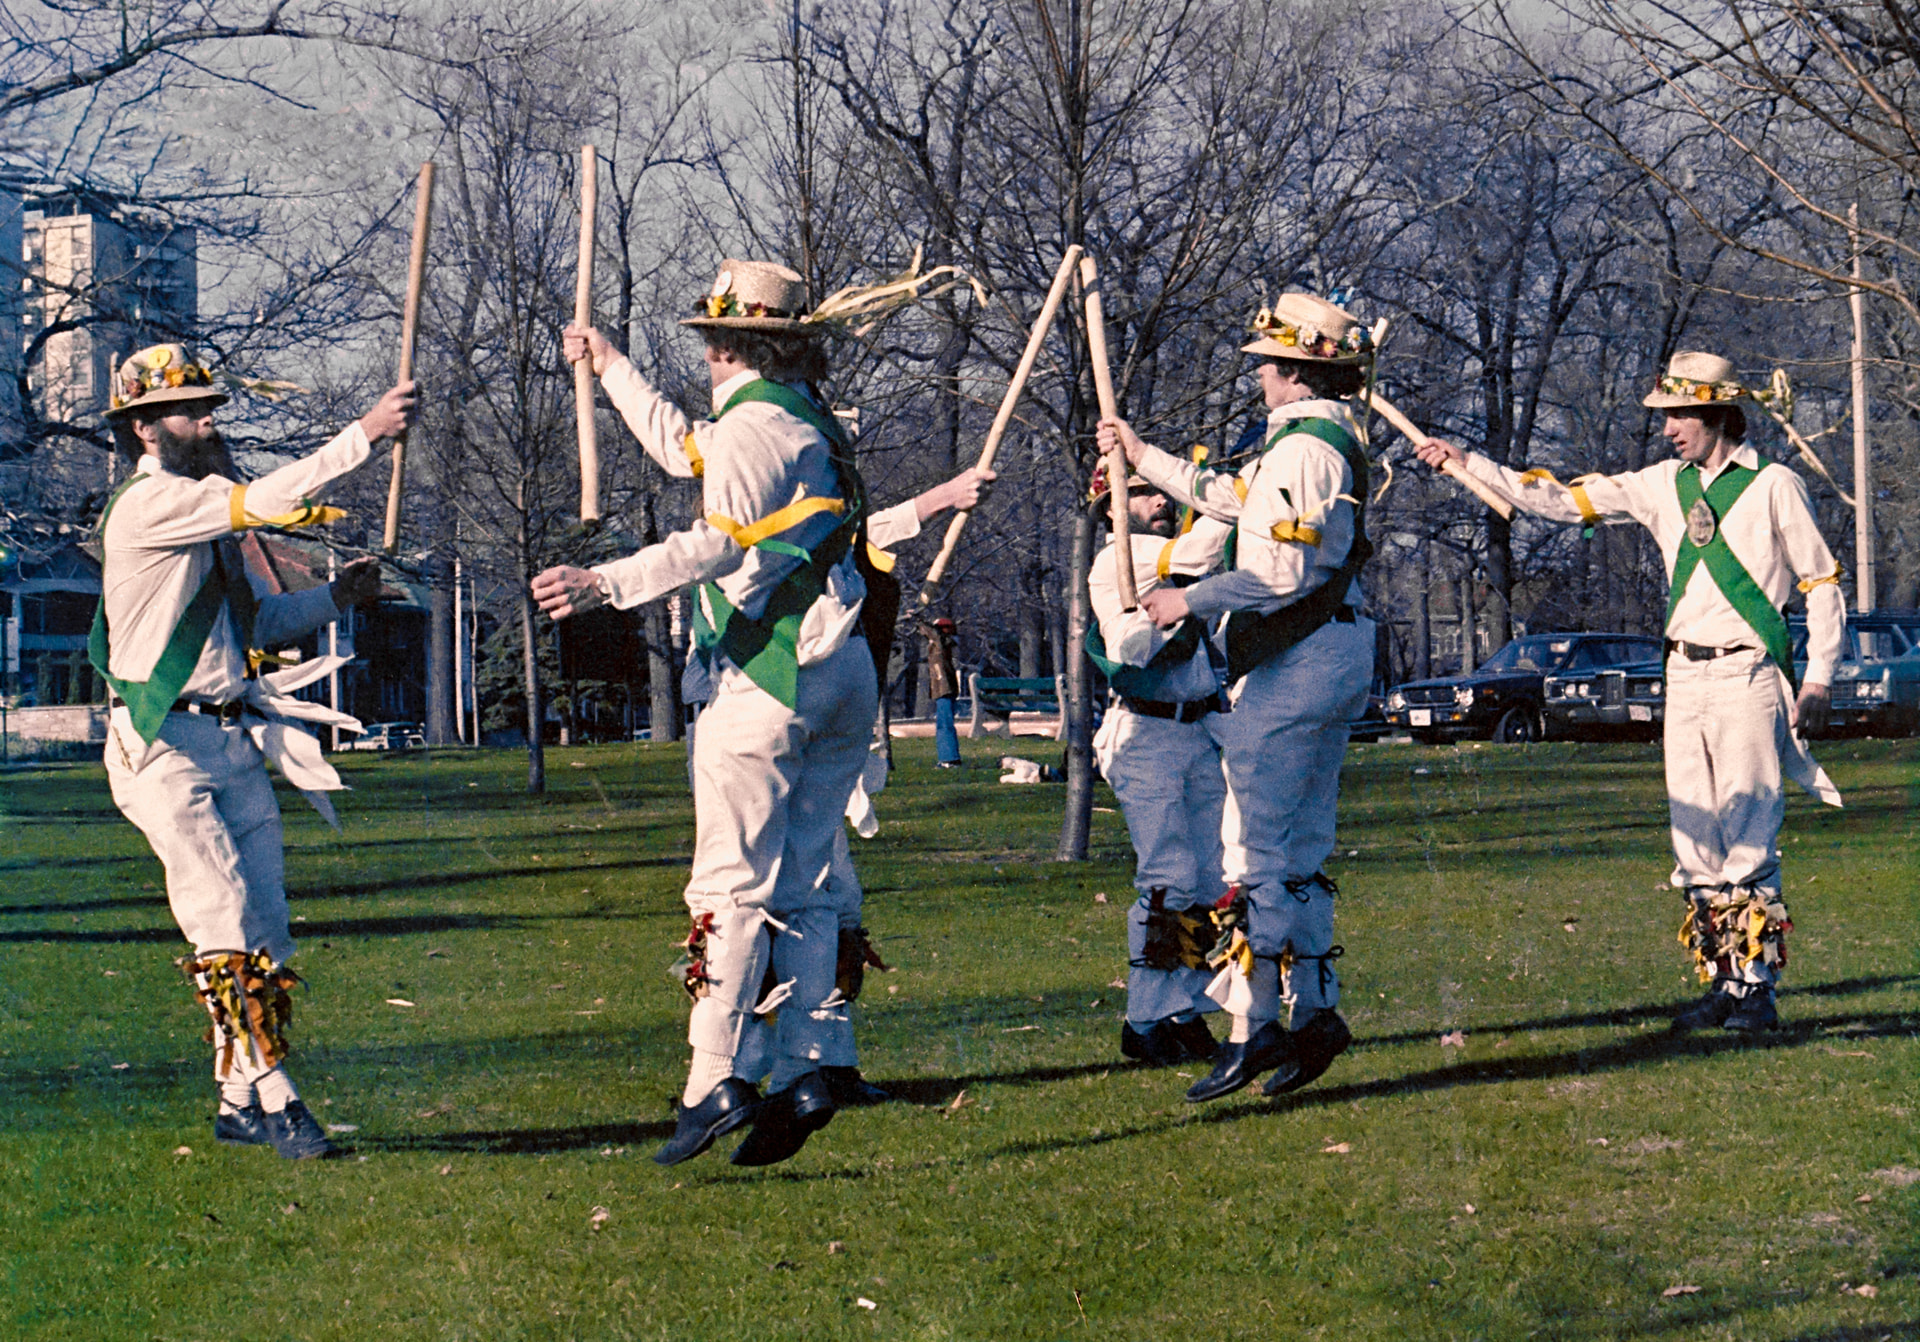
I have just scanned a large number of negatives that I have from the past five decades. By scanned I mean I used my camera to photograph the negatives resulting in a collection of very orange raw images, I will call these “photoscans”. Film pack version 8 introduces a way of inverting the colours an image, and then using a curves adjustment to remove the resulting cyan colour cast. It also allow the curves setting to be saved as a preset for later use. Out of the box thirteen numbered presents plus linear are provided with no explanation on what they have been created for.
After fumbling around for a few hours I have arrived at a method that seems to produce a usable result. So I thought I would share it here for comments and possibly to help others. There may well be better or quicker ways so if you know of one please publish it here.
The method:
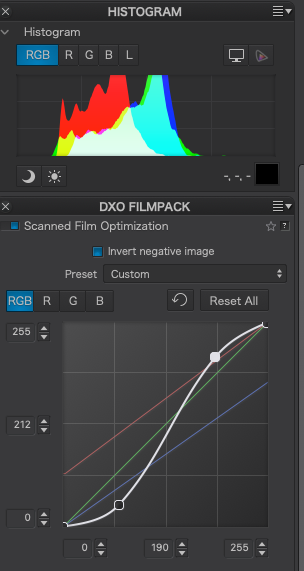
Open your photscan and select the linear conversion.
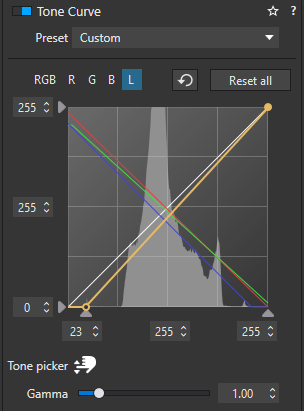
Ensure that you are displaying the full RGB histogram. Your image will be quite flat and have a cyan cast.
The aim is to merge the three colours into one somewhere near the middle of the histogram resulting in a white portion of the graph. As cyan is made up of green and blue it is best to start with these first. In the example above I would start with blue. Try moving the end points towards the bottom right corner. At some point use the RGB setting to add an S curve for contrast.
You are on the right track here. On a good image, the three colours should be equal. So if you can take a good image and create an accurate conversion curve, you should be able to reuse that curve on all similar images (and then use the normal PhotoLab colour correction tools).
I found the curves far too fiddly and sensitive in the FilmPack conversion tool but you seem a patient man.
The big advantage of this program is that it’s designed from the ground up for color negative processing (including dealing with the orange mask and different emulsions). I’ve found it simpler to use than trying to adjust histograms in PL/FP. But I’m not currently scanning many negatives.
The obvious disadvantage is cost for a separate program and a Lightroom subscription (w/o the standalone version, anyway).
If one has CaptureOne (in any version back to v9 at least), the built-in curves have the right responsiveness to comfortably create a working preset. None of it is perfect. It would be great if DxO made the built-in negative converter work better. Probably they will.
Thanks! I published a process here some time ago but it wasn’t necessarily that great and took a lot of work. I will certainly give this approach a go.
I have asked DxO to consider at least addressing the mask colour in an easier way, if not the individual colour responses. No sign of anything yet.
This is easier but I’ve found it can still take a lot of twiddling to get natural looking results. In my experience it can oversaturate very easily, especially on poorly exposed frames. Interesting to see a standalone version is in the works. Its Achilles heel is needing to run as a Lightroom plugin.
Personally, I would far prefer a native DxO solution because then I only ever have one file — the original RAW shot with my camera. With NLP, you need to create a positive before you can use the rest of LR’s tools.
Thanks for your inputs. I am still seeking a more accurate way of getting to an acceptable image. In my opinion the present tools in Film Pack require further development after all why should I have to iterate through curve settings when that is something that software can and should do?
I don’t mind buying extra software as long as its not by Adobe as I have found in the past that Adobe adds an awful lot of background “stuff” that at some point in the future causes issues plus I am not keen on renting software.
The stand alone version of Negative Lab Pro looks promising and could be ready in the very near future. I have also found FilmLab which I may try. I think I still have a copy of Capture One so will give it a try. The issue with all external editors is that stepping out of DxO means having to adopt a different workflow as I guess the only option will be to convert the images to tiff or similar. It would be preferable if all the work could be completed inside DxO.
Using the white balance tool was mentioned above. Yes I have tried it and no it does not work on the negative as it just does not have the range.
OK, I just tried it out on 4 quite different frames from different films. I have to say it gets in the ballpark pretty reliably. Yes, it takes a bit of fussing and going back and forth between the four curves, but every frame looked believeable after I had aligned the three channel histograms and stretched the RGB. one.
Here’s the slightly modified process as I have found it to work. I had the same basic actions before, but did not previously appreciate the interpretation of the main histogram.
Select the Invert negative image option (defaulting to linear preset).
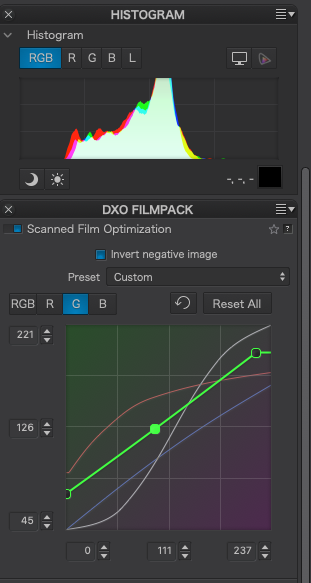
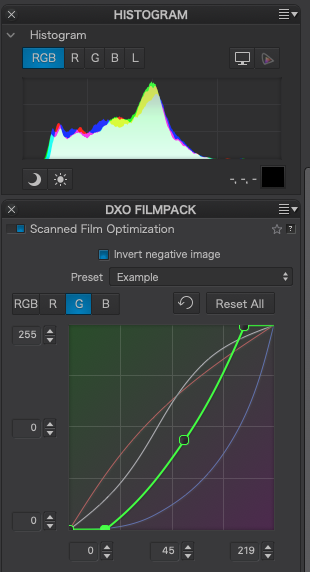
Move the ends of the three B, G, and R curves (in that order seems to work well). These moves can be across the top/bottom or along the sides of the square — whatever moves the end of that colour’s histogram in the right direction. Once you have it roughly aligned (there will often be small peaks in the blacks and whites which should be matched)…
Move the ends of the RGB curve in the same way to stretch out the histogram.
As step 3 will expose more accuracy in the alignments of the R, G, and B channels, you may further tweak them.
As necessary, create an ’S’ curve on the RGB (or just one end of it if necessary) to improve contrast.
Move on to all the usual sliders thereafter.
Note that Negative Lab Pro requires you first use the WB picker on a section of the mask outside the frame, however as soon as you turn on negative inversion in PhotoLab, the white balance is zeroed out and you get the simplified control without tint. You can still use this, but it does not seem to do the usual thing and wherever you click, the slider will not move, even though the colours clearly change. Odd. You do get a fair range of adjustment if you just move the slider.
Also note that you can use the HSL tool to further adjust the colours.
At the moment I am trying to decide if the new curves tool is actually needed. The original curves tool, named “Tone Curve” has the advantage of also displaying the histogram simplifying the selection of the end points. It seems that straight lines is the way ahead.
Yes,you can also pull the curve control out and resize to whatever you want. That would be as nice addition for curves, which as you say need UI space to finesse.
DXO could look at C1’s built in negative conversion tool which works great.
The histogram is a representation of the amount of different values of the channels. Nothing more. Using it to get the same amount isn’t making the image better.
#George : so how do you remove the orange mask then ?
Anyway, that was yesterdays method, if you look at my more recent posts the aim is to “lop” off the portion of the histogram that is the mask. Thankfully, this seems mostly to fall outside the image data.
However, I am all ears and look forward to trying your method.
#platypus thanks for the links which I have now read. It seems to me that the new “powerful” tool in Filmpack8 is not needed if Photolab is available as all it adds is the inversion of colours and the new or second curves tool is not as useful as it does not display the histogram behind the lines of the curves.
I realise that this is an unfair question but you wrote the following back in 2019. If you remember could you explain what you mean by matching the low and high edges of the histogram?
“adjust each of the R, G and B curves so that the (RGB) histogram low and high edges match”
It would also be good if your method were described in the user manual.
Using the WB dropper on the orange mask, I set the white balance
Invert and adjust the RGB tone curves till the photo looks “right”
Process as normal and save as a tiff for a “clean-up” in a pixel editor such as Photoshop.
Sometimes, I use Neat Image to reduce image noise.
Now, this method does mean that the function of some tools is inverted but I think it is just a minor inconvenience. Cheaper than having to buy filmpack!!
The biggest variable is the film characteristics and its processing.
Here is one that I did a few years ago. I am showing the pre-process tiff as I cannot show the ORF. Looks like the tiff does not show either. You can download it and open it to see the condition of the original negative.
@skids , thanks for inquiring, some details are clear to those who write and leave the readers in the dark…
Assuming that the original subject taken on film has white and black parts, the converted image should have those parts in white and black too.
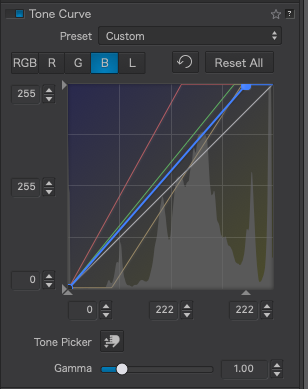
drag the Tone Curve’s R, G and B diagonals inwards
until the R, G and B histogram curves reach a point near clipping
drag each curve not all the way, but only to make all histogram curves begin and end in the same place and then white will be white and black will be black.
Well, the histogram is a tricky thing: If the brightest part is a blue sky, dragging the R and G curves too far will make the sky white and you’ll want to back up those diagonals until the sky gets blue. You do this while you drag diagonals and this will probably need to be repeated with increasingly small changes.
It can be easier to adjust the tone curves after picking up white balance from an unexposed part of the film or from a very dense part or from some place you know to have been neutral. Play around to see how things work. This takes some time as you start, but you’ll get to know how to proceed best after a while. Nevertheless, some negatives are really beastly and resist conversion. In such a case, export to 16 bit TIFF and do the rest on the TIFF and local adjustments as needed.
As for the entry in the user manual… DxO will surely resist the temptation. As a long time user of DxO software I’ve seen DxO implement features requested by users and can still recommend to not hold your breath waiting. Hibernating will probably not be sufficient either…but every now and then we get a welcome surprise.
Allan, thank you for your message and the challenge. So far I have totally failed to adjust the tone curves to get a image that looks as good as the one in your post.
Mind you its a useful task but could be a long night.
That’s a technical description. Have you actually tried using what has been described above?
Strike 1. This is not a method, it is just moving stuff “until it looks right” which, with some frames, is an exercise in futility unless you have a background in film processing or colour science.
Strike 2. That’s not an inconvenience, it’s a complete pain.
These are the reasons a product like Negative Lab Pro exists.
Should you buy FilmPack just to invert negatives? Maybe. Should you try to learn this new tool if you already have FilmPack (or other reasons to buy it)? Of course!
I thought this was a discussion of how to use this nascent tool, not a list of reasons “it’s dumb”.
With a slight modification of @skids original process I have found it much quicker to get to a good start point than I previously had. That is useful information.