I sustain ; with a separate checkbox that inverts negative to positive and remove orange mask, all color corrections would be similar to corrections on a positive picture.
I have made color negative processing with DxO by trial and error but that not comfortable and reproducible.
The method is to move stuff until white is white and black is black and everything in between looks like you want it to look. “Move stuff until” describes an adaptive process which is necessary because not all negatives are the same. Family name is Trial&Error.
We can also save the first steps (flipping the curves and maybe more) to a partial preset and it might even work on many images, but not on all. You’d get a ballpark conversion that needs further customising, sometimes more, sometimes less.
The “science” part of colour science is just a bunch of mathematical operations, the “real” colour part of it is based on an artistic (or true to life) idea of how the resulting image should look - and the skills to follow the method that we can call “moving stuff” instead of Henrietta or Fritz.
So, if we do things manually, we read a manual or try, learn from both and develop our skills and routines. Next comes automation which is meant to make life easier for some and generate income for others.
We can do things in many ways and as long as they serve, it’s okay (imo)
Well I prefer iterative but it amounts to the same thing
The reason for my original post is DxO advertising a new tool to invert images. Now while they have done exactly that I remain underwhelmed. The inversion check box inverts the image which means the other controls work in the correct sense. I find the new curves tool which comes with the invert check box is difficult to use as it lacks both the histogram of the original tool and also the adjustment triangles running along the edges.
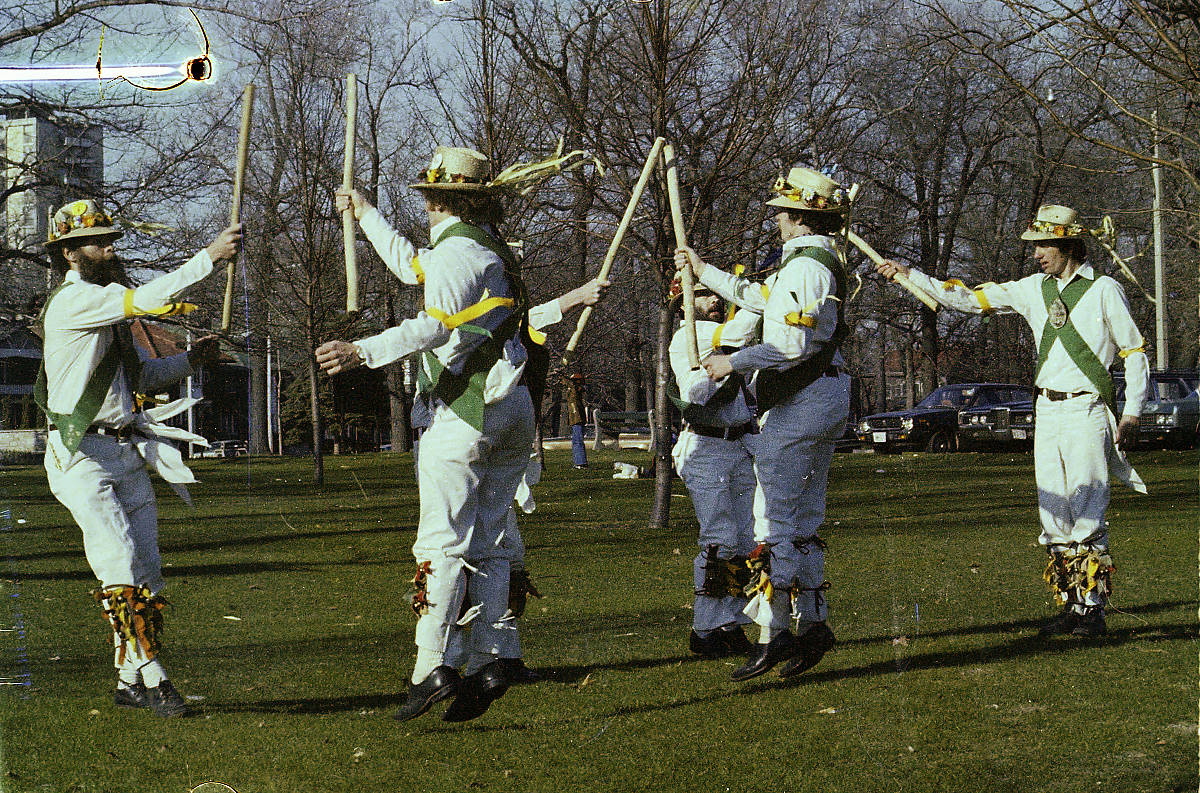
Above Allan posted an image and the result of his own editing. So far I have been unable to match the range and clarity of his final image. Along the way I have concluded that both the curves tools in PL + FP8 are far to small and cramped. Their size make it difficult to accurately position the black and white points (should that be your aim). I struggled for an hour producing ugly looking images then tried using Affinity Photo 2. I produced my best looking version on my first attempt. This improvement was through the simple to use Levels tool which allows the black and white points to be set through the use of sliders.
Back in Photolab, George suggests using the grey point tool. I have found this can be useful but at times it acts as a reset button so I only use it early on in the process when it would be more useful towards the end.
While I have not given up on DxO PL+FP yet I am thinking that there are better tools available and I will be trying the Negative Lab Pro standalone once it becomes available.
I tried to use an older copy of Capture One but it has some issues with modern OSs and it does not read the latest raw files. I will try a free trial to see how it works.
Getting back to DxO. I asked them how the new tool should be used and what the presets were aimed at. Here is part of their reply:
For the best results when working with color negatives, we recommend the following workflow:
Enable “Invert Image” first in the Film Scan Optimizer palette.
Start with the “Linear” preset in the Color Shift Neutralizer section to establish a neutral base.
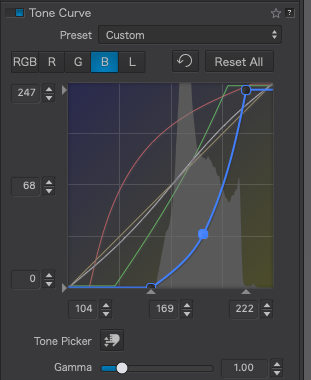
Use the individual RGB curves to gradually compensate for the orange mask:
Red curve adjusts red/cyan balance
Green curve adjusts green/magenta balance
Blue curve adjusts blue/yellow balance
Apply small adjustments progressively while monitoring both the image and histogram to avoid clipping any channel.
Once the color balance is close to neutral, apply a gentle RGB S-curve to refine contrast and midtones.
After achieving a satisfactory result, save the correction as a custom preset for reuse with similar film stocks or scanning setups.
The included presets are intended as starting points for different types of color cast and contrast compensation:
Presets 1, 2, 10, 11, 12, and 13 mainly compensate blue, yellow, indigo, and green casts
Presets 3, 4, and 5 primarily adjust contrast
Presets 6–9 are based on common film scanner correction profiles
The key difference to what has been discussed above is that they make no mention of setting the black and white points which to me makes like far simpler. Also at the moment I get better results using the original curves tool because it enables the black and white points to be set.
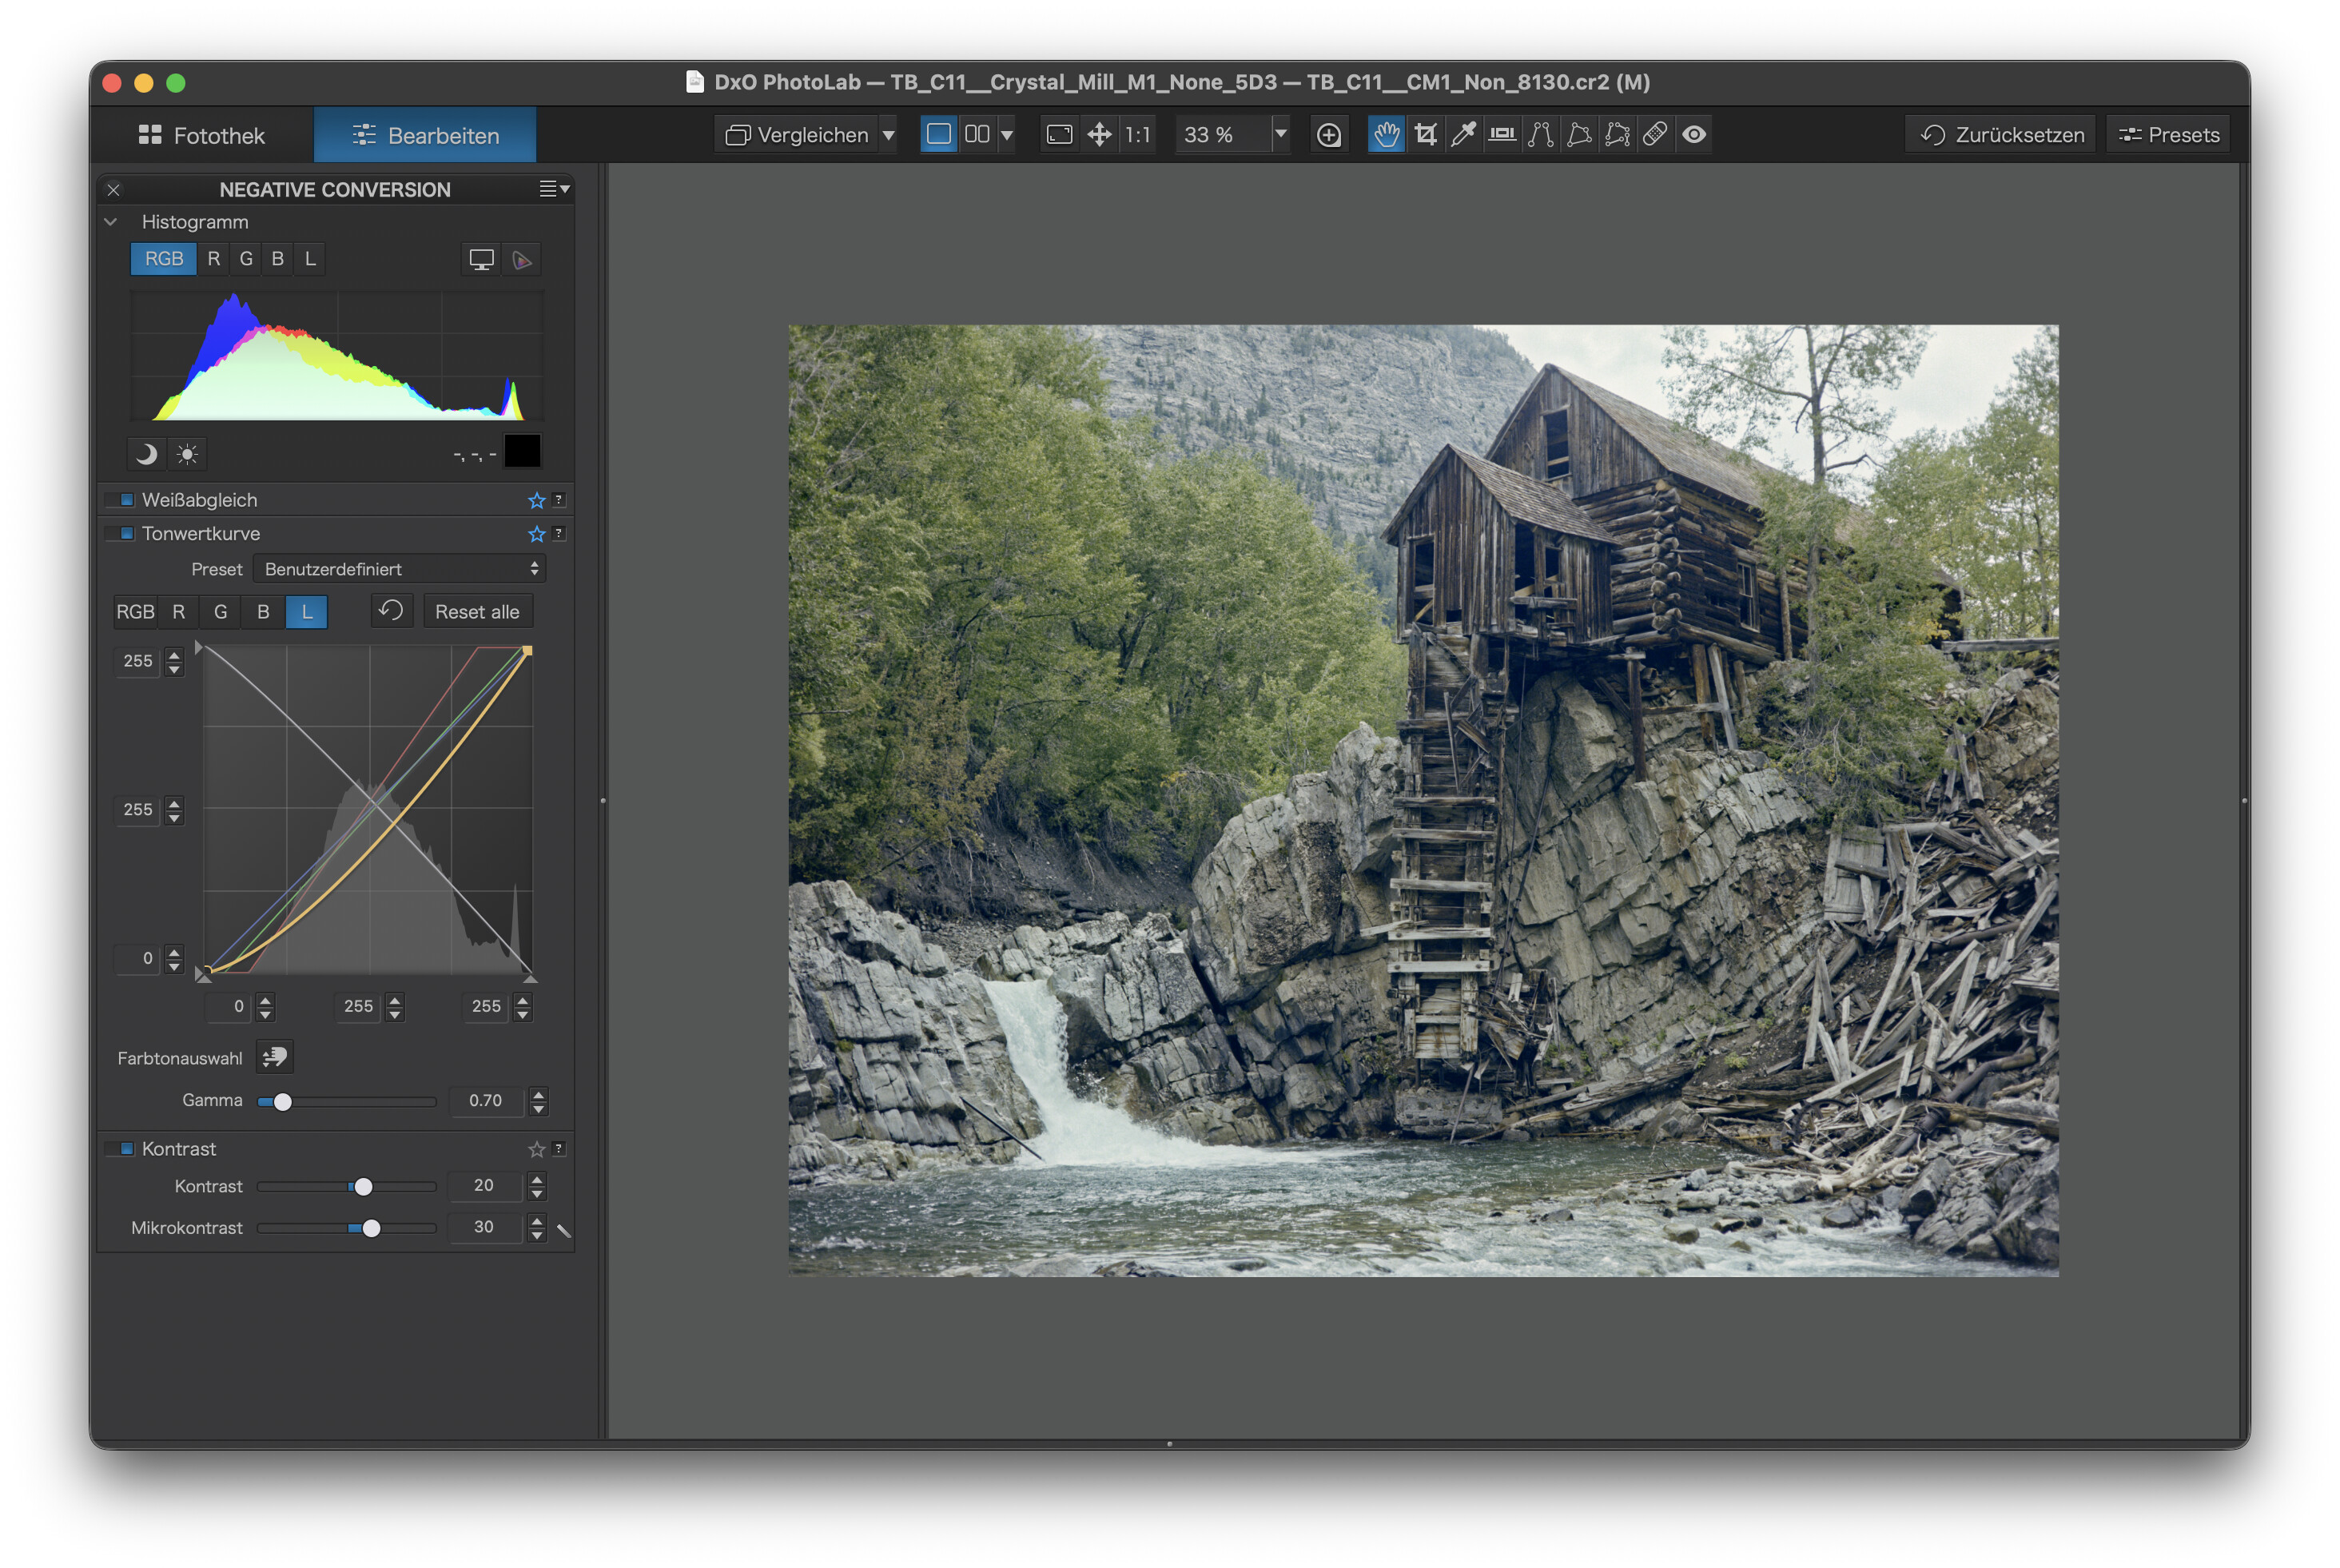
Setting the black and white points, then adjusting the curves to taste results in the following version of Allans Morris Men:
Here, I first picked unexposed film base, cropped the image, inverted the RGB tone curve and adjusted the other curves to taste. Final touches with lighthanded changes of WB and contrast.
Your conversion looks great and its an interesting subject.
I take back what I said above as I have worked out how the update in FilmPack 8 is useful to me.
My workflow is similar to yours :
Crop the image to leave just the image.
Using the FilmPack8 tools inside Photo Lab invert the image.
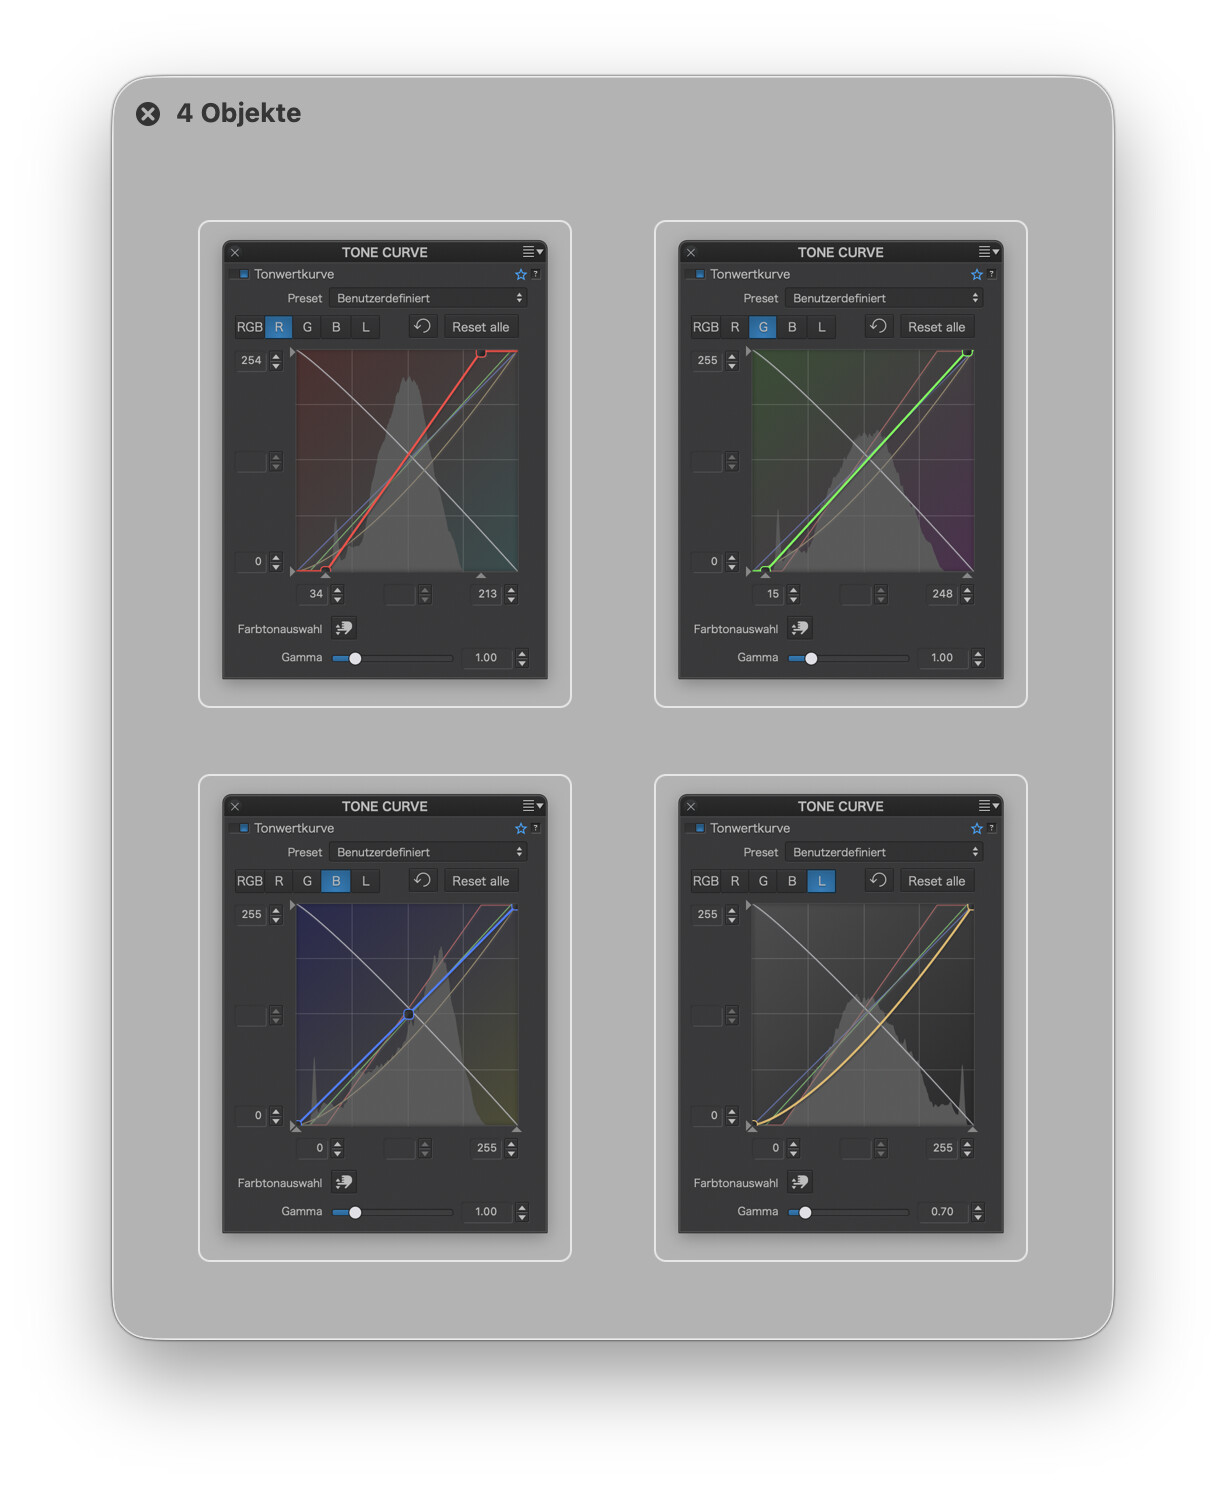
Next set the black and white points using the new curves tool. To do this select a colour both in the tool and in the histogram and slide the endpoints of the top and bottom of the colour line horizontally while looking at the graph in the histogram. Moving the end points of the line inwards will stretch the graphs along the horizontal axis.
Repeat for each RGB colour.
The end result should be a good starting point for fine tuning.
One option that now works is that the white balance tool may be used and will probably improve the image.
So while I am not over whelmed by the new tool it does have some utility.
In PL9 Elite, there is a custom Tone Curve called Negative (RGB). I believe this is a new preset (I did not have PL8).
While this setting does invert the negative and allow for “normal” processing, some other tools are still inverted. E.G. the White Balance Pick Colour dropper. If you use this after you have made any adjustments, it will mess up the colours. The Selective Tone sliders are also reversed.
So, rather than use the dropper, I set the WB manually by eye immediately after I selected Negative (RGB). Then, I started adjusting the individual RGB tone curves, then Luminance and contrast. I fine tuned the colours using the HSL panel.
End result - not any different to the process I described above.
It eliminates having to swap the colour channels with the Tone Curve but, you still have to adjust the individual RGB channels anyway.
That didn’t answer my question. Forget what you know and try it.
Personal experience. I’ve spent a long time moving sliders around trying to come up with a consistent approach. Most based on prior posts in this forum. It has been hit and miss and I’ve frequently given up trying to get the colour to look “right”.
To me. I thought that was a given.
OK, on this I may have overstepped. But… any time someone talks about using the feature (take a look at the OP - this was about the Negative Inversion feature) it devolves into people talking about doing it without the tool.
Which was what thread was about.
Back at you. You can call my ramblings nonsense. I choose not to. To each their own.
As the original poster I thought I would post an update.
I have downloaded trial versions of FilmLab and Capture One. I have also continued using DxO’s new invert and curves tools.
FilmLab works well and is a reasonable price. It operates on a folder of images at a time and can automatically crop the images to remove borders etc, itwrites it’s own small sidecar files to be stored alongside the original raw negatives. When required it outputs jpeg or tiff files. I have used it to produce jpegs to sit alongside the raw files so that NeoFinder has something to display. The downside is that adding metadata using NeoFinder requires that the jpeg and raw file be selected.
Earlier this year Capture One added negative conversion features (see https://support.captureone.com/hc/en-us/articles/33917623779229-Negative-Film-Conversion). The new features work well and it produces good looking images. However, it requires that the edges of the negatives be cropped before conversion and fortunately it allows batch cropping. The editing tools are larger than those in DxO PL and provide finer control so as long as you don’t mind the price it is an excellent choice. One further issue is that it requires that images be imported into a catalog or sessions folder. When in the past I have used Capture One I found that the catalog became very slow and basically non functional once more than twenty five thousand images were imported. Sessions don’t really work for me as they are aimed at a job based workflow. Again in the past there was no simple method of passing a number of images into Capture One from an external DAM or even the Finder so the poor performance of the database was always an issue. I have six days left on my trial so will test the database and report back.
I’ll write my comments about PhotoLab in my next post.
As I wrote above I have continued with conversions in DxO using the new tools provided in FilmPack.
I have found that with a wide range of scans the curve based on built in option number two works as a starting point. The key learning points for me are try not to take away to much by dropping the curves as this makes the image darker and that a cast can most likely be removed by the subtraction of one primary colour or the addition of the other two :
Red + Green = Yellow.
Blue is the opposite of Yellow
Green + Blue = Cyan.
Red is the opposite of Cyan
Red + Blue = Magenta
Green is the opposite of Magenta
Photos of colour negatives have an orange base or mask. When inverted this becomes cyan and is best countered by reducing Green and Blue and adding some Red.
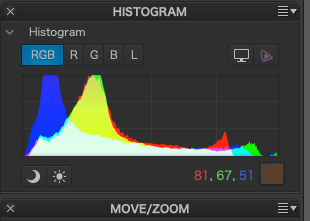
For typical images taken in daylight the three primary colours should occupy the same part of the histogram unless one colour dominates the image e.g. a field of red poppies or yellow sun flowers will bias the histogram.
Setting the black and white points of each colour seems a good idea but it has issues. The first is that unless you work in an almost dark room seeing the end points of the histogram is very very difficult. You can use the main curves tool for this but it is very cramped and again is difficult to judge where the colour data starts and ends. Once set any new curve adjustments are even more sensitive because of the way the tool is designed. At the moment making small changes is next to impossible.
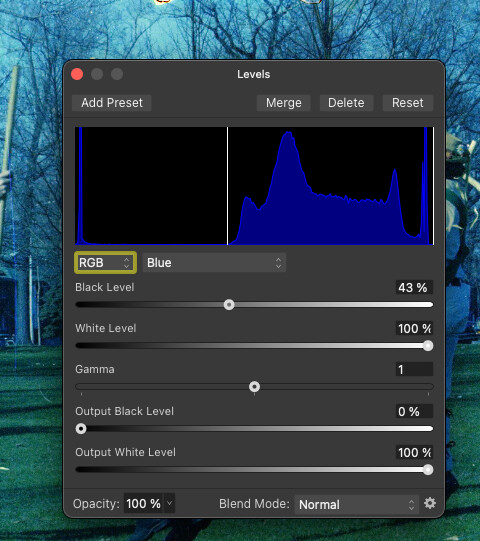
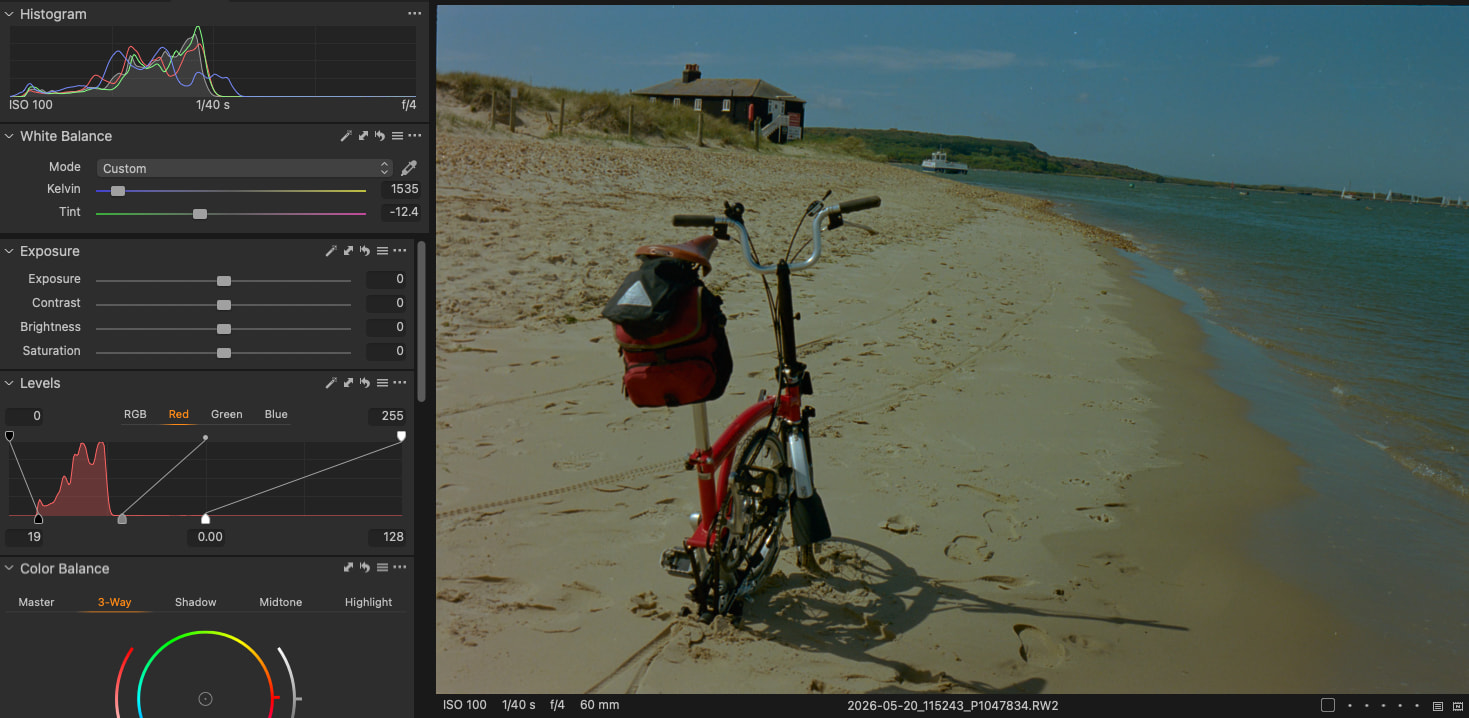
To be workable over thousands of negatives DxO need to add some automatic tools much as Capture One have. An auto crop and straighten would be nice. An auto invert and correct is needed but along the way larger curves and histogram tools are needed and these need to be visible and have auto white and black end point selections. Here is how Capture One has implemented levels
Its worth noting that once the white balance is set in Capture One it remains set. in PhotoLab there is an interconnection between the invert process and the white balance which resets the white balance settings rendering them pointless. White balance does not seem to work very well once the image has been inverted using the new tool.
The bottom line is that FilmLab2 is faster and more accurate with the down side of all later edits having to be conducted on a large 16bit tiff. Capture One requires slightly more work, produces ok images and preserves am entirely raw workflow. DxO PL is ok at producing proofs but is far more difficult to create good looking output than the other two.
Lastly Negative Lab Pro will be launching a standalone version in the near future.
Several posts have shown that and how PhotoLab can be used to convert negatives, be it with or without (embedded) FilmPack.
The mostly manual procedures will take a lot of time when a bigger number of negatives wait to be converted. And the task takes more effort, if the negatives were taken at different times, with different light and on different film stock.
DxO is now striving to catch up with available converters, but I fear that they will take at least two more years due to sales tactics.
As long as DxO is evolving the feature, I’ll stick to Negative Lab Pro and, alas, Adobe Lightroom Classic. And as long as I have to use LrC, PhotoLab will play second fiddle at best. A pity really, but hey, things are as they come.
Unfortunately I am coming to a similar conclusion. Having tried Capture One I realise how much I struggle to see the menus and tools built into DxO PL. Small font sizes and poor contrast are the order of the day and it is not a good place to work. What is annoying is with modern programming tools it isn’t difficult to increase the size of the fonts and tools as well as giving some higher contrast options. For example why should I have to peer at the histogram to spot where the graph ends and the border starts?
Getting back to the topic I have concluded that the new tool integrated from Filmpack is not worth using. The prime reason is that when it is used the white balance tool is crippled and the only way I can fine tune an inverted negative is using by using both the sliders of the white balance.
So my semi reliable method of conversion is :
Using the built in tone curve tool invert each colour channel (this may be saved as a shortcut)
set the white and black points for each colour.
viewing the histogram adjust the curves so that the largest white portion of the graph is displayed. Typically the red has to be boosted slightly.
The image will probably look ok at this point.
Use the two sliders in the white balance tool to fine tune the result. Note that these function backwards owing to the inversion in step one.
If that were true, it would be great! Unfortunately, it isn’t. Inverting the RGB curve without color correction works only if the negative film used does not have an orange mask.