PLv7: Wide Gamut Color Space - Soft Proofing, Export to Disk, NikCollection

I’m pleased (for you) that you’re not seeing any “deviations” - but you may be fooling yourself.

It’s true that there are not too many situations whereby what-you-see on PL’s main screen is NOT what you get when exporting the image to disk (via ICC Profile = sRGB) and then displaying that image on the very same screen … but there certainly are examples where this is so . . . esp. as you would expect, in cases where colours are saturated and full of detail.

And the way to mitigate against that situation (so that you DO always get the same result on-screen, within PL, versus viewing the same image when exported via sRGB profile) is to have SP ON.

Just as a starter: I don’t really care for something to be “correct” or not. My main objective is to get the representation I want, or, in case of reproductions, something that gets close to what the original looked like as seen under similar conditions.

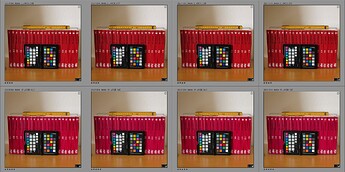
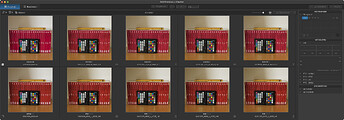
That being said, I tested something as easy (from a colour space requirement point of view) as a colour checker. Image hardly customised in wide and Legacy colour spaces and exported to AdobeRGB and sRGB with the “preserve colour detail” boxe checked as well as not checked. Here is what I got as seen in DPL7:


Top row from left @ Wide: RAW, Tiff in AdobeRGB with “preserve” off, TIFF in AdobeRGB with “preserve” on, Tiff in sRGB with “preserve” off, TIFF in sRGB with “preserve” on
Bottom row from left @ Legacy: RAW, Tiff in AdobeRGB with “preserve” off, TIFF in AdobeRGB with “preserve” on, Tiff in sRGB with “preserve” off, TIFF in sRGB with “preserve” on,

Exported files as seen in Lightroom:


Note that rows are switched.

Exported files - specially the books - match the actual colours better when WCS was set to DxO Wide Gamut. On screen, DxO’s images look a tad more saturated than Lightroom’s… It doesn’t show in the screens though. Differences between AdobeRGB and sRGB exports are hard to ake out, but measuring e.g. the colour patches with macOS’s Digital Colour Meter app reveal differences that can exceed 2% (per colour component).

My lesson(s) learned: Stick to DxO Wide Gamut WCS

Be careful now. What I say here Is that soft proof is of no practical use at all using it with the ICC for monitors like sRGB, Adobe RGB or Display P3. It only has a role to play when testing printer profiles for different paper manufacturers paper/printer-profiles.

I don’t say there are no differences between my hardware calibrated profiles with my Benq SW271 because they give very distinctive differences switching between them. I have sRGB, ARGB and Display P3 that I can toggle between instantly.

What I say is that I can’t see any markup differences at all proofing Photolab’s own ICC-profiles with Photolab´s soft proofing and that is nothing to be expected either.

Don’t confuse that with using different monitor profiles when working with Photolab because those differences are very obvious and easy to see. It is not hard to either understand or see the effects of using different monitor profiles. It is not hard to understand either that each profile used will affect the postprocessing final export files in a distinctive way that reflect the filter bias a certain monitor profile will give.

It is not either the same thing exporting a file with sRGB ICC when it’s postprocessed using a Display P3 monitor profile as when you do it with a file made with an sRGB-profiles monitor. These are different files. Still if you export three files just changing the ICC at export, will give you three distinctive flavours of the same basic image data despite that file might not at all contain image data made with the corresponding monitor profile and there is nothing that stop you from doing this wrong really.

The only way to handle this is to get properly organized - which many are not as can be seen and read in many forums handling printing error matters.

Apols, @Stenis - but I don’t understand you at all.
And that’s OK - if you’re getting results that you’re happy with - then that’s all there is to it.

John

1 Like

You will only see a difference if your image has out of gamut colours that do not fit in the output colour space. These are generally very saturated bright colours like a poppy flower in bright sunlight.

I only use soft proofing if I know a particular image is very saturated and bright which is very rarely.

@KeithRJ ,
I still don’t understand what you’re saying.
Under normal conditions it is working colors pace->monitors color space. Color management is taking care for that.
When soft proof on it is working color space->soft proof color space->monitors color space.
If the soft proof color space is bigger as the monitors color space then you don’t see any difference. Color management is taking care for that. If soft proof color space is smaller as the monitors color space then you’ll see differences.

George

George you have SP wrong, it is:

working CS → monitor CS only and then simulate target CS. Use OOG warnings to see what will be OOG in the target CS. PL uses the target CS to calculate what colours will be OOG and provides tools for you to see what those colours are and lets you make adjustments to either change those colours or adjust how they transition to the target CS (detail recovery).

SP is only useful when the target CS is smaller than the monitor CS.

2 Likes

I reckon this is worth repeating, for emphasis

:white_check_mark:

I will explain my experience, to explain my approach;

  • When beta-testing introduction of the new Wide Gamut Color Space in PLv6 - I just happened to be using an image of autumn leaves as one of my test images … with deep and saturated reds, and details in veins of the drying leaves.

  • I exported the image to disk (via sRGB) only to find that the result looked very little like the version of the image I was seeing within PhotoLab - - even tho I was reviewing the exported result on the very same screen that I was using with PL.

  • This puzzled and perplexed me. With some help from DxO staff, and extensive discussion with others in the EA group, I was finally able to understand what was going on.

  • When working on the image, within PL, with SP NOT ON, using my more-capable-than-sRGB monitor, I was fooling myself with the colours and detail I was seeing … because I was not seeing an image constrained by the sRGB color gamut.

  • When that same image was exported to disk, via ICC Profile = sRGB, then I was seeing the image constrained by the sRGB color gamut … and, that’s why it looked different.

  • This is where the “Protect Saturated Color” algorithm comes into play; It applies some DxO-proprietary “smarts” during the process of “squeezing” the colors and details available in PL’s working WGCS down into the target ICC Profile (being sRGB in my case) … so that there’s limited loss of color & detail in this process (or, at least, less than there might otherwise be).

  • With Soft Proofing switched ON - even tho I am working with a more-capable-than-sRGB monitor - I will then see, on screen, within PL, the same result as I will see when I export to disk (via ICC Profile = sRGB) and review the result.

  • So, this is how I (personally) prefer to work;
    – I have Soft Proofing ON so that I will enjoy a WYSIWY(will)G experience … and I cannot be caught-out, unexpectedly, with the exported result being substantially different.
    – And, I have found by experience, that the “Protect Saturated Color” algorithm does an excellent job of “taming/squeezing” difficult & challenging images into the sRGB gamut.


Yeah, I know … TL:DNR … Sorry 'bout that.

  1. On SP. To keep things simple I stay in sRGB all the time (my target is mostly sRGB monitors and subjects don’t really need wider colorspace), so I have switched to sRGB my camera (that’s only a hint for software in RAW anyway), my monitor (although it’s Adobe RGB capable, otherwise I had some problems, e.g. with faces getting reddish), and export everything in sRGB (I don’t print anymore myself – that’s a different can of worms). I use my laptop for “hard proofing”. Do you think there is any reason I should use Soft Proofing?
  2. On PSC. I would guess that ‘Protect Saturated Colors’ is tuned for human color perception, where the naive linear mapping between working/output colorspaces can produce unsatisfactory results. Am I right? I often change PSC to 70-80 to get what I want, but I’m not sure why it works and I can’t guess easily (yet) when I should use it. This really needs some solid explanation.
  3. On ‘Preserve Color Details’ in Export settings. PL help explanation looks very muddy.

BTW, the RGB coordinates shown under the Histogram are very different for Legacy and WGCS for a sample RGB TIFF (16mpx containing 1 pixel in each 256x256x256 color). The primaries in Legacy are mapped in WGCS as follows (no corrections applied, PSC=0): (255,0,0)->(201,76,39), (0,255,0)->(161,245,0), (0,0,255)->(59,34,244). Does anyone know why? Also histograms are wrong, with many spikes instead of smooth graph. That’s not important for “normal” photography, but still strange – why display the values when their meaning is unclear?
EDIT: It seems that in Legacy mode target ColorSpace coordinates are shown, while in WGCS mode the WideGamut coordinates are displayed, unless we use SoftProofing – then PL shows coordinates in target CS (albeit slightly desaturated).

Yes - As then you will see, while working within PL, the result of applying the Preserve Color Details (PCD) algorithm directly on your sRGB-tuned monitor (rather than waiting to see the result only after you’ve exported the image) … assuming you have PCD set for Exports too.

The ‘Protect Saturated Colors’ slider has a different purpose from Preserve Color Details … You can use it (P-S-C) to tune colours to your personal preference - as you describe.

The PCD algo is specifically related to optimising the process of converting from PL’s WG working color space down to a smaller color gamut - such as sRGB.

  • I guess one reason it’s not explained in great detail is that it’s proprietary to DxO … and, I find it works exceptionally well !
1 Like

You will see only a difference when the output color space is smaller as the monitors color space.
When softproofing an image to any color space wider as my monitors color space I don’t see any differences. Except that there might be OOG warnings showing what colors are not correct on your monitor.
You can try this out for yourself. You can make it vissible.
Monitor warnings are showing you what colors of your soft proof image are out of the color space of your monitor.
Soft proof warnings are showing you what colors are out of the color space of the target color space relative to your working color space.
Try this out with a printer profile using a smaller color space as your monitor.
The most simple way to archive this is sending an image in the soft proof color space to the monitor. The only thing that must be added in the Destination gamut warning.

With SP on the histogram is reflecting the soft proof image, with SP off it’s reflecting the in memory wide gamut image.

George

John,
Compare the image between softproofing to sRGB and your monitors profile. They may not be the same.

George

Hi @Stenis … and all interested,

It’s not easy, but not too complicated either. :slight_smile:

Use DxO WGCS as internal/working color space (remember: in LR we have “Melissa” as internal WGCS) to start with maximum quality (color, saturation…), or in other words, don’t ‘degrade’ your image too early.

Now for evaluation purposes, skip your own images for a moment so you are not influenced by the subject, your camera/lens, DxO’s color engine/interpretation (aka profiles … ) and use an image created for testing.

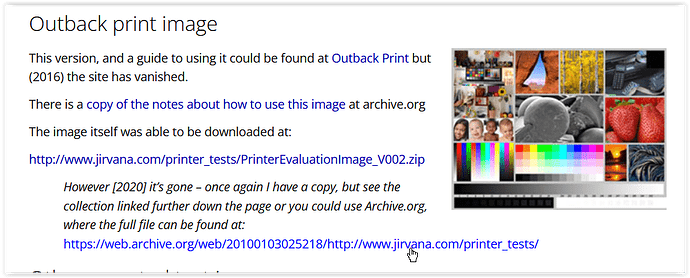
Checking e.g. this site https://www.northlight-images.co.uk/printer-test-images/ you can get a variety of test images. Scrolling about halfway down you see the “Outback print image”

and the link to download from → https://web.archive.org/web/20100103025218/http://www.jirvana.com/printer_tests/
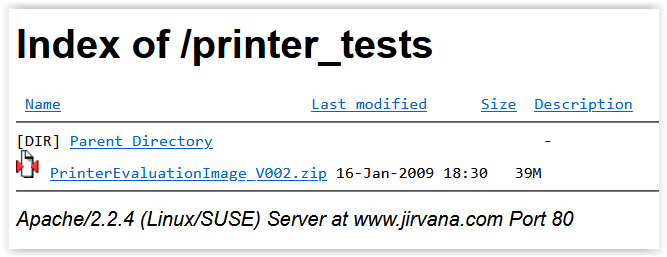
Screen Shot 05-03-24 at 12.21 AM

When extracted, you will receive a TIFF file in the ProPhoto color space that shows a variety of subjects as well as color swatches with highly saturated colors, which simplifies the assessment here.


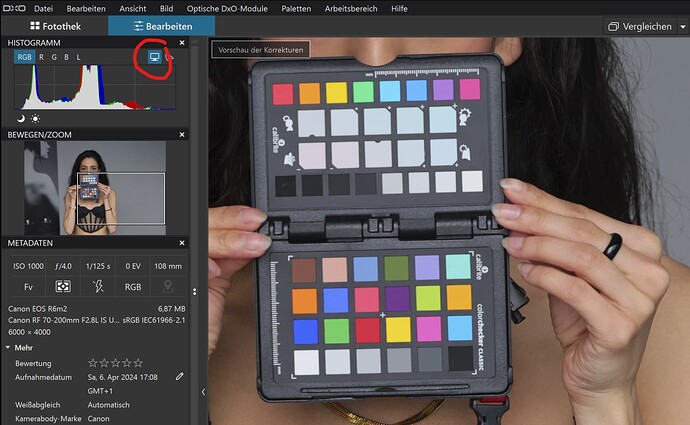
Your monitor shows you what fits into its color space. To see if there is anything beyond that, in PL 6/7 enable Monitor Gamut Warning (blue overlay). This means you will see the corresponding display on your P3 monitor the way others see it on their AdobeRGB or sRGB screen.

So why a Soft Proof?

Activate Soft Proofing and select the ICC profile corresponding to your monitor’s color space and enable Destination Gamut Warning (red overlay) … and the same area as before will be shown as being out of color space.
Disable this warning and toggle Soft Proof (SP) ON/OFF. If you look at the different motifs you may or may not notice any change, just the color swatches. Why this?

What you see now is the result of the Preserve Color Details function.

To check this, move the slider all the way to the left “0” and turn SP ON/OFF. Everything looks exactly the same. – Move the slider to the right “100” and the subtle change becomes more noticeable.

That said … if you are exporting to your monitor’s color space, you may or may not want to use SP (and the same for others on a AdobeRGB or sRGB screen).


If you care about “your customers” (the people you want to show your images to) and you don’t know what monitors they have and whether they use (or know how to use) a color managed app, this is better/ safer to export (convert) the images to the usual sRGB color space.

Before exporting to sRGB from your P3 capable monitor (and the same goes for others on an AdobeRGB screen), you can use Soft Proof (SP, then set to sRGB) to simulate the result and also use the Preserve Color Details (PCD) feature.


Now, for real images you will use PL’s color engine, develop your (raw) file to your liking and possibly invoke the Protect Saturated Colors (PSC) function (e.g. instead of the HSL tool).
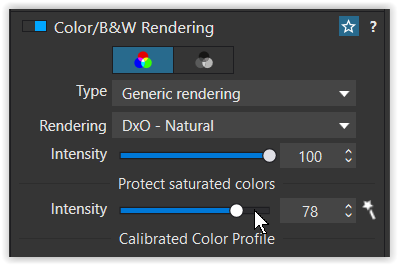
Screen Shot 05-03-24 at 02.08 PM

All of this affects what colors are in your target color space, which could be P3 for example.
You may also want to export (convert) the result to sRGB… and possibly use soft proof. – You decide how you work.

Wolfgang
:white_check_mark:

Servus @Klick ,
@Wolfgang und @John-M und all die anderen haben schon viele gute Sachen geschrieben und das will ich hier nicht wiederholen. Ich hab nur selbst auch einen langen Gedankenprozess durchgemacht wie Du ihn jetzt gehst und wollte Dir nur mein Ergebnis mitteilen.

WGCS gibt es seit PL6 und am Anfang habe ich den sogar ein paar Monate noch abgelehnt. Jetzt empfehle ich auch auf jeden Fall den WGCS zu nutzen. Im Gegensatz zu Dir gehen meine Bilder nicht nur in sRGB ins Internet sondern werden auch gedruckt (zu Hause und in der Druckerei).

Aus diesem Grund und weil DxO und ich ( :smiley: ) empfehlen, Softproofing nur in einer virtuellen Kopie vorzunehmen, nutze ich NICHT permanent Softproofing. Da ich in mehrere Ziele ausgebe, kann ich nicht den kleinsten Farbraum hier als Master nehmen. In Deinem und Johns Fall mag das anders sein.

Das von @Wolfgang genannte Monitorsymbol nutze ich im Master permanent


Aber da wirst Du kaum Probleme haben, da Dein Monitor genauso wie meiner P3 kann.

Was die Ausgabe in sRGB für das Internet betrifft, bin ich über den Punkt hinweg, mir darüber zu viele Gedanken zu machen. Das Problem ist hier ja nicht die perfekte Darstellung auf Deinem Monitor, sondern die Darstellung auf den Monitoren der Betrachter, die in der Regel nicht kalibriert sind und im Zweifel nicht mal sRGB anzeigen können. Bei wichtigen Bildern mach ich hier ggf. auch schon mal einen Vorab-Export und schau mir das auf einem Zweitmonitor (mit Absicht habe ich hier einen normalen Büromonitor, die aus arbeitsergonomischen Gründen oft blaustichig sind) und auf meinem Standard-Handy an.

Es ist erstaunlich, dass es bei vielen Farben auch bei sRGB keine Probleme gibt. Kritische Farben (wie z.B. Türkis), die am Rand von sRGB sind, schau ich mir schon mal mit Soiftproofing an. Ansonsten nutze ich Softproofing hauptsächlich für den Druck auf herausfordernden Medien (z.B. Leinwand). Denn das Softproofing ist a nicht nur zur Darstellung da, sondern auch, damit man hier eingreifen kann (z.B. mit dem HSL-Werkzeug).

Wenn Du mir eine Nachricht schreibst, kann ich Dir gern mal die Seiten zum Softproofing. aus meinem Buch ( eBook zu DxO PhotoLab erschienen ) zusenden.

Also, einfach auch mal fünfe gerade sein lassen :-D. Nur meine Erfahrung.

Liebe Grüße
Akki

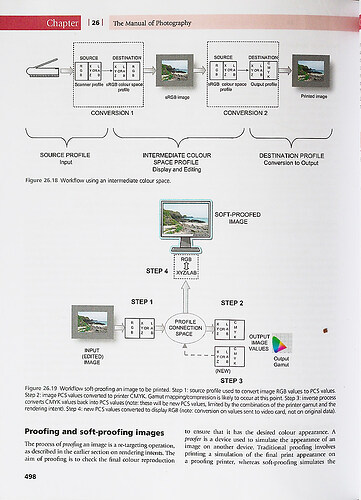
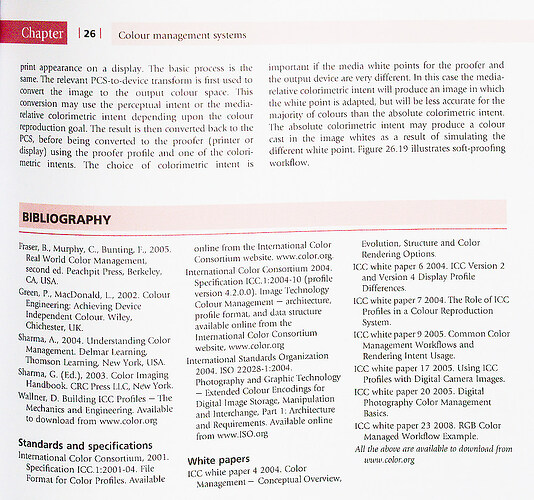
And how is that simulating done? By sending the image in target color space to the monitor, in the meanwhile converting it to the monitors color space.

I remember having posted this before. From the Manual of Photography.

As you can see the image is converted to the target color space and that image is converted to the monitor color space.

From my post.

From your post.

To me we don’t disagree.

George

Hallo AkkiMoto,

danke auch dir für deine Erfahrungen und Tipps.

Ich bin seit PhotoLab 2 oder 3 bei DxO und komme mit der Software an sich gut zurecht. Nur war die Einführung des WGCS eine tiefgreifende Veränderung. So wie du, habe auch ich ihn gemieden - nicht nur zu Beginn, sondern bis dato. Das möchte ich ändern und deshalb schätze ich die vielen Hinweise und die Diskussion zu diesem Thema hier sehr.

Was die Erstellung von VCs für das Softproofing betrifft, so kann ich den Nutzen davon nicht ganz nachvollziehen. Wodurch sollten Bilddateien beim Softproofing gefährdet sein, so dass eine VC nötig ist? Ich sehe keinen wirklichen Grund. John-M hat dazu auch schon mal angemerkt, dass er in seinem Workflow keine VCs verwendet.

Was die Darstellung und Überprüfung exportierter Bilder angeht, so machst du im Grunde das Gleiche, was aus Softproofing ermöglicht. Nur führst du es mit Softproof-“Hardware” (sRGB-Monitor oder Handy) durch.

Eingreifen lässt sich mit dem HSL-Tool, oder eben auch mit den Möglichkeiten, die das Softproofing selbst anbietet (PCD-Regler).

Ich schätze vielfältige Meinungen. Von daher nehme ich dein Angebot bezüglich der Seiten aus deinem Buch zum Thema gerne an und werde dir eine kurze Nachricht senden.

Danke und liebe Grüße
Manfred

----- ENGLISH -----

Hello AkkiMoto,

thank you for your experience and tips.
I’ve been with DxO since PhotoLab 2 or 3 and am getting on well with the software. But the introduction of WGCS was a profound change. Like you, I also avoided it - not just at the beginning, but up to now. I want to change that, which is why I really appreciate the many tips and the discussion on this topic here.

As for the creation of VCs for soft proofing, I can’t quite understand the benefit of that. Why should image files be compromised during soft proofing so that a VC is necessary? I don’t see any real reason. @John-M has commented that he doesn’t use VCs in his workflow either.

As far as displaying and checking exported images is concerned, you are basically doing the same thing that soft proofing allows. Only you do it with softproof “hardware” (sRGB monitor or cell phone).
You can intervene with the HSL tool, or with the options offered by the soft proofing itself (PCD slider).

I appreciate diverse opinions. Therefore, I will gladly accept your offer regarding the pages from your book on the subject and will send you a short message.

Thank you and best regards
Manfred

[Translated with DeepL]

Find which data in the displayed image is outside of the target profile and display them using the OOG warnings. No conversation necessary at all as the image is still displayed in the monitor profile.

Without conversion you’ll have wrong color by definition.
Conversion doesn’t mean that the original image is converted, it’s done on the fly by the Profile Connection Space as the diagram shows.
With SP ON the displayed image is the image in the target profile, with SP OFF it’s the in memory image in WG.

George