This post is long and full of snapshots, the actual procedure is fairly simple but only necessary if you need to preserve ‘Project’ on Windows or ‘Project’ and ‘Advanced History’ on a Mac because these items only exist in the DxPL database.
Users need to be able to replace a drive for a number of reasons e.g.
- More space
- More speed
- Unreliable existing drive, i.e. failing drive
- Failed drive
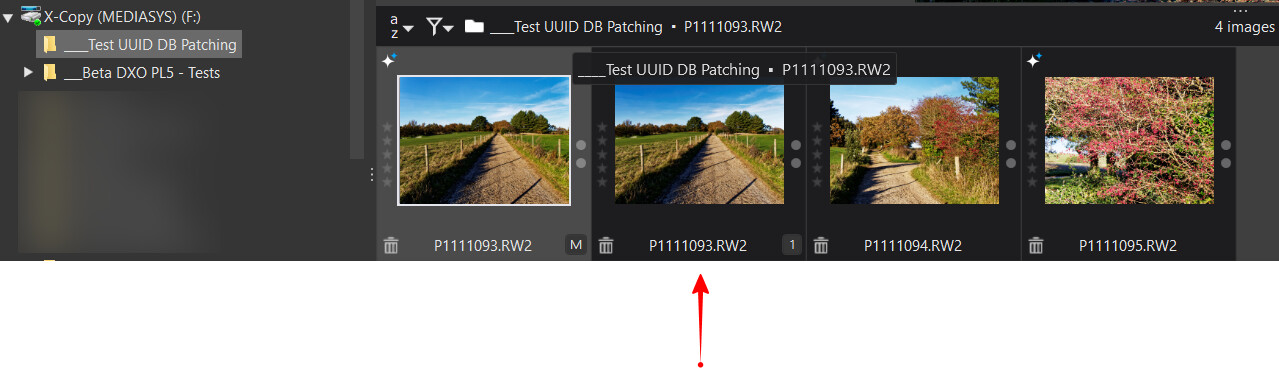
Users typically copy the images or use a backup copy, change the name to the name of the drive being replaced and set the drive letter to the original drive letter and discover the new drive in DxPL.
All will appear to be O.K. if there are no ‘Projects’ in DxPL(Win) and no ‘Projects’ in DxPL(Mac) but with DxPL(Mac) the apparent loss of ‘Advanced History’ on the Mac and ‘Projects’ on both systems, if they existed, will not go unnoticed!
The reason for the problem is that DxPL does not use the ‘Label’ or the ‘Drive letter’ to recognise a disk drive it uses the ‘Volume GUID’ (other terms appear to be used for this unique identifier).
Do I need to do anything special:-
If the user is not using ‘Projects’ on DxPL(Win) or ‘Projects’ and/or ‘Advanced History’ on the Mac then providing all the edits have been written to the DOPs and metadata written back to the image, if required, then
-
Take a backup of the current database, if possible (i.e. the drive still exists/works)
-
Start with an empty database (or no database at all) and recreate whatever is required by discovering directories and thereby importing the images into a brand new DxPL database.
What happens if I just present the replacement drive to an existing DxPL database:-
If the ‘Volume GUID’ of a drive is not recognised by DxPL then it will continue to work as normal but each directory accessed by the user will result in new data being added to the database, the old data will remain intact but unused and inaccessible!
I believe (guess) that the ‘Volume GUID’ is used so that users can remove external USB drives from the system but it allows DxPL to recognise them if/when they return!
However, if the user intends to use a replacement disk, e.g. me replacing my F:\ drive with one of my backup USB3 drives, they will be “unlucky” unless they adopt the following procedure!
The database table that controls this access is the ‘Folders’ table in DxPL(Win) (a different naming convention is used for the Mac and the databases are not interchangeable).
‘Folders’ looks like this for a small test database

and the UUid (UniqueId) must tally with the ‘Volume GUID’ shown here
If a drive is accessed that does not match a UUid in ‘Folders’ then that drive will be considered as new and any database data relating to the old drive will be ignored and data will be taken from the “new” drive… i.e. the image, the DOP (if it exists) and from an xmp sidecar (if it exists).
Any ‘Projects’ will then get a “?” when attempting to access the image to which they “point” which cannot be found.
Other software will often detect such a potential mismatch and offer to take the “new” drive as if it is the “old” drive and continue without additional problem but no such facility exists in DxPL.
The “safest” way, I believe, is to patch the database to reference the GUID of the replacement drive, i.e. patch so that the new drive replaces the old drive in the ‘Folders’ Table in the PhotoLab.db database.
The software used for this is
![]()
and is available for Windows and MAC.
Before starting I must make a warning that this procedure is not endorsed by DxO and cannot be undertaken easily if the database to be patched has already “discovered” the new replacement drive, i.e. do not browse the replacement drive with DxPL if possible so that it remains unknown to the DxPL database!
If the new drive is already in the database it becomes harder to assign the UUid of that drive to another drive because of the rules governing the keys used in the database, i.e. the UUid must be unique in the database as it is on the system.
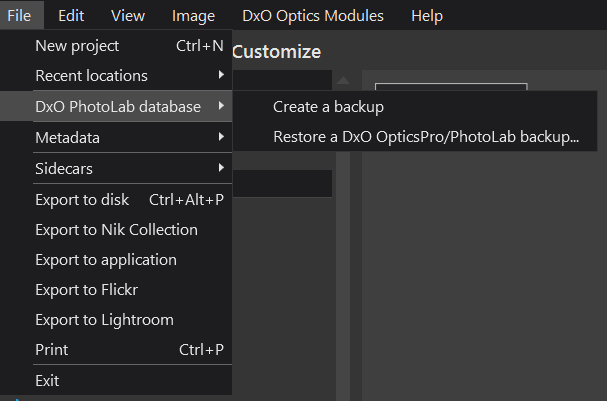
Step 1 - Back up the database:-
Use DxPL to make at least three backups. Unfortunately the utility used to patch the database does not allow the changed database to be given a new name when it is being saved.
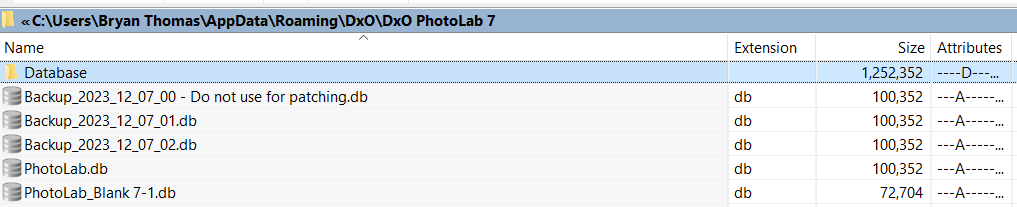
So using DxPL make three backups using
i.e. to create
Step 2 - Obtain the GUID of the replacement/new drive:-
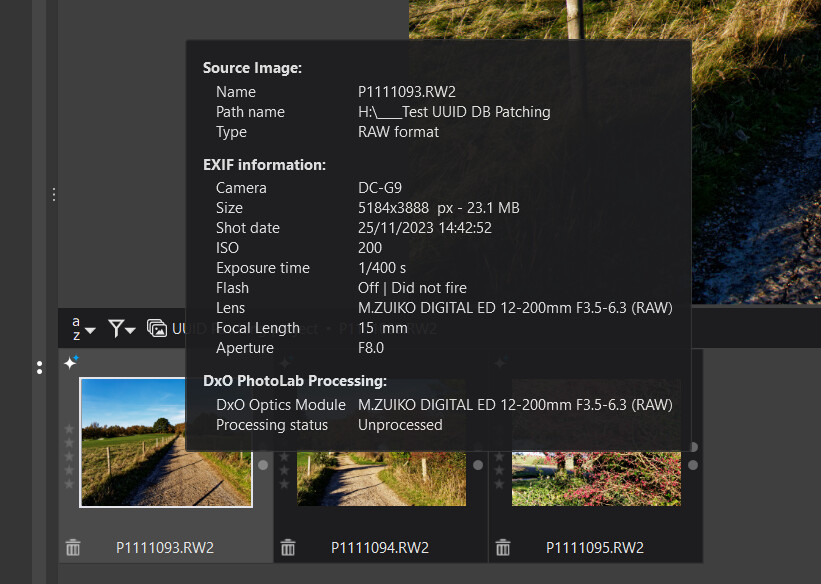
In my case I want to change from the H: drive to the F: drive , i.e. to reverse what I did in a previous test.
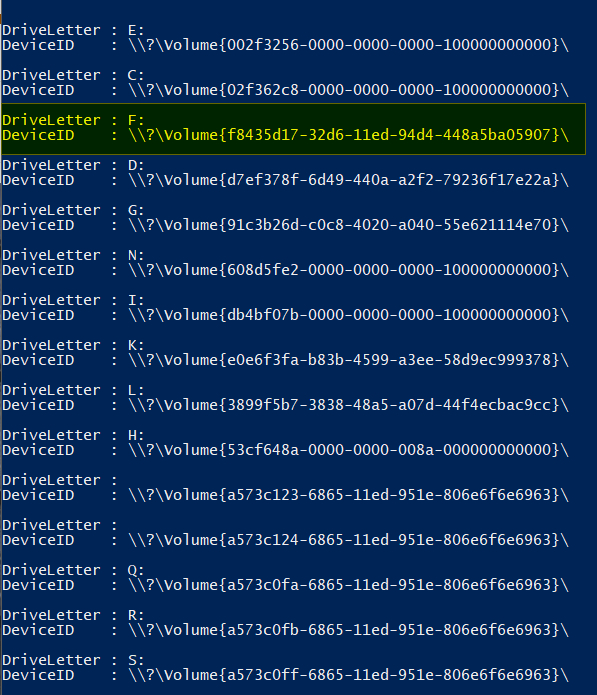
So I am going to change the UUid value in the database from “53cf648a-0000-0000-008a-000000000000” (the GUID for H:) to “f8435d17-32d6-11ed-94d4-448a5ba05907” (the GUID for F:).
This might help https://www.addictivetips.com/windows-tips/find-disk-and-volume-guid-windows-10/ to use PowerShell to get the GUIDs for the operation. If the drive to be replaced is no longer available then that is not a major problem but the replacement GUID must be located and copied.
The PowerShell command is
GWMI -namespace root\cimv2 -class win32_volume | FL -property DriveLetter, DeviceID
So in my case both drives are available and I get

The GUID for F:\ is “f8435d17-32d6-11ed-94d4-448a5ba05907”
and for H:\ is “53cf648a-0000-0000-008a-000000000000” and the current value in the ‘Folders’ structure of “Backup_2023_12_07_01.db” is

Because the patch is going to be made to the 01 backup copy, DxPL can be open at this point.
Step 3 - copy the new GUID to the ‘UniqueId’ for the H: drive in the ‘Folders’ Table

and ‘Apply’ to get

This now needs to be written back to the database and sadly there is no way of changing the name of the database at that point.

so after ‘Write changes’
will contain the patched ‘Folders’ structure which in my case will mean that ‘Projects’ that were set up on the H:\ drive will now continue to work correctly on the F: drive, but only after that database is ‘Restored’ into DxPL.
Before
Restore
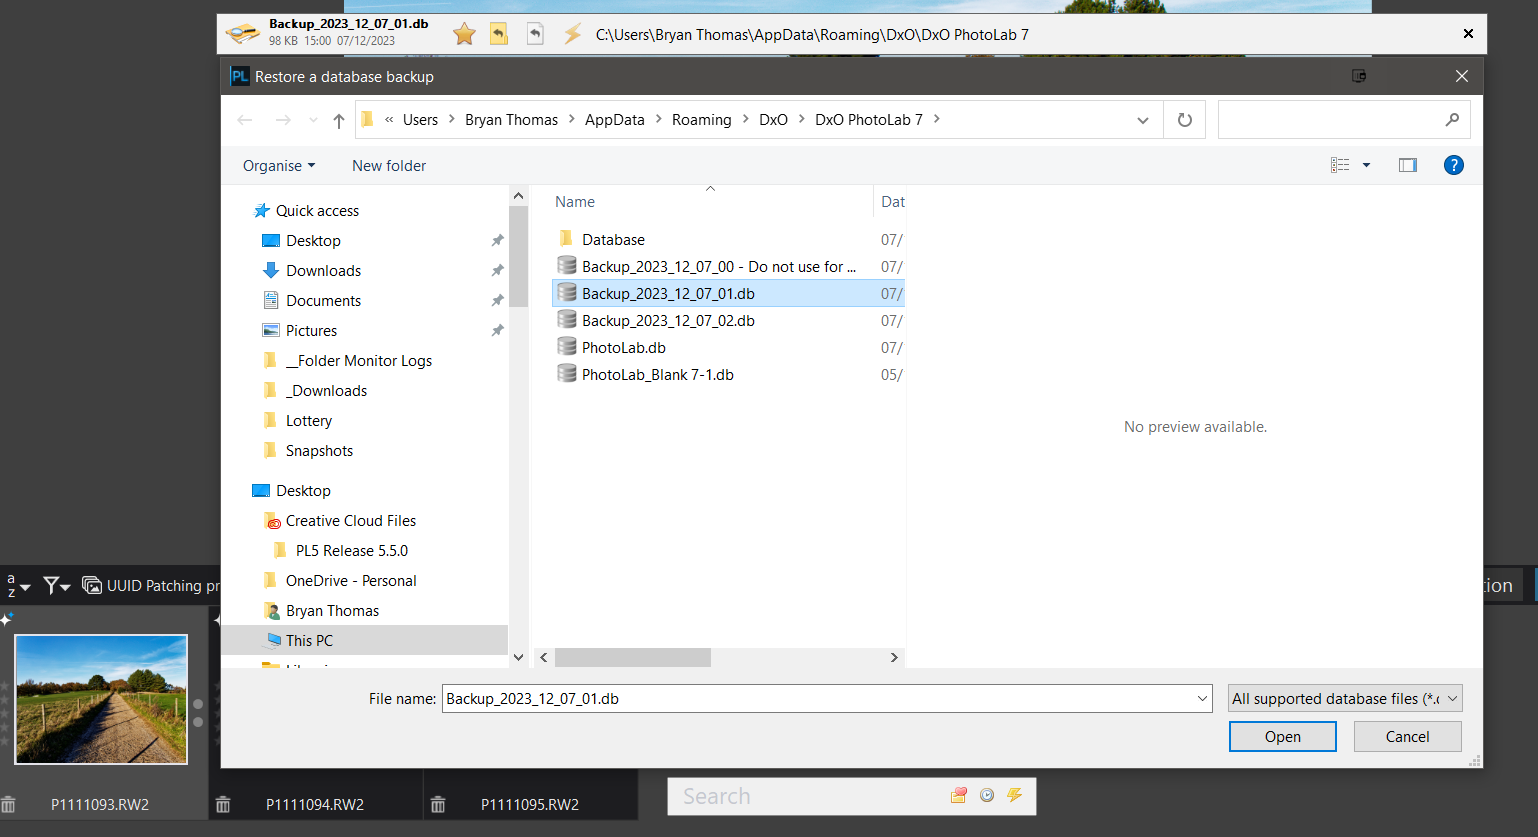
which requires a ‘Restart’ and
After:-
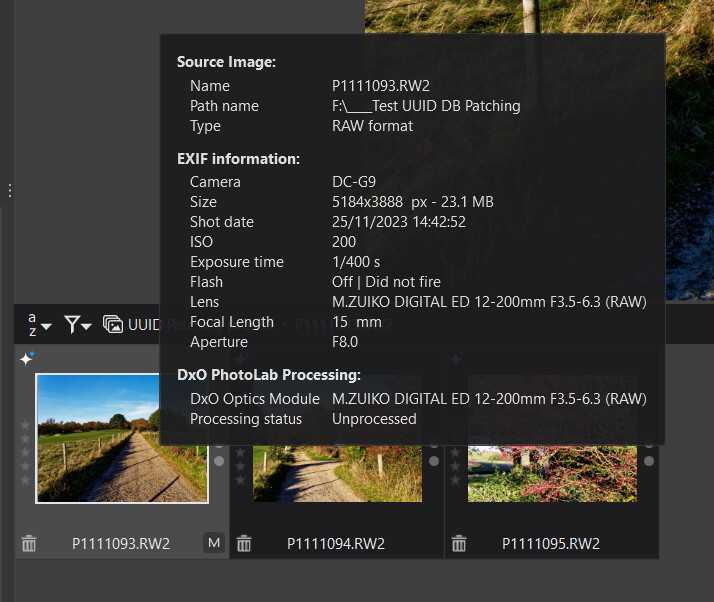
But F:\ and H:\ were not exact copies so I acquired an Unwanted Virtual Copy and that risk will always be a potential hazard with recovering