Hy John.
i am a bit busy with everything except DxO and photography.
So i am a bit in idle mode at this moment on my pc and couldbe lagging behind on the working of DxOPLv6.1 
ive read your default settings and some how i think there’s a double/ overlap in it or not?
lets’s recap what’s happening according to my point of view. (it’s a few months back)
We have automated color-rendering with automated Protect Saturated Colors. (PSC)
based on the rendering from raw to pixel file right? (the working colorspace preview on your screen)
Most people would use camera profile and generic renderings. (Easiest way to start.)
(This particulair tool is reacting on the setting Classic(legacy) /wide gamut in working colorspace.)
Visualisation is Histogram and the monitor Gamut warning (P3/sRGB depending on your monitor icc profile in your OS system.) (And the sun and moon (highlight/shadow warnings for channel under and over exposure/saturation)
(New area is basicly wider working colorspace which is further away from your monitor capability.)
in order to show you which colors are out of your monitorgamut and thus viewed incorrect they made that Monitor Out of Gamut warning button.
Histogram/sun and moon warning are only evolved to that wider working colorspace but are working as before in pl5.
Sofar simple and straight forward.
now we are in to the woods of detail. And the devil is in the detail. 
Color Rendering: raw to pixel so at rendering intensity 100% means ALL available colors are squeezed inside the workingcolorspace and as saturated as possible and PSC is activated if needed. So best to have rendering 100% and the magic want ikon of PSC active.
(ok some colors could be altered in your image when the protection gets activated but hence they arn’t colors before the rendering just charges of photon’s in a gridlayout)
Second part where those colors could be altered is in export from working colorspace towards your export colorprofile.
So Soft Proofing-tool does show you which part of your image is altered at which setting of export colorprofile.
easy right? litle point of critic we can’t realy see which channels are out of gamut of the pixel(group) (%)
or the amount of out of gamut. (a bit like like FRV shows could be interesting )
So default soft proofing active before exporting is a good and prefable advise even when you only use an other tv monitor to review your images and not really print hardcopy’s.
ok now the devils things.
1 we alter/edit on a really smaller colorspace: monitorgamut. so most of us when we squeeze color inside this gamut so we use SWYG principle are in sRGB/P3 kind of colorspace. right?
2 if you don’t have a propper calibrated screen and iic profile for your monitor you have A) maybe wrongly viewed colors which tilted you over towards wrong corrections. B) the gamut of the monitor is not correctly used => again wrongly viewed colors. (Ergo the easy monitor out of gamut warning(MOFG) could be advise you wrong.)
Say you dont use the MOFG to alter/edit but only to see which colors are shown wrong so you know that you need to use Soft Proofing. (sRGB/P3 are most common in export to view electronicly.)
right so you start to edit and check after edit which colors/part of your image are shown wrong. No blue? al is inside so no soft Proofing is needed.
You have “blue” masking: =>
soft proofing must be activated.
now we get to the part the new PSC slider comes in play.
(note all your rawdata is with PCS magic want squeezed inside your working image.)
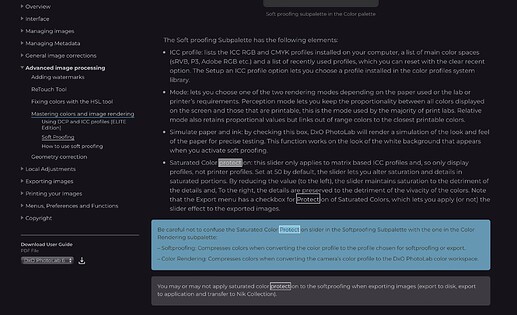
choice one : relative or perceptual? (PSCmagic want was dxo’s own kind of in between preceptual and relative, thus is the new PSC in Soft Proofing-tool following your choice or is it as the first one? (Then why would i need the choice?)
Choice two: % of strenght.
50% default. do i loose some colors along the way? is 50% drawn in and 50% left out? does it squeeze no matter what or only when colors ARE Out Of Gamut?
Why not again a “magic want” system which show you which % is Out Of Gamut when you use selected icc profile? Then i can decide if i want to clip colors (lower intensity%) or squeeze colors by or following automated advise or downsize the effect by lowering intensity.
See it’s not that easy to just follow the path. (please shoot at my story if any isn’t true.)
(note to myself: if working colorspace lecagy is selected your inside AdobeRGB and often inside monitor gamut warning.)
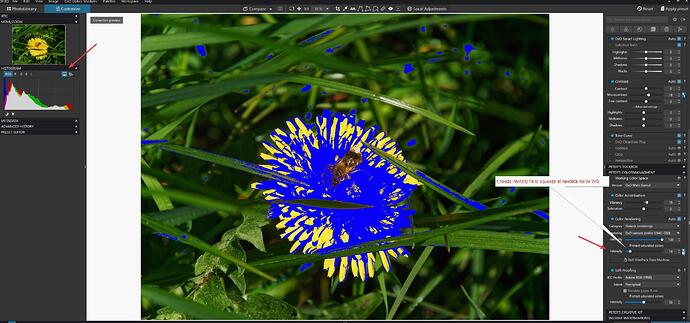
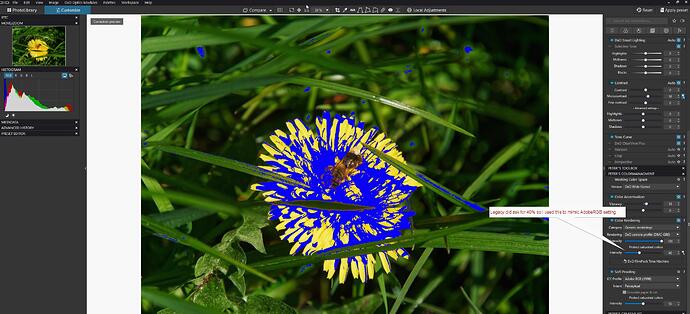
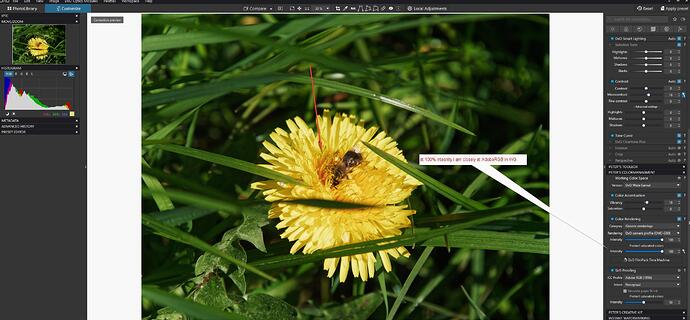
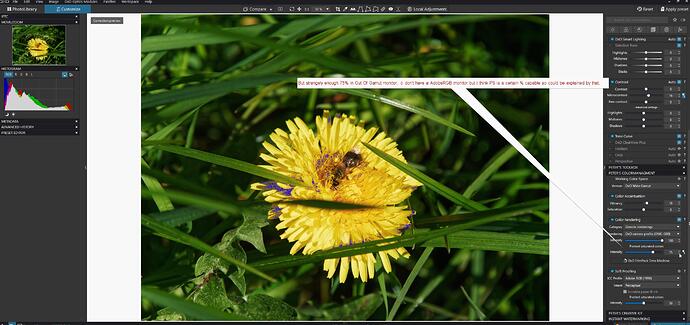
strangly when i take over PCS 40% of legacy in WG. monitor warning is active in WG but not in Legacy… (which means there legacy rendering is not relative in rawfile to pixel.)
i would think that if legay is PSC automated shows 40% (some colors are out of gamut of AdobeRGB)
and my monitor OOG warning stays inactive everything is inside sRGB/P3 kind of way right? => which means Legacy is rendering rawfiles completely different and perceptual against rawfiles colorspace wile WG- working colorspace is nearly 1 on 1 rawfile colorspace. right? (Softproofing does show the same filter/mask. when you select AdobeRGB)
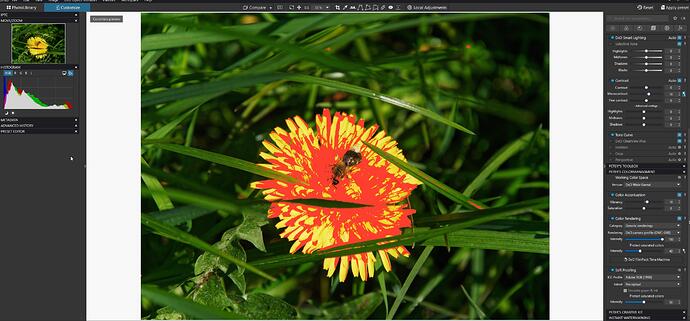
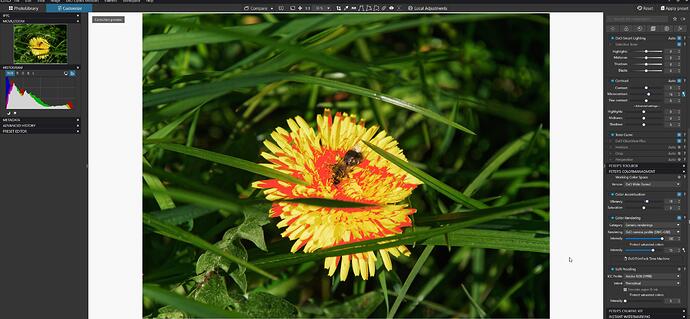
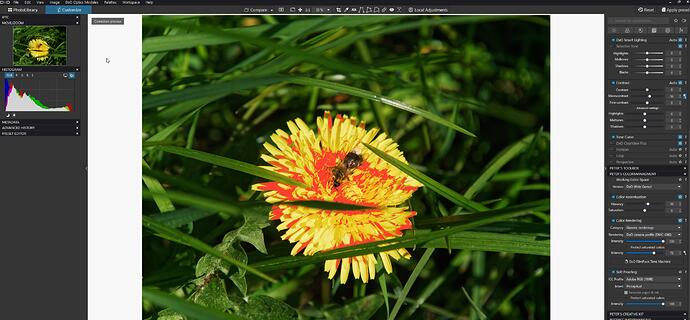
And increasing intensity in Soft Proofing of PSC does nothing on my red mask of Soft Proofing…
ok lets go visual:
step 1 is prove? that Legacy and WG are differently rendered.
Soft Proofing shows the same mask:
last and final two images are shown 0% and 100% in intensity of PSC in soft proofing:
No change what so ever.
So WHAT does that intensity slider in Sof Proofing?
Do i need soft proofing over soft proofing to see what that slider does?
the first PSC is clear: it squeezes color data inside the working colorspace. no fog about that.
How? DxO’s own kind of percetualrelative -isch.
Soft proofings PSC?
mask shows what’s out of gamut but not HOWMUCH. That could be shown with the PSC intensity slider but that thing doesn’t react on that (red)mask…
Do you see my point?

