Highlight Recovery Current best practice

I was using Capture One as it recovers highlights better than DXO, but it’s noise reduction is rather sad. :grinning_face:

A Tone Curve function works exactly the same in all software. It maps input to output pixels within 0-255.

Below are the same images but this time using DXO Photolab.

Looks like Capture One.

In PhotoLab you can do it in a similar way but because of wider range affected by SelectiveTones.Highlights, usually you have to counteract with the Midtones slider. You may combine it with SmartLighting, Exposure and ToneCurve. Then use Fine-contrast Highlights to make some details in highlights stand out, if desired.

If data is blown out in RAW, you would need some kind of AI/ML to guess how to invent the blown-out parts or be ready for usually pinky transitions.

In fact, these are not your images. Mike Myers posted these Off-Topic - advice, experiences and examples, for images that will be processed in PhotoLab - #2 by mikemyers over three years ago. Please credit authors in future

3 Likes

My PL looks exactly the same.

George

OK, we are talking about two different things. The OP asked about Highlight Recovery, which, to me, is clipped highlights as shown in my first image above. LR and others handle this better than PL.

What you are showing is reducing the entire highlight area as shown in the photo where you set the Tone slider to -100.

Yes, I use the Selective Tone sliders for that.

However, in your Tone Curve as shown above, you just lowered the High Tone (right side) to 245 thus affecting the entire curve. In my setting, I placed an anchor point at 222 and then adjust the right side to 245. This maintains the “normal” curve for the rest of the image - thus, reducing any clipping without adjusting anything else - unless, of course, you want to.

The advantage of this is you remove the clipping (subject to raw over-exposure latitude) and still leave the highlight areas untouched - which the Tone slider will Not do without additional adjustments.

No, there is a difference

The two middle values? I never understood these. But further no differences I can see.

George

Are the coordinates of the solid white dot near the top of the tone curve.

Another example of my method:

In the original photo, #1, with nothing applied, you can see the clipping.

In photo #2, I have removed the clipping using my “Hi -5 Tone Curve preset” but the highlight area is still a bit bright. Look at the shift in the Histogram.

In photo #3, I set the Selective Tone Highlights to -70. Now, the photo looks OK.

In photo #4, I did not use my Tone Curve preset but I set the Selective Tone Highlights to -70 as in #3. There is still some clipping but overall, the photo looks like #3.

In order to remove all the clipping from #4, I would need to lower the Selective Tone Highlights further resulting in an overall darker image.

So, my workflow is to apply any clipping correction before I use the Selective Tone controls.

Allan

Thanks for that. I have a collection of downloaded images that I use for testing and I have forgotten which websites they came from. That’s why I always use a partial image and don’t make any original image available.

I am sure Mike will be looking down and will let me know if I have upset him. :grinning_face:

1 Like

As an example of how one-size-doesn’t-fit-all.

This is how the SOOC JPEG looked:


What the scene actually looked like was:

The settings needed to recover the highlights were:
Selective tone highlights = -100
Tone curve

Yes, for sure, it depends on several factors, this is why I said above…

“First, in camera, I have the “blinkies” turned ON - Orange for over and Blue for under exposures. I can dial exposure compensation as desired. So, for example, a sunset over a snow covered lake. The meter gave a good overall setting with clipped highlights on the sun. I dialed in -1EV.

and

“Now, this works depending on “How Much” and the latitude of the raw files.

This why in my sunset example, I underexposed in the camera by 1 stop. This still left clipped highlights but, they were recovered in PL.”

My Tone Curve presets work well for most of my photos where I have clipped highlights or shadows. Once the clipping is removed, I can then make any further adjustments as I see fit.

Allan

There is no wrong way or right way to edit your images it is 100% a personal decision. However, there are technical facts that we need to be clear on.

When you set the Tone Curve to 245 you are telling DXO, or any other program, to look at the image and do the following:

Any pixel that is at 255 change to 245

Any pixel that is at 254 change to 245

Any pixel that is at 253 change to 245

Any pixel that is at 252 change to 245

etc

Any pixel that is at 246 change to 245

This effectively paints any pixel above 245 a very light (245 pixel) grey.

This is not recovering highlights it simply prevents any pixel from exceeding a value of 245.

Here is Mike’s image with the Tone Curve set at 245, over exposure warnings on and exposure increased by 4 stops. No pixels show as over exposed.

This technique is useful when printing images with small areas of blown highlights eg specular highlights which can’t be recovered, as it means that these areas get some ink coverage rather than remain as bare paper.

There are experts on this forum who can tell you the best way to recover highlights to avoid the Highlight sliders impact down into the mid-tones etc, eg apply locally, use Smart Lighting, increase mid-tones, decrease exposure etc.

As I said at the start, do whatever you like, it’s a personal choice, but it’s best to understand exactly what you are doing with respect to how the controls work.

3 Likes

And with large prints it’s vissible. I’ve seen this several times at expo’s.

George

Yes, I understand very well what is happening. When an image is clipped, there is no further information that can be recovered.

But, what exactly is the clipping point?

That varies with the camera to a small degree and the specific channel being monitored. To “recover” clipped highlights, one or more channels need to be under that threshold. This is handled a lot better in Lightroom than it is in PL.

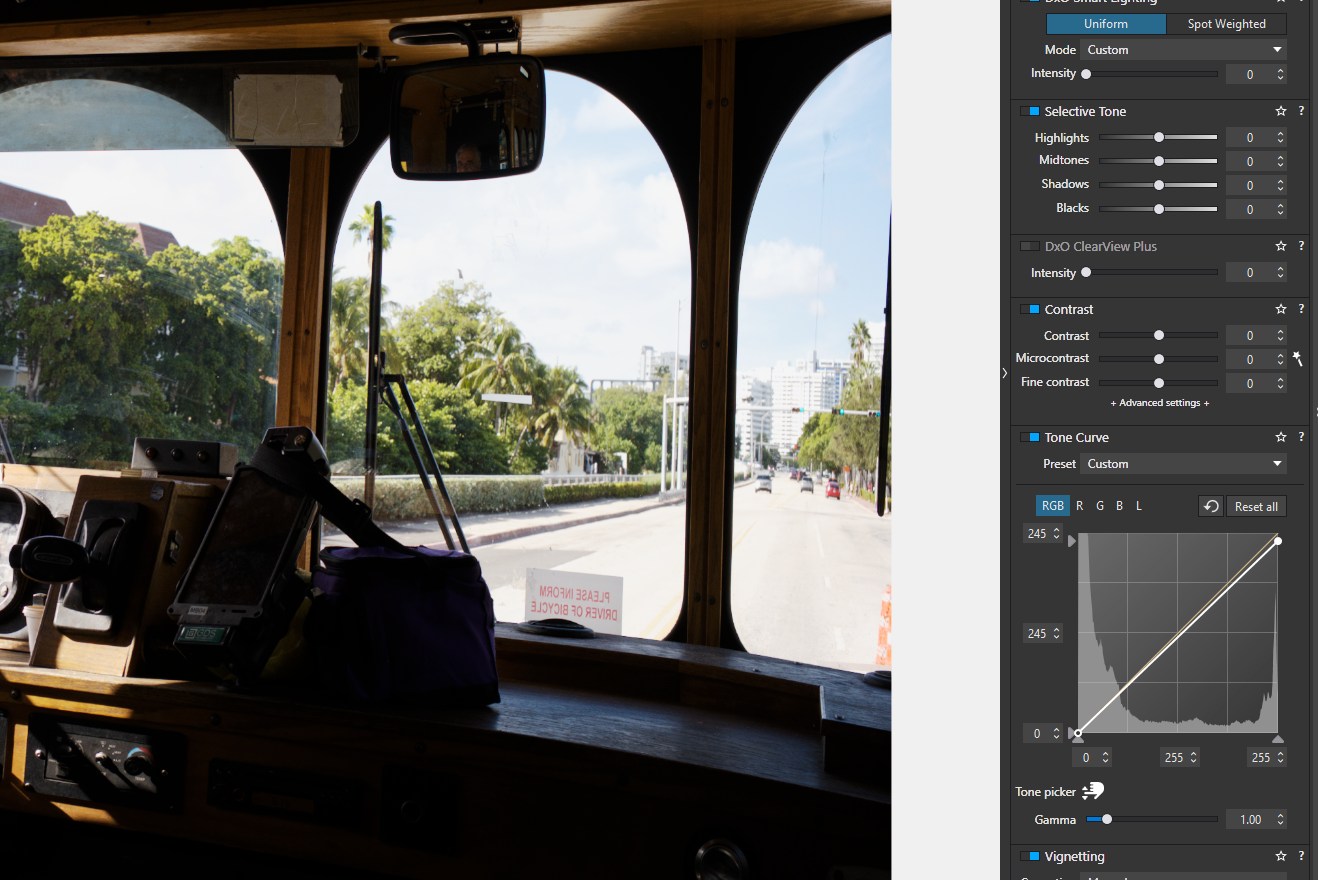
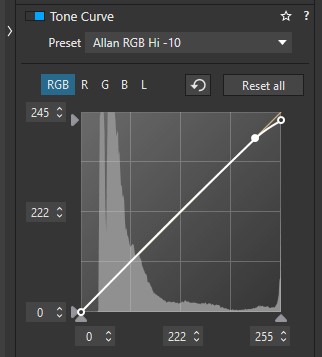
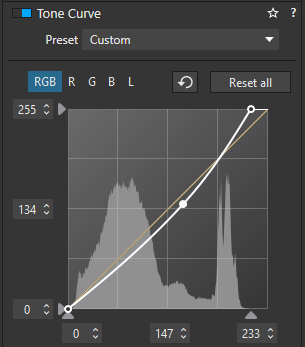
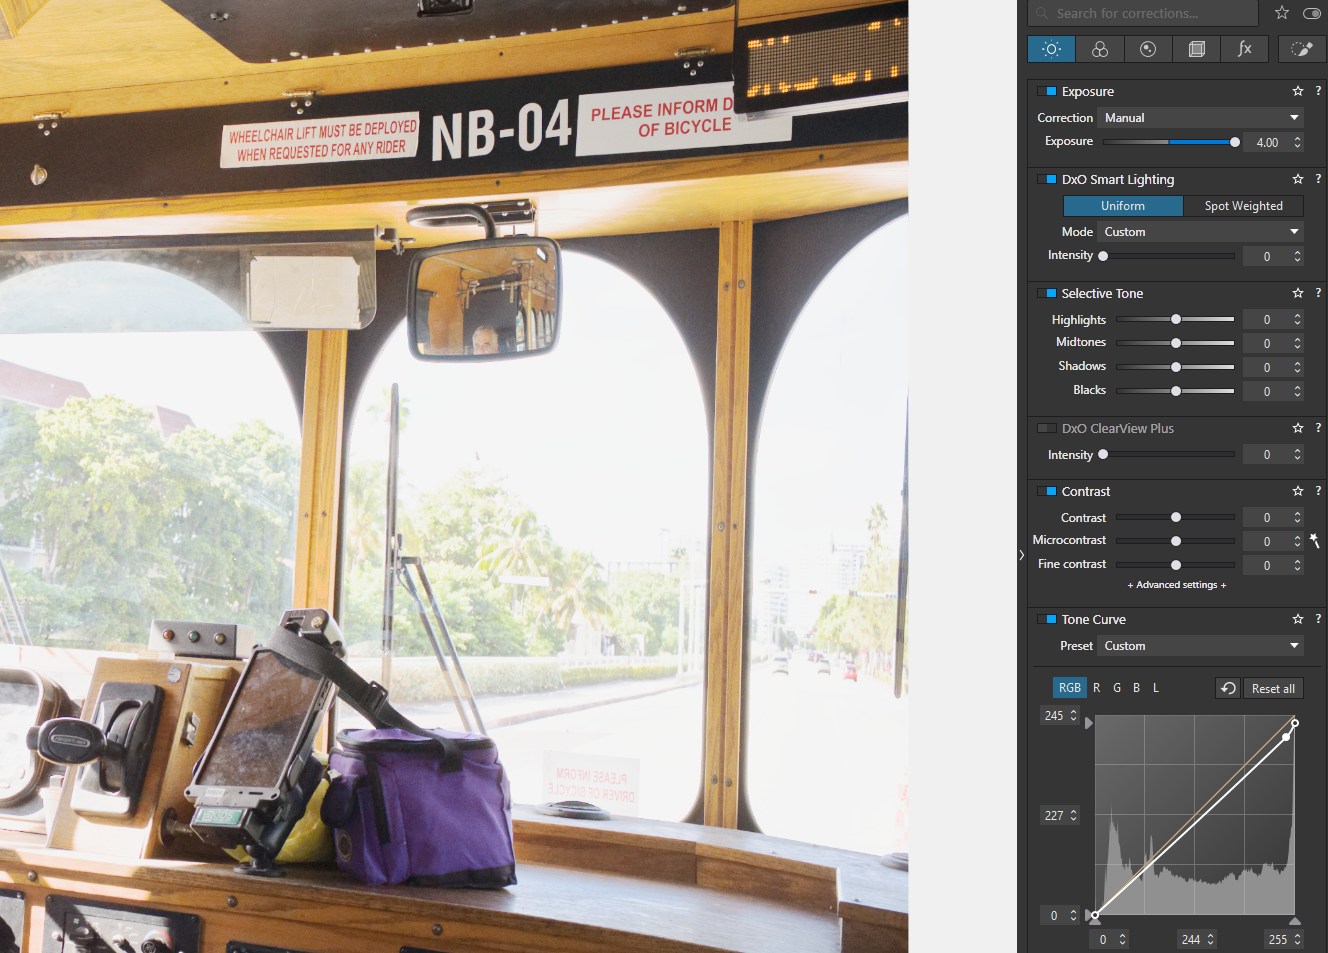
The “right” way to do this is to recover any information in the clipped areas without affecting the rest of the image. This is what the Lightroom slider does to some extent and what my preset does.

  • This technique is also used in the film world, usually in the development stage or the printing stage or both
  • I restore vintage audio recordings and the same principles apply - deal with any clipping first - harder to do as you cannot see it

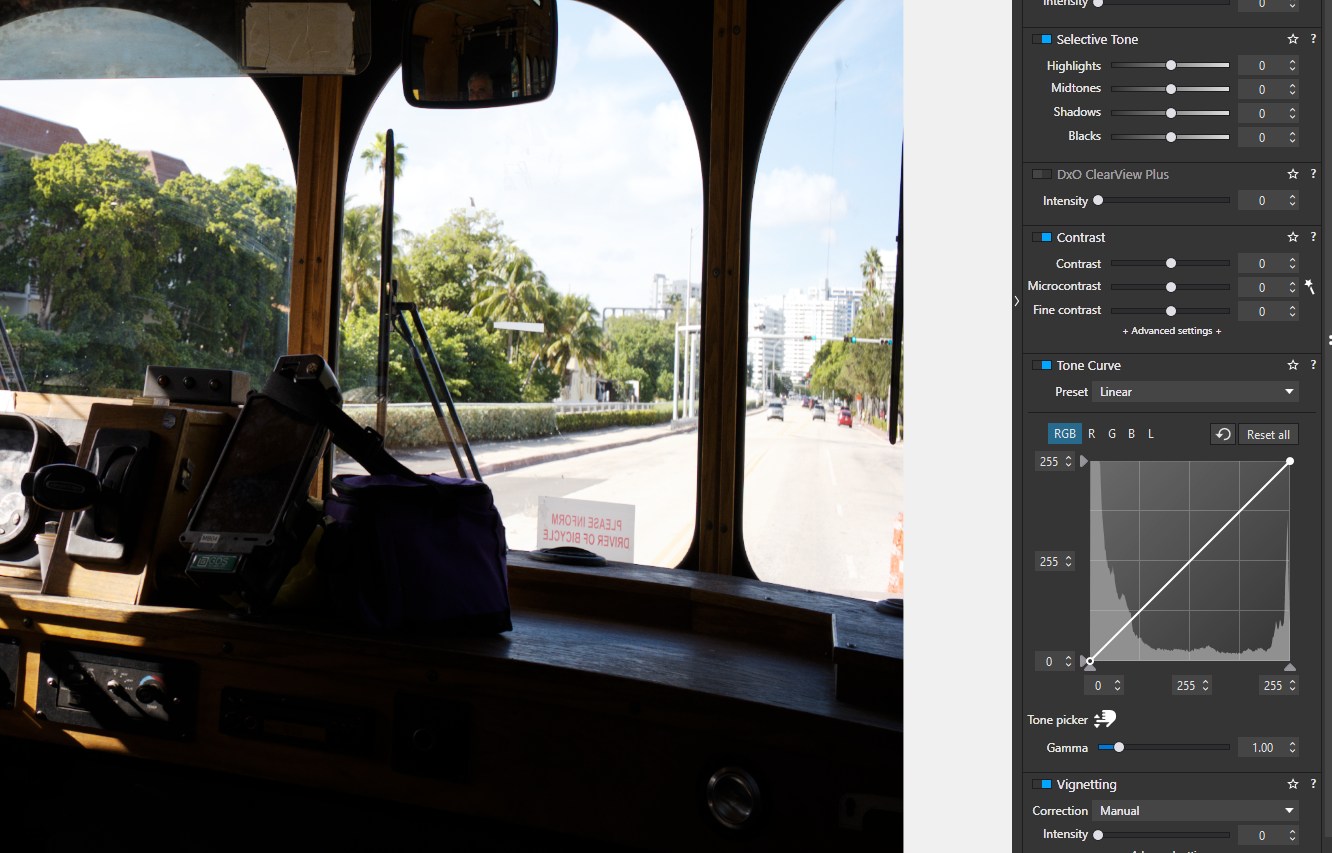
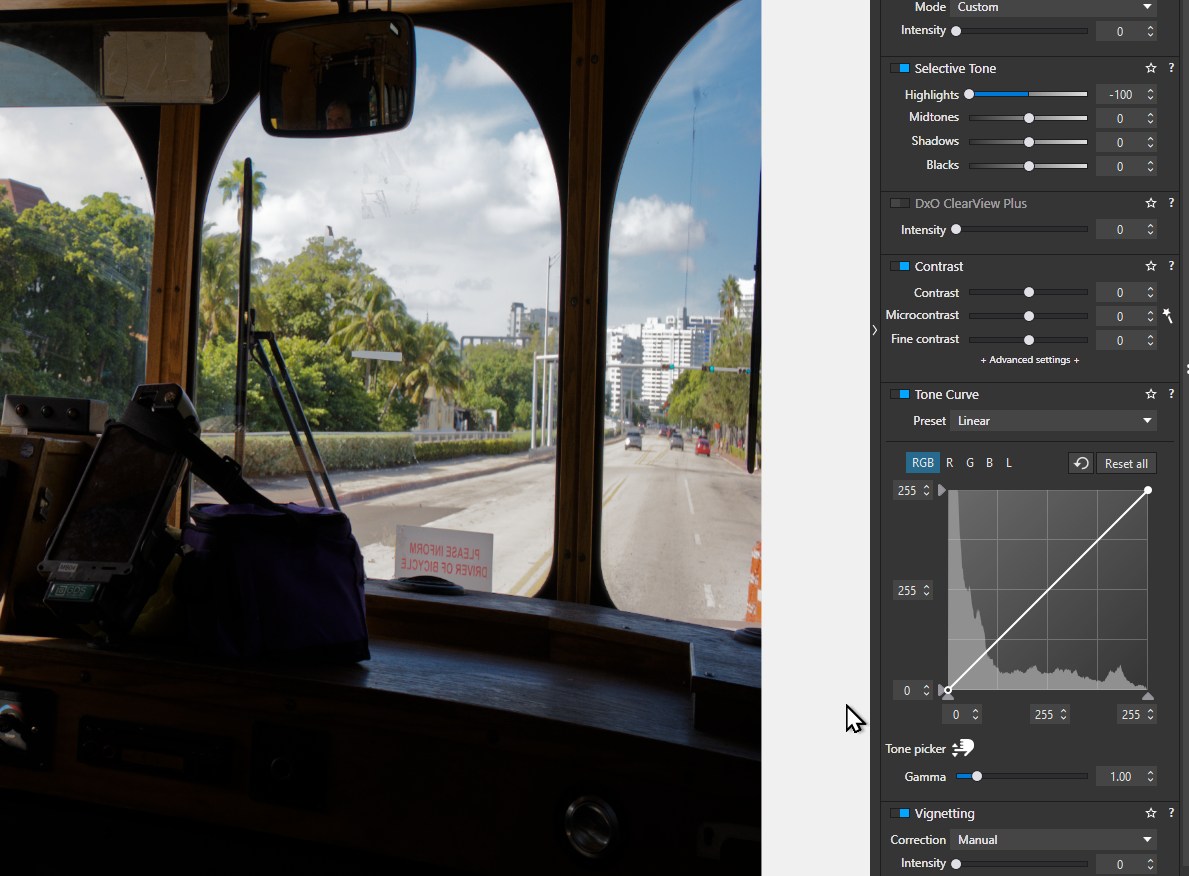
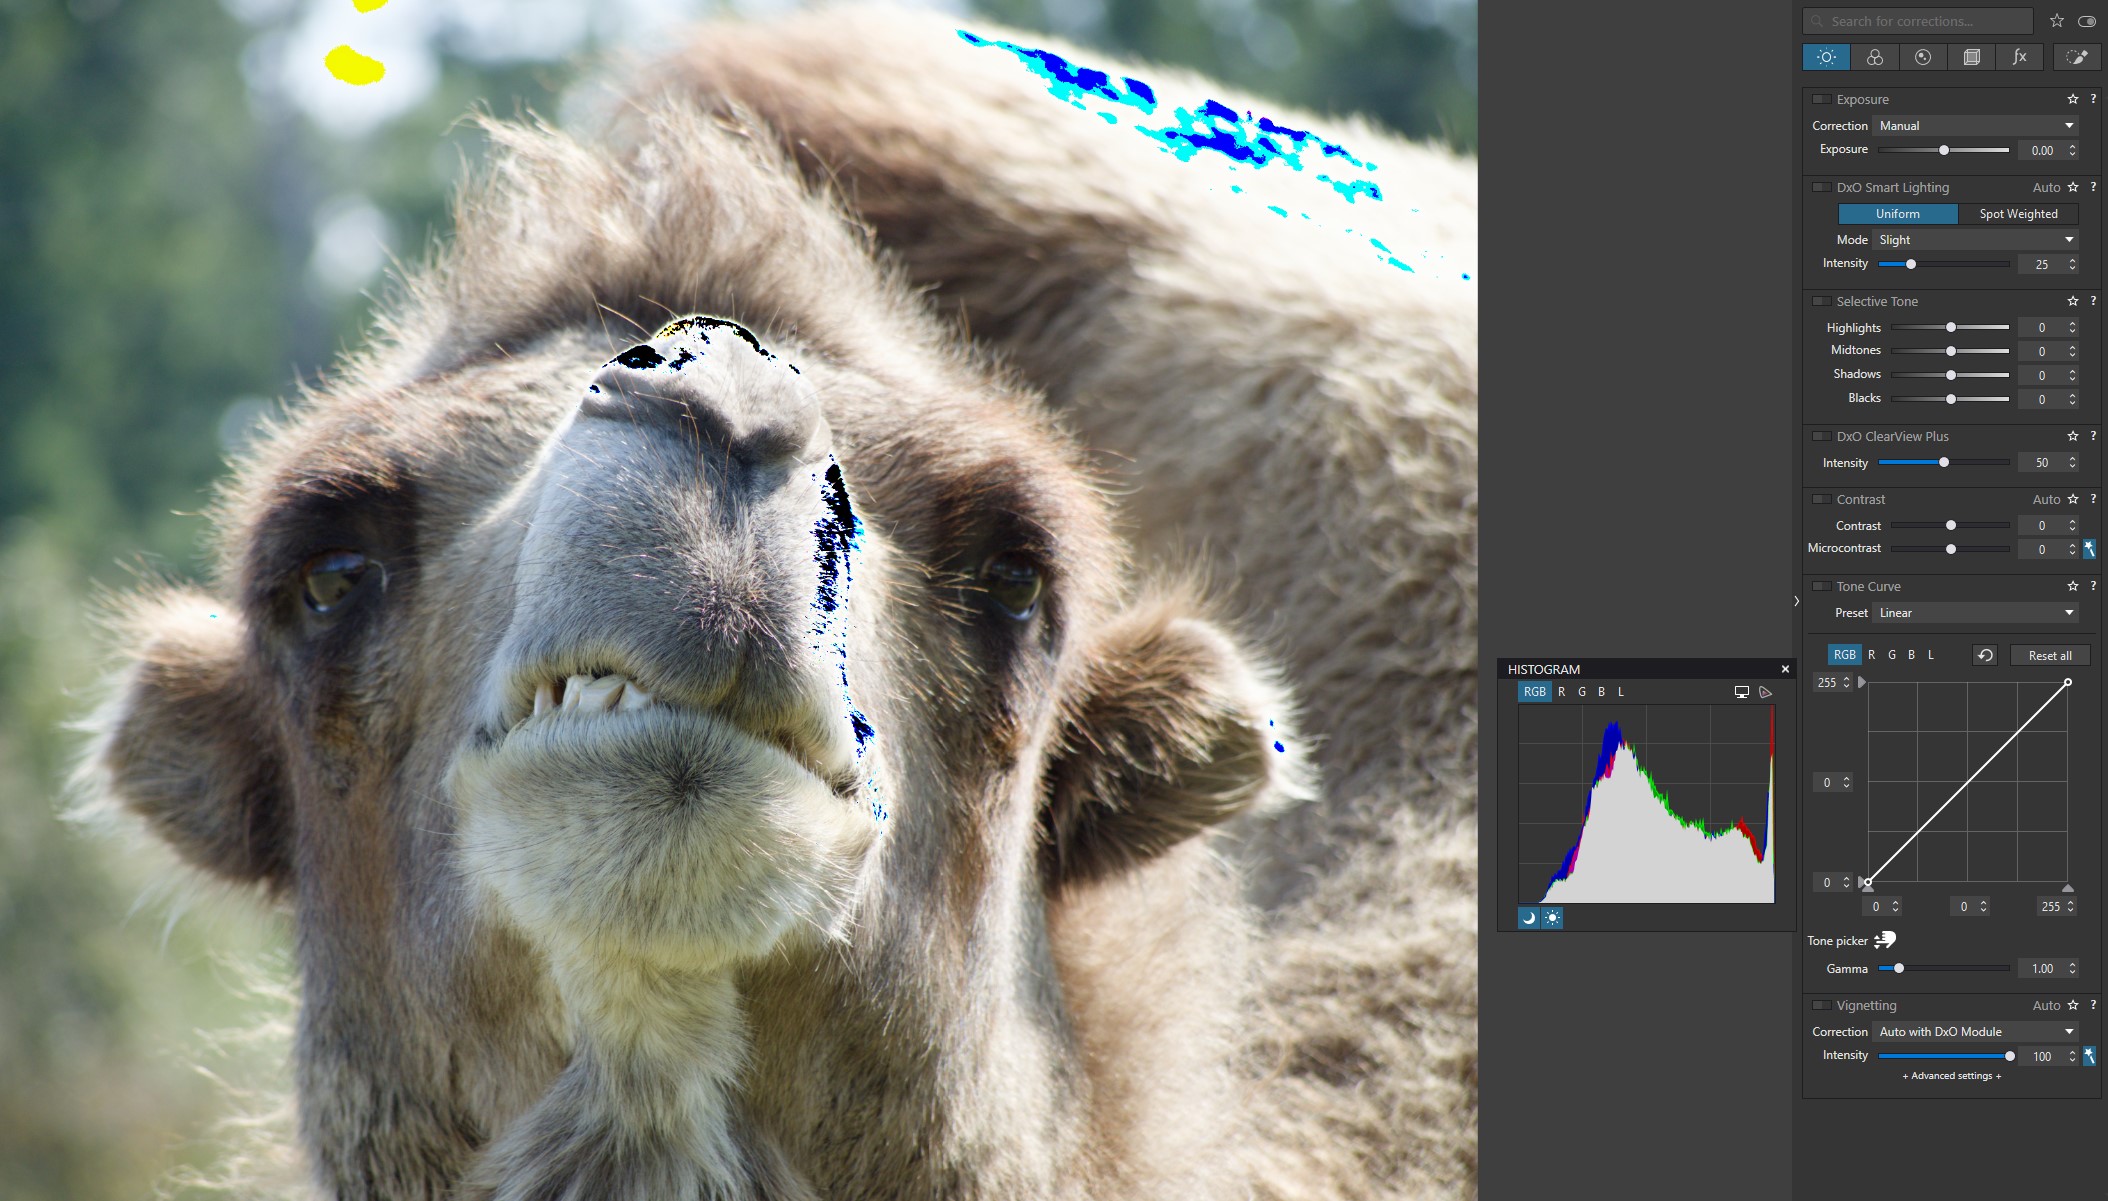
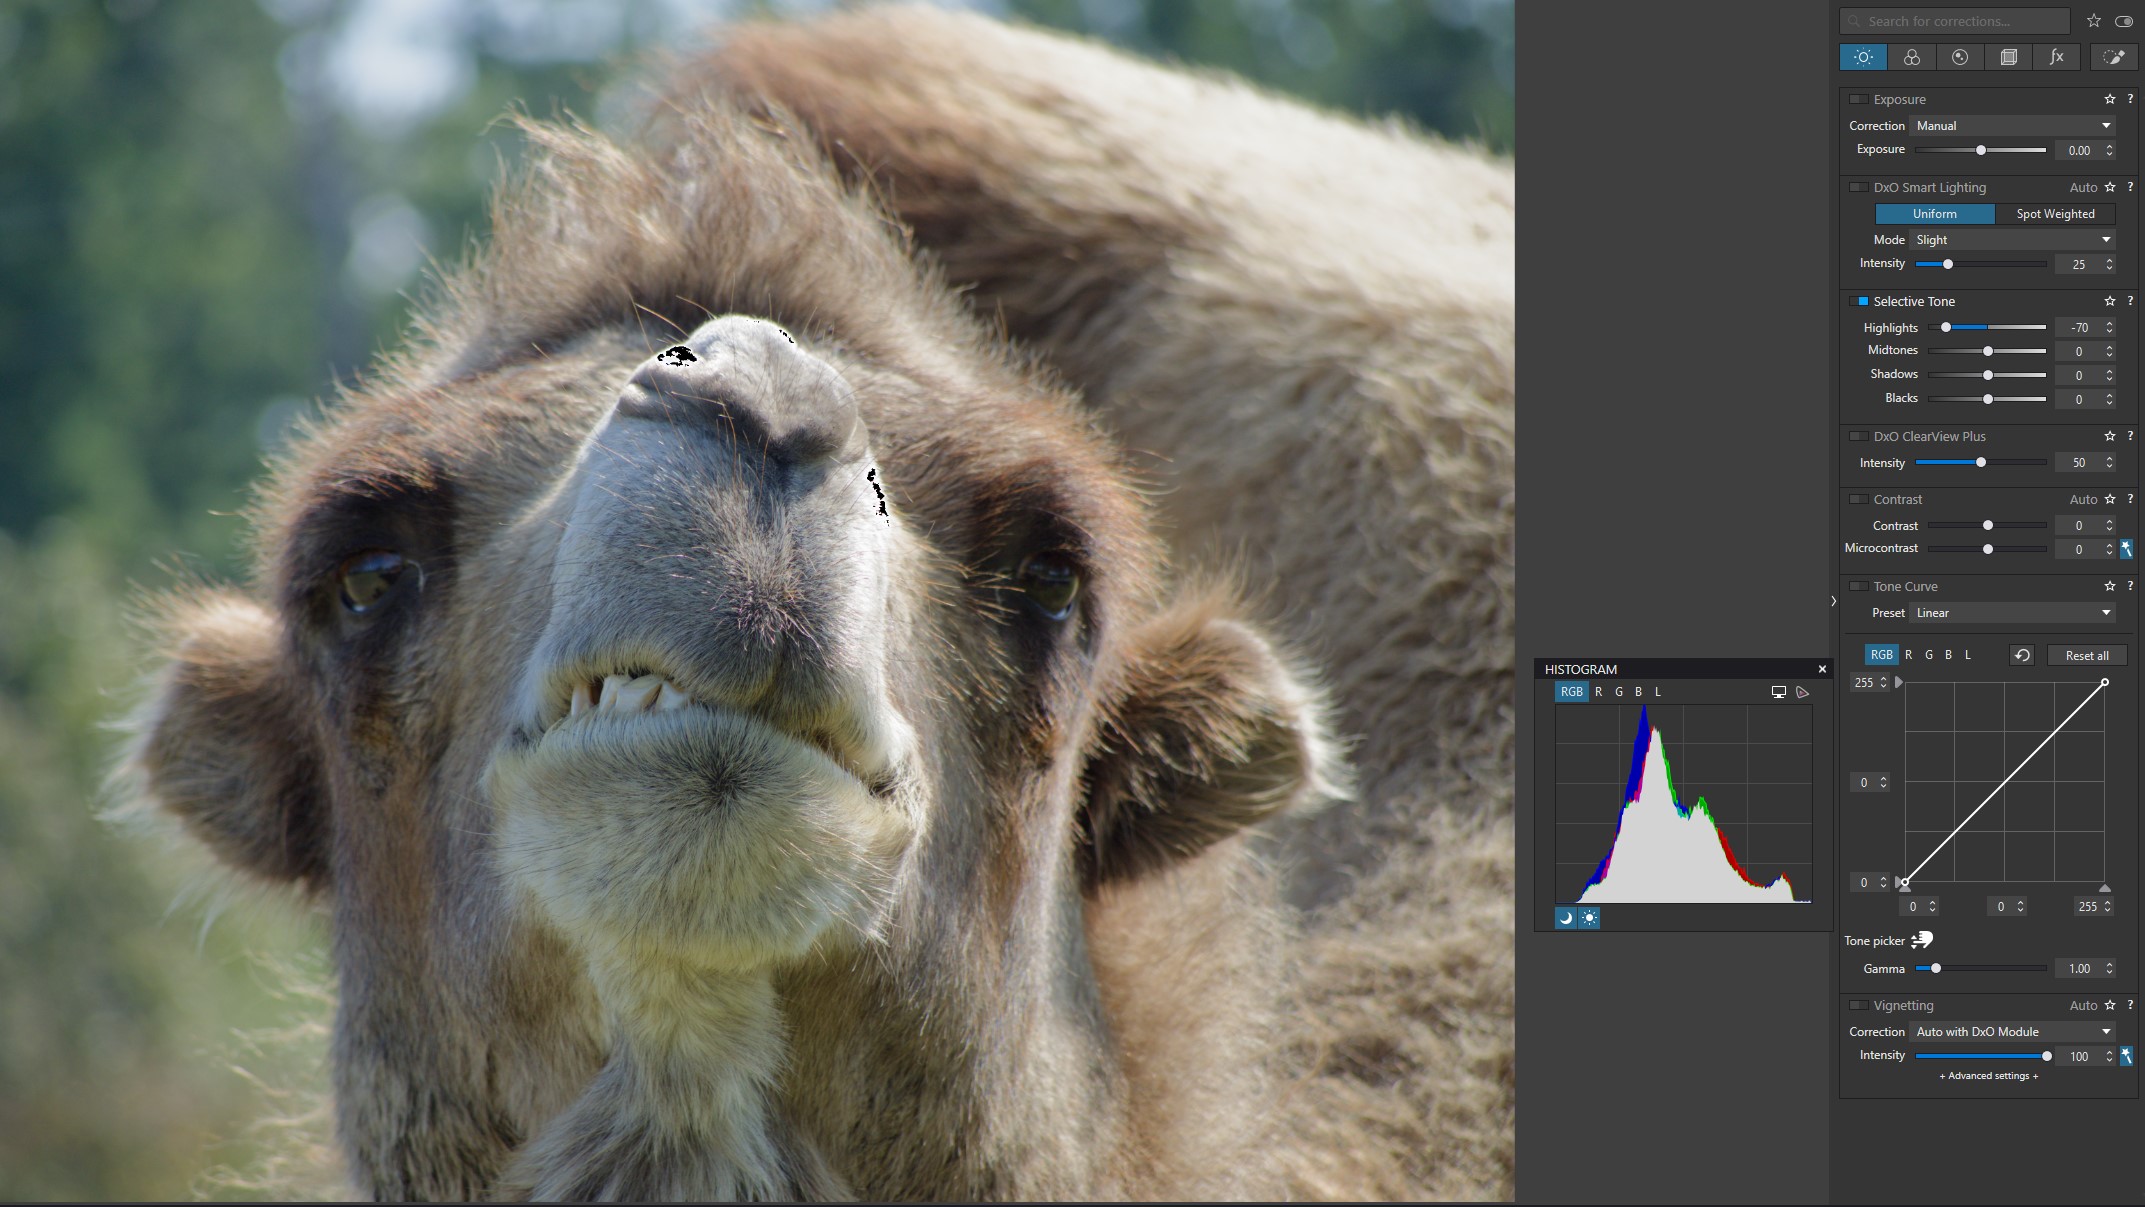
Now, after that, if you want to make any further adjustments, then you can do so. My camel images show the difference in applying a -100 Highlights with and without addressing the clipping. The same applies to images with “crushed” blacks. In both cases, the image looks a bit better without the clipping.

You can see the difference in an image with clipped highlights vs the same image where those clipped areas are a very light shade of grey as you also said above.

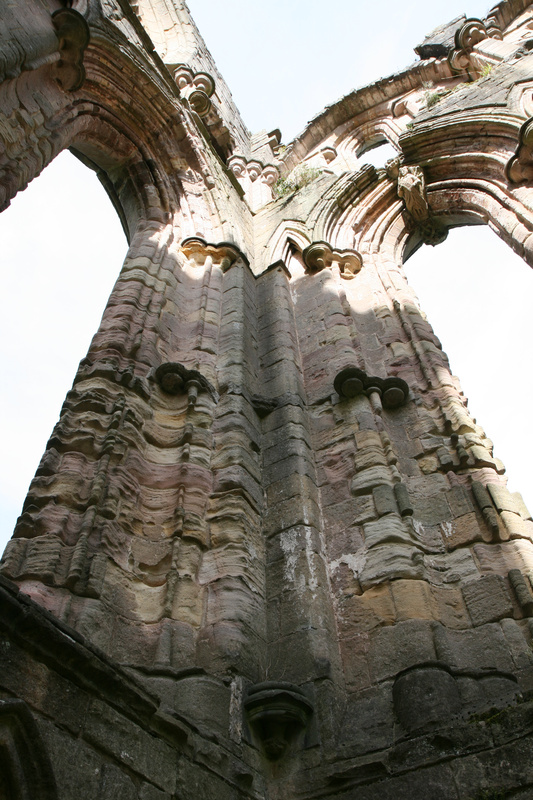
Now, in Mike’s image that you posted, I would say that it is over exposed but is it clipped? I don’t know as I did not download it. It does not appear to be clipped. I do make a distinction between over exposure (very bright) VS actual clipping.

So, as I said above “My Tone Curve presets work well for most of my photos where I have clipped highlights or shadows. Once the clipping is removed, I can then make any further adjustments as I see fit.”

Anyway, the OP asked “Is there a current best practice with recovering highlights in an image.” I take this as meaning clipping, not a general over exposure.

I tried to be helpful in presenting my technique when using PL.

1 Like

PL shows you the highlight clipping, and as a black overlay in case all color channel are “over”. Then there is nothing you can do, except to add some grey by locally decreasing the brightness (and/or try to copy sth).
If you see local banding simply reduce the white point globally by 2 points to 253. *)

Only as long PL’s highlight warning shows some contrasting color (e.g. yellow for the blue channel) there is some “hope” to get back some texture.

*) By bending the “linear curve” as you have shown you raise some midrange and 3/4 hights. Of course that works too, depending on the image and what you do with it otherwise.

As shown in my camel and sunset photos

How do you do this without affecting the entire image?

Do you really see a difference between camel photos #1 and #2 other than the clipped areas? Even at 100%, I am hard pressed to see any.

As you can see in the camel photos #3 and #4. the histogram looks the same but the clipping is not visible in #3. This shows that, if you only reduce the Selective Tone Highlights, the clipped areas remain.

Now, with the sunset photos, there is a visible difference in the yellow clouds in front and around the sun. They are not washed out.

I am open to other methods and suggestions, however, after doing this for many years with LR and now PL, it works well for me.

As I mentioned earlier, one main key to all of this is to minimize or remove clipping in the camera first.

I’ve checked that with 2 different images of mine,

In both examples I see differences, when comparing instantly

  • the base image (red) vs. white point set to 253 (orange)
    = overall ever so slightly dimmer, just barely noticeable

  • the base image (red) vs. curve + white point set to 245 (orange)
    = overall slightly brighter … and noticeable

There is no universal solution. – However, if necessary it is generally better to reduce the hightlights to 253 (also avoiding “banding” with intense local correction) than to use a curve + limit/cap at 245.
→ When clipping you want to control the highlights, not to intensify them.

But of course, you do as you like / always have done. And yes, the most important thing is to avoid overexposure in the camera. :slight_smile:

Unlike with negative films, where overexposure occurs gradually, clipping in the digital world means: “It’s over.” – Fully blown out areas can’t be salvaged. There’s no texture left to work with and everything else is just a last resort.

The best software to handle highlight recovery in my experience is Darktable. Of course that comes with a whole lot of other issues, but that’s another story :slight_smile:

1 Like

Again, how are you setting the White Point to 253 when there is not a White Point control?

This is just one example, the other example was set to 250

I do have the ability to fine tune this number and also by colour, so, for example, red 253.

Yes, I can do this to some extent in Local Adjustments, However, there is Not a Tone Control in Local Adjustments. So, some other control has to be used e.g. Exposure. Would you really see the difference? I think not as I have already explored that option and it involves a larger number of steps for little gain - if any.

I do not understand this. None of my settings intensify the clipping and I never mentioned this.

Allan