I spot meter, in manual mode, placing the pointer on the +2 (or other) segment of the meter scale
If the brightest part is not truly white, cream for example, I might only use +1
I spot meter, in manual mode, placing the pointer on the +2 (or other) segment of the meter scale
If the brightest part is not truly white, cream for example, I might only use +1
You get the same result using the histogram in the camera. I know most DSLR’s don’t have a live histogram but system camera’s have. When adjusting the histogram in your example as is shown in your second image I would get the same result as you have.
I’m not sure about that. A full sensel is a mathematical or physical approach. Full is full. On the dark side there’s is no exact limit. And that is where the best results can be achieved.
I think @John-M is referring to the +2 stop. If that is for most camera’s then the extension of the dynamic range can only be on the other side. In your case about 12 stops to the dark side.
George
The difference is that I don’t have to look at, or play with, the histogram. I just take one spot measure and press the shutter.
What’s more, as I have already said, the histogram shows the JPEG dynamic range, not the full RAW.
What on earth are you talking about? I’m a photographer and don’t even know what a “sensel” is. How do you think I have managed all these years using the same techniques for both film and digital and getting guaranteed perfect exposures for more than 90% of the time.
Once again, I don’t get your point. The D850 sensor has a range off 14.6EV, of which I reserve 3EV for highlights. It’s just simple logic.
Exactly what is shown your screen print.
I think all that discussions of the RAW vs RGB histogram is rubbish. Theoretical during the conversion there is no clipping added. And then most clipping warnings use a threshold, be it in camera or in the editor.
What pixel is for the image, picture element, is sensel for the sensor, sensor element. I thought it was quit common.
You use a correction of +3EV relative to what the meter proposes. If your camera has a dynamic range of 14.6 then there’s another 11.6 left on the dark side.
I don’t say that what you’re doing is wrong, not at all. There’re more roads leading to Rome.
George
Agree completely, in this context only suitable for non-RAW. For RAW, I’ve always used your method (or close variant) to determine the exposure headroom, and it does vary from camera to camera as you say.
I recently switched to a Sony a6700, my first Sony camera in many years. The zebra settings there offer another approach. The zebras can operate in the RAW headroom area (beyond the standard histogram) and can be adjusted to the desired lower limit. The testing method for establishing that lower limit is just as you describe. I use a zebra setting of 107+. This is a bit conservative, but is where my old eyes begin to see loss of detail in a bright textured surface. Mark Galer (see link below) recommends 109+, and demonstrates this simple, fast approach.
Wouldn’t it be nice if cameras could just display the RAW histogram? Someday maybe.
Liamsi, I am also a beginner trialing Photolab 8 but what I want is simplicity.
I tried Wolfgangs family picture from above but just used the 2 HDR Artistic Preset and after a few other small changes to exposure etc got quite a good result. Unfortunately just installed new Mac mini and appear to have lost it. A new download is not working at the moment.
You can only have one trial of PhotoLab per email address. If you have another email account try using it on your new computer.
Mark
Thanks Mark but I do only have 1 email. I think it might have been down to the system not allowing me to do too much on my first day of posting. Took 24hrs to get this reply posted.
Here is my version with just the HDR preset, and small reductions to exposure and higlights. It’s looking very likely that I will be buying the product very soon.
Mike
P1050189.RW2.dop (12.4 KB)
In my case, the answer is to work from the exposure setting. Get the highlights right from there and work down to bring out the shadows, etc and rely on the noise reduction to ensure that the final image is what you need. My main fault is over exercising the fine /micro contrast settings.
In practice, it is necessary to constantly take into account the area of the exposure point in the ratio to the optics angle as well as the contrast of the surface entered in the exposure point, because Continuous textures do not always come across, and also Sekonic is not always with themselves) so more often in practice you even need to do an correction of -0.7 and the measurement point is essentially a average value of brightness. And in order to accurately get it, you need to turn on the BKT and choose the best frame using the FastRawViewer program) But you can also use a more promptly matrix meter + BKT.
That’s why I love these forums: After moving from Lightroom to DXO, I was struggling with highlight recovery as well.
For me, the first answer (using the Spot Weighted feature of Smart Lighting) is working so well, it is even outperforming Lightroom with one click. Well, actually two clicks.
Thanks @John-M !
This is a technique that I have used since my days with LR.
Since I switched to Olympus cameras, most over-exposure problems have gone away. The camera’s ESP metering correctly exposes for a wide range of subjects I.E. I get white snow, white vans, dark shadows etc. without having to make any adjustments.
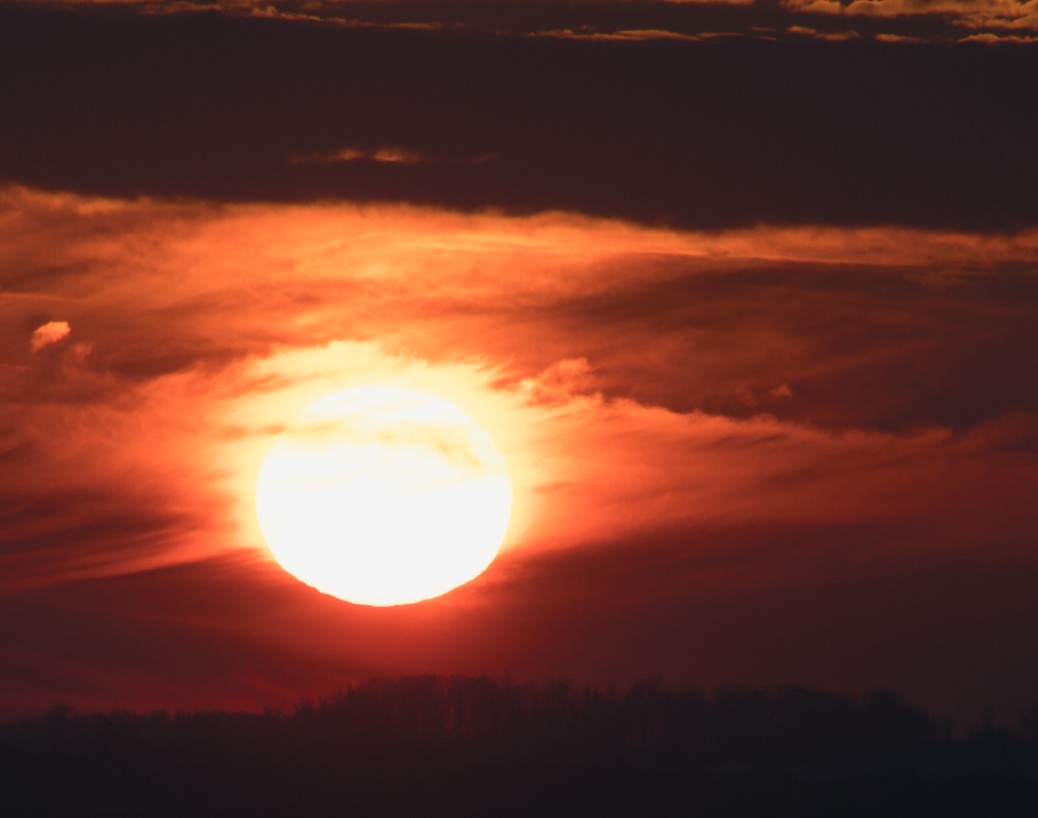
First, in camera, I have the “blinkies” turned ON - Orange for over and Blue for under exposures. I can dial exposure compensation as desired. So, for example, a sunset over a snow covered lake. The meter gave a good overall setting with clipped highlights on the sun. I dialed in -1EV.
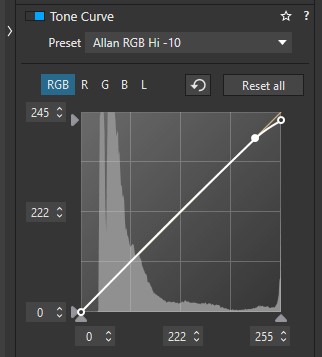
Now in PL, I use my custom Tone Curve preset to remove the clipping but leave the rest of the scene untouched. The preset set a value of -10 at the high end.
This works very well for things like clipped highlight reflections and so on.
I also have presets for Hi-5; Blk+5, Blk+10 and a few others.
I very seldom use Smart Lighting. I do use the Selective Tone sliders but for a different purpose.
If you just want to get rid off the blinkies just set the range to 2,253. PL has a treshold of 2.
George
Reducing the threshold point of the blinkies does not remove the clipping.
I am reducing the “over exposure” of the clipped highlights - or the “under exposure” of the blacks - by adjusting the end points of the Tone Curve, while leaving the rest of the image “normal”.
Now, this works depending on “How Much” and the latitude of the raw files.
This why in my sunset example, I underexposed in the camera by 1 stop. This still left clipped highlights but, they were recovered in PL.
PL does not have a Highlight recovery tool, so this is how I handle it.
Allan
I can’t reduce the threshold of the Tone/Curve diagram. But if you set the value 245 in your example to 253 you won’t have blinkies. Just try it. However there might be other reasons why you want a lower value.
George
I’m confused.
Simply mapping the 255 pixels to 245 doesn’t really recover much information.
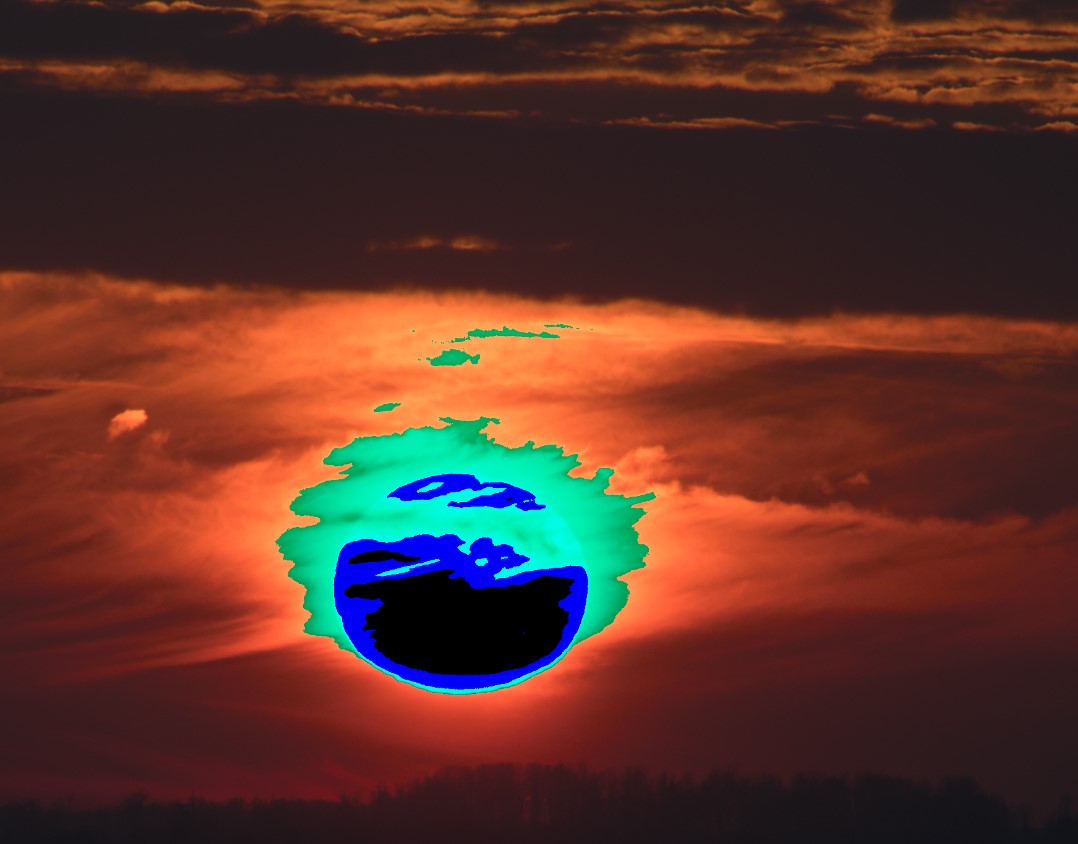
Here are 3 images:
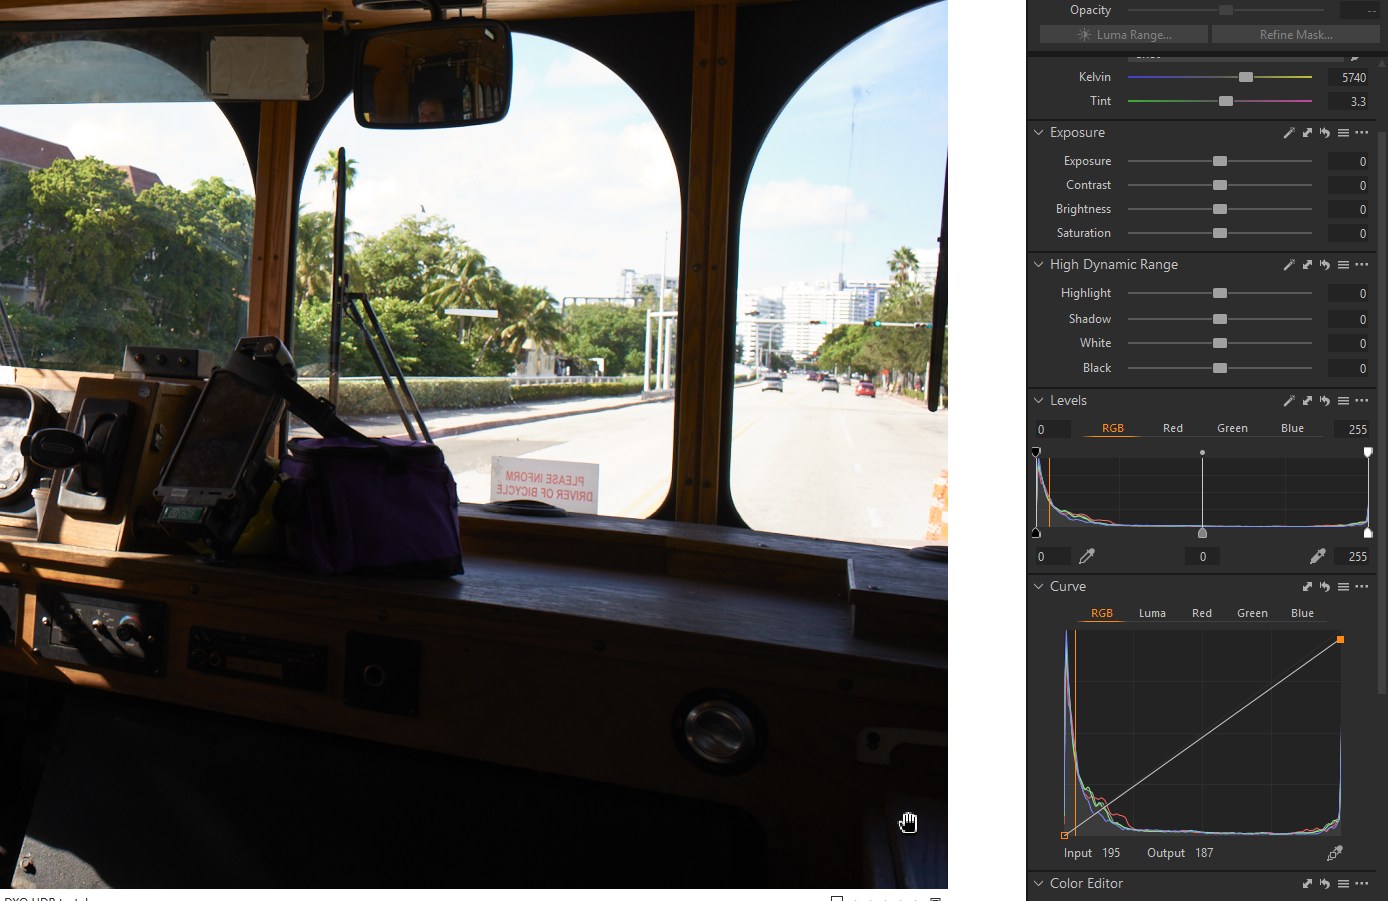
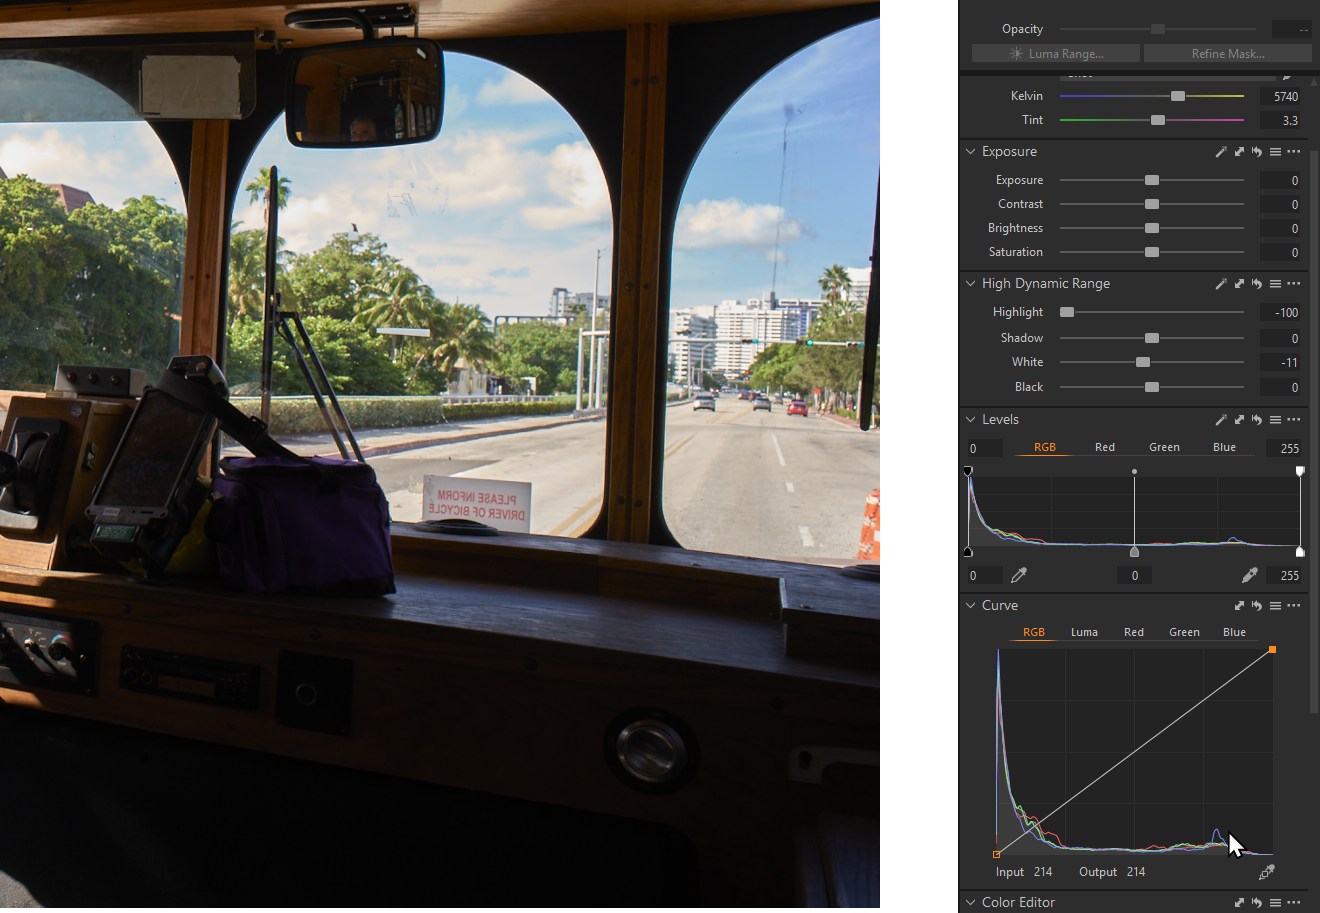
1: Unadjusted image with blown info.
2: Curve set to 245
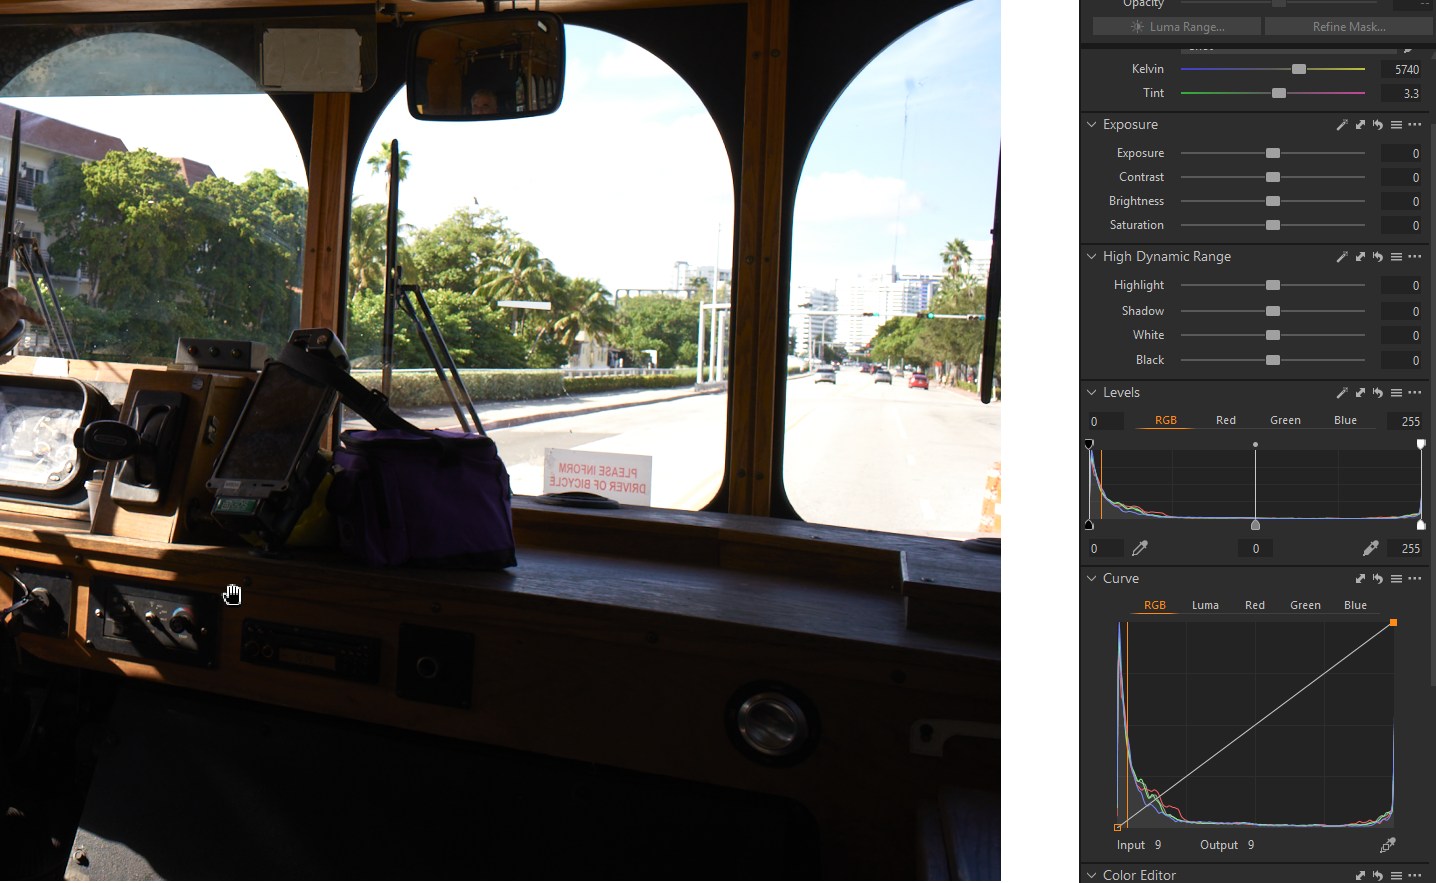
3: Unadjusted Curve but info recovered by reducing Highlights
I am Not reducing the threshold point of the Tone Curve, I am adjusting the curve itself - the end points.
In that particular image, although I used my Hi-10 preset, the actual value required is 247. Setting the value to 253 does Not work for this image. Why? because I am adjusting the curve NOT the threshold.
Allan
What software is this that you are using?
This is the Photolab forum and my answer is in relation to Photolab. Other software such as Lightroom work differently.
Allan
I think he’s using PL.
Read my posts again.
George