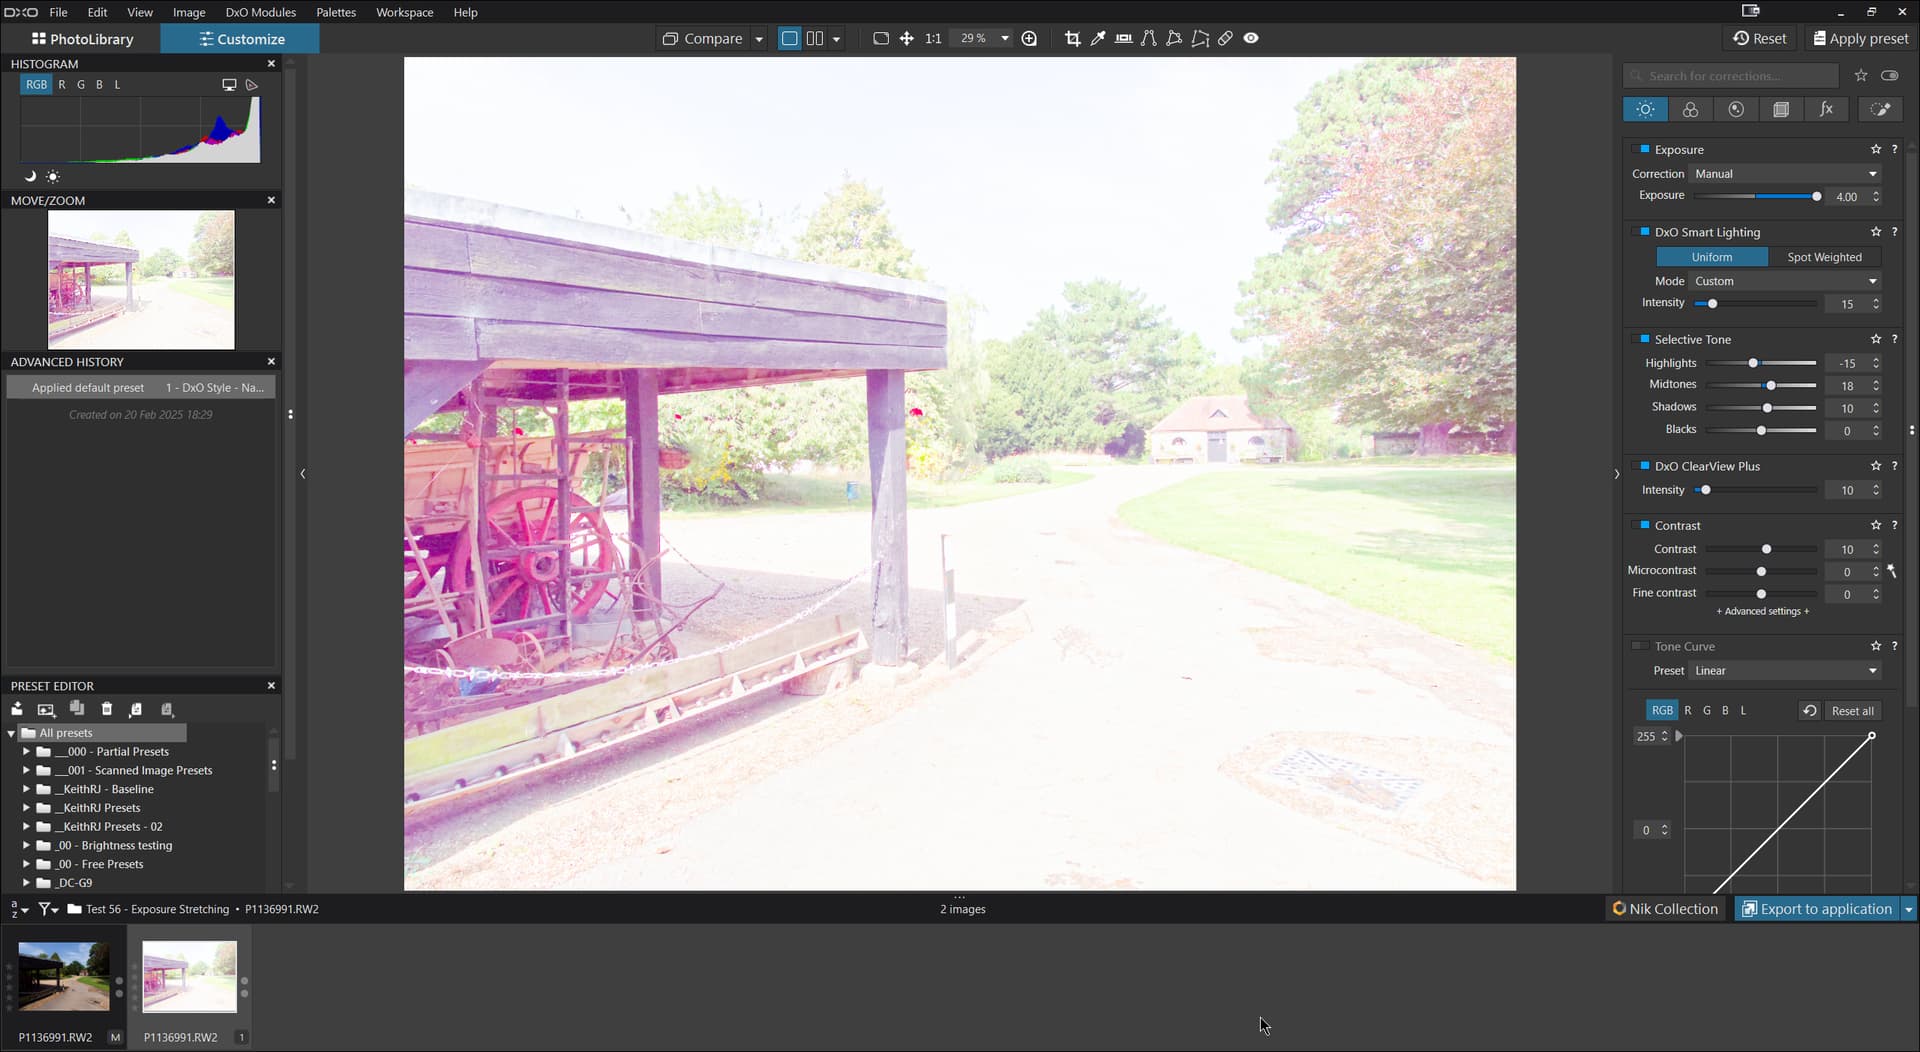
The exposure compensation slider can be pushed to ± 4 (EV)
With modern sensors and their low noise, a compensation of >4 could make DPL more welcoming to underexposed captures. Editing the .dop sidecar and setting “ExposureBias” to e.g. 5 instead of 4 will make DPL compensate according to what’s in the .dop, even though the slider still reads 4 instead of 5. This means that DPL has the capability for wider adjustments, but it blocks us from using it.
Proposal
Make DPL’s Exposure Compensation tool accept corrections greater than ±4 EV
And with some iso invariant sensors it gives sometime a safer solution (in tricky lighting conditions) to not use camera gain but adjust this in post processing.
I’ll chime in here and add on: are there any workarounds to this limitation besides editing directory files? I routinely expose for the greatest highlight and work my exposure up from there, and I find myself needing upwards of +6 ev sometimes! Any assistance they could give us with this would be great
Here’s an indication that DPL can calculate wider exposure variations indeed and that this is only prevented by choice rather than technical reasons. Clear enough, if one has to push exposure a lot, quality might get compromised in the process, but imo, there is no need for DxO to take their users by the short leash.
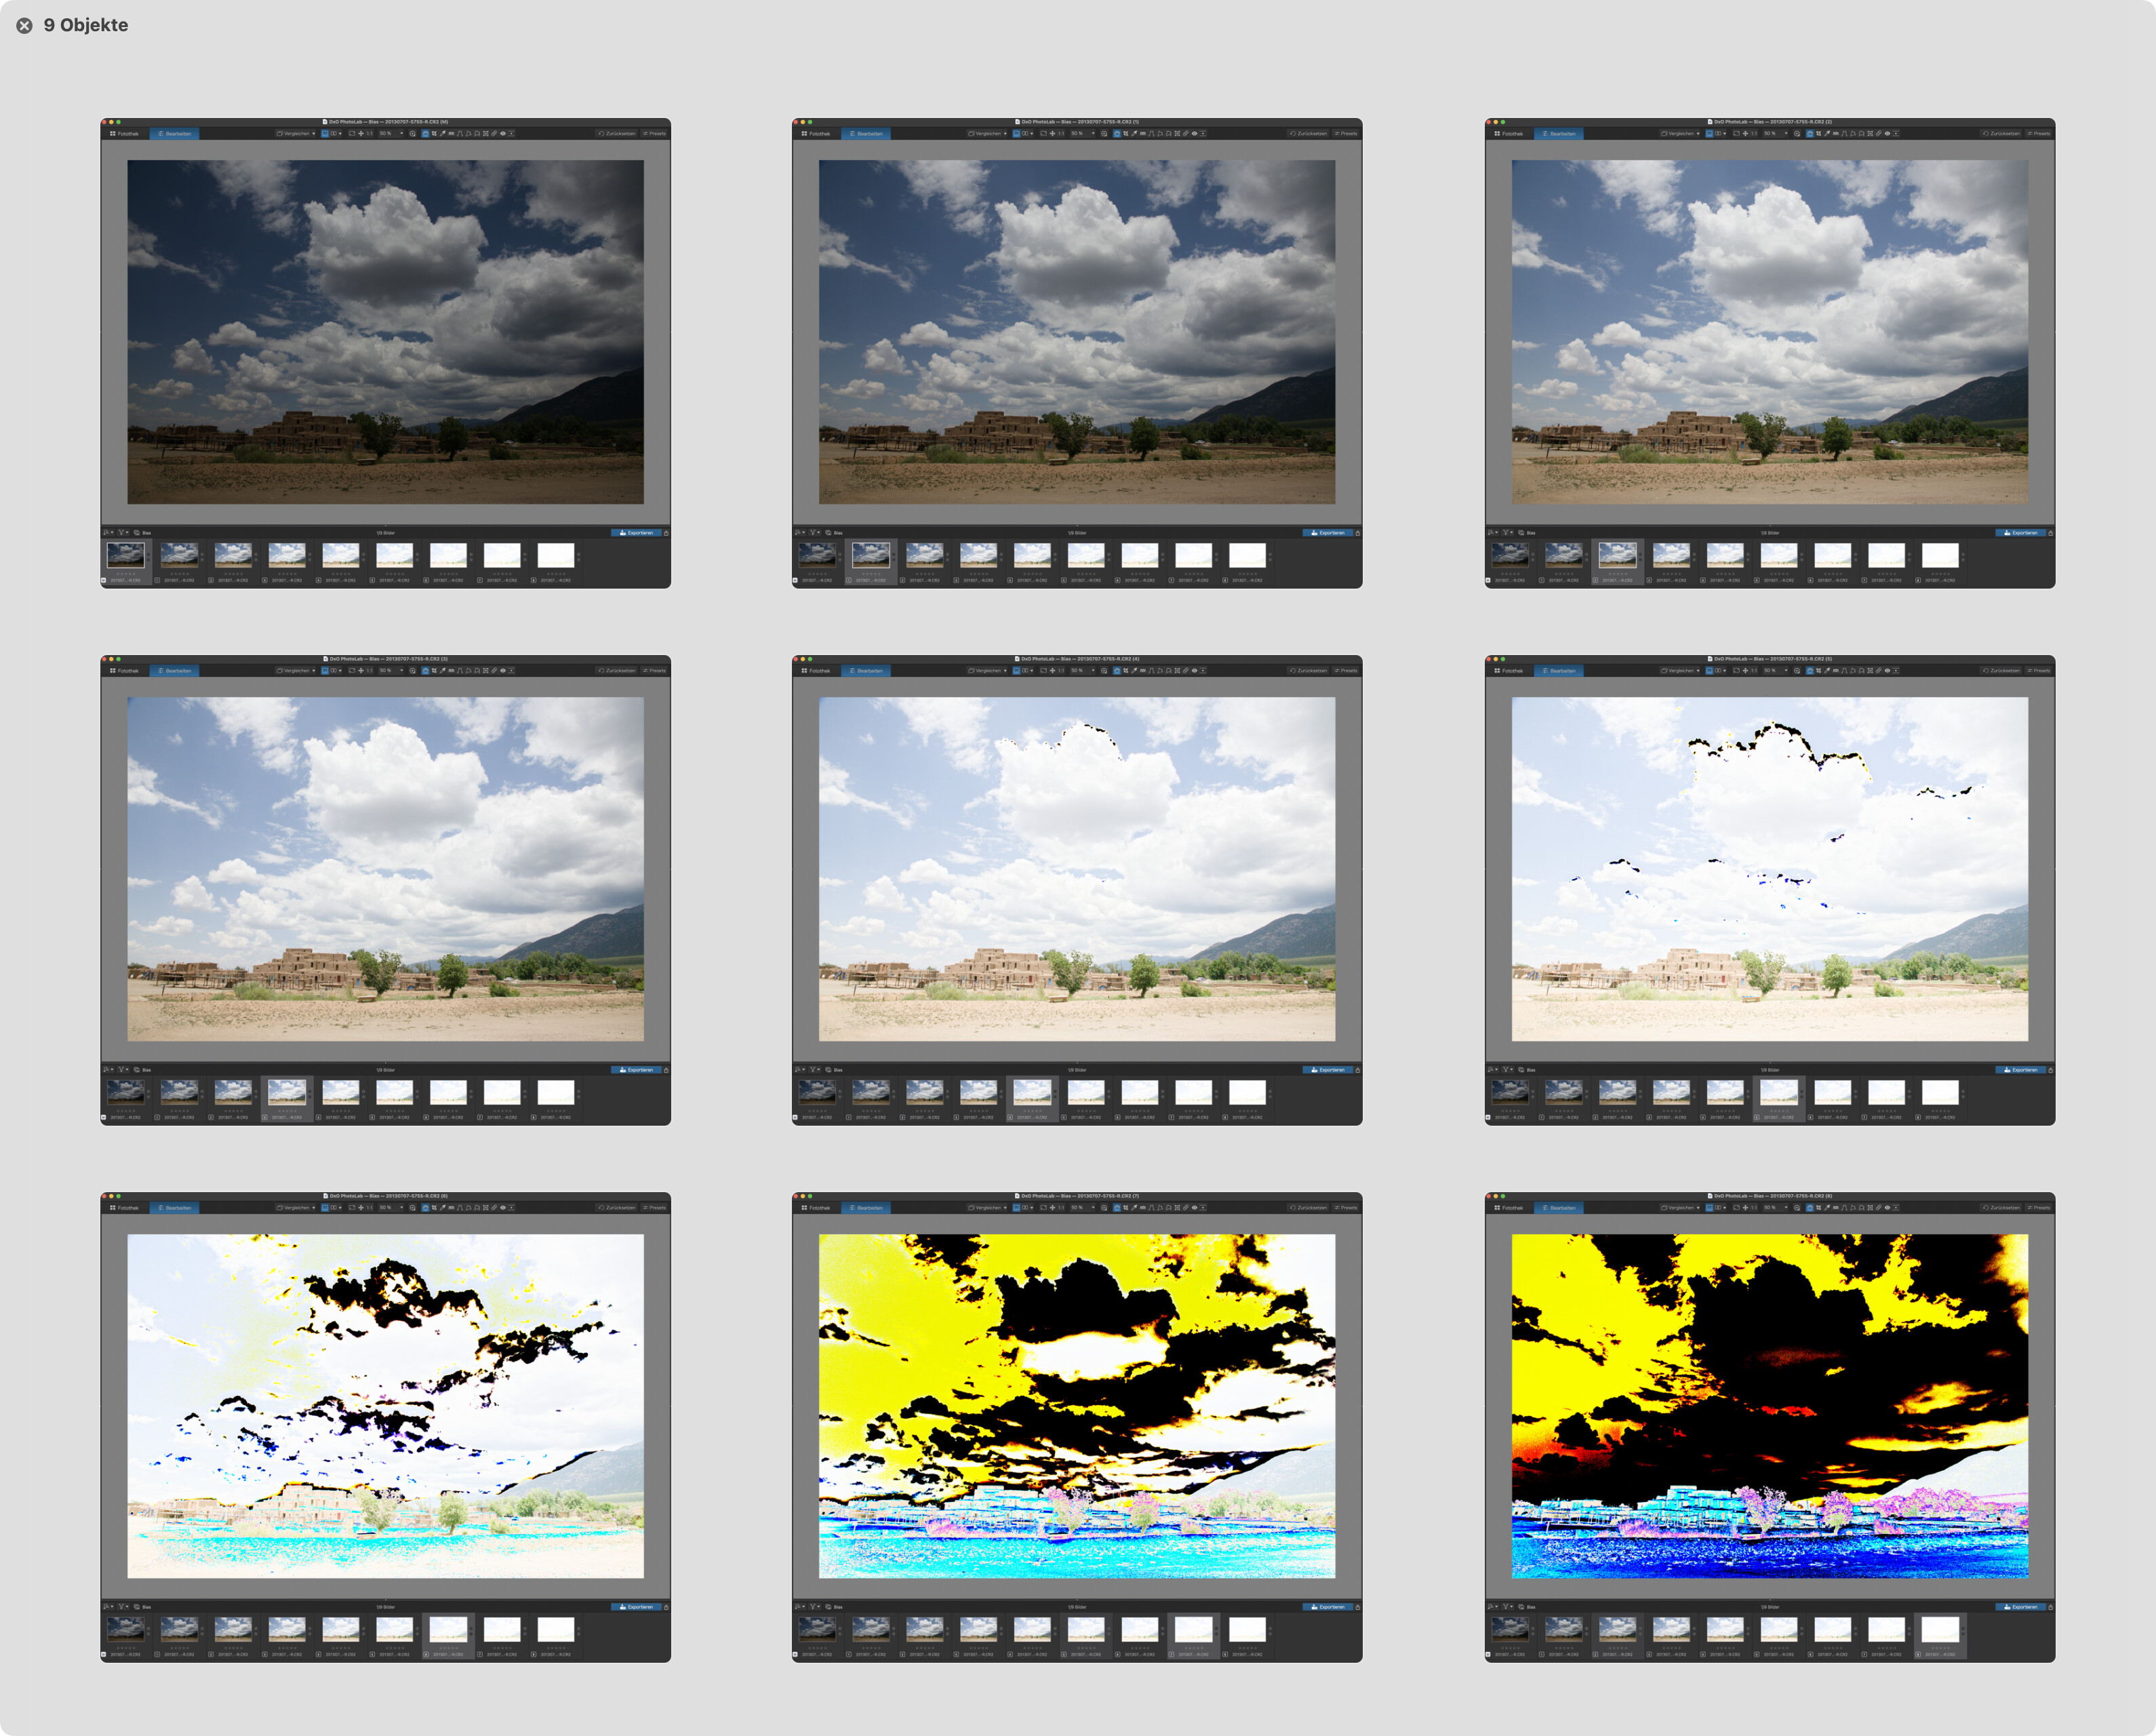
Note: Clipping indicator switched on to make things visible.
From top left: Original photo, VC pushed by 1 stop, 2 stops … 8 stops
Occasionally, one gets a heavily underexposed shot that needs a lot of pushing. DPL8 limits exposure compensation to 4 stops. if a shot is still too dark, I usually use the tone curve by pulling the upper RH end of the tone curve inwards.
How did I do it? Opened the .dop file and changed the “ExposureBias” values.
Personally, I throw out photos which require pushing exposure globally more than 3 stops. You can use Tone Curve to push by 6 stops, but to prevent posterization in the shadows you’ll have to “tame” the curve in the deepest shadows. Note that standard gamma correction pushes deepest shadows by 2 stops (its “toe” part), so you would end up pushing them by 8 stops, when anything above 5 leads most often to posterization (that’s my private rule of thumb). Also vignetting correction may push by 2-3 stops image corners for some lenses, when used wide open.
With my z5 and its invariant sensor, I’m regularly shooting at -3 just to preserve highlights, say with a backlit bride in front of a window to get a silhouette.
Needs and requirements differ and a capable editor should be able to accommodate both ends of what might be a reasonable range. ±4 seems to be it for DxO while ±5 is Adobe’s idea…and LrC cannot be tricked into further pushing by editing a sidecar
@platypus ,
I tried to change the ExposureBias setting in the dop file but without any result. I’m loading from the dop file in the preferences. I’m on windows.
@George , try the following - without virtual copies for ease of testing
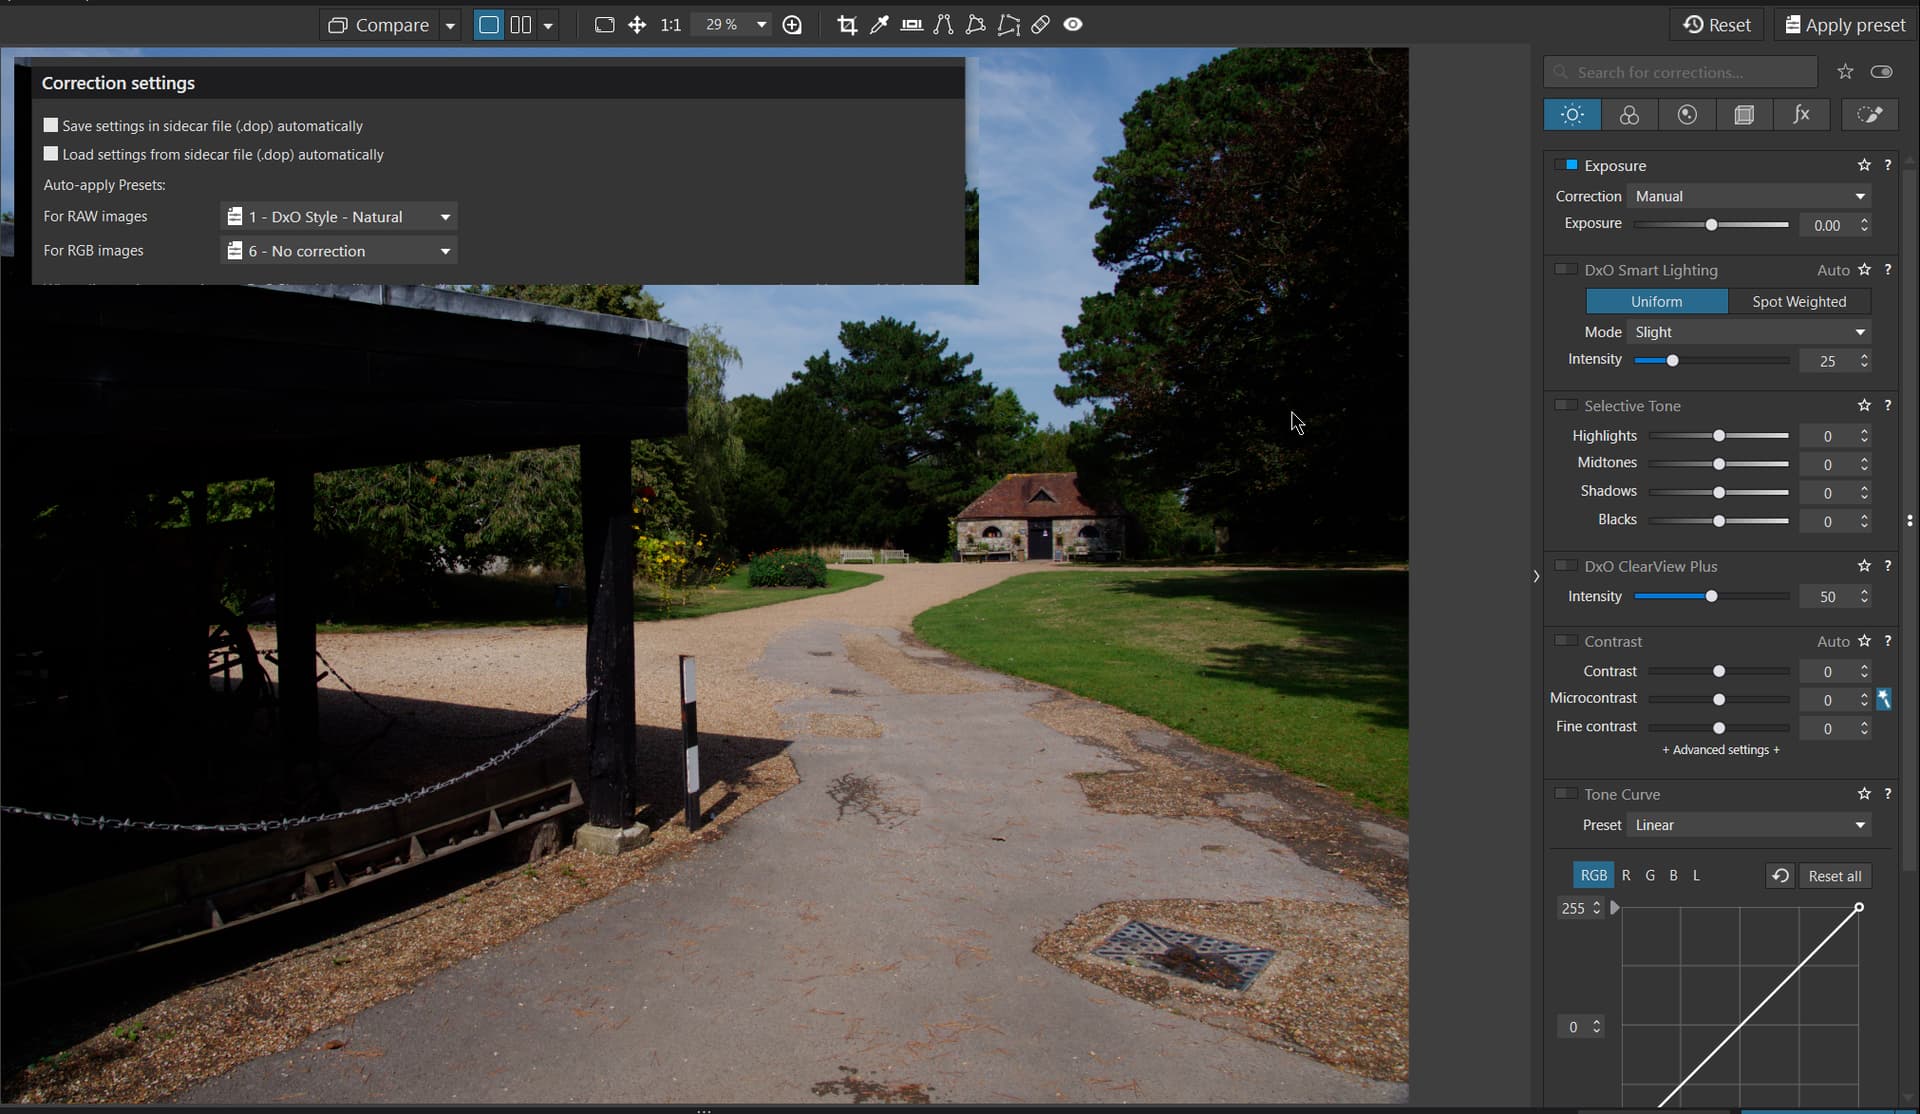
Switch off automatic import and export of sidecars (puts you in control)
Select an image and shift the exposure slider
Manually export the (.dop) sidecar.
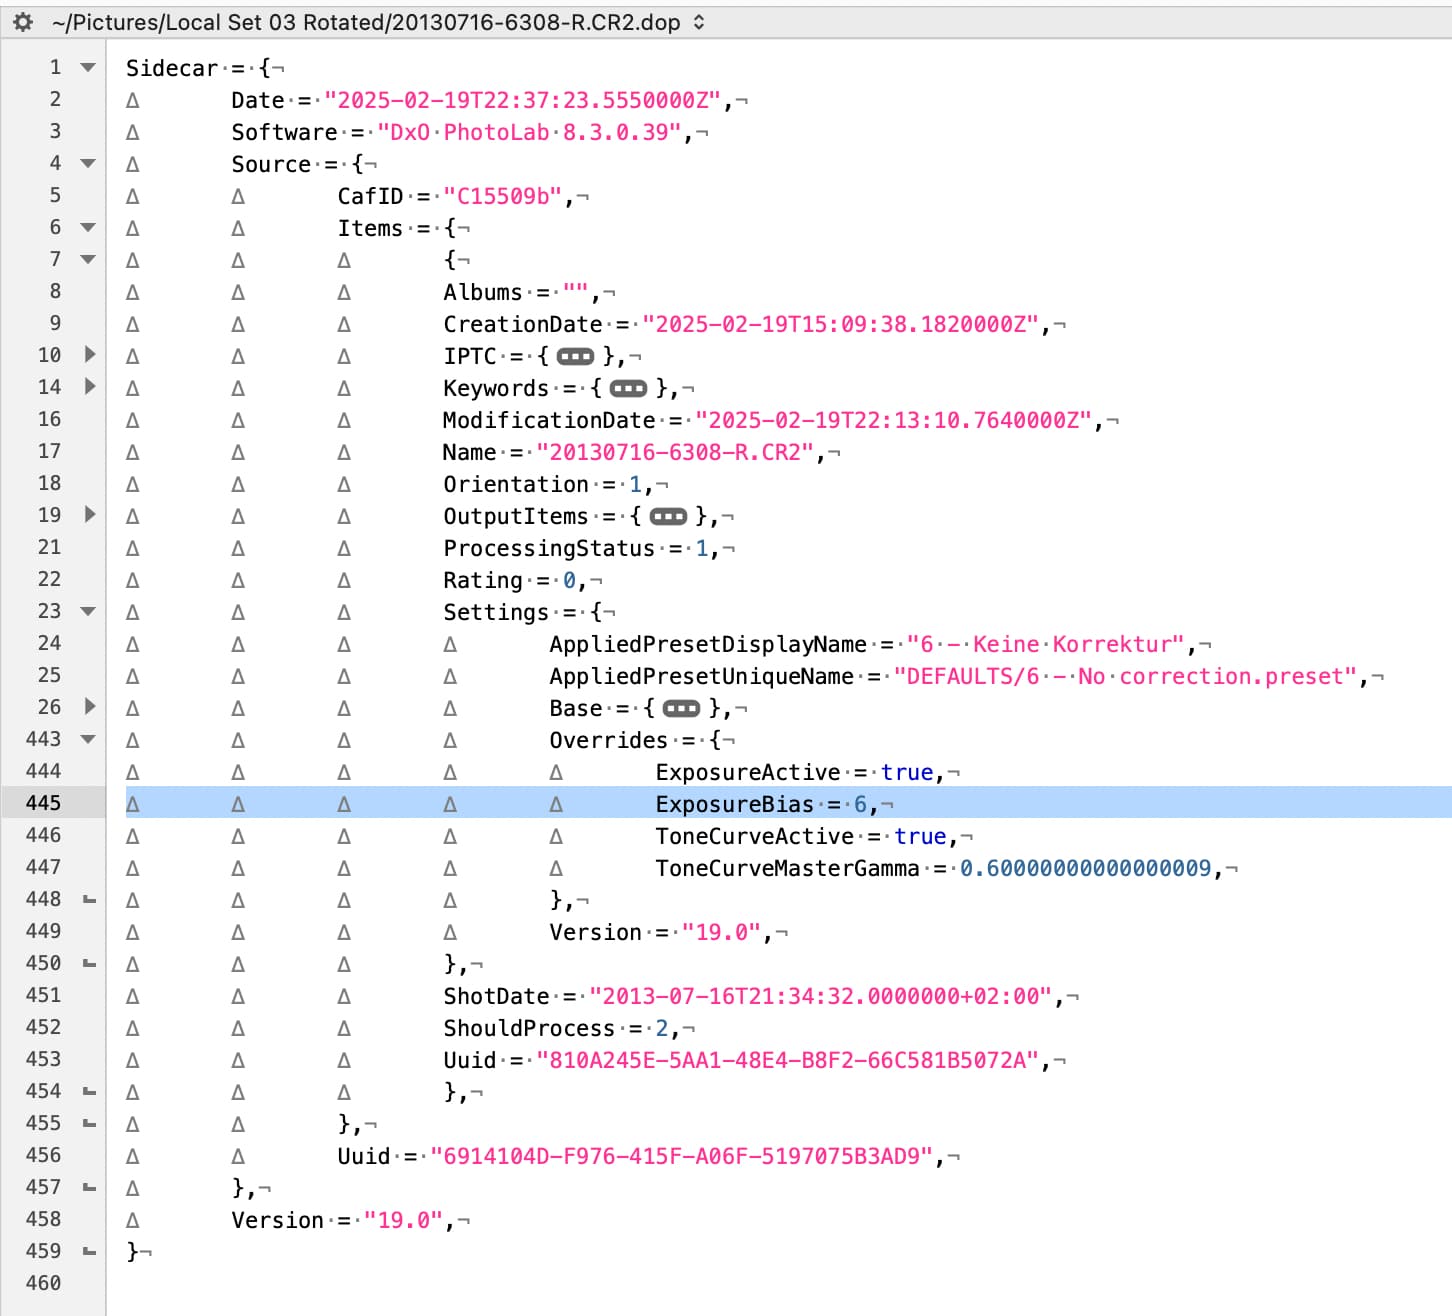
Open the sidecar with a text editor. On Mac, a .dop sidecar contains (amongst others) two sections of settings. One is called “Base”, the other’s name is “Overrides”. (Base lists settings of the applied preset, Overrides the changed settings)
In the Overrides section, look for “ExposureBias” and set the value to, say, 6, observing that you don’t change the syntax (e.g. remove one or both " signs around the value)
In PhotoLab, manually import the (.dop) sidecar; the brightness should now change.
Example of a .dop sidecar with exposure set to 6 (highlighted line)
Note that I use BBEdit, which is not available for Windows. If you have/get an editor that can recognise java-style text, it will probably look better than in an ordinary text editor.
I have no idea what you say. On Mac, there are no .dop files in the preferences/settings.
I’m guessing George is referring to the default Presets (assigned to newly encountered images) … since Presets are, essentially, just sidecar/.dop files.
@George Sorry @platypus changed to +5 and attempted to force a DOP read and nothing changes. Tried -5 and nothing changed but tried -4 and blackness.
The value I am changing is in the ‘Overrides’ section of the DOP (sidecar).
Change to +4 and mostly burned out image as expected in the case of the image I was using.
Looks like the “feature” is limited to the Mac
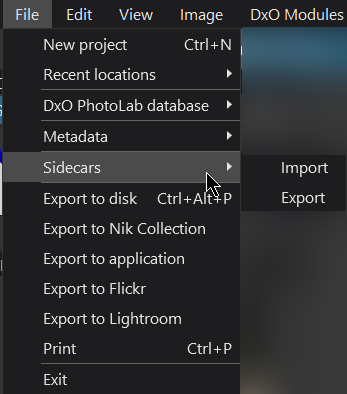
PS:- The significance of the “Sidecar” bit, in this case in particular, is that there is no ‘DOP’/‘Import’ command but there is a ‘Sidecars’/‘Import’ command
Interesting. On Mac and after importing the .dop file/sidecar, the exposure tool shows what’s in the sidecar. As soon as I touch the slider, it snaps back to +4
On my Macs, I keep the settings you show unchecked. I don’t want DPL to import and export sidecar (.dop) files automatically. Manual I/E is better suited for testing imo, and I also mostly use DPL as an add-on to Lightroom. I don’t need to keep DPL’s data. If PhotoLab were my main editor and asset manager, I’d probably check the setting though.
(For those who notice the mix of languages: I’m using a custom workspace that I set up when DPL was set to use an English UI. Custom workspaces stick to the language used when they were set. They don’t change with the language of the UI.)
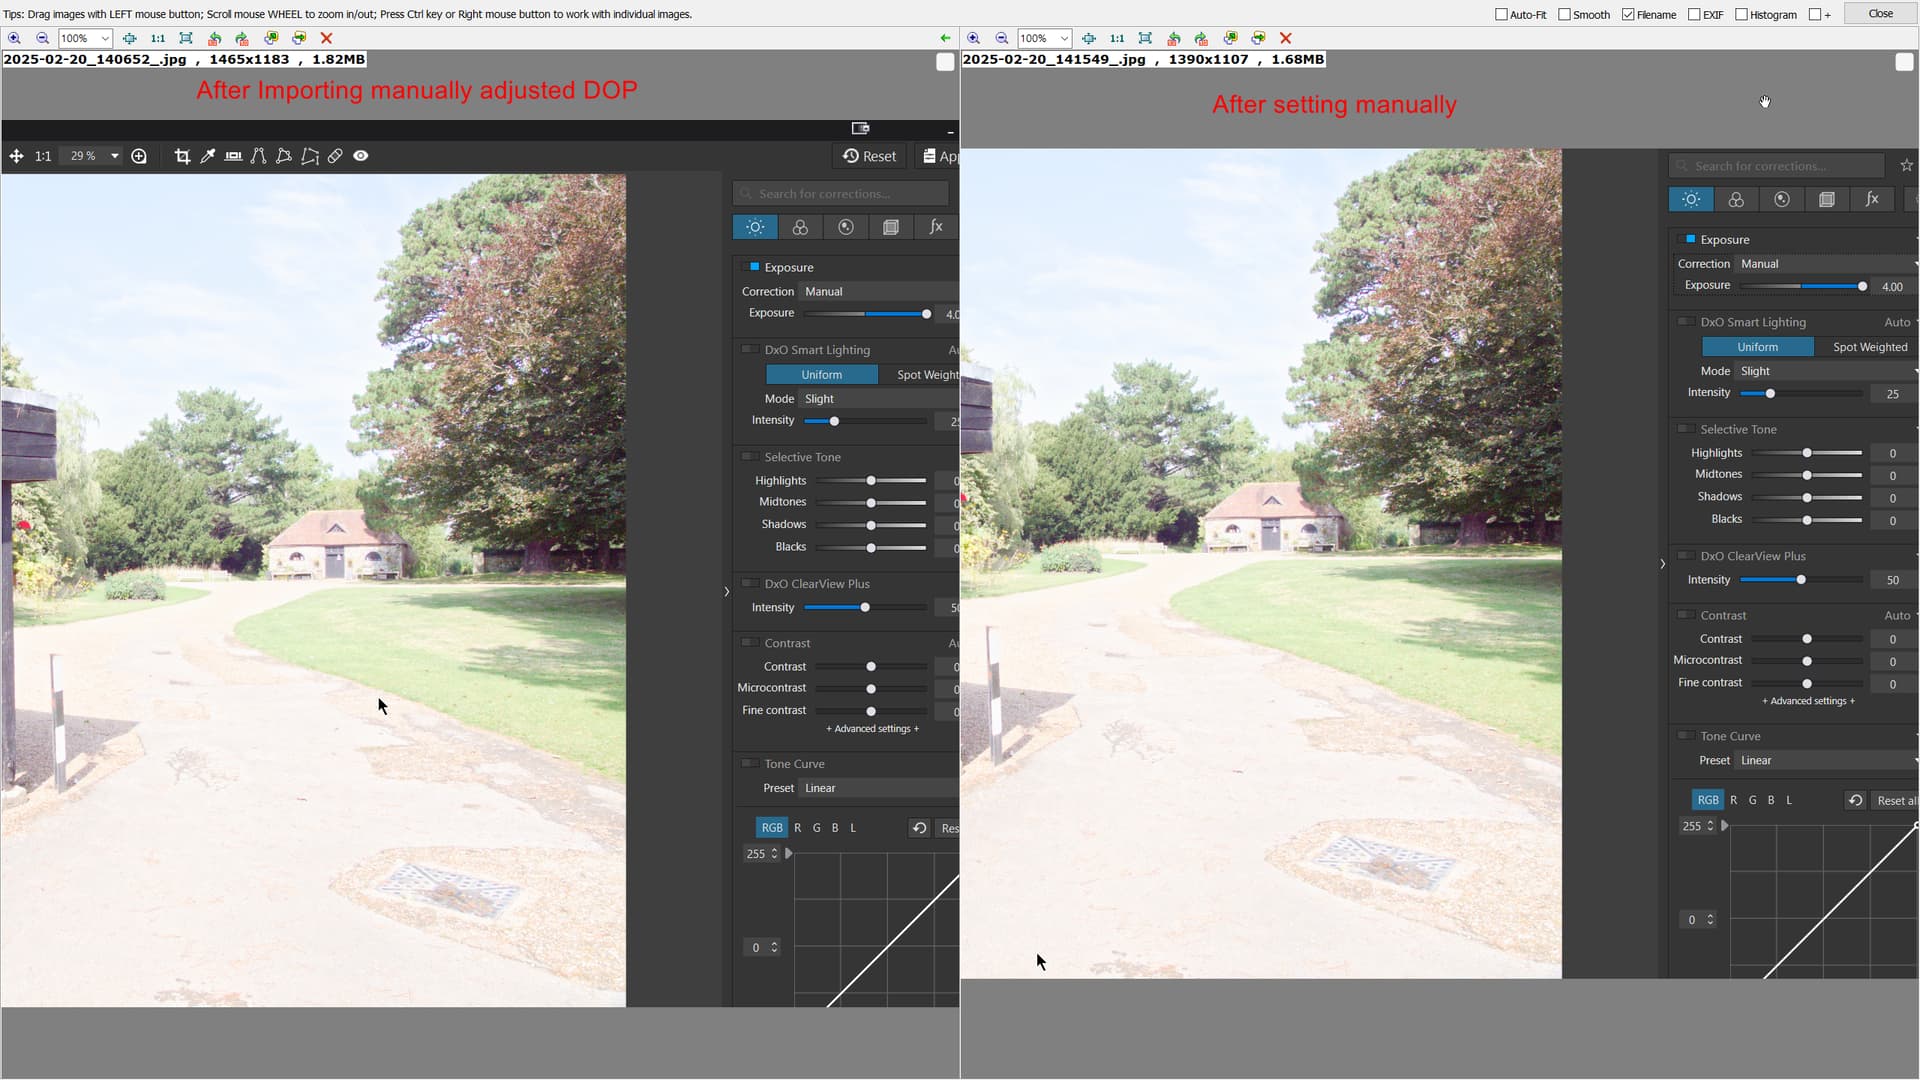
after the (DOP) Sidecar ‘Import’ we have what is shown on the left below i.e. the setting has gone to its maximum of 4 and the actual value of 5 has been “ignored” or replaced by the maximum available and the image state shown is the same as if I entered 4 as shown in the right hand image below.
With unchecked .dop settings, the ExposureBias is in the database (I presume that the database is set to the maximum value of 4 because this is what the UI allows) and I am able to override that these few steps.
manual export of .dop
editing the .dop
manual import of .dop
I am sure that I see the difference. Scroll up to post #4 and see it too.
There has been a recent post saying that a few number fields accept values outside of the range made available by the sliders. Exposure is not one of them in terms of entering a number, but it will display what I put in the .dop file.
Alas - there seems to be another difference between Mac and Win versions of PhotoLab…and you’d have to tweak both exposure bias values to get out of the ±4 corset.
@platypus I need to apologise because I believe it did work when I took the trouble to close the database down and clear the database between the actions which were
Remove the old DOP completely
Remove the old database
Open PL8 and discover the image to give me a new DOP to hack and I set the Exposure to 1.47.
Close PL8 and review the DOP which showed two entries for ‘ExposureBias’, somehow I had only found the second one on my previous tests.
Change both entries in the DOP to 5 and write back to disk.
‘Import’/‘Sidecar’ which results in a VC on Windows which doesn’t happen with a Mac (as we have discovered before)