Different results depending on imported color space of RGB picture

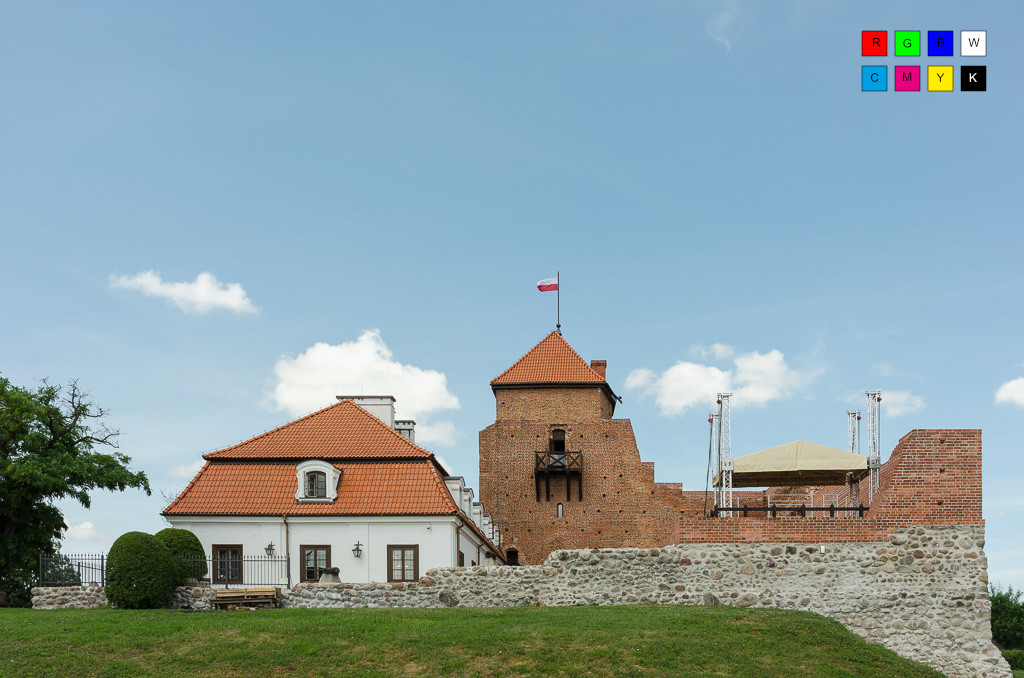
User wosse in the german DSLR Forum found a difference in the Sepia tonung with FP5 depending on the color space of two otherwise identical TIFFs. Going further he tested with a JPG file which has a special color space (see http://fotovideotec.de/browser_farbmanagement/farbmanagement_test.jpg) which can be used to test color management capabilities of software.

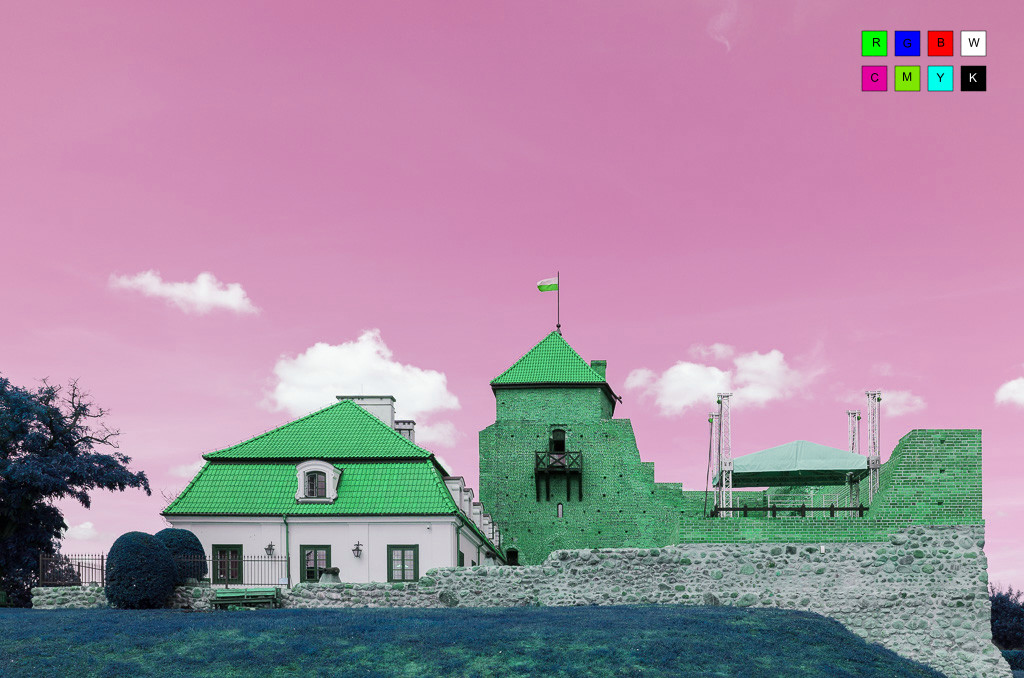
A) If this picture is shown in a software without color management it looks like this:


The three words on the right hand side are “Red”, “Green” and “Blue”. So the special color space is giving the effect as if the hues were rotated by about 215 degrees.

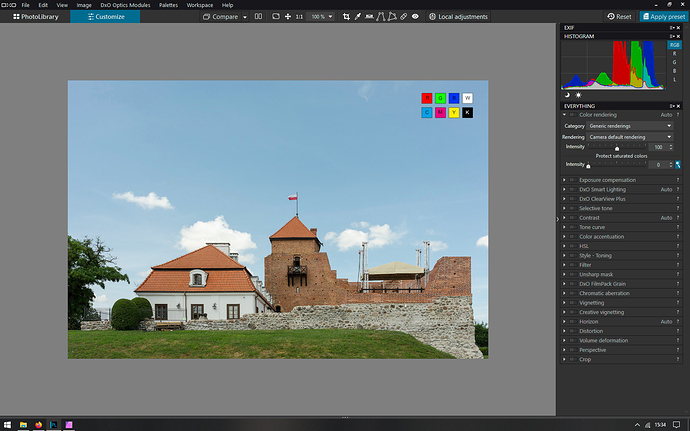
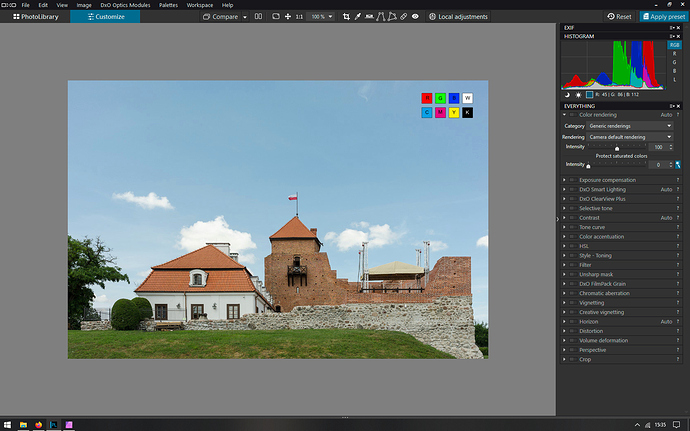
I went on and used ColorSync on the Mac to create a version of this test picture with the normal sRGB color space. Then I view both in DxO PL3. All following screen shots show in the film strip the sRGB version on the left, the special color space on the right and in the preview window.

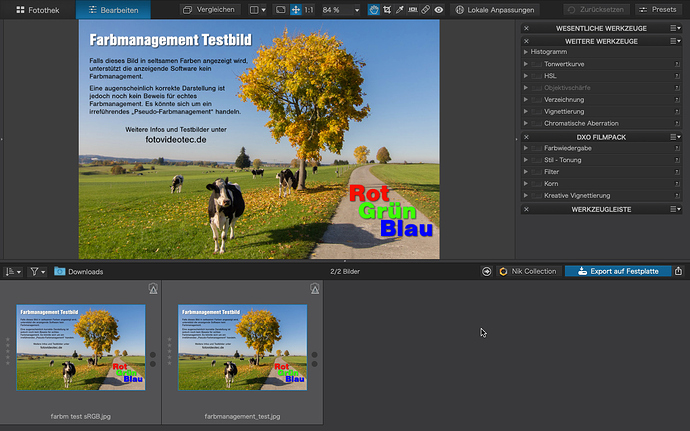
B) No changes, both pictures appear identical, as it should be. PL3 is using the embedded color space:

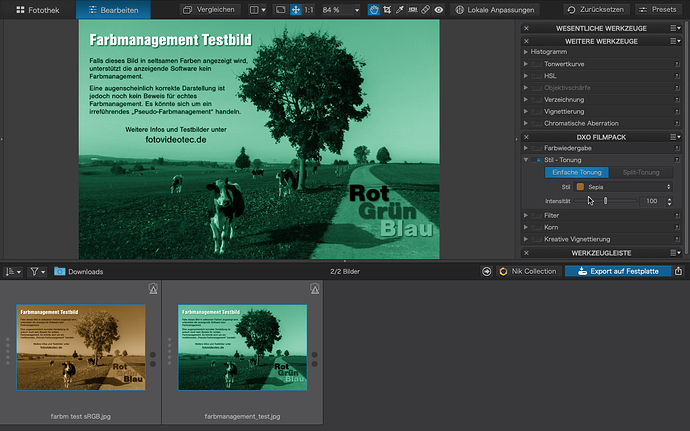
C) Sepia tonung: As you can see on the special color space the Sepia turned the picture to green.

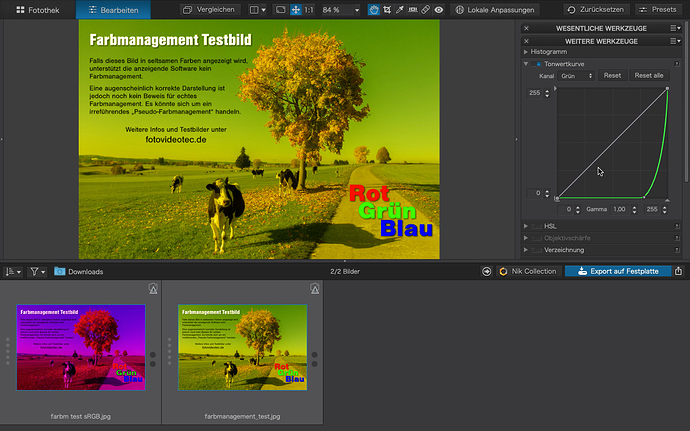
D) Tonecurve green reduced: I think this is especially interesting since it shows the green works like “reversed” on the special color space as if the tool is influenced by the color space of the source. But it shouldn’t be from my point of view since the tools should work in the working color space of PL3.

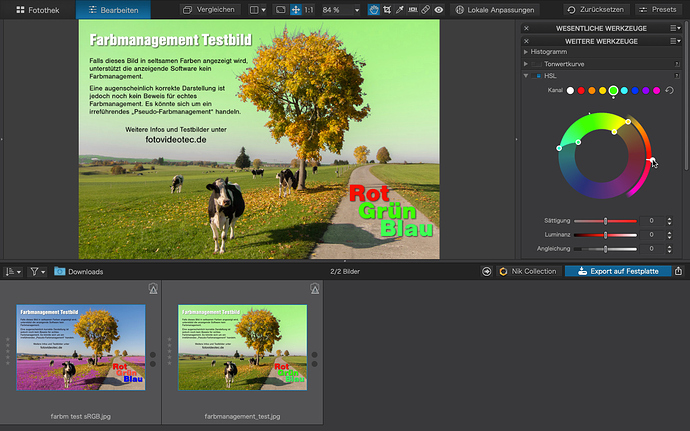
E) HSL tool, green rotated to magenta: On the RGB image (left) the effect is correct. On the special image the effect acted on the blue colors instead. Compare picture A above: The HSL tool select the green from the “wrong” color space.

I think in reality this is no big deal, at least not for me, since I use PL3 to develop RAW files, not RGB. But generally spoken I’d have expected the color management in RGB to work so that there are predictable outcomes, regardless of the color space of the source material.

My mental model is: Input color space (e.g. embedded in RGB) -> color transformation -> working color space of PL3 -> tools (HSL, tone curve, etc.) -> color transformation -> output color space (display, export file).

But given these results it seems like PL3 works in the input color space and assumes that green is green, regardless of what the embedded profile of the RGB picture says.

To be fair I tested the exact same thing in Pixelmator 3.9 classic and found the same. So I start to wonder if my reasoning is flawed.
Apple’s Photos App, though, works as expected. Also the MacOS preview shows no issues applying a Sepia tonung to the picture with the special color space and even save it back to the same color space.

In PL3, even if I export with the original color space, the colors are wrong, e. g. Sepia is Green, as displayed.

If anybody can explain what happens here I’d be very happy.

2 Likes

The moral of the story is: while they are good for testing purposes, don’t use swapped-channel ICC profiles for your editing (as a working colour profile).

Although the RGB channels in your test file look correct in a colour-managed program, when you start shifting the hues in a tool which operates on channels (Tone Curve, HSL, most filters in simple Style-Toning), the changes will affect a different channel than expected.

I can see that the swapped channels profile embedded in the file was created in DisplayCal. It’s manipulated in such a way that what’s called the Red channel is in fact Green, Green channel is Blue and Blue channel is Red.

It’s best to see this in the HSL tool (point E above). When you select the Green swatch and shift the hue, you’re not manipulating the Green channel as expected when using a regular RGB file, but the Blue channel because that’s what the ICC profile tells the program to do. So it works as expected. When you pick the Red swatch you affect the Green channel, etc. So all your editing will be shifted accordingly and works as the embedded profile tells PhotoLab to work.

If you want to affect the Yellows in your swapped channels photo (the grass and the foliage are seen by PhotoLab as Yellows rather than Greens), choose the Magentas swatch and rotate the hue. Cyans are Magentas, Magentas are Yellows and Yellows are Cyans for this file.

And if you want to get Sepia toning on the swapped channels file, enable the Sepia module and then in the HSL module select the White swatch (all channels), and shift the Hue about -120 degrees.

For the Tone Curve example, don’t modify the Green channel but the Red one.

I knew that was coming…

a) This extreme example was chosen to demonstrate the effect. The original finding was a subtle difference in sepia toning depending on sRGB vs Adobe RGB color space.
b) Some other software, e.g. Apple Photos, has no issue with that example. It doesn’t make assumptions about “color channels”. After all we have numbers that are interpreted as colors in a color space. That’s what color management is about.
c) Just to avoid the question: neither the extreme example nor the real world example suffer from exceeding the color space.

Until I get a better explanation I say that PL tools just don’t work correctly in a color managed environment. The effect of a tool must not depend on the color space of the source file being sRGB or Adobe RGB.

d) To avoid the “this has no relevance” argument, here a practical example. I created two neutral gray TIFF files, one in sRGB, one in Adobe RGB. Both are identical in appearance.
Then I applied the Sepia and this is the outcome:


Both pictures are exported as sRGB because the forum software can’t handle AdobeRGB.
I hope everyone can see the difference.

OK, I re-tested this with other applications and it’s an interesting issue.

In my previous testing I compared how DxO PhotoLab2 and Affinity Photo worked with your test file. Both behaved similarly but it seems they apply a different image processing pipeline for rendered RGB files than some other applications.

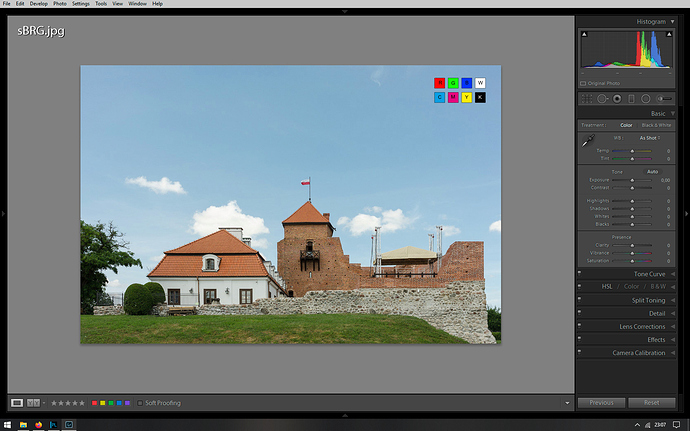
When I open your swapped channels test file in Lightroom, using the HSL, White Balance or Tone Curve modules doesn’t cause the channels issue. Other colour-managed applications that I have installed (e.g. XnViewMP, Topaz Adjust AI) behave in a predictable manner, too.

So it seems you were right. PhotoLab (and Nik Color Efex Pro 4, Viveza2 and Affinity Photo) treat the file differently – they seem to apply the embedded profile transform after the Tone Curve, HSL, RGB White Balance and Style Toning modules, which leads to twisted colours with this file. That’s at least how I interpret the situation.

It would be nice if somebody like @wolf could have a look at this issue.

Hi @Calle and @sankos,

You have analyzed the situation very well, I don’t have much to add.

As explained some time ago in this thread, for RGB input images (TIFF or JPEG), PhotoLab uses the input color space as working color space, which explains your observations.

Different programs use different approaches, some of them use a fixed working color space and will convert the image to that at the beginning, some let you choose. PhotoLab currently does not provide such options. You could still do such a conversion manually before processing your images in PhotoLab, for example using ColorSync.

For displaying the preview, we convert the image to the display color space at the end of our processing, that’s why the test image appears correctly.

For RAW images, on the other hand, we always use AdobeRGB as working space, for all cameras.

If you think that the option to chose a working color space different from the input color space would be useful for TIFF and JPEG images, please file a feature request.

Br, Wolf

3 Likes

Thank you for the confirmation. As I initially said I don’t think it is a big deal as I use PL for RAW processing. But it is still interesting and I learned some from this.

I agree, that was a useful exercise. It encouraged me to create my own swapped channels ICC profile with DisplayCal Synthetic Profile Creator that I could apply to an image of my own, so that I could make sure what’s going on. I still have to think about the implications of this – for instance, it would be good to know the exact order of operations of the different modules (e.g. does tone curve come before or after HSL, etc.).

I wonder if the fact that Affinity Photo has some colour management problems with the Nik Collection plug-ins (most notably with Viveza) can be attributed to the internal order of colour transforms that take place in the program.

I’d like to sum up this interesting topic with a couple of observations.

I created my own swapped channels ICC profile based on the sRGB profile ArgyllCMS ships with. I called it sBRG to show that I changed the RGB channels into BRG channels. Then I took this photo:

and converted it to my swapped channels profile:

The photo looks weird in this post because the forum software assumes it has a regular sRGB profile embedded in it, not my custom sBRG profile (so it looks here as it would in any colour-unmanaged software). Note that if you download this photo to your computer by clicking on it, it doesn’t have the profile, so it will also look weird on your computer, even in colour-managed applications. Here’s the correct file for download.

Here’s a screenshot of how PhotoLab2 opens the original sRGB image (pay attention to histogram):


And here’s how PhotoLab2 opens the sBRG image:
Both photos look correct but note the swapped channels in the sBRG file histogram. The histogram is incorrect. Also the RGB read-out values are incorrect, because when I hover over the sky they suggest it’s red, which we see it isn’t. This is something that I think is a design flaw in PhotoLab. In my opinion the histogram and the RGB read-out should be based on the working space profile or the output profile, and it shouldn’t be based on the monitor profile transform.

It seems the differences between the various types of photo software depend on the internal order of operations (which the user usually doesn’t have any control over). If the embedded profile of the tiff/jpeg file (Color rendering in PhotoLab) got applied before the generation of the histogram and before tools like RGB white balance, Tone curve, HSL and Toning, then swapped channels images would behave just like normal images. To prove that is the case I opened the sBRG image in darktable. Version 3 of dt allows the user to change the order in which each of the tools is applied (darktable calls it pixelpipe). You can do so by Ctrl-Shift dragging the modules in the stack.

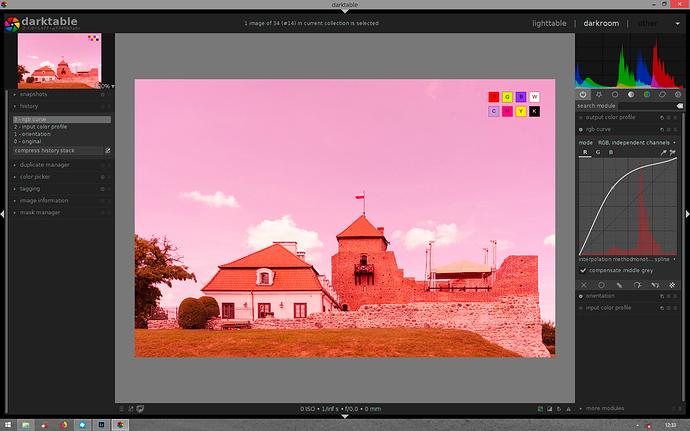
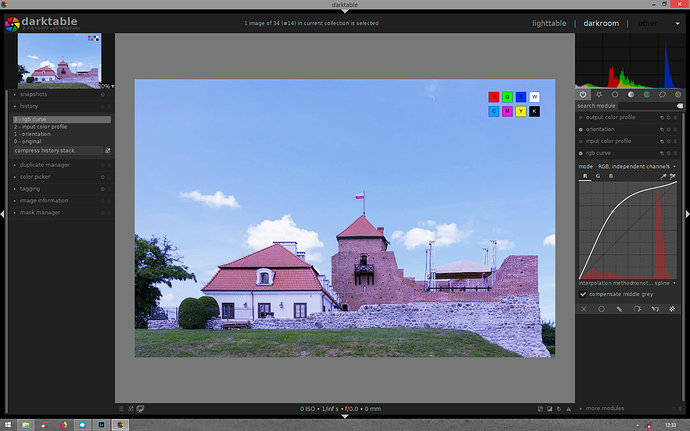
So here’s what the sBRG image looks like in darktable when I modify the red channel (the histogram is based on the working space set up in the input profile module):

Note that the RGB curve module is above the Input color profile module, which means it’s applied after it (like layers in Photoshop). And here’s how it looks when I move the RGB curve module below the Input color profile module, so that it is applied before it:
This is the result we get in PhotoLab when applying the same kind of correction in the Tone Curve tool. It’s incorrect because when modifying the red channel we don’t expect to modify the blue channel instead. So the default order of having the RGB curve applied after the input profile transform is logical not only for jpegs/tiffs, but also for raw files (hint, hint).

To sum up – here are other software packages which behave in a similar way to PhotoLab: Affinity Photo (both the Develop and the Photo Persona), Photoshop Elements (but not the ACR plug-in), Nik Collection (also in standalone mode).

Capture One behaves erratically. It has a correct histogram, Color Editor and Color Balance tools, but WB, Tone Curve and Levels behave in a similar way to PhotoLab (they get applied before the input profile).

RawTherapee and darktable have correct histogram, RGB curves and Lab curves etc, but they apply White Balance before the input profile – a behaviour characteristic for raw files, but not really appropriate for rendered files like a tiff or a jpg.

Lightroom / ACR, FastStone Image Viewer, XnViewMP, Topaz software behave in a predictable way with jpeg/tiff files like these. The embedded profile gets applied before everything, so we don’t get any surprises when e.g. adjusting white balance in a jpeg.

6 Likes

Sankos you are losing me and i am slowly disappear in your rearviewmirror , trying to keep up.:grinning:

This dummy is trying to understand what your are writing:
1 you created a ICC profile where your “renamed” rgb to BRG , and rearanged the three channels sequence.
2 web ICC is “reading” this as if it’s still RGB So "it’s sees the values of RED as if it’s Blue and Blue as if it’s red. (hence the redisch sky)
don’t know why you would want this but i can follow.
3 PLv2 is correcting the values and shows a correct color but the histogram is still swapped.
Here i am starting to lose grip.
colorspace sensor => colorspace workspace AdobeRGB => to preview colorsspace sRGB / monitor ICC depending on your selection in preference) and from AdobeRGB to export is in my case sRGB colorspace.
i suppose this is the sequence of colorspaces in PLv2 and 3.
As i @wolf wrote on screens histogram shows the latests( processed) srgb-colorspace RGB values. => not the “preview” screen ICC rgb values.

i was in the assumption that @wolf did wrote that. So what is be seen ? the auto correction in a monitor icc profile? identifying BRG and act like it?

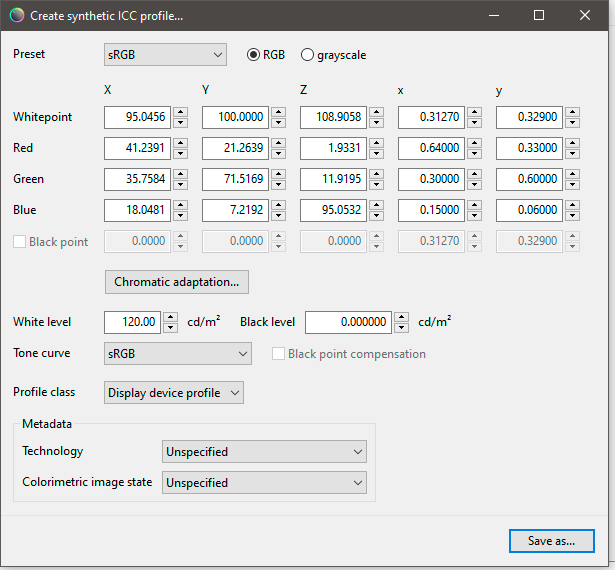
I use DisplayCal software to calibrate/profile my monitor. It ships with an application called Synthetic Profile Creator.

I simply loaded the sRGB primaries and swapped the channels. Pretty easy.

This forum strips the embedded profile and assumes the file is a regular sRGB file. But this particular file was converted to sBRG (so red became blue, blue became green, etc.), and without the embedded profile it produces garbage colour even in a colour-managed application.

There’s no conversion to Adobe RGB when it comes to jpeg files. What you outline is the processing chain for raw files in PhotoLab. Please re-read what wolfe wrote in his post above.

The way I see it:

  1. When PhotoLab opens a jpeg file it first assumes (incorrectly in this case) that the jpeg is a regular sRGB file.
  2. It looks up the monitor ICC profile and creates a preview accordingly.
  3. It then creates the histogram and the RGB read-outs underneath it (I assume they are done at the same time, but I don’t know this).
  4. Finally, it actually consults the profile embedded in the jpeg file (the Color Rendering tool) and performs the conversion. The preview gets updated accordingly.

Personally I’d do it the Adobe way – first perform step 4, then step 3 and then step 2.
As I demonstrated elsewhere, the RGB read-outs, the Moon and possibly the histogram show the values after they are converted to the monitor ICC profile. See @sgospodarenko 's post. This design confuses everybody and should be changed, in my opinion.

Yes, but if the histogram was created before the creation of the preview, why does the sBRG.jpg histogram show swapped channels, but the preview itself looks OK?

Yes , sorry misinterpreted your test. my sequense was indeed rawimport. if you import a jpeg it’s already RGB so it could be adobeRGB but not processed by DxO only read.

ok i think i can follow your thoughts.

For JPEG/TIFF files, we:

  • Use the input color space as working color space (supposing that it is somehow similar to AdobeRGB);
  • Almost at the end of the processing pipeline, we compute the histogram and highlight/shadow clipping indicators;
  • Finally, at the very end, we convert the image to the display color space.

That’s why your histogram above shows red as the brightest channel, but the sky is displayed blue.

So, yes, the histogram is based on the working color space – which is identical to the input color space – and not on the display color space.

Br,
Wolf

3 Likes

If the jpeg-embedded ICC profile (input) is indeed the first thing which is consulted why is red the brightest channel, though? – that spike signifies the sky, which the sBGR profile should correct to blue. The input profile must be applied after the histogram is created, and also after RGB White Balance or Tone Curve, otherwise this doesn’t make sense. The sBRG jpeg stripped of the profile shows exactly the same histogram in PhotoLab as when it has the embedded profile, and it is distinctly different from the sRGB.jpg histogram, so what gives?

If what you’re saying is true, why do we have two different histograms for the sBGR file and the sRGB file in PhotoLab, and almost identical histograms in Lightroom? Lr also uses the same display colour space transform…

C1, dt and RT also show the same histogram, with blue being the lightest channel, so the histogram is created after the input profile in these converters.

This assumption is the only issue. And it is only an issue with JPEG/TIFF, not with RAW.

Only a side note:
I tested myself with Affinity now (great software, by the way). It behaves correctly if you select in the preferences to convert opened files to the working color space. This is not enabled by default.

2 Likes

I prefer to convert the colour spaces manually, otherwise setting this as a default behaviour you might run into issues when e.g. opening 8-bit sRGB jpegs and automatically converting them to ProPhoto RGB – a recipe for banding. Affinity can warn you that it’s doing the conversion but normally I export from raw in the colour space I want to start from in Affinity (so I prefer embedded input profile as working space, unless in special cases).

2 Likes