Now to read your past responses, and edit my new image.
Very happy with results so far.
Thank you all for the guidance, without which I doubt I would have gotten this far.
I haven’t even started to think about this yet. Yes, I need to figure out what filters might be appropriate, and when. I’m still in kindergarten, maybe now first or second grade. Gaining, slowly.
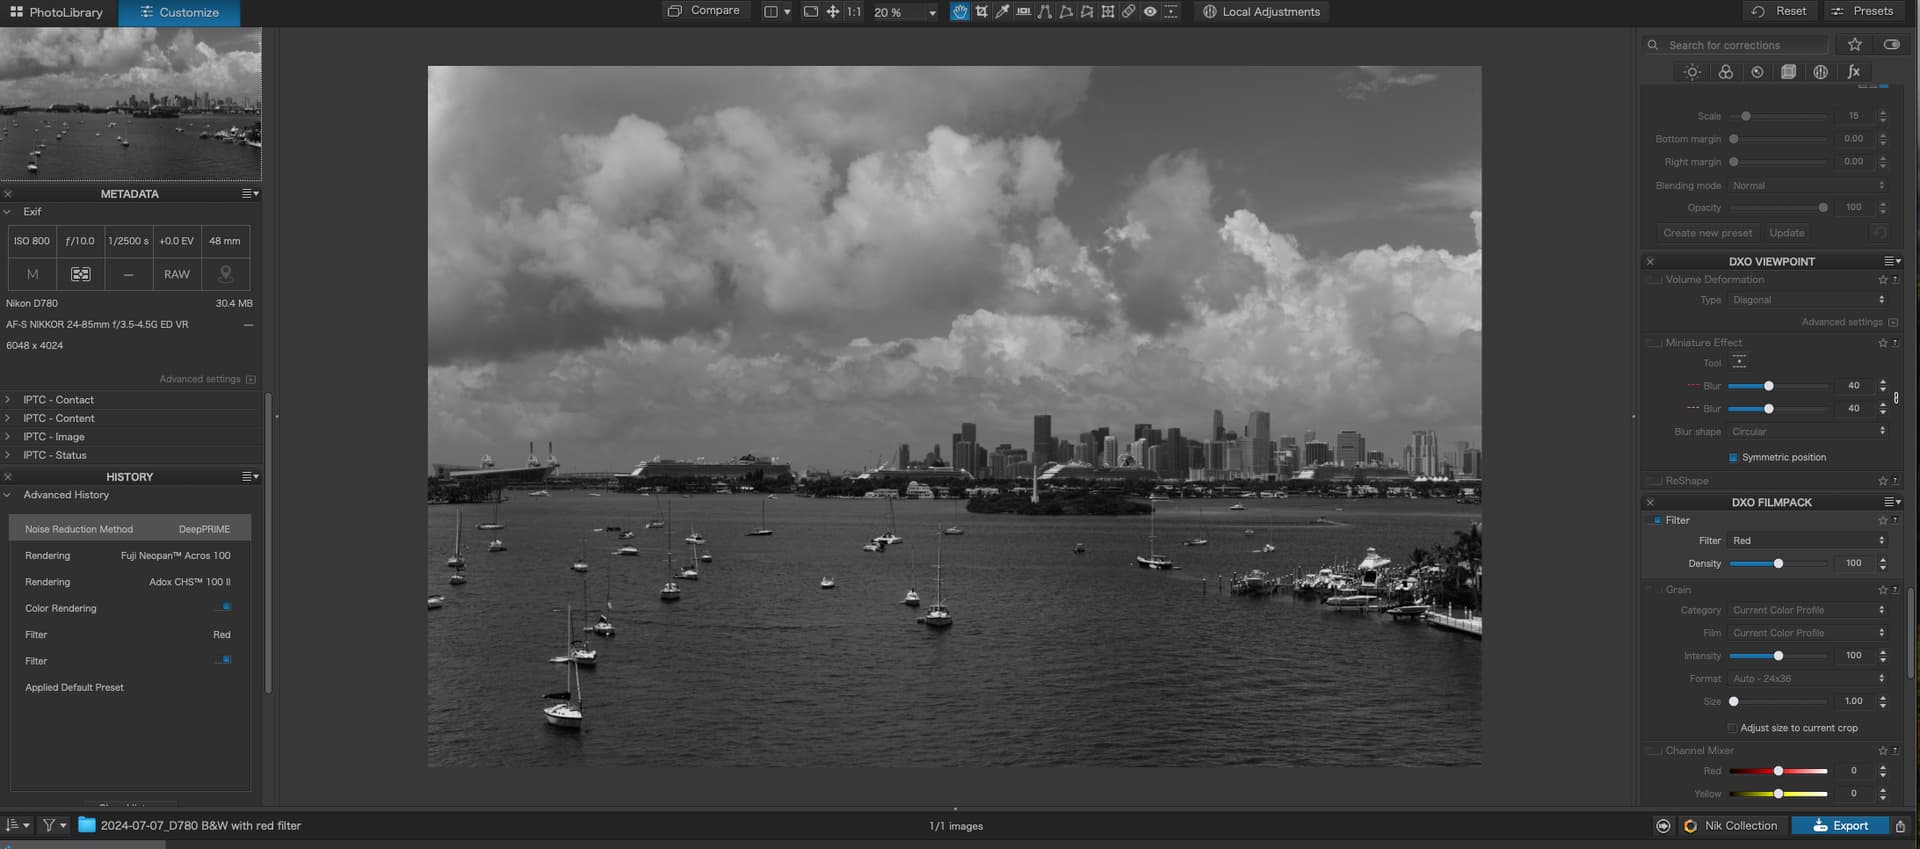
Correct, the “filter” came from PhotoLab, not a physical filter. Until I used the filter, I had an ugly image on my screen. With the filter (only) it came to life. There are now yet more things to learn, based on the article I posted up above.
I never looked at a jpg image deliberately, only what PhotoLab showed me from my raw image, same as always.
Same as me, until I made the two corrections listed above, for “Color Rendering” and for “Filmpack”.
I’ve got a >>>lot<<< to learn about filters. My only goal right now is for better skies, but I want to try to understand what you are showing me.
I wish you had included one color image in those groups, possibly I could figure out why you got the results you did. Without the color image, I don’t know how to interpret what I’m seeing in your post. If I already knew this stuff, it would probably be obvious, but I’m just as ignorant as @Wolfgang thinks I am, perhaps even more so. …but ignorant, or slow, or whatever derogatory term anyone can think of, I’ve got one new thing to be very happy with right now.
I had no idea how to set my Nikon the way it’s set now, and what to do next. I’m amazed that it worked/works, but I need to make it just as intuitive as what happens when changing from f/2 to f/22. I can’t use my age as an excuse, as between all of you and what I read, I just “did” it! Maybe anything is possible. …and anyone reading this discussion with a Nikon can do the same thing I/we just accomplished.
Whether or not it did or didn’t do anything, the first step was making the changes in the Nikon settings on my camera.
Perhaps you are right, but if so, what did changing those settings in my Nikon D780 accomplish?
You could try the exact same thing in your D850…
I read the article I posted the link to, and followed all those steps, and then followed with what I’ve learned here about DxO PhotoLab settings.
I never took a ‘jpg’ image - just a raw image, same as always.
Maybe you can try it “their” way, and then evaluate it, and maybe have a better way to do things?
After all the settings were done, naturally, looking through the viewfinder I had a full color (live) image in front of me. I could have used “live view” where I would presumably seen the image in B&W, but didn’t try.
I’m still confused about how this worked, but I’m happy that it did/does work.
Weather outside is getting cloudy, and feels like rain. Will go out and take some more photos later today or tomorrow.
If what you say is correct, following this advice allows me to get a feel for what my B&W image might look like, rather than guessing, based on a color image in the viewfinder.
You’re saying all of this stuff has no effect on the RAW image.
I can accept that, the more I think about it.
This puts me back to the question of buying a Monochrom, which will create a B&W raw image. But I think I’ll stick with what I just learned, shooting with either of my cameras, the D780 still being preferable for many other reasons.
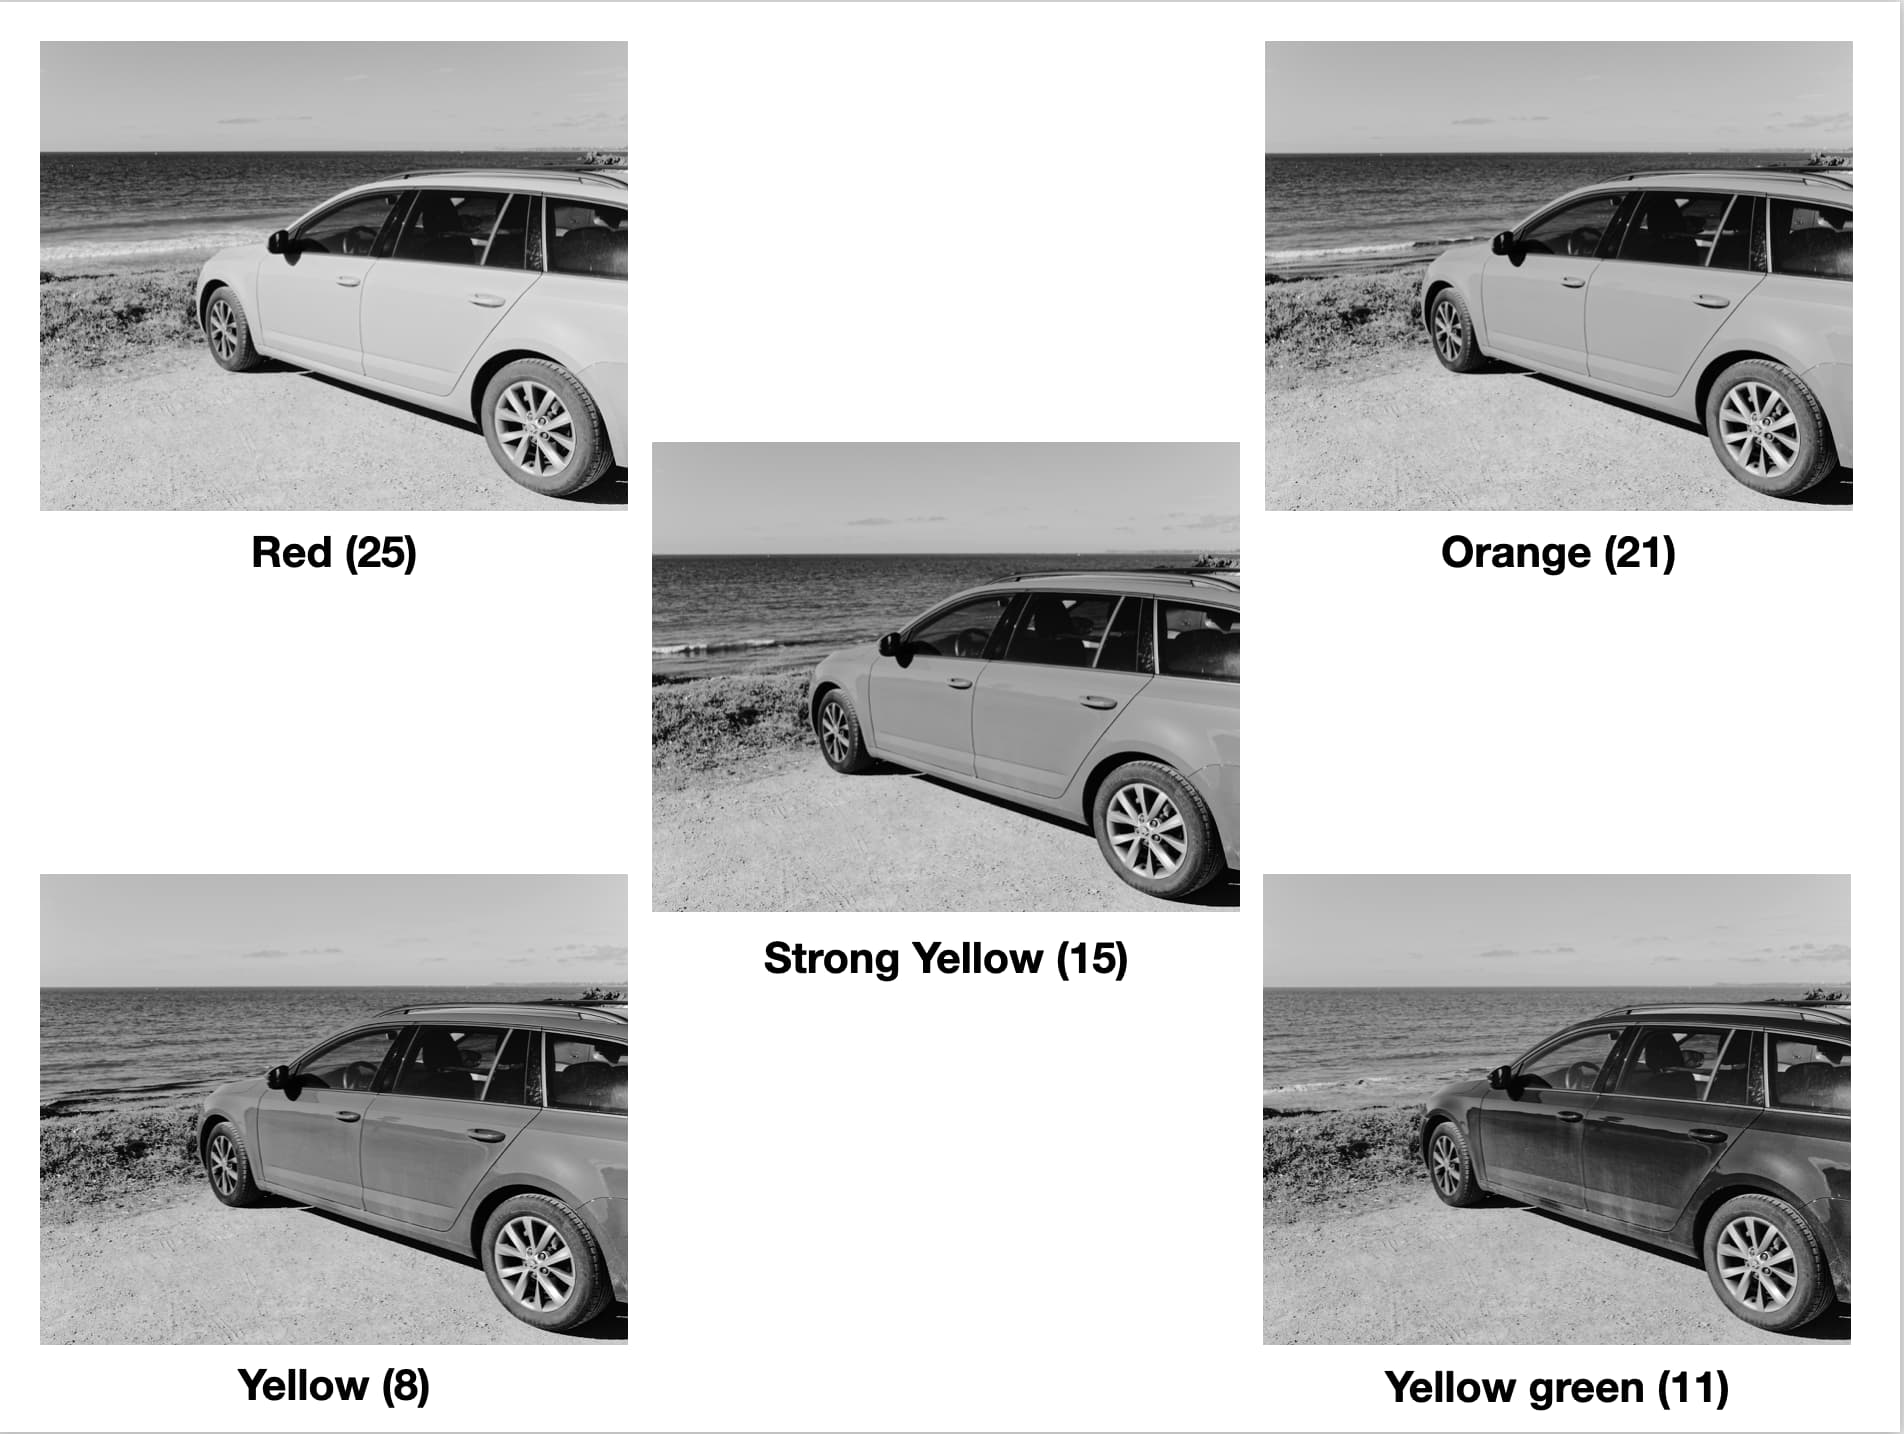
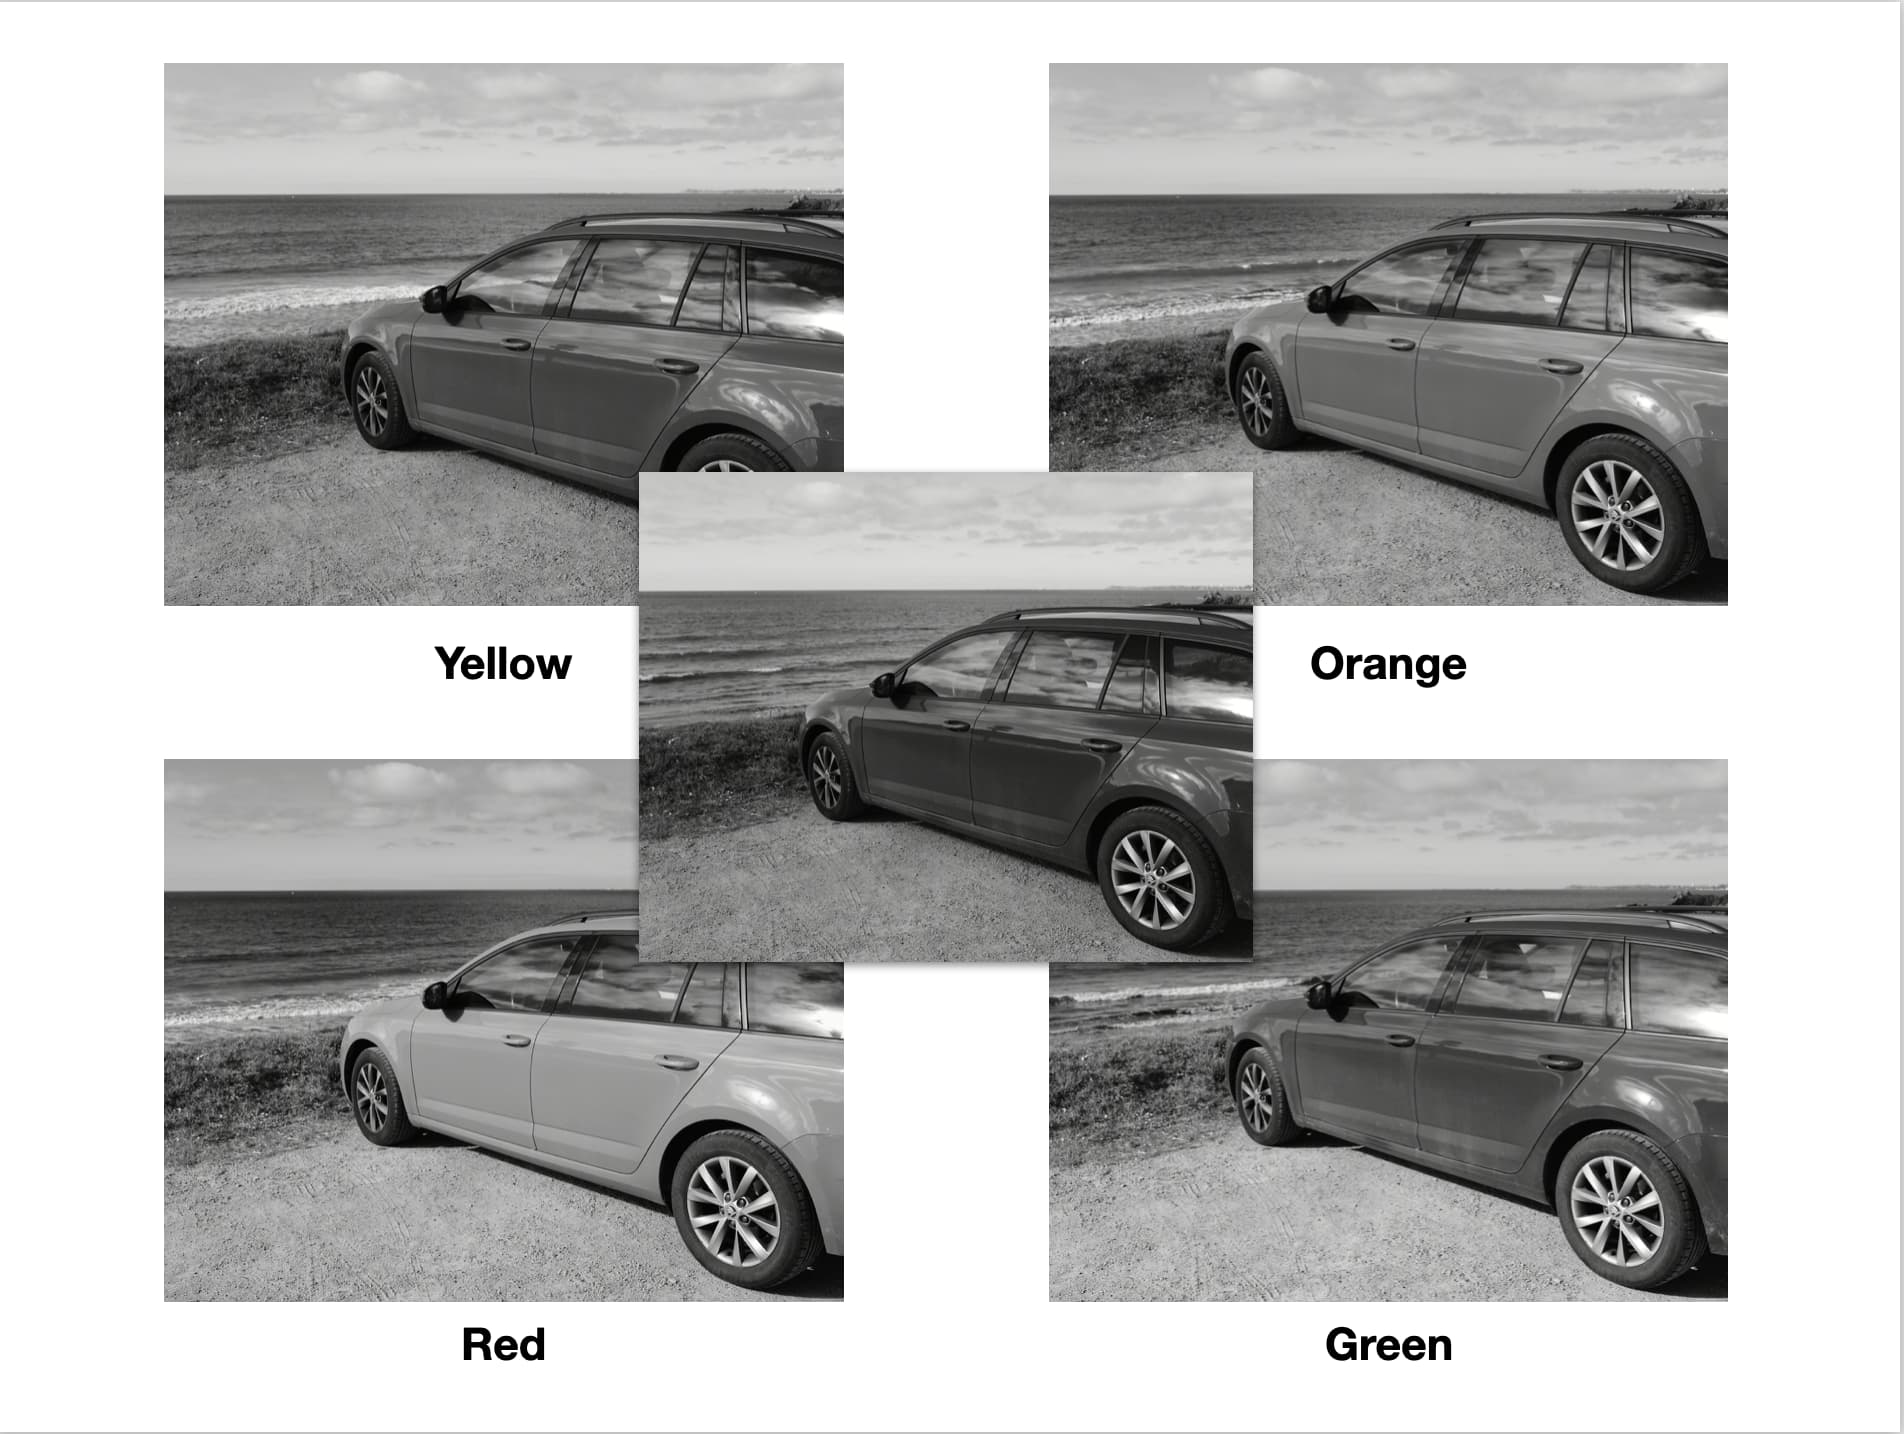
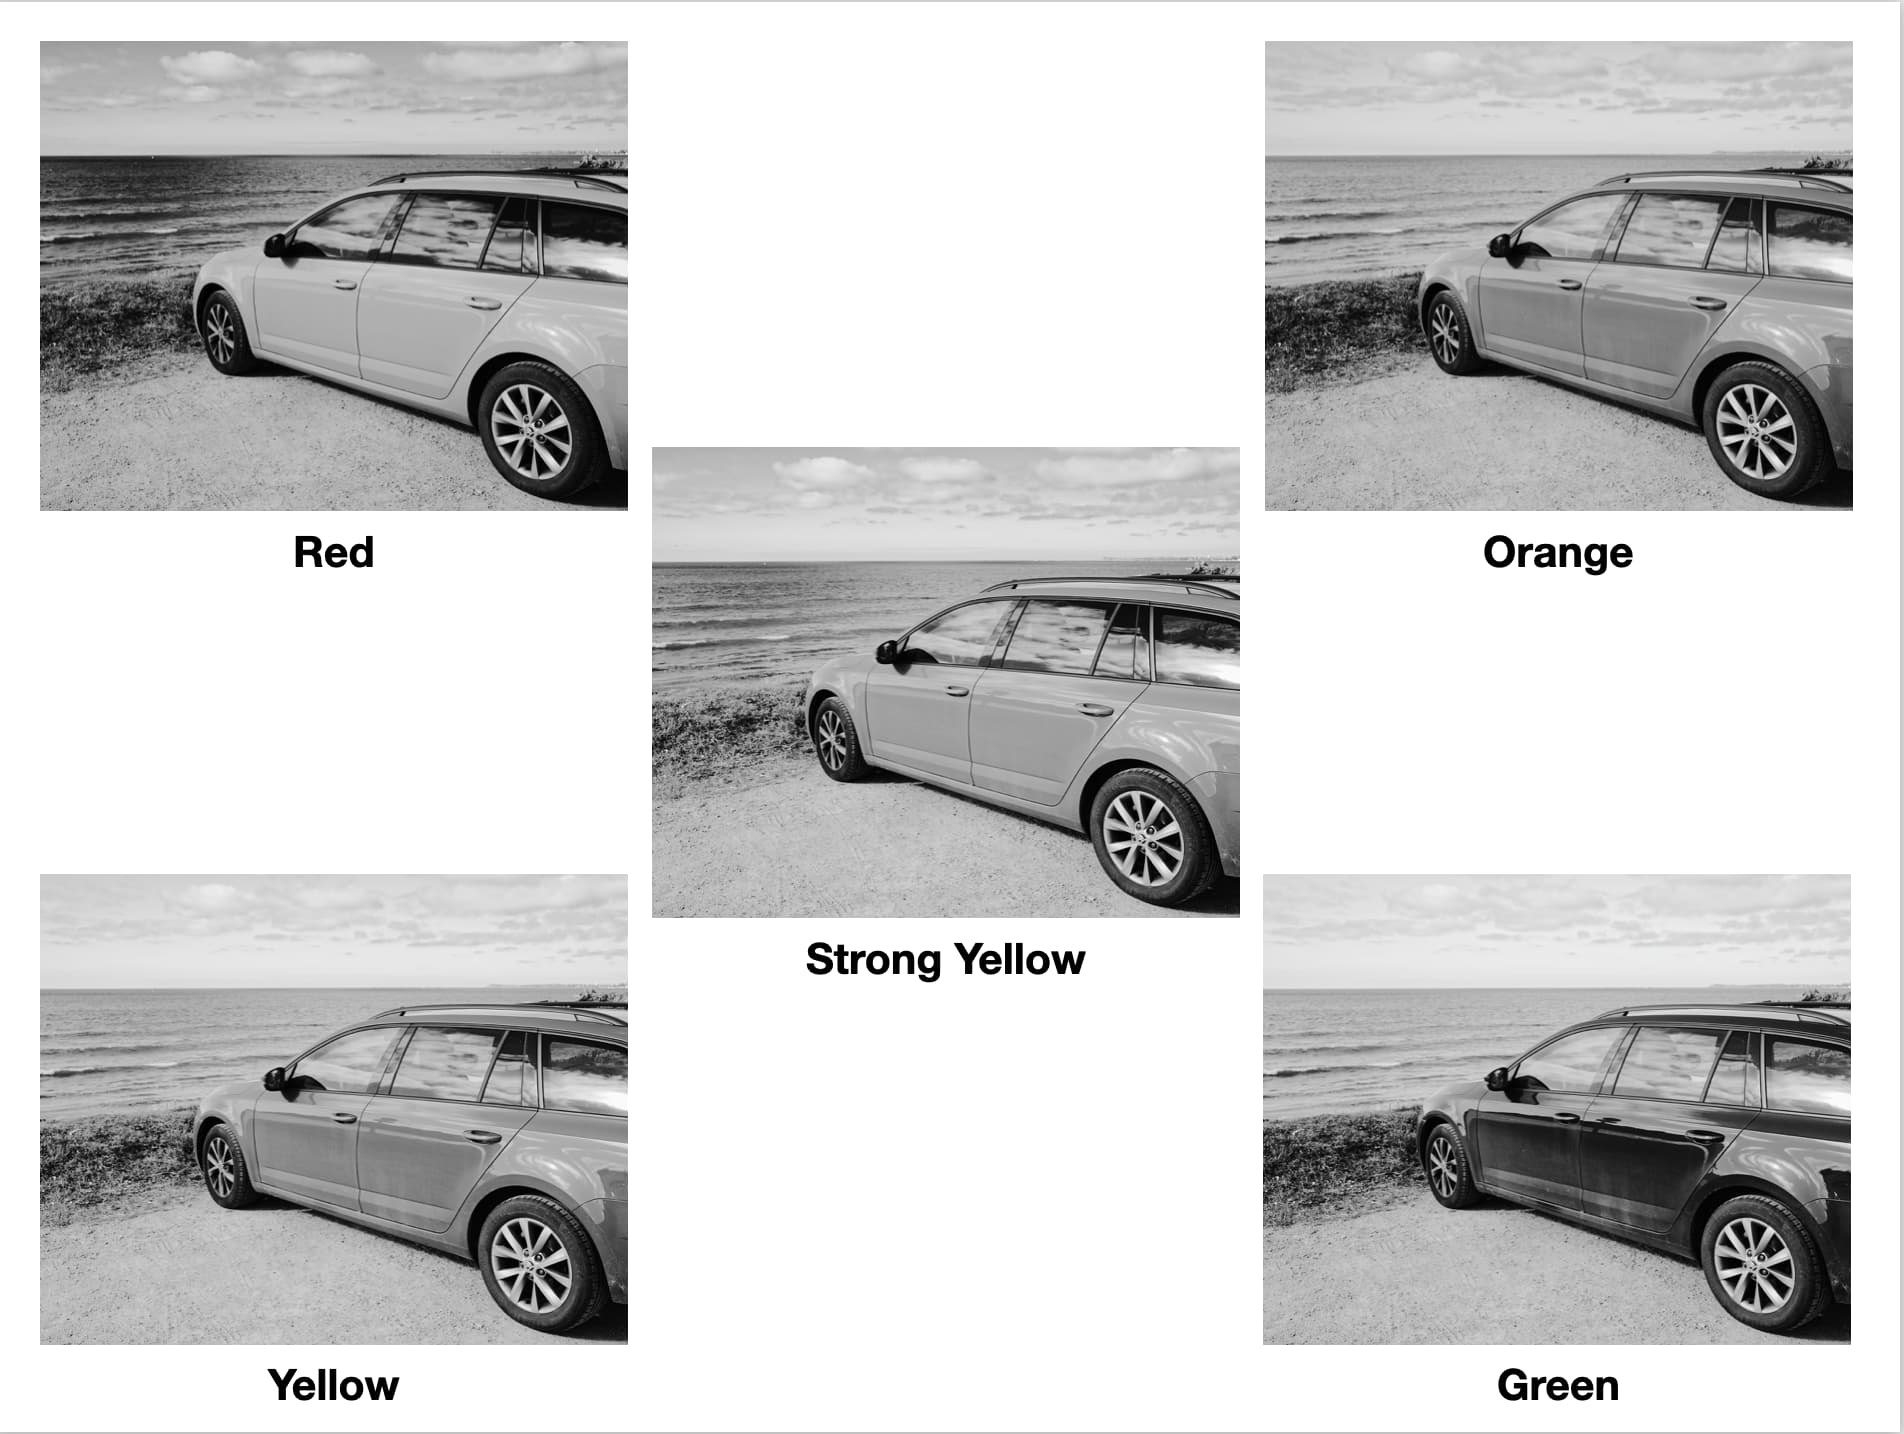
Take a look at the difference in rendering between in-camera JPEG, physical and FilmPack from my lecture slides. The in-camera filters are no use at all as their effect is totally different from the other two.
Oh, and don’t forget to find out if you need to apply a filter factor to the exposure for the in-camera filters
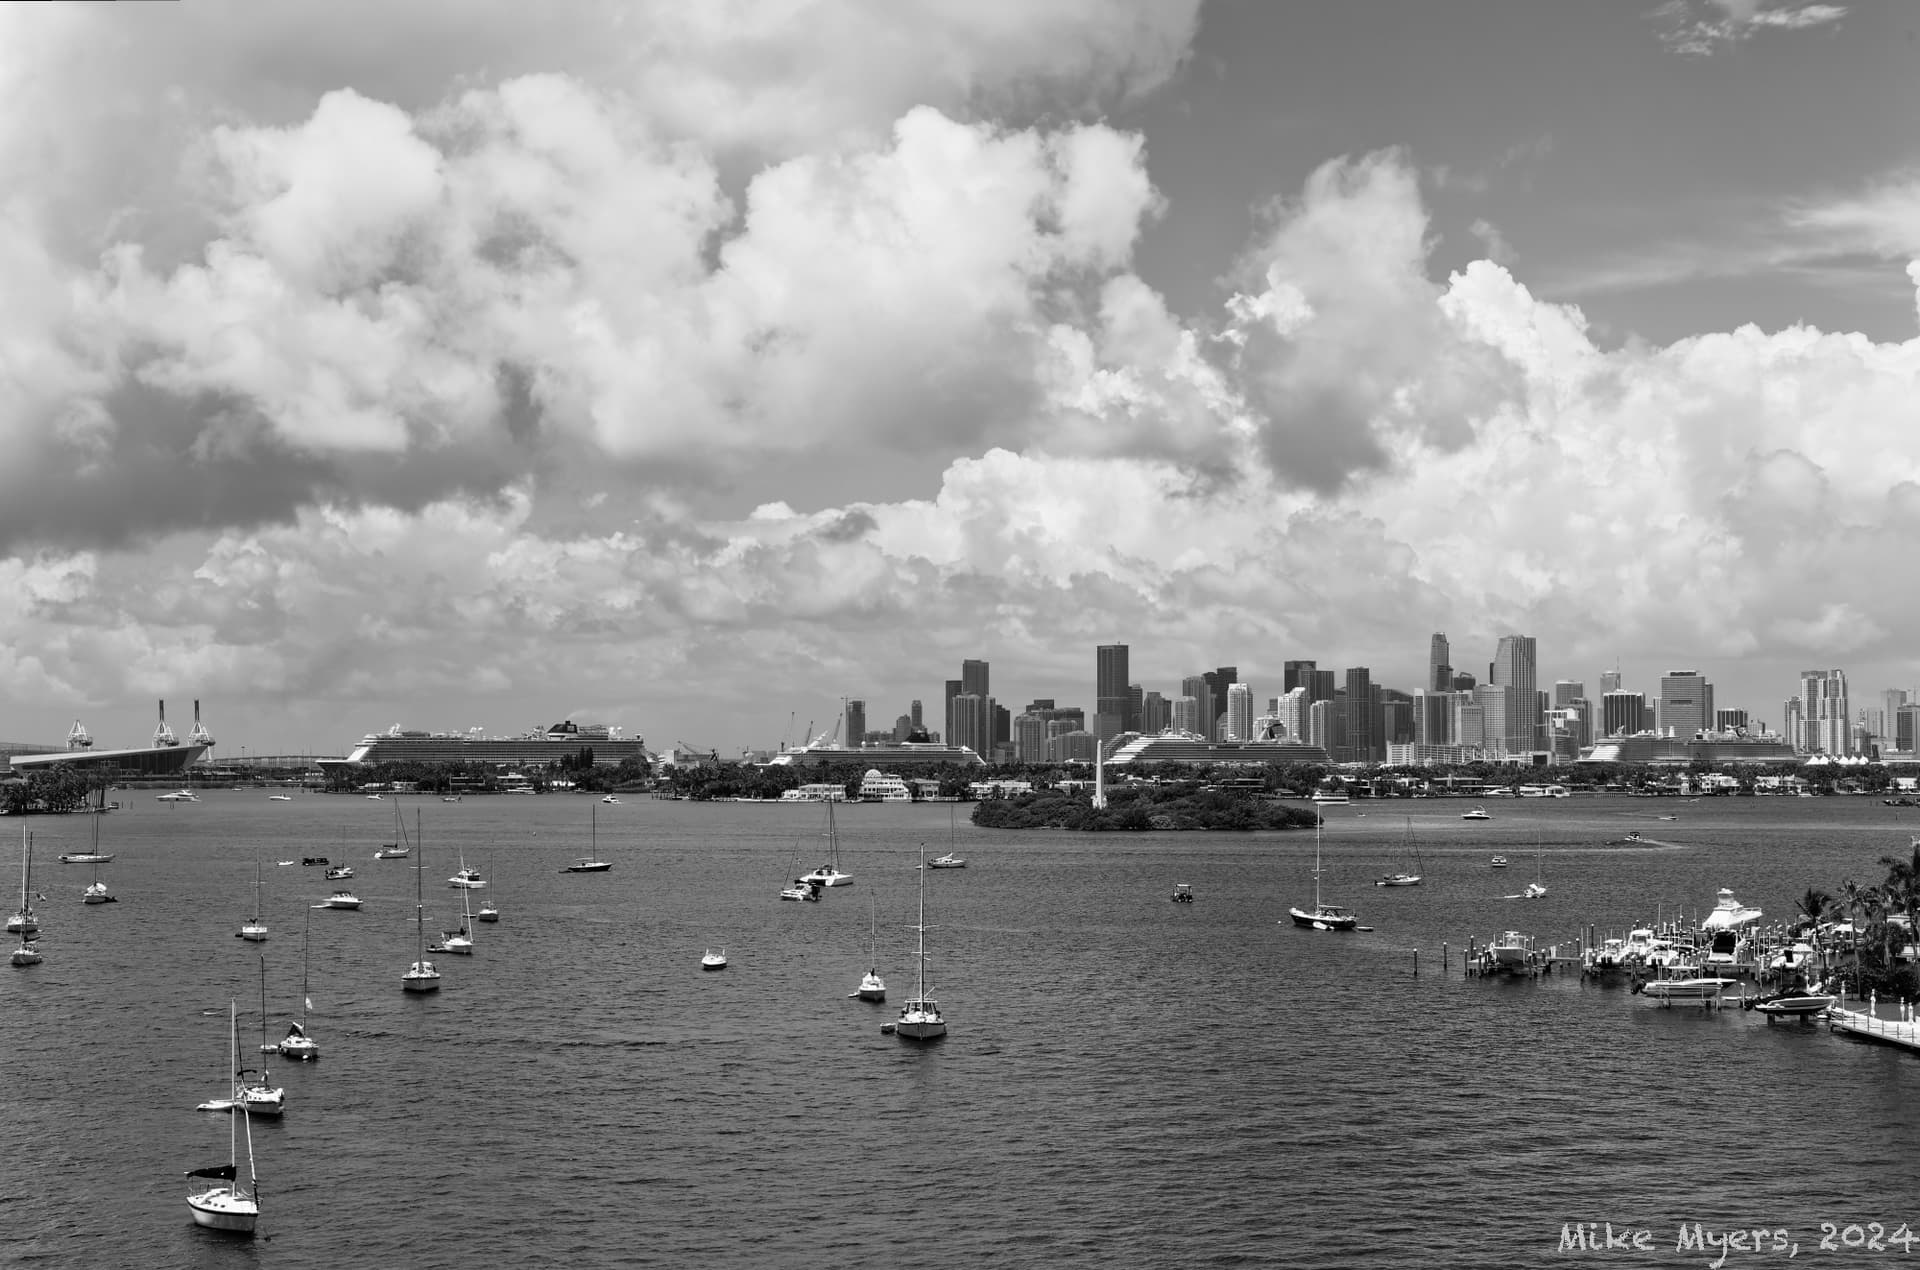
Well, it’s only a “test image”, nothing spectacular, but here’s how it turned out.
I added a graduated filter, and I also increased the “Filter Density” to 115%.
Not much else.
I’m working with my raw file, and changing the settings based on what I’ve learned today.
I’m pleased with the results.
Maybe there are additional settings I’m not (yet) aware of.
There are other things I also need to think about, but my goal was the sky, adjusted by the red filter.
To @Joanna - based on how much more you know and understand these things, is this an acceptable B&W result? I may think so, but I trust you far more than I trust myself.
Channel mixer does not change greys. Unlike HSL, it is applied before B&W rendering, so you can use it like a film filter, but it leaves greys unmodified.
Why? It is the job of the red filter to darken the blue of the sky, not a luminosity control, which will also darken the brightness of the clouds and reduce the impact of the contrast between them.
But adding the Picture Control red filter did absolutely nothing because that only affects JPEG files. Go to your camera menus and turn it off before you forget.
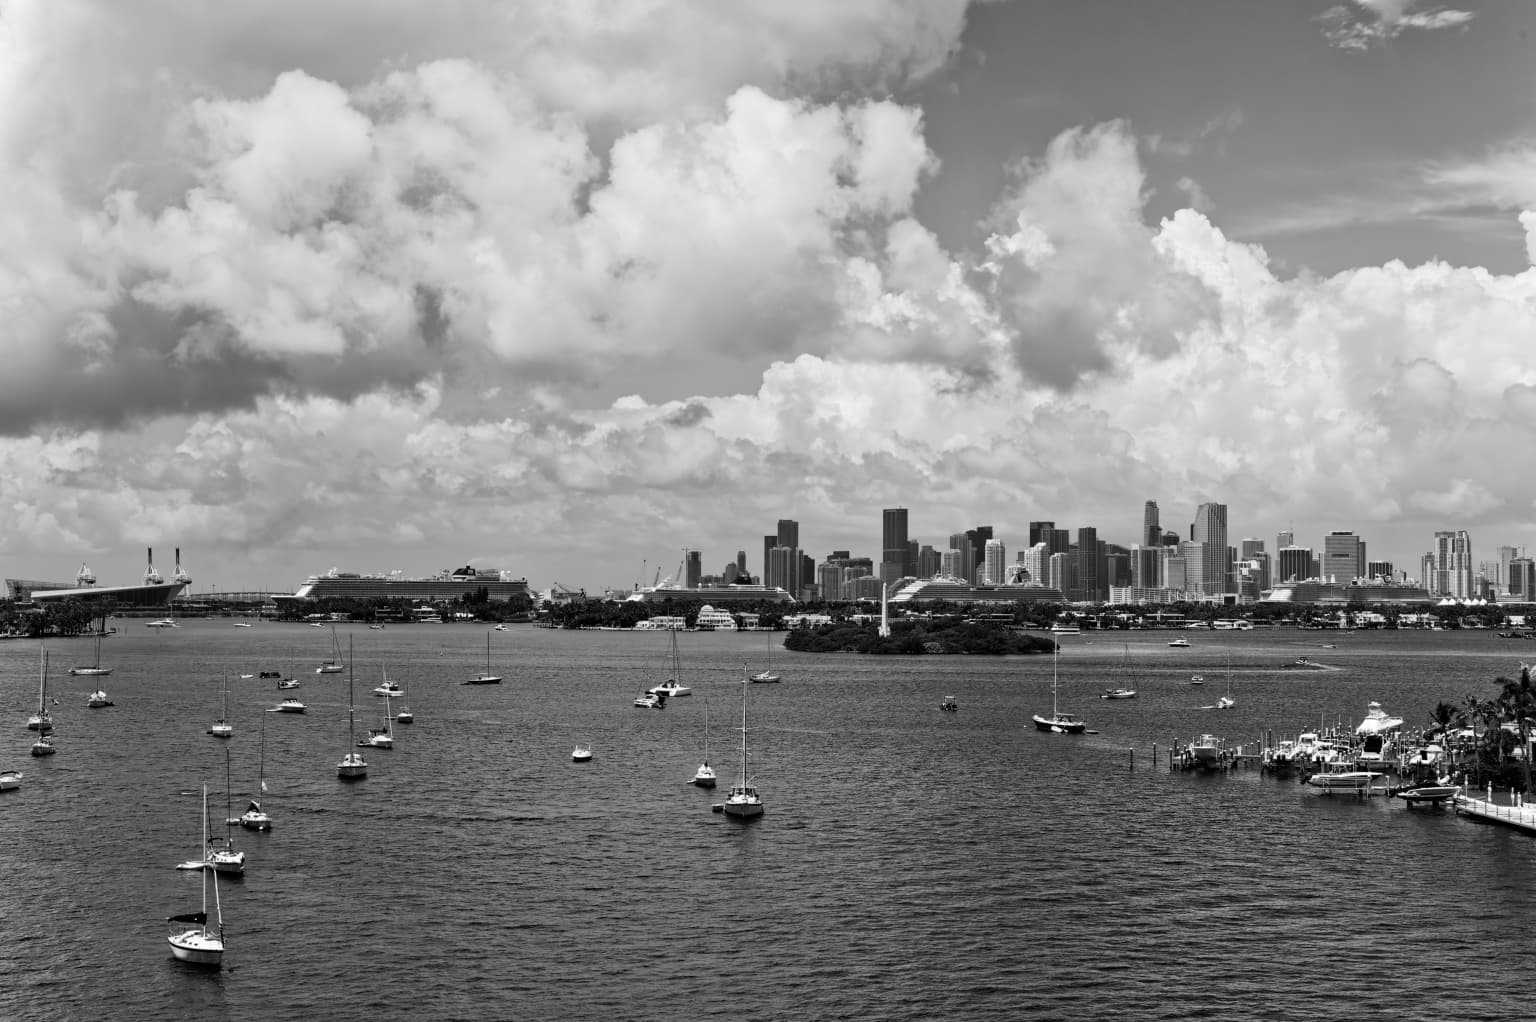
It’s a tad flat but not too bad. What helps is setting the white balance, to neutralise the overall blue haze, before converting to B&W.
It is now turned off, but until now, while I knew it would have no effect on the RAW image, I thought it would show up as an effect on my rear screen as I was viewing my image about to or after, I captured the image.
OK, none of this stuff has any effect on the raw image, but the settings and changes I made in PhotoLab are what leads to the final image I will save, before exporting. (I hope you agree with at least this?)
I think I’m done for today - too hot outside, and too cloudy. I will try for a real photo tomorrow, Monday, not just looking out from my balcony and taking a test photo.
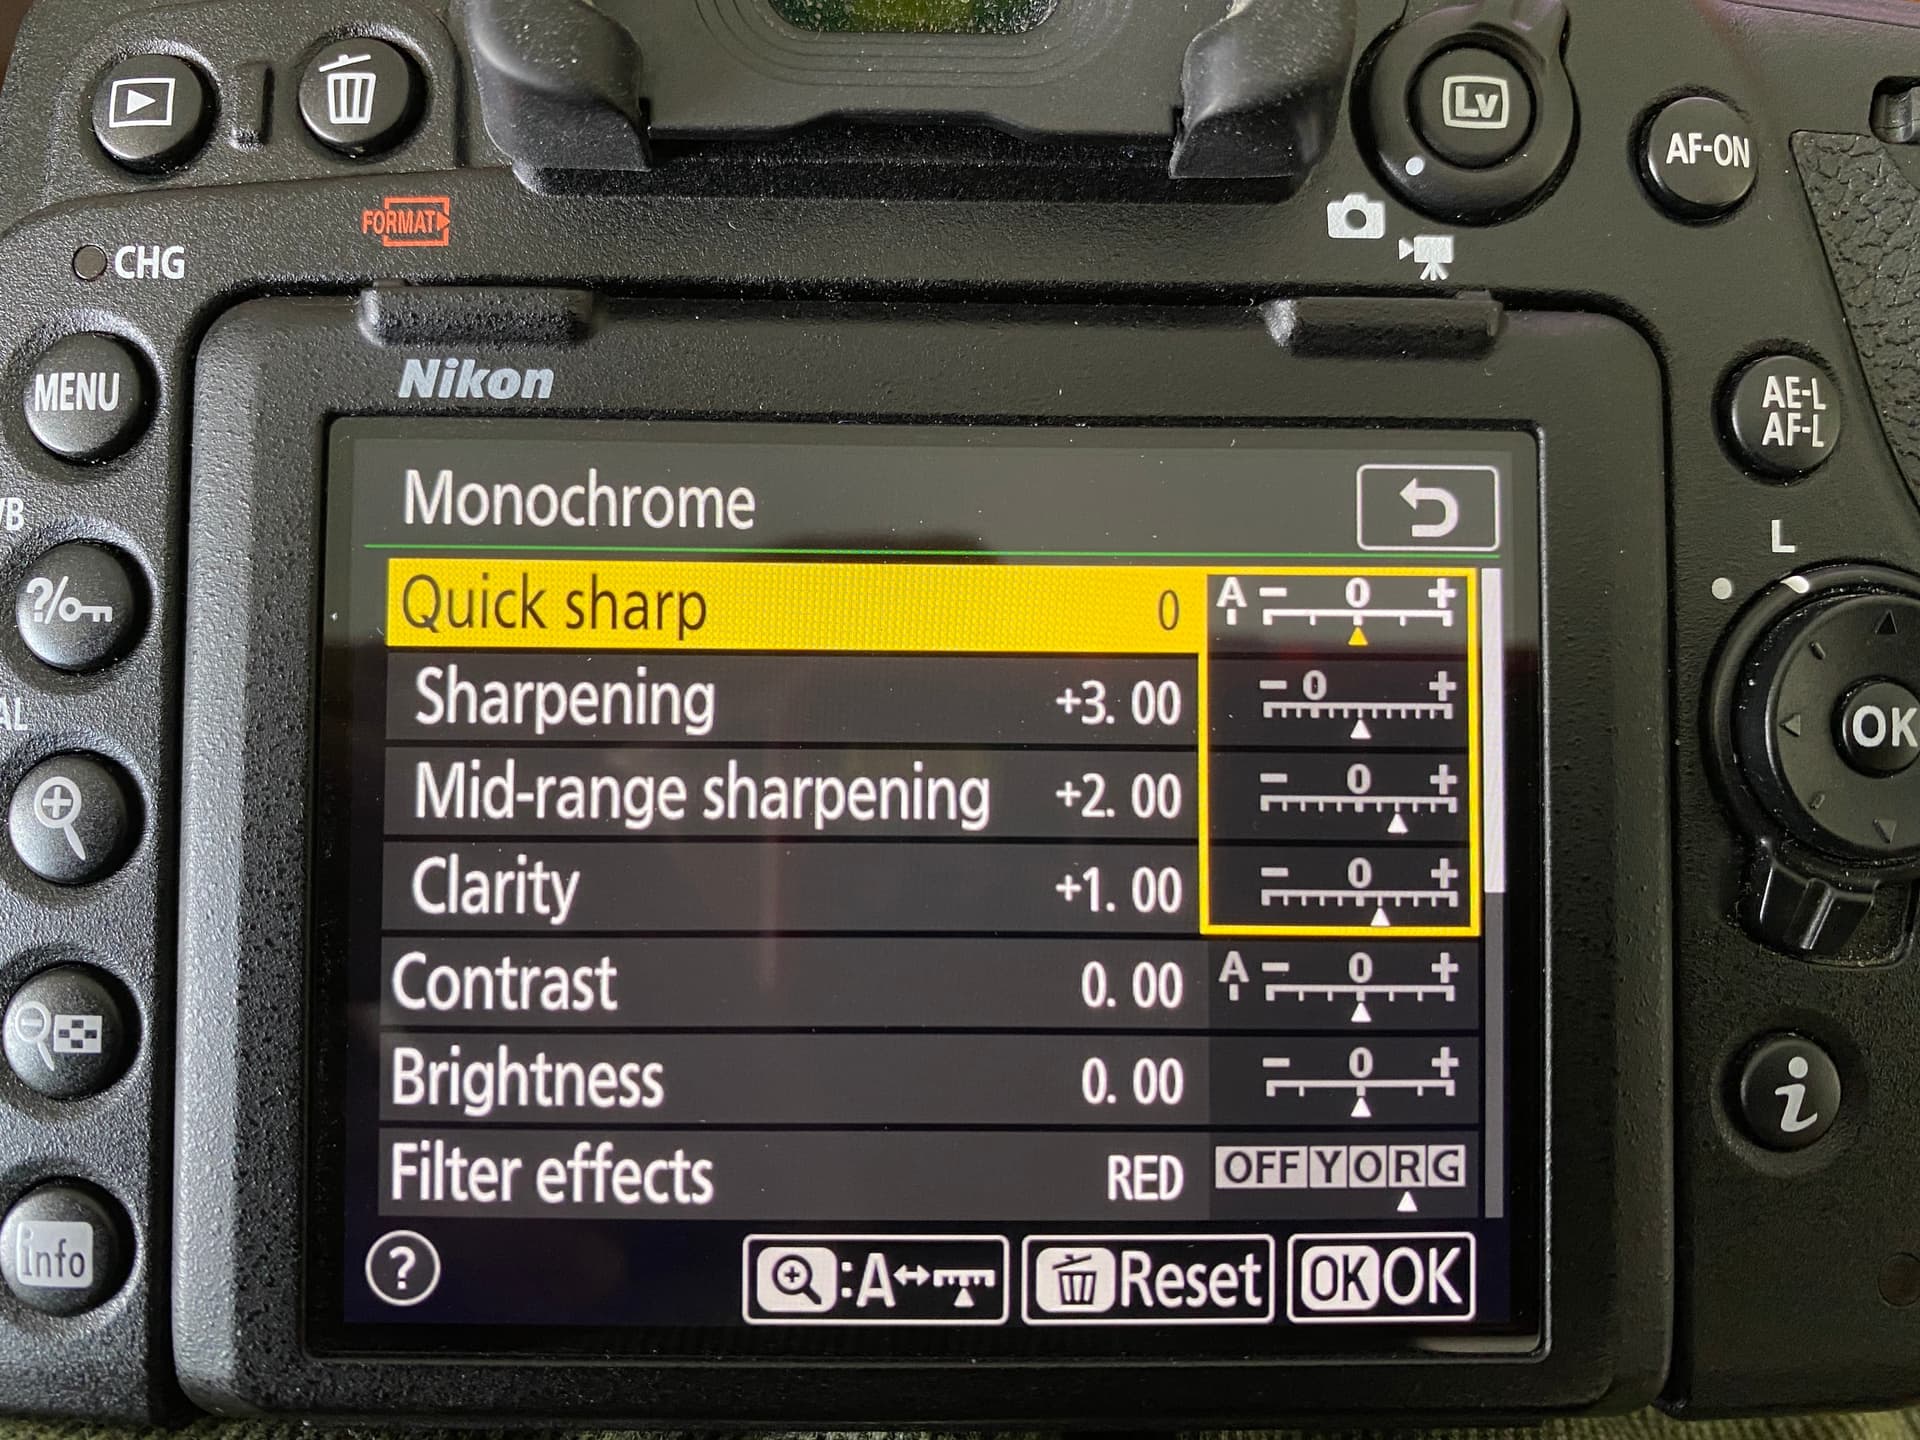
Well, having gone this far, here is a photo of my rear screen, just before I changed “Filter Effects” to “OFF”.
I don’t recall why I have the other settings as shown, but I assumed all of this was to show me what a jpg image would look like, and what the sharpening effects might be. I have never gone to this menu before - never knew why it existed.
What I don’t understand now, is why (assuming these controls will affect what I see on my rear screen) I don’t want to turn on the red filter when appropriate.
Do you mean with grey monochrome jpg’s?
When adding a B/W preset to a RAW image I’ve a grey image, B/W. That reacts on the channel mixer. But when I export that image as JPG and load that JPG the image doesn’t react on the channel mixer. So my conclusion is that it works only on the RAW data.
The same for the HSL channel mixer.
I did some more playing with a monochrome JPG.
Changing the color temperature is odd too. Moving the slider to the right does change the luminance but keeps the ratio between the channels, meaning even. Moving the slider to the left does change the ratio between the channels.
As I understand things, when I take pictures intended for B&W use, I will capture them on one of my cameras, load into PhotoMechanic, which sends them to my photos folders on my computer, then when editing start by converting to B&W as described earlier.
I should have written “my D780 is ready to let me view potential photos in B&W, and to then create RAW images that DxO will let me change them into beautiful B&W photos - IF I do my part well.”
This afternoon:
I went walking along Lincoln Road two hours ago, I have around 50 lovely images left in PhotoMechanic (shows B&W) after deleting poor images, and I need to pick a favorite to convert to B&W.
(Is there a way to batch convert them all to B&W images in PhotoLab, so I can select my favorites? They will likely require a lot of fine tuning… If not, I need to judge my favorites in color.)