Visible Posterization in PL8, in Bokeh Areas

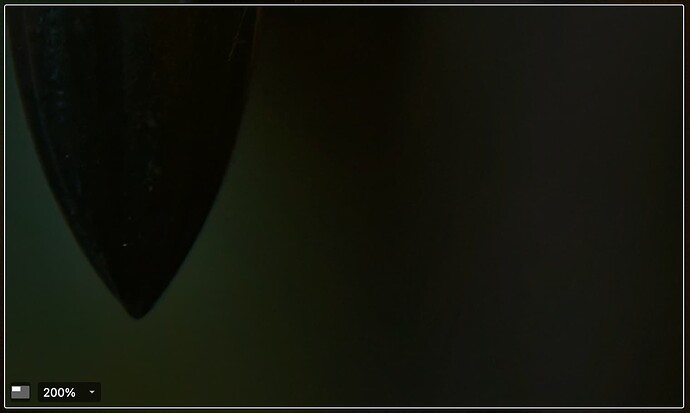
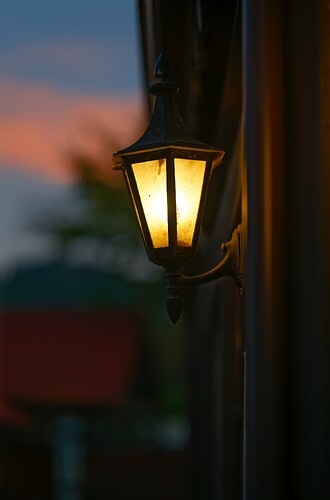
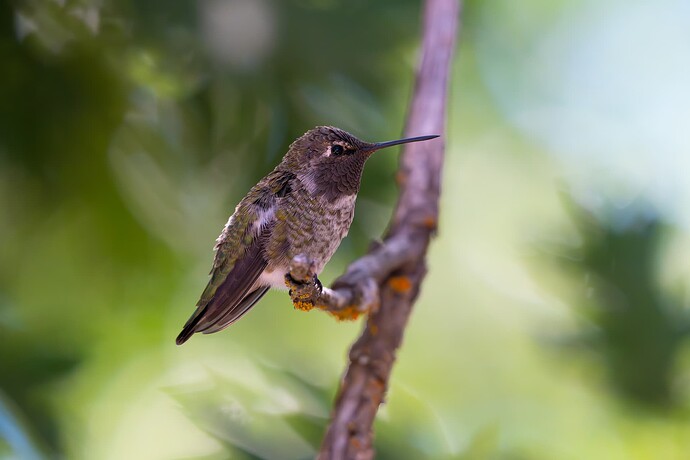
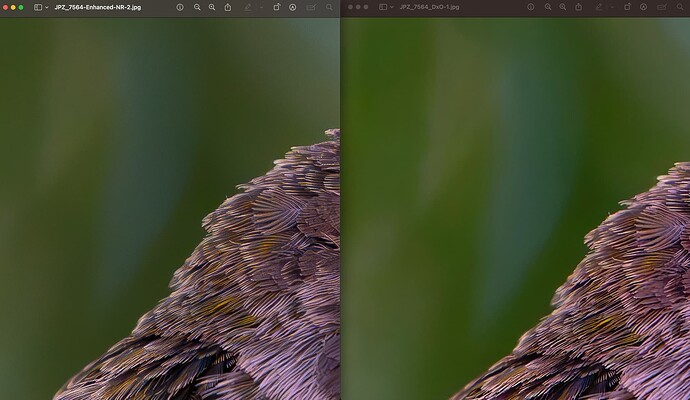
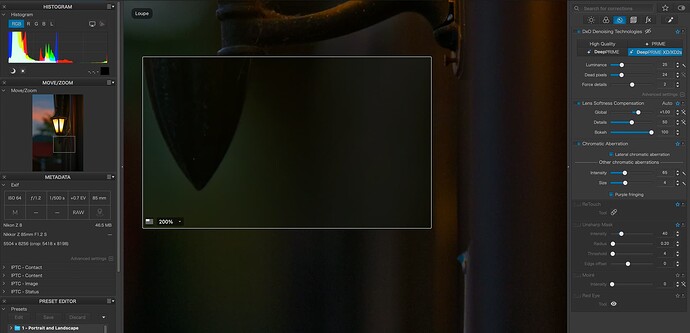
I’m seeing some ugly posterization in bokeh color transition areas where shadows have been raised slightly. Is there some way to fix this? I’ve tried using noise reduction to get a handle on it, but that doesn’t really work. Here’s a screenshot sample:

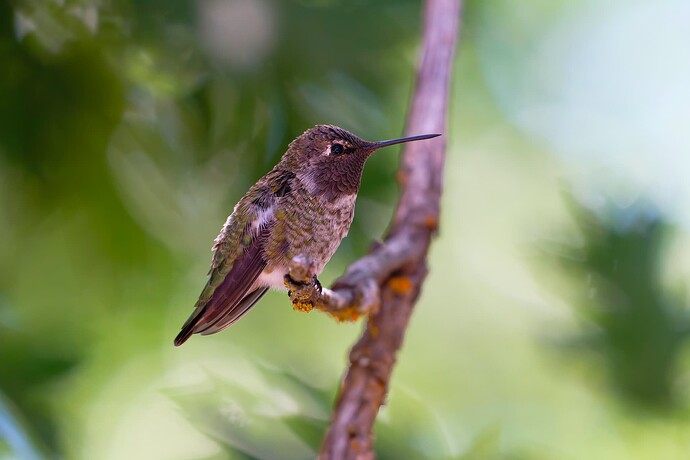
Here you can see that I didn’t lift the shadows very much at all:

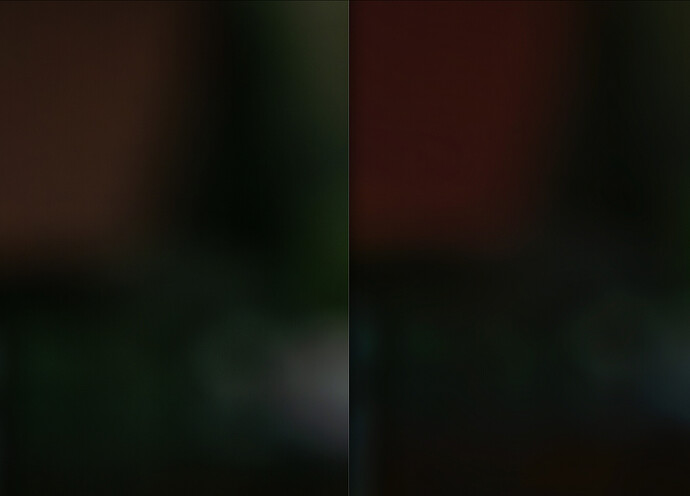
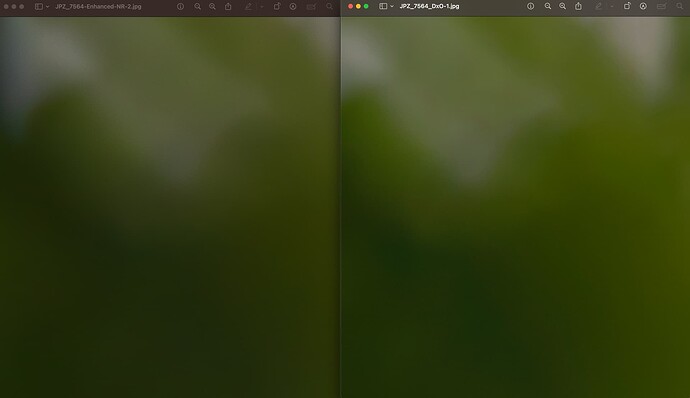
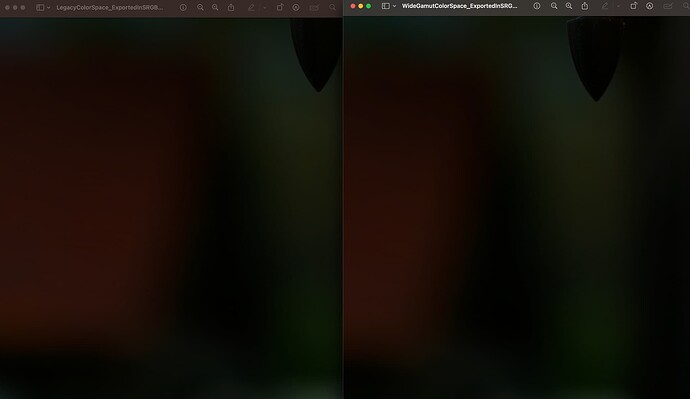
Here’s a comparison to the latest Lightroom Classic (left) vs PL8 (right). Not too much better of a result, but slight improvement.

1 Like
  1. Maybe try to go down with microcontrast, even down to -40 or so. Probably you have FP license, so you may try to diminish fine contrast shadows too, and perhaps counteract slightly to strongly negative microcontrast with some fine midtones corrections, until you get some kind of balance (keep an eye on bokeh, sometimes I go down to deep negative values with both microcontrast and midtones fine contrast to calm it down, but you don’t have to worry too much about it in this example).
  2. The other way, which would be in my spirit, is to drown the deep shadows in blacks, but perhaps you like all those dark details…
  3. Yet another thing to try is to set XD2S ‘Force details’ to something negative.
  4. Also ‘Lens Softness Correction’ may cause some posterization in deep shadows. Try to use something between -1.50 and 0.00, rather than the default 1.0. And I don’t suspect you used Unsharp Mask :wink:

The LR version is washed out, so if you increase vibrancy or saturation to match the PL rendering, you’ll probably get similar result. There should be no miracles here – in my practice I get usually quite harsh tonal transitions with LR, compared to PL. Maybe you used Adobe DCP Z8 for rendering? Never tried it in PL, but with my D700 DCPs (v4) or D4, I had rather bad experience with LR and color tonal transitions for portraits. I would switch to NX Studio in such cases.

Still, this is about very deep shadows and you have to look carefully for the faults to find them. Most people will not notice them. I would call it posterization, rather than banding. I think the Z85/1.2S wasn’t meant to be inspected closely under a microscope or at the borders. I see it as a low-light concerts tool. Personally I use Z8/Plena, but I keep an eye on 85/1.2. Just considering… BTW, very simple photo with a climate, something what I like. Happy testing.

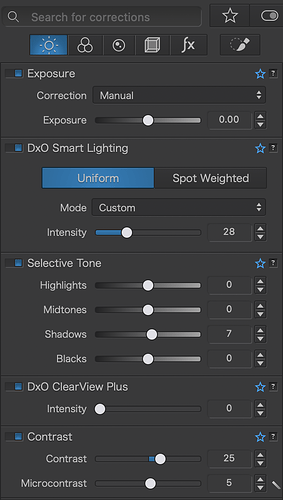
EDIT: I’ve just noticed that you used SmartLighting global default at 28. Even with low values, SL can bring out a lot of noise from shadows (and Z8 downscaled is quite noisy compared to D780, I think), so try to balance it with Selective Tones or, as a last resort, make tonal adjustments using Tone Curve (which finally got usable in the low tones). Sharing the RAW would make it easier, but that’s at your wish.

1 Like

A few long shot suggestions: You might try adjusting the noise model in the noise reduction options (“force details”). Or raising the “Protect saturated colors” Intensity slider in Color Rendering. Or try adjusting the “Preserve color details” slider in Soft Proofing. Then there’s the HSL adjustment “Uniformity” which might help as a global or local adjustment.

Unfortunately, as we’ve seen, the way PhotoLab demosaics and reduces noise (HQ and all PRIME modes) is susceptible to posterization in fairly uniform but noisy deep-shadow regions. DxO have known about the problem for years but haven’t solved it yet. They’ve made a lot of related improvements along the way, though. For what it’s worth, other denoising-from-RAW applications I’ve tried are better at avoiding posterization but much worse at smoothing out noise while preserving fine detail.

But OP was using DPXD2s with Luminance=25, Force Details=2.

Off-topic: I’m new to PL, so I’m a bit intrigued by your statement about HQ or PRIME posterization. May you share a link? Personally, I haven’t used PRIME or HQ , except for a single case of maze removal, where DPxx wasn’t up to the job in PL7.

I said “HQ and all PRIME modes” - not HQ and PRIME. In other words, every denoise mode from HQ to DeepPRIME XD2s.

I started reporting this to DxO with examples years ago, and have repeated the test with every release up to PL8. A few others have noticed similar artifacts during beta testing and perhaps on other occasions, but I don’t think you’ll find much about it in this public forum or elsewhere online.

The lens is superb. I’ve been enjoying shooting just about anything and everything with it. The posterization happens with other photos as well when I look closely, I just try not to let it bother me. At f/1.2 there’s so much more smooth bokeh everywhere, the lack of busyness makes it more apparent when backgrounds are so blown out.

Well, I think Lightroom just caught up to DxO PL8’s DeepPRIME XD2s. The posterization is also eliminated in Adobe Lightroom’s AI denoise.

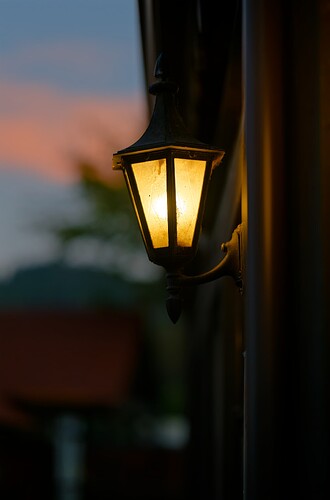
File processed via Lightroom Classic:

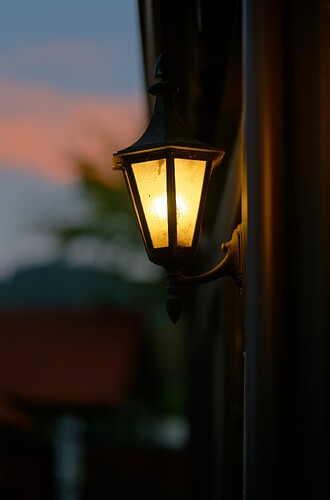
File processed via DxO PL8:

The LR version is washed out, so if you increase vibrancy or saturation to match the PL rendering, you’ll probably get similar result (?). Otherwise it’s comparing apples and oranges…
EDIT: Apart from saturation, there are differences in tone curve. Additionally, distortion corrections were probably applied in DxO version only.

Both versions have some small demosaicing artifacts, though.

Result is similar whether the vibrance or saturation is turned up or down. I’ve also tried to apply as little noise reduction as possible in PL8, and still got posterization in these areas. I’m really hoping DxO can work on eliminating this. Don’t get me wrong, I think it’s a great software and I’ve used it for many years now. I find Lightroom to be a clunkier user experience, so it’s not like I want to switch, but when it comes to photos where there is a lot of out-of-focus background like this, I’m going to have to use Lightroom Classic to avoid the posterization effects.

Edit to add; I started a thread on dpreview that has a few examples from both software and you can view the 200% in much better quality (click “original size” link under each image for full view) here: Quick Comparison Between Updated Lightroom Classic AI De-noise & PhotoLab 8 DeepPRIME XD2s

Well, the first photo in OP was taken at ISO 64, so it’s more about demosaicing comparison. Use ISO in the 6400-25k range on Z8 to make meaningful comparison.

I’ve already seen your examples with birds at dpreview. Shadows in PL are pulled up much more than in LR, so hard to compare anything.

Actually it’s the reverse. I feel like I have to push the exposure, shadows and darks in Lightroom a lot more to get comparable results in PL8.

Oops, sorry for my English. By “lulled up” I meant increased.

Note that export to jpegs may also bring some harsh tonal transitions, depending on settings.

We can try to defend these artifacts in PL8 if we want, but the truth is that Adobe figured out a way to soften the out-of-focus areas in their denoising process and eliminated such artifacts. I can turn up the saturation in Lightroom and still won’t get the level of posterization in JPEGs that I’m currently getting in PL8.

The good news is that most photos don’t have this issue, but that percentage that does, it bothers me.

I didn’t defend them, just argued about the quality of your comparison.

Well, for ME it’s YOUR truth :slight_smile:
Over.

I have downloaded the original jpegs from dpreview forum (no raws there too). The DxO forum server preprocesses the jpegs too heavily… With original jpegs, the problem is more evident.

UPDATE: Re-edited completely comments on photo #1 after some tests at home.

Photo #1:
This photo is of HDR type, with all the problems it brings. Quite extreme case, it seems.

To summarize, the posterization problem is probably due to PL deep shadow recovery artifacts, observed in some extreme cases. The XD2s role is auxiliary, since these artifacts happen only on certain type of “clean” images.

PL: Posterization near the upper corner of the red roof and in the greenish area below the lamp.
LR: Washed out colors compared to PL (e.g. for some red roof areas, the S of HSV coordinates is about 60, while in PL it’s 80+), green-magenta artifacts, e.g. in the “white” areas at the bottom.

So, both images suffer from different artifacts, with LR version perhaps less annoying. I don’t use LR anymore, so I’ll write about the PL version only. The affected parts were probably in very deep shadows, which had to be recovered, while trying to preserve highlights. This was probably done using SmartLighting strong recovery and maybe high Blacks in Selective Tones settings. Both methods correct individual pixels taking into account quite large neighborhoods, adding varying amount of microcontrast (yes, Selective Tones are NOT only about global tonal curve). In some extreme cases, when strong image frequency component “resonates” with the length of microcontrast fall-off, this may produce the “see-saw posterization” seen. If the input is noisy, other image frequencies may prevail and there is less see-saw effect, if any. This is why XD2s may expose these shadow recovery artifacts more strongly than DP or HQ. And the noise is there even at the base ISO, since the deepest shadows had to be recovered probably by 5EV or maybe even 8EV (?). It seems that LR at given settings did shadow recovery, less aggresively avoiding the “HDR look”, hence the result looks more flat and lacks saturation, while not producing the see-saw.

I was able to reproduce this type of posterization just with Blacks=+100 and XD2s default settings on few photos, provided there was some specific frequency pattern in the deepest shadows (shown black in unedited image) and the ISO wasn’t too high. For ISO 20k/Z8 there was enough noise left by XD2s for the artifacts NOT to appear, but that observation is based only on few examples. As a general rule of thumb try: for deep shadow recovery, use SmartLighting rather than high Black Selective Tone values. The latter produces posterization artifacts more easily, it seems from my home tests.

For full analysis, one would have to work using RAW data and consider also given camera noise characteristics around the black level, ADC linearity, possible differences in gamma correction, rounding errors, etc. It’s a topic for DxO image engineering, not the amateurs like me.

Side remarks on photo #1:
The Lightroom version looks like it was denoised with traditional method – reminds me of LR5.7 (similar artifacts). Or, maybe new LR denoise switches to old method for low ISO?. Did you use Adobe DCP camera profiles in PL? I had some bad experience with them on D700 and to a lesser degree on D4 – they could cause harsh transitions for certain colors.

Photo #2:
The bokeh on the second PL photo was busier than in LR version because of differences in various settings. I was able to get slightly softer look in PL than in LR just with Selective Tones and Microcontrast sliders, but still preserving the bird. The difference was rather small, but I was working on jpeg. After desaturating a little, to match the LR version, it looked even better. In PL, the heaviest impact on bokeh have microcontrast, fine contrast, and ClearVision settings (plus global tones). The LR version has a lot of luma noise in the background, but still quite pleasant, and looks a bit oversharpened to my taste. There is difference in distortion correction and perhaps in CA settings, which could also play role in details. Using some settings you can easily make whichever version you choose to look better than the other, like you can see in many marketing videos. To put it short: there were too many differences in processing to make any credible conclusions.

Both PL jpegs were exported in Wide Gamut, which was noted already in dpreview retouching forum. You never know what other photo viewers or web servers may “invent” in this case. It’s safer to export jpegs in sRGB, and it’s just not fair to compare with photos exported in sRGB, like your LR versions.

If you expect some further help, please post the raw files, the DOPs, and export settings. Or, you may open a case at DxO and send them raws. I think they will be interested in the first one.

Last update: Oct 18 (rewrite on photo #1).
2 Likes

After reading your post, I decided to export the images in sRGB. I changed the color space to “Legacy” to see if this makes any difference. I then tried to export the “Wide Gamut” color space in sRGB.

Although the banding loses the colorful transitions, the banded transitions remain. I tried to apply less and more DeepPRIME XD2s. This didn’t change the outcome in any favorable way.

I tried not to use any DXO Smart Lighting to raise the shadows, and raised the shadow slider only to try to match the outcome. That didn’t help either. The results are still inferior to Lightroom Classic’s AI denoise. I’m not saying Lightroom is perfect, but it does do a better job with these gradient transitions regardless of how much or how little saturation is added.

I want better results from DxO PL8, because I prefer it for the color renditions in general, but I do not like what it’s doing to some of these photos. If there’s an easy work-around, I’m all ears, but if it requires an extra five minutes per photo, then I’d rather use Lightroom.

I’ve just had a brainwave. A couple of years ago, there was a discussion on the pitfalls of the selective tonality sliders. Somewhere there is an example screenshot of “steps” in tonality produced by the selective tonality sliders.

I’ll see if I can dig it up but, in the meantime, have a play with replacing the sliders with a tone curve

Thanks for looking into it.

I think basically I may be asking too much of these software. :sweat_smile: I’ve been spoiled, but I still hope that little improvements can be made over time and over future generations.

My point was that the problem is probably with using high values of Selective Tone Blacks or SmartLighting for deep shadow recovery. Denoising just makes it (more) visible – the better denoising, the worse posterization. These two settings are very far from individual pixel value mapping, like tone curve does. They both may add huge amount of local microcontrast in the deepest shadows for “low frequency” image, e.g. strongly denoised, lacking small details. Mostly it gives pleasing results, but in extreme cases it may cause posterization. The problem seems to be more easily reproduced using the Blacks slider, rather than SmartLighting Intensity, but that may depend on particular photo (?). Maybe there are differences in gamma curves for low tones but it wouldn’t bring the posterization problem (just amplify it a bit), I guess.

Personally, I’ve used positive Blacks value maybe only twice, so I never run into this problem. I rarely take HDR type of photos, like in your example. Don’t know how extreme it was without seeing a raw, though.

Please post the RAW and the DOP files (after all you posted jpeg with full EXIF on dpreview forum). It would be interesting to see the LR settings too. Otherwise the discussion becomes void. It seems to me, that the problem really requires some DxO attention, and if you like PL edits for some photos, please help them.

I would be interested in that too.

Please find attached jpegs generated from 8-bit RGB TIFFs containing rectangles with constant grey values in 4 and 8 steps in the 8-bit scale. Those with Blacks100 in name had Selective Tone Blacks=+100, the other two had no edits. On unedited ones you can experience Mach bands illusion (Mach bands - Wikipedia), the edited ones have the effect amplified by using Blacks=100 - the rectangles with constant values now have them heavily variable. Note that in “true life” photo, the effect of applying Blacks is much more complicated – this is to get some idea.

If I find time, I’ll prepare 16-bit TIFFs for deep shadows only, to show the difference there.