I’ve just found my post on selective tone artefacts…
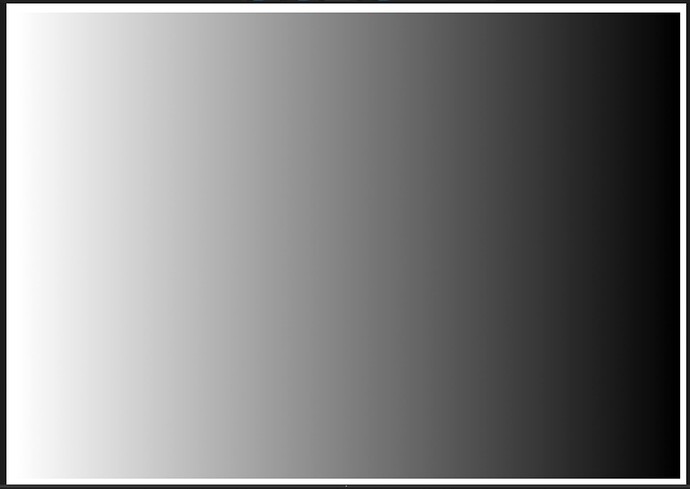
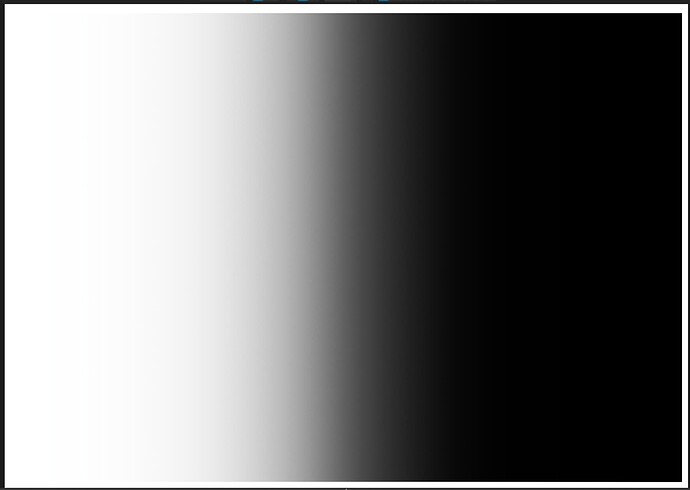
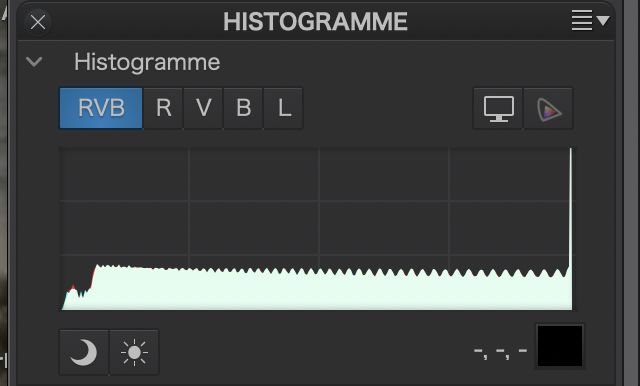
For your interest, I created an image in Affinity Photo that is a simple gradient…
The histogram shows a series of small “teeth”, which, to me, indicates that the gradient has “notches” of varying luminance.
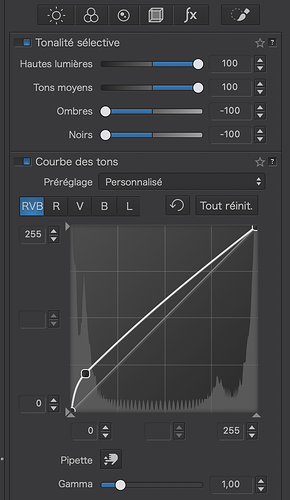
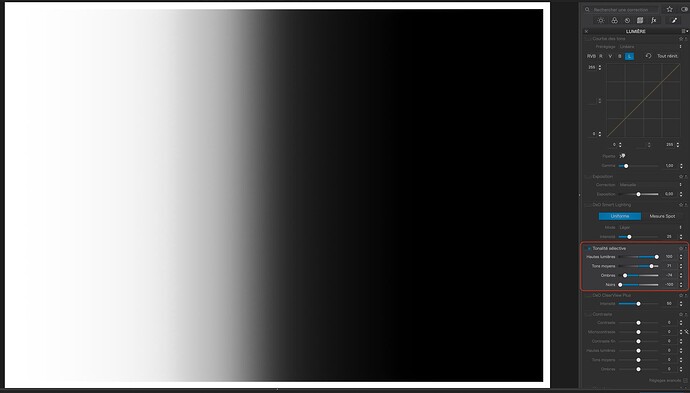
Then I adjusted the four Selective Tonality sliders and created a Tone Curve to increase the contrast…
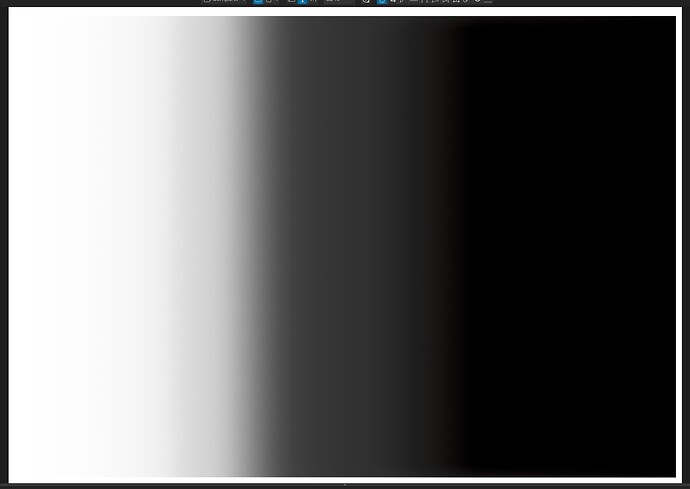
The result is…
… where you can start to see banding appearing, due to the Selective Tonality.
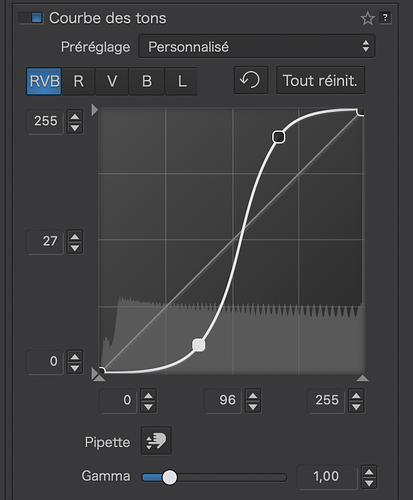
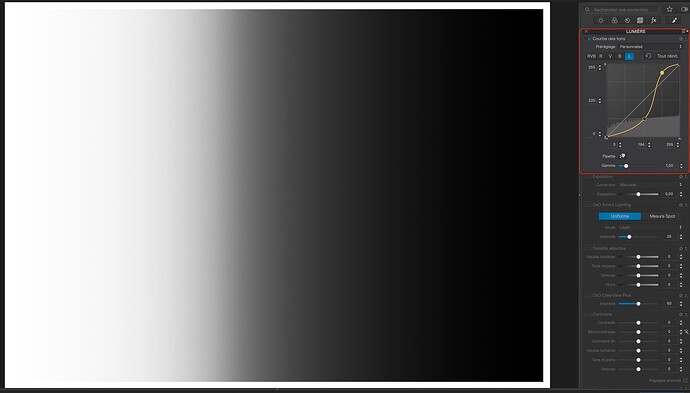
Whereas, if I only use the Tone Curve, with a gentle lead in at both ends…
The banding is a lot less obvious…
All this to say that I rarely use Selective Tonality because of this problem, which can, effectively, “sharpen” the transitions in bokeh.
Using just tone curve for shadow recovery may produce washed out colors. LR, like PL, shadow recovery adds some microcontrast for a good reason. But it seems LR does it less aggressively than PL. See https://www.dpreview.com/forums/post/56283735 and compare with the above examples to get some idea. Probably this is the reason why PL shadow recovery preserves colors better than LR, at the risk of posterization in extreme cases. Now, without a RAW, you can’t tell if the “extreme” boundary was set too low for PL.
Side remark: Perhaps microcontrast alone is not the right word here, “heavy tail” or “low frequency” microcontrast may describe better what I mean. Probably one would have to switch into wavelet language to define it. Maybe someone knows the right term to use here?
@TheSoaringSprite
Just to understand what really happens, could you tell me 2 things :
- what color space your monitor is able to display and is displaying when you work on your image and when you do screen capture ?
- what is the intended use of this photo, and therefore the color space into which you want to export it ?
This is probably due to a kind of dithering added by Affinity to prevent or attenuate banding.
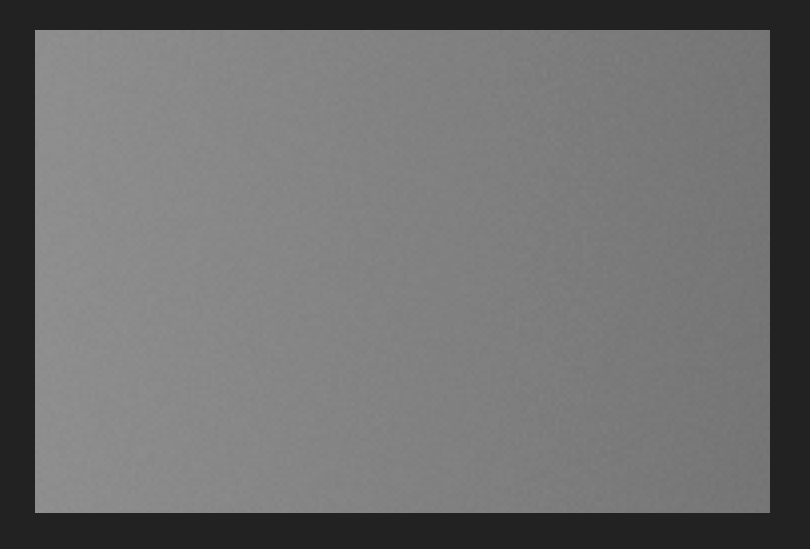
Here is a screen grab of a 400% zoom in a middle of a 1920pixel White to Black gradient on an adobe rgb rvb/16 image seen on a 100% srgb screen converted in srgb for upload on this forum :
original crop in the 1920 image

400% screen grab
You can easily see the dithering pattern.
EDIT @Joanna PS : it seems your images test were created using rvb/8 in affinity.
From my experience, the depends on the shape of the curve.
I use the FilmPack Fine Contrast sliders to boost detail in the shadows and highlights ranges.
I have an Apple monitor with P3.
For me, usually printing to either Canon’s own B&W mode or an ICC profile for colour.
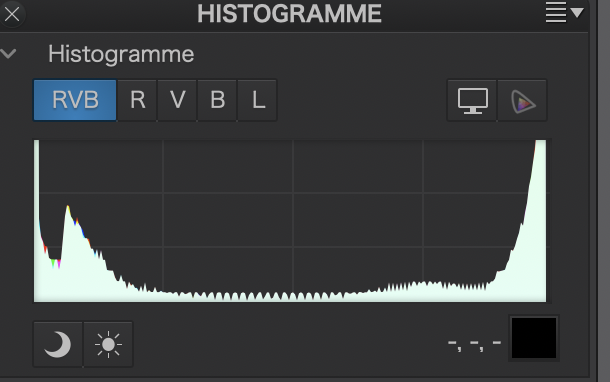
Interesting. I created a 16bit TIFF gradient and got the following:
With Selective Tonality…
With Tone Curve…
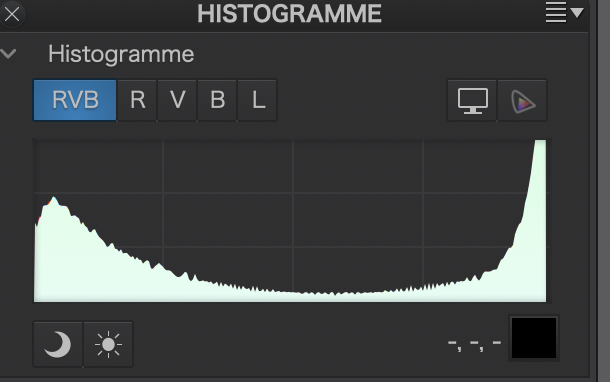
So, even with 16bit, the Selective Tonality seems to provoke the notches, whereas the Tone Curve is a whole lot smoother.
Have you ever tried to lift the Gamma by a few increments?
It can help when to lighten deep shadows while keeping the blackpoint for contrast.
And you still can use the Tone picker for some corrections.
With 16 bits per channel affinity adds some kind of dithering (notches) even for a gradient from black to white of 1920 pixels only :
my example above is created and saved in 16 bits per channel and has no compression artefacts since it is png file (and I compared original and forum image, it’s ok).
All this work is in vain, as OP has decided NOT to share the original raw file, neither here nor in dpreview forum, being asked for one in both. Asking for help, “knowing better”, or just getting her message through? Anyway, bad manners, it seems…
Everyone, thank you for looking into the problem and trying to find a solution. I am using an M3 MacBook Pro and its’ monitor at default factory settings. I don’t print my images, I only share them on my website and social media. Most people would NEVER see this posterization pattern, unless they go to my website where they can see the full-sized image and zoom into 200%. That would be mostly other photographers who like to pixel-peep. I don’t find this problem in most of my photos, but there are some where this pattern becomes obvious.
I found that setting contrast to zero and setting micro contrast to a 0, or a negative value also helps mask the posterization. Here’s the RAW file. I didn’t realize you can attach it here and share it directly to the forum:
JPA_6914.NEF (44.3 MB)
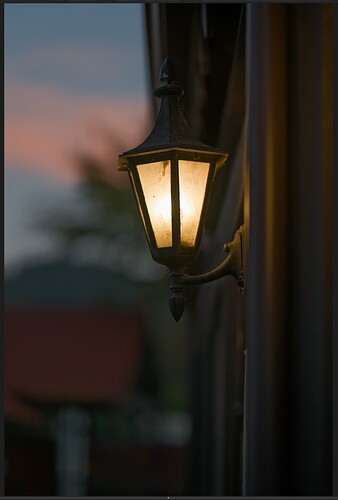
Well, from the unedited NEF file that you posted, I can only see Bokeh but not posterisation. Here is a screenshot from PhotoLab with just the default optical corrections, slight trimming of the tonal range on the curve and Smart Lighting applied
If you want us to see how you edited it, you are going to need to post the DOP file as well.
JPA_6914.NEF.dop (17.6 KB)
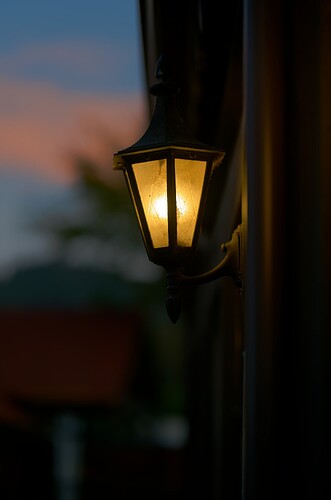
Here’s a new attempt with a bit of tone curve.
JPA_6914.NEF.dop (19.3 KB)
OK. I’ve taken your first DOP file and added a virtual copy with my name…
JPA_6914.NEF.dop (29,9 Ko)
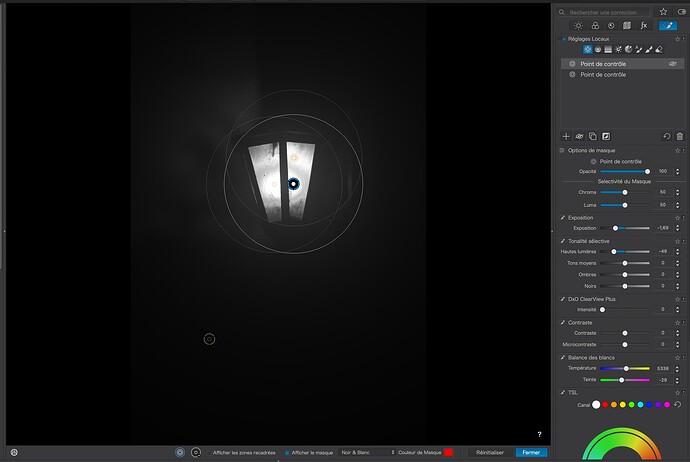
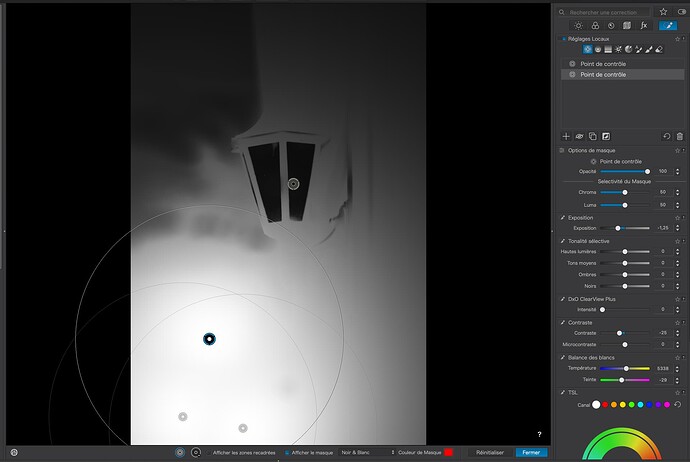
Now, let’s take a look at the Control Points you have added.
First, to the lamp…
Because you haven’t used the Selectivity sliders, you have created what looks like posterisation in the mask for the lamp.
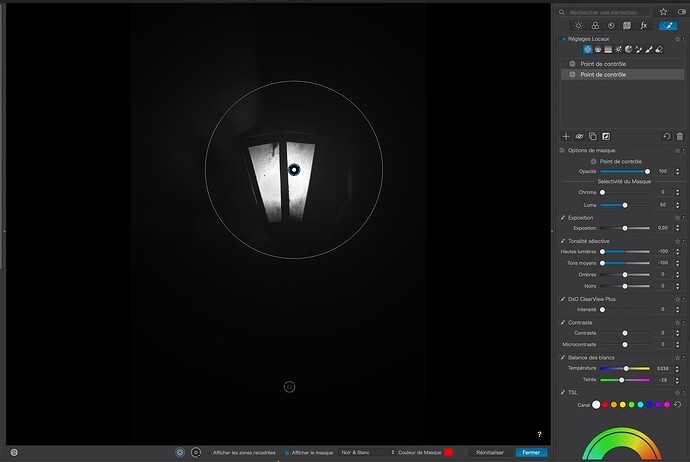
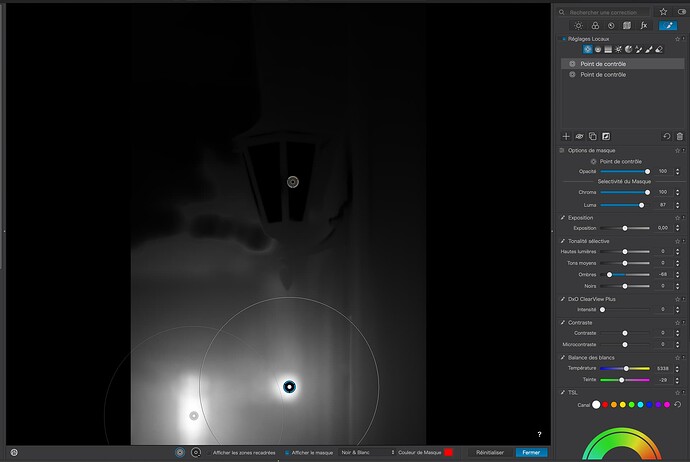
Compare that with my version…
See how reducing the Chroma Selectivity slider has given a smooth and even graduation to the mask.
Likewise, with your Control Point in the dark area…
Without Selectivity, the mask covers almost all of the bottom half of the image.
Whereas, I created a mask just to darken the two brighter areas and, once again, lowered the Chroma Selectivity…
See how focused the adjustment is and, because I only used one Control Point, I didn’t get that posterisation that your mask induced.
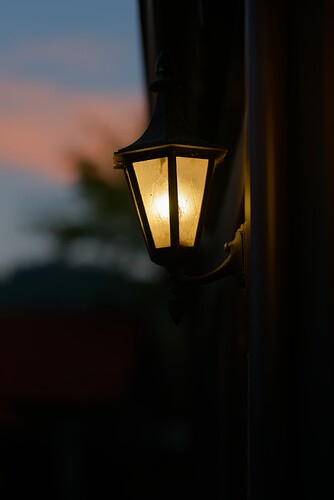
End result…
Let me know what you think
I didn’t have any issues with posterization on the lamp, rather mainly on the lower background with the red roof in particular. If I do a more gentle shadow lift and accept the darker background, the posterization is hidden. It did help to use the tone curve instead of the sliders to lift darker areas.
I tried to load the file you posted, but I’m not sure it imported correctly for me. I even copy-pasted it into the same folder and overwrote my own file. I’ll have to figure that out. Thanks for taking the time.
Unless you delete the database, PL will not recognise replacement DOP files.
Your best bet is to create a separate empty folder and put the image plus the downloaded DOP in there.
Thank you for the raw file. It seems that my earlier speculation was right. The problem comes from adding high (kind of) local contrast in deep shadows recovery, combined with high quality of DP denoising. This is like one of those cases, when the result is bad because the tool is good ![]() . Even small values of SmartLighting intensity or Blacks recovery result in posterization in this case. Unfortunately, it seems that ToneCurve is applied only after blacks recovery, so you can’t combine effectively both (unless going through intermediate tiff or dng, which I would “hate”). I have attached a quick and dirty ToneCurve preset, which you may tune (highlights,…) with SmartLighting OFF and Blacks at 0, just add some HSL Saturation, perhaps about +10. The other way, is to use HQ denoising instead of DP. There would be enough noise left then, not to trigger the local contrast improvement.
. Even small values of SmartLighting intensity or Blacks recovery result in posterization in this case. Unfortunately, it seems that ToneCurve is applied only after blacks recovery, so you can’t combine effectively both (unless going through intermediate tiff or dng, which I would “hate”). I have attached a quick and dirty ToneCurve preset, which you may tune (highlights,…) with SmartLighting OFF and Blacks at 0, just add some HSL Saturation, perhaps about +10. The other way, is to use HQ denoising instead of DP. There would be enough noise left then, not to trigger the local contrast improvement.
BlacksRecovery.preset (685 Bytes)
Perhaps DxO should add much less local contrast in SmartLighting or Blacks recovery on parts of image which are more than 8 or 9 stops below the white level in the raw data (at base ISO). They may argue that the example is too extreme, though. In my opinion it’s just on the edge, so they could fix it. That’s touching very basic processing part, so it would require a lot of testing on various examples.
Some details:
The raw file is 14-bit with lossless compression (best you can do with this camera), ISO 64, black level 1008 (standard for Z8 fw 2.01). After black level subtraction, 0.3% of raw data is blown out in raw with values 15375 = (2^14 - 1) - 1008 (the lamp), 75% is below 70, 50% is below 15 (10 stops below the white level!), and 23% has values below 7 (in the [0…15375] scale). For comparison, black frame photo (lens cap on, dark room, 1/500 sec, ISO 64) taken with my Z8 has standard deviation 3.3 from the black level, with 1% of values above 7 and still 0.1% above 20 (after black level subtraction).
The area mostly affected by posterization (top right corner of the roof) has values 8-22, about 15 on average. At this level, there’s a lot of photon, readout and other types of noise, so SNR is well below 10:1, what is generally considered to be the acceptance level. When denoised with XD2s, this area gets smoother with “jumps” in those few values left. These quantization errors get heavily amplified by SmartLighting and/or Blacks settings, which results in obvious posterization.
Off-topic:
For analysis, I’ve used my C program linked with the latest public version of libraw (0.21.3), which officially does not yet support Z8 camera. However, the image gets unpacked with no errors, with unpack() using internally the nikon_load_raw() function. When saved as a tiff, it looks as expected. There seems to be a bug there in libraw (maybe on purpose?), which luckily makes this analysis possible.
Thanks for checking it out. I think you’re right. While this may be an example that teeters on the extreme end of things, it’s not all that uncommon, especially when using the “highlight-weighed” metering option to preserve all highlights in the frame. I even shoot with exposure compensation set to +0.7, so that highlight-weighed metering doesn’t underexpose to the extreme. Usually it works out.
I think you are right. DxO has to rethink deep blacks recovery to make it compatible with DP and XD2s. It’s all about one stop more in the shadows, it seems.
