Hello folks!
First off, I am super-chuffed that I’ve discovered DXO PhotoLab for myself… I had been using, HATING using Capture One for some years, and it just annoyed the crap out of me. The paradigm of importing stuff, when it’s already on my system, and then the pain of trying to export stuff… just super unintuitive… DXO on the other hand, makes complete sense to me!
So in the context of me being very impressed by this software, there are a few things which I find irritating, some more than others… most annoying first
1/ Crop, by default, is restrained. IMO this should stay where you left it last. I almost never crop with a restrained aspect ratio, so having to CTRL drag points is really tedious… I searched Preferences, but no sign of this being optional. It would be VERY good if there was a single keyboard command to toggle this function.
2/ customisable keyboard commands (for things like 1/)
3/ The crop tool is not smooth - Especially with rotation…
4/ IMO slightly rotated images (to level things) should result in the crop marks automatically remaining within the image areas, not allowing you to have black wedges of areas outside the image cropped in.
5/ You cannot rotate the image hovering to the outside of the left and right grab point on the crop marks, as you can when you’ve cropped in a bit…
6/ I wonder if DOP files would be better implemented, neatness-wise, if they were in folder in the same folder as the photo, so each folder of photos would contain a DOP folder with all the dop files for the photos in the same folder. This way you could keep things tidy and at the same time have all the DOP files ready to move with the photos if and when needed.
7/ I have scoured YouTube a couple of times and don’t see any detailed videos on the backend of the metadata and organisational tools, like what’s in the dop files, can they be text edited, copied, renamed, shared… Also if the dop files contain all the tweaks of the adjacent images, what then is stored in AppData\Roaming\DxO\DxO PhotoLab 7\Database and can this be moved/transferred/backed up etc.
Thanks for the WAY more intuitive software, keep up the great work.
Mark.
hi, yes I know… and they cause a lot of clutter, which is why it would also work if all images in a folder created their dop files in a folder called DOP in the same folder that they are in… so it would be very easy to find and back-up etc.
I find having the DOPs alongside their respective Raw files very useful.
I’ve used other softwares that place them in subfolders and it was frustrating if I wanted to move or delete selected images. Having to search for the paired file or having orphaned sidecars as a result of just deleting the Raw.
I entertained the idea of creating a Python script that would list orphaned sidecars but it’s no longer a problem, now that I exclusively use Photolab.
I suppose it would work for me because I only have up to about 40 photos per folder, and on the VERY rare occasion I’d need to find a single raw file and it’s DOP file, I’d have to spend a few seconds to do that… but I can’t see that I’d ever want a single file, typically I’d be backing up the whole library, or at very least the whole folder if I’ve been editing those shots.
As an aside, I’ve noticed that if I remove the DOP files completely, the changes I made to photos are still there… so are all the edits ALSO kept in the PhotoLab.db file?
That would definitely be a very bad idea … It’s crucial that all sidecar/.dop files be located alongside the source-files to which they relate … mainly for management (relational integrity) reasons.
Sidecar/.dop files contain all the details related to corrections you have made using PhotoLab … Essentially, they are an image-by-image container for all such corrections - as are held, collectively, in the PL database.
Assuming use of Sidecars is activated in your Preference settings;
If the database is deleted, it can be rebuilt (folder by folder) from the sidecar/.dop files in each folder
If any sidecar/.dop file(s) is deleted, it will be recreated from details held in the database for related image(s)
An image-specific sidecar/.dop file can be converted into a “Preset” (which can be applied, generally, to any other image) via the menu option;
Sounds like you’re used to using (in other software) the crop tool to manually straighten horizons, etc … Instead, try the Horizon tool - which, often, will do this task automatically …
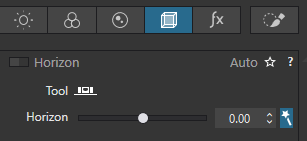
You need to have the “Magic Wand” setting ON - and then you simply activate the Horizon tool (either via the Toolbar at top, or via the Geometry panel);
hi, thanks, that often does the job I want, but sometimes not… and when rotating the image, the motion is very jerky and difficult to rotate manually with any accuracy. The jerkiness is one problem, the other is there does not seem to be a CTRL/ALT/SHIFT delimiter to be able to finely adjust rotation. One has to guess the value and type it in as a Horizon value or frantically click the Horizon value in the Geometry tab… The horizon slider is ok, and it’s good that it automatically crops the image to avoid “black wedges” outside image area.
ALSO when you click on the crop tool, I’d want the crop marks to be visible immediately on the outside of the current image. It seems currently you have to click and drag an area, and it’s difficult/impossible to click on the top left pixel to click-drag-create crop marks… so one has to do it crudely then manually adjust all 4 sides. Better to have it all selected and then crop sides as needed.
Lastly, when you have selected your whole image with the crop tool, the rotate function seems unavailable. My preference is for the crop tool to select the whole image (if it has not been cropped before) and hovering to the side of the left and right control points on the crop marks should result in seeing the cursor changing to the rotate function, as it does if you have cropped in a bit.
After 4+ years of struggling with the mess that is their file system, I gave up, tired of importing images that were already on my system… I found it extremely confusing and unpleasant to work with, “good form” or not, the fact is I hated it. DxO makes immediate sense to me. Whatever the difference is, it’s huge… perhaps it is the Capture One requirement that you are forced to first create virtual spaces rather than working directly from your computer file system - DxO makes a lot more sense to me.
But if you don’t know your way around, and you don’t seem to, it’s simply wrong to present something as fact that isn’t true. Later users read such posts and assume - oj I have to import something that is already on the disk. And this is simply not true.
Each of us has to find an application that works well for us. DxO PL has so many limitations for me that it will never be my primary RAW developer. Nevertheless, it is good software
The fact is that to me, Capture One is so poorly conceived that after all these years I still do not know how or why the virtual spaces are required. When I have something I quickly want to process, I don’t want to spend time creating a virtual place for it, I want to simply navigate to the hard drive and open the files I want to process. Capture One makes a complete and unnecessary mess of this IMO. Adding items to a virtual folder is what I would call importing. Perhaps you don’t, good, keep your policeman opinion, but I have mine, I do not like IMPORTING items to virtual folders. OK? It is unnecessary, clumsy, and time consuming. I hope anyone who is considering Capture One will read this and see how some people really dislike their workflow…
AND don’t get me started on how messed up convoluted the process is if you want to export something… sheesh.
Capture One “Sessions” work essentially the same way as PhotoLab, where you can point at an arbitrary directory with images. Unlike using a Capture One catalogue there is no import process. Capture One will even produce sidecar files in this mode, just like PhotoLab.
I am curious why you found Capture One’s export problematic? It works in the same way as PhotoLab.
I would agree with your comments if you were referring to Lightroom, however!
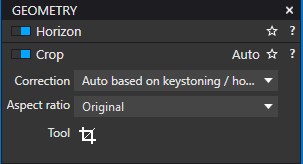
If you have the Geometry / Crop / Correction drop down set to “Auto based on keystoning / horizon” then you will find that after adjusting the horizon the crop restricts itself to the rotated image and doesn’t leave any black wedges.
Sometimes you will find there is then latitude to move the cropped area, which you can do by just dragging the whole crop window.
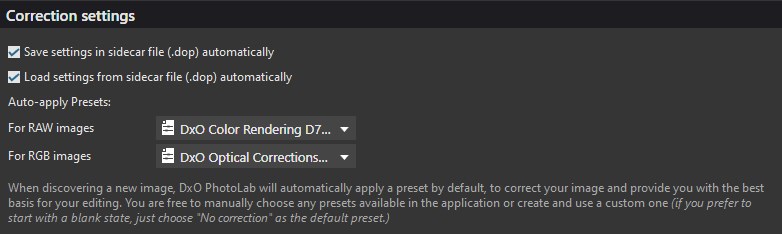
To ensure this setting is applied to all my images (so I don’t have to keep setting it each time) I just have two presets (one for RAW and one for JPEG) that apply the minimum changes I want to all images (e.g., DxO Color Rendering D7200, DeepPRIME Noise, Lens Sharpness, Chromatic Aberration, Keystoning, Lens Module) and have these set as the default Presets to be applied via the Preferences / General / Correction Settings options.
If you use presets and partial presets(elite) you can make a default import preset for your own liking.
Just set every tool in the state you like, no image related adjustments, just a setting you would be applied on each image.
Say clearview at 15% set at 15% and keep tool activatings slider off. This means you can toggle clearview on off at 15% in one click.
An other nice preloaded start is smartlighting in box mode at 25%(slight) default is global.
Your drop modes, set crop tool in your favorite starting point and turn it off after that.
Then create a preser called my preset 20240511.
Go to prefferences and select this for default preset.
From that point on every new importend image is getting that preset.
If you made a certain correction which you use often, create a preset and the edit this in preseteditor to turn off effect on the side with the checkbox of all the tools which you don’t want to over write when you select this preset.
That action made a partial preset.
(store those in a different folder called “PartialPresets” so you don’t make a mistake with full presets.