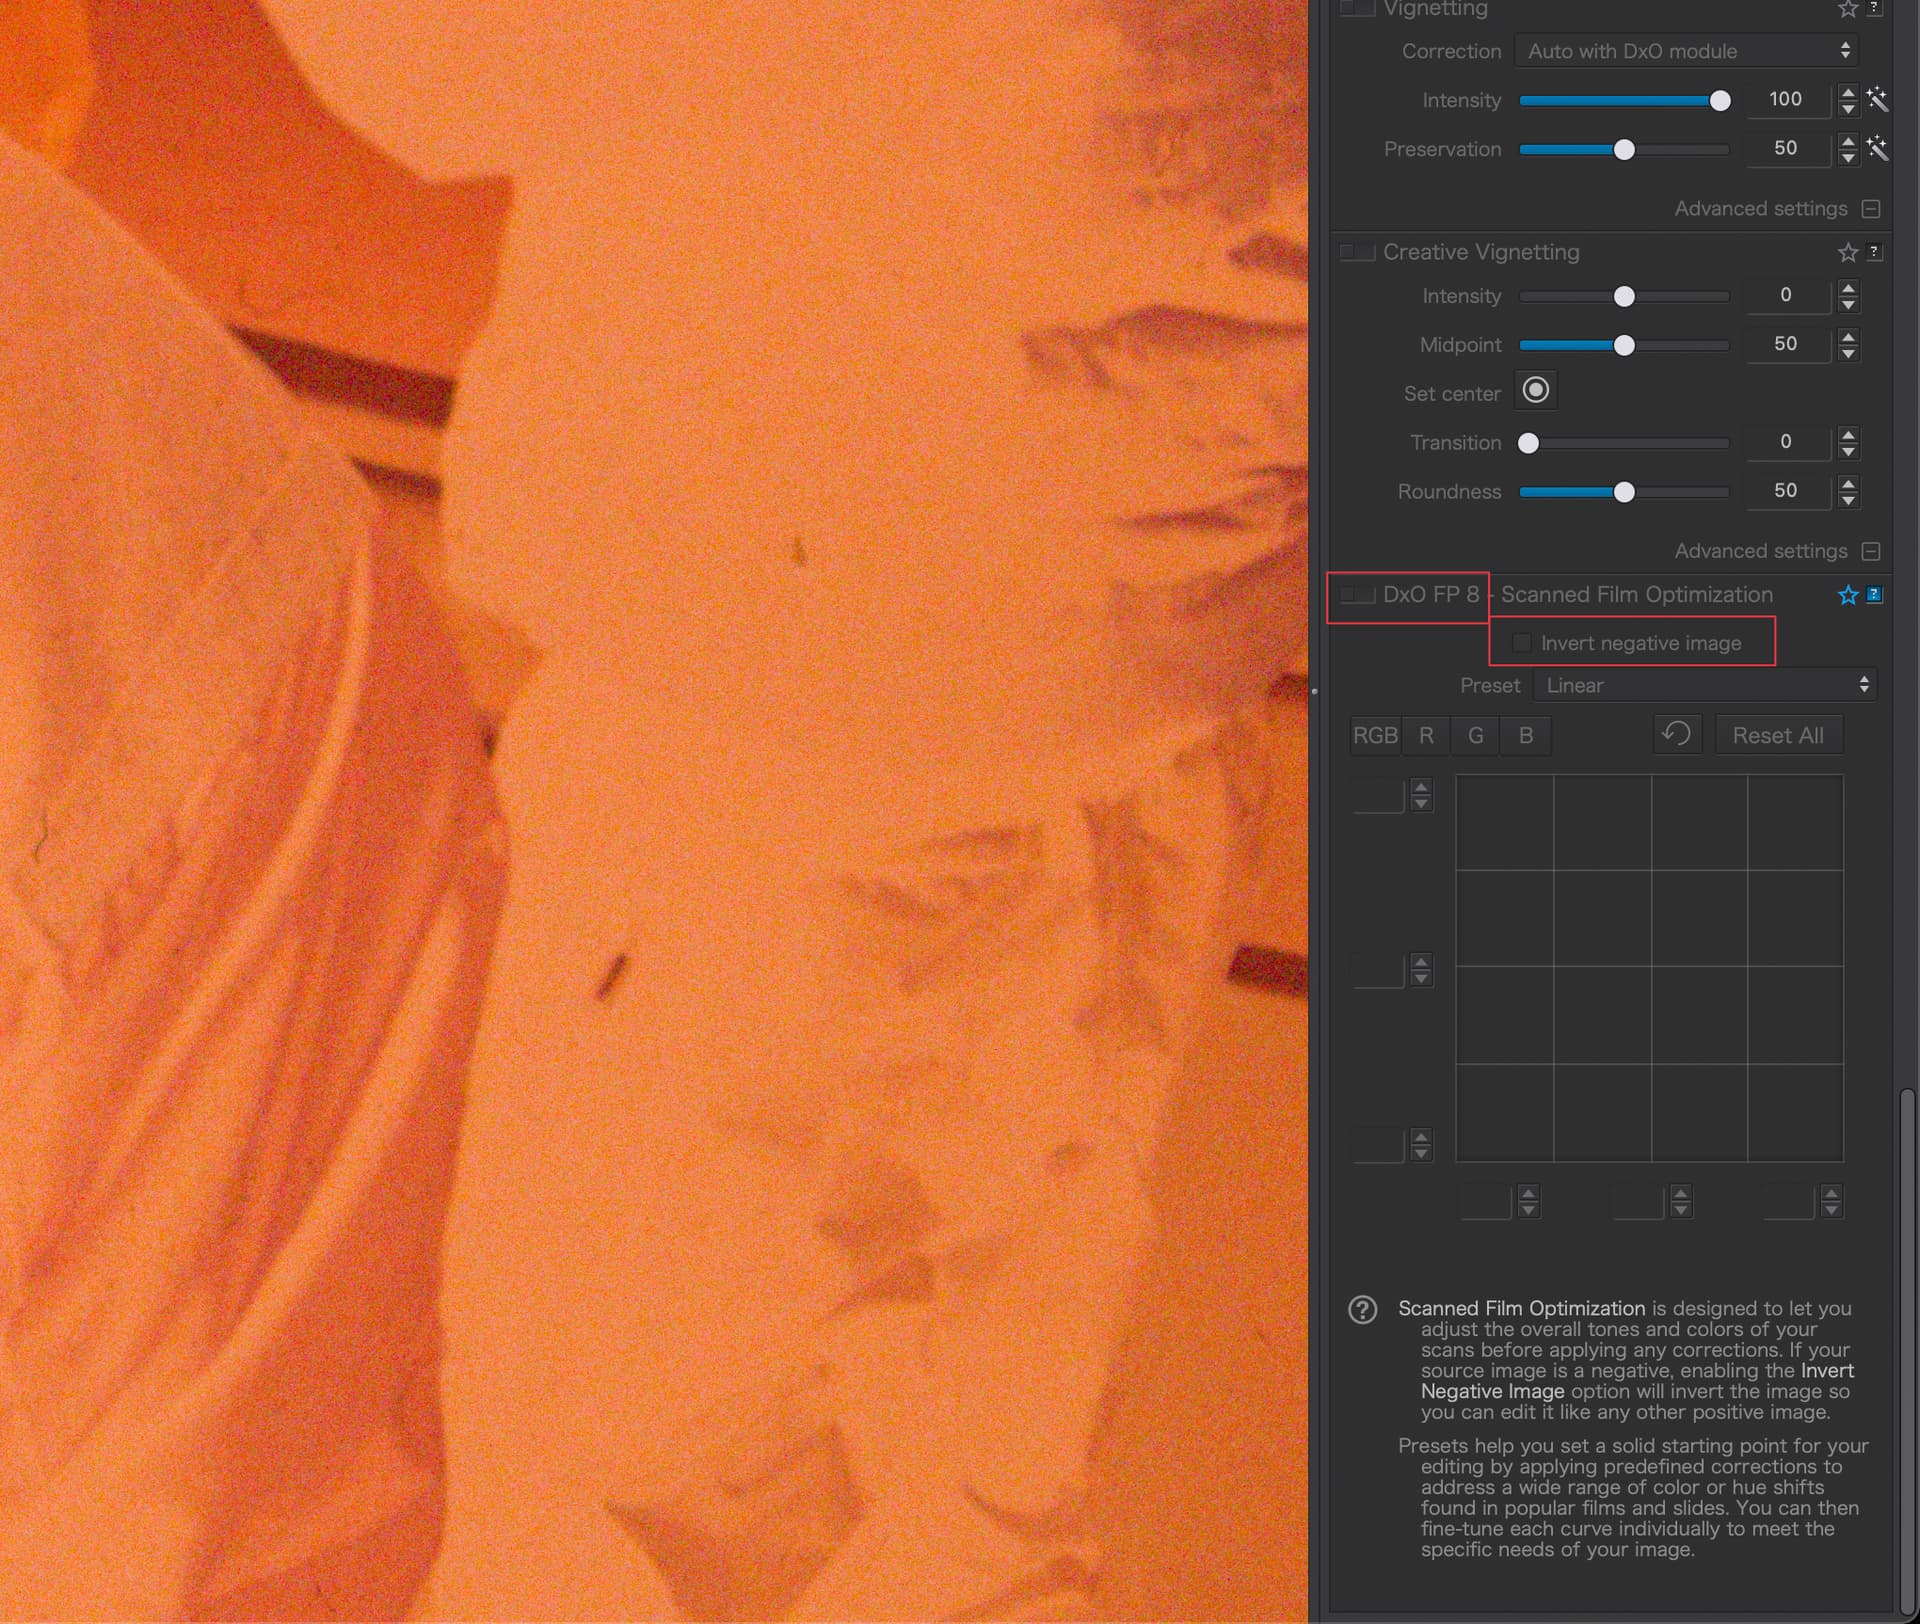
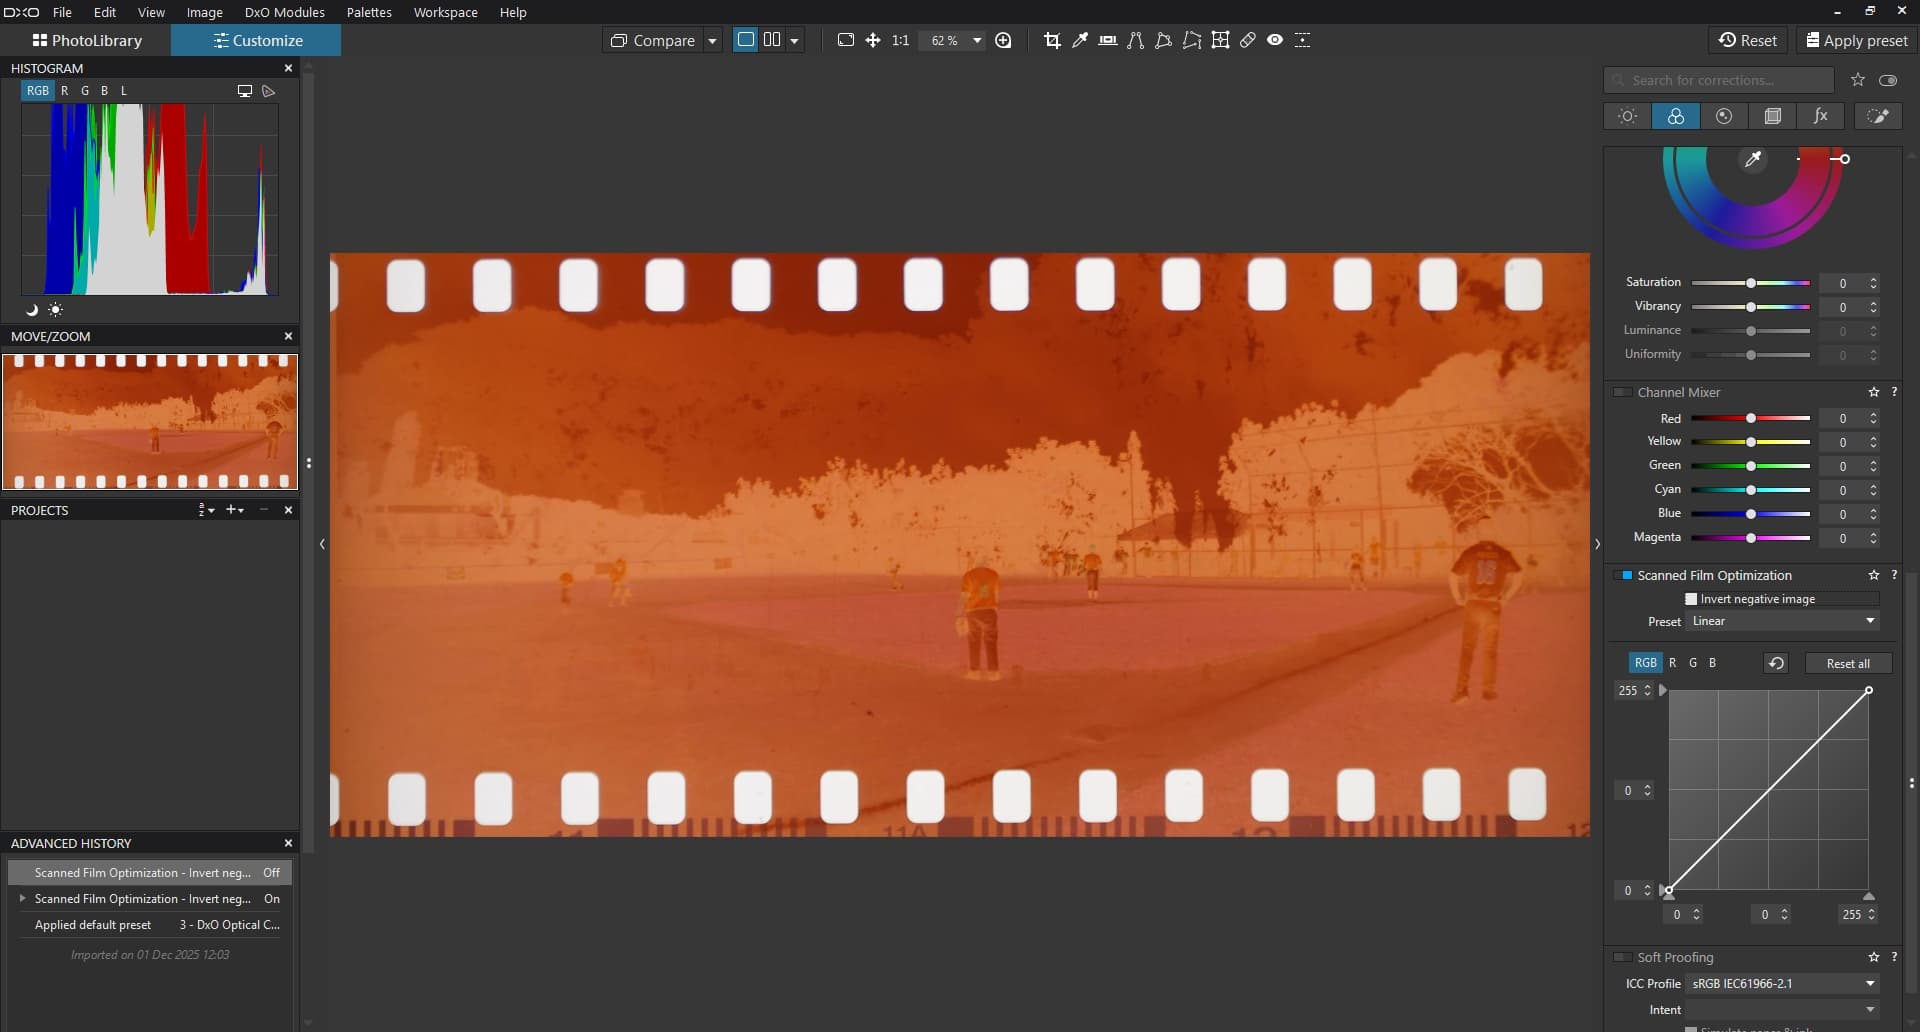
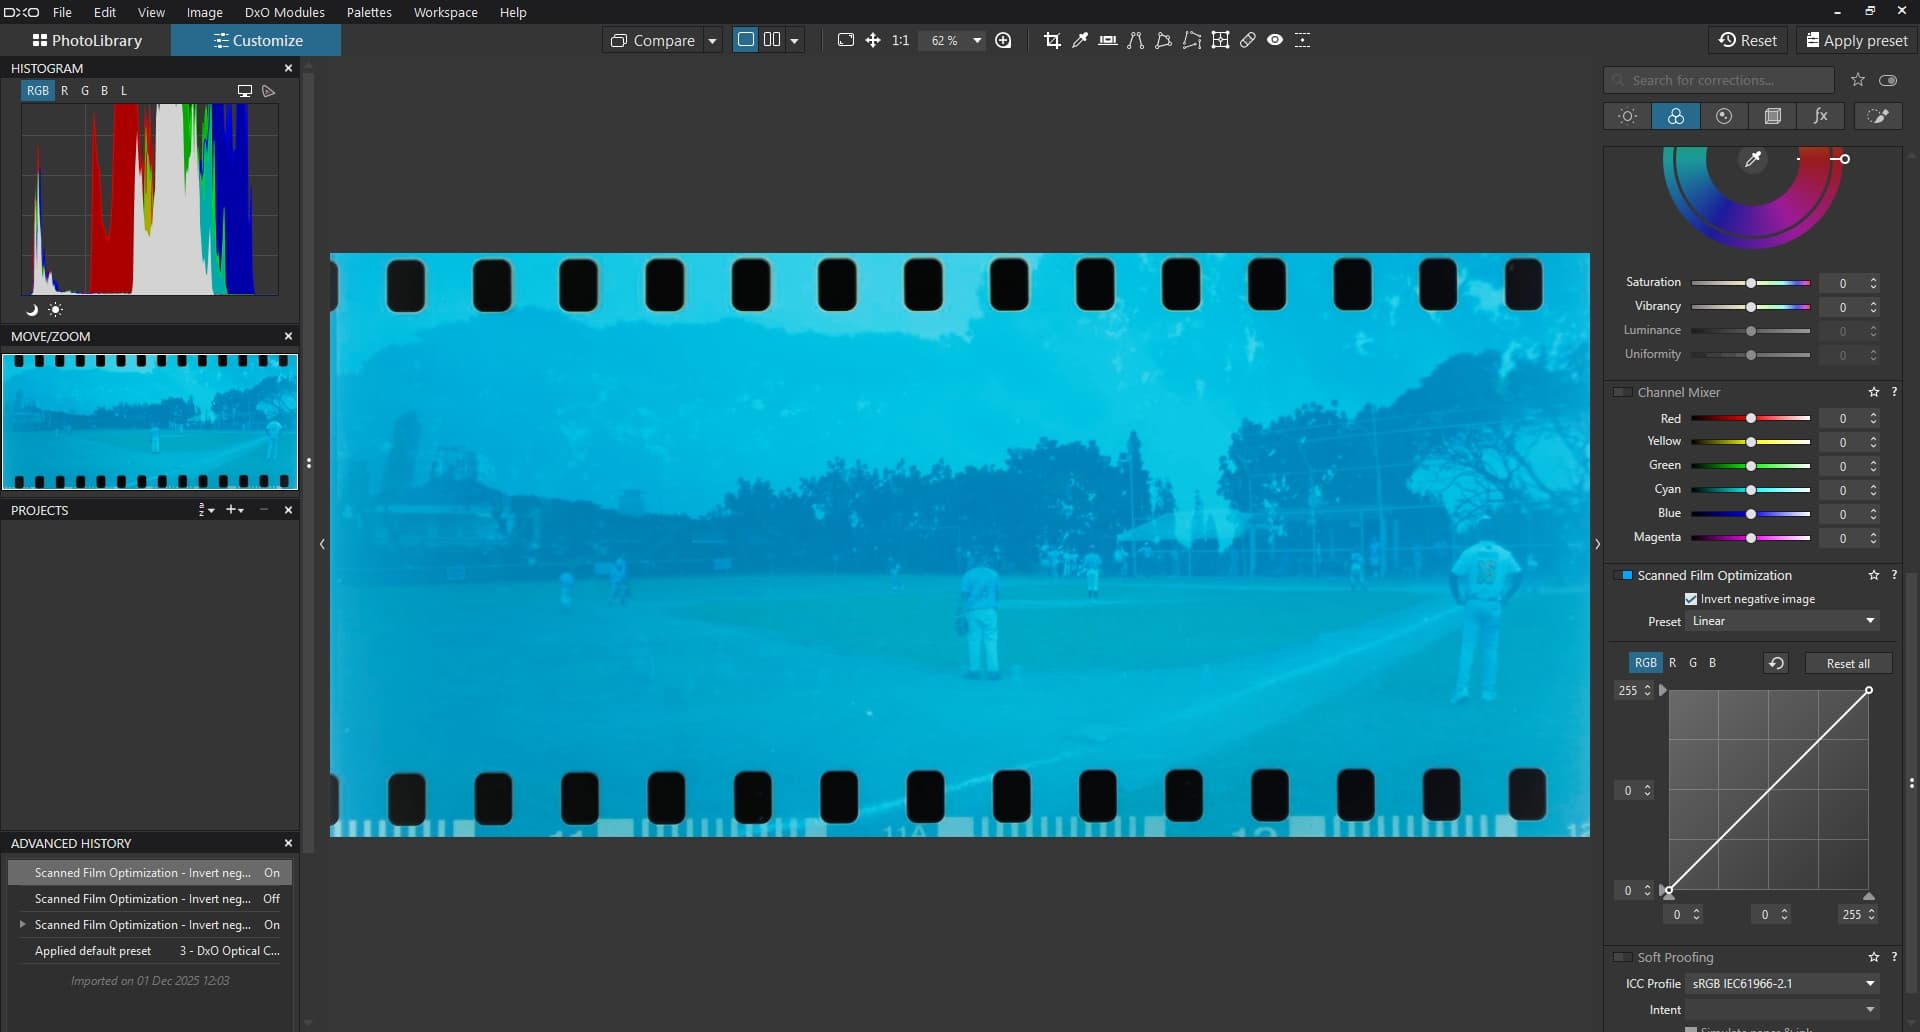
Has anyone else run into the issue that it’s impossible to turn on Scanned Film Optimization in PhotoLab 9? It’s also impossible to turn on the invert control. Neither jpegs nor NEF files will allow turning on the feature or the invert checkbox:
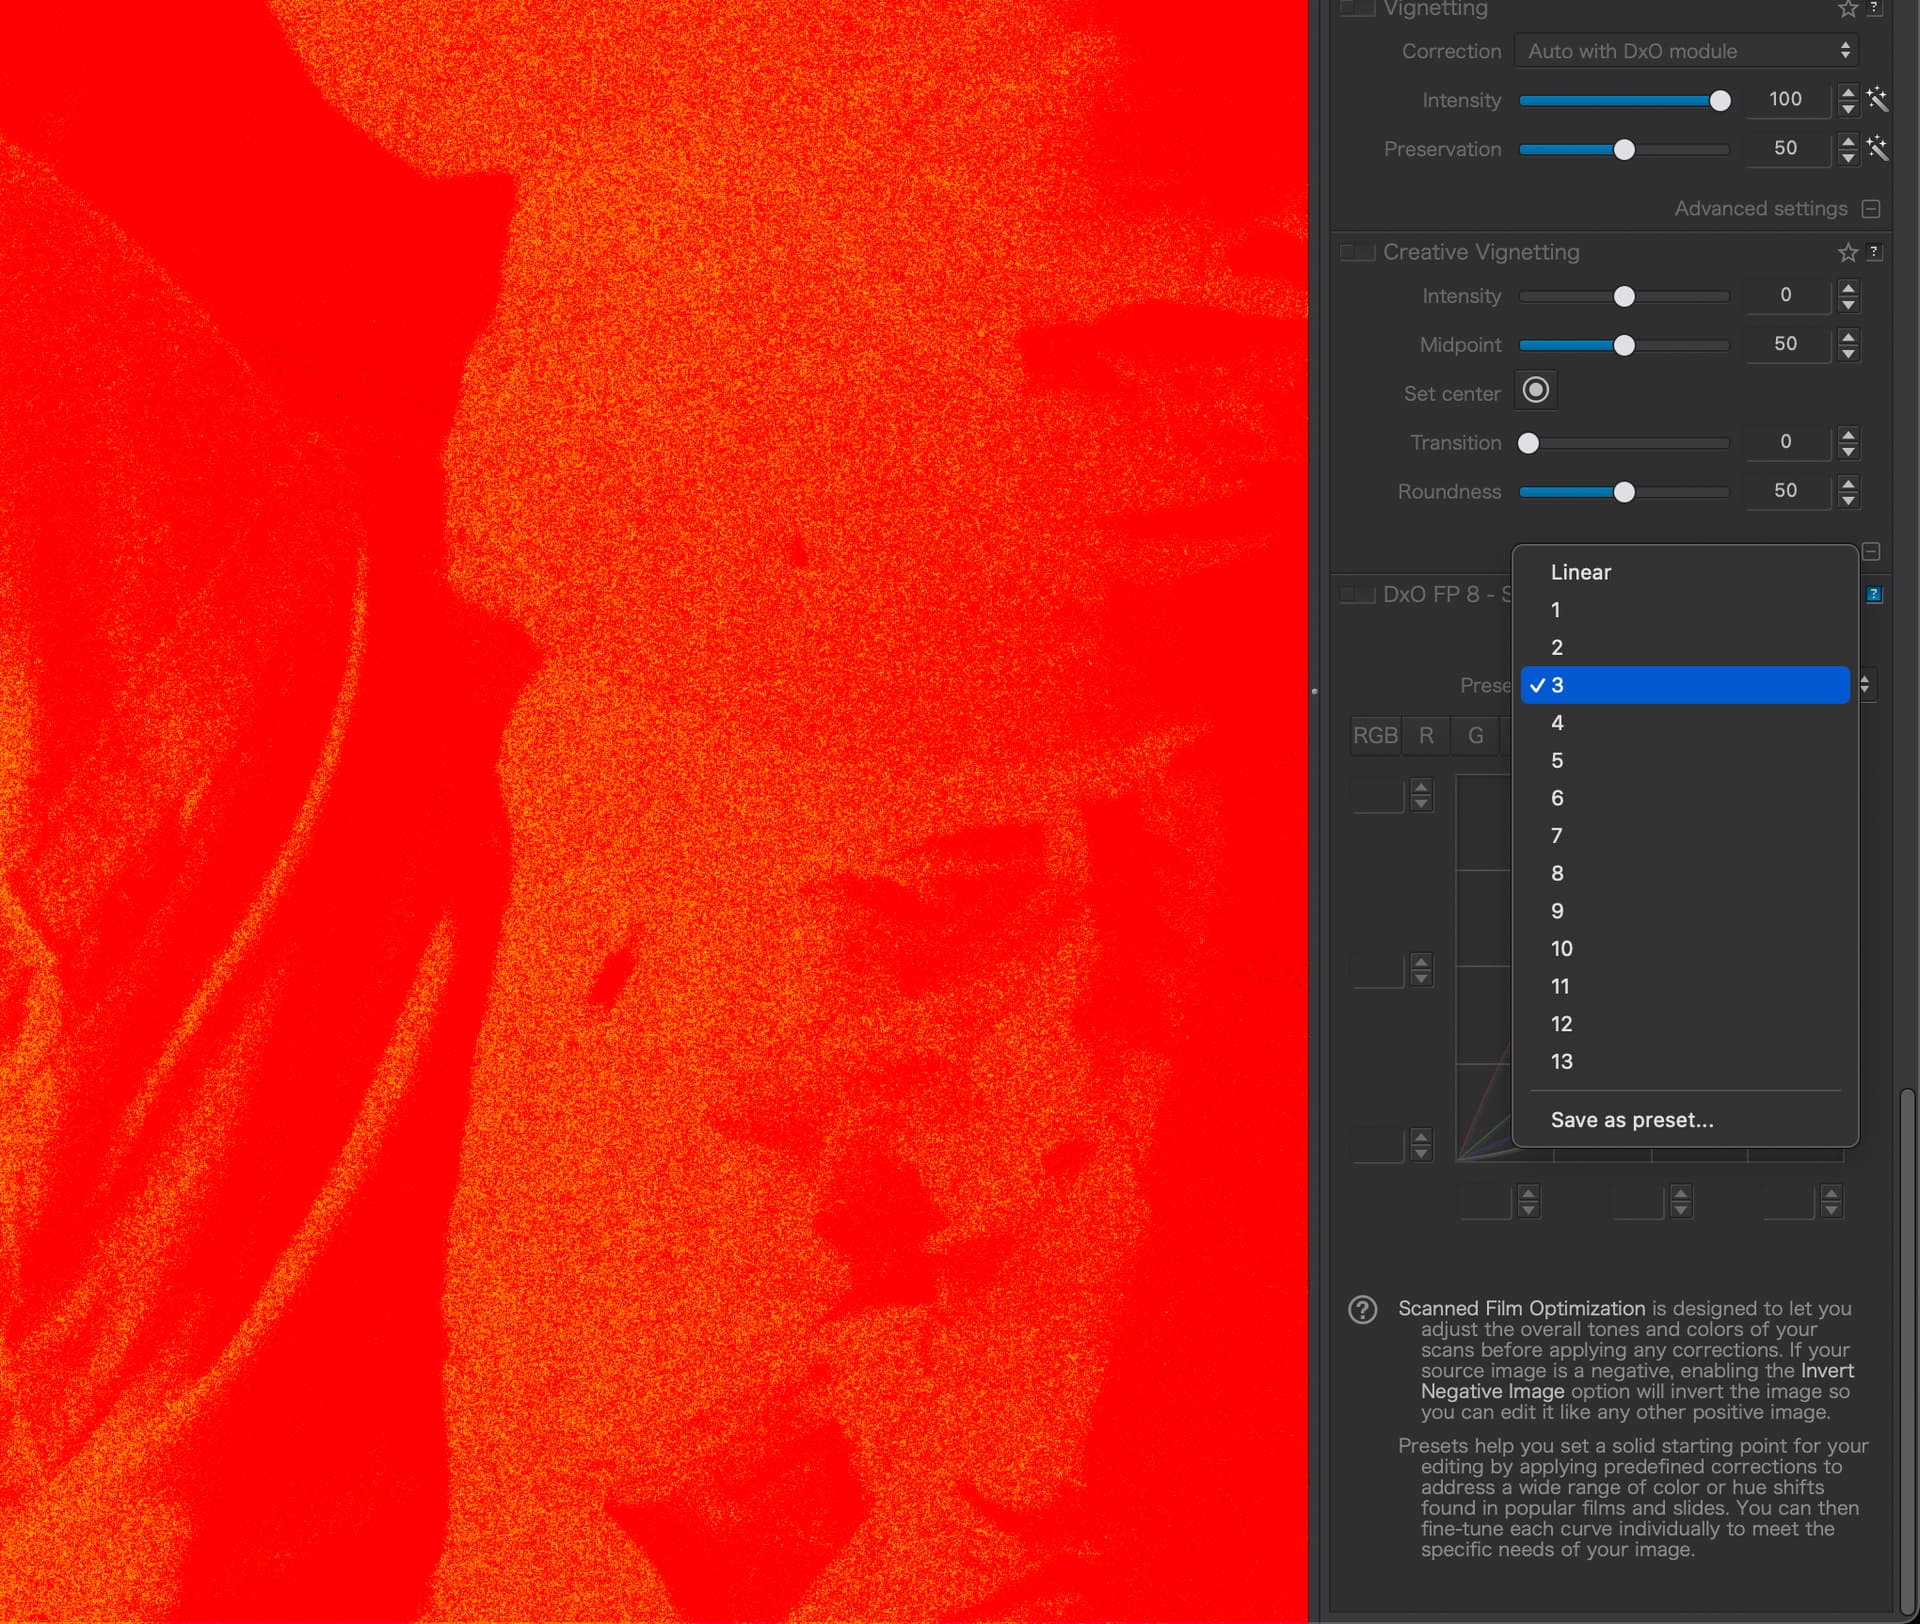
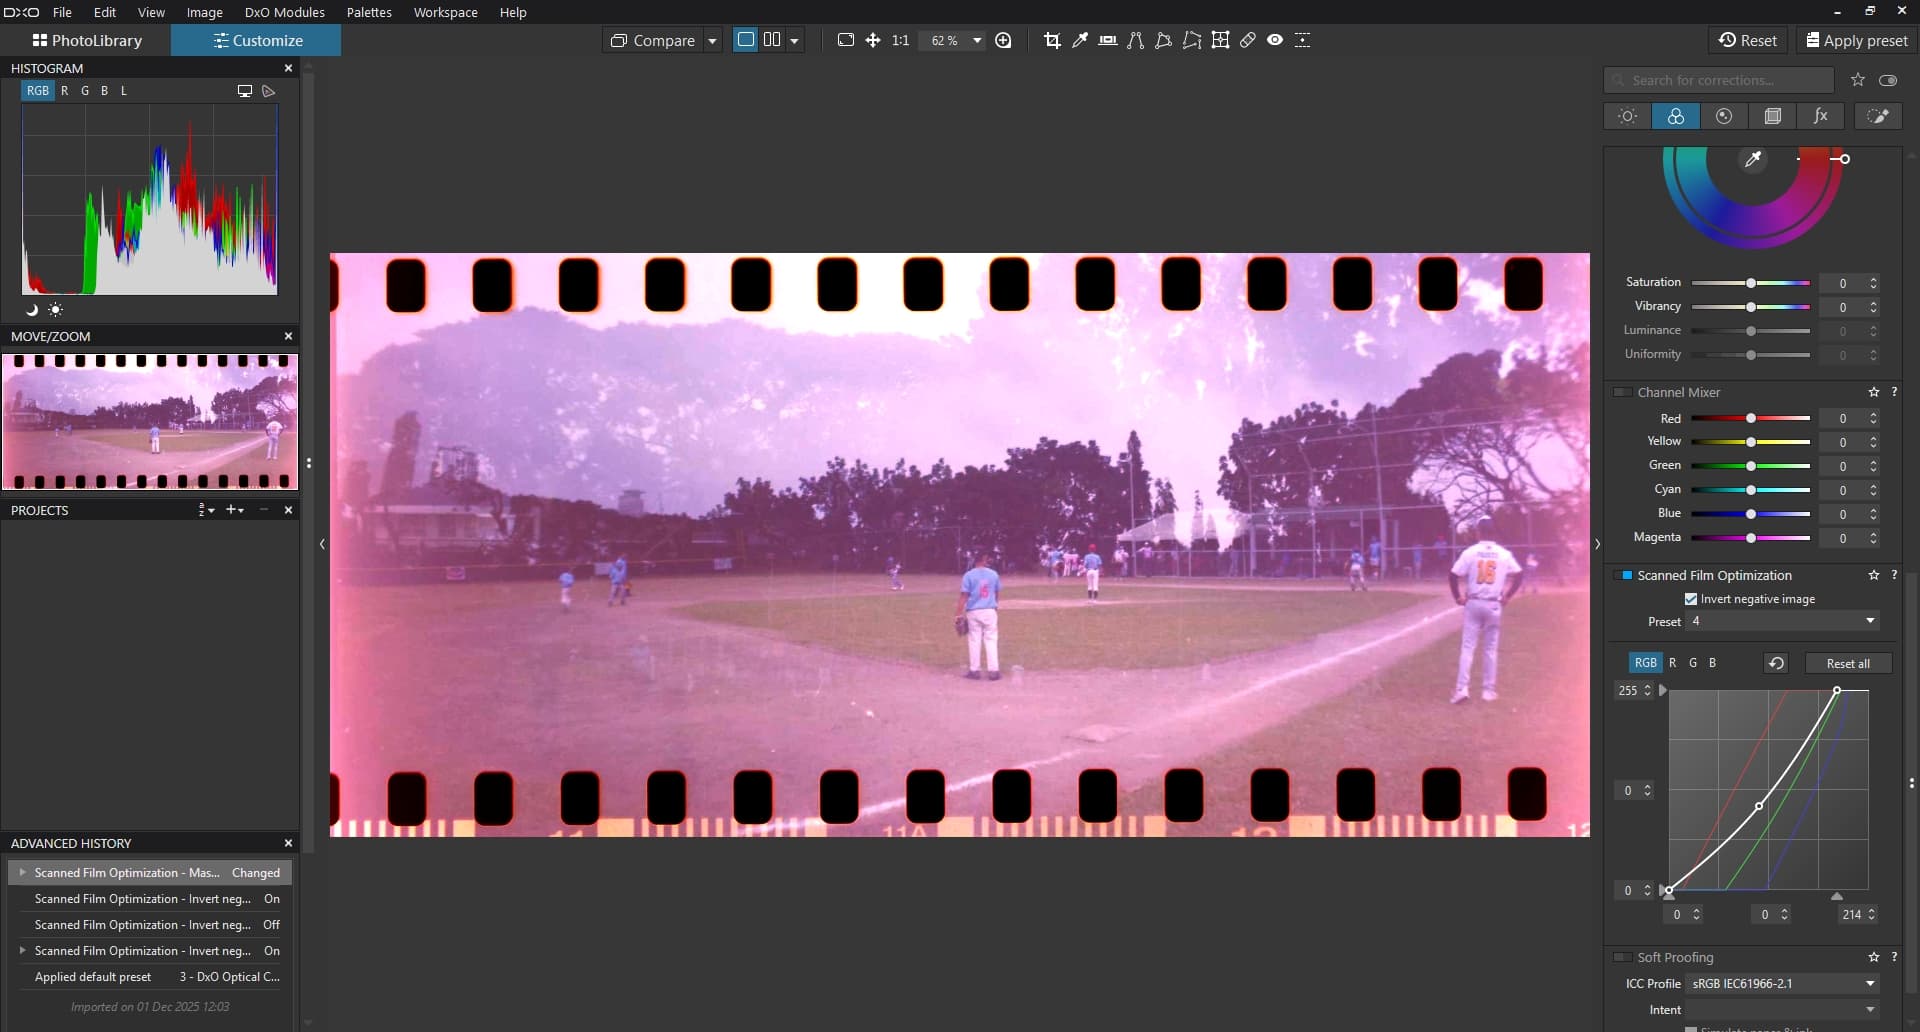
A manual inversion (reversing the RGB curves) doesn’t work either with these curves.
These features do work in FilmPack but it doesn’t seem like much fun to have to do negative correction in FilmPack or in two steps. If one has to use two programs, C1 12 creates more accurate colours with more detail when used on the same NEF files. Since I don’t use C1 much, I’d rather have an all PhotoLab workflow.
For fun, here’s my best effort from FilmPack (created custom curves several times across multiple sessions) up against my best effort from C1 (single setting). First FilmPack:
I hope that when the Scanned Film Optimization tool finally works in PhotoLab it will work better than in FilmPack. The main point would be for all the sliders to work in the right direction.
With a manual inversion, all the controls are upside down. What works better is to get a good correction done in inverted mode (something like the C1 above) and then do final corrections in normal mode in PhotoLab. The intermediate version should not have crushed shadows or blown highlights and should have rich colours. One can’t bring back to a jpg what’s not there any more.
@Stenis You have a lot of experience with archival materials. Have you played around with the Scanned Film Optimization tool in FilmPack 8/PhotoLab 9 yet?
Stenis
(Sten-Åke Sändh (Sony, Win 11, PL 6, CO 16, PM Plus 6, XnView))
2
Hi Alec!
No I haven´t done that yet mostly because I haven´t come to the stage where I have started to digitize my negative color films yet, I still have a lot of color slides to process first because they are the oldest and the ones in most poor shape. A lot of storage damage too (stored to varm).
As you might know I have just managed to migrate to my new computer and lost a couple of weeks there too. But now I´m flying again but has to walk through all my archive again since it seems like Photolab needs to refresh all the profile combinations I ever have used when I took these pictures. It takes some time to walk through the 20 000 I now have processed and tagged (still about 50 000 left of the ones digitized and quite a few thousands not even digitized).
In fact i tried to test these features when version 7 was released but nothing serious really so I guess I have to gived it I new try. Did it work in version 7 for you?
I am invited to the City Museum of Stockholm the 3rd of december. They use Lightroom of course since they have standardized like many museums on the DNG-format for RAW-data since many years back now. I still have a few friends there working with these tasks at their Photo Department. I don´t really remember if they use their DAM-workflow to turn these negatives positive because today that is a standard procedure even in some more advanced DAM-systems. I know we automatically turned negative B&W to positives that way.
I hope they fix these features because I will definitely need them later on. Thanks for the question. I will look in to it and get back later.
I also use Vuescan as a scanner software and I think I might be able to use that one as well as a converter for negative color film. It is a fascinating software - nothing fancy at all with a terribly unpolished user interface but it is just soo good and supports almost all scanners there is ands has been out there for decades.
J’utilise également VueScan et j’en suis totalement satisfait….Un scanner Canon que tu ne peux plus utiliser car il n’est plus compatble avec la dernière version d’OS, fonctionne très bien avec VueScann et c’est vrai également pour un vieux scanner de négatif de chez Nikon.
I also use VueScan and am completely satisfied with it… A Canon scanner that you can no longer use because it is no longer compatible with the latest OS version works very well with VueScan, and this is also true for an old Nikon negative scanner.
Stenis
(Sten-Åke Sändh (Sony, Win 11, PL 6, CO 16, PM Plus 6, XnView))
4
Yes exactly @papidou , a few years ago I was just about to throw away my Epson Perfection 4490 Photo - I was fed up with Epson’s own poor software when I tried Vuescan. I kept the scanner and have had good use for it scanning old photo copies from the early nineteen houndreds of since long dead relatives.
I paticularly loved the possibility to add name and sometimes birth and death data at the bottom of the pictures.
That said Hamrick Software is one of these one man IT-companies that often are soooo good. Ed Hamrick is very much like Mario Westphal at Photools that makes the DAM-software iMatch. A brilliant software developer that has managed to establish softwares often far better than the softwares developed by Seiko/Epson and say Adobe. In both cases they also provide a worl class service and support that either Seiko/Epson or Adobe can match at all.
“Ed Hamrick has always been interested in photography, and when he purchased his first film scanner (an HP PhotoSmart) in 1997 he decided to see if he could produce better quality scans than the software that came with the scanner. The result of this was a program called VueSmart. After upgrading to the Nikon LS-30, Ed modified VueSmart to support multiple scanners and renamed it VueScan. In the following years, Ed added support for many different scanners, and is constantly adding support for new scanners (now more than 6000), implementing suggestions from users, and adding new features. As a result, new versions of VueScan are released frequently.
…………..Ed graduated with honors from the California Institute of Technology (CalTech) with a degree in Engineering and Applied Science. He worked for three years at NASA/JPL as a programmer, and worked at Boeing as a programmer and manager for ten years. Subsequently, Ed worked for five years at Convex Computer Corporation as a Systems Engineer and Systems Engineering Manager. Ed is also the inventor of six granted patents in biofuels technology. He speaks fluent English, Russian and German.”
I’ve installed PhotoLab 9 and FilmPack 8 on a second computer (also under macOS Sonoma), and the same toggles don’t work. Looks to be an OS version. Usually you Windows Photolab users are on the short end of the stick, rejoice, this time it’s the Mac users.
@stenis@papidou VueScan. I do all my scanning with D850 and don’t own a scanner. I briefly did when I trialed an Epson EcoTank ET-8550. Sadly the only part which worked was the scanner, which was excellent. If I did own a scanner, I’d definitely consider VueScan. My print scans with Epson’s own software turned out very well.
The D850 does offer excellent built-in negative conversion but only to jpeg and at half resolution. I’ve had great success with the same camera with full resolution RAW scanning of slide film, so I’d rather invert the negative in software.
I planned to upgrade to FilmPack 8 had the scanning negative feature been first rate. Otherwise, the additional film profiles are pretty duff, so I’ll probably sit this one out.
I’ve had such a rough run of technical support from DxO I dread the idea of starting another one. Someone will probably tell me to reinstall my OS or something mad like that (I have work to do beyond babysitting photo editing software).
1 Like
Stenis
(Sten-Åke Sändh (Sony, Win 11, PL 6, CO 16, PM Plus 6, XnView))
7
I also prefer to use repro photo with RAW. The last three years I have used my A7 IV (33 MP) with my Sony G 90mm/2,8 Macro. It is one of the absolute sharpest lenses Sony has ever made (Maybe the new GM variant can top that).
The problem though is that Photolab and Deep Prime never have been really able to handle repro RAW-pictures from my Agfa CT 18 and CT 21 properly. Deep Prime is totally indifferent to these pictures and so is both sharpening methods in Photolab. The only thing working is to decrease Microcontrast a lot (to the bottom really) and then increase Fine Contrast a lot. I also always export in 100%.
So for those derivates, regardless if in TIFF or JPEG I am forced to go to Topaz Photo AI 4. But Topaz is really tricky and often forcers me to shop around among all the different sharpening- and denoise models it has and that is really ineffective compared to using Deep Prime with normal digitally born RAW-files . I still haven´t found any way around that. Topaz is still worth it because it definitely gives a far better result with these old positive color slide pictures.
Nikons D850 is still a very good chiose with it’s high res. sensor. It’s bad you can´t get a higer JPEG resolution out of it when the conversion there is so good. That would have been the smartest otherwise.
“Photos are saved in JPEG format even when [NEF (RAW)] is selected for image quality. Photos taken with a JPEG option selected will be saved at the chosen setting, while photos taken with [NEF (RAW)] selected will be saved in [JPEG fine*] format.”
So it seems that Negative Digitizer can convert to full-resolution jpegs. Am I’m missing something?
Btw, this feature is available also on D780. One may use ES-2 too.
Strange that NX Studio doesn’t have this feature.
I’m not sure. I know my negative jpeg scans with the D850 were much smaller than my RAW photos of the same negatives. Perhaps I have something set wrong in my jpeg settings as I always shoot RAW (something like shoot jpegs at half size for RAW previews) and have jpeg disabled completely these days.
While I was trying to track down the issue online (the camera is at another location right now), I ran across a couple of useful references. Nikon’s own Guide to using the D850 and ES-2 to scan negatives, as well as article on PetaPixel of a fairly expert negative to digital archivist by the name of Peter Krogh. His article offers quite a few good examples and sets expectations reasonably: The Nikon D850’s Negative Digitizer Isn’t Ready for Prime Time.
What’s weird is the negative headline, probably written by a PetaPixel editor in peak anti-Nikon sentiment (pre-Z6, Sony mirrorless ILC were all the rage): the article is very balanced.
I relearned something important if using the digitizer. While one cannot get RAW, one can affect the brightness by pressing the OK button and then choosing a brightness level. This will help with hot highlights. If one didn’t have to go back and forth in a menu from digitizer mode to normal RAW mode, I might shoot both. Jpeg for here and now, and RAW for special images to which I might wish to return with fancier software in the future.
I will give Gemini 2.5 a try on negative conversion now.
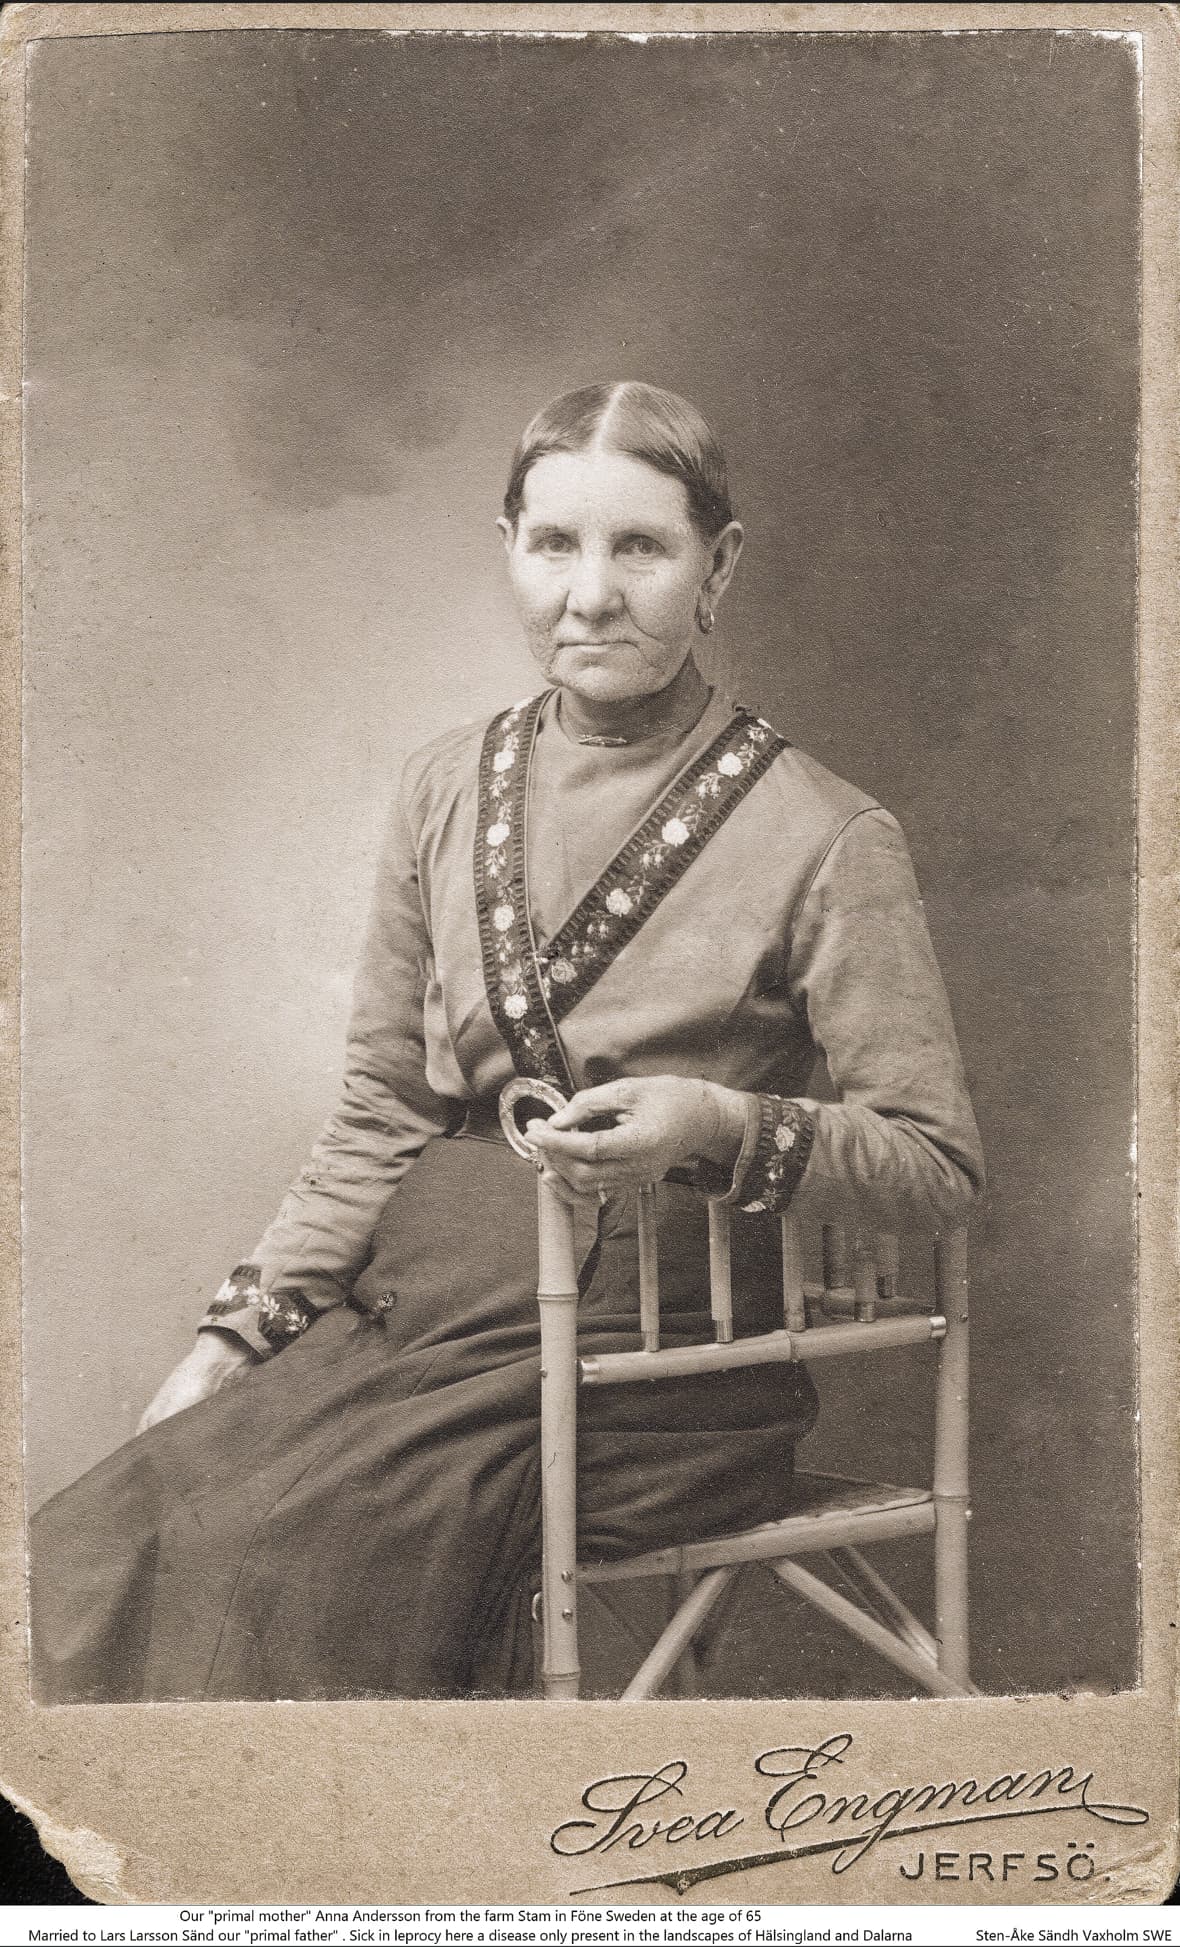
You have probably seen some of my color slides and some of them has also been in a really bad shape. I have the whole spectra with scratches, pictures with stains difficult to handle and the loss of almost all info in the “Green” RGB-channel. That is the reason why I have turned them brownish in Photolab because I don’t find it all that meaningful to restore the colors.
Here to a portfolio where I have tested using Topaz and I have also tested to upload (for the first time) a portfolio that uses even the support for IPTC-metadata the Photo-site Fotosidan (The Photo Page) has. This is a really interesting feature they have had for many years that I haven’t used before now. So that will be my new workflow for these kind of pictures. I add metadata automatically with iMatch Autotagger and the Open AI API for Descripotions and Keywords and just ad hoc prompting the first row normally in Descriptions (type Place Country and Year).
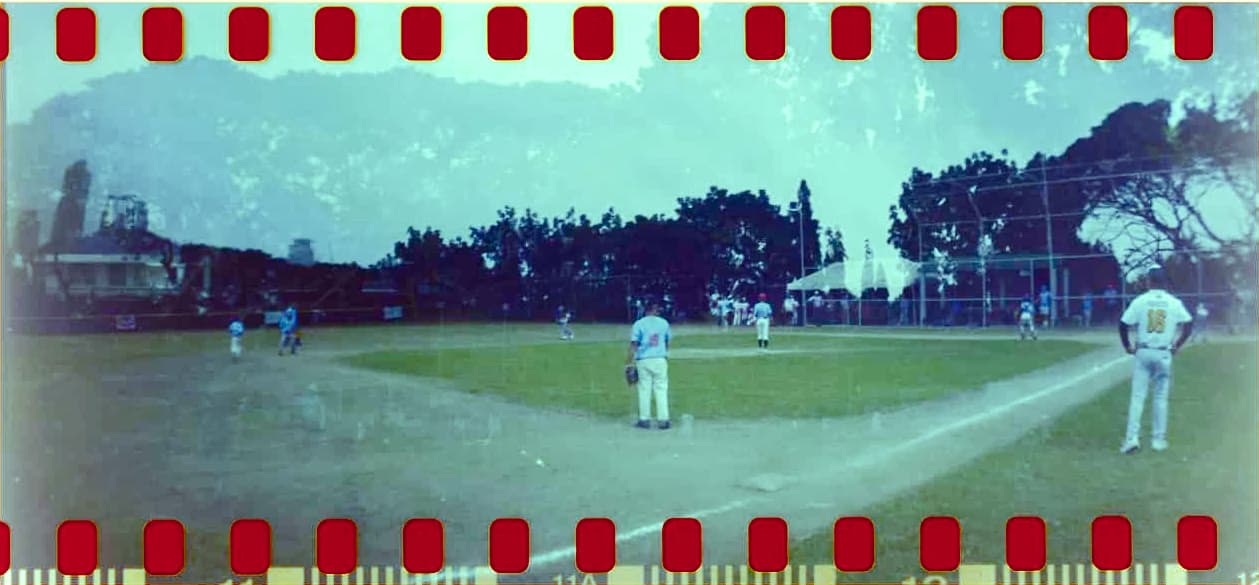
I couldn’t do much useful with this sample negative either (I should have put the original up from the first post and then I’d have it with me now too).
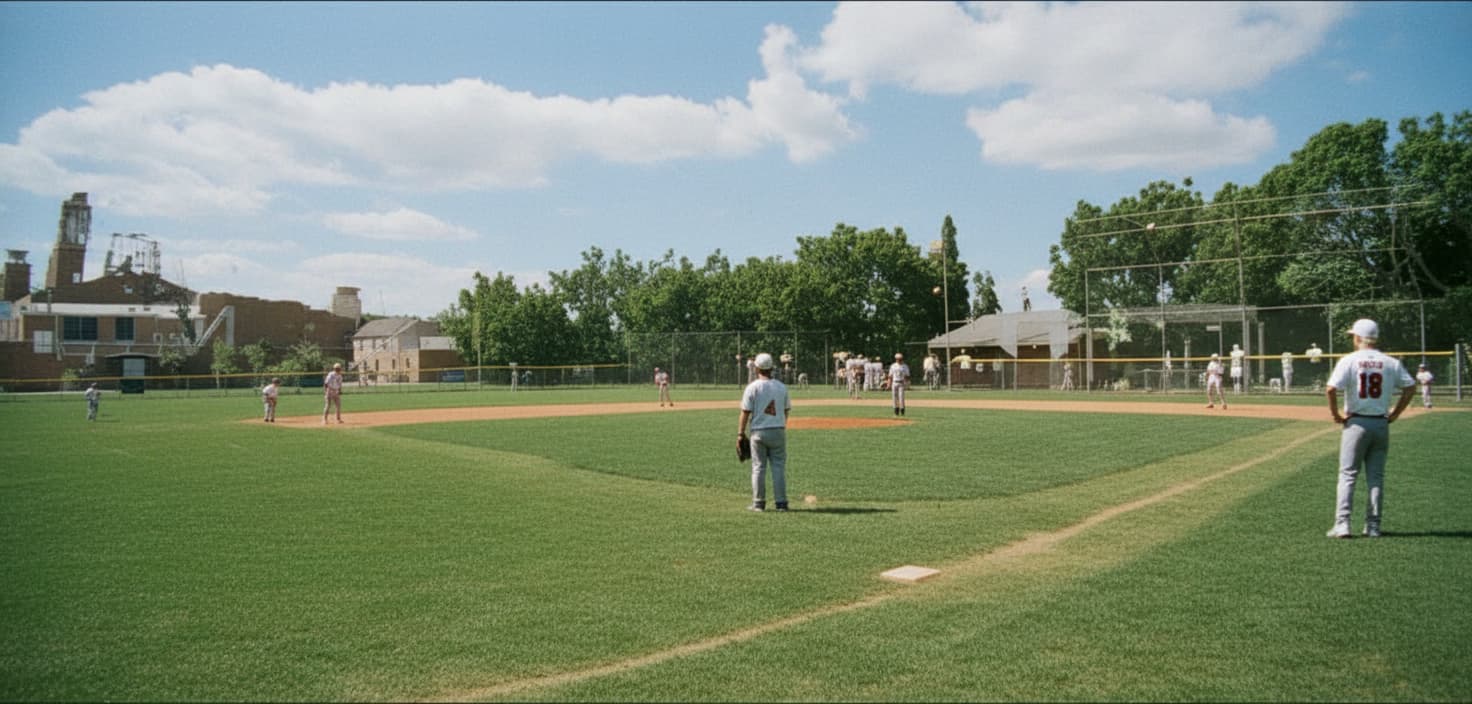
But I have some bad news for you/us. Here’s what Gemini Flash 2.5 was able to do with the negative.
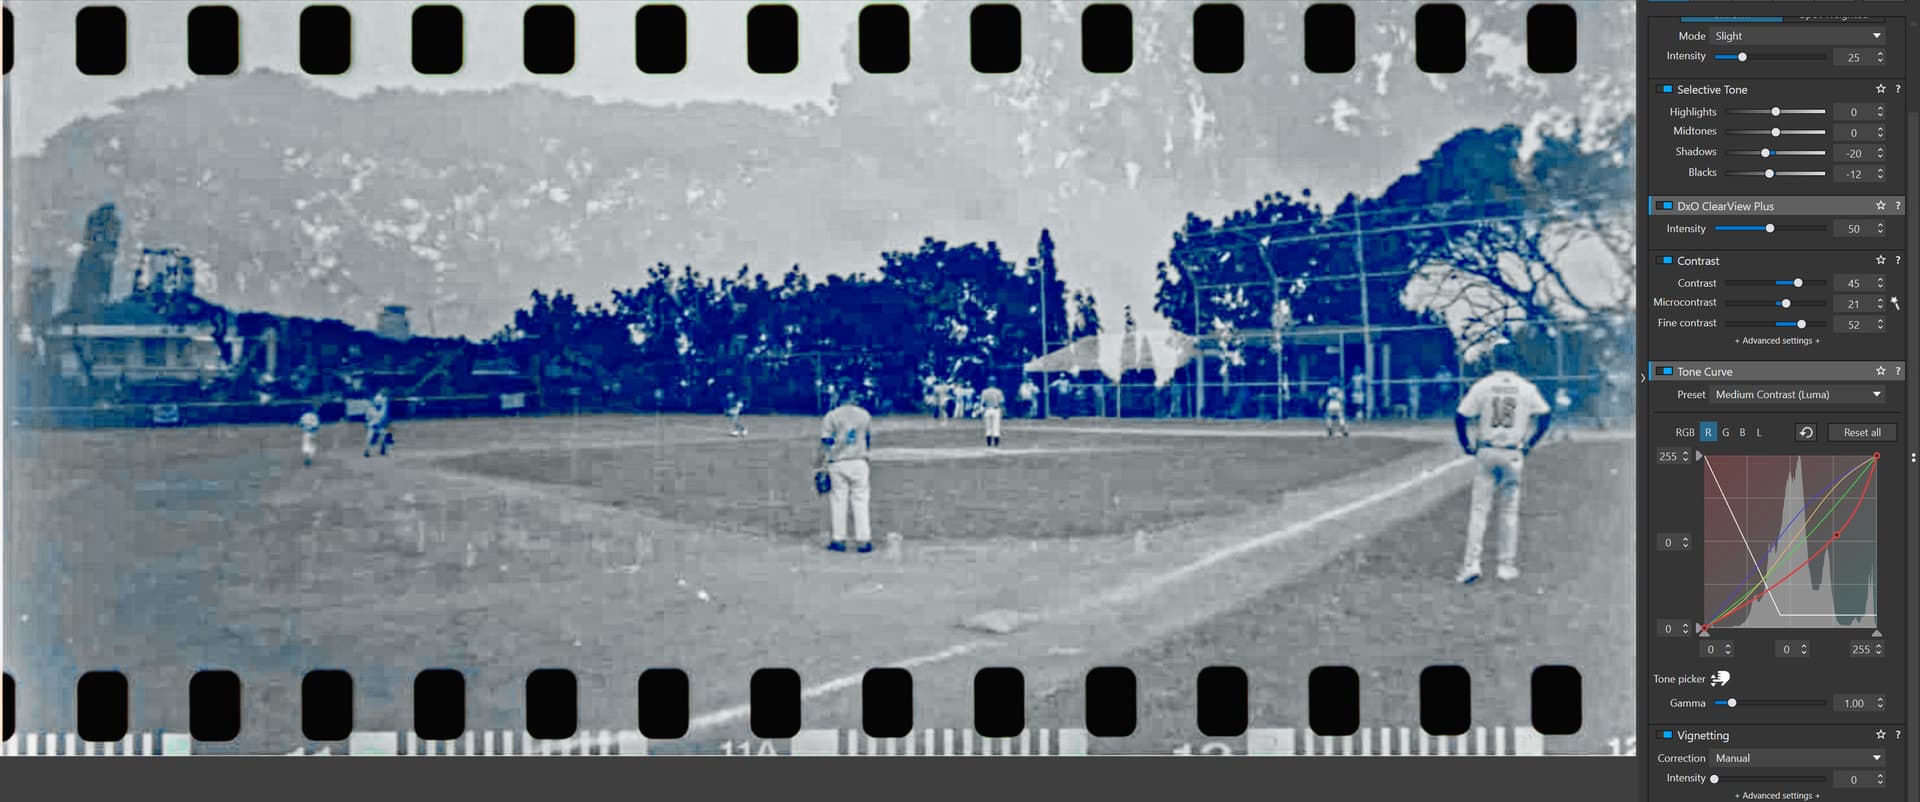
It’s beat me with about two or three different techniques, and you too Stenis, and both of us are reasonably good hands. This is what I could do in FilmPack 8 with a tweak afterwards in PhotoLab. I was able to retain some of the original colour.
In fairness to us (the humans), the original appears to be a double-exposure and Gemini just throws away the original information and makes it an ordinary photo.
The key trick after the initial curves was to add a cyan colour filter in PhotoLab. I went through all the colour filters to find the one which removed the heavy blue cast post-FilmPack. Colour filter correction is old school photography but clearly has its place in negative conversion.
@SAFC01 It’s a really tough image. If you are game for it, perhaps you could put up a full size negative scan alone for people who like to test their negative conversion skills. I’d like to have a go in C1 with their more powerful curves inversion.
Except, to me, it looks like Gemini has invented stuff. Compare the two versions of the person in the background at the right of the frame. To me, in the original it looks like the player has their back to the camera and they are carrying a baseball bat whereas in Gemini’s version they are facing the camera and are not holding a bat.
So yes, it’s an impressive restoration but it’s not a faithful restoration.
Of course, that might be OK for your purposes but it would annoy me.
Not to mention that the dirt infield in the foreground has been turned to grass.
Maybe confused it with a cricket ground.
Stenis
(Sten-Åke Sändh (Sony, Win 11, PL 6, CO 16, PM Plus 6, XnView))
17
It is pretty fantastic. The environment is handled not perfect but maybe acceptable for some use BUT it is just crazy what it has done with the players. It is an entiredly diffent team!!
In fairness to us (the humans), the original appears to be a double-exposure and Gemini just throws away the original information and makes it an ordinary photo.
Yes, Gemini just makes up stuff. I’ve tried it on some old prints and it got off to a good start when asked to clean up some discolouration. When I asked for some corrections, the people in the photos came back with demonic eyes.
What’s relevant here is not the results now, but the results in two years, let alone three. Almost all of the manual restoration of technical flaws will have been taken over by AI retouching routines. AI does in about one minute, what it would take one of us between half an hour and four hours to do (depending on the damage, and how exigent the final requirements).
I’d be careful about how much I invested into any digital restoration tools now. Almost everything we buy now will be as obsolete as a buggy whip by 2027.
This isn’t a dig at RAW development tools like PhotoLab which are focused on photography and which will continue to exist as people do want to see real images. Restoration is a different matter. I can just see the committees set up like the Spanish Inquisition on allowed and not allowed restoration routines. Humans are strange!
Stenis
(Sten-Åke Sändh (Sony, Win 11, PL 6, CO 16, PM Plus 6, XnView))
20
I have realized that I have lost my perpetual key for Vuescan (shit), so I haven’t been able to give Vuescan a try with that color negative. They have also gone subscription but it is also possible to buy a perpetual more expensive license. Friday is the last day still with a good discount and I will buy a new perpetual I think, cause I will need it anyway later.