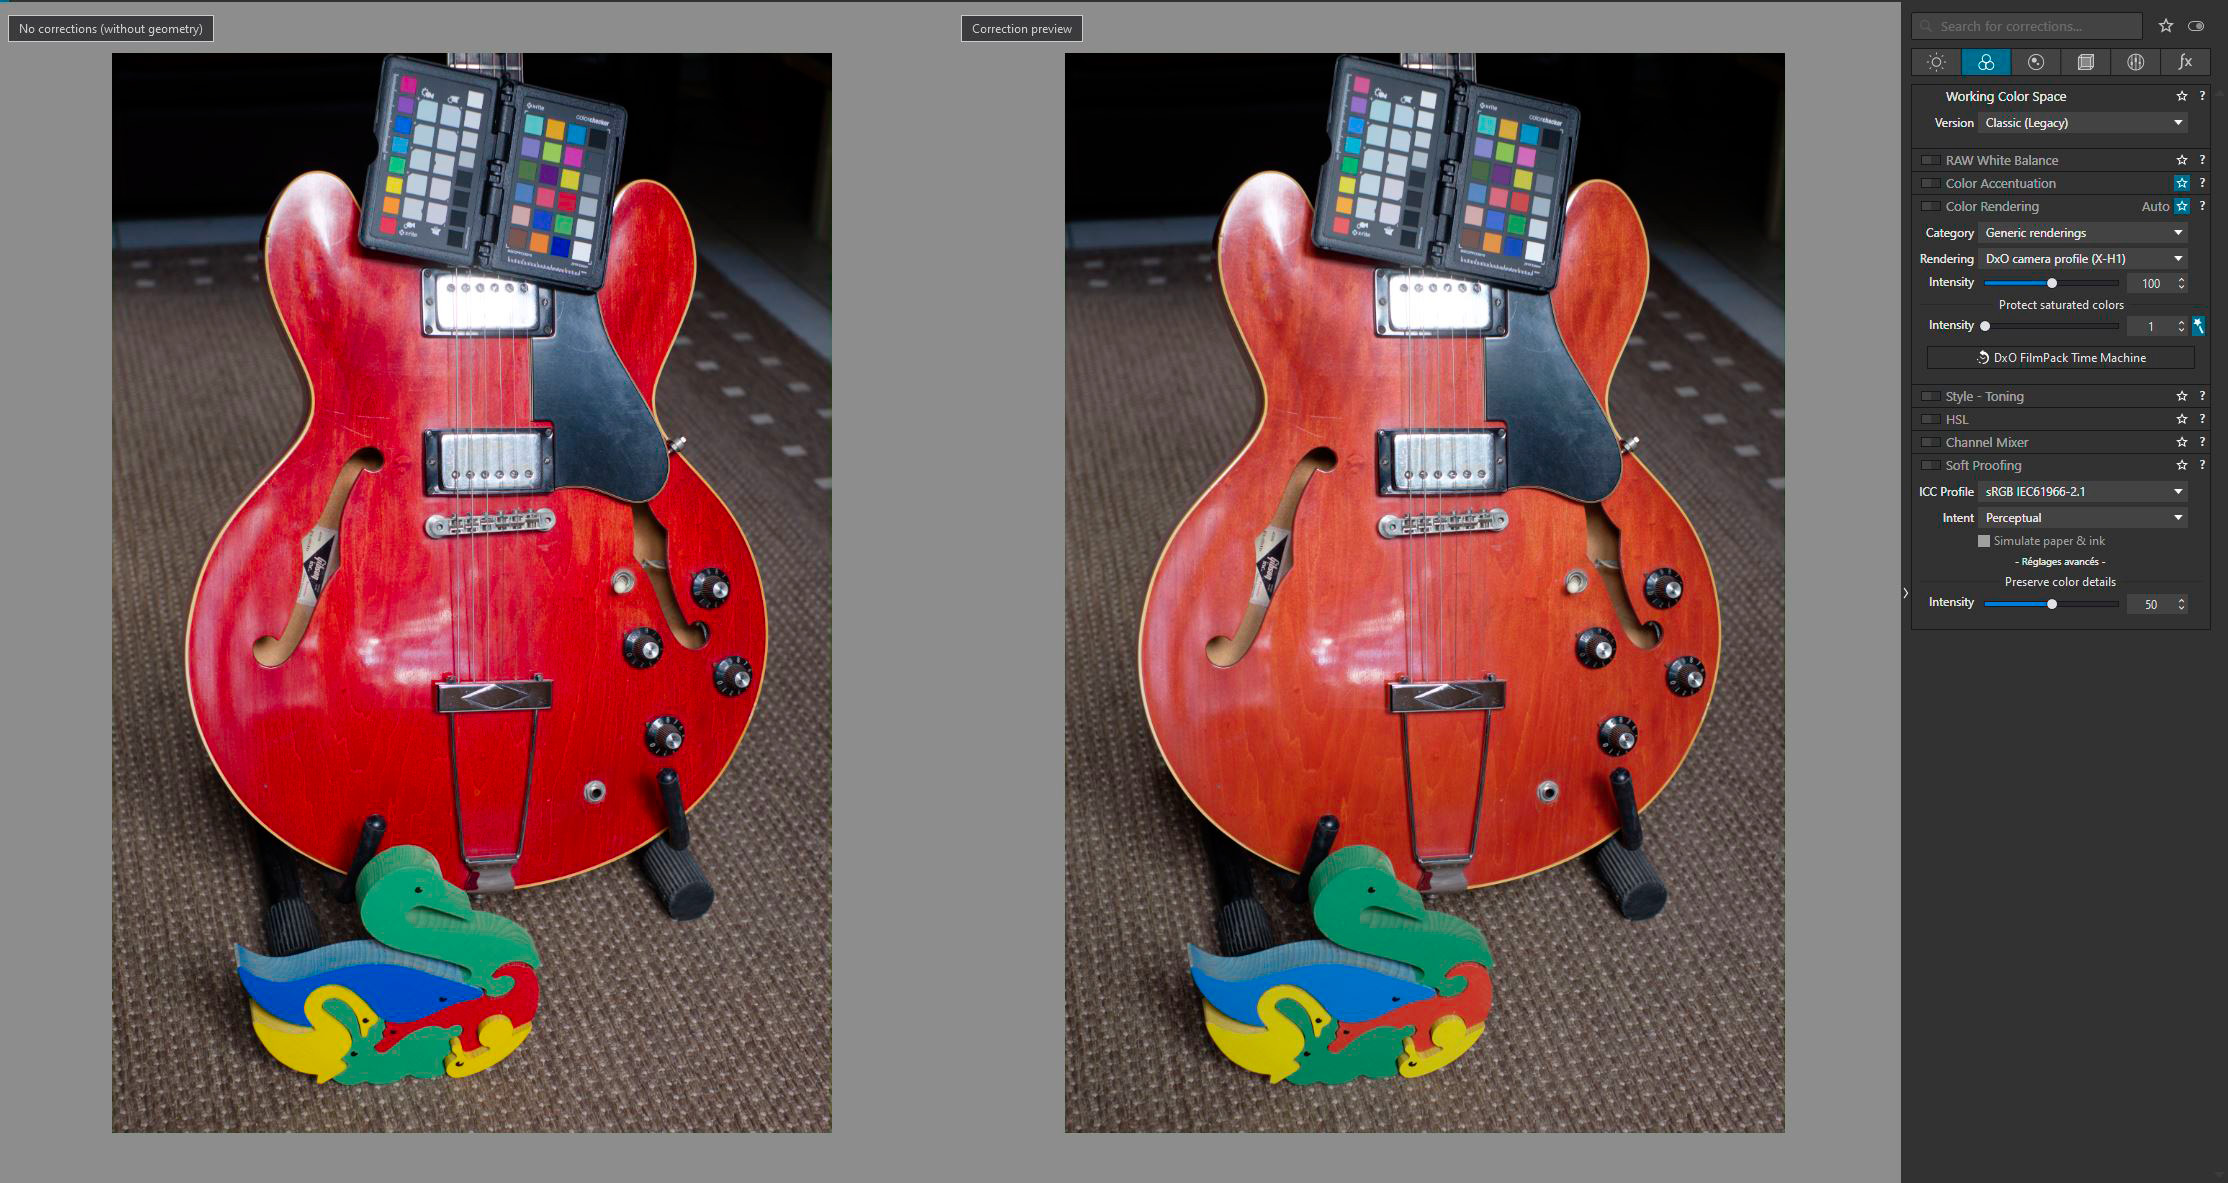
That is exactly what I thought might be happening and I posted my screenshot example of the same thing and have been trying to explain to you what has been happening and why. It’s not a bug.
The slider for intensify changes automatically, but you will have to ask DXO team why it does so in this particular way. It’s not a bug from what I can tell or a color management issue, its a matter of preference.
It’s not entirely clear why DXO team decided to use the intensity slider at different values, but I assume it has to do with the arbitrary value of one vs the other color space that is not based on standard. Just a way to start adjusting the image appearance manually.
[quote=“Photo-DKO, post:25, topic:31957”]
That is an entirely wrong assumption. A display is a output device and fortunately for us color management applies to displays too. Otherwise photo editing or graphic design would be a nightmare. [/quote]
You don’t understand. If you want to keep the appearance of RAW rendering as camera propitiatory profile does it Classic (Legacy) and you can either generic rendering options, and whatever your camera model is. Or you can load a custom ICC or DCP profile to maintain the appearance of the what the camera JPEGs would look like.
Classic (Legacy) - Color processing pipeline used by DxO PhotoLab 5 and below. Color adjustments are applied in the AdobeRGB color space (RAW) or in the input color space (JPEG/TIFF).
That also means if you load an image you download from the internet it should keep the same appearance as JPEG and TIFF. Switching between WGM and Classic should also keep the same appearance.
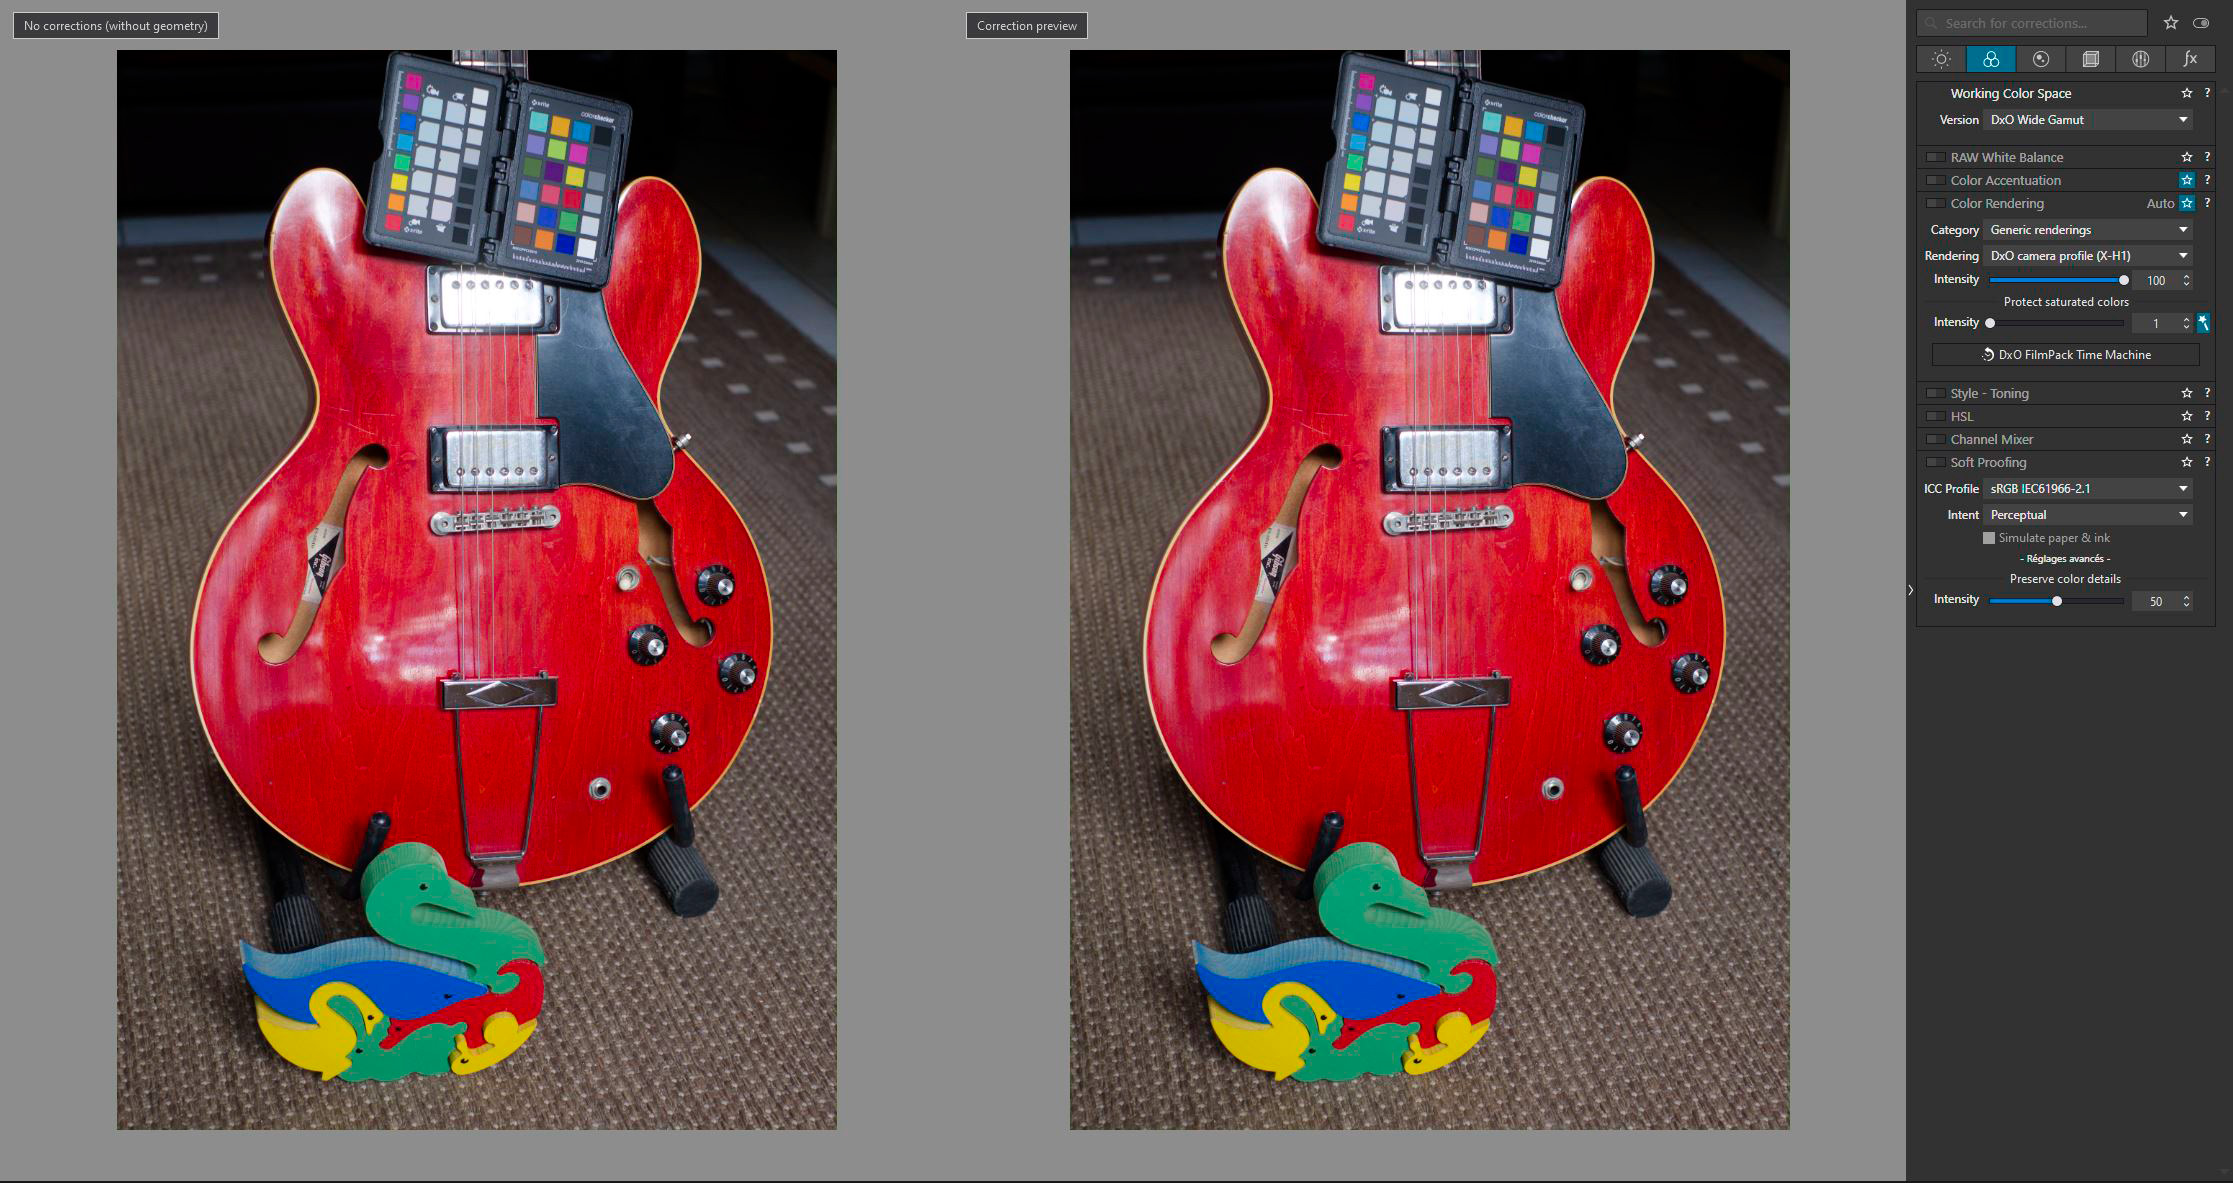
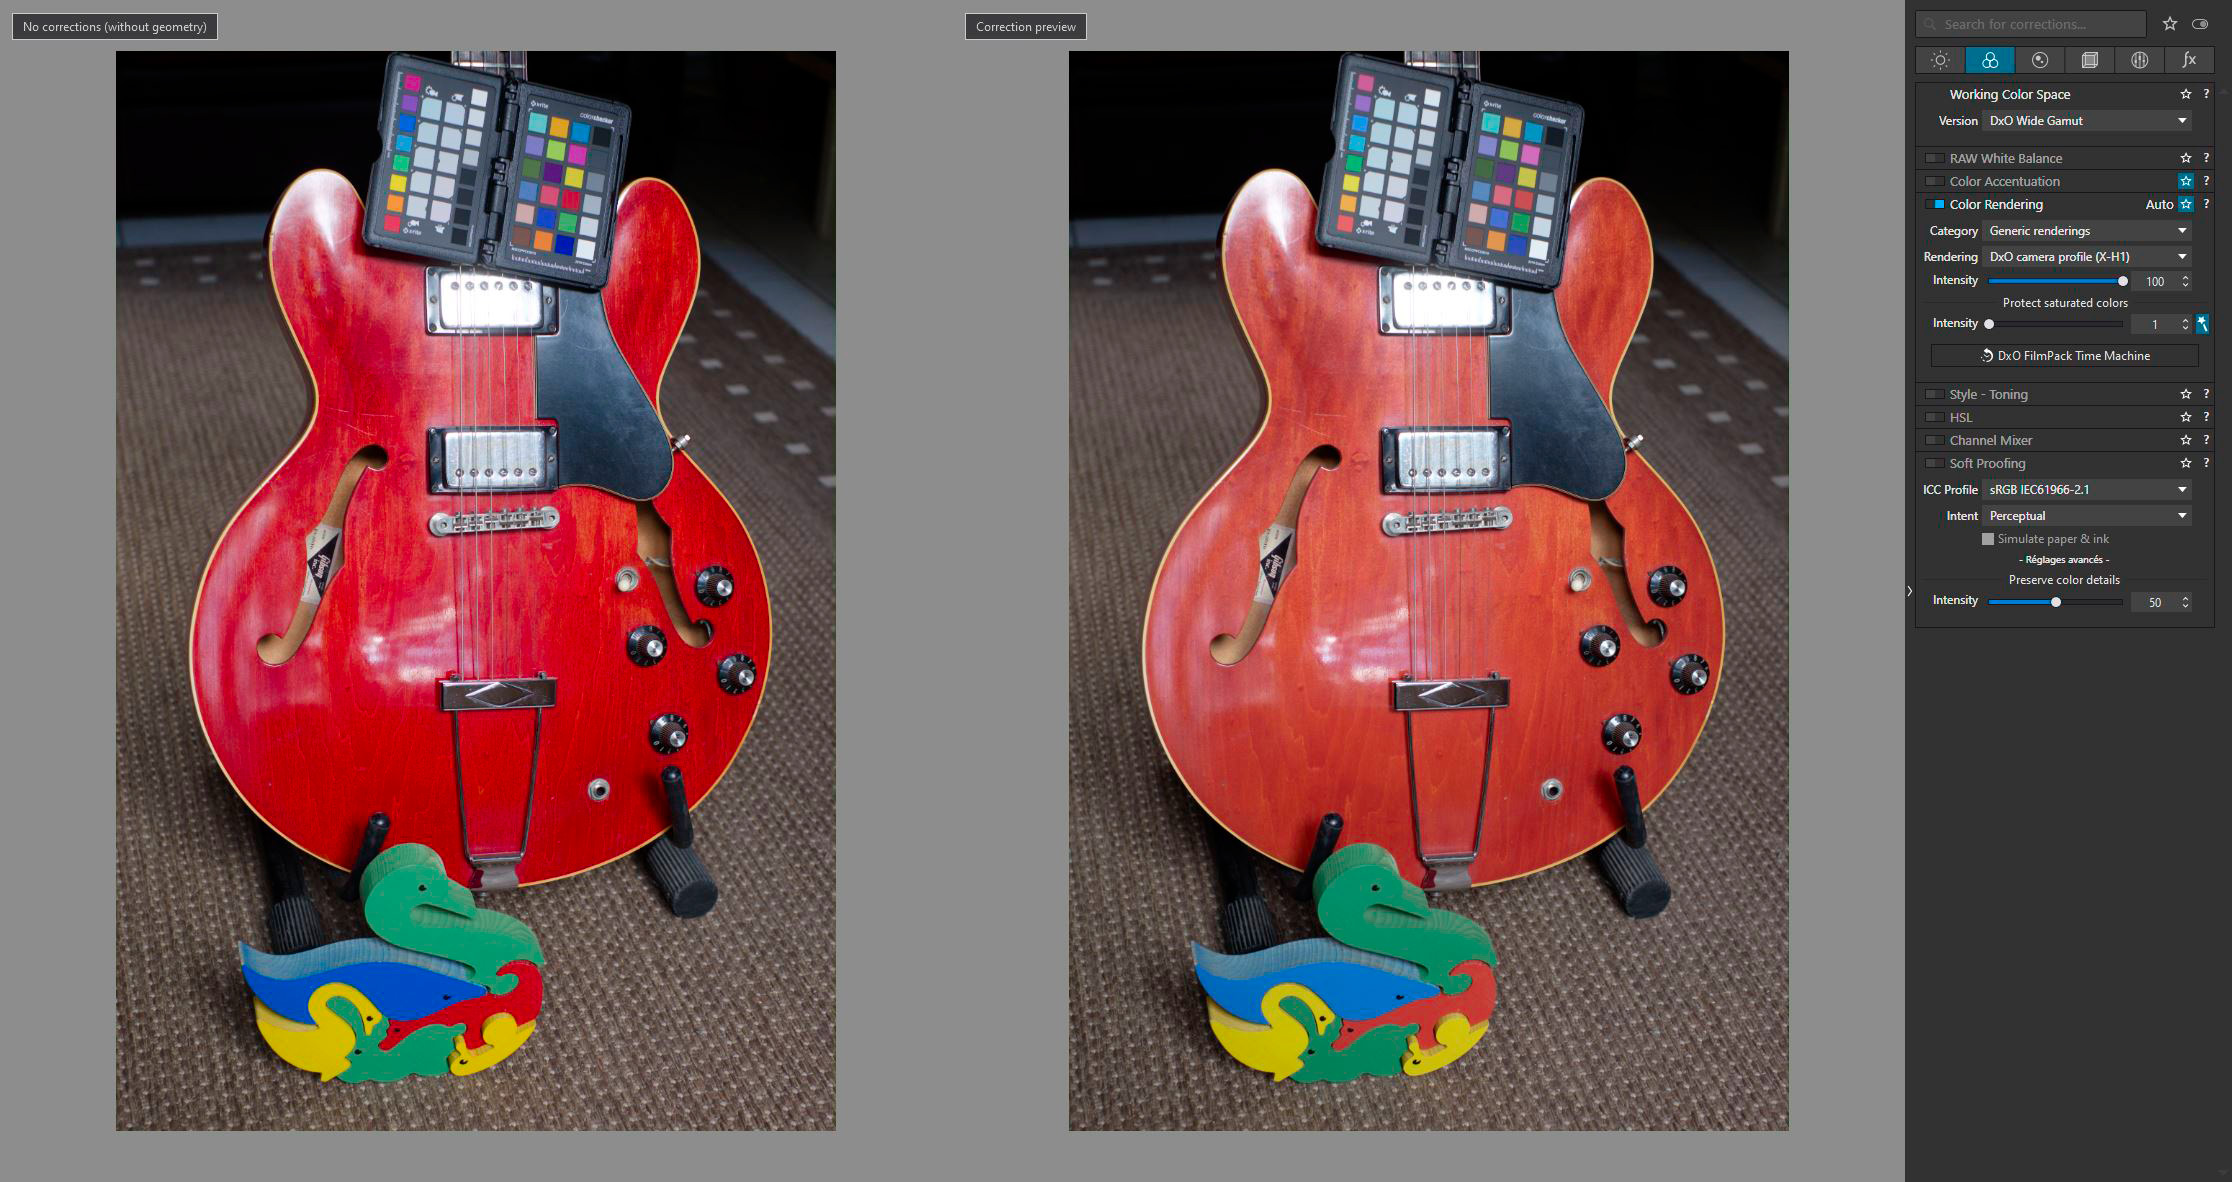
When you work with RAW images and you want to get the most out of it, DXO has created a proprietary DXO Wide Gamut Working color space. I want to stress out here the term working color space. Not color profile, color space.
DxO Wide Gamut - Color processing pipeline introduced in DxO PhotoLab 6. Color adjustments are applied in a wide gamut color space. Conversion from sensor native color to working color has been optimized for highly saturated colors.
DXO PhotoLab is an application mean to develop RAW files and adjust them to your liking before exporting them. Depending on your output device, web or print, you can use a soft proof feature to simulate how they might look, and you can embed color profile during export to ensure color management applies.
“A display is a output device and fortunately for us color management applies to displays too.”
Yes, it does, that would be your monitor that has its own color profile. And it’s separate from DXO photo lab and separate from DXO Wide Gamut Space.
What you claim to know, you don’t. You have a misunderstanding about the way PhotoLab works with color, even if it’s explained in the app itself.
You might have an understanding about color management as a topic, but you have a misunderstanding about DXO PhotoLab and how it works. If you could stop being stubborn for a moment and pay attention to what I’m telling you, you would have a better understanding. Your 66 years is irrelevant for this matter.
Once again color rendering is a simulation feature that can act as a color management assistant feature, but it is not, strictly speaking part of the color management because it can simulate not just current devices, output devices or input devices, but also devices that don’t even exist physical or are not digital devices, like the film simulation. Like I said , it’s a feature to simulate color. Simulation can be what your input was or what your output was or something that does not even exist or it’s not a digital device. That is the beauty of the simulation, it can provide more creative freedom.
It does not hinder color management it’s not a bug, it’s a feature that compliments color management inside DXO Photolab.
…
Official manual provides more clues.
RAW images
Because RAW images still contain all the luminance information and have never been converted into any color space, they are particularly suitable for the Color rendering correction. This means that many creative opportunities are open to you, as you can see from the contents of the two drop-down menus Category and Rendering:
Generic renderings: Camera Body is the camera default rendering: if you select a JPEG file, the rendering will match the manufacturer’s. In the second dropdown menu, you have the choice between four “neutral color” settings, which differ slightly only in the shape of their tone curves (i.e., contrast levels). Of these, the Neutral color, neutral tonality setting is our baseline for switching from any color rendering to another.
DxO PhotoLab does not take into account the photo styles provided by some camera makers. However, it will try to match the standard original rendering as closely as possible. Note that DxO PhotoLab lets you apply Fuji renderings (see below).
Camera body: When selected, this option reveals (in the second drop-down menu) a long list of cameras of different makes and models which DxO Labs has tested and measured, and whose color renderings you can use.
Color Positive Films: Without the DxO FilmPack plugin, DxO PhotoLab offers by default one single choice, Color-positive films, a selection of generic positive films.
If DxO FilmPack is not installed and activated on your computer, the available analog film simulations will be limited to a very small list of well-known positive color films (Kodachrome, Fuji Velvia, etc.). However, if DxO FilmPack is activated, you can choose among many more different film types (for more information, see the DxO FilmPack user guide).
ICC Profile: Choosing ICC Profile opens a dialog box for browsing your file system to find color profiles that you might want to use. Remember that an ICC profile is a set of data that characterizes any visual device such as a camera, a screen, a scanner, etc. As with JPEG or TIFF images, an Intensity slider allows a progressive change of the image’s original color space into another. At 0, only the original image appears; 100 is the default setting; and above 100, the image is “hyper-corrected.”
DCP profile: See Using DCP Profiles for more information.
Intensity Slider: The Intensity slider enables gradual changes to the rendering of the original image in another color render. 0 matches the original image, 100 is the default setting. If the color profile is Classic (old), values above 100 will allow for extreme corrections. If the color profile is DxO Wide Gamut, the maximum value is also the default 100.
Protect saturated colors: The Protect saturated colors correction prevents some specific saturated colors from being clipped, which may lead to unnatural colors and loss of texture when a particular color channel is close to the minimum or to the maximum luminance intensity (0 or 255). This process is performed automatically; you can fine-tune or modify the result with the Intensity slider. Clicking on the magic wand restores the image to the original automatic setting.
The Saturated Color Protection slider only works if you apply a special color rendering. On RAW files it always works because you have to apply a color rendering system (the default camera renderer); For JPEGs, the device has already applied a rendering, in which case DxO PhotoLab will not apply color rendering unless explicitly requested.
Fuji images
If you are using a Fuji camera, you have the option to automatically apply the camera’s generic or analog rendering. To do this, you will need to activate the option Automatically use Fuji camera rendering for Fujifilm images in the Preferences > General tab of DxO PhotoLab. There are two possible scenarios, depending on whether DxO FilmPack is installed or not:
DxO FilmPack not installed: the rendering will be the generic rendering of the camera, and DxO Photolab will apply this rendering if the camera is set to Fuji film rendering.
DxO FilmPack installed: in addition to the generic Fuji rendering, you will have the choice of all Fuji renderings to apply as you wish. Note that in this scenario, you will also be able to apply Fuji renderings to any brand and model of camera supported by DxO PhotoLab (renderings are available either in the Color > Color Rendering > Rendering palette or in the Presets, DxO FilmPack Designer – Color and DxO FilmPack Designer – Black & White sections).
https://userguides.dxo.com/photolab/en/general-image-corrections/