Nikon Perspective Control Lenses - only for interested people

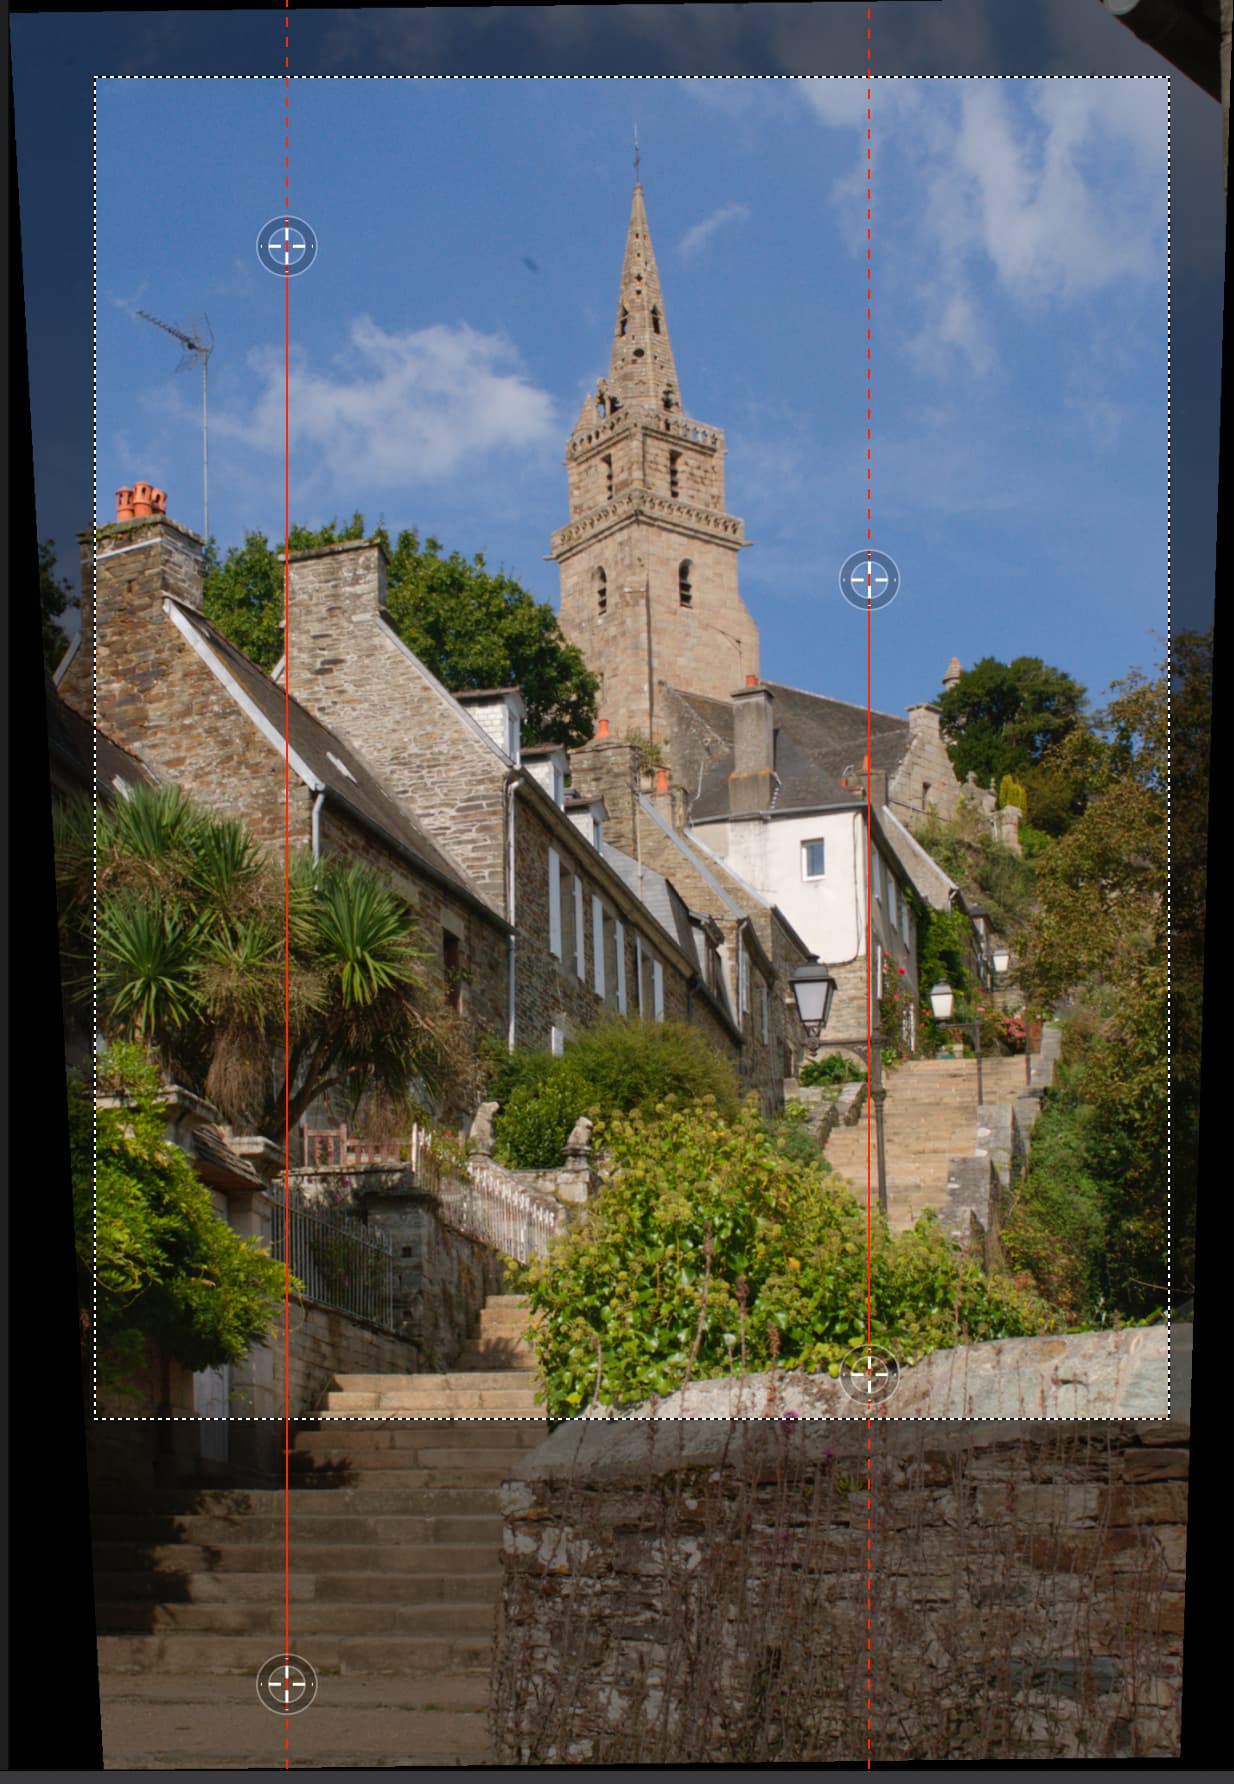
This thread is not about PhotoLab, at least not directly. It’s about Perspective Control Lenses, that can adjust the perspective BEFORE opening the file in PhotoLab.

I’ve been working with (fighting with) a Nippon Kogaku PC-NIKKOR 1:2.8 f=35mm lens. I couldn’t find anything on the internet about it, so I called Nikon Tech Support - after an hour of endless searching, the technician found the instructions:

https://cdn-10.nikon-cdn.com/pdf/manuals/archive/PC-Nikkor%2035%20mm%20f-2.8.pdf

Nikon made both “shift” lenses (like mine), and “tilt” lenses.

I’m wondering if anyone here has any experience with these lenses, and if so, any recommendations.

It has an aperture ring for f/2.8 through f/32, but it has a “minimum aperture ring” which can restrict how far the real aperture lens can be adjusted. Currently that is set to f/16, and because of diffraction, I doubt I would want to go beyond that.

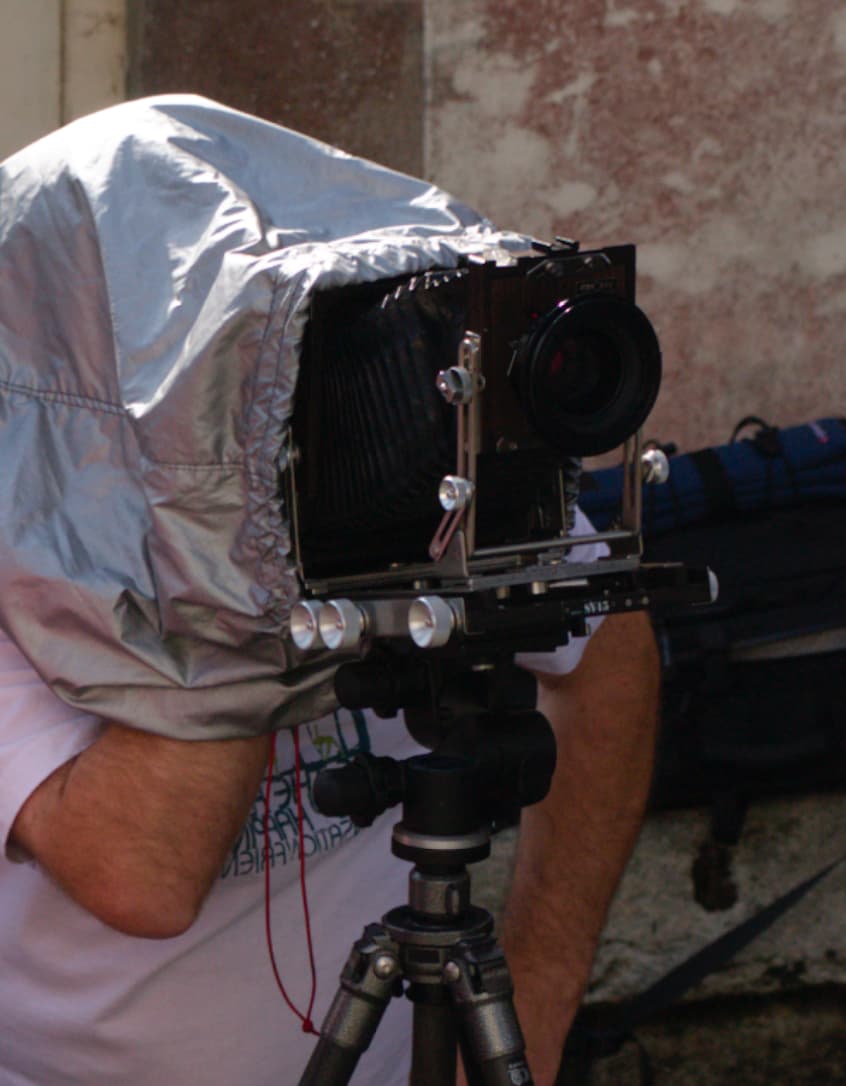
(It’s the closest I’m ever going to get to having an “almost” view camera.)

If anyone here has such a lens, I’m wondering if you can give me any advice or suggestions.

I often find myself correcting perspective in PhotoLab, because I didn’t hold the camera level, and sometimes things got tilted a lot. If I keep this lens handy, and if it works as expected, it might be very useful for me.

Are you familiar with Keith Cooper from Northlight Images?
He has a series of YouTube videos on tilt/shift lenses.
Not exactly what you are looking for, I know.
There is a video on a Laowa 20mm f/4 shift lens (without the tilt) which may be closer to what you are looking for.
See this link: https://www.youtube.com/watch?v=GsMJomc3EQw

No, never heard of him, but later today I will check out the link you posted, and also Keith Cooper’s articles here:
https://www.northlight-images.co.uk/tutorials-and-how-to-articles/

Also, videos, starting with the basic one:
https://www.youtube.com/watch?v=alTQ0pWJlpM

Thanks for the feedback. I’ve learned more about these lenses in the past few hours than I have in the past 15 years. Joanna’s feedback helped, but I need a very simple starting point. Joanna’s middle name is “LargeFormat” so I think she already knows all there is to know. !!!

I think I’ll put the shift lens on my otherwise bored Nikon D3, and play around with it trying things out. I’d love to learn how to make use of this lens (which I realize is backwards, first I should find an application, and only then learn how to use these lenses, but I need to start somewhere…

In hindsight, I should have left the word “Nikon” out of the title for this thread - I suspect many other companies might make these lenses.

First impressions:

Negatives:

  • If I mount the lens on my D3, lens pointing straight ahead, everything works as expected. The over/under exposure indicators work, but when I use the “shift”, the viewfinder gets darker and darker and the metering no longer works.

  • Focusing - well, my D3 has none of the focusing aids, and it’s better to guess the distance. The camera is a guide, but I’ve long since forgotten how to focus without any of the devices that make this easier, for example on my F2 with a split image rangefinder.

  • Viewing - the D3 doesn’t have the aids that help keep the camera level, which I need to do to use the lens properly.

Positives - as I adjust the shift, while the viewfinder gets dark, the images seem to come out fine. I guess that makes sense the light still reaches the sensor, but at an angle.

Can use an external exposure meter to get the right settings, a tripod, and a level to make sure the camera/lens is level.

I haven’t yet taken any images to make use of this lens, but I did make a comparison of the lens “level” and with the lens “lowered”. At least a good attempt to accomplish that, just for comparison purposes:

I can see where I’ll need a tripod and a bubble-level to keep the camera level.

Perhaps I’m just wasting my time, but if I want to do it “for real”, preferably on the D780 which will help in leveling the camera, I’ll perhaps know enough to do so.

You’re sure this lens is meant for FF?

George

Yes, but according to the instructions (posted earlier) metering is supposed to be done before the “tilt”, while the lens is still centered.

Following those instructions, everything works the way it’s supposed to work.

That i don’ understand. If you see the viewer getting black than the image circle doesn’t cover the mirror/sensor.

George

I agree with you.

https::cdn-10.nikon-cdn.com:pdf:manuals:archive:PC-Nikkor 35 mm f-2.8.pdf (5.3 MB)

No need for you to read through all that - I did yesterday, and yes, it does cover the full sensor, but no, I can’t see it in my viewfinder. It works properly, in use. It works in LiveView also. Maybe the image works once it hits the sensor, but bouncing off the mirror, it no longer works…

They do tell me to set the exposure before moving the lens, after which there is no way to set the exposure.

It doesn’t adjust perspective. It’s moving the image circle parallel over the sensor. When trying to shoot a high building from grond level it’s difficult to include the top and the bottom of that building in the same image. To do so one has to tilt the lens causing a wrong perspective.
In this example there is a lot of foreground. When keeping the camera level but shifting the lens the image circle is moving upwards, some less forground and some more of the top of the building.
Moving the image circle is something else as moving the camera.
About your lens it’s a very old lens.
https://www.mir.com.my/rb/photography/companies/nikon/nikkoresources/PC_Nikkor/
https://www.mir.com.my/rb/photography/companies/nikon/nikkoresources/PC_Nikkor/index1.htm
https://www.mir.com.my/rb/photography/companies/nikon/nikkoresources/PC_Nikkor/index2.htm
If you want to know how old your lens is. Seek the chapter pc-lenses.
http://www.photosynthesis.co.nz/nikon/serialno.html

Your images are a wrong example for the use of this lens.

George

1 Like

Agreed. But the name of the lens is PC, for Perspective Control, and I’m using it in order to avoid perspective issues, that the use of this lens can correct.

Thanks to your link, here’s the information:


So, 1968 to 1972.

That wasn’t the point of posting those images - it was only just to show what changed when I lowered the lens as far as I could. At some point I will try to capture and post photos for a more appropriate use of this lens.

I wasn’t aware of that link, so I called Nikon USA Tech Support, and they sent me the user’s manual which I have already posted a link to get all the old information about my lens. From your first link, this is apparently started in 1962. Excellent link, for me, thank you for finding and posting it. But I did find the age (see above) thanks to you! I have other lenses I may want to look up, including my old Nikon 80-200 f/2.8 which I “replaced” with a newer lens, but still have the old one.

Your second link was fascinating - very much appreciate your finding it and posting it. It makes me even more intrigued with this lens, and anxious to try it some more. I was unaware of all that information. It’s so old, it reads “Nippon Kogaku” instead of “Nikon”. I will slowly read all the detail, later today. It has a purpose, but I think it should be used carefully, and slowly, while mounted to a tripod so I know the camera is level.

I suspect when Joanna took photos with her LF camera, the camera was usually perfectly level, and she adjusted the height of the lens to capture what she wanted in the photo. Me? I aim the camera to get what I want, and correct parallax errors in PhotoLab. I’m not sure when (or if) I will actually use this lens - it just sits in my lens drawer for lenses I don’t usually use, for whatever reason. Of course, on her camera, the lens mount has far more adjustments - not sure how often she uses them, but I suspect for her, this is just as easy as selecting an aperture.

Once again, all the information you found is VERY much appreciated. You are infinitely better at Google Search than I am. Later today, I will read everything you found, in detail, slowly.

Nothing is changing. I mean the images with the fire hydrant. It fits on your sensor.

George

Well, to me, the difference between those two images, taken from the same position, is that the camera seems to be pointed down, which it wasn’t. Only the lens moved down, so effectively, the camera was aimed lower, but in a way to not distort the perspective.

I should have done this more precisely, using a tripod I guess.

I’m referring to the 4th post to this topic, with the two images from my front porch.

If you move a shift lens downwards, you are effectively simply lowering the camera.

Why? You didn’t even need the shift lens for the shot you took.

Here’s a shot taken with vertical shift on my Ebony…

And here is a shot taken on my old D200, allowing room for perspective correction in PL…

Here is a shot of a student learning how to set the movements for his attempt at that shot…

Notice how the rear standard is vertical, the front standard is vertical and the baseboard is tilted up at the front to add extra rise because the front shift didn’t give enough rise on its own.

Unless you are using a tripod with the camera completely vertical, there really isn’t any point in using a short lens, especially if you can correct the perspective after the fact in PhotoLab

I only posted the photos to show that the camera seems to be “lower”. It’s a nothing photo, just a test.

I never put it together in my mind as clearly as what you wrote, but it’s misleading as with this lens I am looking “down” at things. It won’t be as if I simply lowered the camera. But I accept that.

I was wondering about that - doesn’t using PhotoLab to correct perspective also “distorts” in other ways? Are both results identical?

Maybe I’m wrong, but I always felt that correcting perspective on the camera is preferable to correcting it during processing.

Also, from other things you’ve written, I thought that tilting the lens was to alter the depth of field?

Thank you for that photo! In a past life, I might be doing what you show, and I had cameras that could do all that (but not the experience). I sold all that old camera gear.

I’m tempted to just put that old PC lens back in my drawer, and try to concentrate on more important things.

And, indeed, it is lower, but only because the lens is lower in relation to the sensor.

No you’re not you are looking straight ahead, just from a lower viewpoint.

Yes, it can also change the relative X/Y dimensions, so this needs to be corrected as well as straightening the verticals.

They can be if you know what you are doing.

Of course it is but it requires a lot more learning and time to implement.

Tilting the lens is a totally different movement, used for entirely different reasons. it doesn’t just change the DoF (front to back), it also changes the angle of the plane of focus from vertical to an angle to suit the subject and the DoF changes from a parallel section to a wedge, which starts at the film plane, in one of the four possible directions (above, below, or two sides).

Better still, sell it to someone who can make use of it. It is way too old to work with any of your modern kit.

I don’t think I agree.

Place two candles on a table, one in front of the other, and shoot them head-on, keeping the candles in the middle of the frame. They will appear to be at the same height.

Now, raise the camera perhaps one foot, and lower the lens for perspective control, keeping verticals vertical, and keeping the candles in the middle of the middle of the frame.

Because the camera is now higher, regardless of anything else, if you adjust the camera such that the “front” candle is in the middle of the frame, the rear candle will “appear” higher in the image.

In one case, you are shooting from the same height as the candles.
With perspective control, the camera (and your eye) will be higher.

You don’t need a camera to test this. Place two items in front of you, one perhaps a foot closer than the other. Look at them straight on, and they will seem to be at the same height. But stand on something, so you are looking down at them, and the closest one will be lower in the image than the furthest one. The higher up you are, the more noticeable this will be.

You can see this instantly with your view camera. Regardless of what you do with the lens, the higher your camera gets above the items, with shift lens or tilt lens, or anything in between, depending on the height of the items, and the camera, you can’t avoid this.

The camera may “look” like it’s shooting straight ahead when you use the “shift” lens, but the image can’t be the same, unless you lower the camera.

Sort of.

If I get down on my knees, and shoot the fire hydrant straight on, the hydrant will not be distorted, each side will be perfectly vertical, and the horizon will be somewhat centered over the hydrant.

Now, to exaggerate, let’s say I stand up, and take the same photo, adjusting the PC lens so the sides of the hydrant will still be vertical. Everything is fine.

BUT

While in the first photo, the horizon will be sort of centered vertically behind the hydrant, the more I am shooting DOWN at the hydrant, the horizon will be moving UP.

That’s what I’m trying to explain to Joanna.

The PC lens not only allows me to eliminate the tilted verticals, it also “raises” (or “lowers”) what is behind the hydrant. In fact, I used this in my last shots to prevent the horizon from interfering with parts of the hydrant, by raising/lowering the camera, and the PC lens should let me do this more easily, without obviously distorting the image.

I have no experience with a “tilt” lens, and I’d like to try one, but not if it means spending $1,000.

This has all been rather fascinating, and thanks to all of you for your help.

That’s about lesson 1 in photography. You can do that with any lens.

And now you’re moving the image circle over the sensor. Taking you can move the lens 11mm and your sensor has a size of 36x24 you can adjust the framing wit some less as 50%.

As long as your camera is leveled there’re no tilted verticals.
But I understand now what you where doing.

I didn’t like any of the images made with a tilt lens so far.

George

Mike, I have no idea what you are trying to do, apart from making life difficult and confusing.

In all my time using an LF camera with movements, I have never come across such a scenario.

There are two main uses for shift…

  1. Front rise for shooting tall subjects like buildings, to avoid tilting the camera, effectively cropping the foreground; or front fall for shooting subjects like valleys; effectively cropping the sky.
  2. Side shift to avoid reflections when shooting windows or the like, avoiding distorting the rectangular shape.

If a subject fits in the image circle, there is absolutely no need to use shifts.

The term perspective correction only applies when you want to avoid tilting or swinging the lens.

I think @George finally understood what I am trying to say.

If you take a photo with any lens, normal, tilt, shift whatever, and
then you take a photo with the camera at a higher viewpoint…

No matter what you do with tilt/shift/whatever, in both photos you are looking straight at the subject, and done correctly all the vertical lines will remain vertical, but the two photos can not be the same.

Even with your eyes - in both scenarios, your viewpoint is different. In one, you are looking straight at the scene. In the other, you are looking down at the scene.

That is the only thing I am trying to describe - all the other things mentioned here I can accept.

Regarding my PC lens, with everything I’ve learned here, I’m more anxious than ever to try it on a proper scene, but I’ll use a tripod and follow the instructions for measuring exposure - or use a separate meter.