Just not getting masking

Perhaps I’ve chosen the wrong software. I’m thinking that I may have learned a $500 lesson. 100% my fault for not doing enough with the trials.

But I’m struggling to do even simple type masks. (At least simple in On1 and C1).

Let’s say…
I have an image where I want to pull a gradient mask from right to left off the right side of the image. But I want the gradient to only be applied to the sky.

Can this be done in PL8 (short of having to manually erase the mask from the parts I don’t want it on?)

I know it’s probably me (and again, maybe I’ve simply chosen the wrong tool) but everything I try to do seems so hard and convoluted.

Anyone have any ideas before I just give up and move on?

Tom

1 Like

Try a Control Line instead. It works like a gradient mask, but is much more selective. You can use a combination of its eyedropper and the Chroma and Luma sliders associated with the mask to apply the mask only to the sky. It takes some practice, but becomes rather easy to do. Also, you can add negative control points and control lines to protect parts of the masked area. (You can’t erase parts of a control line, whereas you can erase parts of a gradient mask.) What DxO gives us is powerful, but takes work to master. More automatic masking would be nice, but simply isn’t available.

4 Likes

Don’t panic! PhotoLab can turn out amazing results but… if you are trying to compare how to do things with other software, you are going to have a learning curve to get the best out of it that can’t necessarily be learnt within a limited period trial.

That’ll be because PL maybe uses tools that you don’t yet know how to get the best out of.

You mean like this?

No mask…

Mask to darken left side of sky only…

And here is the mask before hiding it…

Especially note the placement of the pipette in relation to the mask - it has to be on the area to be masked and not left where it appears next to the start of the mask drag.

Also, you need to switch to the B&W mask instead of the coloured one to better see what is and isn’t going to be selected. here is a screenshot of what the B&W mask shows before changing the Selectivity sliders…

See how there might be darker areas (which will not be affected) but they are not truly black, so they still allow the mask to have an effect.

However, when you tweak the Selectivity sliders, you can end up with this…

… where only the left part of the sky is brighter than black, fading away towards the right.

You can see here…

… where I have added a second negative Control Line to make sure that the sky visible through the pier gets affected but not the pier structure above it.

And I have placed a couple of negative Control Points on the bright spots in the foreground to exclude them.

All these lines and points are contained in the one “layer” to form a “composite” mask.

But you really have to remember that it is a two stage process - you need to “construct” the mask before attempting to make any adjustments (apart from a tiny one to overcome a bug that hides the image until you do at least a minimal adjustment)


You can certainly do most of what you want with PL but you are going to have to plumb the depths of these powerful tools to find out which tool does what and how.

You would make life easier if you would post an image you want to edit and tell us what you want to do with it. Then we can advise on your best course of action.

5 Likes

Thanks… I understand I have to get my head around these tools… I am trying… Sometimes it feels more like banging my head against a wall though.

Tom

Doing masking in PhotoLab does take more effort then ON1. I have licenses to both for years but I rarely ever use ON1 and use PhotoLab all the time. Regardless of what at first blush seem like great tools in ON1, I find the results I get with PhotoLab to be far superior in almost every respect. For me it’s worth the extra effort. It’s the end results that count.

Mark

2 Likes

@Joanna!!! Somehow I’d missed the concept of NEGATIVE control points/lines. THANK YOU, THANK YOU, THANK YOU.

From this perspective at least, this has been a bit of a revelation for me this morning.

This is VERY powerful.

This is very true and I’ve admitted as much in my posts. IE. Its probably me :stuck_out_tongue:

Again, thank you for this walk-through. So helpful.

Tom

2 Likes

Thanks, Mark. I’m ‘learning’ to agree with this. And I AM trying to put in the effort… Sometimes, you don’t know what you don’t know… but @Joanna certainly helped some scales fall off these eyes this morning (so to speak).

Tom

1 Like

Control points and control lines (including the negative versions) are extremely powerful. It usually takes a bit more clicking to get a mask ready vs Lightroom or Capture One, but you can usually get there in the end with Photolab.

On the flip side, since the edges of the mask are often a bit “softer” in Photolab, I find that it also helps reduce unnatural looking results when you push the adjustment too far.

1 Like

OK, let’s take a look at Control Points.

Up to PL6, Control Points were simply a mask, whose selectivity was based on the point in the middle of the circle and was fairly vague in the area around it that was affected.

PL7 changed that and introduced the concept of Selectivity, allowing the user to choose how much tonal range was made available for editing.

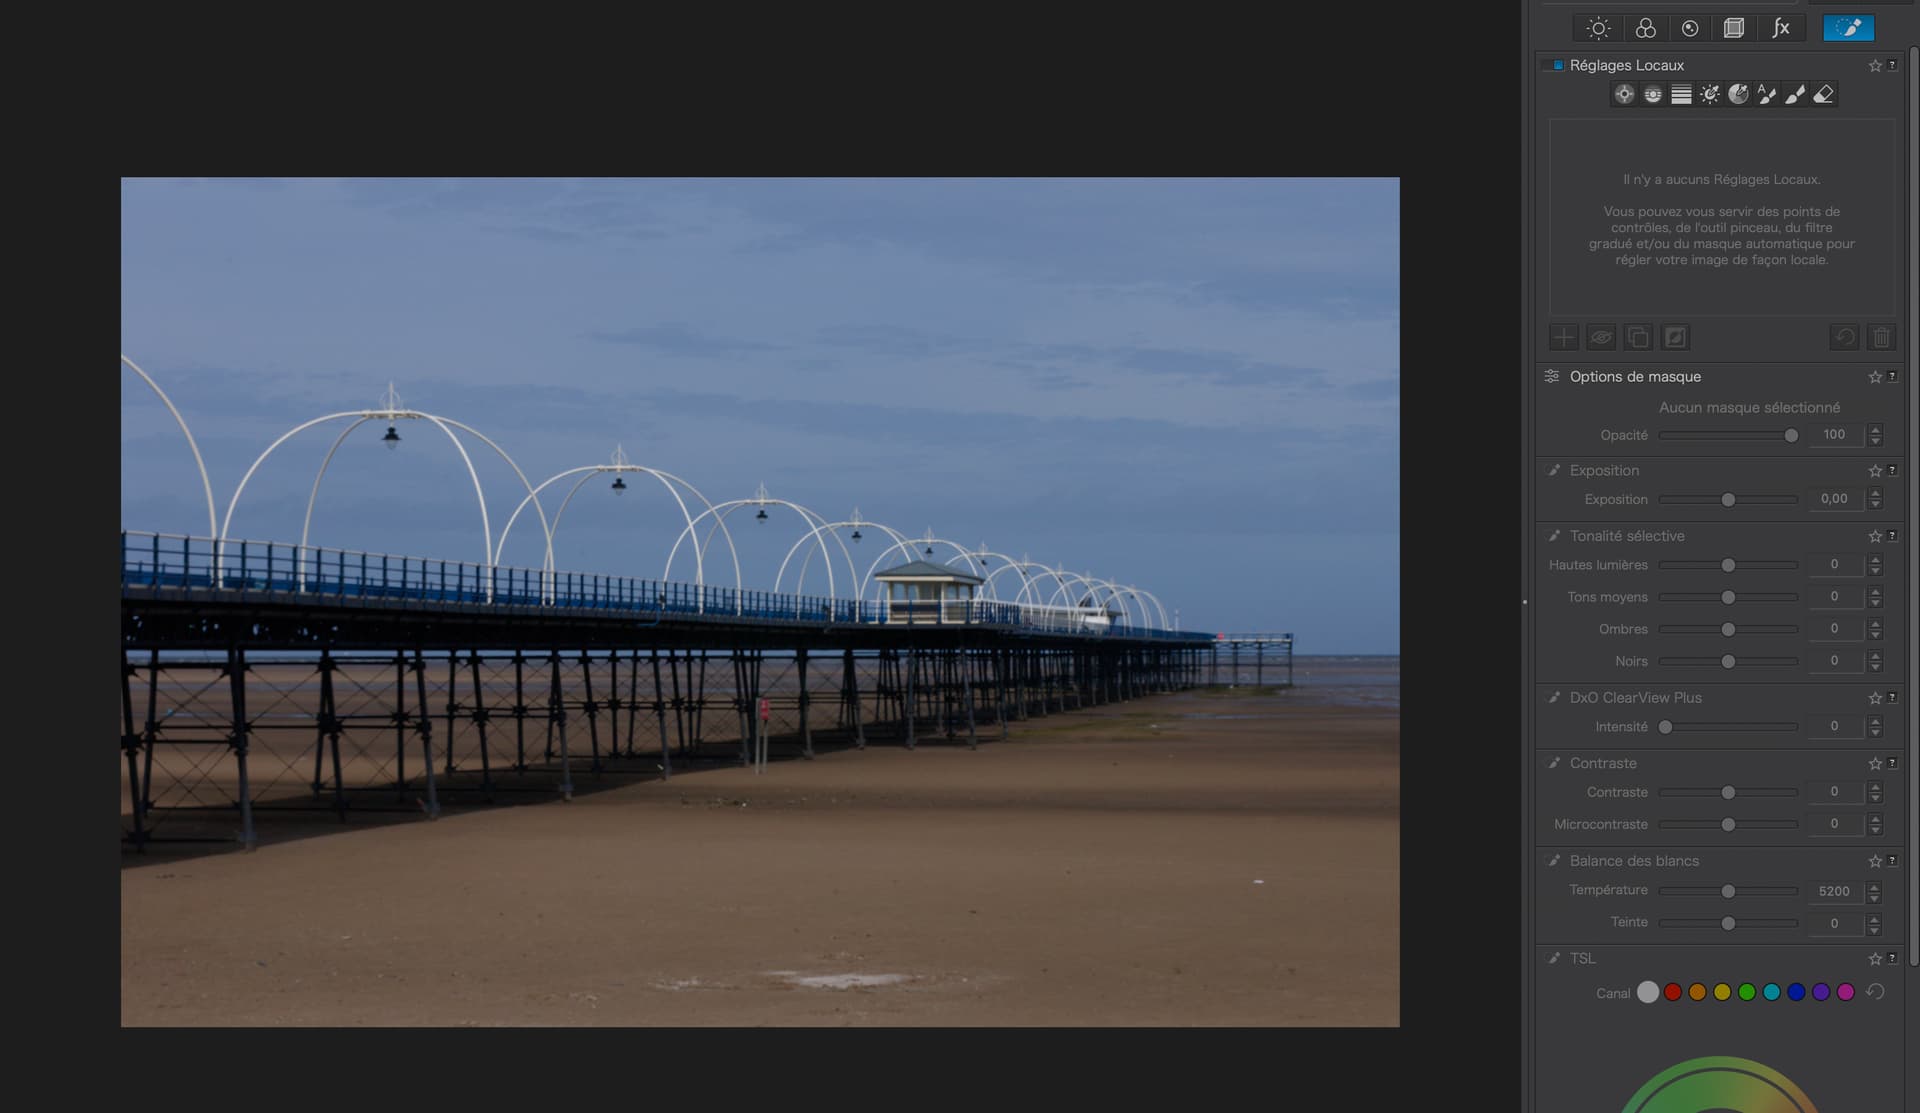
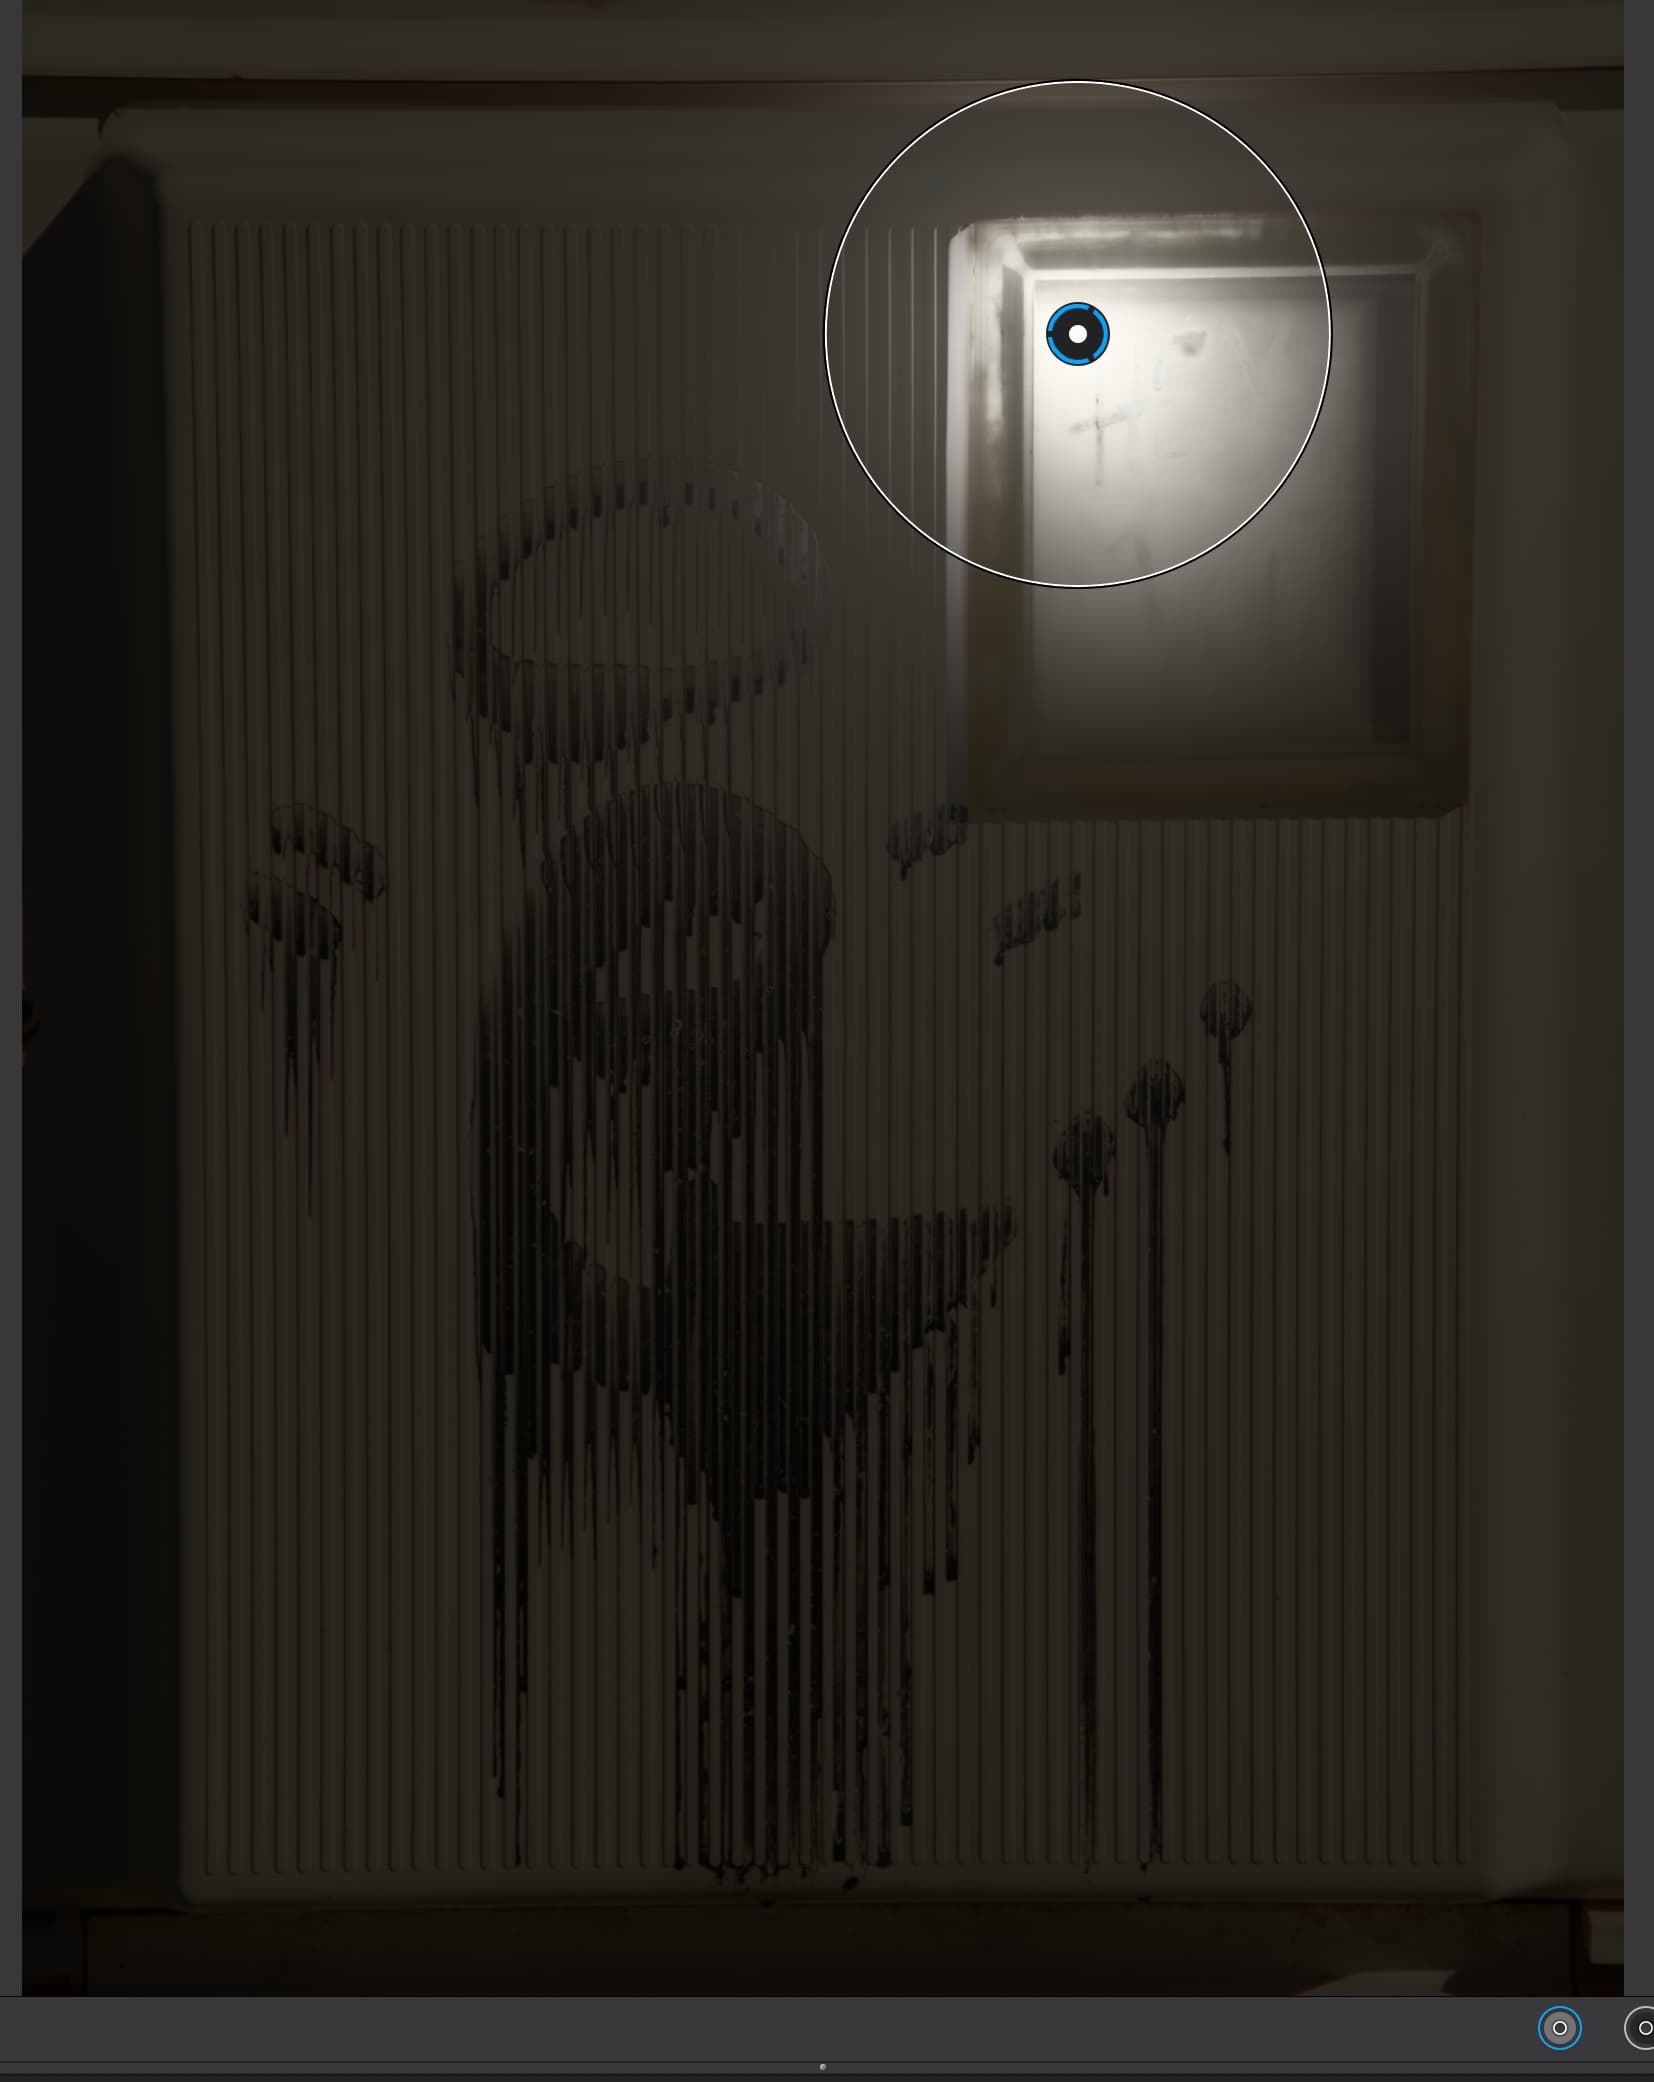
In PL6, a Control Point looked like this…

The black areas denotes areas that will not be affected by adjustments, the white represents the mask, where changes will have an effect. But you will notice that the black is not completely black, which means a very small amount of change may be visible over the entire image.

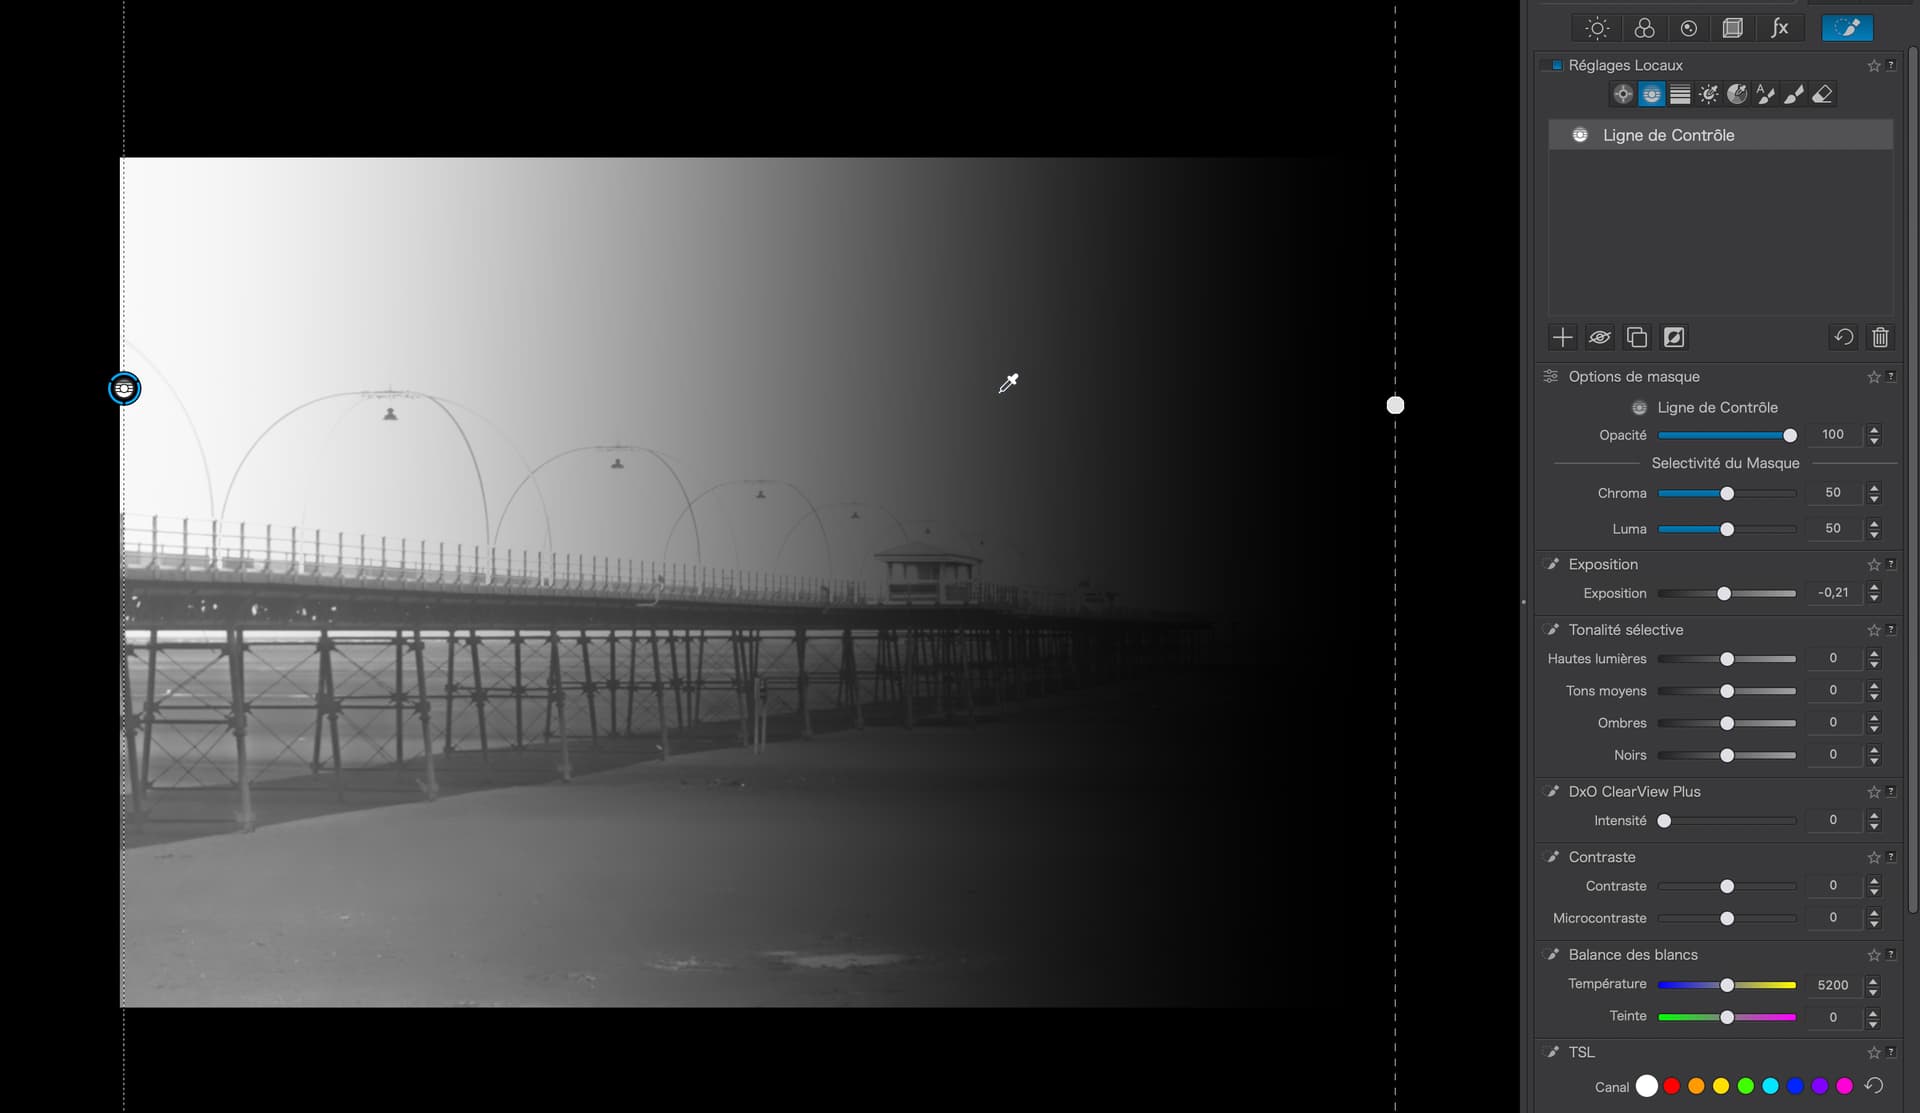
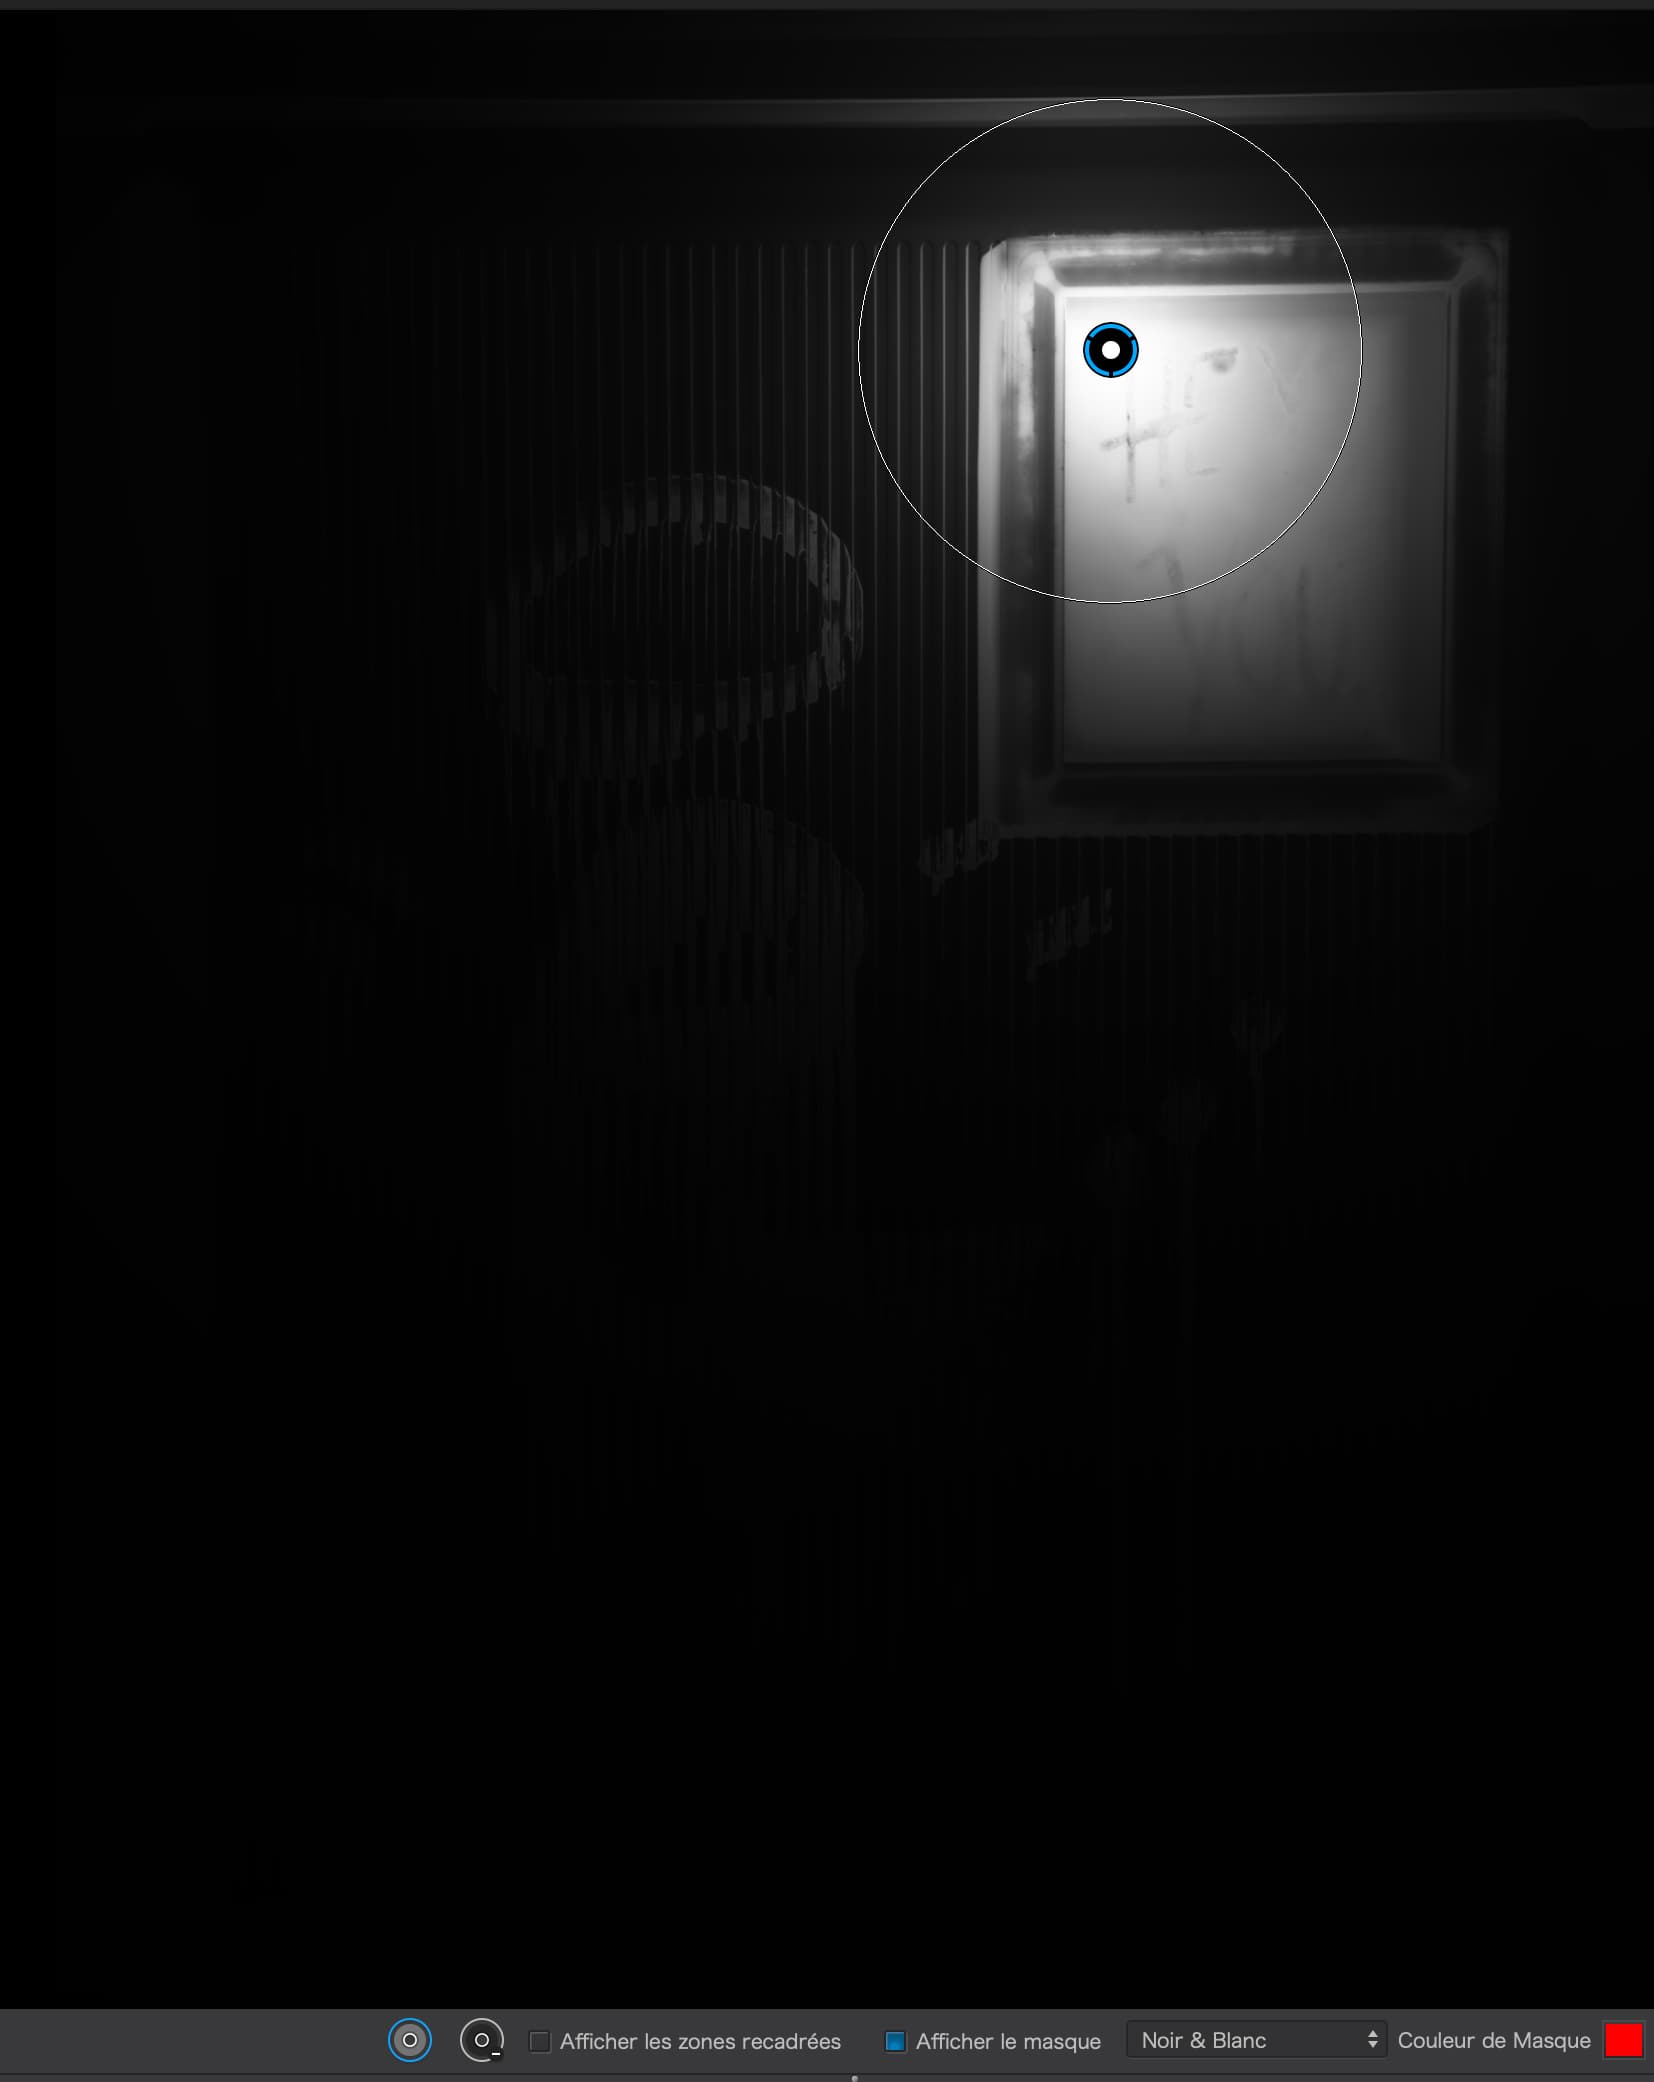
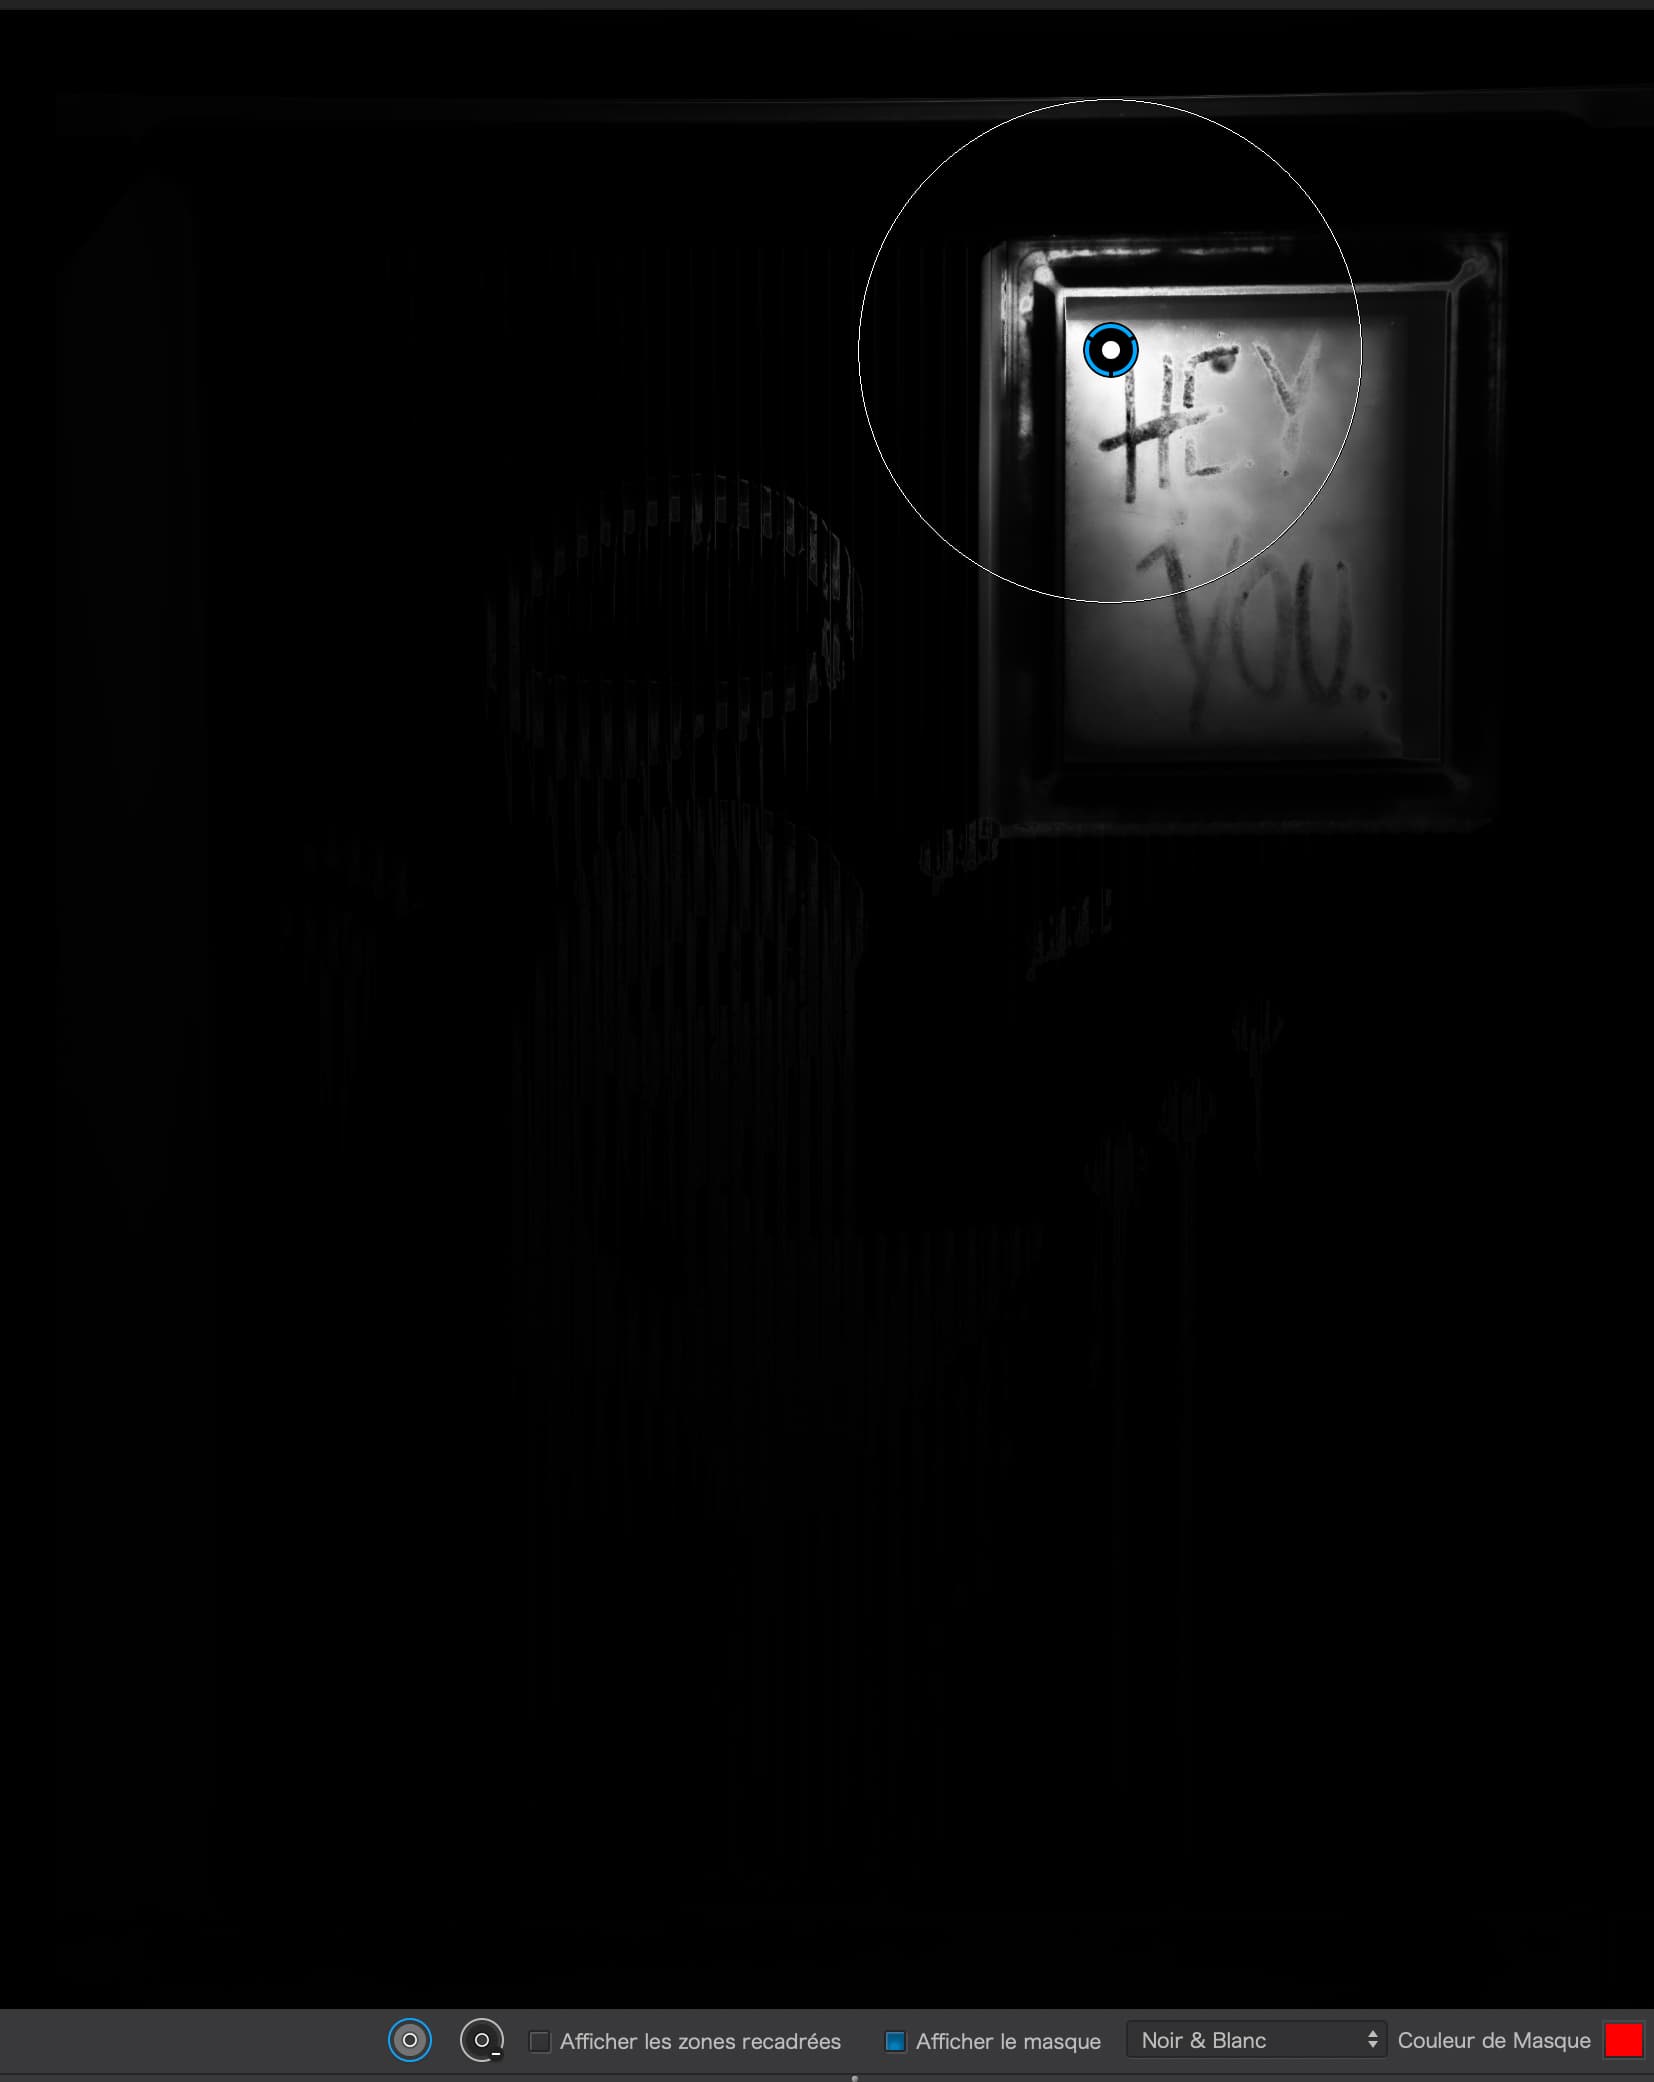
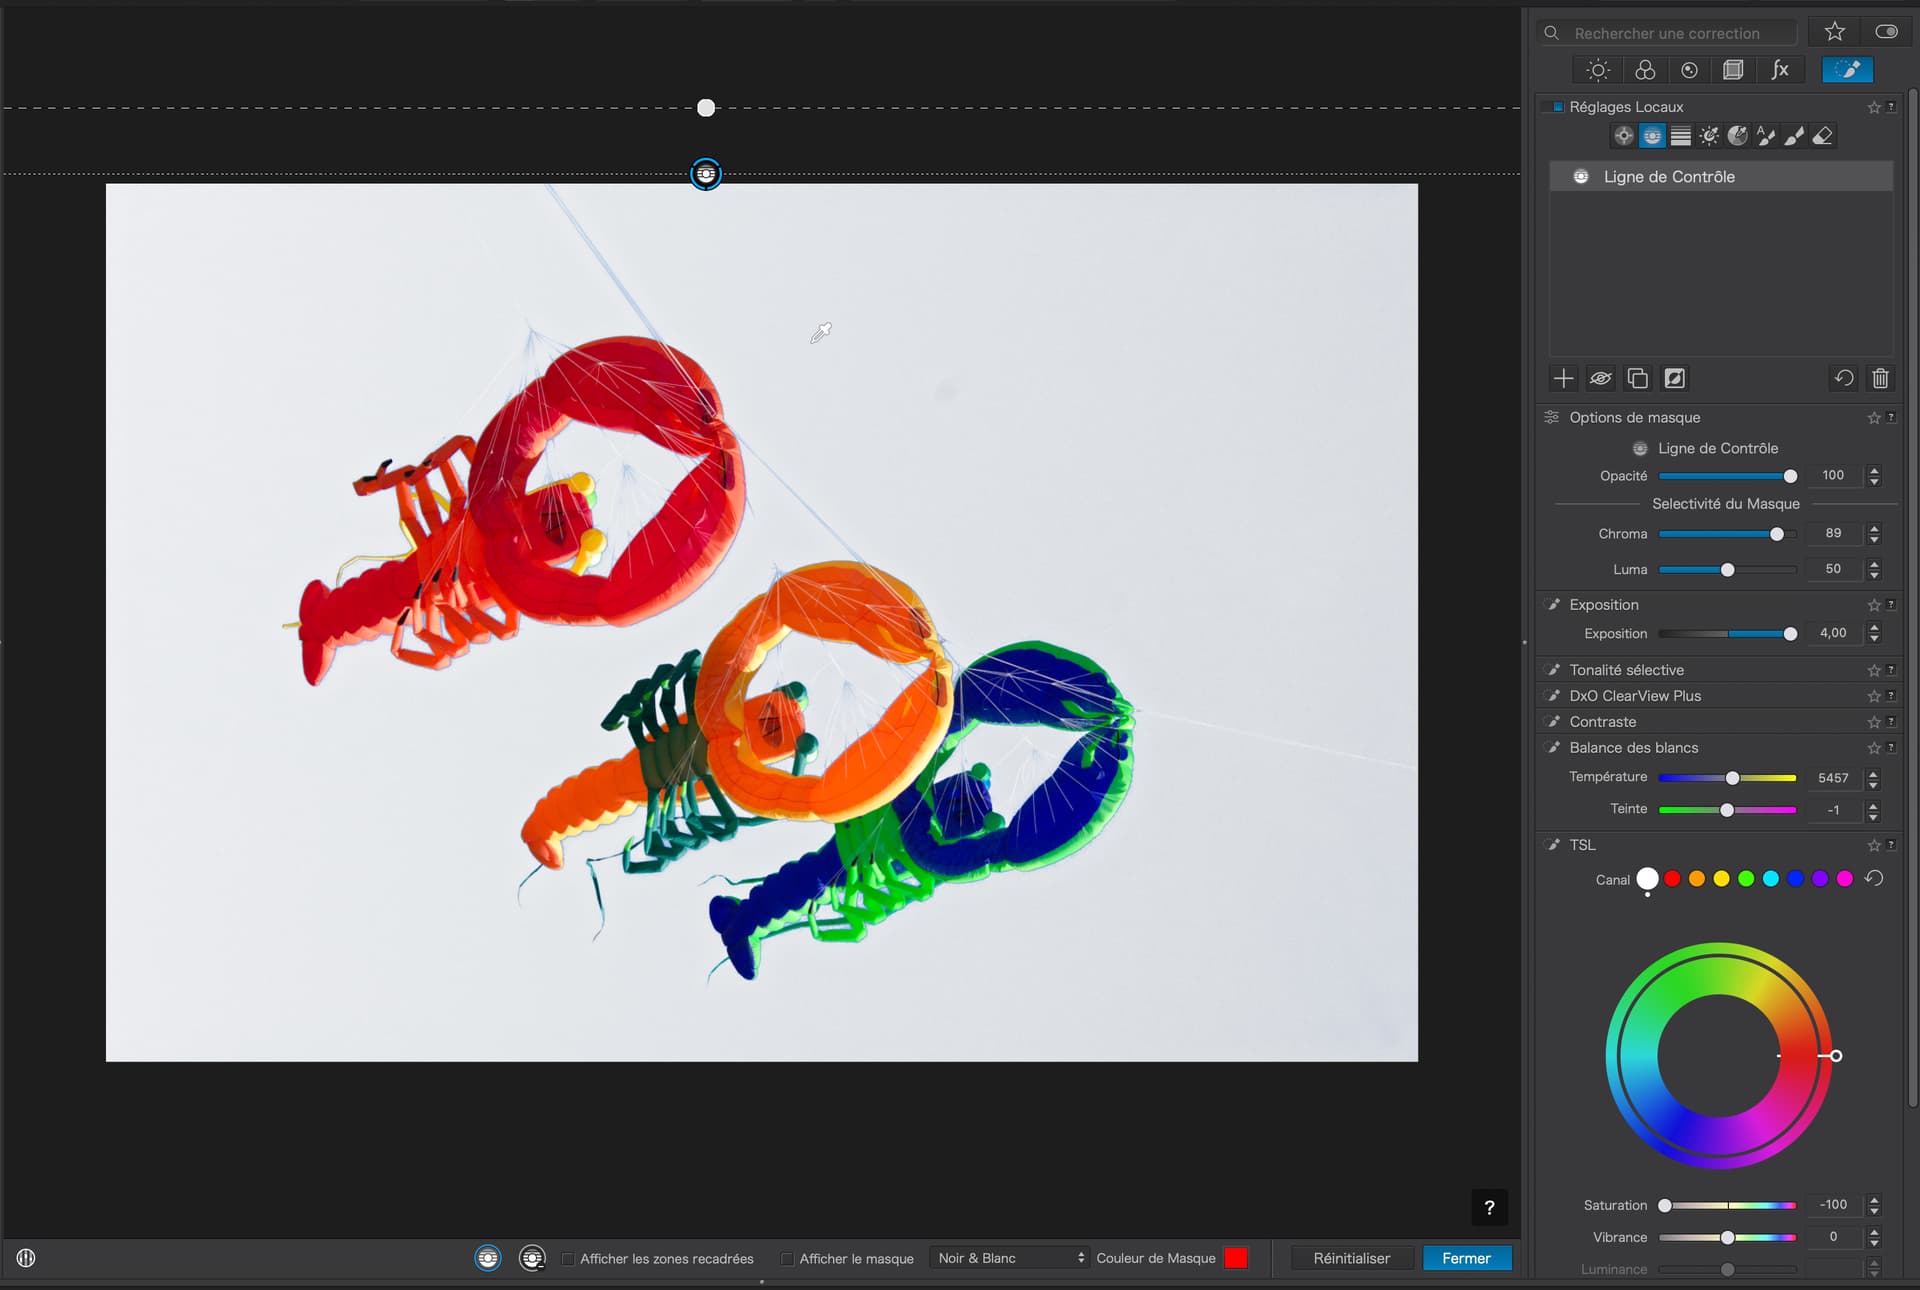
However, if I open the same image in PL7+, the mask is more clearly defined…

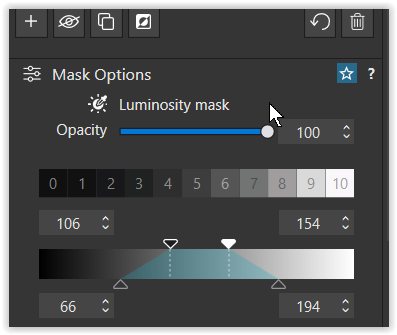
But this still means that a reasonably wide range of tone gets selected. If you look at the Luma Selectivity, you will see that it is set to 50.

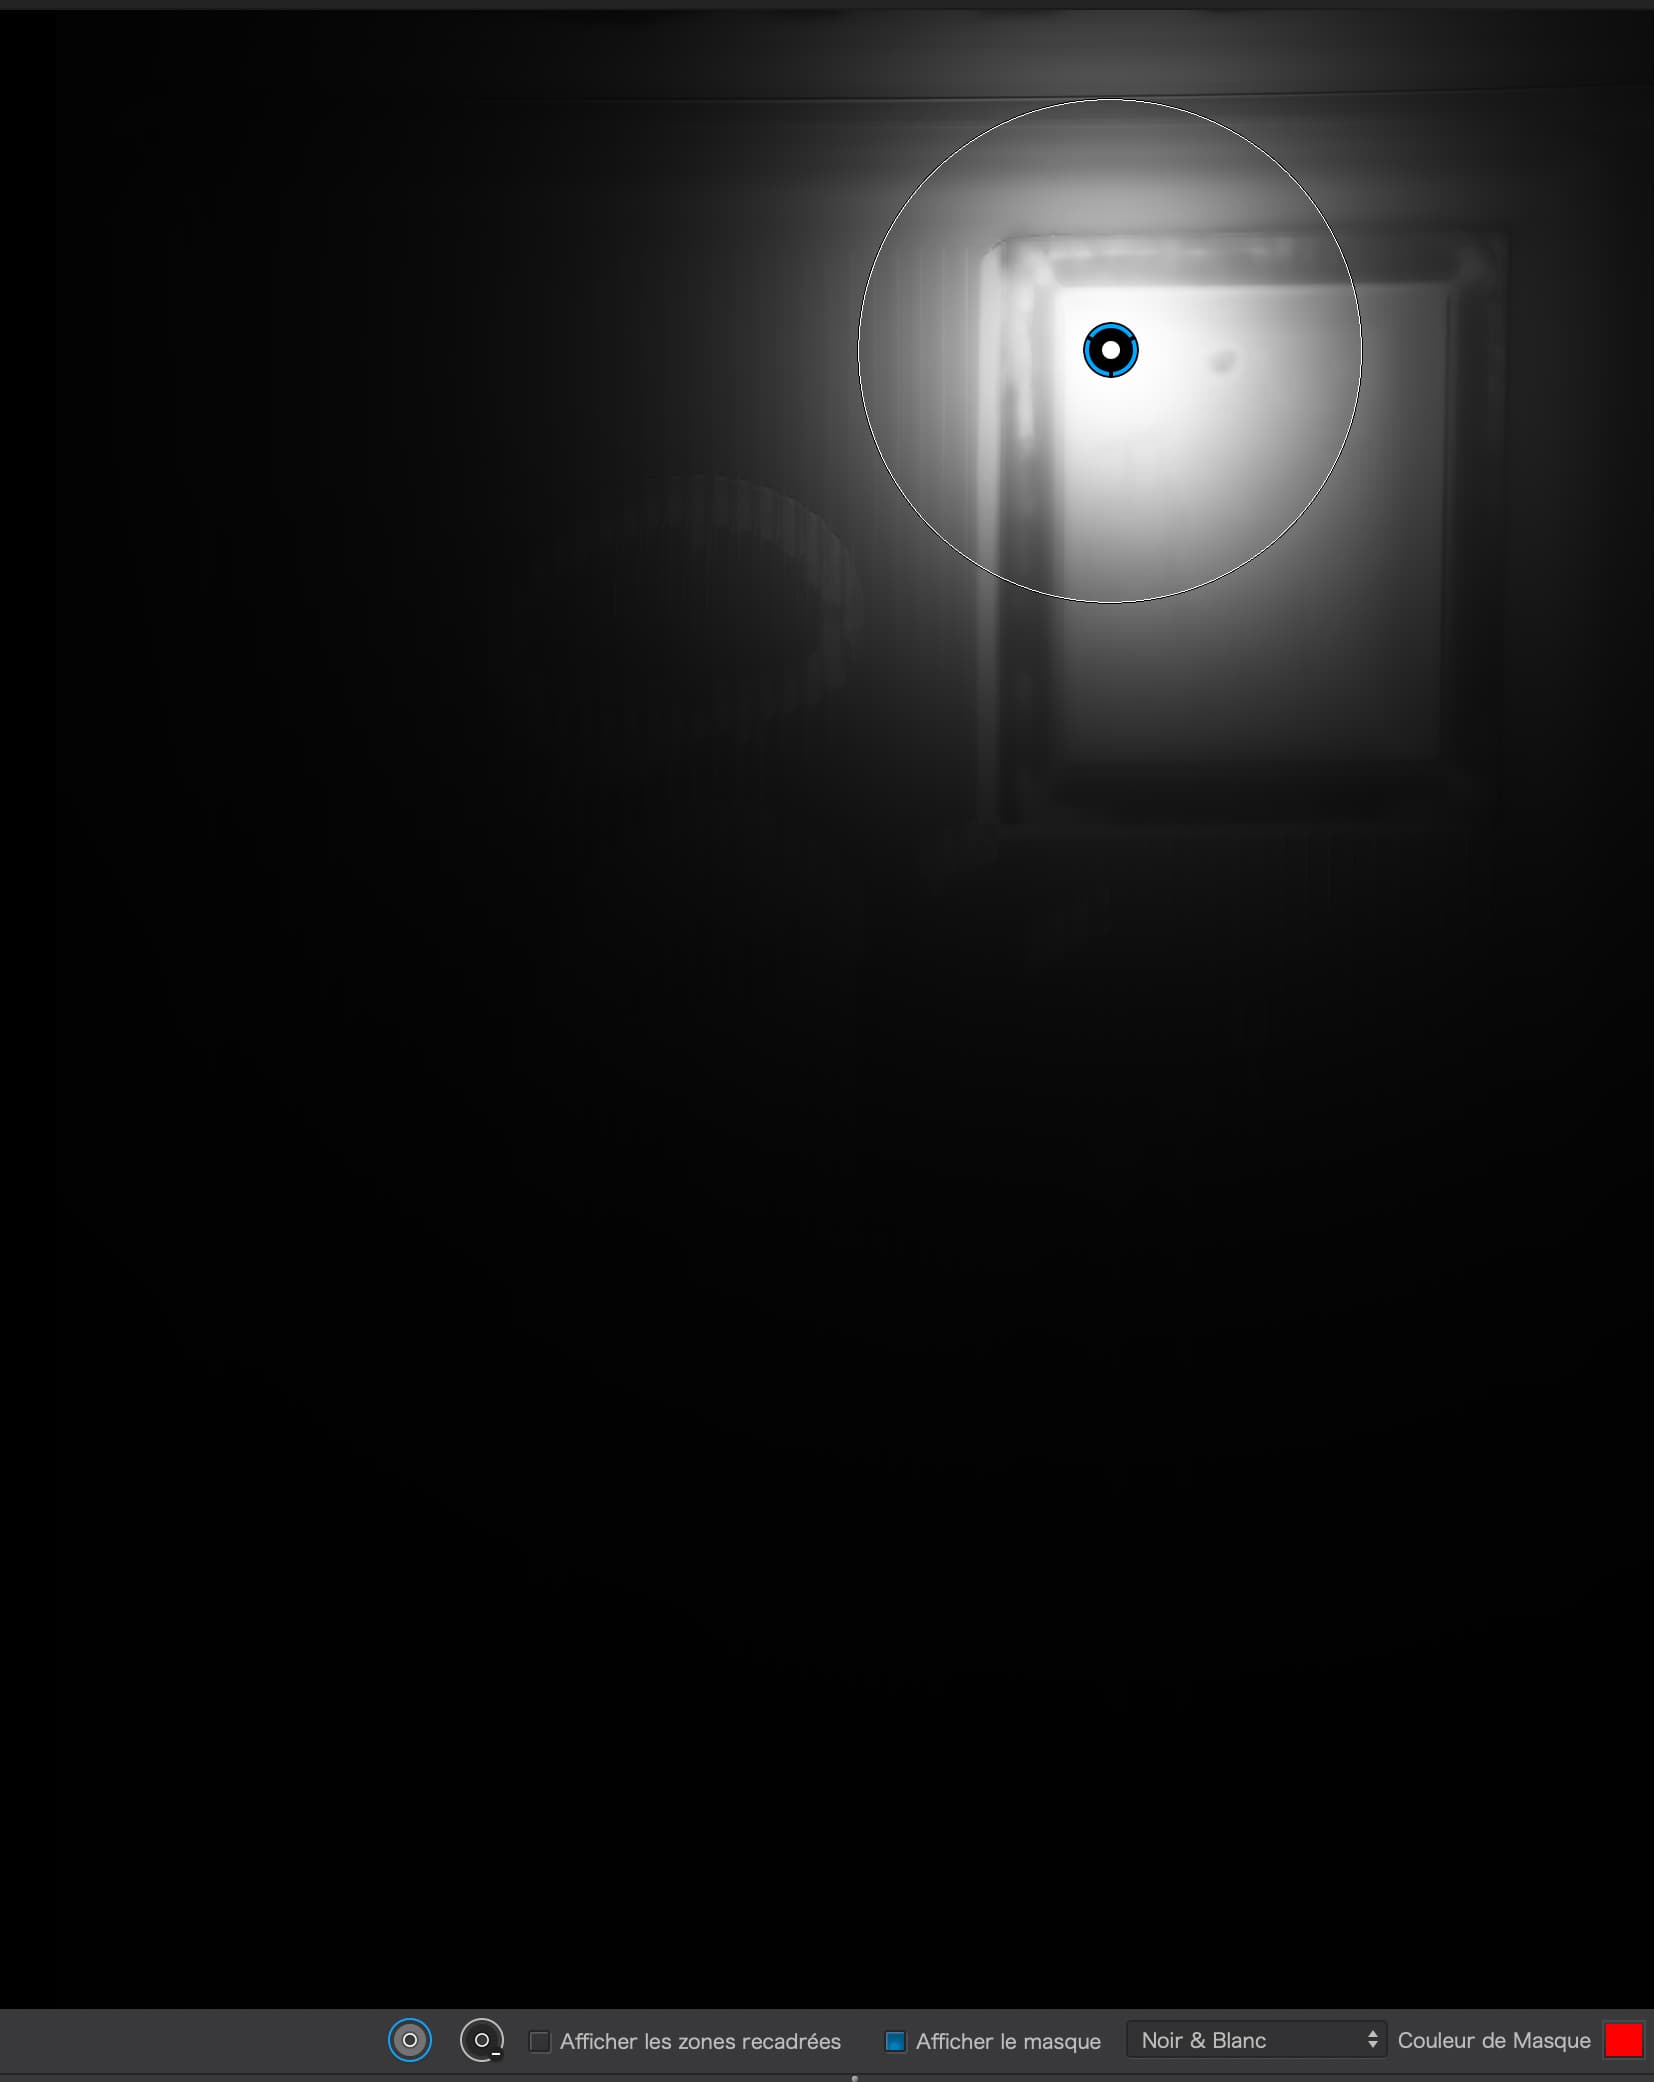
But, with PL7+, if I lower the Selectivity to 0, the range of tones that will be affected is much increased…

… and is roughly the equivalent of a circular Paintbrush mask with a very soft edge and a lot of overspill outside the circle.

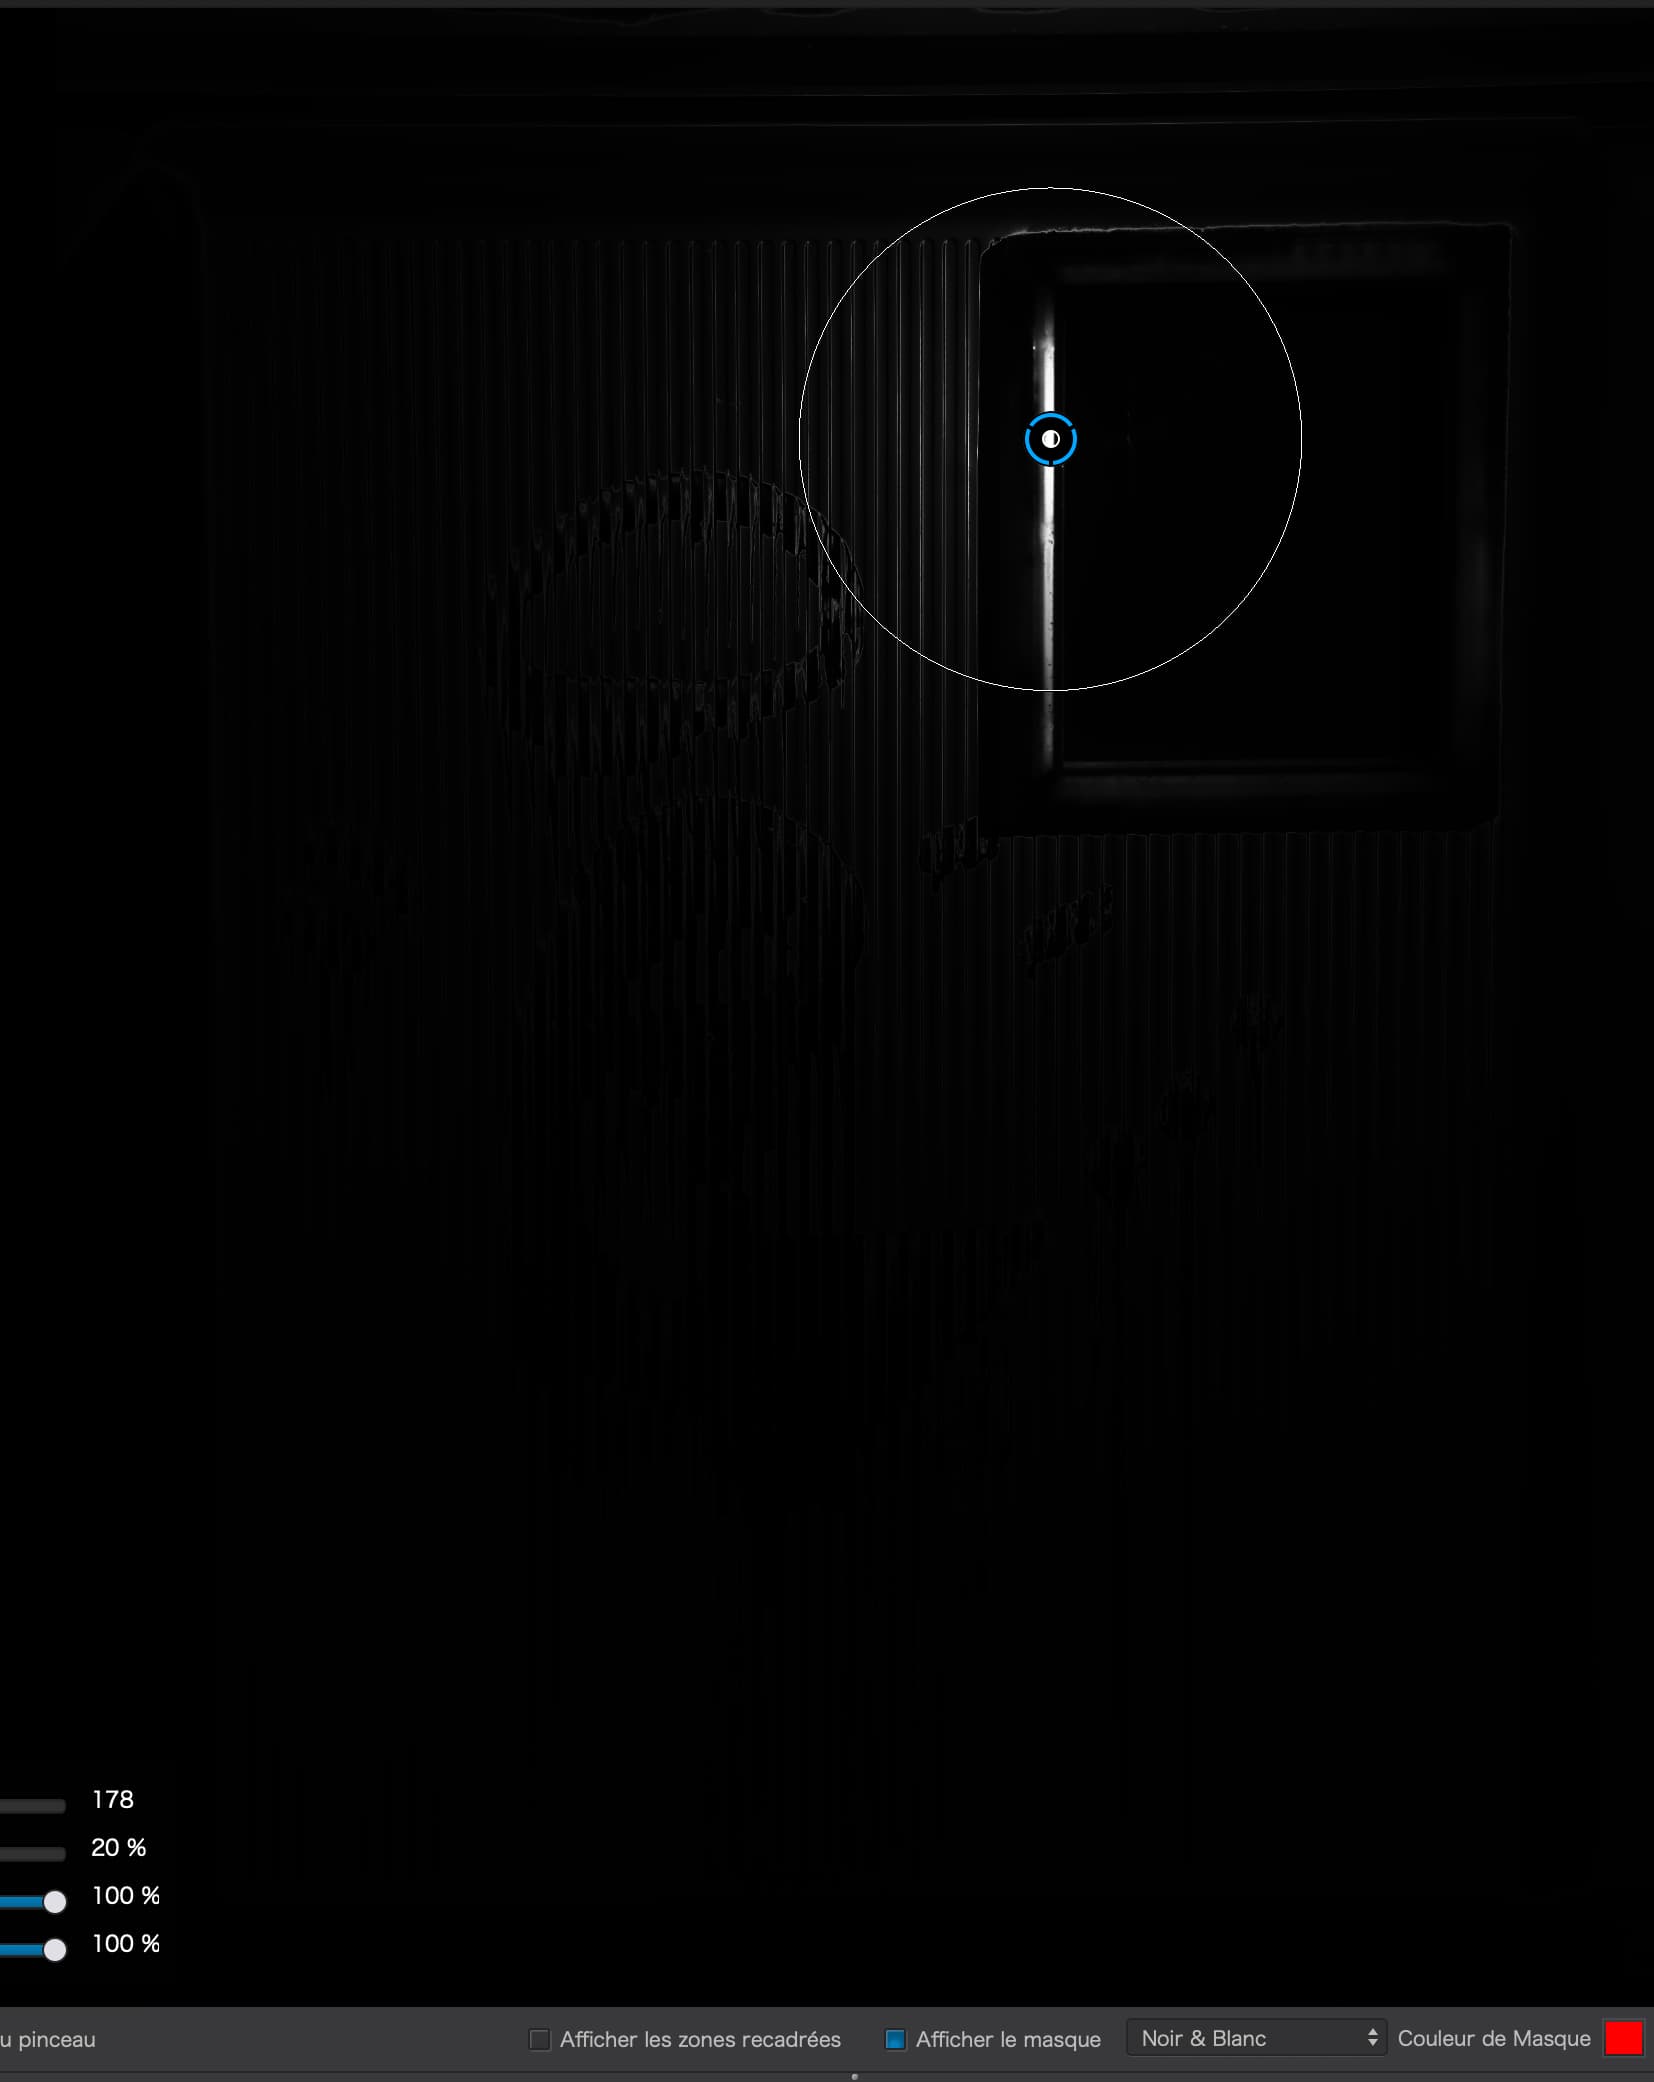
Now, if I increase the Selectivity to 100…

… I get a very restricted range of tones and very little overspill at all.

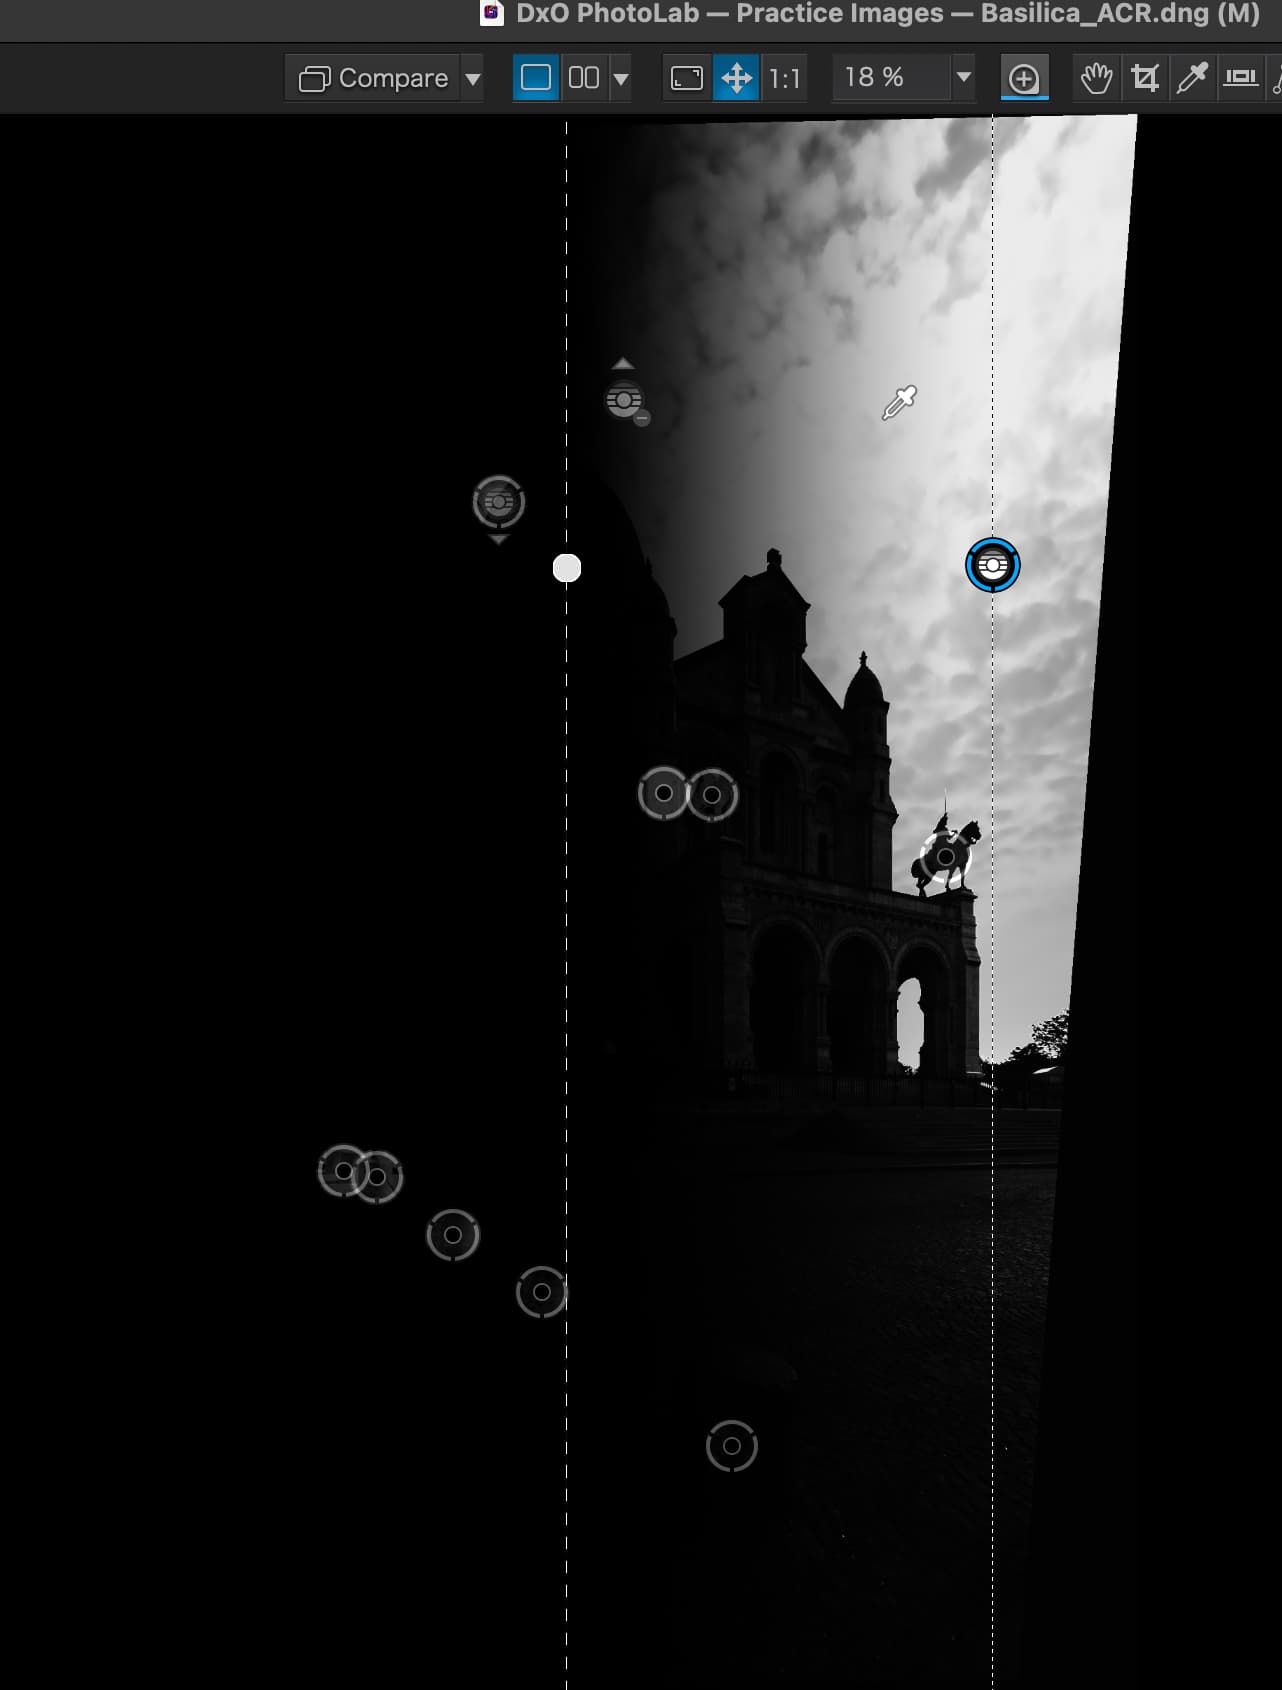
By moving the point to the frame edge, the range of selected tones switches to whatever is below the point…

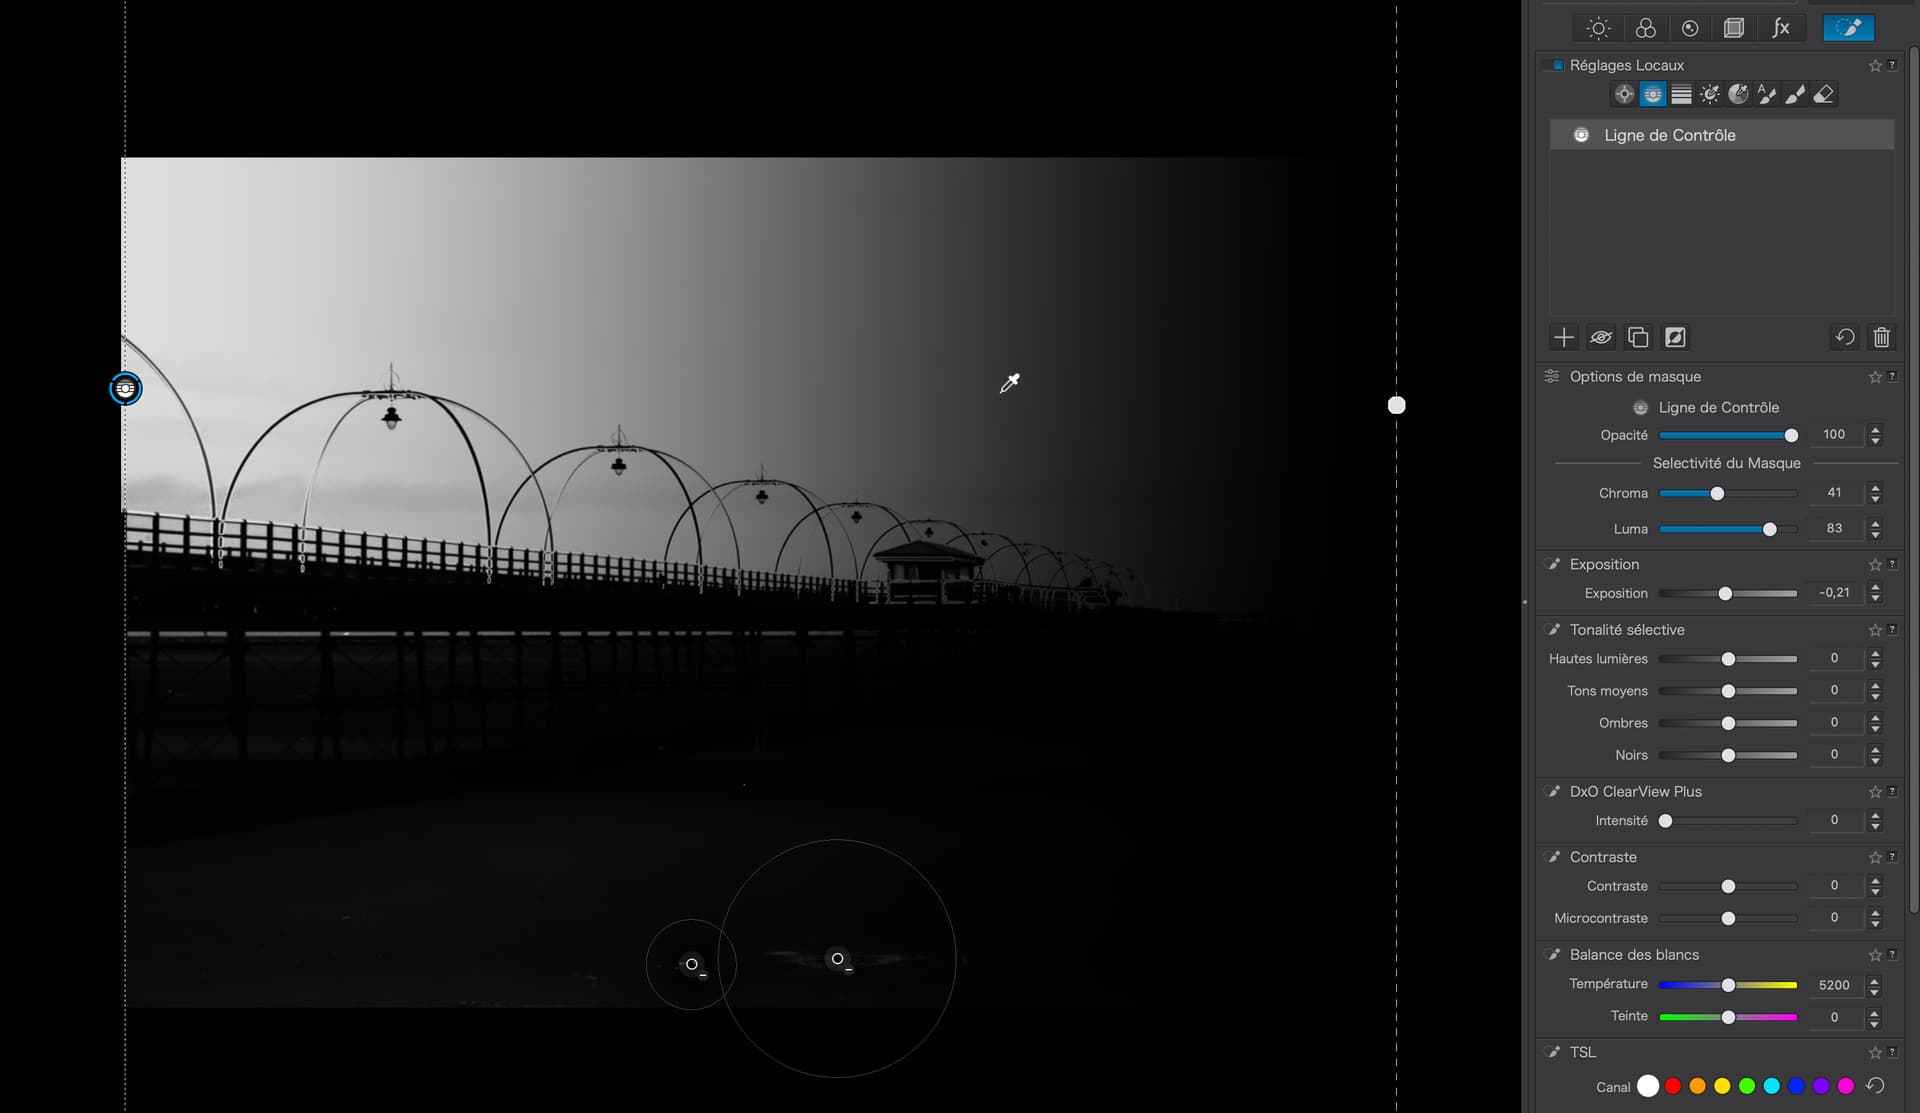
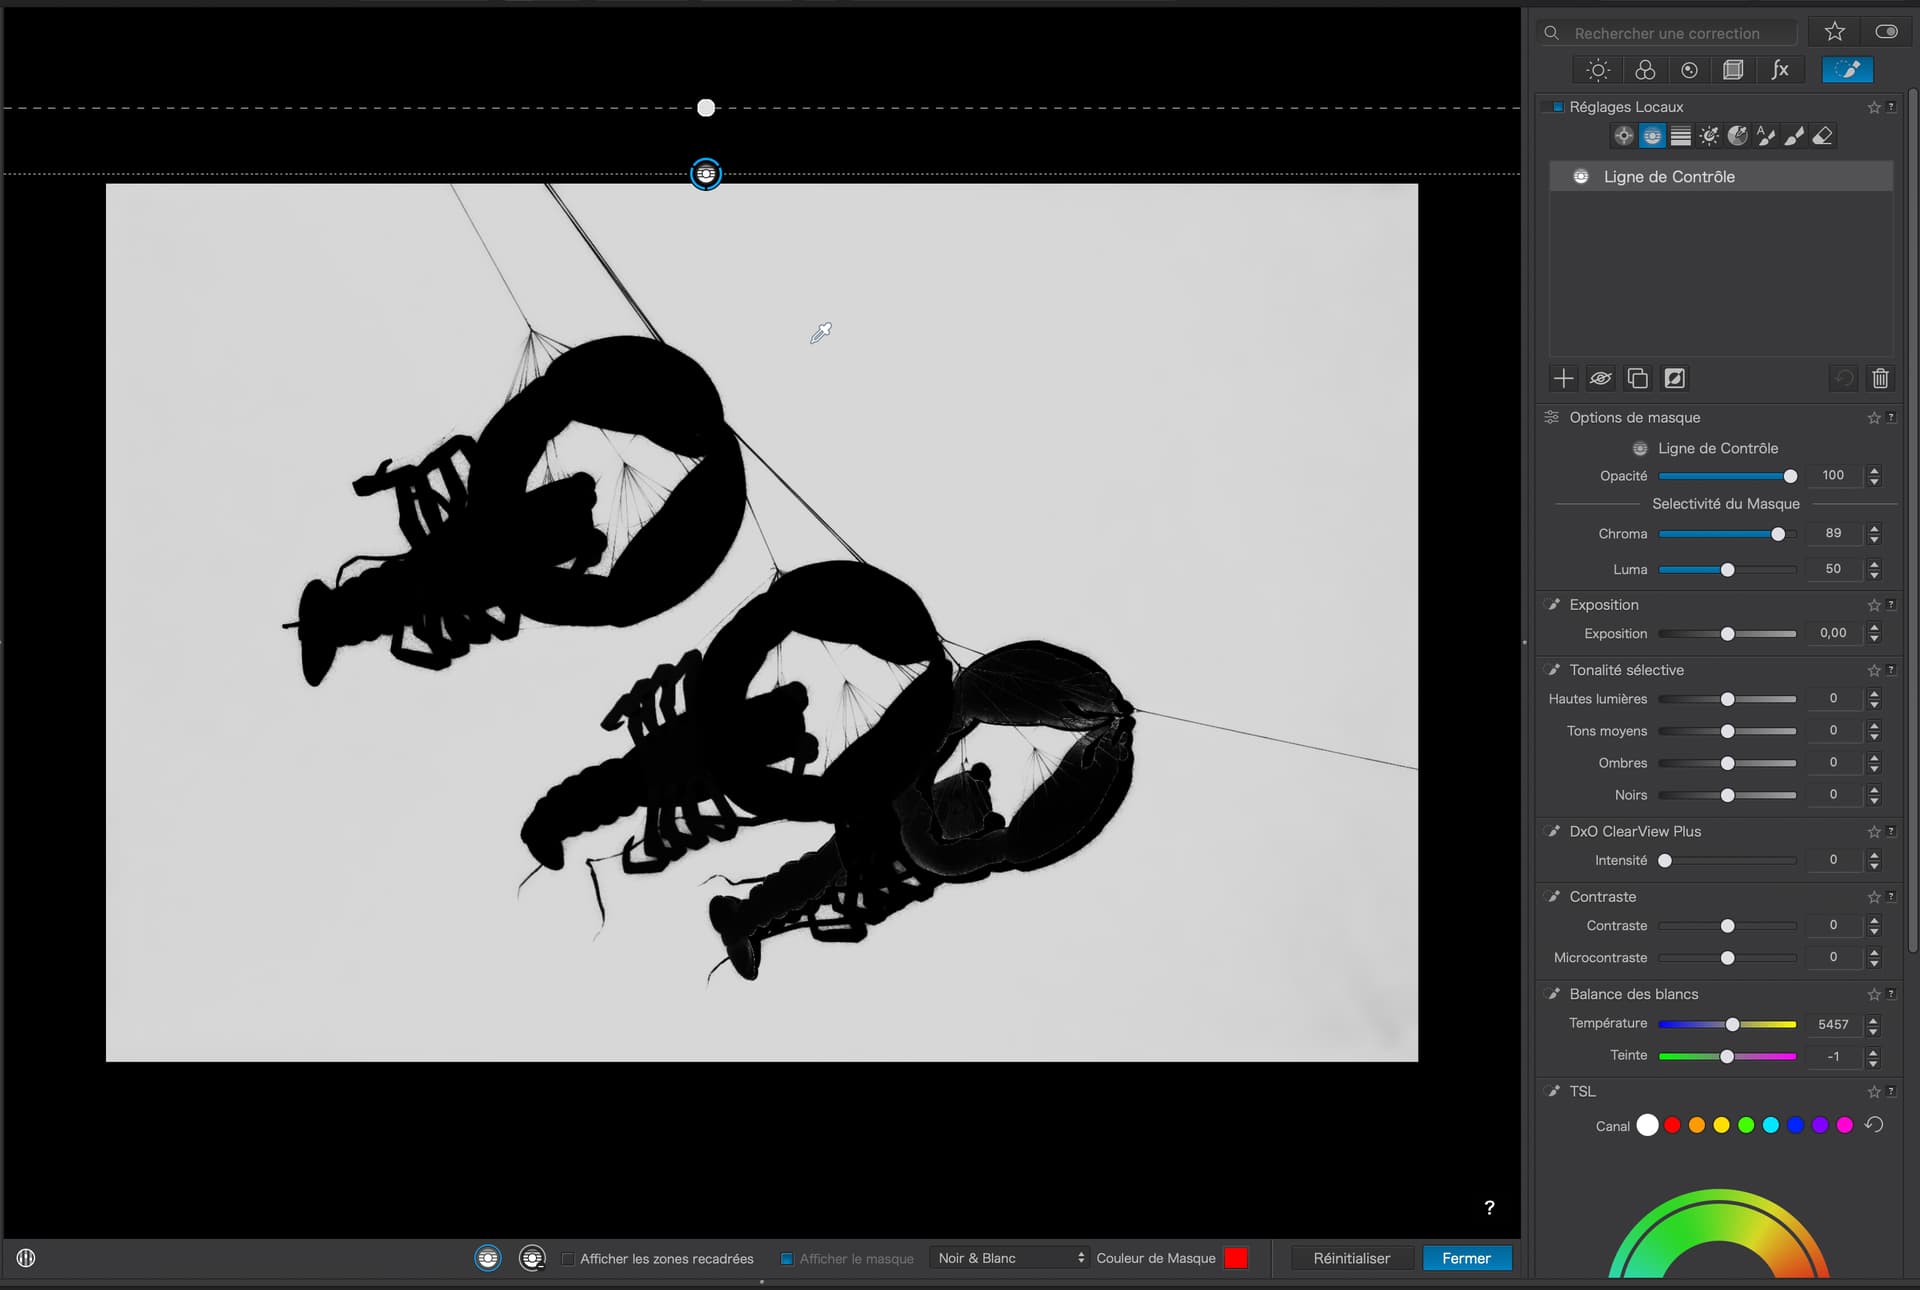
This can give very precise masking but can be complicated if you want to remove any overspill by using negative points. If this is the case, using a Control Line that covers the entire image can be useful…

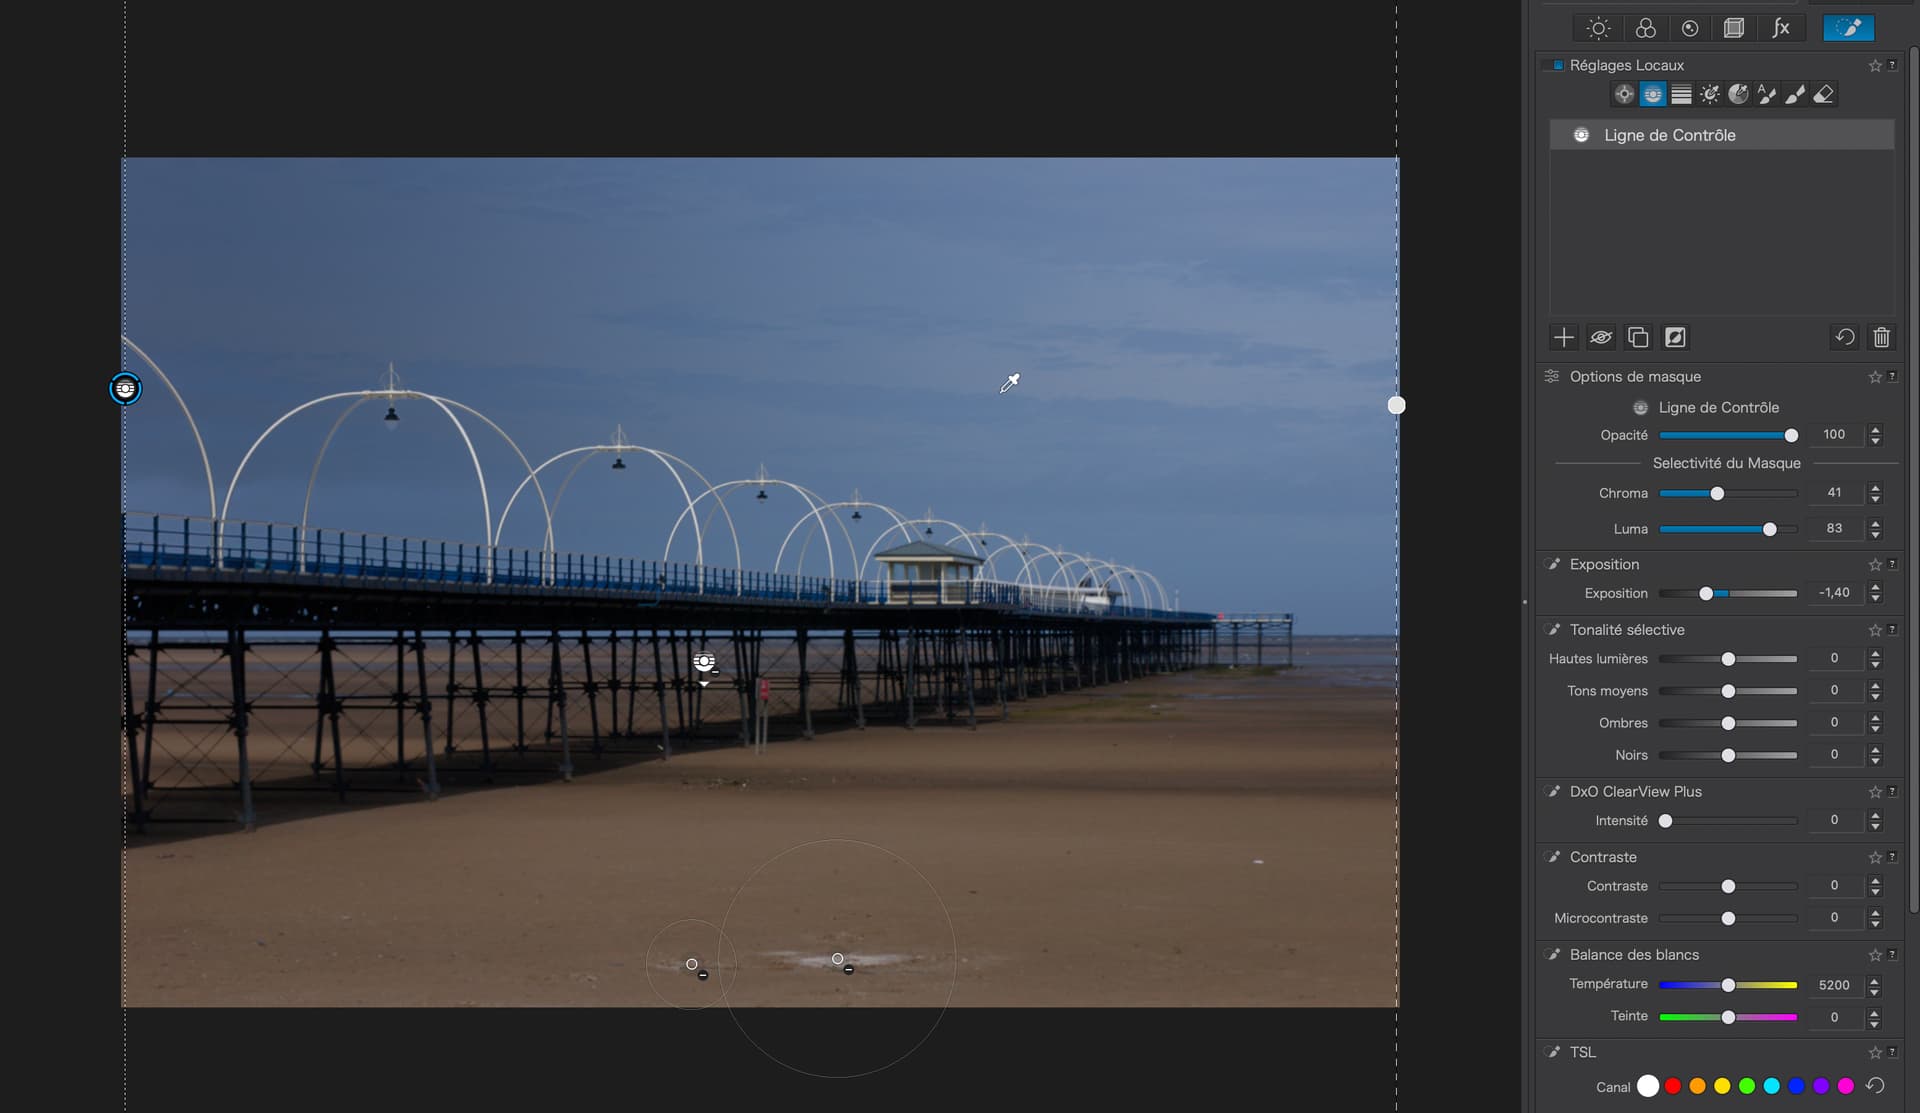
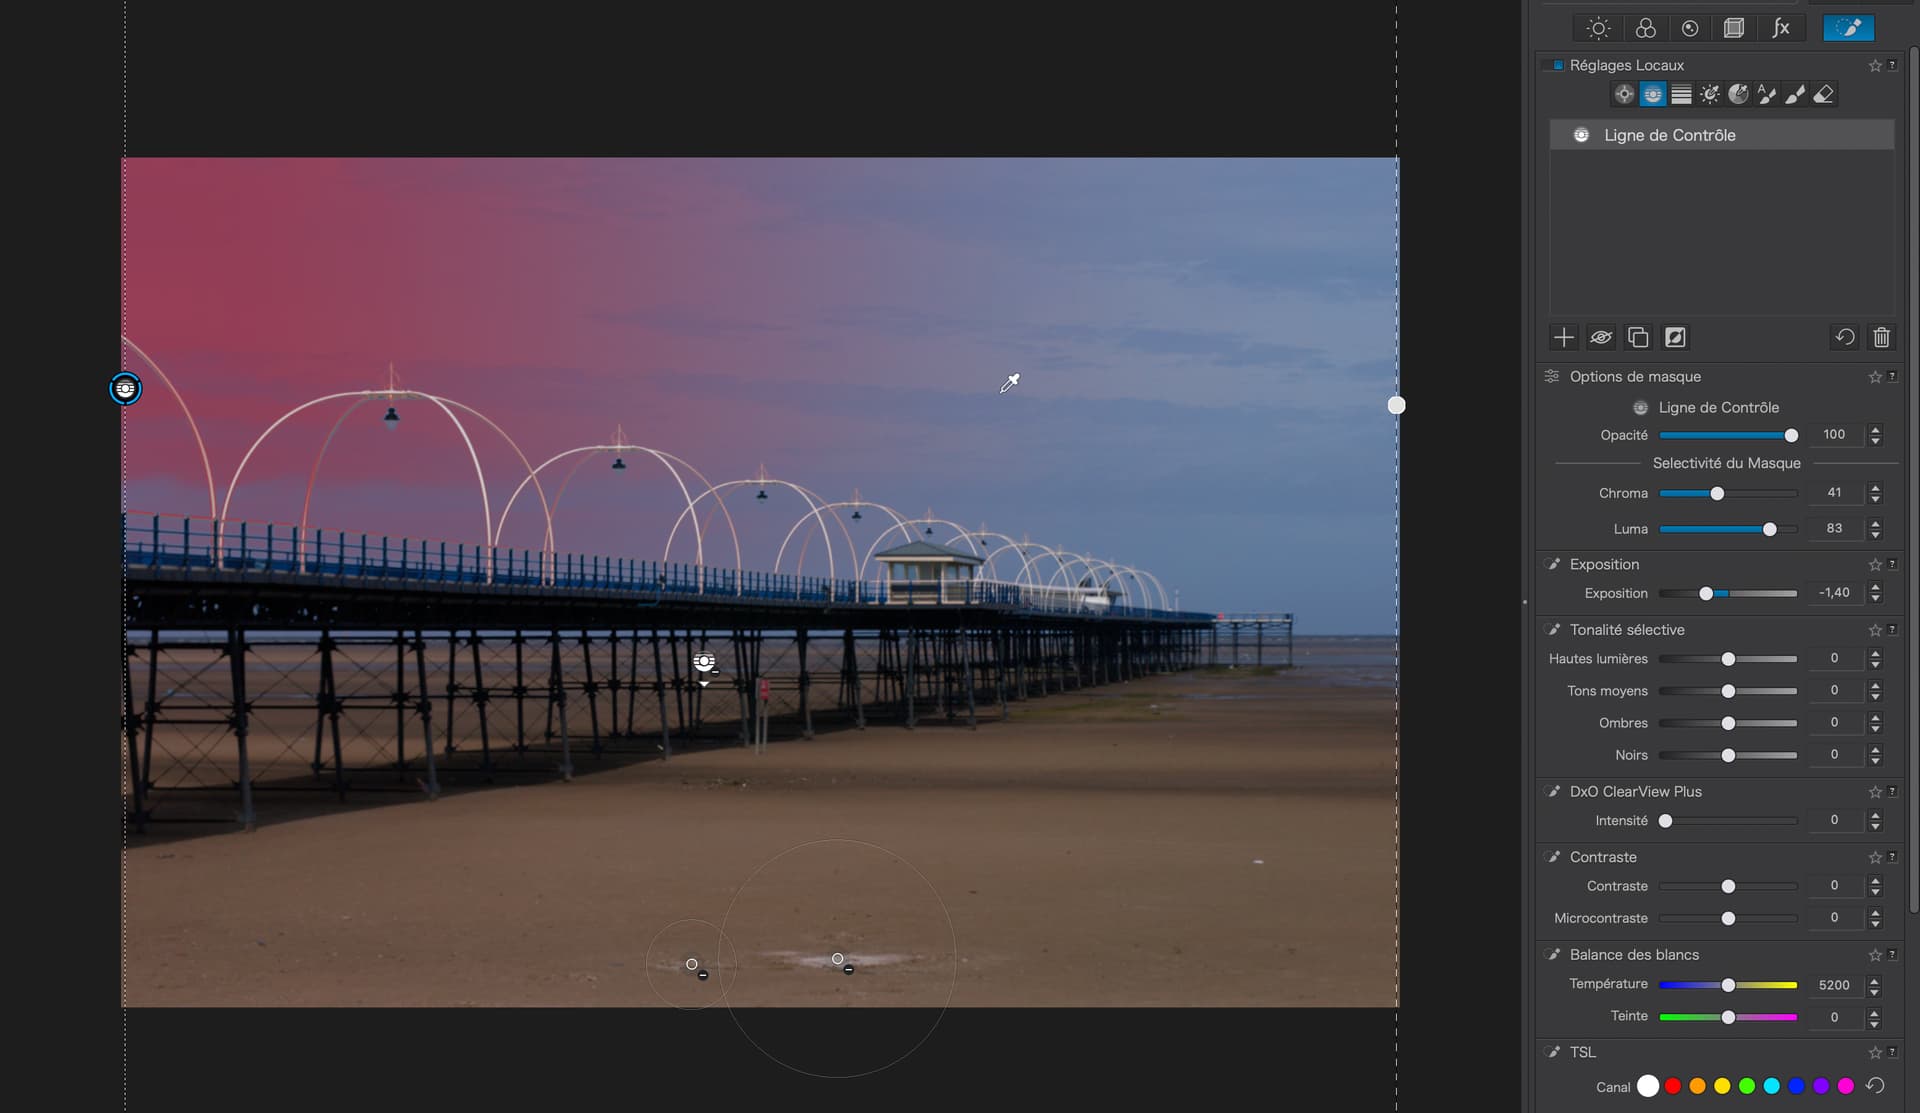
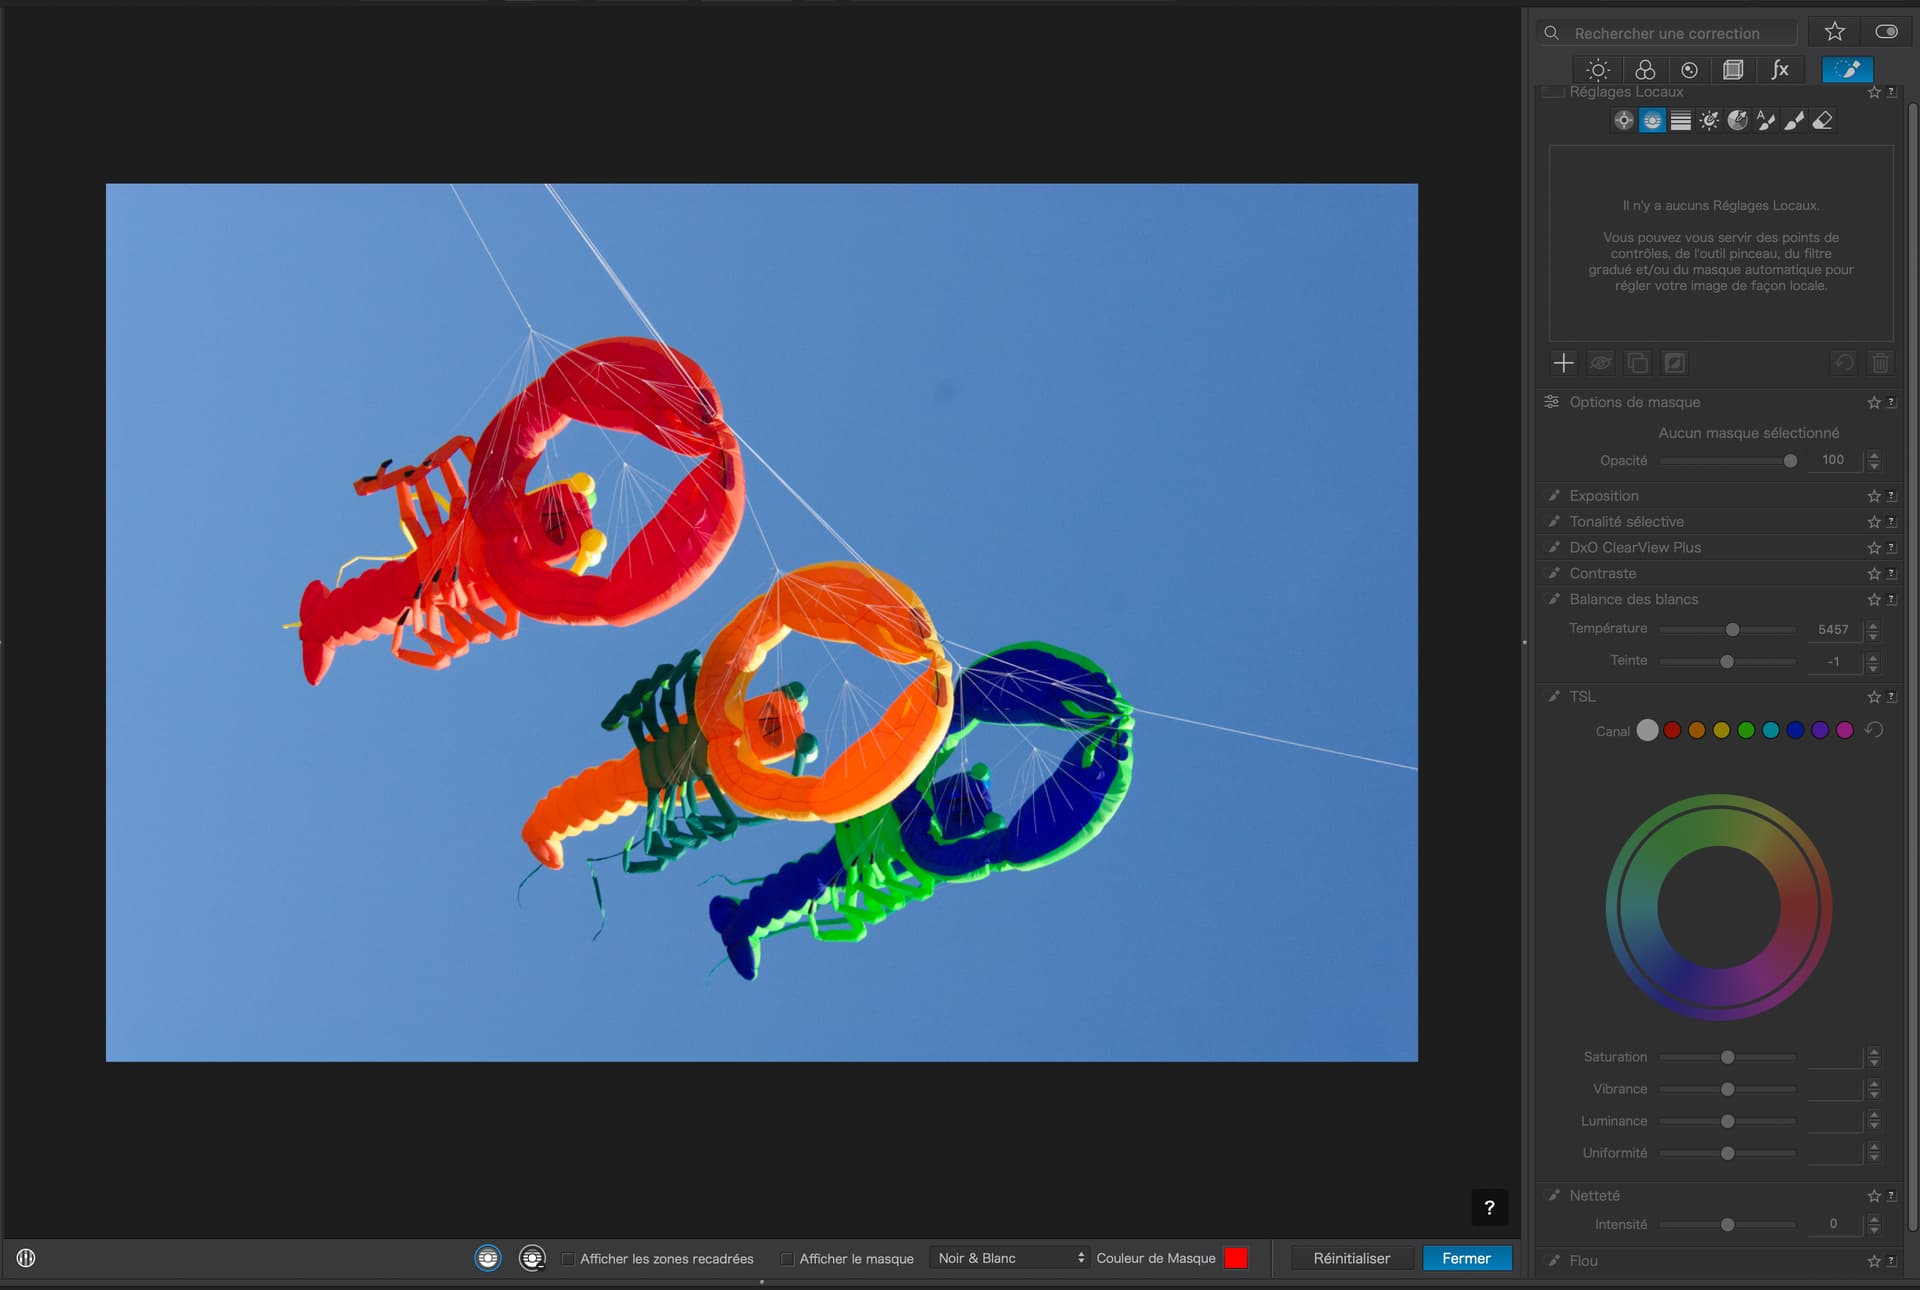
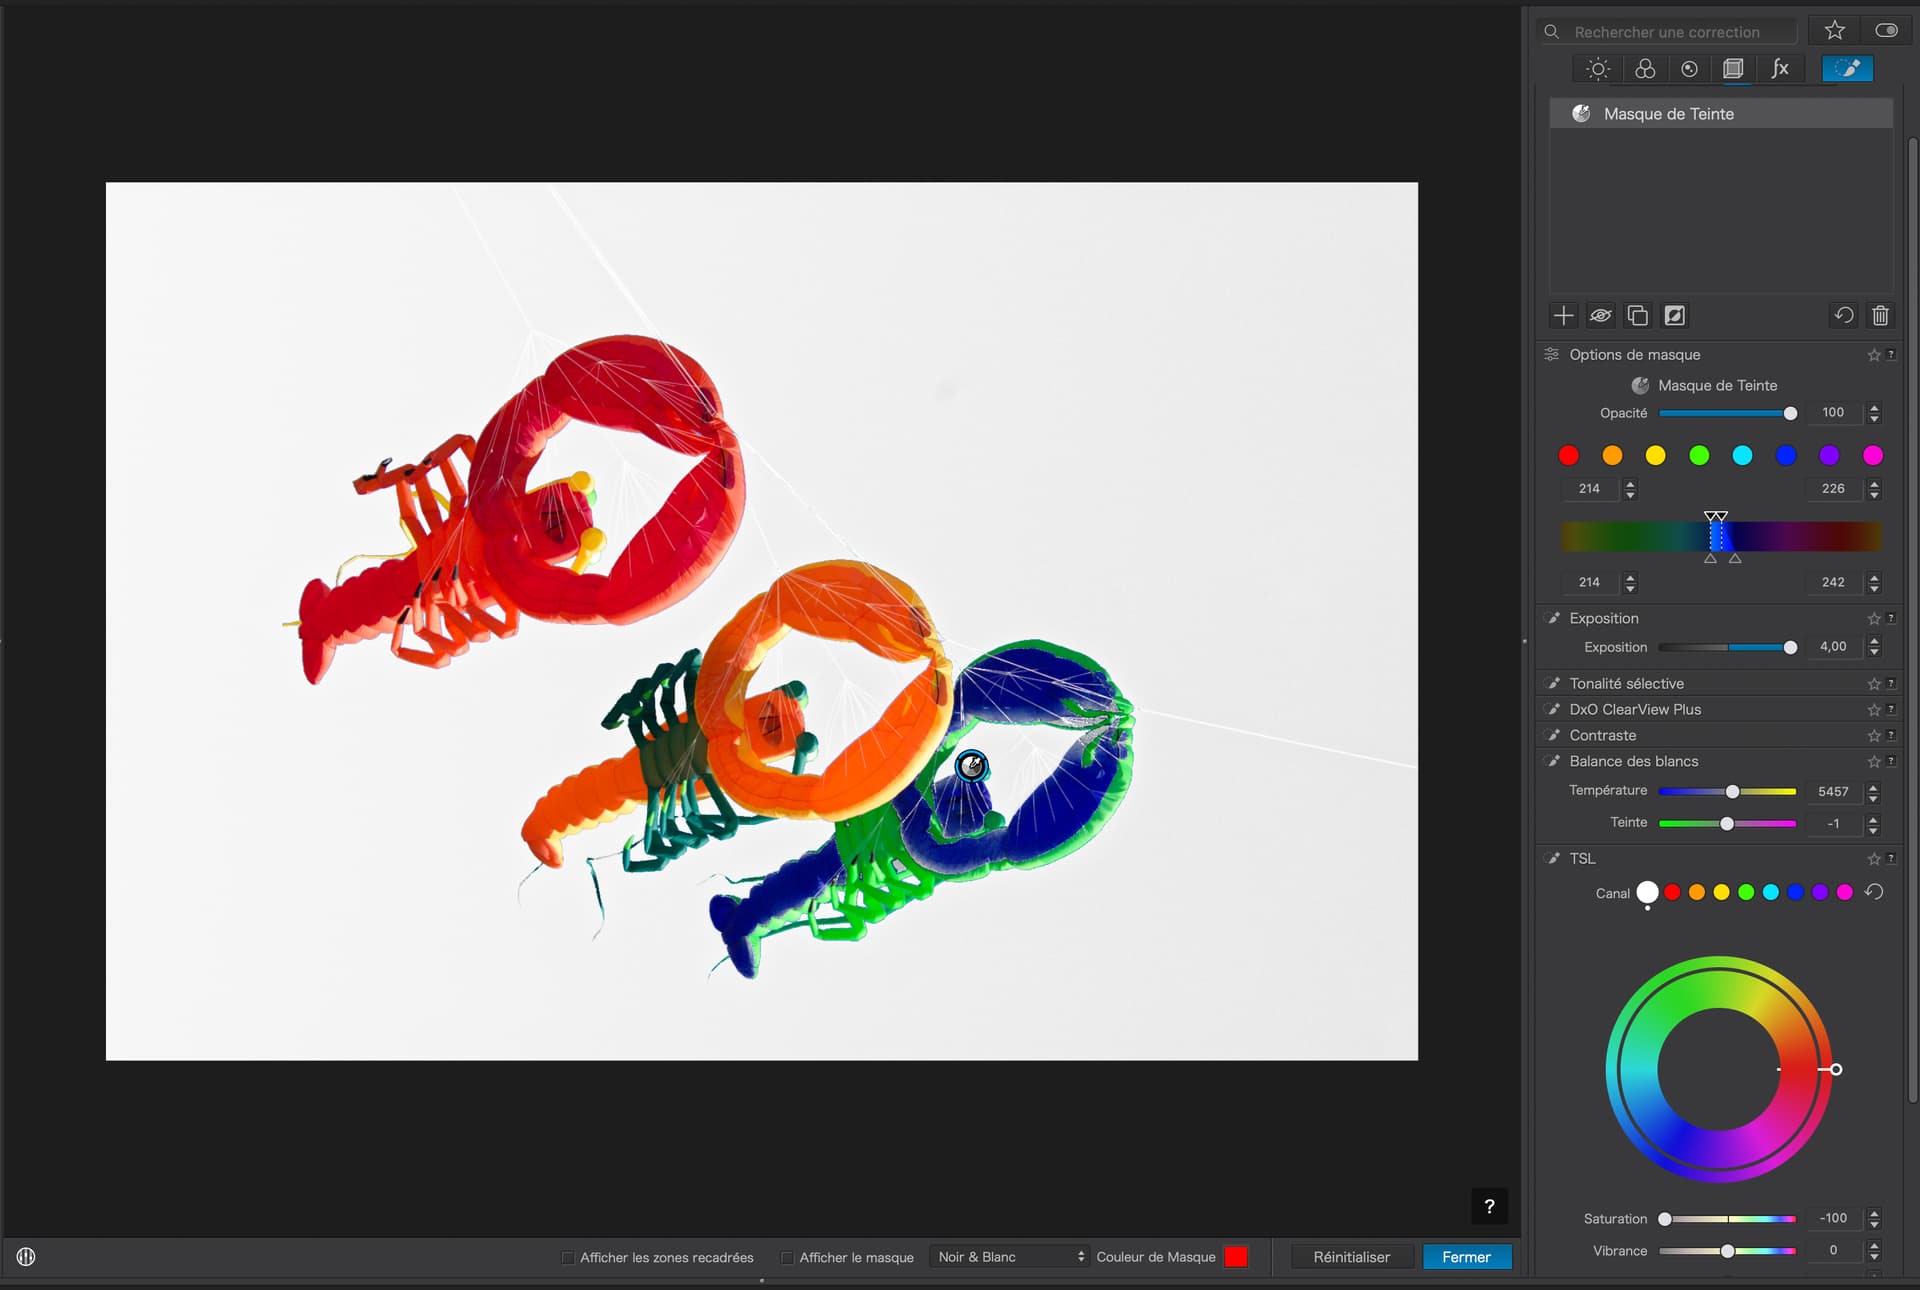
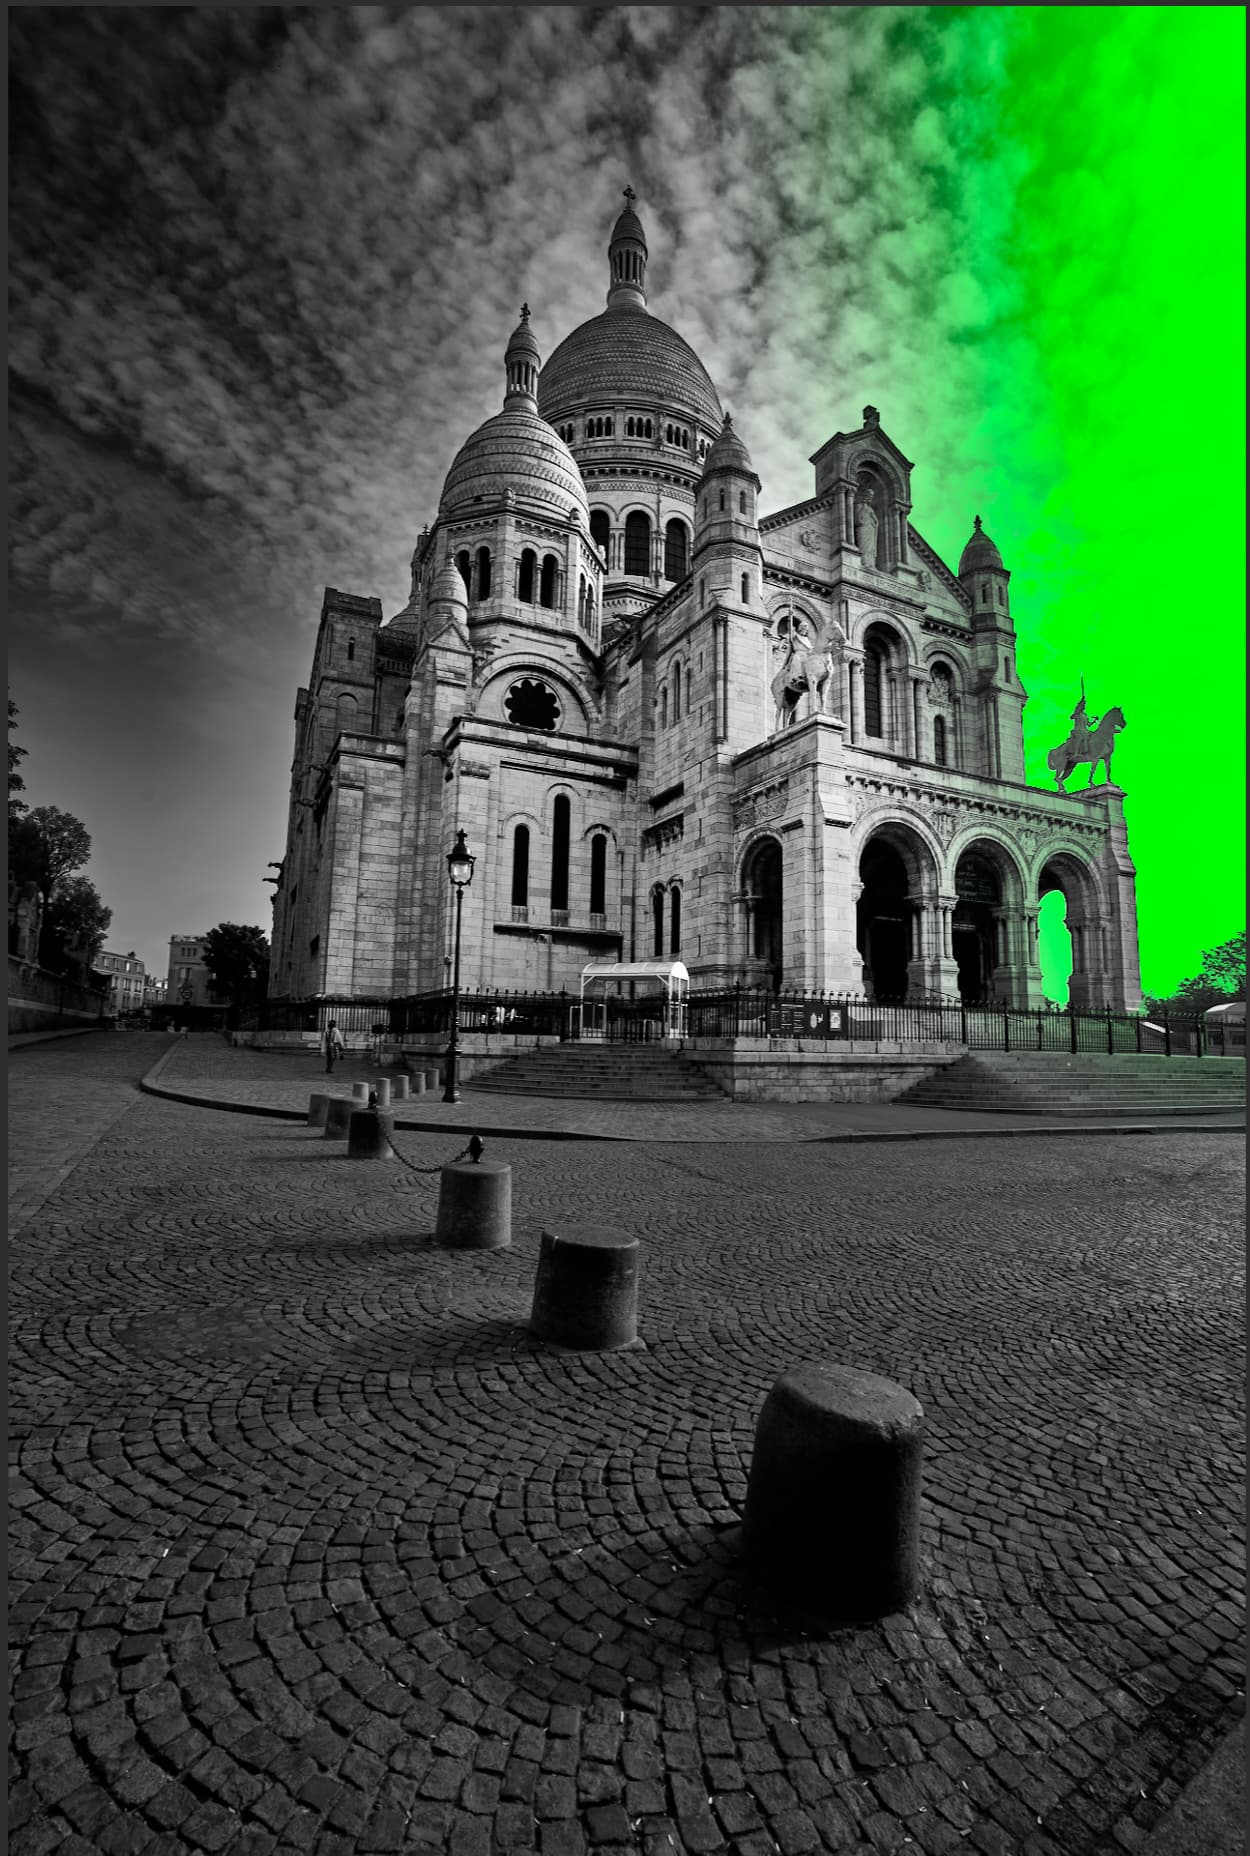
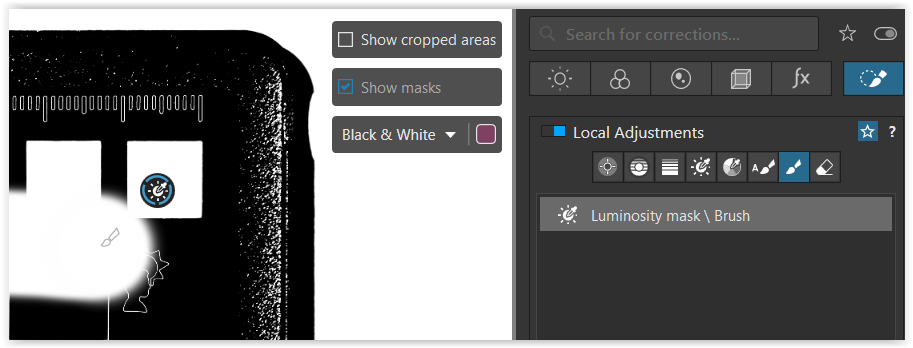
I want to change the sky to white…

This screenshot doesn’t show the sky as white, it is only showing the mask and, as you can see, the Selectivity sliders have been adjusted to make sure that the sky and only the sky, is selected.

Now, I can hide the mask and adjust the saturation and exposure for the sky only…

But, be warned, this can provoke edge halos and is why, for this kind of need, I have switched to Luminance and Tint masks, even though it can sometimes mean having to tidy things up a bit…

3 Likes

@Joanna thank you for this… Question, can you use negative control lines/points against a luminance mask?

Tom

This all was very helpful. Im still figuring it out. But I was able to get what I was looking for using the techniques on this thread.

First image is from C1:

Second image is from PL8:

Thanks again.
Tom

2 Likes

No software program is the right choice for everyone.

For some people ease of use is the most mportant feature, even surpassing quality of output. My experience with ON1 is that it is bloated software with dozens of targeted filters that are essentially different combinations and subsets of existing tools. Many of ON1’s tools look good but they are unfinished and actually much slower to use than PhotoLab. This may become obvious to you once you develop more of an expertise with both programs. Many of those who praise ON1 in a number of forums seem to lack experience with its superior competitors, Lightroom, Capture One, and PhotoLab. As a result they don’t have a basis to compare the output quality.

Yes, there are definitely a few features there that would be nice to have in PhotoLab, however the results with those features is not always as good as I would have expected, and with increased knowledge of PhotoLab, many of those ON1 tools can be replicated with PhotoLab’s existing tools. The latest toy that they have is the Generative erase. The built-in local free version of generative erase, Local Gen AI, is terrible and for the most part is a complete waste of time to use. . The cloud based, paid option, using Stability AI, is much, much better but still fails miserably on a lot of tasks.

People have criticized PhotoLab for its lack of AI features other than for the DeepPRIME variants. Having experienced the less than great implementation of AI features in ON1 and in other software, all I can say to them is be careful what you wish for.

In the end, only you can tell If using PhotoLab gives you the results you want and is the best use of your time.

Mark

5 Likes

I don’t really care much about AI stuff. Some of the masking in C1 is really good.
But, for control purposes, I personally would rather do it myself… so long as the tools are present to do it. I enjoy this part of the image making process.
I appreciate the help and feedback.

Tom

2 Likes

Not sure if you saw this?

3 Likes

Thank. you.

Tom

No, not with control lines/points.

But once you have controlled the → spread of the luminance mask
Screen Shot 11-04-24 at 07.00 PM
.
you can extend the mask with a brush


.
or reduce the mask
a) holding down the ALT key (Windows) while you brush

b) use the eraser

.

… and the same when to “correct” a Hue mask.

1 Like

Got it… Thanks.

Tom

One thing I notice about this mask is that it is mottled. Did you intend to cover the sky or just clouds? Did you think of using Selectivity to select both clouds and sky?

@PopsInABox – and all

I just checked for the latest PL8 Manual → downloadable print version, which now also contains screenshots.

Information about the Luminosity mask (followed by the Hue mask) can also be found on pages 338 ff.

2 Likes

@Eigil_Skovgaard

So if you’re done with PL, why are you still coming here – just to spend some time?

3 Likes