Color grading is definitely not just the three wheels. Color grading is a lot of things, which is why I asked what feature you wanted. LUT creation could be considered part of color grading, but I wouldn’t vote to include it.
I get it now—your request is to add the three color wheels. That’s fine and the interface is convenient.
If you need this feature today, the functionality is there as long as you also have FP7’s luminosity mask. If you want to color grade by altering colors (and more) in the highlights, midtones, and shadows, you can do it. You can even pick your own tonal ranges.
A working AI mask would be really a big step forward … or at least a functionality which shows what Automask has choosen . But best would be to get both.
Its never worked very well, the face on the shirt is good for it. I have had people standing under trees and a group of leaves selected no people. The most basic camera/phone I have used can manage it so I am amazed how it failes so easly in PL just always expect to select the faces my self. On the occasion it gets faces I am usually hunting around to find what it selected missing the idea of even checking faces! (it probably thought the faces were leaves). Its main use ifs selecting the high and shade points you what to use for that its good.
Yes – this one. By adjusting/changing the size of the drawn ‘rectangles’ or applying additional ones, it is easy to adjust/balance brightness and contrast.
I don’t rely on it either, it’s not a surveillance system. Just a funny example of AI mishit, if I may use the word “funny” in this case. BTW, when the above crop from the screen is loaded into PL7.1, it detects also the second face. The photo is 12+ years old, so I think no privacy problem there.
You are going to like this (I just discovered it):
Create a local adjustment mask.
Go to the global adjustments HSL pane.
Enable the picker.
Go to the local adjustments HSL pane.
Result: the picker remains enabled and anything you select will create a range selection in both the global and local HSL adjustment wheel.
It’s not as convenient as being able to turn the picker on/off from the local adjustments HSL pane, but it does provide the ability to pick a color range that can be used with any mask.
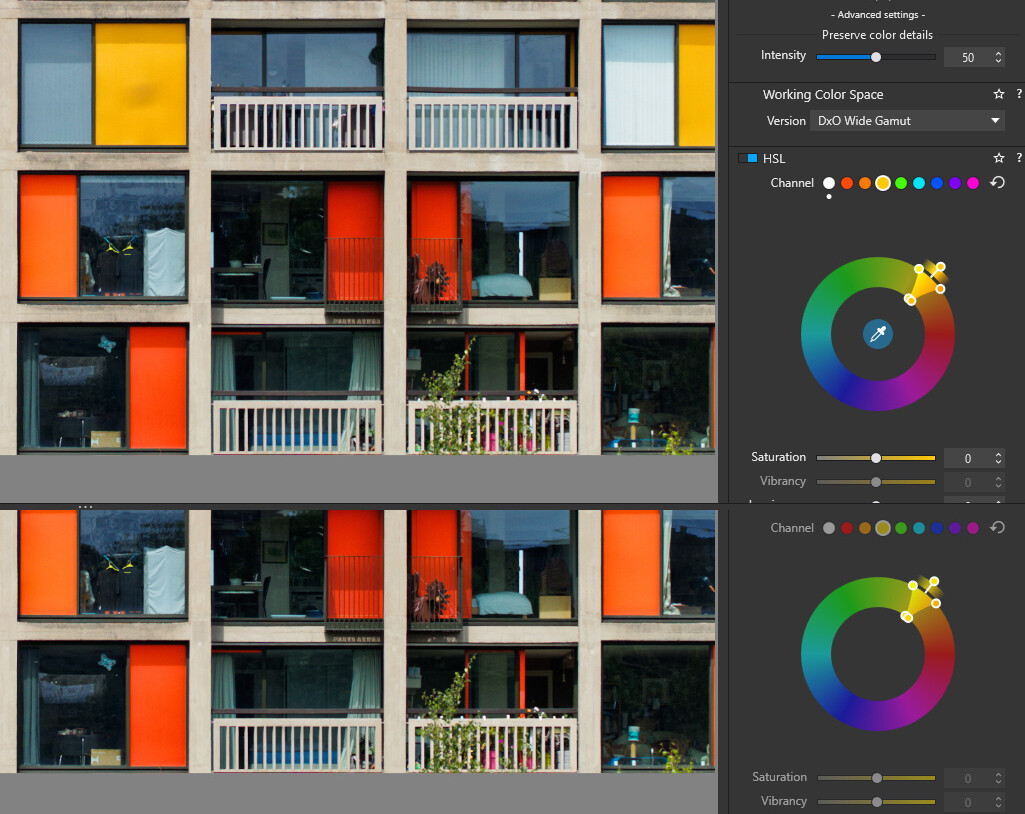
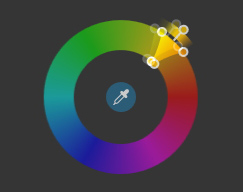
Strangely, this is not quite accurate in my experience. Whatever is picked with the global picker is slightly off in the local HSL wheel. Rotated clockwise by a few degrees. Noticeable with any colour but here is a yellow example:
I pick from the yellow panel at top left but when I go to the local HSL tool, it is more orange:
Good eye! I played around with this for a bit and, at first, I got the same “few degrees” problem. Then I picked a desatured mint green and it wasn’t off by just a few degrees. I also got huge differences with some other colors. It wasn’t off in just the color, but the whole range.
Sounds like a bug. And yes, they should add the picker.
4 Likes
Stenis
(Sten-Åke Sändh (Sony, Win 11, PL 6, CO 16, PM Plus 6, XnView))
54
Strange that the code seems to differ between the global and local side.
Are there some adjustments done on this image ?
My point is maybe global HSL acts before those adjustments and local HSL acts after them, and so find a different color at the same place, which in this case would be fair.
Not easy to understand how modifications are applied with a not real layer system.
I don’t remember exactly which but the adjustments that would affect the colour would be applying one of my default DCP based presets and changing the white balance.
As those are frequent starting points for me, I would be flying blind if I tried to do the local adjustments first. My workaround with local HSL is to place my point/line/etc, choose a near colour (e.g. blue) in the HSL tool, drag the HSL luminance to minimum then rotate the wheel until the affect on the target colour in my image is darkest. Then I know I’ve ‘picked’ the colour.