Sure, this is a very good example what easily could be fixed with a lumunosity mask but say you wanted to mask or demask one particular of the trees that have the same luminosity as the surrounding trees. In CO you would only need to press Alt and click to deselect that tree and to select a certain tree could be made by a click or drawing a rectangle over that tree. When you do the last you will see how the mask adapts to the subject just by hoovering over it. It is rather flexible and intuitive
I compared with traditional layered approach without AI, where this kind of selection takes a lot of time, if possible, at all.
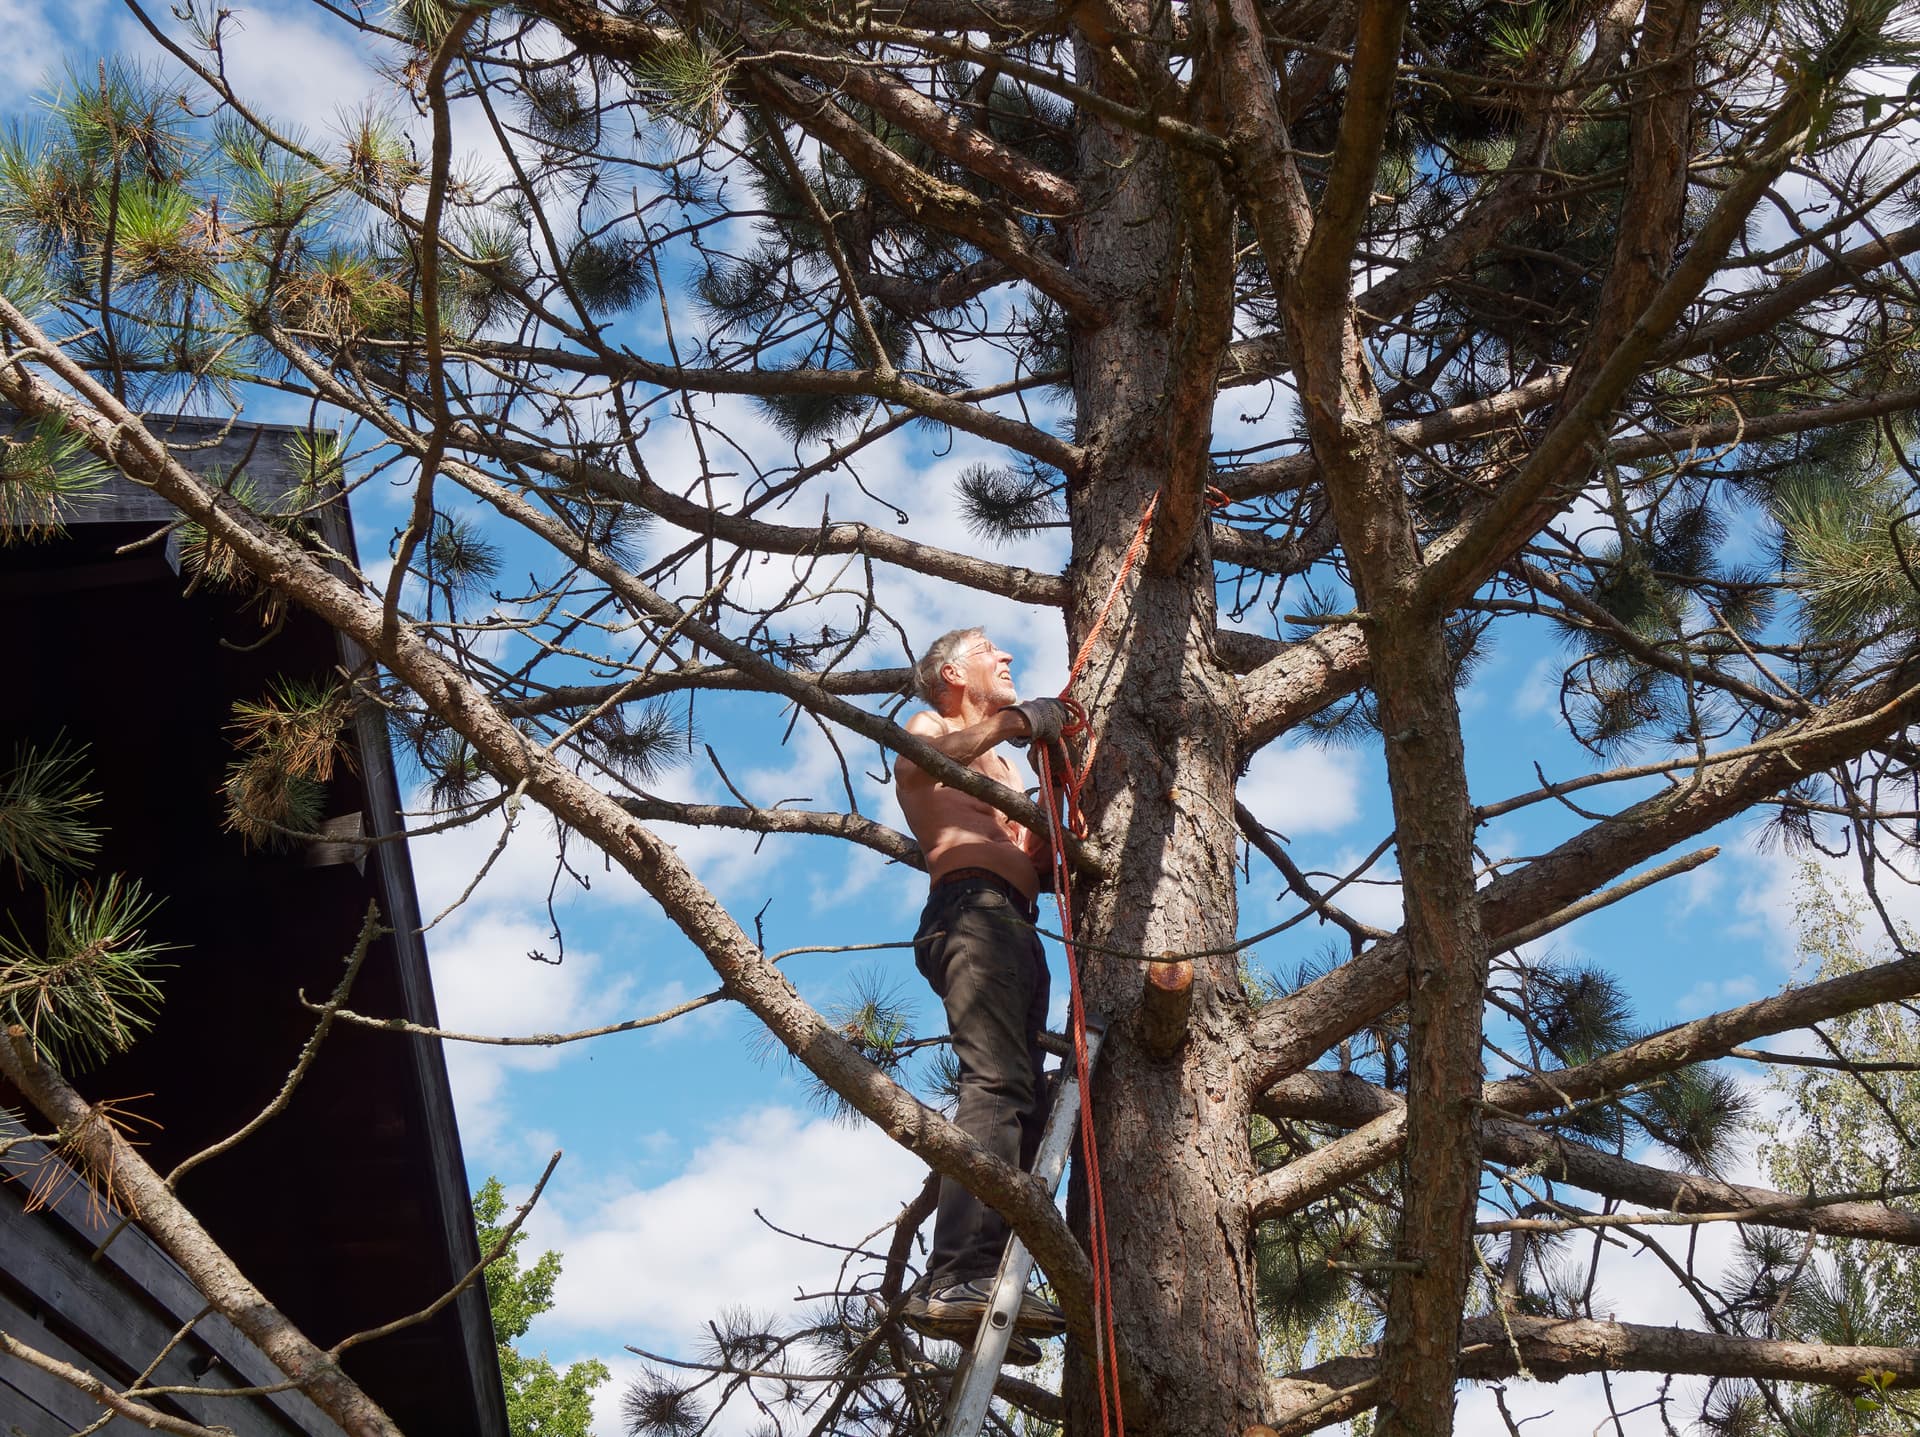
If anyone has time and want to test, in the sample I have included, how well do AI select sky, person, house and tree here?
Here you have a video that targets AI masking of complicated areas in both Lightroom and Capture One. It about shows where we stand now and the small differences between Lightroom and CO that obviously are there. The most obvious is that it is dedicated function to target a person. In CO you can either choose between “Subject” and “Background” to begin with.
CO seems to have an ace LR seems to lack and that is “Refine Mask” That tool solves for example to sort the problem refining hair on people that might be a problem with the LR Tools. Besides that CO also have Magic Erase and AI Erase that helps cleaning a messy precission jobs.
See for yourselves. In Thorsteins image above I should start with Subject when masking the man for example and then use the AI Erase if it will be necessary or just hoover and click when the mask looks best and take it from there. I doubt luminousity tools would fix this more easily sins there are light parties both on the man’s body and the tree.
Here is a video that better shows the different options there are now in AI masking in CO.
1 Like
Nice videos!
to complete the overview, take a look at the last video on the same channel:

@noir.fonce
There is a lot to like about DxO:s Control Points too and all that have used them for long can advocate that. They can be very effective and useful generally. One problem though i that the precision sometimes just isn´t good enough. It has advantage in the cases where might WANT the edges to bleed over the “edges” into the background smoothly but that is not always the case and I have long before AI looked to CO in situations like that.
Thanks for the video link it was a good complement to the other videos.
Hej Torstein!
Here a few examples of masking in Capture One 16.3
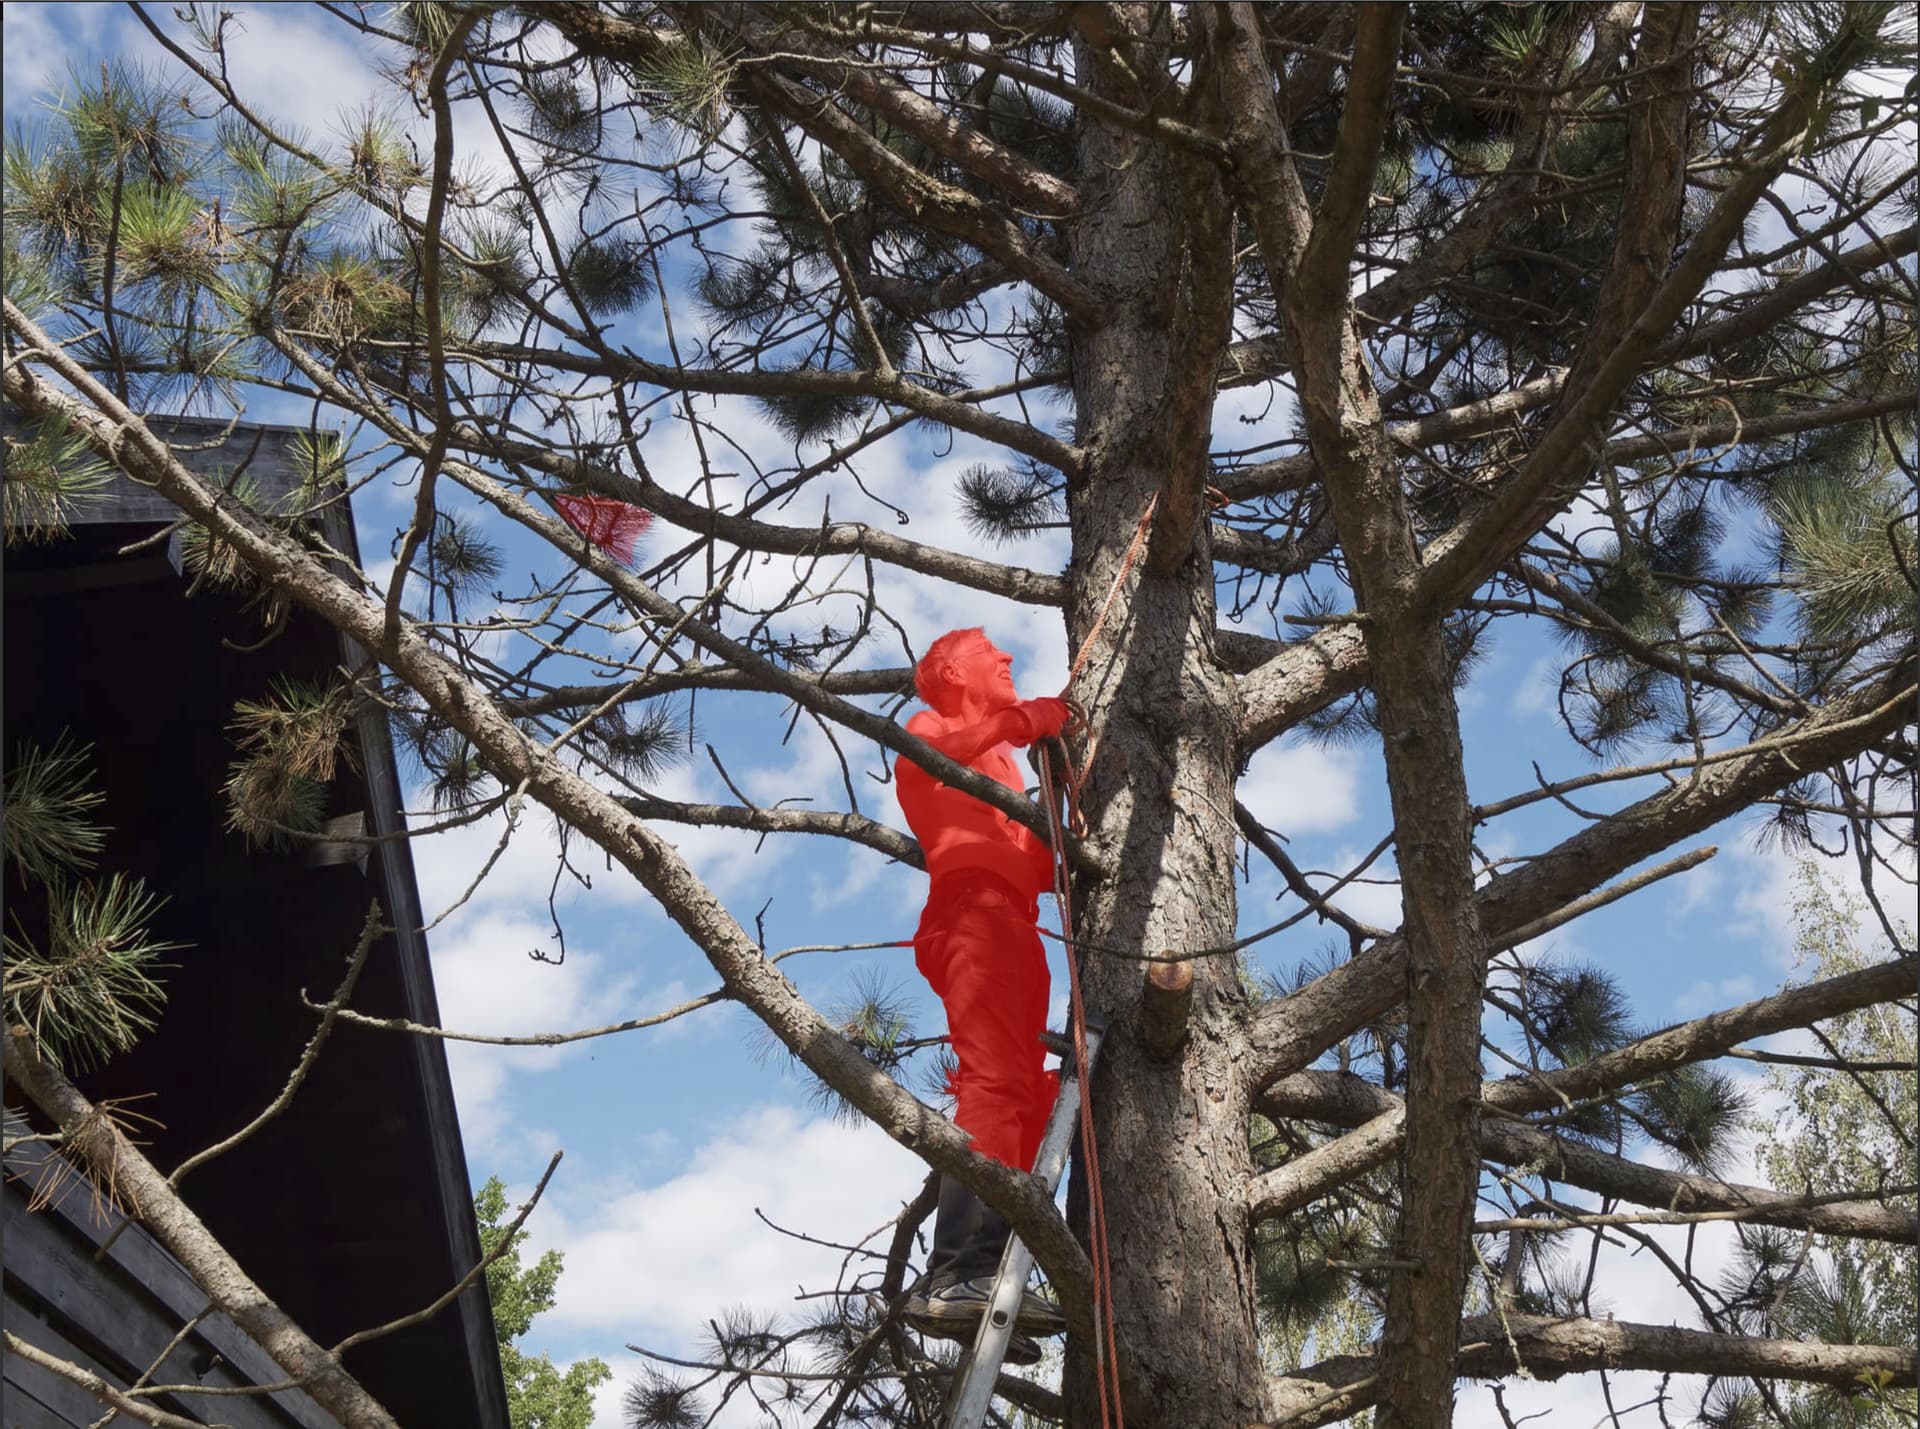
I have started with AI mask of “Subject” and as you can see it both missed the lover part of his legs
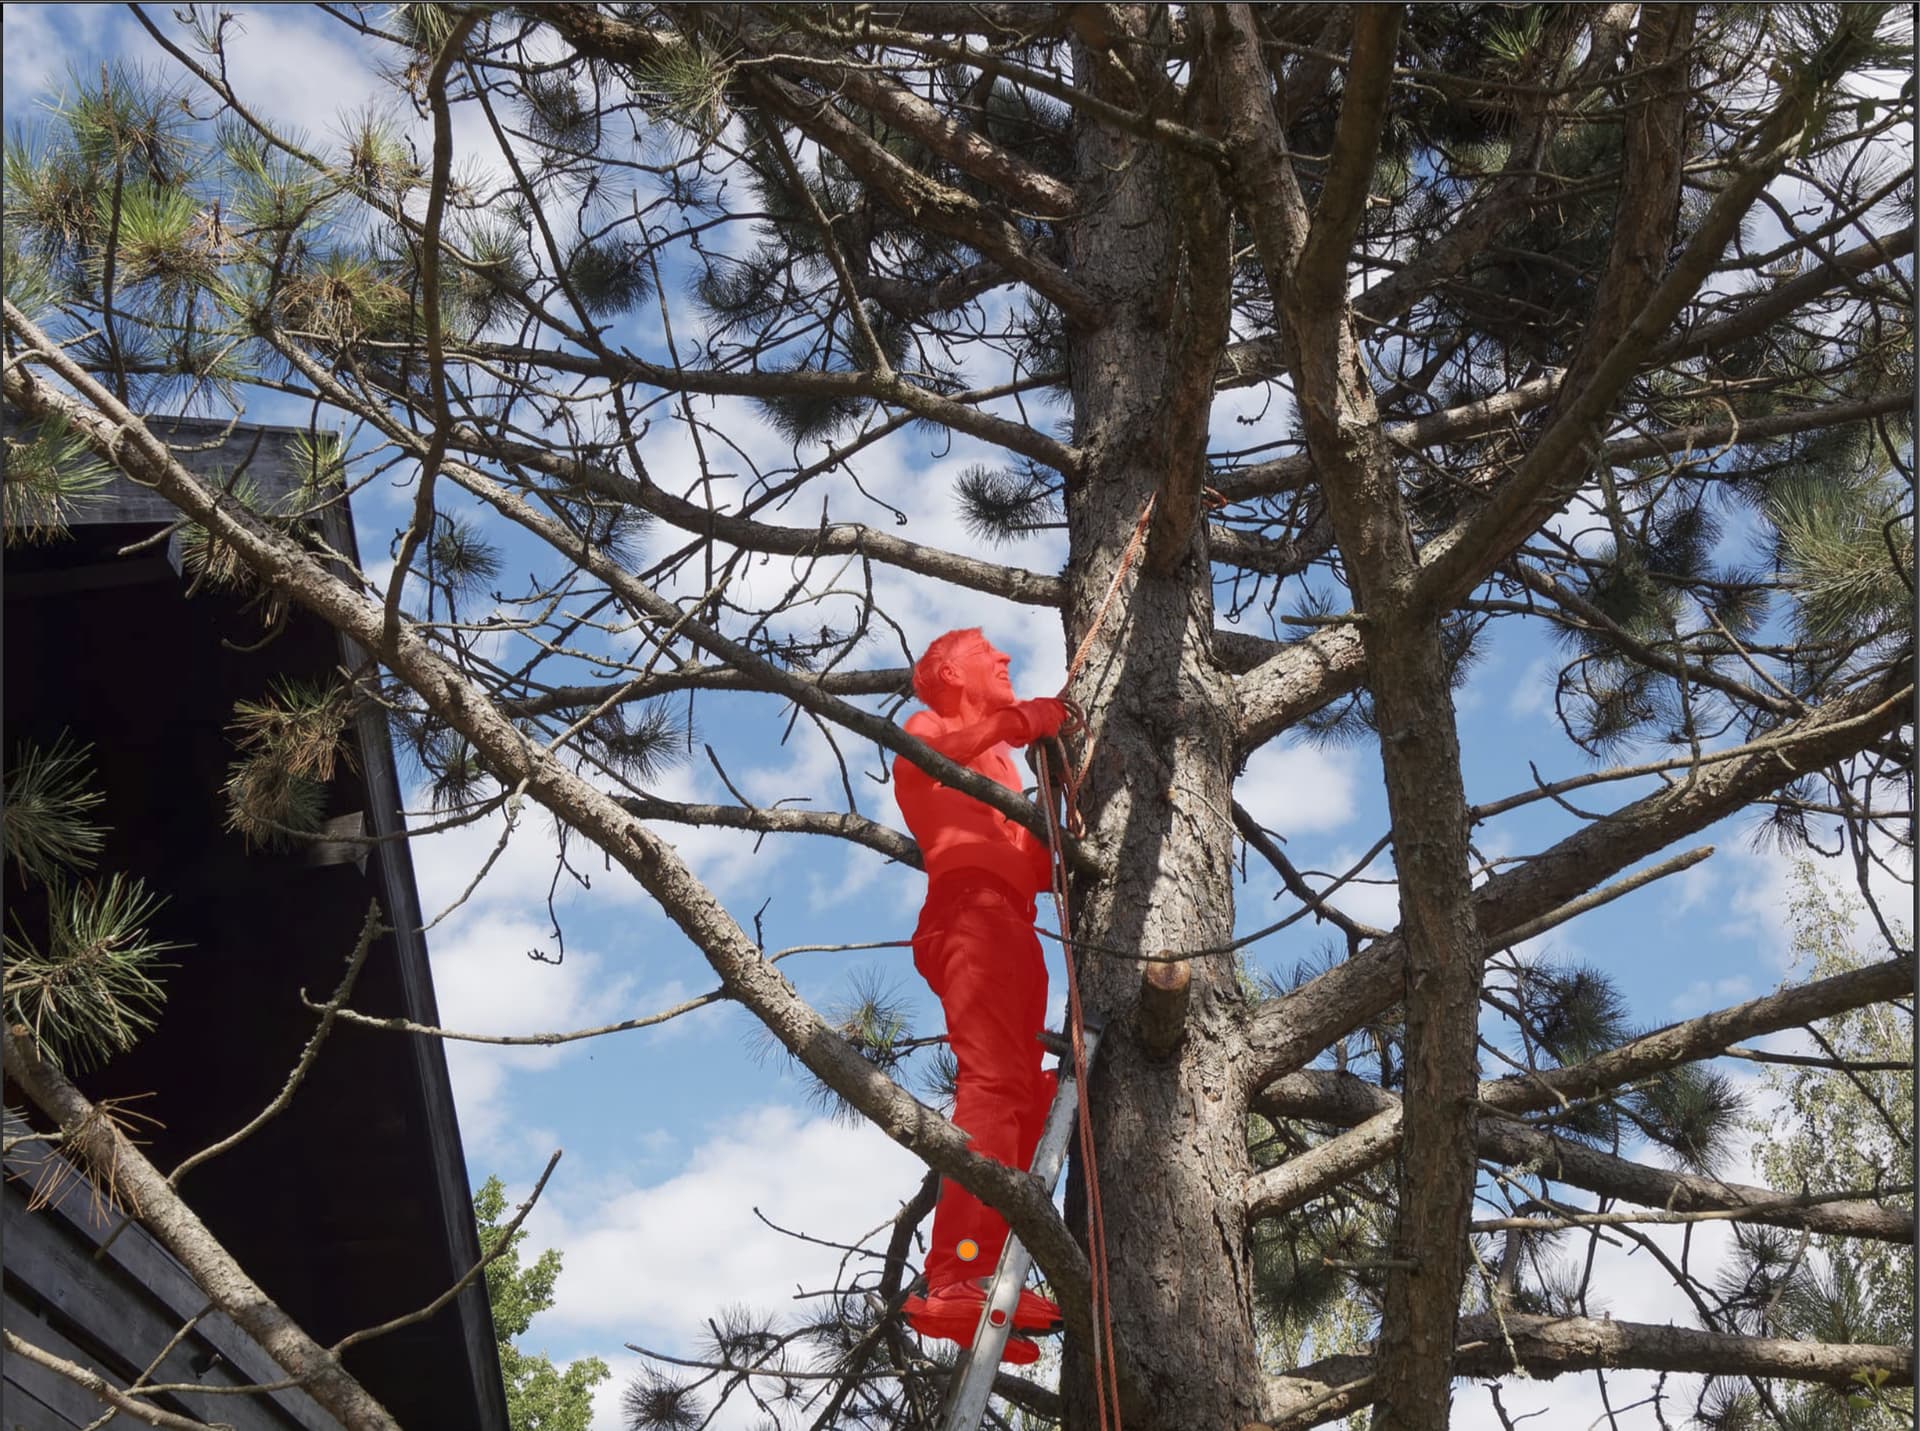
After a couple of more clicks with the AI Brusch and the AI Eraser
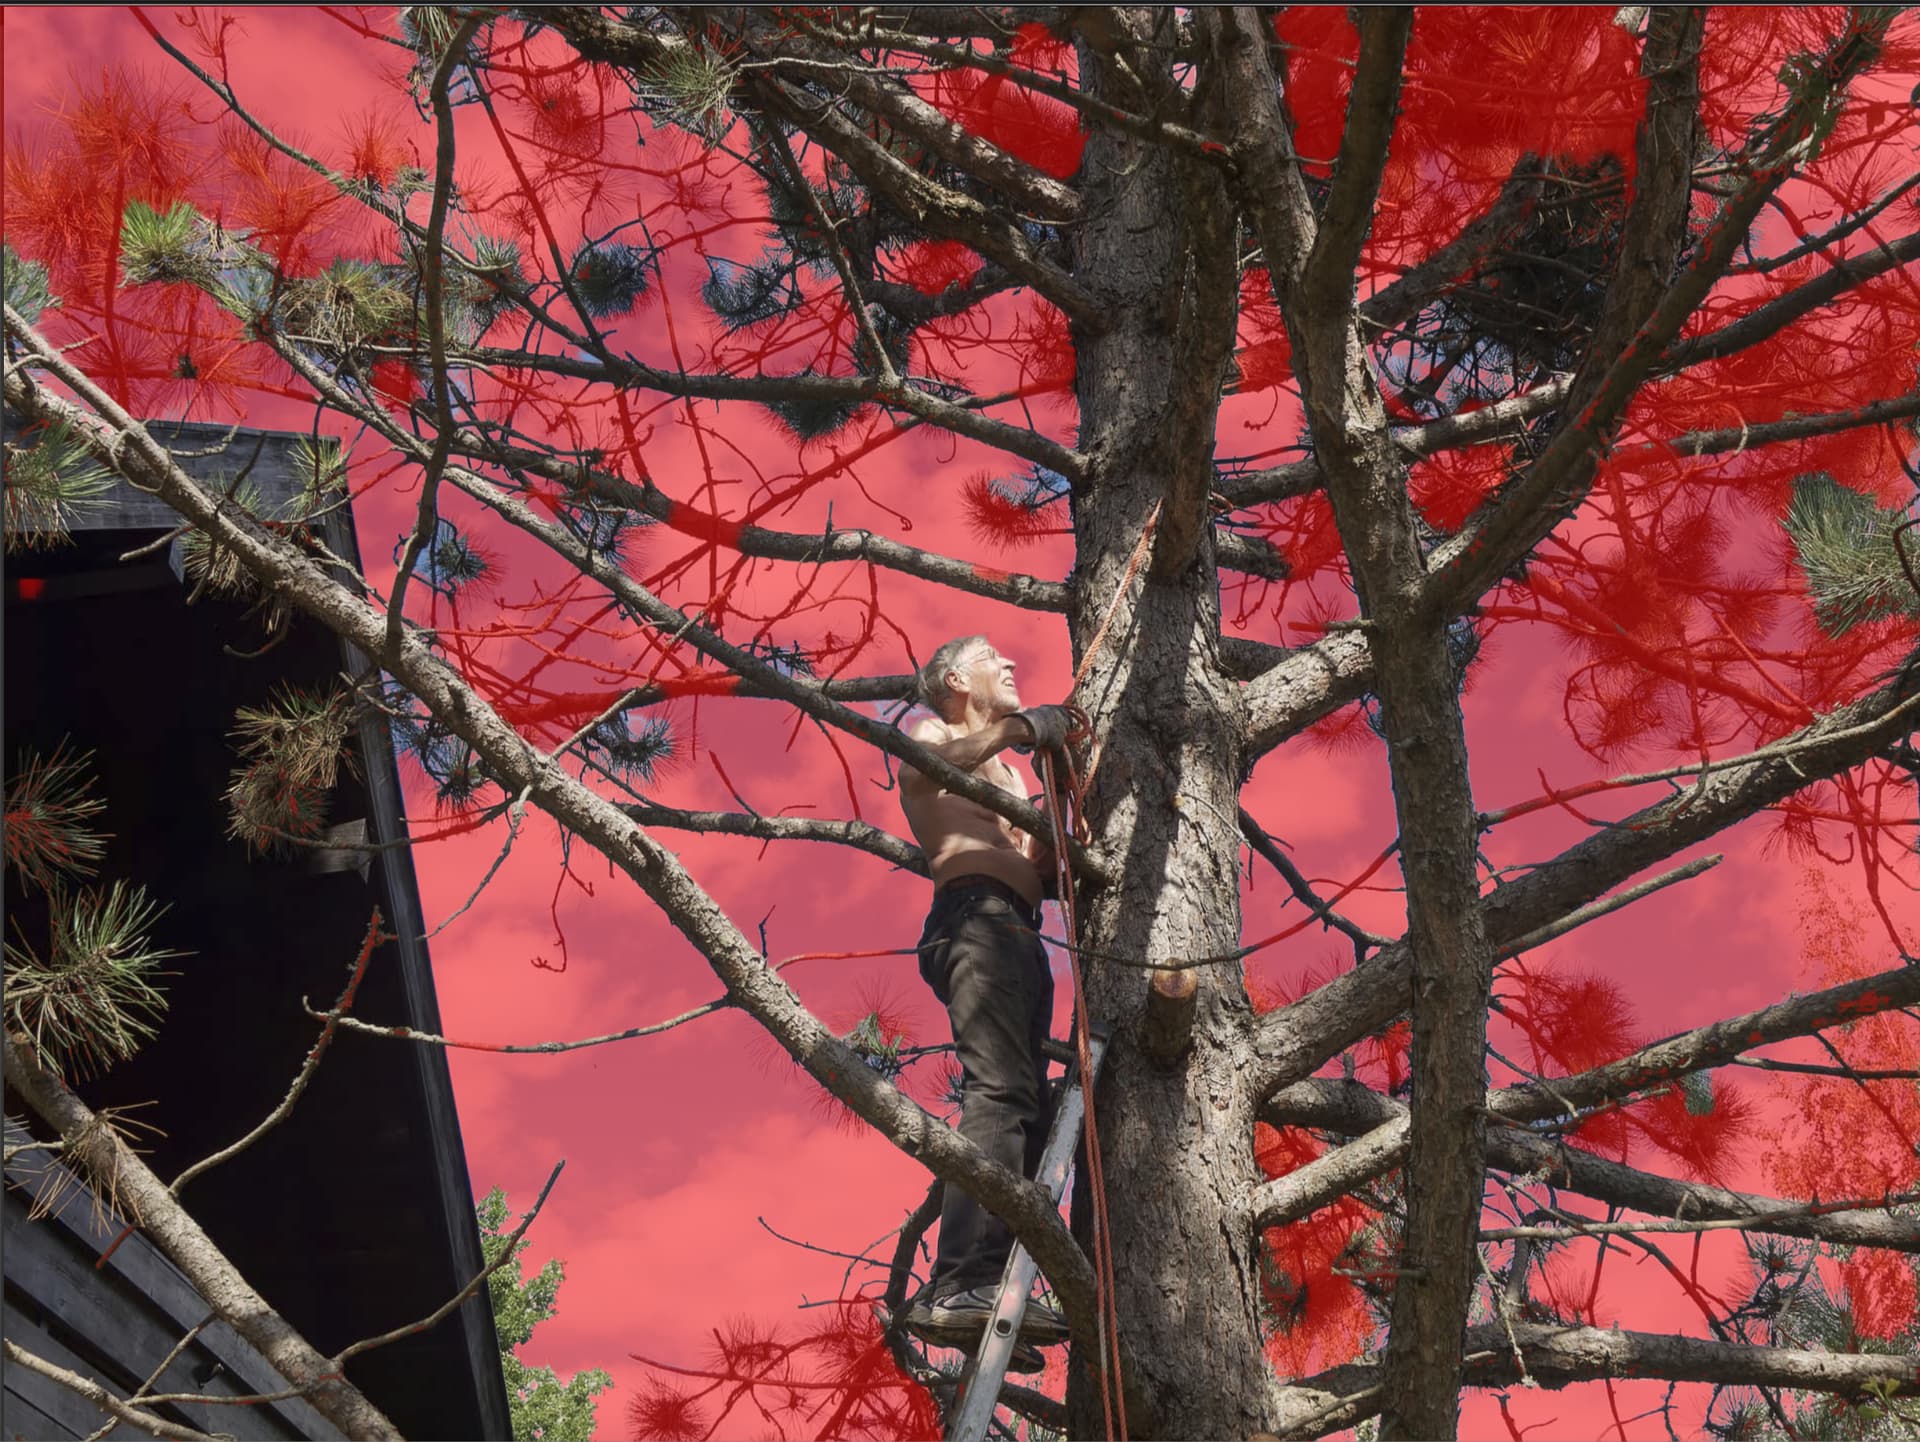
It´s not an easy task to get a “perfect mask” of the sky here when it it so cluttered with “needle leaf balls”, maybe this would have been better of with some luma masking and work with the collateral mask of the man that probably had been the case then.
It is kind of interesting to see that it was not the new AI Brusch tool that gave the best mask of the sky. Instead it was the older tools called Magic Brush. The way that tool is working is that you click the few various areas with special color or tone and then the mask is growing as you click. I think it took four or five diffferent clicks to get this result, which I think is pretty good. It solved the problem pretty well. I think Magic Brush came in a feature release with version 22 a couple of years ago.

So, it is absolutely possible to make a mask of the sky even if the background is very cluttered with Capture One. The Magic Brush seems to use both Luma and Chroma to manage to isolate the sky from the person and the tree and is a good complement to AI masking.
1 Like
Absolutely but version 7 is pretty different than version 6 since they now have changed the interface substantially. That was necessary but unfortunatelly not even the new UI is all that good because the devision of the UI into a global and a local part is inproductive. It is far better to make layers of it all like in Capture One and make all adjustment tools work even in Local Adjustment. Then you get a consistent UI, The one in Photolab is not. Not everything in Photolab is so confusing, poorly implemented and ineffective as the Color Wheel implementation but it is far from the only exampel.
Have you tried to use Capture One with “Sessions” instead?
I only use CO with Sessions. Originally there were just sessions often used by studio photographers.
You have to rig sessions - session by session. It is not as straight forward as Photolab but it’s possible.
CO AI masking is brilliant for a first interation. PL is definitely lagging behind the competition in many ways. ON1 and Neo have workable AI masking that save significant time. Rather than give us new masking capabilities, DXO releases Luminosity masking and diffusion control in other products but not PL.
I guess DXO:s focus on color management issus like LUT and calibration, functions that might get used by a very limited user group has drawn resources from AI masking and layers. The year before it was the PictureLibrary.
1 Like
Much of this is personal preference and familiarity wit the software. I really like the new CO. I can create similar masks faster with the CO than I can in DXO with control lines and I can use luma curves and better tone sliders in each mask. In the above photo, magic brush would do a fine job selecting the sky. I can quickly select intricate skies around trees using CO’s Ai mask box, magic brush, or create mask from color selection. Once sky is selected, I can copy the mask and invert to select the foreground. I can do similar in LR C, albeit in a more cluttered interface. I’d happily use PL6/7 if I felt it were better. Unfortunately (because I like the program), I pretty much dropped DXO except for noise reduction as I feel PL7 still needs significant improvement (already discussed in other posts).
You can do some nice things with control lines too but I feel that it is done much faster with Magic Brush in CO and often with much better precision and control. I just did 4-5 clicks on that image above which didn´t even take 10 seconds. It is just to make a cumulative click and click the different nuances of the sky where you find them. In that case I don´t think it can be much simpler.
I think Photolab has some really strong cards though and for me it is more the integration with PhotoMechanic Plus since an efficient metadata maintenance is so important for me. CO can´t compete there at all and not Photolabs PictureLibrary either but it is nice to have PictureLibrary too just to keep an eye on the metadata updates despite the sync between these applications are rock solid from what I have seen.
BUT I really feel I have to make some new tests with syncing PM Plus and Capture One 16.3 now. Maybe something has improved since the last versions.
Yes, Corgi I totally agree and I have lifted this several times too. The possibility to turn a color pick into a layer is very useful sometimes and is of the things I expect to get in a close future even in Photolab together with a “Filled Layer”-layer option. This is nothing complicated at all to add and shouldn’t need to wait until next year. Why do I explicitly have to create a layer in LA before I can use the Color Wheel? A layer ought to be created automatically in the background as soon as we start using the Color Wheel - picking a color with the color picker.
1 Like
CO has one thing i’d like to see in PL… colour grading, seem only every other software as it.
1 Like
Looking at the Wikipedia page for “color grading”, I see:
Color grading is a post-production process common to filmmaking and video editing of altering the appearance of an image for presentation in different environments on different devices. Various attributes of an image such as contrast, color, saturation, detail, black level, and white balance may be enhanced whether for motion pictures, videos, or still images.
PL already includes controls for contrast, saturation, etc. Looking at a page on color grading in C1 (A Step-by-Step Guide to Color Grading in Capture One Pro), it looks like everything they have is available in some fashion in PL.
The 3-way color balance tool seems useful, although one can do this much more powerfully using luminosity masks (which ought to be native to PL7) and the HSL local adjustments.
C1 also has a a nice Levels tool, with the ability to set the white point/black point and gamma, although this can all be done with PL’s curve tool (it’s nice to be able to see the histogram).
To create a specific, re-usable “look”, one uses a LUT, which PL7 supports. There are various LUT creation tools, ranging from free to expensive. These programs can be complex and I’m not sure embedding all that functionality in PL is the best use of their limited resources.
I’m not questioning that there is some “color grading” feature that could be added to PL; I’m curious what specific feature(s) you would like to see.
PL7 local adjustment colour wheel doesn’t have a “picker” not sure why, but sure would be nice if it had one.
Seems nice.
But each example is done fast and about no mask I saw seems really perfect. (Many are probably not usable for good quality output).
So I would really like to see real (production) masking projects done right and see how many time it takes to get perfect result. At 100% magnification.
And how many can’t be acheived …
This reminds me a topaz example (some years ago) of a completly out of focus image (everything was totaly blurred) becoming extremely sharp. It was very impressive.
I tested this and took several completely out of focus images. None of them could be decently solved by topaz.
Image used in the example was probably one of those used to train the ai …
1 Like
I may be missing something here. You said you wanted color grading in PL. I asked which specific color grading features you wanted.
Are you saying that that the HSL local adjustment picker is the only thing that needs to be added to satisfy your color grading request?
the color wheel ain’t color grading and yes it’s missing the picker.
the 3 wheels, that’s the main point of colour grading. not every one need it, same as FP, VP and NIK, if you don’t know or ask what it’s for then no you don’t need it.