@mikemyers
If I came to the conclusion my dof is to less then the first thing I would do is finding out why, what happened, what did I do wrong.
I think it’s time for you to do that too.
George
@mikemyers
If I came to the conclusion my dof is to less then the first thing I would do is finding out why, what happened, what did I do wrong.
I think it’s time for you to do that too.
George
I agree with you, but like I wrote earlier, this was deliberate, not an accident. I only wanted the three chickens up front to be sharp.
The “problem” is with what I wanted to capture, not with the end result. What you see is what I wanted. …meaning if it looks bad, that is my fault for wanting that effect. I wanted the chickens up front to stand out.
That can’t be deliberate when shooting in P.
George
I am a snapshot guy, i look around and see things and decide a frame and angle, choose a Aperture for DoF purpose, check shutterspeed, check focuspoint, shoot, change aperture up or down shoot again , change angle framing, refocus shoot again.
I use inteligent ISO. Which is mildy reacting on motion, no motion in frame means longer shutterspeed and lower ISO, motion means cranking up shutterspeed and ISO.
This gives me control on things which are visible in a image and use automated ISO to help out to safe time.
I did a walk with my Carnival Guinea pig in the dunes and every timei got my 12-60 (24-120mm efl) i wanted a 14-140mm or my 100-300mm (24-240/ 200-600mm efl) on my body… For walking and shooting a 12-200mm of olympus kind of lens would be ideal, you never mis a shot in the time window wile having a open body changing lenses.
An other way is dragging/lugging two body’s with a wide zoom and a long telezoom. Merging shotnumbers of the two in one time line.
I have a camerabackpack but maybe a belt pouch for two lenses and leave one empty.
Disconnect lens put pouch, open second pouch and connect, start up camera.
Let the top lid take care of the lens protection and leave the back cap off.
Point is every choice has a plus and a drawback.
Combi superzooms don’t stand’s out in resolvingpower and sharpnes. Has often large distortion issues.
My 35-100mm f2.8 is great, but to narrow angle and not tele enough for walkabout lens.
Same is the 12-60mm f2.8-4 , i have some shots of a black angus but i don’t try it with this lens. Because 25m is a minimum safe distance and then you don’t get a close frame. Then the 100-300mm is a better choice or even my 14-140mm.
Don’t worry about having the right lens on the body, you won’t most of the time…
and you can’t ask your subject to wait until you swapped lenses so walking and shooting is dredfull list of choices and every choice opens and closes a opertunity.
So option 1: Get a powerfull superzoomlens and accept the drawbacks.
Option 2: Choose a lens and work with that and accept the critters who escape your framing are lost for a image.
What i try to say, don’t try to be a photographer who needs to get a certain standard to show the taken images.
Just enjoy your walkabout snapshooting and let the camera be a toy. 
Chicken crowd, yes good idea but in order to get that to work you need a more horizontal angle and a telezoom in order to get that fast sloping DoF out of Focus running image. Or aimed for a more wide angle shot with more chickens in more space.
I didn’t looked at my shots yet from the walking, my harddrive did scared me causing a error. So i backed up all data of the old 1TB and ordered a new 2TB.
When i am done i will show you some with my thoughts writen about what i wanted and what i got.
Peter
On my friend Susie’s D7000 you are correct. I set her camera to something in (P) mode, and I had no idea what the exposure settings were.
But, when I hold up my D750 to my eye in (P) mode, it shows the shutter speed, aperture, and ISO under the photo. I always know all three values as I take a photo in (P) mode.
Maybe this is what led to the confusion?
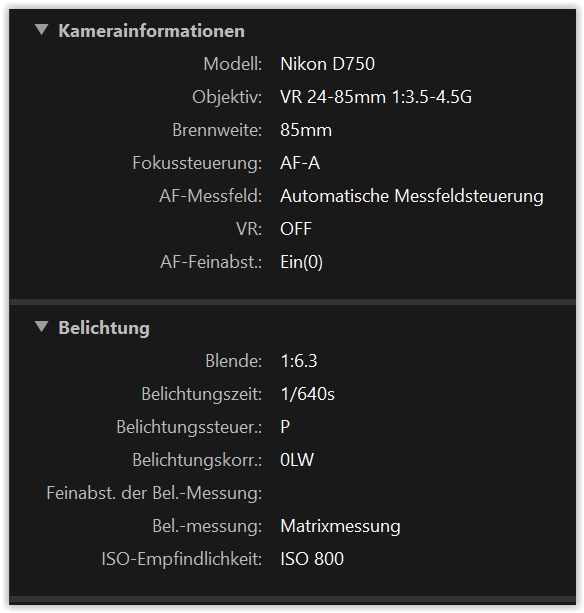
For this photo the camera was set to ISO 800, and the camera selected f/6.3 at 1/640th, with the lens zoomed in to 85mm.
Again, if the end result is not good, it is 100% my fault, not the camera. The camera did what I wanted, and if I wanted was wrong, then me bad.
I don’t know how to take a photo of my viewfinder window to show the display. Maybe I can find one on-line, and post it here. There was/is no confusion about what the camera was going to do, as long as I look at those settings.
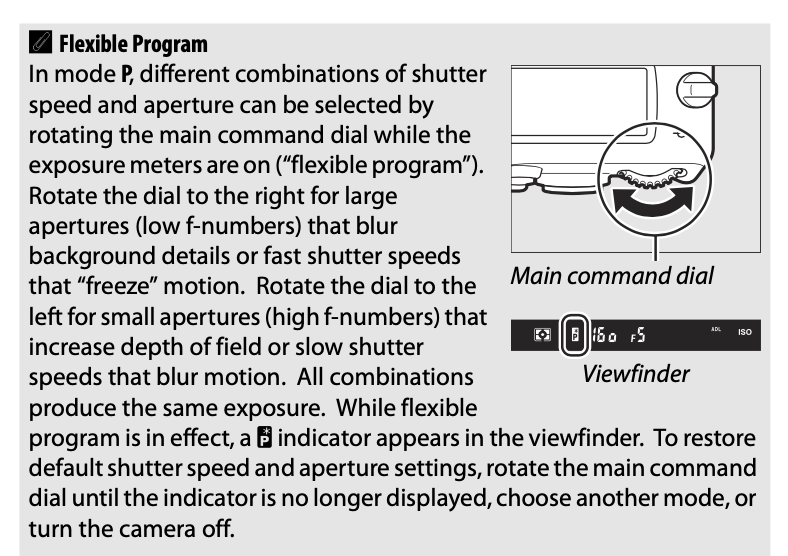
Added later - this is what I can see, and what I can do, in (P) mode on the Nikon D750:
If you read the write-up, I can adjust the aperture in (P) mode just as if I was in (A) mode, by turning the Main Command Dial.
I guess not all Nikon cameras allow this… but the D750 does.
If this was how it went then you did let the camera make the decision.
I don’t care how you got the settings. But if you wanted a small dof then you should use a large aperture. That’s important and you can gain that with A,S ,M,P or Auto. I never used P or Auto.
Working like that you can’t say the camera did what you wanted. You accepted the camera setting without thinking.
And you’ll lose a correction when the camera goes in standby or is switched off. I never switch my camera off ![]()
George
I don’t think you understand. The most important thing to me, at that moment, was TIME, as in I wanted to take the photograph at that instant, before anything changed.
I suppose I could have thought about what the camera had selected, perhaps revised that aperture or shutter speed or ISO to something even more appropriate, and then took my photo, but by then it would be too late, with no photo left to take - I wanted what I saw in the viewfinder at that instant.
What did I see? The image, clear as can be thanks to the D750’s wonderful viewfinder, and three numbers underneath the image, the shutter speed, the aperture, and the ISO. Specifically because the camera was in (P) mode, while I already knew the ISO was good, I had a split second to consider the shutter and aperture, which were acceptable, so I got the photo I wanted.
To do what you really want me to do, I need to put the camera in (M)anual mode, and select the shutter, and aperture. That takes time, which I didn’t have.
For the previous weeks, I had use the camera in (A) mode… actually, the previous two months. At home, this was fine, I thought about the best aperture to use, and selected an appropriate shutter speed, maybe revising the aperture, or even the ISO if needed. When I left for Colorado, that was my plan. I’m sure it was suggested here, and it worked nicely. At the farm, it failed me. The animals might move into a very light or dark spot, and had the photo not been taken in ‘raw’ it would have been scrap… most of those I deleted anyway. Everything changed when I decided to try (P)rogram mode, and most of the time the selection by the camera was acceptable - and if not, I would stop, adjust as needed, and continue shooting.
I suggest that shooting animals is not like shooting scenery, and at least for the photos I wanted to capture, the camera needed to be set ahead of time, so I could instantly capture what I saw through my viewfinder. I understand that you don’t agree. You’ll just have to try it yourselves, going to a barn or shed with dark and light areas, and try to capture photos of the critters around you. Maybe you’ll do it just fine, and the problem (again) comes down to me, that I can’t make those changes quickly enough so I don’t lose the image I’m trying to capture. If so, I’m guilty as charged.
I don’t understand the issue with turning the camera off. Maybe you’re making manual corrections? I just tried this, setting my D750 to -2.3 exposure, turning the camera off, then back on later. It was still set to “-2.3” for exposure.
I don’t know that all Nikons work this way, but the D750 does.
I don’t switch the D750 off that much, but if I won’t be shooting for a several minutes, I try to shut it off, so as to not waste battery. Maybe that’s an old habit, and because the camera goes into standby, it’s not necessary.
We both agree on the first part obviously - for a smaller depth of field we need the lens opened to a larger aperture. Setting the camera to (A) mode, one can directly control the aperture. I’m not sure if you’re aware of it (I suspect most people are not) but you set the camera to (P)rogram mode, you can still change the aperture as desired with the rear command wheel.
I forgot about this tool from not using it for a year or so, but the only difference between doing so in (A) mode and in (P) mode is that in program mode, as you change the aperture, the shutter speed changes simultaneously, to keep the proper exposure. You see both numbers change, before you capture the image.
Please answer me this… if you have a good exposure selected, and if you then decide you want to decrease the depth of field, you and I both agree that the aperture needs to be increased. Doing it your way, you need to also change the ISO or the shutter speed, to keep the proper exposure. Doing it my way, the shutter is adjusted precisely for any change I make in the aperture.
On my D750, what is wrong with doing it the way I’m doing it now? I am making the change, not the camera, but I am making the change in a way that doesn’t change the exposure. …and if I ALSO want to change the exposure, I still have my controls to do that as well.
As it does in (A)perture mode.
Have you ever thought of auto-ISO?
One other problem is the choice of exposure measuring mode. Your chicken image shows you were using Matrix mode, which takes an overall average reading. I tend to use Centre-weighted mode, which puts more emphasis on the centre portion of the average reading.
Then you might find, in certain circumstances, that it is beneficial to adjust the exposure compensation, depending on whether you are shooting into or with the light.
Just tried it - and you are right (as usual). In that case I am wrong (once again) and my reason for using (P) mode is not necessary, meaning I can go back to using (A) mode. As George was saying, there is no longer any need for me to go to (P) mode.
Auto-ISO? No, I stopped using that a lifetime ago. I would prefer to set this manually, so I’m sure what the camera is using.
I used to use center-weighted mode, as I figured the most important part of my images is the center, not the edges. I switched back to Matrix mode because of all the animals I was shooting on the farm, and my landscape photos. The “edges” were just as important as the central area.
That has been a big issue for the past few weeks - I think you are correct, that center weighted might help with many of my photos. I have tried to keep the light behind me, but many times that was impossible.
Another problem I have had was shooting into the light for landscape photos, and the only solution I found was bracketing, and using HDR software. I’ll post one of those images later. I don’t think I could get a similar result from PhotoLab - didn’t even try. I thought the range of brightness was too great.
One last question - if I’m capturing an image, and decide I want to use f/4, what is the difference, if any, between using (A) mode and (P) mode, then selecting f/4 ? As I see it, they are the same. What am I missing?
you where talking about time?
If you know what aperture you want just set the camera to A and shoot.
George
Messing around in P mode to get the exact aperture or the exact shutter speed I want is inefficient in my experience.
I can accomplish the same thing in manual mode with more flexibility, and I can do it faster. In addition,.P mode does not give you the option of modifying both the shutter speed and aperture for the same shot. It is one of the other if I want a specific shutter speed and a specific aperture, which I often do, I use Manual mode, often with auto ISO which I can adjust using exposure compensation.
Over 75% of my shots are taken in manual mode, most of the rest are taken in Aperture priority. And finally perhaps 1% or less or taken using P mode with no adjustments for those times that my photography is secondary to what I’m doing and I just want to be able to capture some reasonable shots.
Mark
I was taught long ago to avoid auto-ISO. This was so long ago, I don’t remember how it happened, but I thinkI was being told I had no idea of what ISO the camera decided to use.
When, and where, would you turn on Auto-ISO ??
From the earlier discussions, isn’t that just as bad as selecting Program mode, so the camera is doing things “behind my back”?
When you shoot in manual with Auto ISO it automatically selects an ISO based on your selected aperture and shutter speed to give you what the camera believe is a good exposure. You can then easily modify the ISO (and the exposure) with exposure compensation. I use it most of the time. Its not that different than explicitly setting ISO, but it is faster and easier to modify ISO that way. A lot of old hands will not use auto ISO but so far no one has been able to explain why auto ISO with exposure compensation while shooting in Manual Mode is a bad thing. If I get the shutter speed, the aperture and the ISO I want, when I want it, wht is the issue? .
Mark .
And don’t forget that now we have Deep Prime and we do not have to worry about the camera choosing an High ISO.
Program mode and Auto ISO allow the widest range of settings to automatically capture the correct exposure … You tried to get the moment and used, what you are so far comfortable with.
But then, you also let the camera decide where to focus on (AF-A = Aut/o)
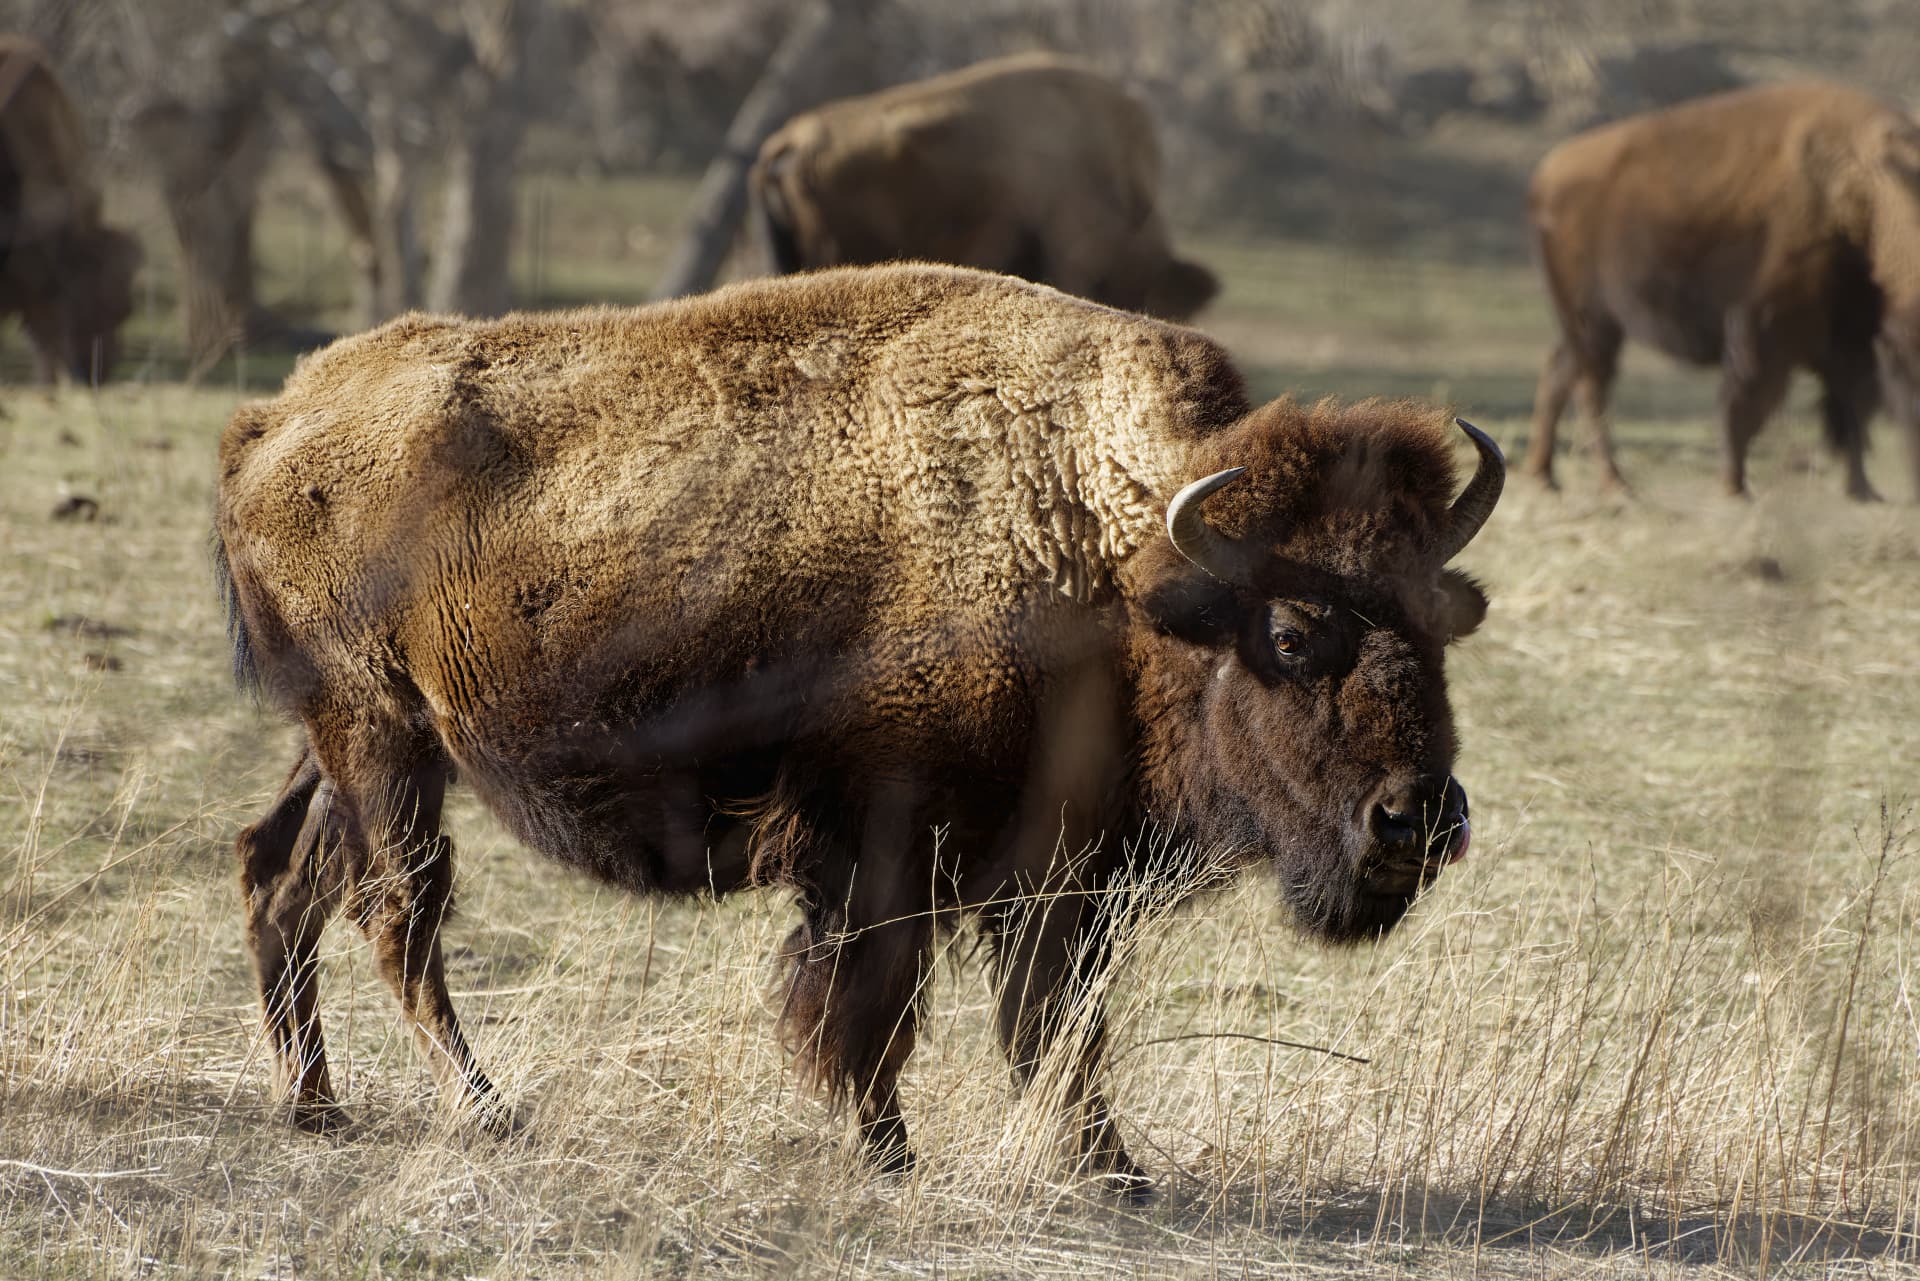
… resulting in randomly sharp chicken or sharp grass in front of the buffalo.
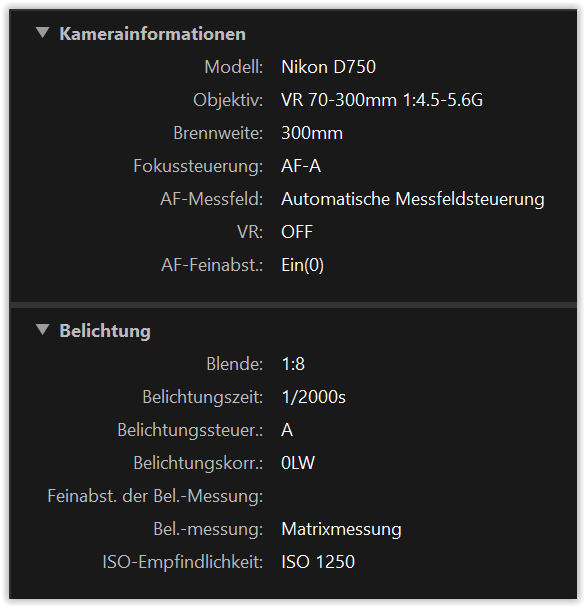
On top of that, VR was disabled with both lenses – and so you noticed how difficult it is to keep the subject ‘in the frame’ handhold.
While tempting to travel with one (zoom)lens only by leaving your new 70-300 mm at home, you really limited yourself. The borrowed lens is the old model, loosing contrast from 200 mm towards the long end.
For some ‘consolation’ I’ll enclose a dop-file for your buffalo pic.
MM2_0486 2022-04-17.nef.dop (305,4 KB) = VC 1
→ To follow, activate the Local Adjustments corrections step by step.
… at the end it looks like this
Similar experience, it has been strongly suggested over many years that I ought to avoid this, and specifically select the ISO that I want to use. So, I’ve ignored it for years. Now, I’m no longer sure what to think.
Are you saying that if I use an extremely high ISO speed, then use DeepPRIME the end result will be just as good as if I never used that extreme ISO speed to begin with? I find that difficult to accept.
Not quite true - the camera showed me where it was focusing, with all the small squares that lit up in front of (buffalo skin/eye or chicken). That is where I aimed the camera, so that is (presumably) where it focused… I think.
The “blurry” areas in front of the buffalo were shrubs and plants blocking my view - very out of focus, but still noticeable.
I don’t understand the chart “AF Area Mode”. I need to do some reading about this. Maybe my understanding was wrong. It seemed like a logical guess.
I thought I had VR turned on for my lens - not sure if the old 300 even has VR. I will check later. Yes, keeping the buffalo in the frame was a challenge, but I found a way to do it reasonably well, resting the lens on the fence.
Thanks for the .dop file - I will do this when I get home, on my better, faster, bigger computer.
More later - need to go back to being a chef…
It depends what you mean by extremely high. In any case I use DeepPRIME on almost every photo I take regardless of ISO. You can always test this yourself. Shooting an
an image at say 3200 ISO, export with DeepPRIME and you can determine whether or not the results are as good as if the isyo was lower.
Mark
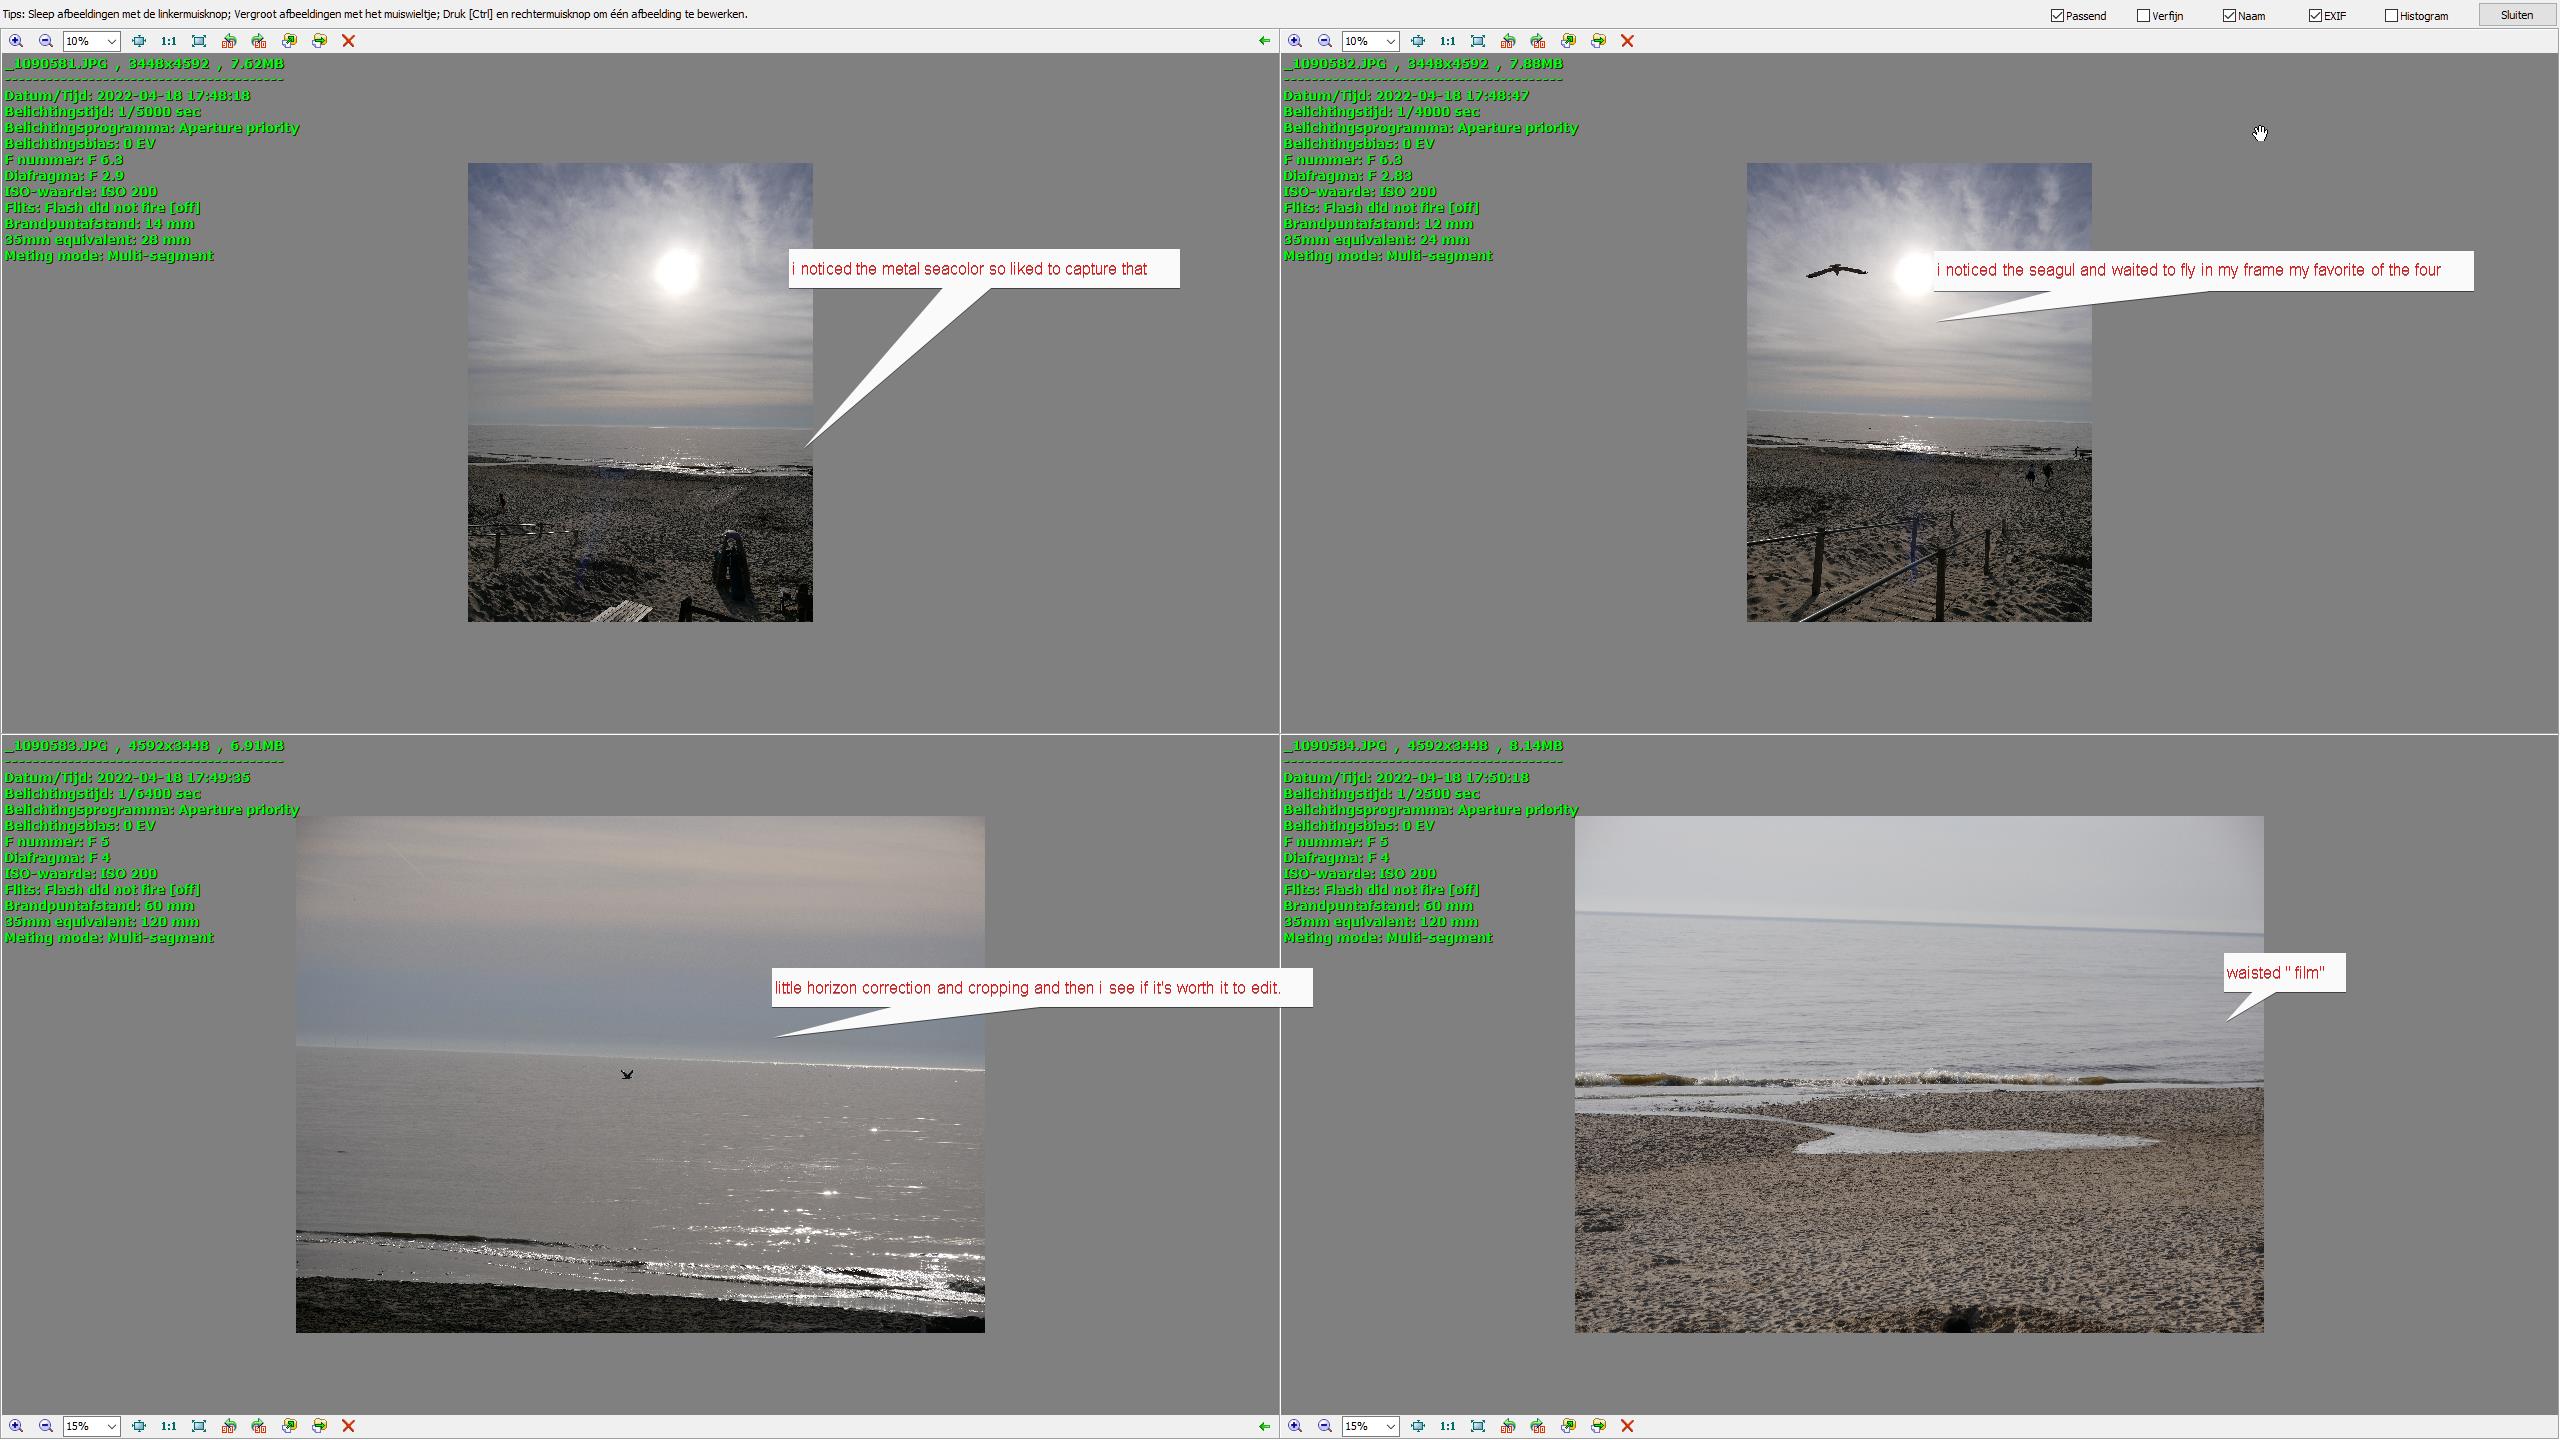
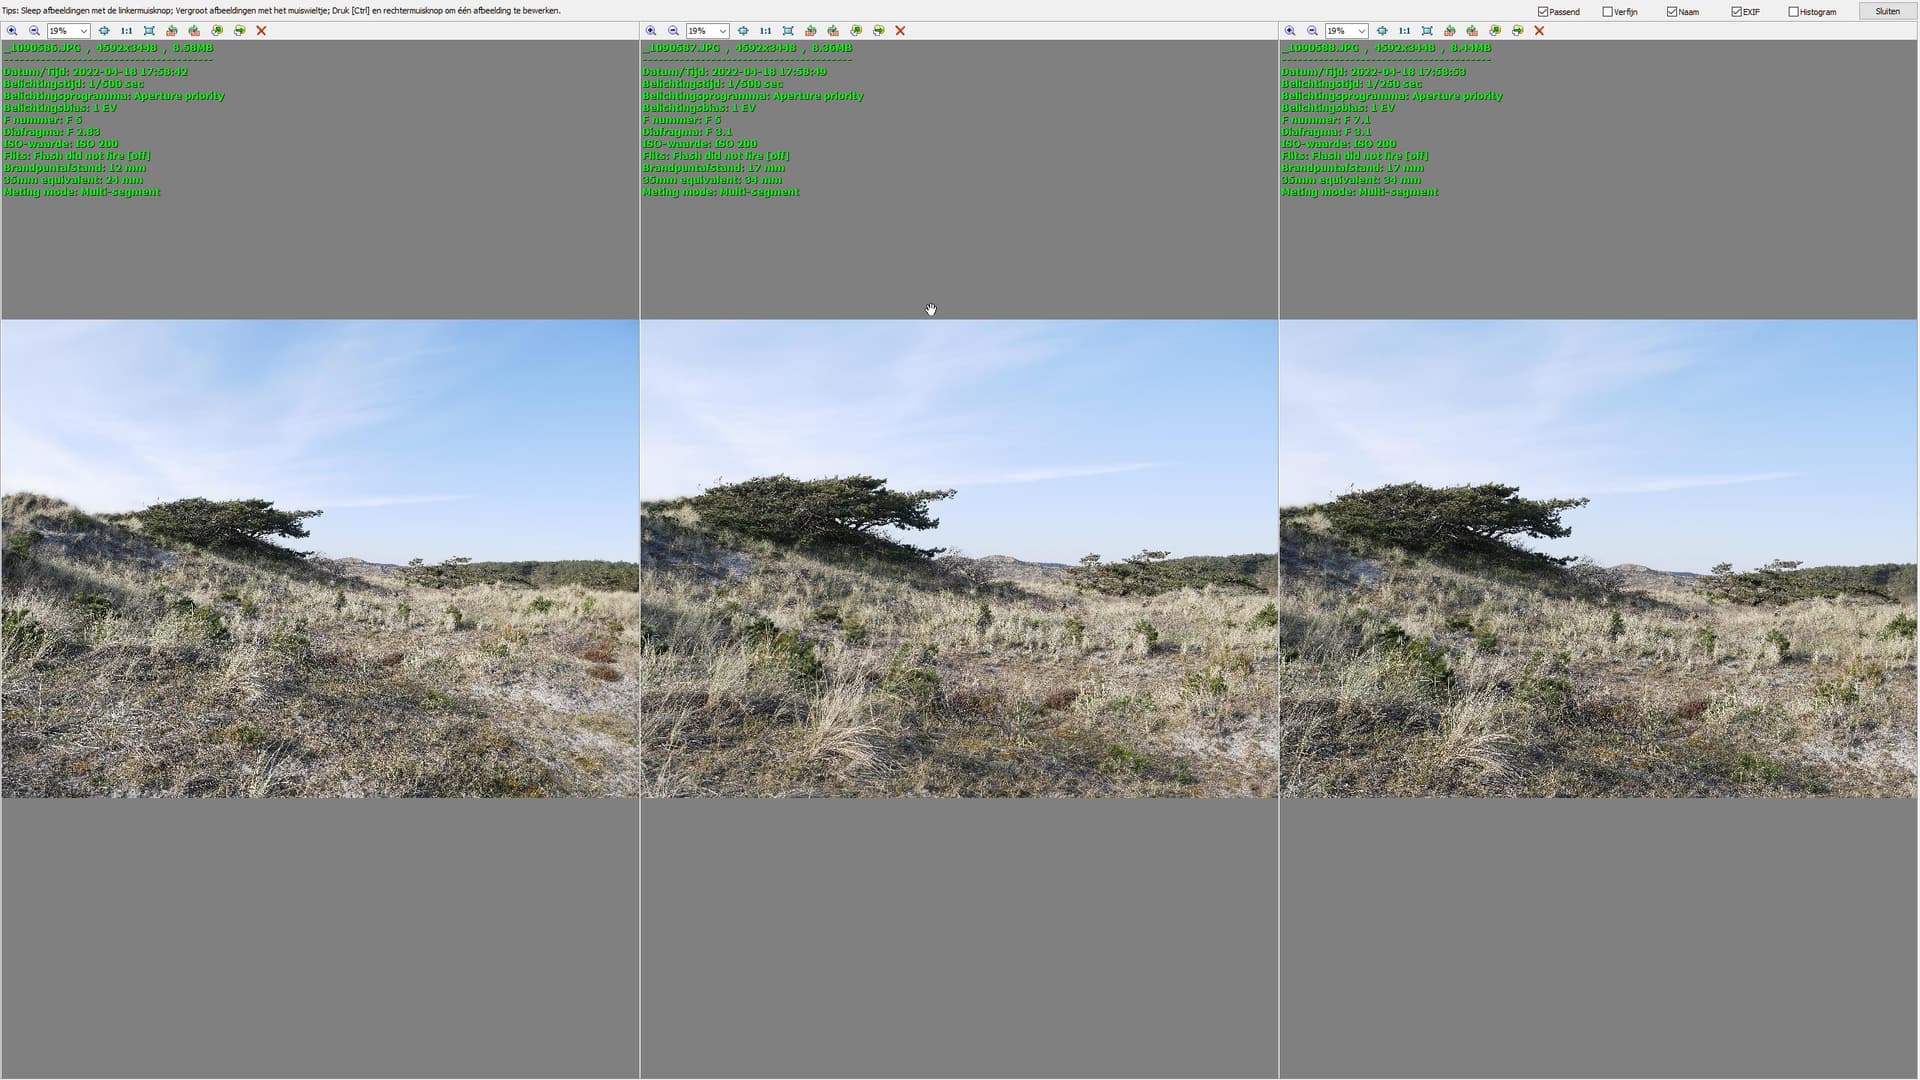
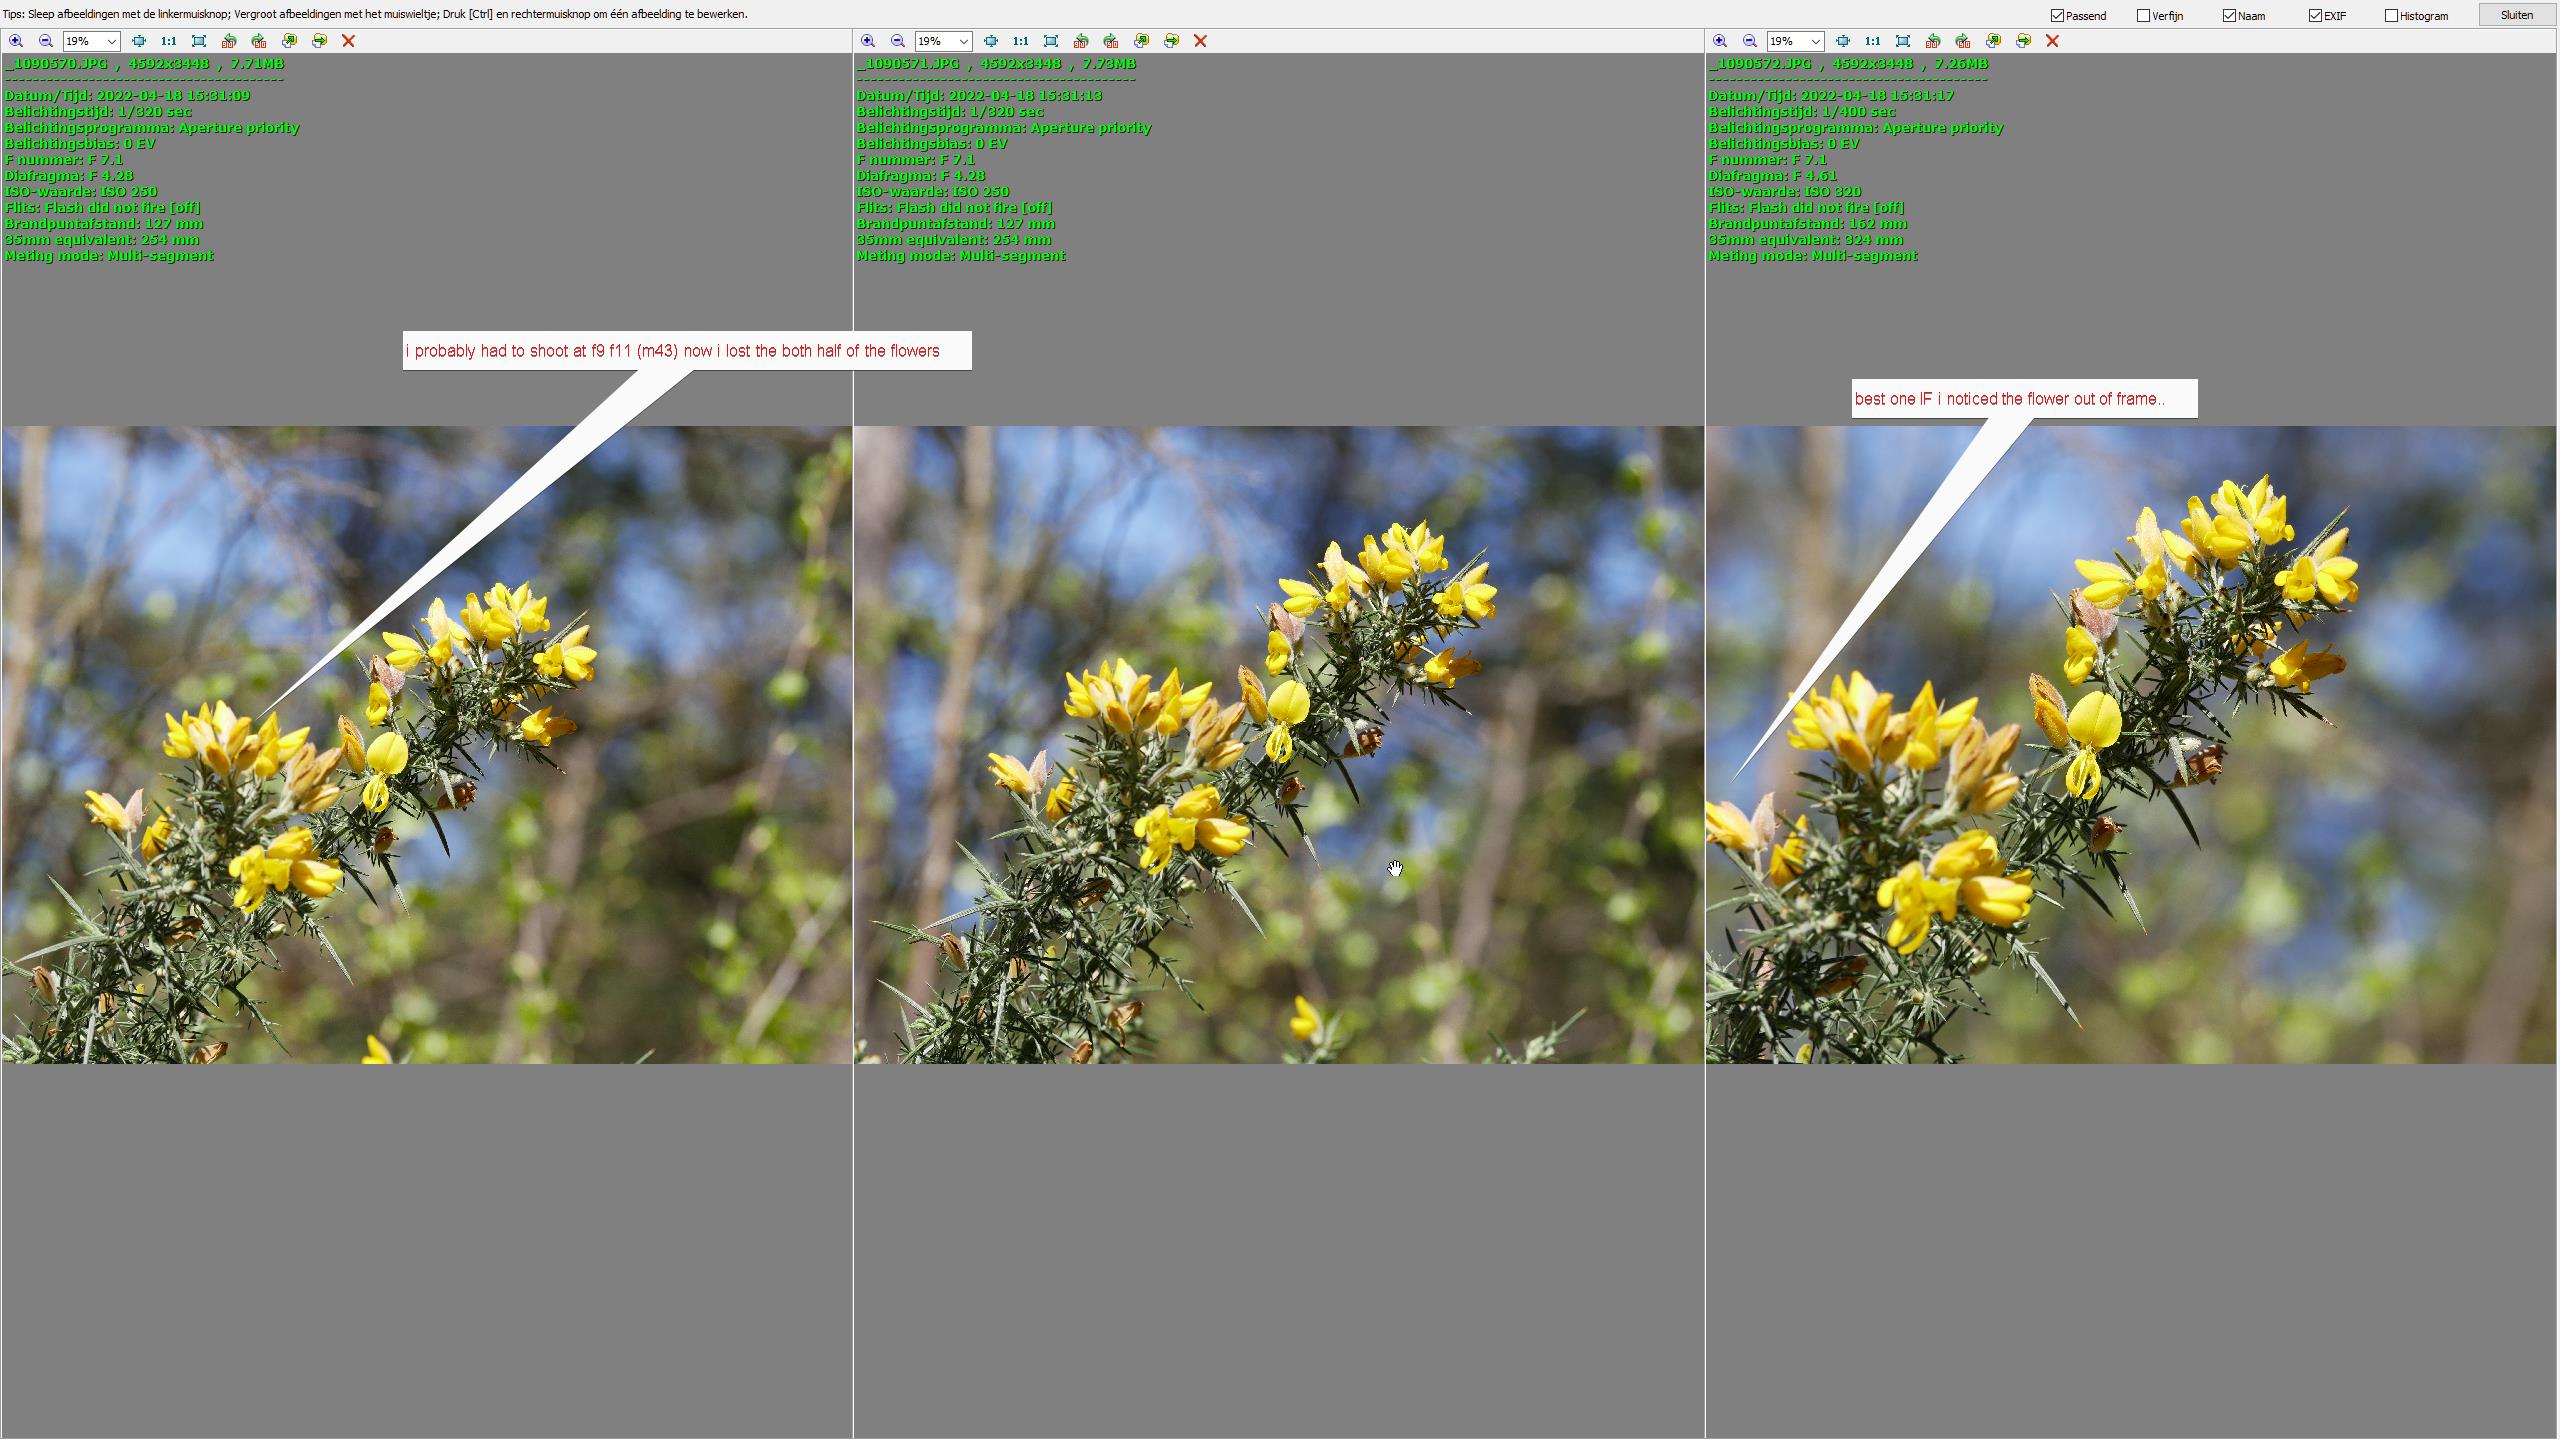
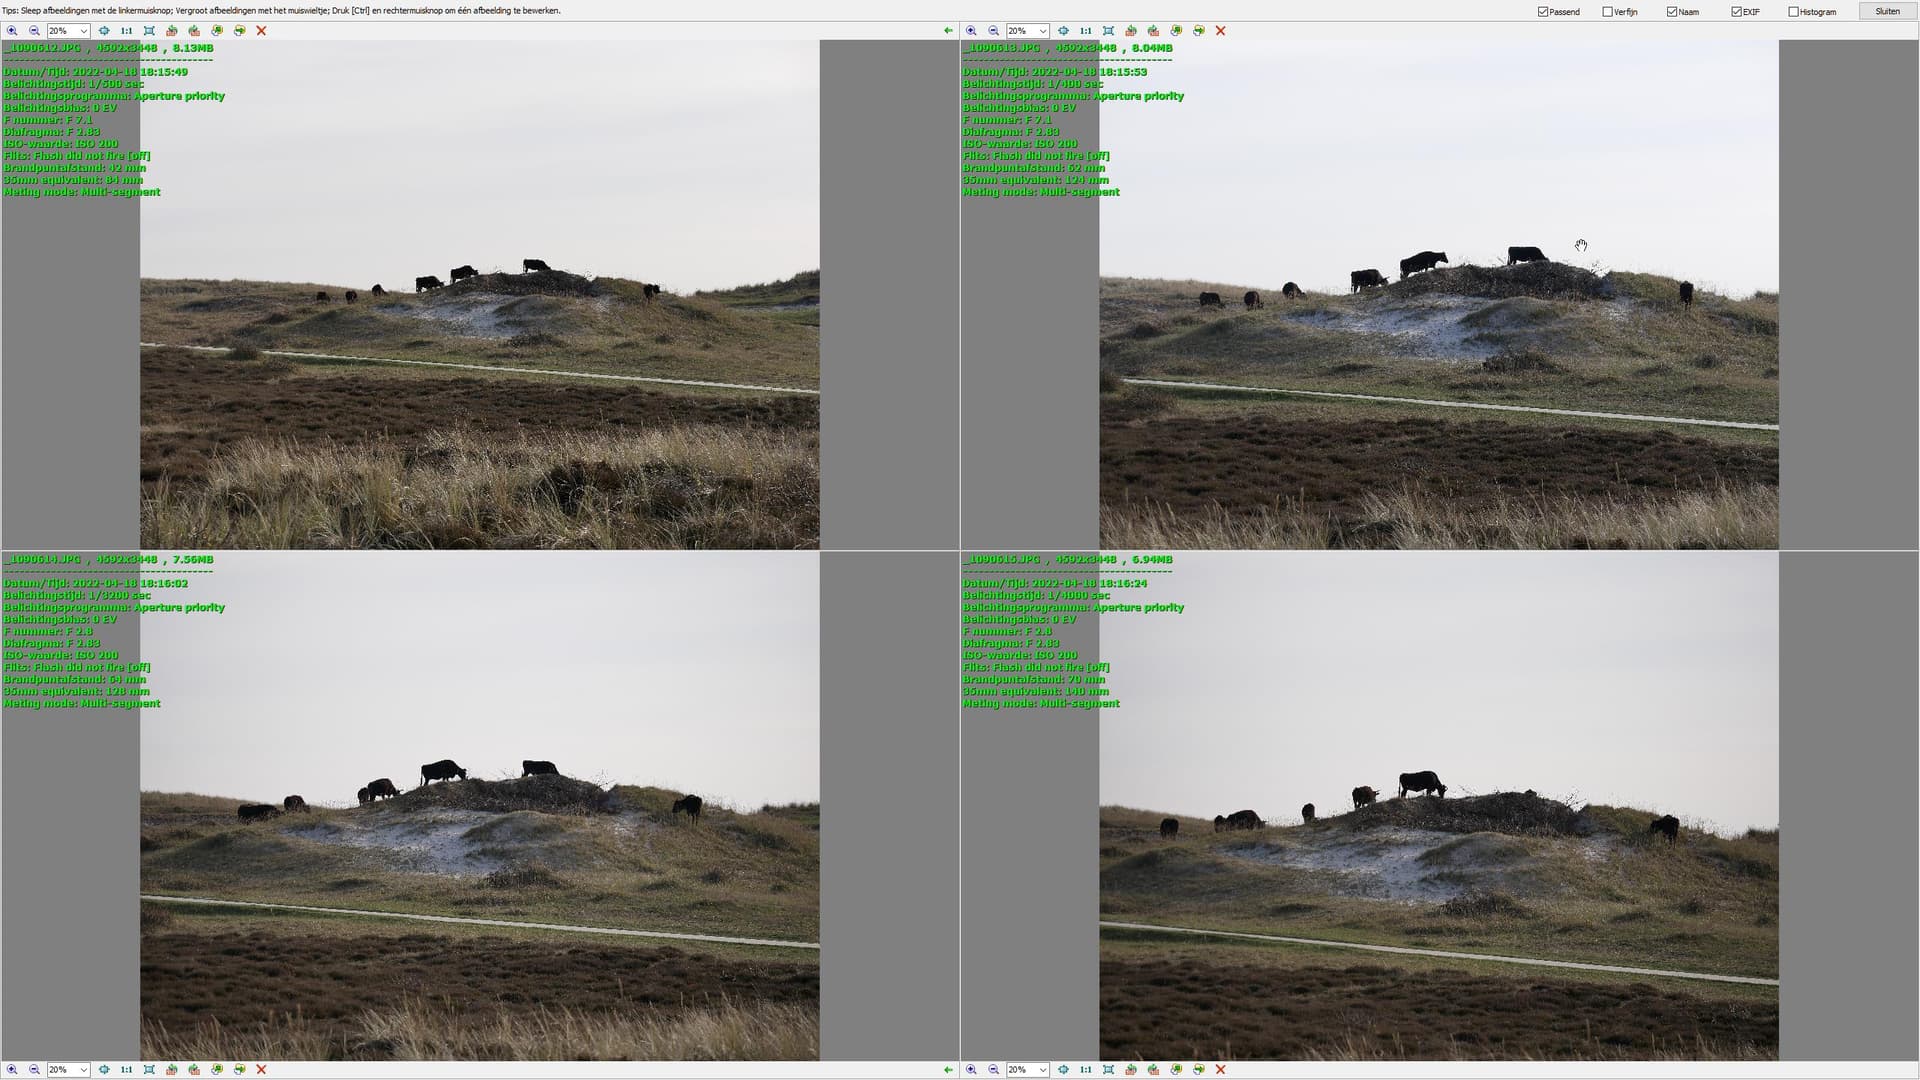
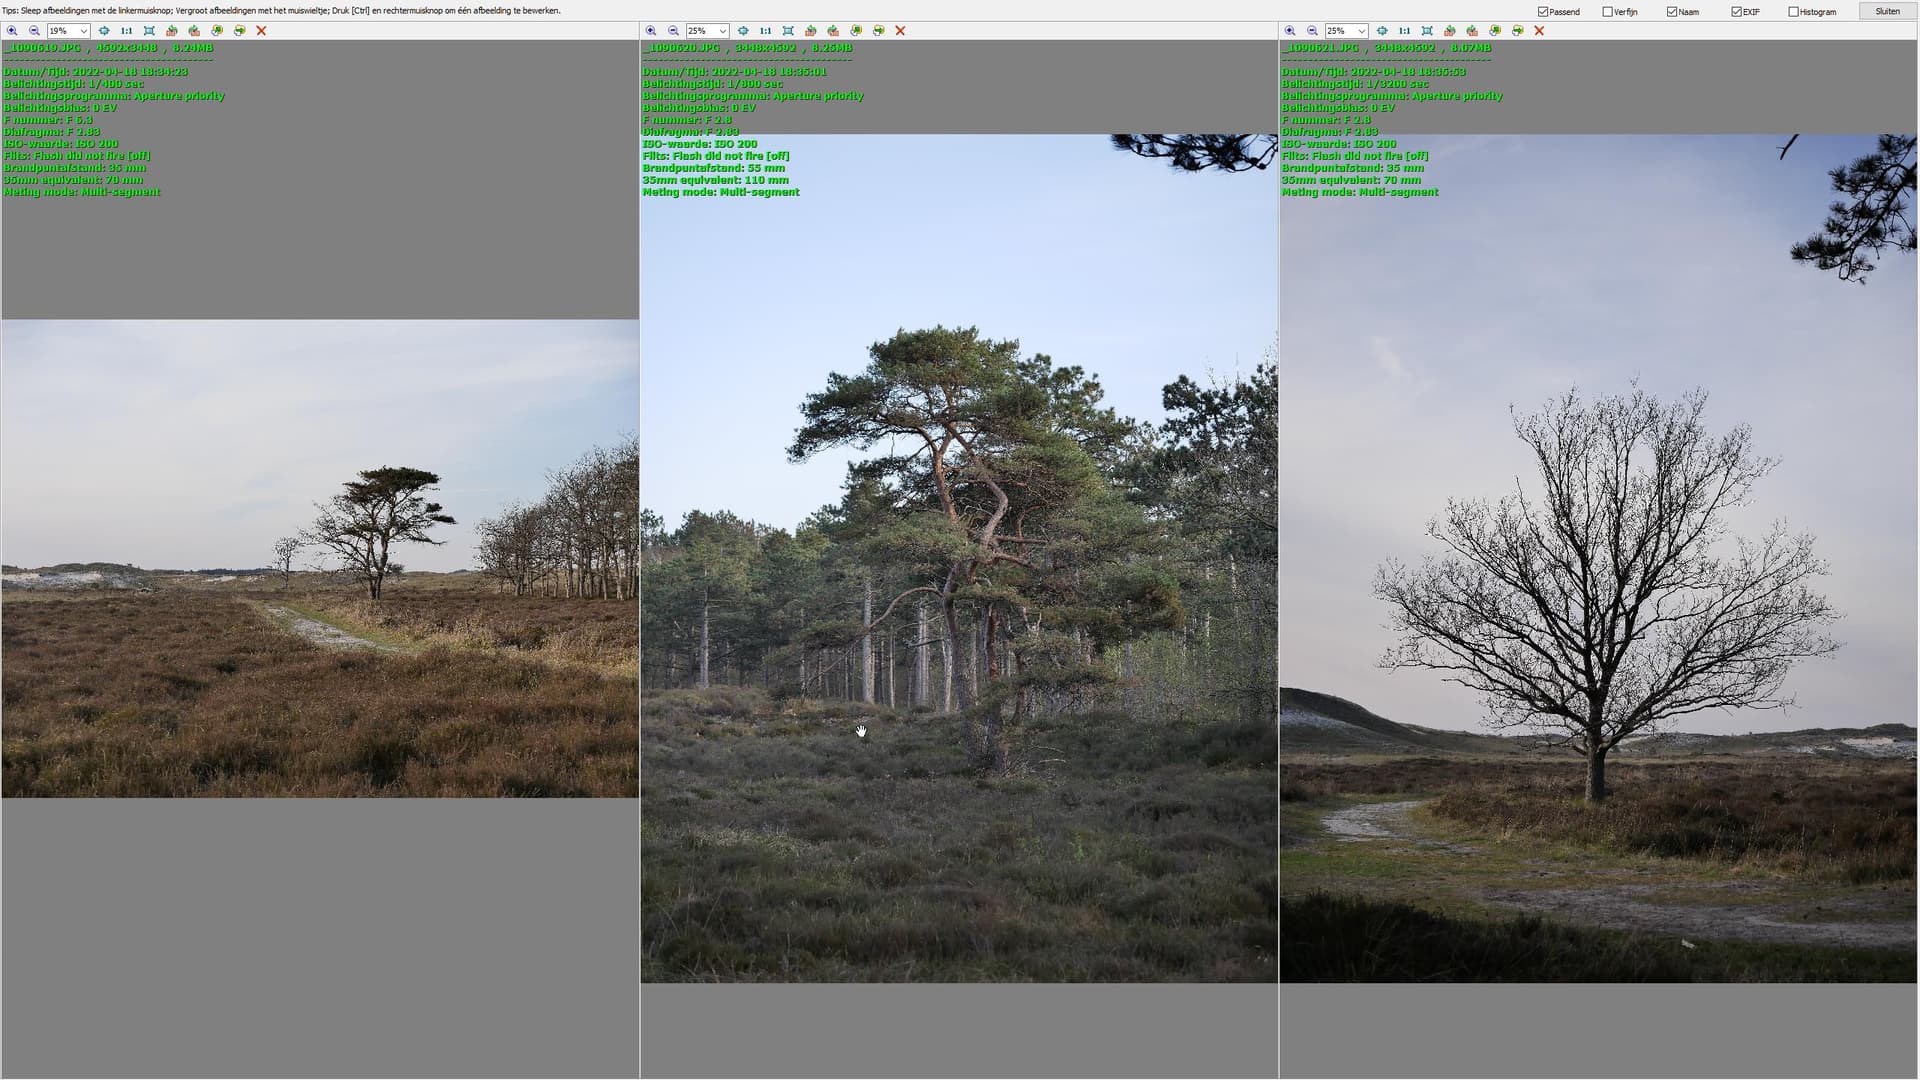
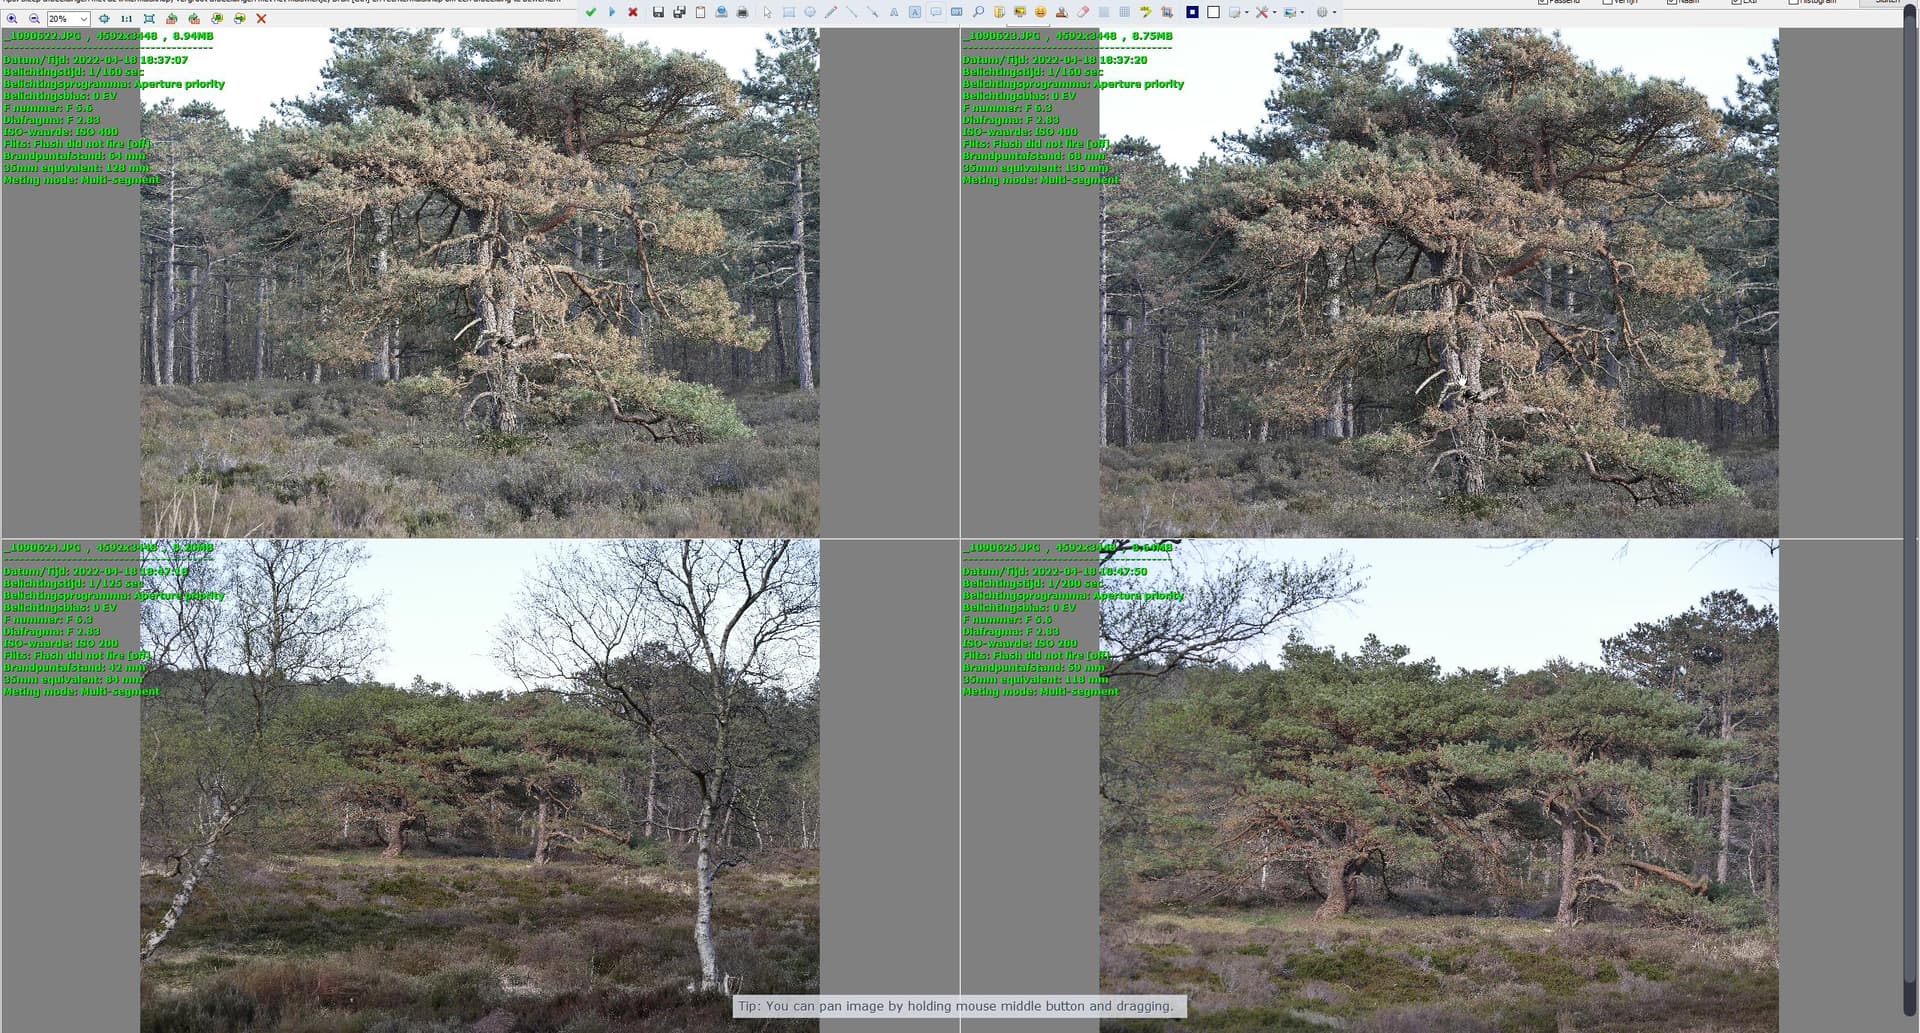
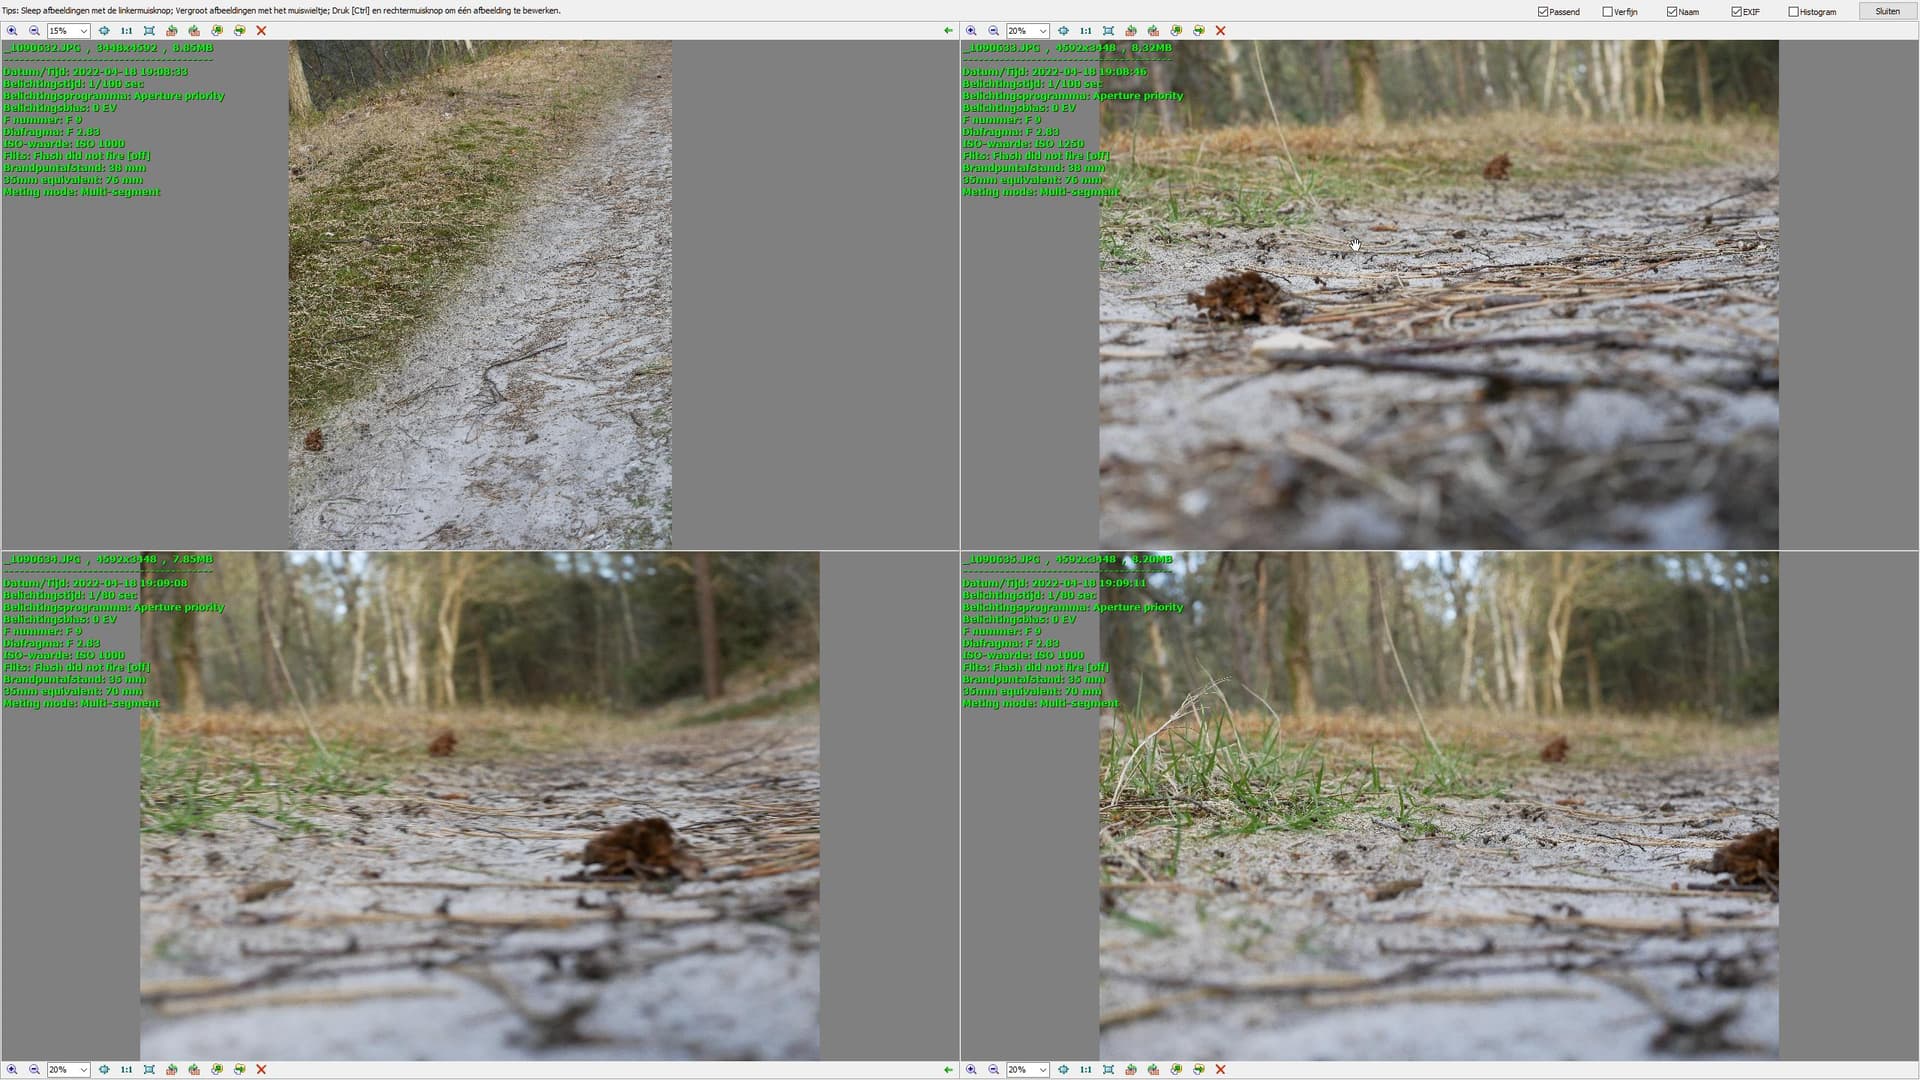
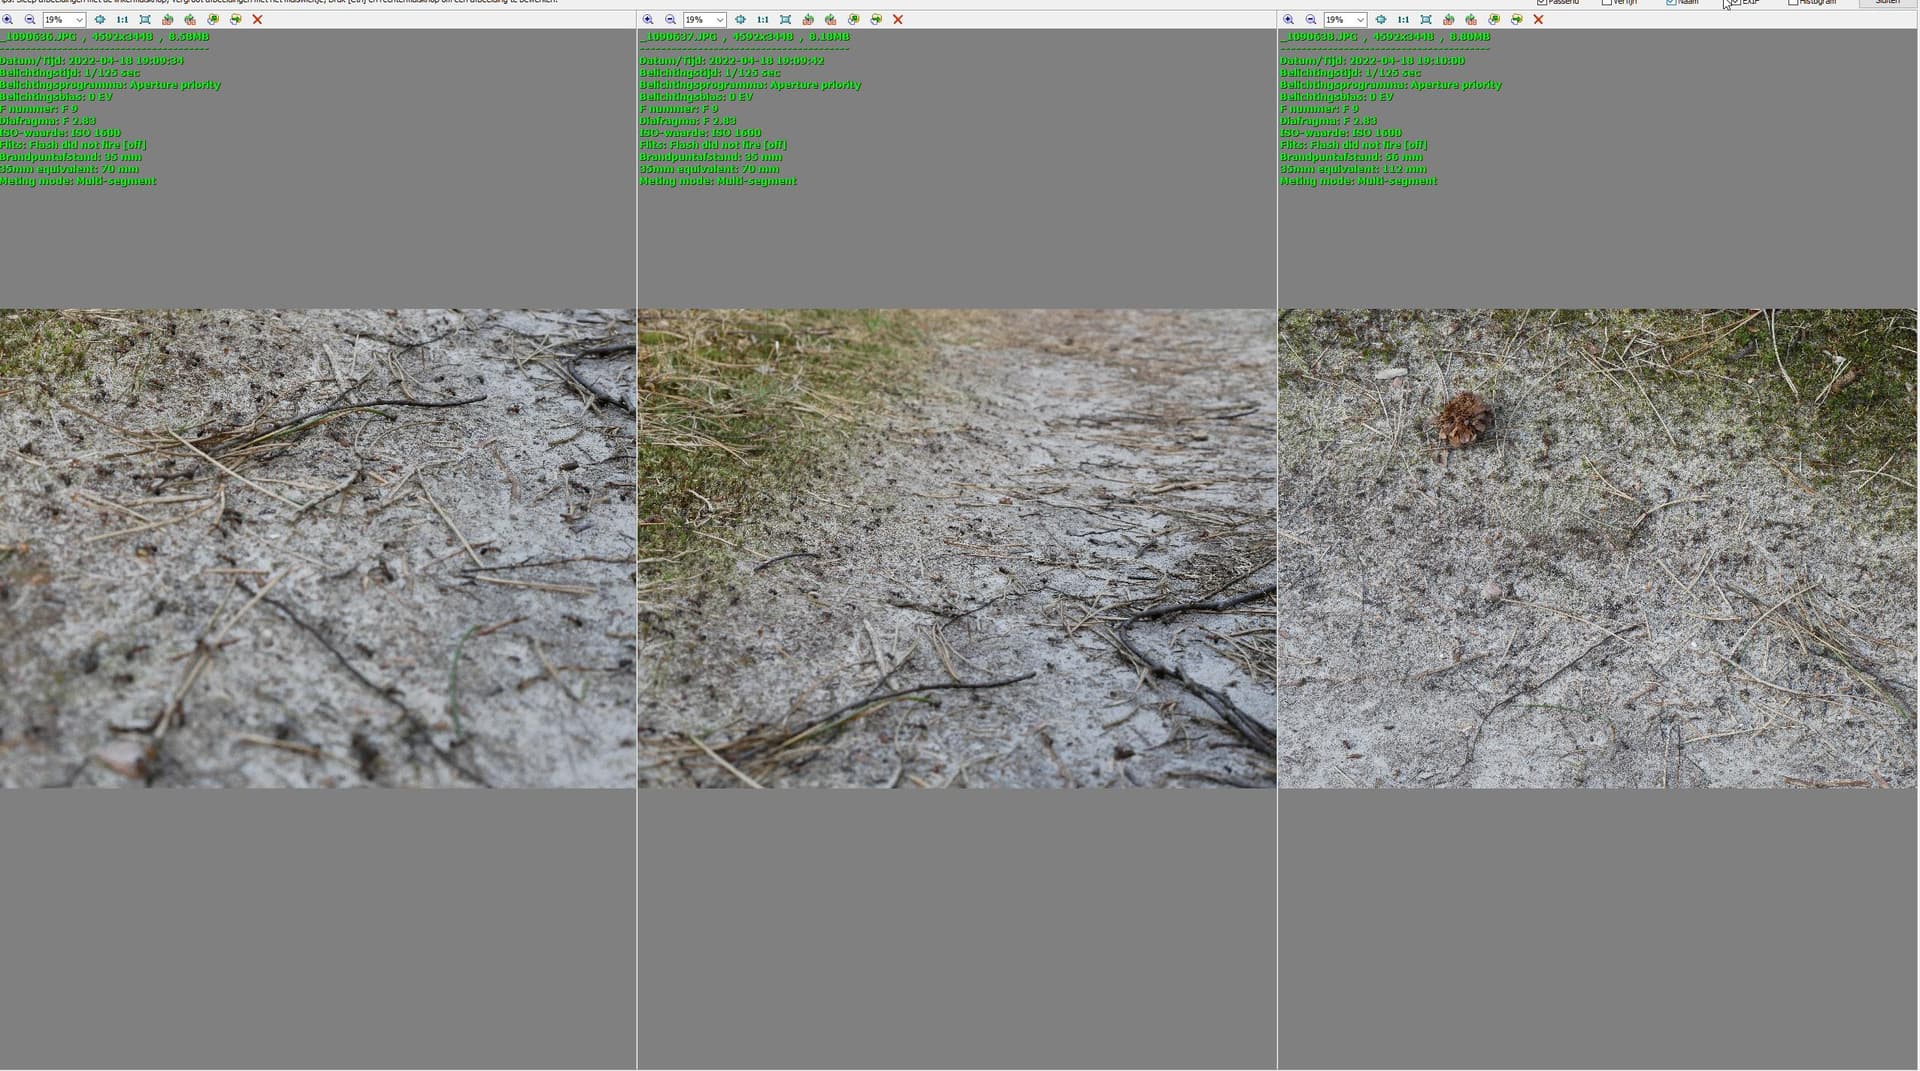
@mikemyers i have some out of camera shots.
example of seeing something and just try to find the frame to capture that.
we have a saying “that wood is blowtorch wood” means bad wood:
example of extreme blowtorchwood:
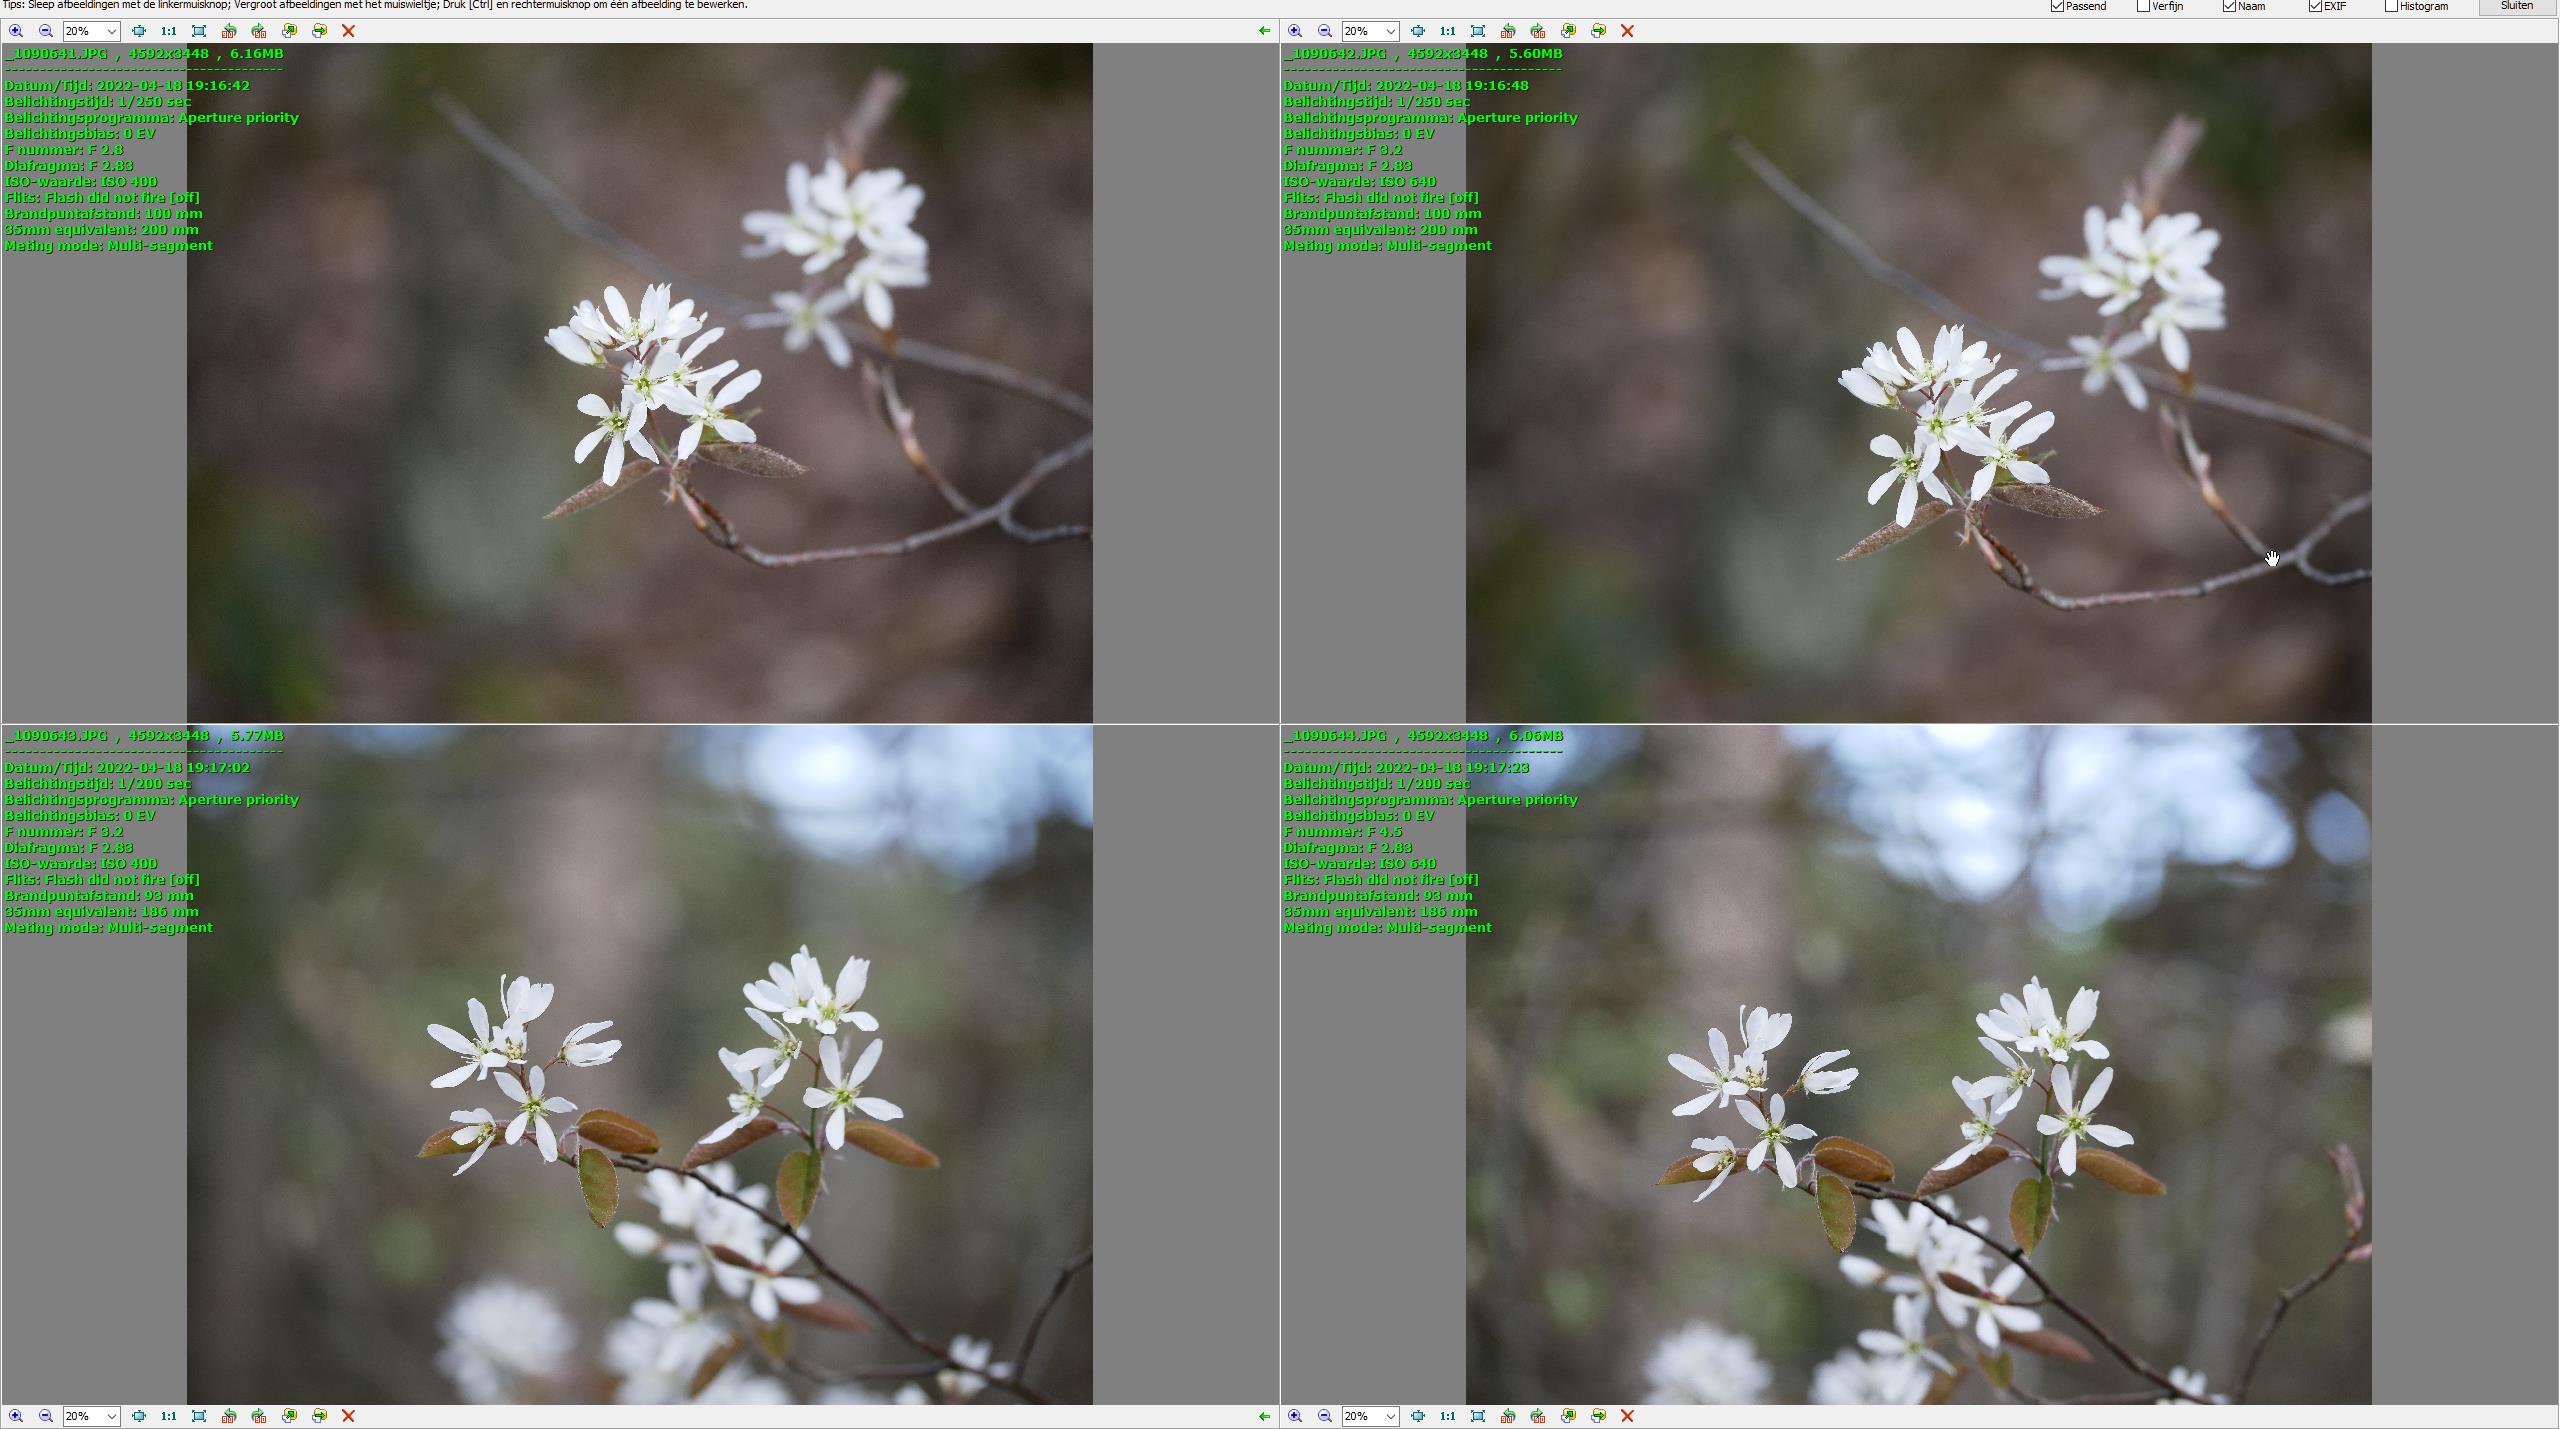
one of this stays:
and a really aim shoot got lucky:
color in the woods:
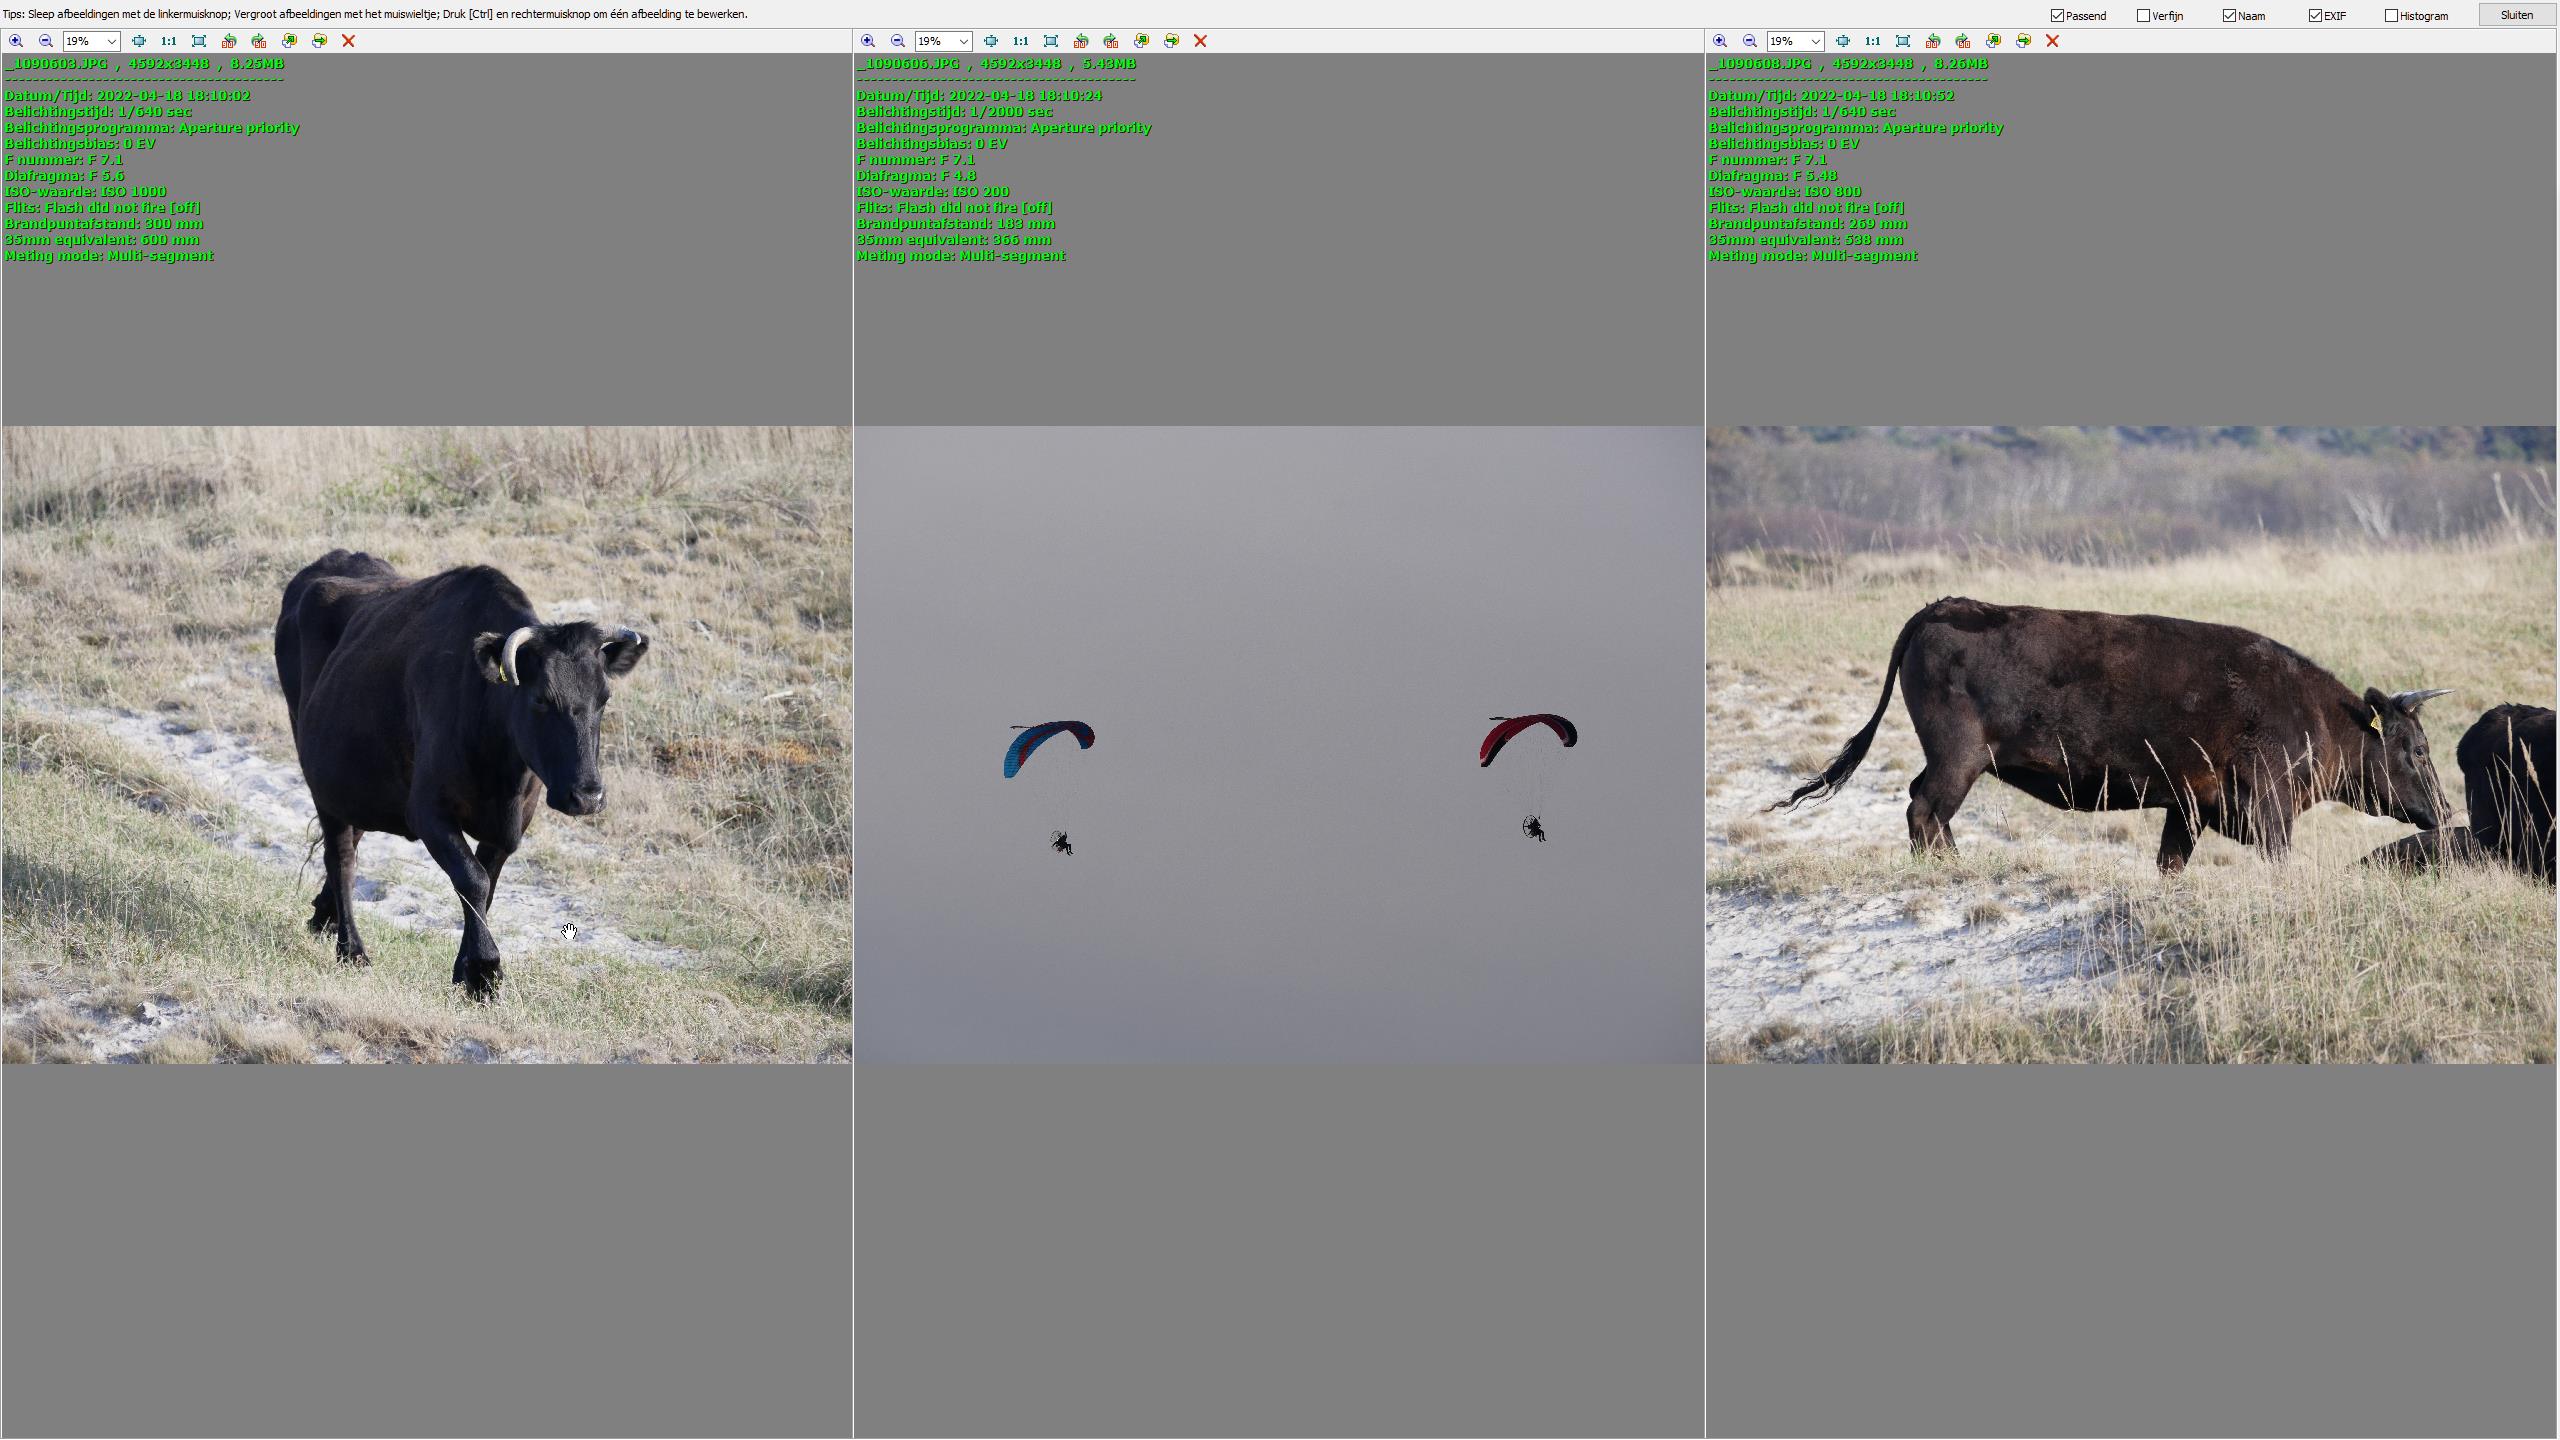
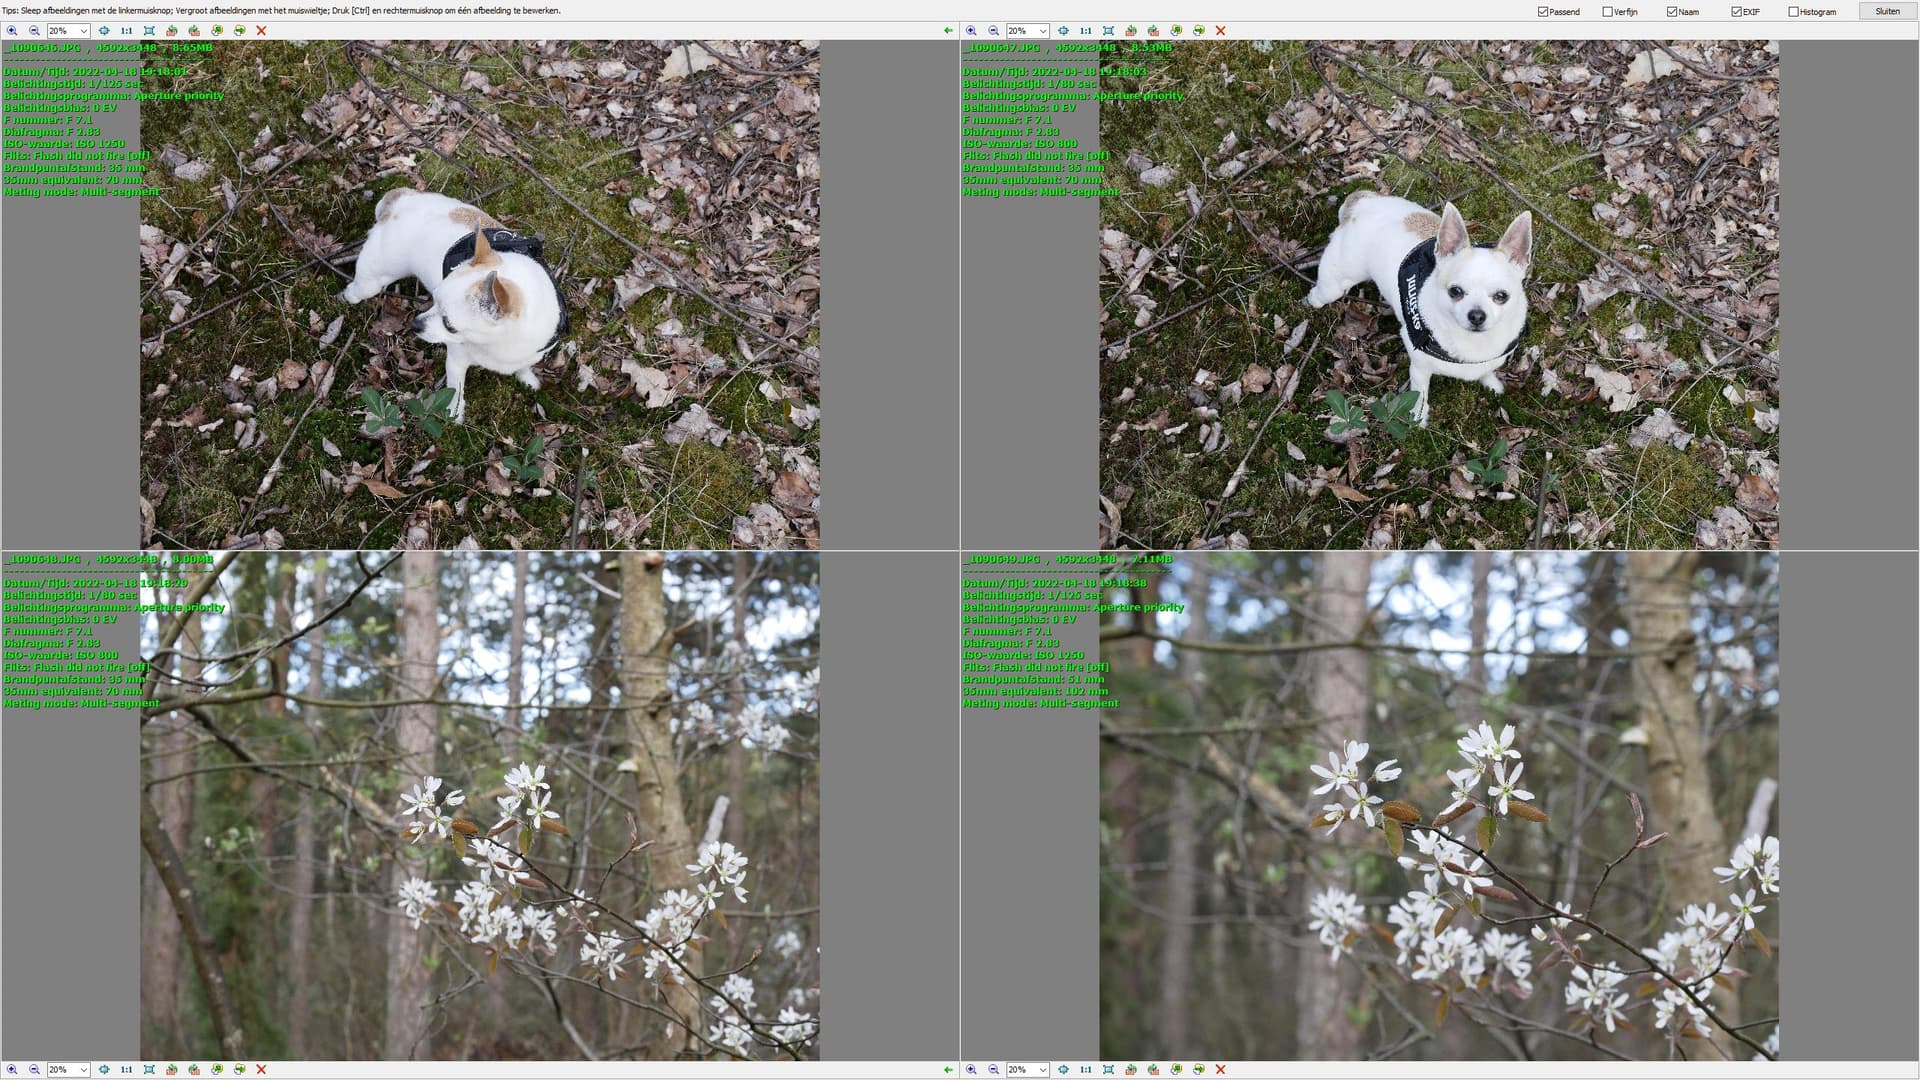
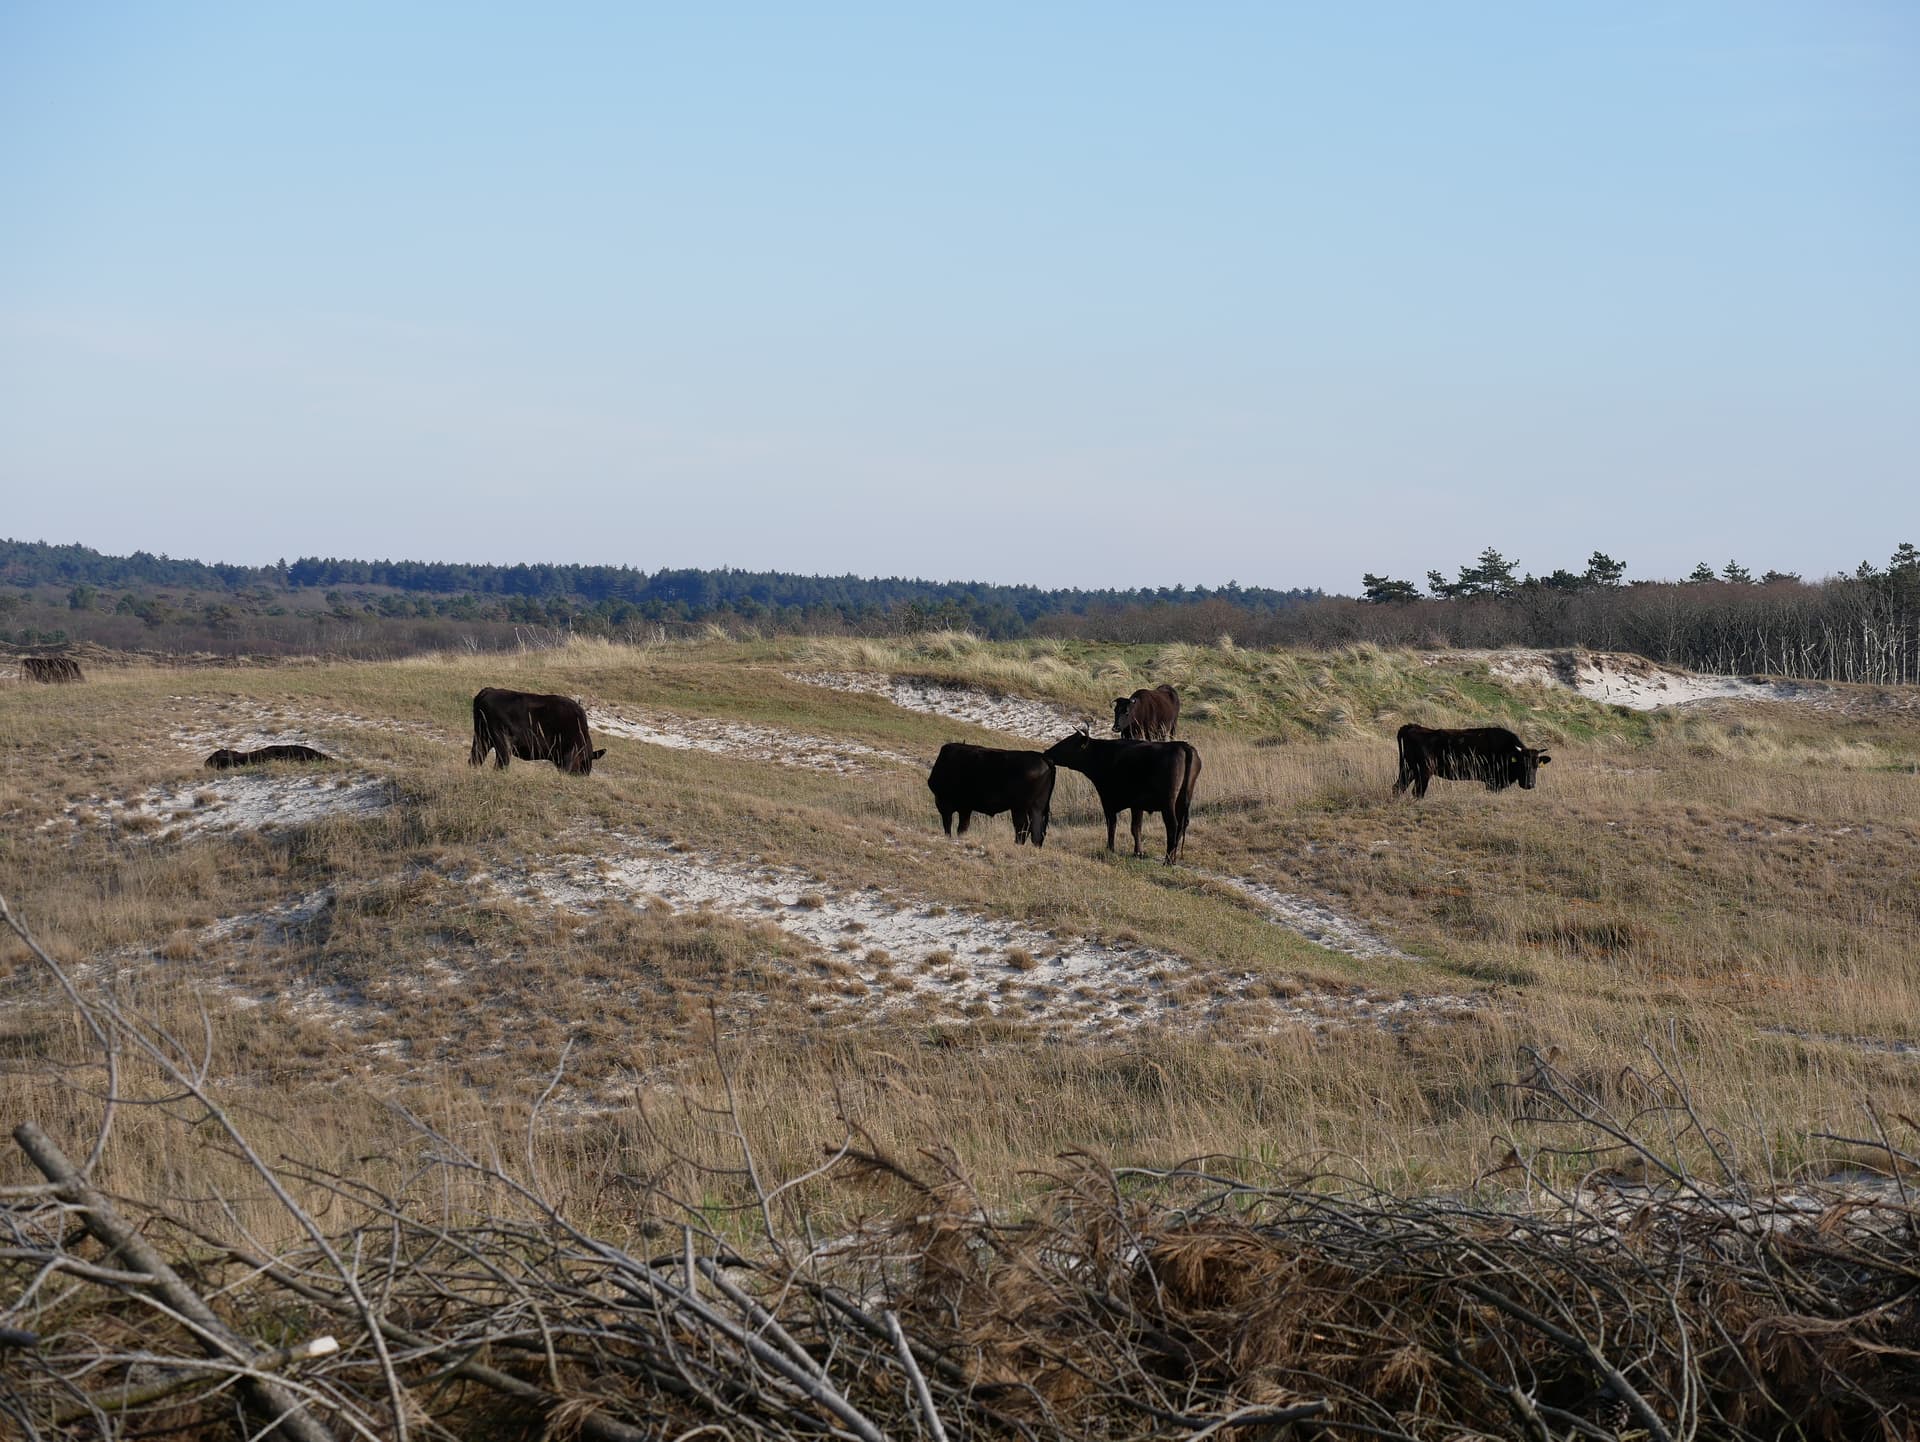
Cows and sky people:
fast change to 100-300mm and
shooting cows and few noisy things in the sky.
my C.C. warned me when the cows came too close.(left eye in EVF so no view on right)

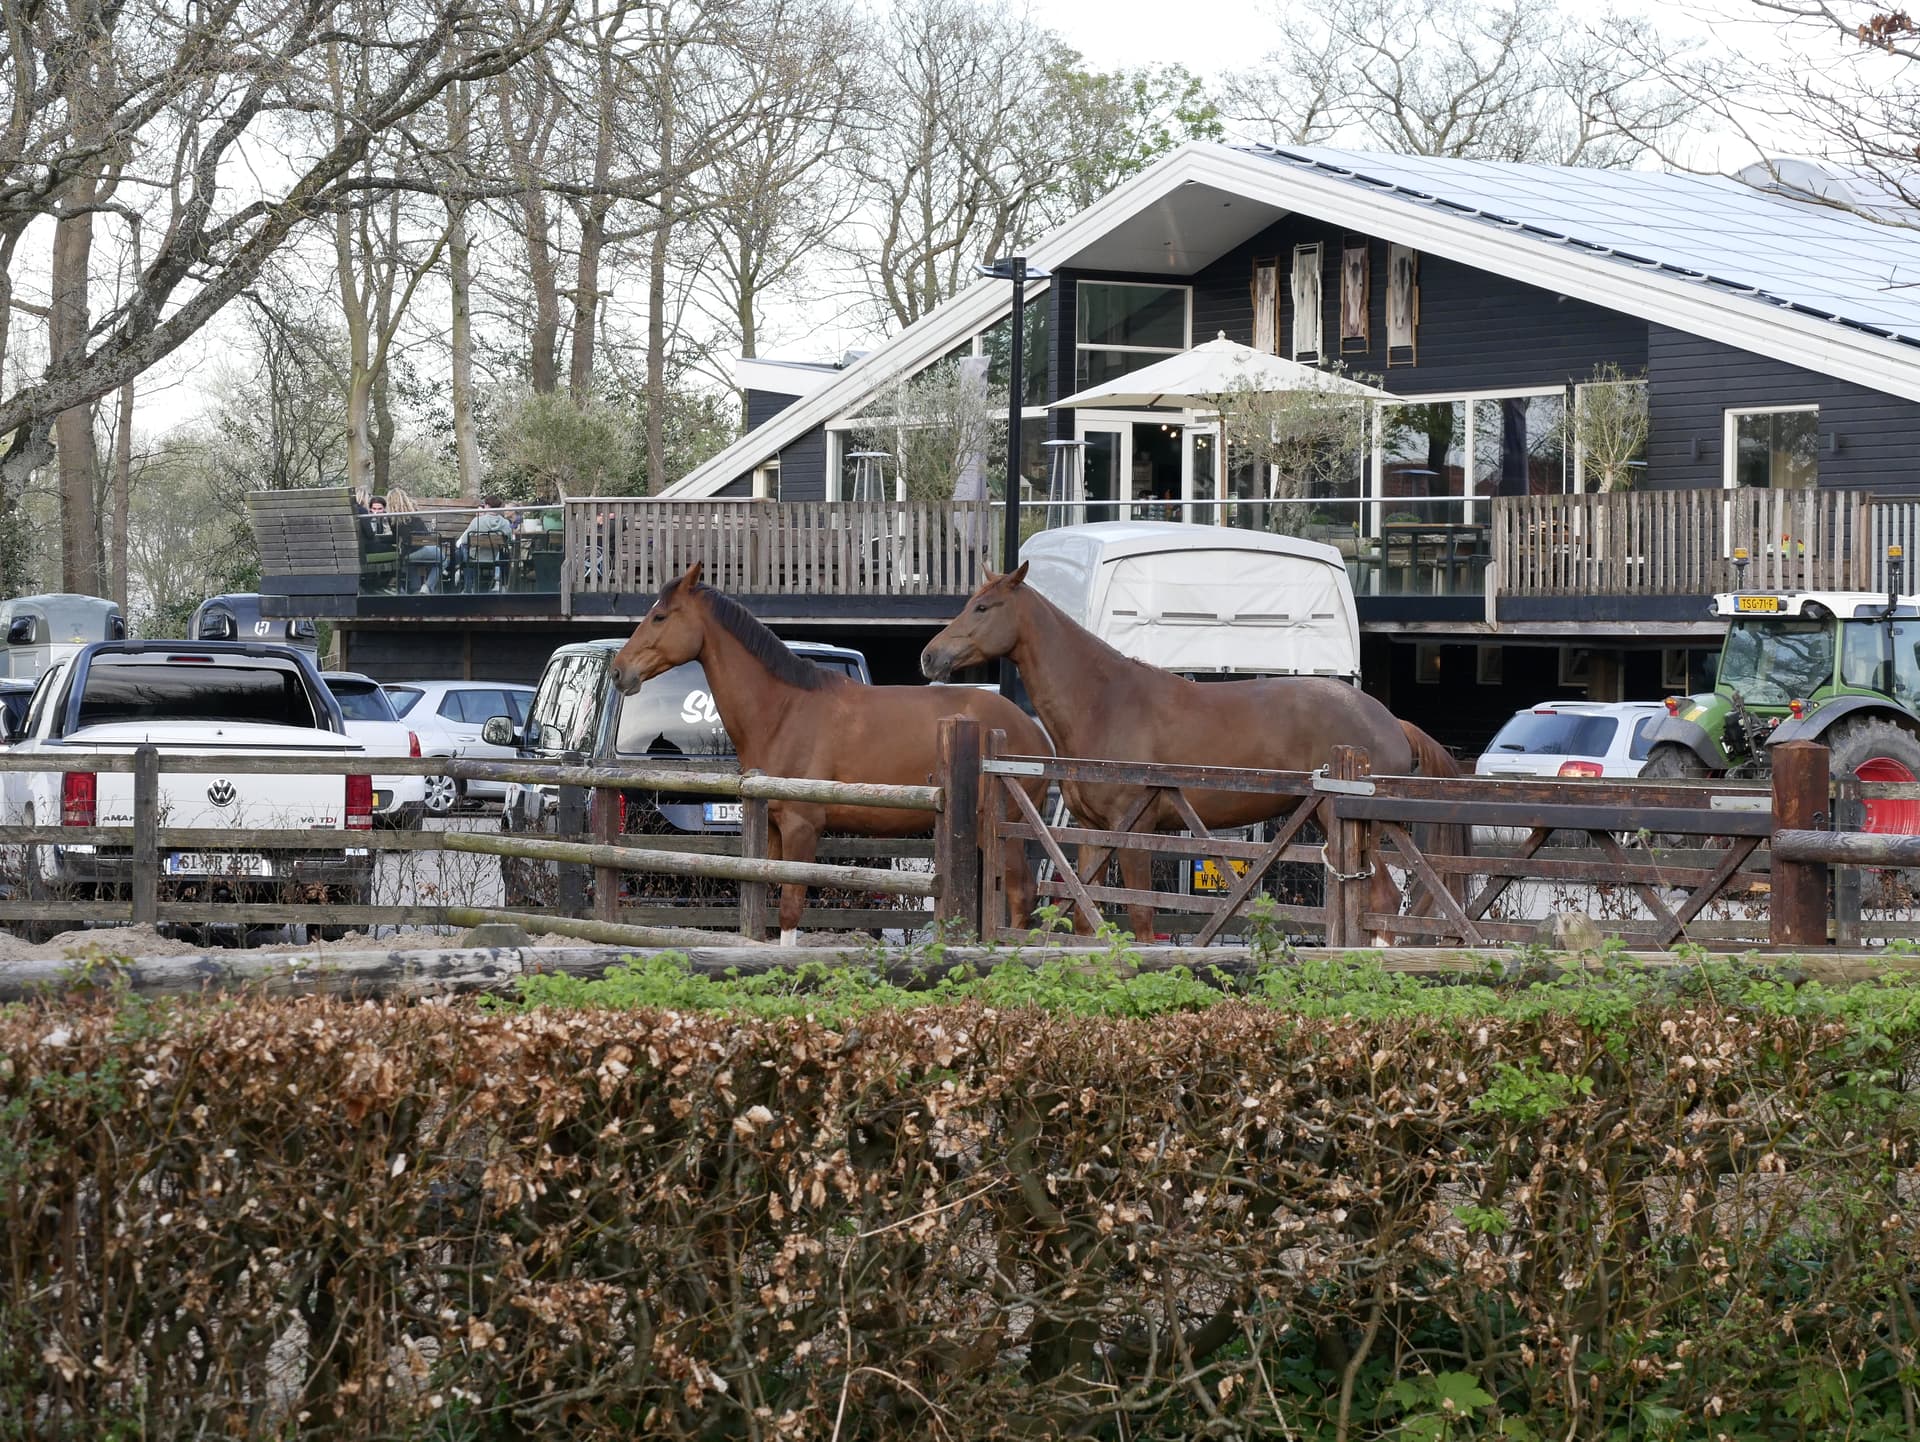
Last one : it looked like man and wife a bold guy with his wife:
ok this was a walk and shoot every thing i like and non of them are “5 star keepers” (i think) but with DxOPL i can lift some of them to a point its interesting. mostly i enjoyed the walk with my companion little friend the Carnival Guinea Pig 
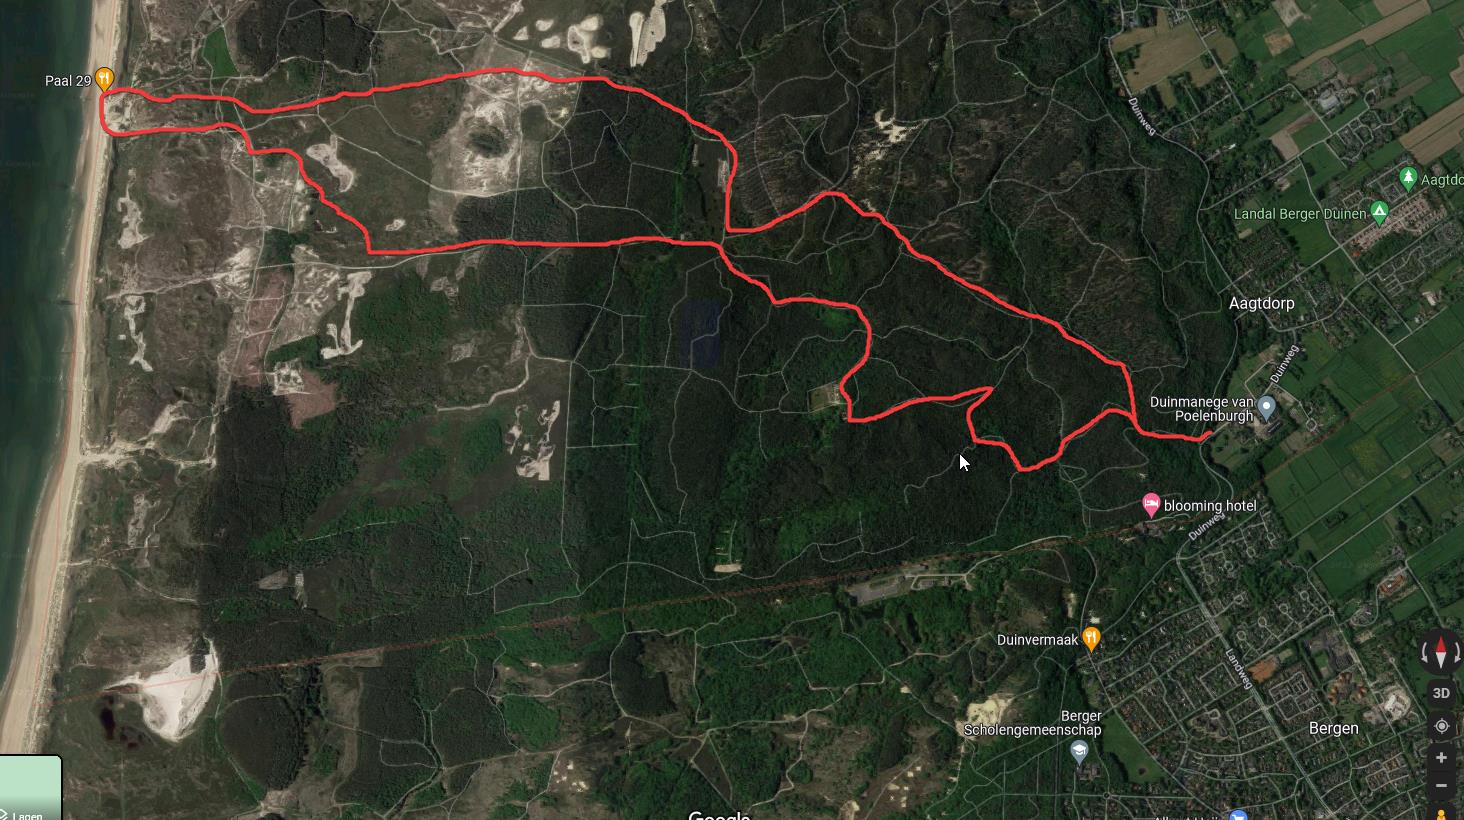
the walk i did on purpose towards that dining place… 

Harddrive seems stable but replacement is better i think.
I have to say, to my mind, that the chicken shot is “neither nowt nor summat” as they say in Yorkshire.
It’s a record shot of a few chicken, most of which are out of focus. There’s sort of something going on between the two front chicken but then the rest are a distraction.
Instead of grabbing a shot, I would have waited and observed until they were better positioned and you could get a couple of them further separated from those behind and opened up to f/4.5 for minimum DoF.
Here autofocus might seem like a good idea but, since it usually is based around the centre of the image, you would not be able to reliably set focus on off-centre chickens. The multi-point mode would not have been any help as it would attempt to take an average distance over everything under its “sensors” and not prioritise one thing or the other.
Actually, you do. There is nothing to stop you setting up the exposure and taking a test shot on anything with the light in the same direction and leaving it there for the whole shoot.
Neither domesticated chickens nor grazing buffalo are known for their speed of movement. In fact, it is you that needs to slow down even further and consider whether what you are looking at really makes a great photo or just a snapshot that will end up being deleted.
With the buffalo shot, it’s a case of patience, patience, patience. Set your exposure, centre-weighted manually, set the focus, either manually or back button, frame your shot on the animal of your choice and then make a couple of noises with your mouth to get the animal you have chosen to look towards you.
Forget all the super-whizzy automatic junk, learn how to prepare your camera for the light where you are and that then gives you more time to concentrate on waiting for the “decisive moment”, even if that may mean shooting a burst of shots to capture it.
In which case, you need to familiarise yourself with the approximate DoF of your lens at max aperture - f/4.5 would have help slightly instead of f/6.3, which is one whole stop different.
Shooting, as you did, with a zoom lens at 85mm lens at f/6.3 at (I’m guessing at 10ft away) gives you a DoF of 17.6"
Opening up to f/4.5 brings that down to 12.7", which doesn’t seem like that much difference but it all helps to isolate a subject.
Compare that with a fixed 85mm f/1.4 lens, which can reduce the DoF to only 4" at full aperture or 8" at f/2.8.
Not forgetting the the DoF is the zone of “acceptable sharpness” and you will actually get a lot more a lot sharper than you would wish.
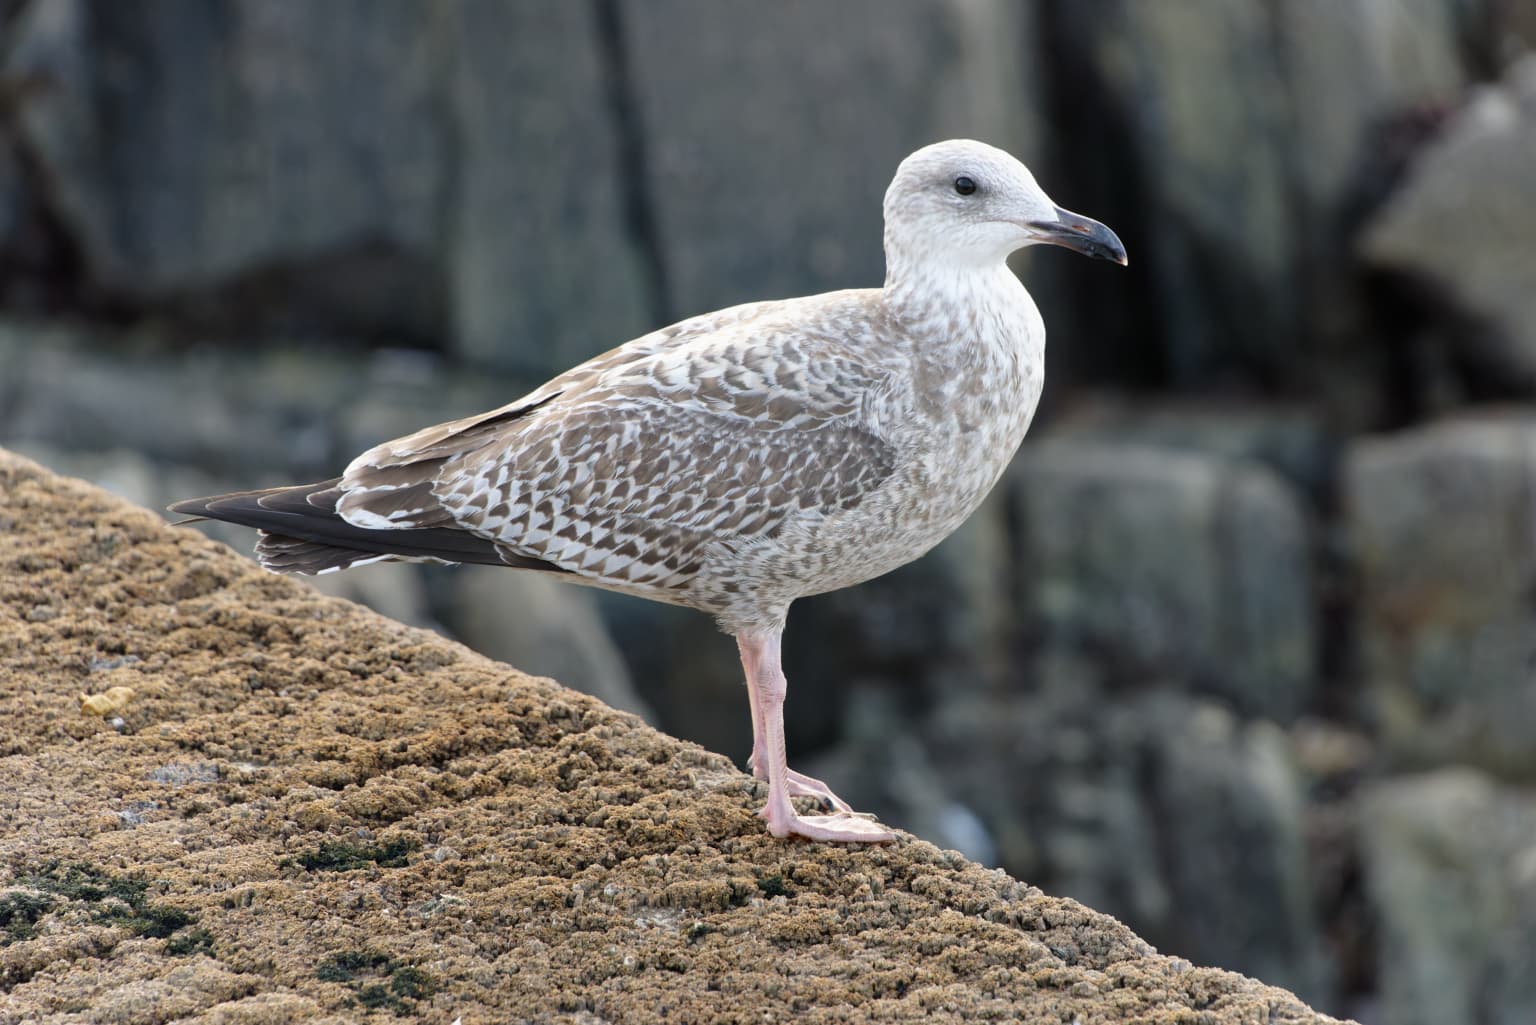
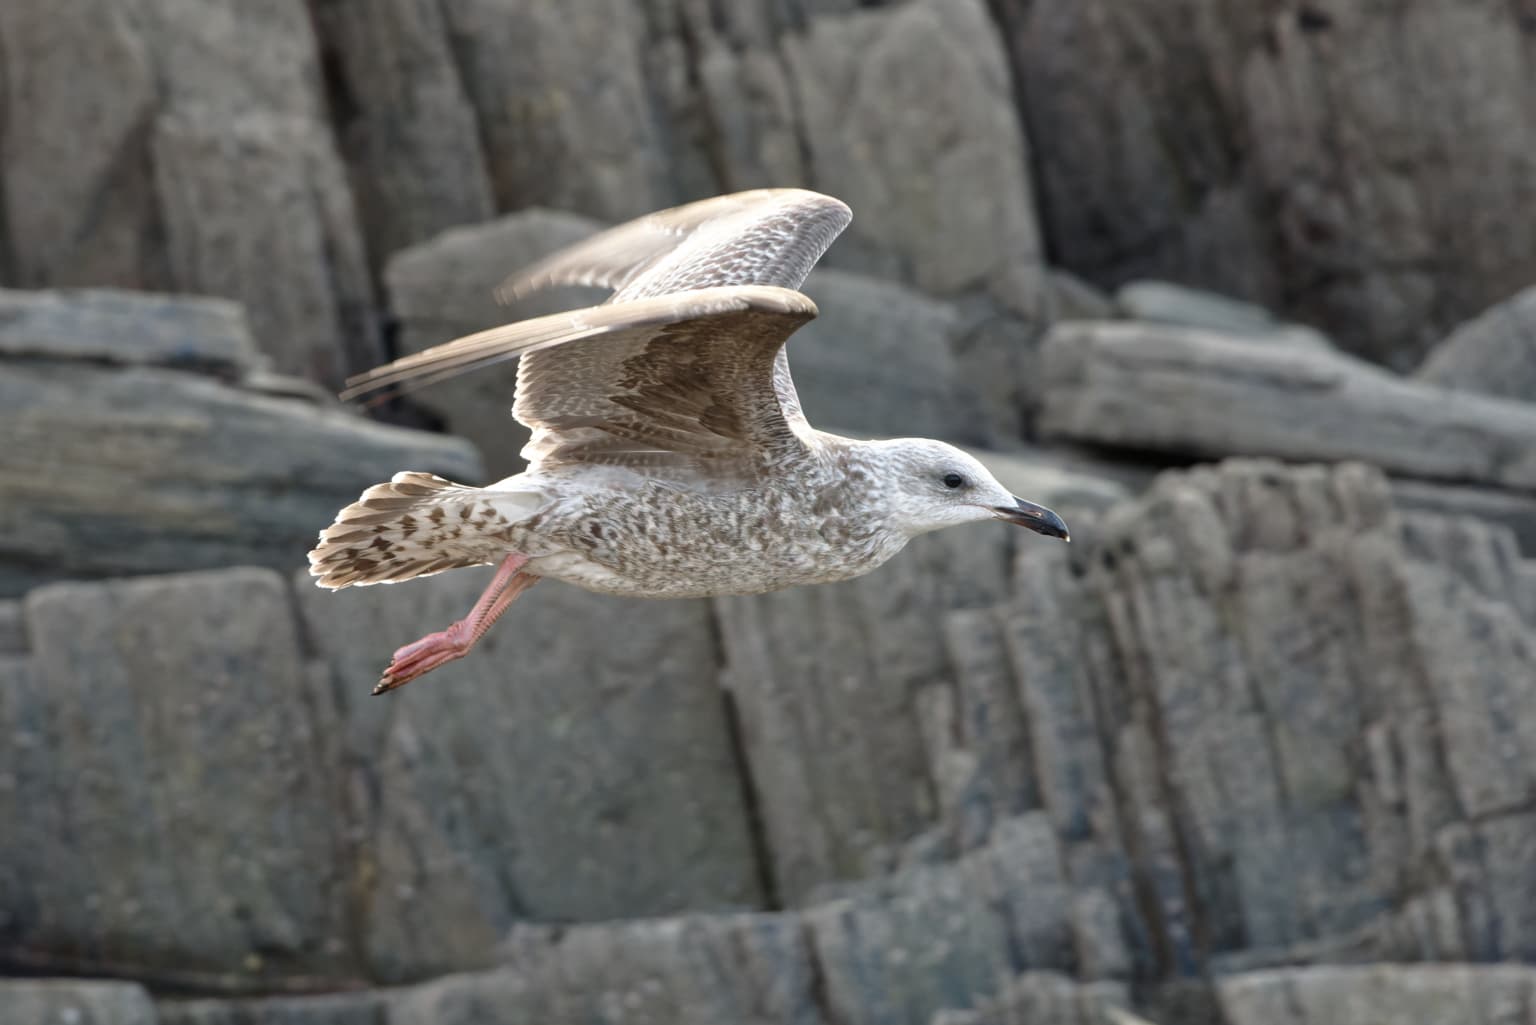
First, find your seagull and, from a distance, take a 300mm shot as evidence of its existence…
ISO 4000, aperture priority, f/10, centre weighted metering, single point AF
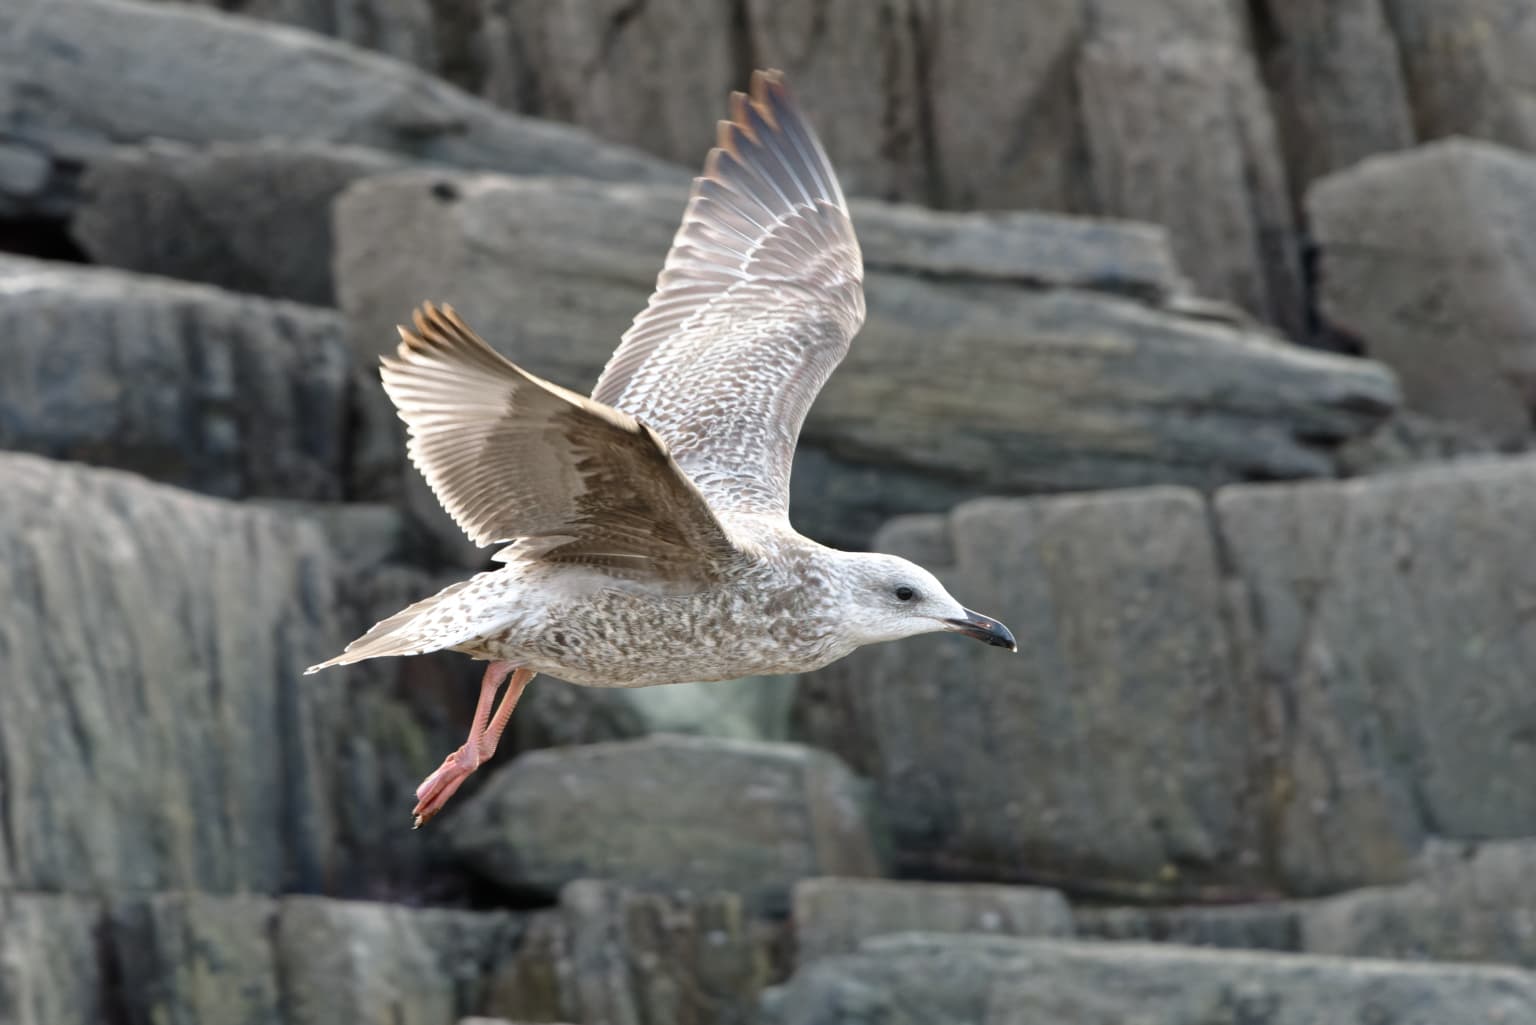
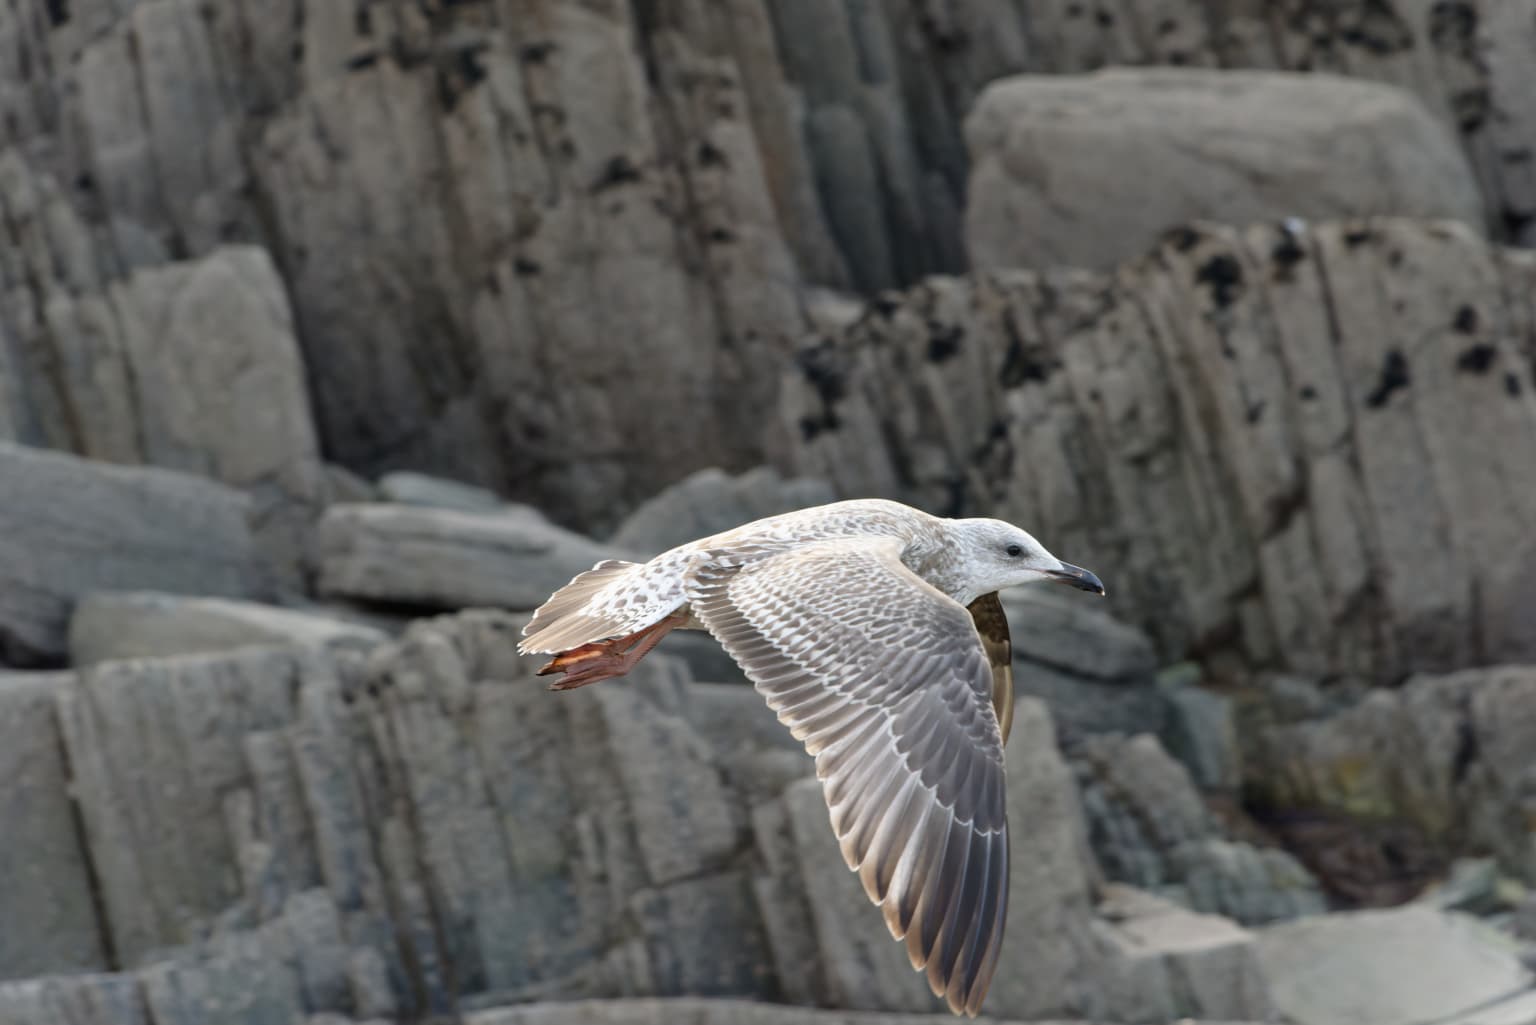
Now, back off the focal length to 170mm and get a friend to move closer from the left to provoke the seagull to take off and take a series of shots, tracking the bird…
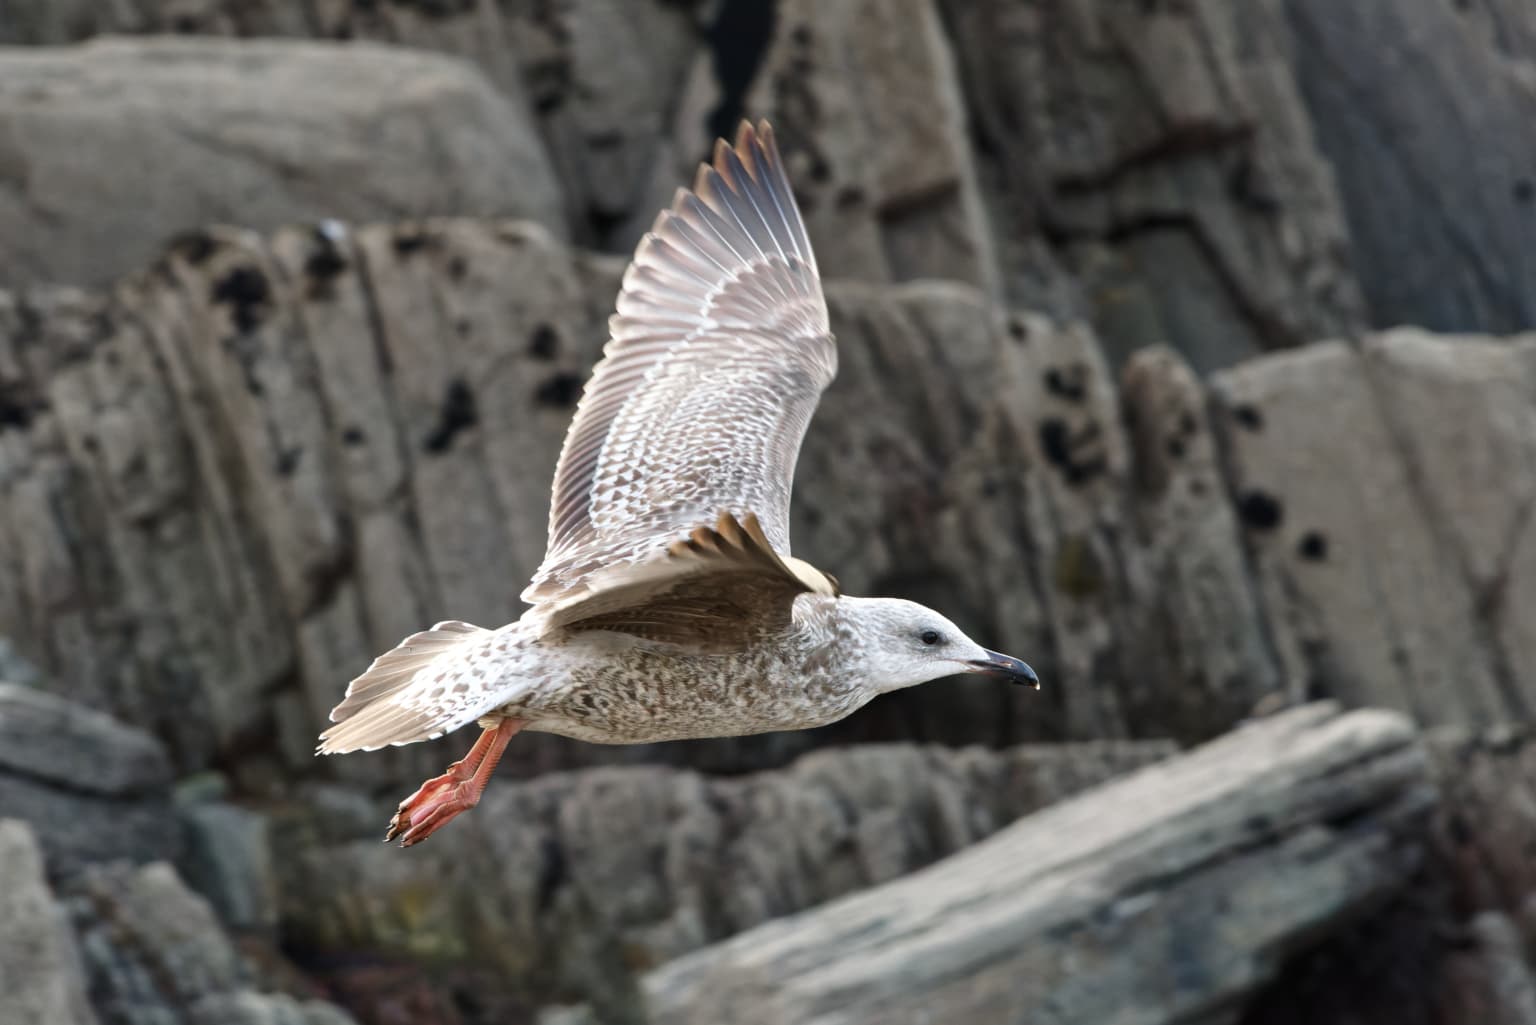
Choose best framing, wing placement and least intrusive background