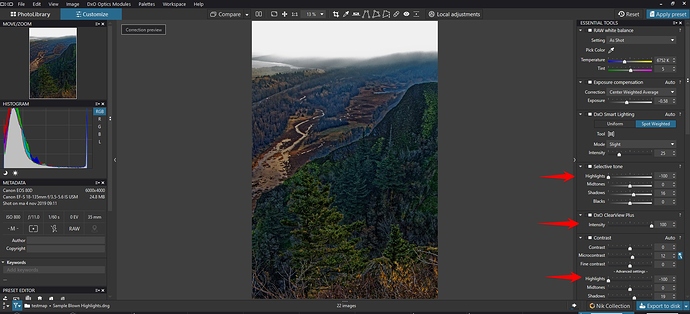
Highlight recovery

Peter, thanks for being the first to give this a try, but I guess I have been as clear as, well, the fog in my photo about what the assignment was.

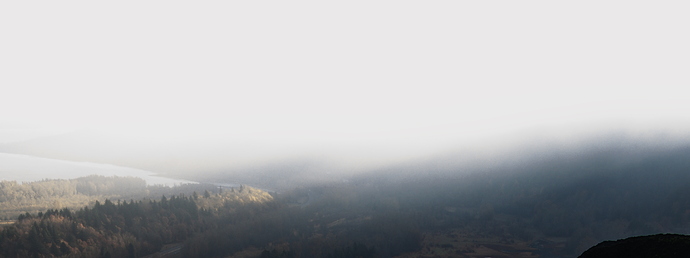
I posted this image as a “highlight recovery” test, not as a request to create an pretty photo. I already have my own interpretation of this shot and it is not any of the images I posted. That shot and your work (sorry) are irrelevant.

The assignment was to compare highlight recovery in PL to other programs. Several people have claimed that they can recover their highlight details with just one or two sliders in LR( @geno, @mrihooper1, @nemo). OK, let’s see what happens when presented with a tough highlight recovery problem.

Ideally, I would have created a synthetic RAW image. Software for doing this doesn’t exist, at least for the general public, so I chose to use an existing image. Yes, the sky is totally blown, but just below it is an area with a lot of detail that, by default, looks like pure white (or gray or whatever).

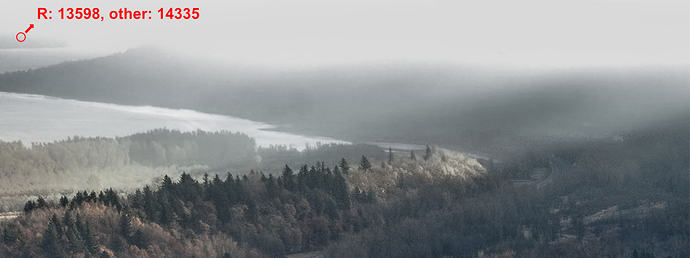
For my camera, the sensor appears to max out at 14335. Forget the image as a whole and focus on just the area below (if I could crop a RAW image and still have a RAW image, I would just posted the cropped area).

Note the circled area. The red channel is not maxed out, but the other channels are. Moving the cursor near the circled area, I find again that only the red channel has any information, but it does have information—this is pretty much the definition of highlight detail. Can your program (a program other than PL—I’ve already shown what PL can do) recover this detail?

Admittedly, in a synthetic RAW image, I could have ensure that the information wasn’t just in the red channel. But @nemo claims that LR actually works better than PL in these situations. Ok, @nemo, here’s your chance to prove it!

If you look at the ACR versions, you can see that none of them managed to recover this level of detail. The latest LR may be better.

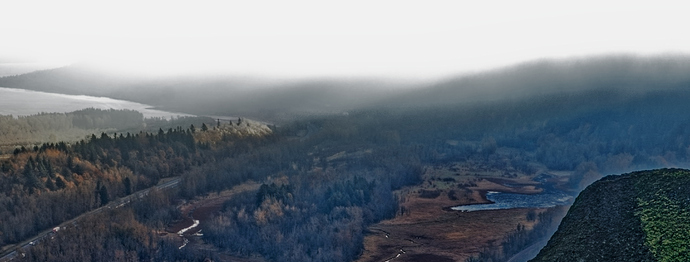
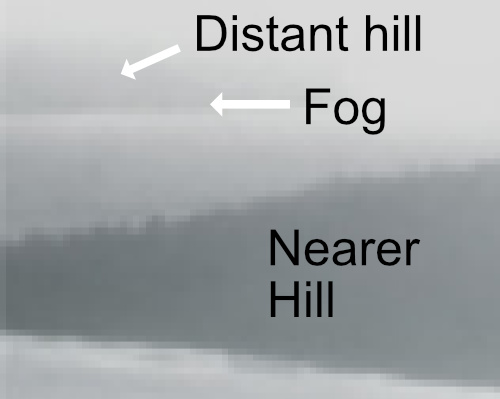
Since people don’t seem to understand my request, I magnified the area where the circle appears and annotated some of the detail that appears there:
Detail

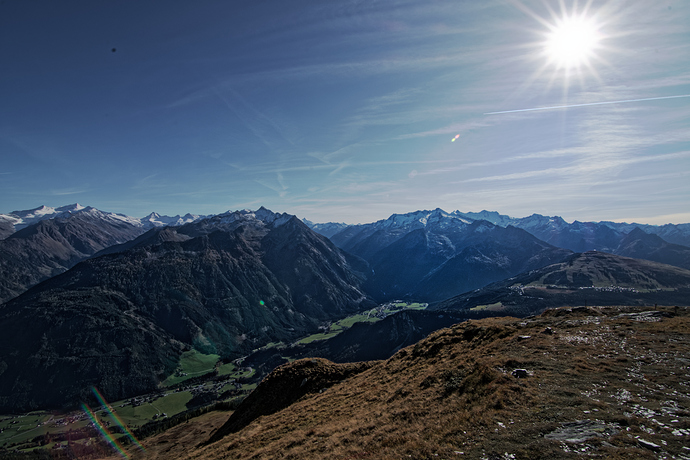
There is a distant hill that is just at the edge of clipping. Then there is a bit of fog that, surprisingly, is still not clipped (it is very close). Then the bottom of the same hill shows up. In the foreground, there is a nearer hill. At the base of this hill, we see a brighter area that come from the waters of the Columbia River meeting the land.

If you go back and look at my best ACR rendition of this same area, you can barely see the nearer hill. The more distant hill doesn’t appear, nor can we make out the whitecaps hitting the land.

The shot, by the way, was taken in the Columbia Gorge in Oregon, USA.
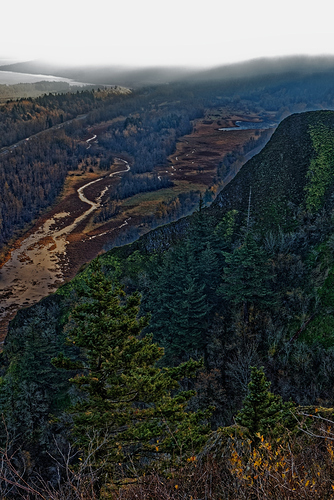
I engaged this image as getting as much detail out the landscape as possible. Using the tools i have.
detail and exposure on the front and in the middle of the valley. The fog was or mute greyisch white or flashing white. Any detail extraction and correction cause artifacts and blotchy pixels.
The Histogram was cut off on the left and right side so detail in the fog on the upper side is nearly impossible. So this image was my most “natural enough” looking thing i could get with out go for hours of trying.

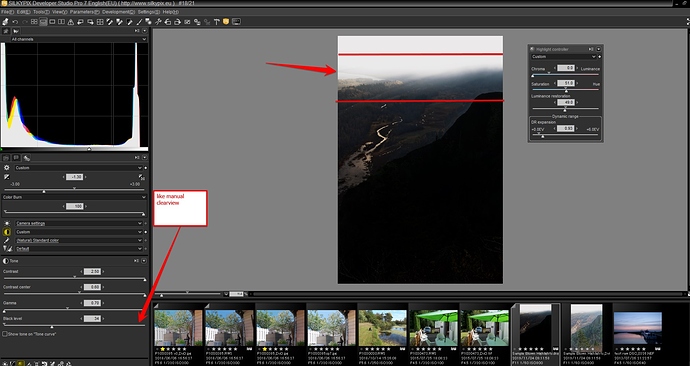
i can give it a try on the same one in Silkypix 5pro which has a nice highlight tool.
Using your point of interest as particulair point to target. Aldoh i don’t think it will give clear view of the hill :wink:

The problem with fog is it doesn’t have much detail from it self bright or not. So no program can get things out that foggy white blur i am afraid. So i concentrated on getting as much image information “seeing things” as possible in the hole image without creating a “monsterly looking” overcooked image.
This image is few years back used in a other “test” also a highlight test for serveral applications
maybe this wil do too as benchmark

1 Like

Sorry, but I can’t get what you mean. Shadows +25 ? Where do I set “Image balance”?

No. I just suppose.
I do not know what algorithms are used by both programs. I’m not sure if they’re trying to reconstruct / rebuild or not. It probably is and will remain a mystery for us. But on the basis of many cases, I can only conclude that LR produces better results in this aspect. And certainly much faster and easier to achieve. Overall, I can achieve similar results in both programs. But in PL it costs me much more effort. And that’s it. This only applies to highlight recovery. In general I find PL much better than LR.

1 Like

Selective tone, shadows +25

Same here.

Yes, but what do you mean with “image balance = 10”?

@Geno, you started this thread and have had a lot of people spend a lot of time trying to assist you, myself included. You posted a sample RAW file that I spent some time with and posted my results for you. Now I would like some assistance from you, unless you consider this a one-way street.

  • Please take the RAW file I posted and load it into LR.
  • Crop it to approximately an area approximately 2250 pixels wide and 840 pixels high, with the crop 550 pixels from the top edge and 0 pixels from the left edge (or eyeball by referencing the composite crop I included).
  • Without making any further adjustments, save a JPG of the results.
  • Slide the highlights to -100 and save a JPG of the results.
  • Using any combination of sliders, tone curves and whatever, try to see if you can recover the detail I described above, in the image where I show a “distant hill”, a line of fog and a “nearer hill”. Make a JPG of your best shot. I don’t expect you to spend a long time on this.
  • Post all three JPGs on this thread.

Under ACR CS6, there are no combinations of sliders or tone curves that recovered the “distant hill”, the line of fog or even most of the “nearer hill”. I am trying to find out if Adobe’s RAW processing has changed since CS6. I can’t determine this unless someone with LR takes my image and performs the above steps.

If @geno won’t take the time, are there any other LR users here who will step up?

I was considering getting the LR trial to get the answer, but this is actually a trial subscription for Adobe CC and requires giving them a credit card. I’ll pass. I don’t need to know that badly.

@freixas - as others already stated - fog has even less structure than sun beams. I think you have used clear view to make those hidden hills visible somehow. It does not show any comparable criteria regarding highlight recovery.
If you think you invest too much time, then just ignore the thread.

As I have stated earlier: Yes, PL can recover about the same amount of highlights. But only using a workaround. And this, as a few others have stated, costs more time than in LR.

Indeed. The contours of the hills are showing because of (too much) Clear View, not because of recovering highlights. I came across this effect, too, especially on water surfaces Clear View can recover structures on the water, which is just blurred grey in Lightroom. This effect actually made me purchase Photolab.

If by others, you mean Oxidant, his claim as patently untrue, as the images I have posted show. As to how one would even compare the “structure” (detail?) in fog vs. sunbeams, I’m not sure. I doubt all fog and sunbeam shots are the same.

That’s a side issue anyway. I am still curious whether LR CC has better highlight detail extraction than ACR CS6. From your comments, I might guess you gave it a try and and had no luck, but can’t be sure. Perhaps someone else with LR CC will try.

In the end, I’m not really sure what “highlight recovery” LR performs for you that you like so much. LR applies local contrast enhancement when you move the tone sliders, so perhaps that’s what makes the difference.

I investigated the tonal sliders in PL in a long thread whose link is in the first reply to your thread (the comment by Egregius). With FilmPack, you get some extra highlight/shadow contrast sliders that might help you get to where you want in PL without so much work (I don’t have FilmPack).

I tend to find PL to be less effort and often don’t touch the tonal sliders at all or only to make small changes. I’m not comparing PL to LR, though, just to ACR CS6. At the same time, PL could benefit from a lot of improvements, such as luminosity masks and LUTs.

nope nothing usefull.
pushed everything to the max:


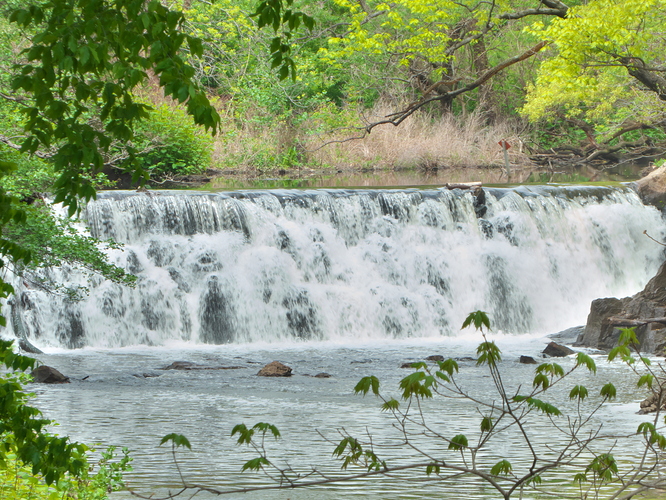
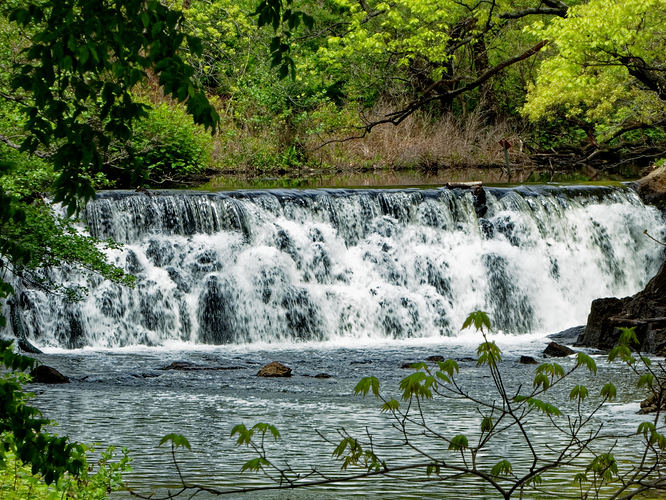
Dxo maxed out sesion:

Uglyyy!!! OVERCOOKED TO PULP!

But ive got that stretch of forest in the back!

So DxO is the clear winner in this contest. :slight_smile:

second test:


when i was training my self on this image seeking max recovery.
Dxo video how i got the image below
I started with maxed out detail seeking only interested in maximized waterfall detail and then reset preset and go from there to a point it’s still oversaturated but maximized in saturation and detailing without blowing the fuse. (protect saturated colors slider stil at zero.)

it’s not ugly in a way as in “destroyed” but certainly overcooked.
Anayv’s test image rawfile
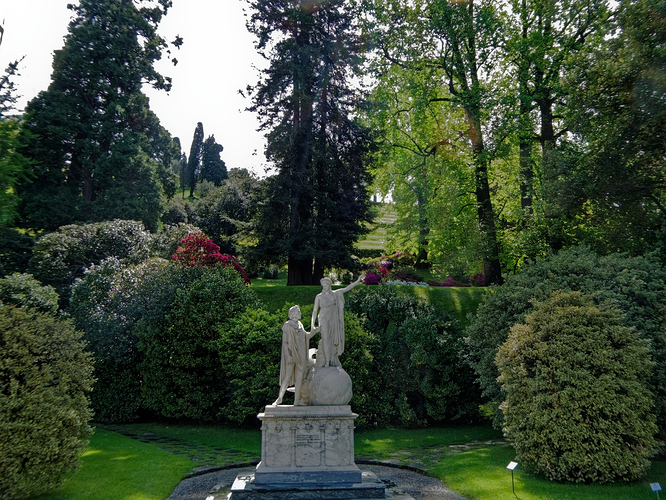
Next an other one we used to see highlight recovery: provided by Lynda:

put in 50% clearview and:
only the left corner has a black spot left.
good balance? well ehhh no.

video for maxed detailing how i would go part one
part two: scraping every detail out
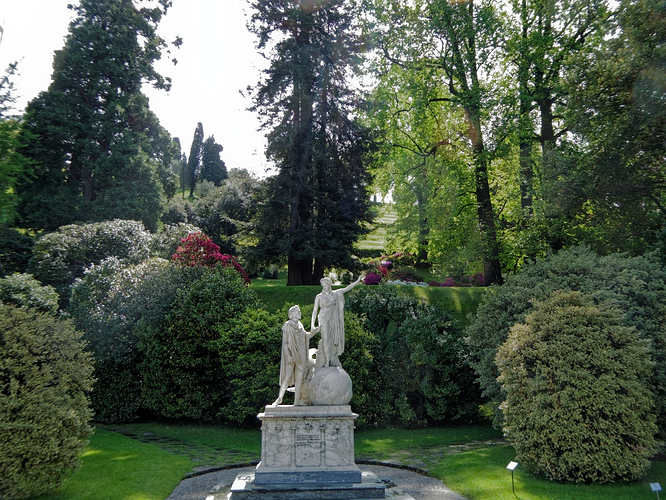
stil not a balanced image overcooked to sqeeze every detail out the statue.

I personally find DxO very capable, maybe not as “easy” as other applications but after some training and trail and error it is a blunt sledgehammer and tapper(wooden hand fist used for chisel) & precisionchisel in one and anything in between. (ok no recovery as in refilling detail in lost area’s calculated from parts around it but if it’s there you can reach it.
statue rw2 for your own testing with regards to Lynda

(i didn’t say it’s perfect and some things need finetuning like how to read the clipping warnings properly and userguide for expertmethodes and … christ im stuck in the cookie jar :joy: )

1 Like

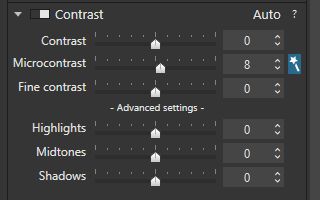
What version of dxo do you use? I don’t have a fine contrast slider in the contrast section. PL 3.1.

George

Hy George,
it’s a part of Filmpack 5 elite.
I know it has nothing to do with film emulations but it’s very usefull
it helps you to control smoothing (-20) or detailing (+20) area’s of shadow and highlight
(edit: the highlight/shadow sliders in contrast.)
Fine contrast slider is for faces and color planes to lose or gain detailing use it with HSL Uniformity and your the king :slight_smile:

1 Like

Thanks for giving this a go. Looks like you got the same results in PL that I did.

Yes, the “fix” cannot be applied globally. This image has a lot of tonal difficulties. Trying to preserve the distant hills while also bringing out the details in the foreground proved tricky in every program I tried, which is why I limited the exercise to just a small selection.

For tests, I prefer to use synthetic images where the results can be objectively agreed upon and where only one particular feature can be tested—it’s just not easy to create synthetic RAW images.

By the way, I tried your image (the waterfall). I could recover maximum detail or I could make it look good. The balance between the two is a subjective decision and I never came up with a choice I was happy with. It was more of a test for blending local adjustments than for highlight recovery. If we crop the image to a small portion of the waterfall, it might make for a good test case.

I agree. I wish it had flexible luminosity masks that could intersect with other masks (a la Dark Table) and LUTs. This would give it awesome tonal control.

Your welcome,

We selected troublesome images back then just to see if we could get the “pain” out the image as natural looking as possible, now i used it to go over that threshold and seek for borders of the application in getting what you want.

That’s the fun ánd the pain of a image like that kind.
if it’s just a exercize , great! if it’s your best shot of something you can’t photograph again, (holiday images) it’s a pain to get it right.
i mostly export a row of edit slightly different of the image and watch them on FHD-TV see which i like most. starting with deleting the bad one’s.
(dxo has Virtual Copy which can give you endles options to try. (and yes i would like to add comments in a info box connected to that VC to remember why i did what)

i remember that test with the tonal grey ladder we did. (can’t find the image fast) where we tried to find the sliders activity area (where they influenced the ladder) i think it was along the new HSL testing. (if you have those Tiff’s ( a colored one and a black to white “piano”) i can place them in a cloud i set up for this kind of images a testcloud storage.) can we re use them from time to time :slight_smile:

( if you want to understand behaviour of a tool in a application you need to fool around with known images tar them apart in pieces go wild in color detail contrast and so on until you understand when to use what to get your desired goal on other images later. The balance is global and local tools blending to one final endgoal, which is always personal choice and preference.)

See Understanding Selective Tone control for the TIFF.

1 Like

Hi Pielo
I agree about the ugly brown colour on the sun star. I think it is probably because LR tries to “paint in” false detail when attempting to recover blown highlights. If one or two channels have some information then it tries this “painting in” and if the area is small and there is a reasonable amount of colour around the blown highlight it often works reasonably well in that it is not noticeable, it often works in cloud detail. However with these sun stars the false information is easily seen. Swings and roundabouts :slight_smile:

I had a go at the image and just quickly processed it. As with any difficult image I tend to start from a flat image without DXO’s auto functions which although usually beneficial can fight you if the image has unusual characteristics like this sun star image.

1 Like

George, additional Contrast settings are integrated into PLx if you also have DxO FilmPack installed.

DxO_Fine

John M

@IanS thanks for your effort. A good measure of the ability to recover highlights is the size of the blown-out center of the sun. The smaller the center of the sun-star becomes, the more highlight is recovered.
You are right about the orange “brown” tone around the sun in the LR image. It is not tweaked, I just pulled the highlights down. With a bit more effort that artificial painting can be minimized.