mwsilvers
(Mark - New Jersey, USA, Win10, RTX 4060, PL9, FP8, VP5, Nikon Zf )
21
I am not seeing it either in PhotoLab. However PhotoLab already had a Negative (RGB) preset in the Tone Curve. Maybe it is just a FilmPack specific version of the Tone Curve. In fact I am not seeing any new or compelling FilmPack 8 features from within PhotoLab other than a minor change to the Time Machine. Am I missing something? I wonder if FilmPack 8 might not be a worthwhile upgrade for those of us only using it from within PhotoLab. I hope someone can prove me wrong.
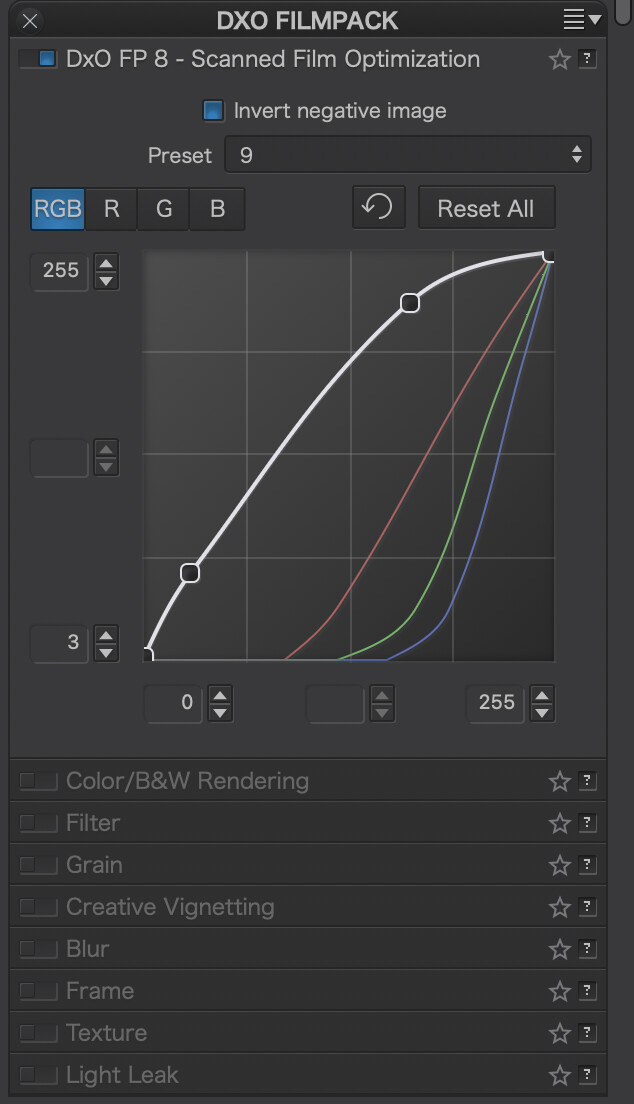
That’s a trivial curve – straight line from upper left corner to lower right in RGB “channel”. Something similar but more subtle is seen also in Bauhaus TimeMachine presets in PL8, coming e.g. from FP7.
That’s my impression too, as a PL+FP user. FP8 seems to address other users with some very specific needs and perhaps also PhotoShop users (?). Not too much attractive for PL9+FP7 users, unless they like some of the new renderings.
But note that I’m not a film processing expert and I don’t know what ‘negative inversion’ really means. Download FP8 GUI, judge yourself and share observations.
I’ve just activated it and loaded one of many DSLR-scanned negatives I already have.
The short version: Nope.
The good:
Negative inversion is a single click.
The bad:
The colour shift neutraliser is a manual choice from 13 different options. Yes, I found an option (#9) that gave me a pretty good starting point, but it should be easier than this.
The whole interface is jumpy as heck! Scrolling of the side panel is hit and miss. Scrolling of sliders (which I don’t even want) goes at light speed.
There’s a weirdly limited set of controls. For instance, my #9 colour shift was still a little too magenta-heavy. I’d normally look to cure that with tint. This is available only with a luminosity mask. White balance is available globally, but not tint?
In general, the PL interface we regularly complain about is way more polished.
Note that in the LR+NLP solution, fixing the colour cast is done very simply, as a single step prior to inversion, by putting the white balance eyedropper on an area of the negative frame. Simple!
So, no, it’s not going to replace LR+NLP for me. A big missed opportunity, I think. It’s not a brilliantly served market and NLP is widely considered the yardstick. FP doesn’t get close.
Something I noticed that had me rolling my eyes. You know how FP adds the Fine Contrast slider to PL that many people love, but not to Local Adjustments? Well, FP doesn’t have it for Luminosity Masks, either.
Negative inversion is simply ‘flipping the colours’ from negative to positive.
With black and white film, it’s very simple. With colour film there are two ways to do it with ‘regular’ software - either reverse the slope of the RGB curve or reverse the slope of each of R, G, and B. The latter has a slight advantage in that it leaves the master curve more usable for actual tonal adjustments.
The downside of a non-dedicated approach to inversion is that some of the other sliders also invert their behaviour. Not all! Software with negative inversion built in will deal with this twist for you.
Colour shift neutralising deals with the fact that real world ‘black’, when represented on a colour negative, is not ‘white’ but usually a shade of yellow/brown. Once the negative is inverted, you need to remove this (now) blue cast from the whole image.
By setting the white balance on an unexposed part of the film (which therefore represents true black) this cast can be instantly neutralised.
The original negative as ‘scanned’ (in fact, photographed by a DSLR with a pure white backlight). Note the brown surround.
Good catch. I went through the manual and didn’t find it – one more bug to fix.
EDIT:
It seems that I was wrong indeed.
mwsilvers
(Mark - New Jersey, USA, Win10, RTX 4060, PL9, FP8, VP5, Nikon Zf )
29
Hi John,
Thanks. I actually found it moments after my post and didn’t have the chance to mention it.
Its funny, I guess I am getting to know you too well. As soon as I found out where it was, I said to myself that John will probably let me know before I have a chance update my post.
How do I “license” the FP8 trial to use inside PL9? If I then choose not to buy FP8, can I revert to FP7 as the ‘built-in’ version?
EDIT: Interestingly, I just noticed I have no version of FP licensed inside PL9 currently. I swear I have been using the Creative Vignette and additional contrast sliders very recently. I wonder did the FP8 trial undo this?
The interface is much more controllable (and familiar). Furthermore, the workflow is excellent, because I am going directly from a RAW shot of the negative to a viable start point with no intermediate stages. NegativeLab Pro can’t do that. It works non-destructively for its own controls, but once you want to bring the rest of Lightroom to bear on an image, you have to render a positive (TIFF) image.
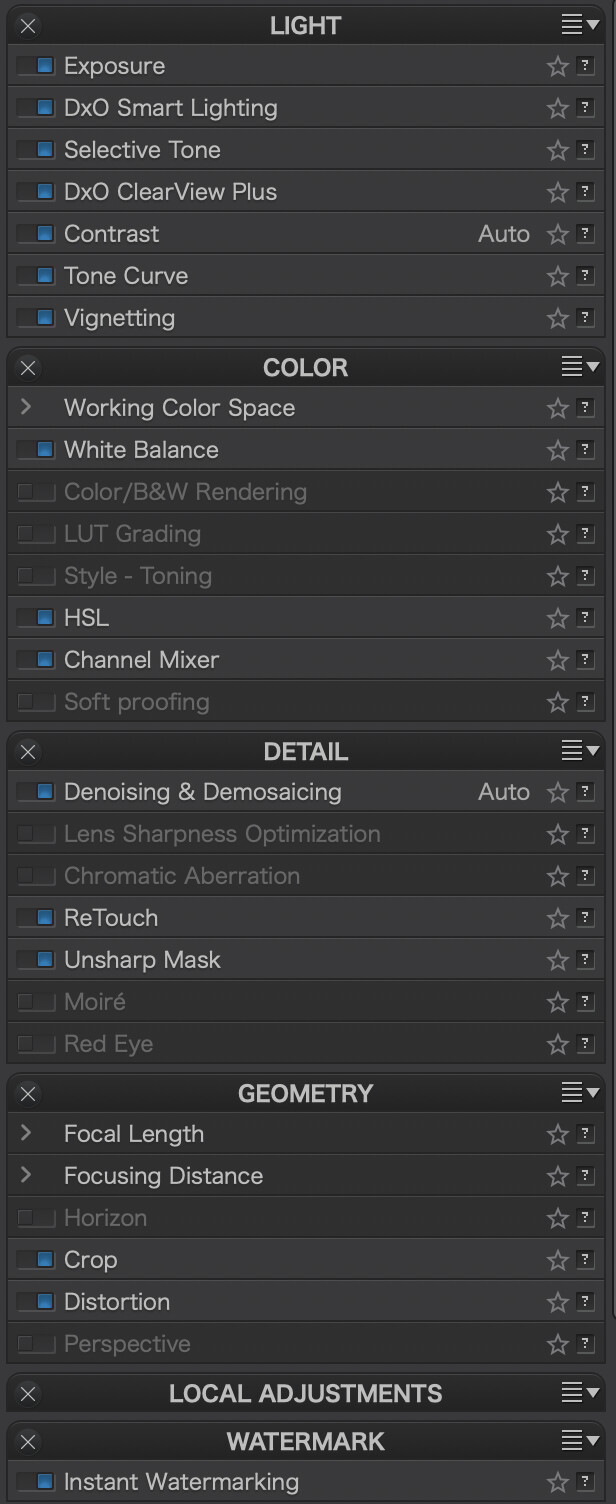
There is something a little weird — and limiting — though. Turning on the Scanned Film Optimisation block disables two things; as if it is then being treated as an RGB image.
The White Balance block loses the Tint slider.
Lens Sharpness Optimisation is unavailable at all.
The tint slider mirrors FP’s native behaviour. I kind of understand that SFO is messing with colours a lot so perhaps Tint is tricky or doesn’t make sense.
But LSO? It was shot with a DSLR and supported lens. If I turn off SFO, then both Tint and LSO return. Odd.
I did, however, try most other adjustments I would ever use. You can see here almost everything I turned on. I also added some volume deformation, (FP-provided) Creative Vignette, and used the ReTouch tool. Oh, and cropped.
@zkarj , have been checking the film scan optimiser and still prefer Negative Lab Pro with its adaptive approach.
Selecting one of umpty presets to get a starting point is just a little bit too basic imo. But I suppose (or at least hope) that DxO will add some smarts that will shortcut the manual selection.
And yes they have a module.
BTW I’m using DxO Optics Pro since v4, so I’m used to module support available!
With this lens it’s not really needed, but it may be with less lens quality.
And I’ve tested that if I apply the Scan optimization, I’ve seen this, and if I uncheck it, then I can use the Based on DxO module option in Distorsion.
mwsilvers
(Mark - New Jersey, USA, Win10, RTX 4060, PL9, FP8, VP5, Nikon Zf )
39
Does anyone know how to access the FilmPack 8 Time Warp from within PhotoLab 9?