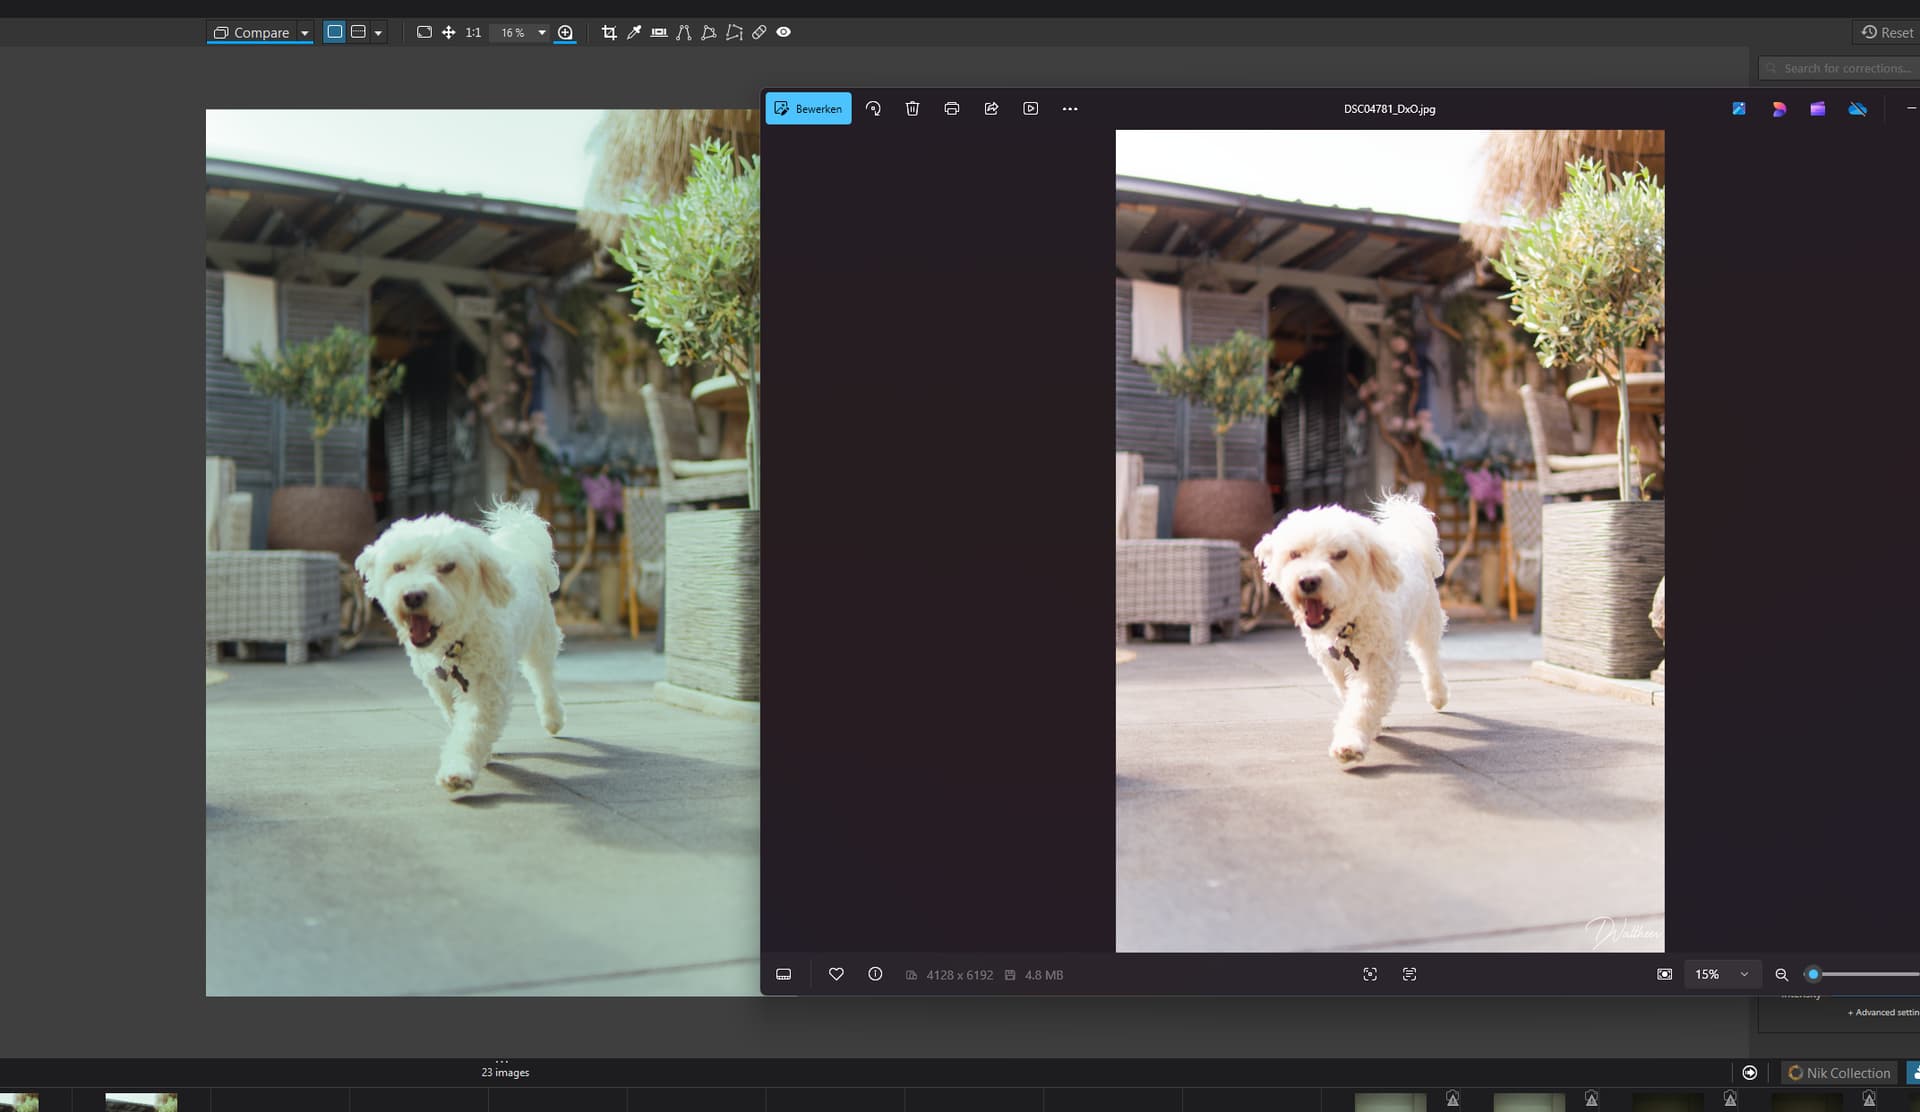
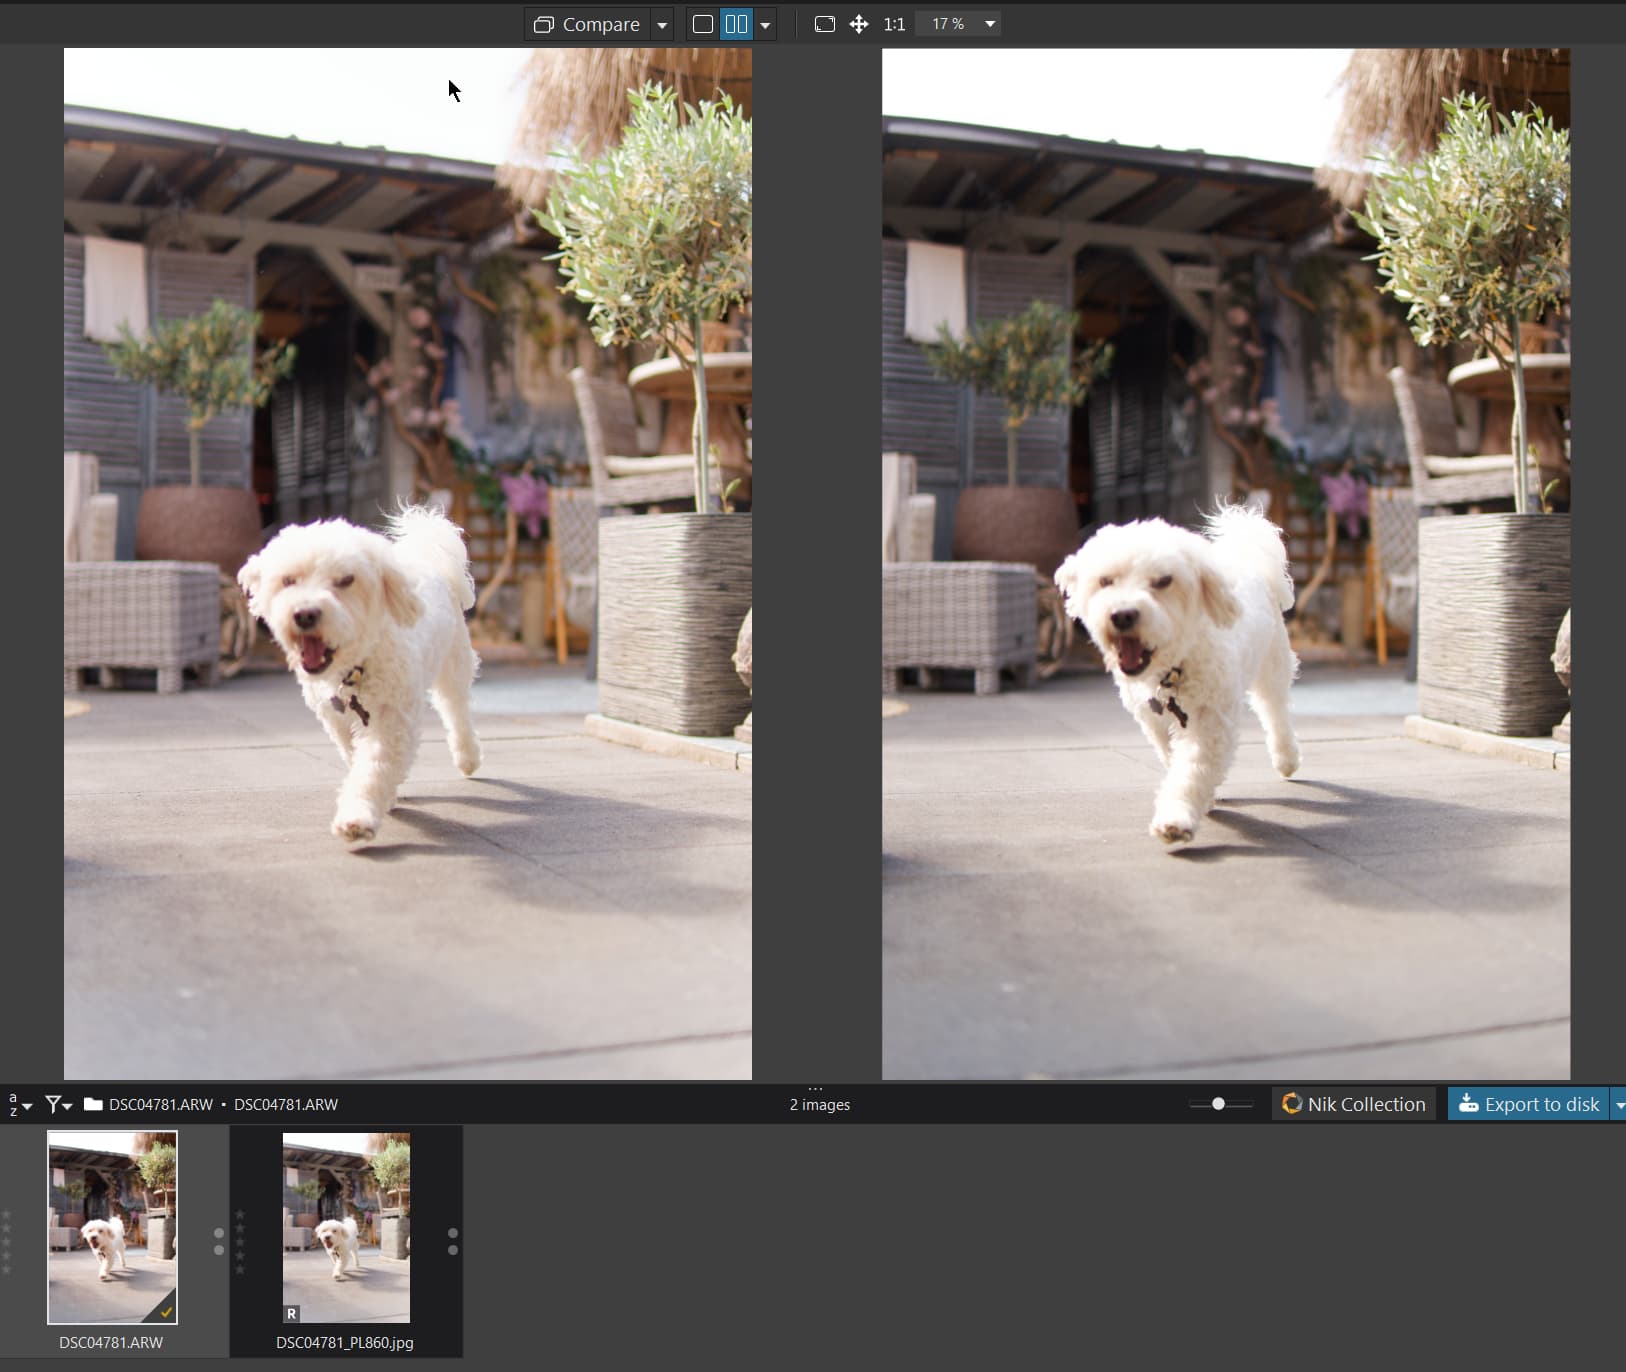
As you can see in the image, the exports (right) are totally different from the workspace preview (left).
It’s as if the tones are warmer and the light is brighter. Makes it impossible to make good edits this way. I cannot figure out what the issue is, either…
I tried messing around with the ICC profile on the export, but none of these seem to actually do anything to change the color. I also have color preservation turned on.
I hope somebody here is able to help… because I just got this program. I had ON1 Photo Raw before, and had absolutely no issues there.
I’ve tried all ICC profiles though and none of them give the same result as in the viewer.
This program doesn’t seem to actually work straight out of the box… because I initially didn’t even make any tweaks to the settings. But when exporting the exports came out with a reddish hue anyway.
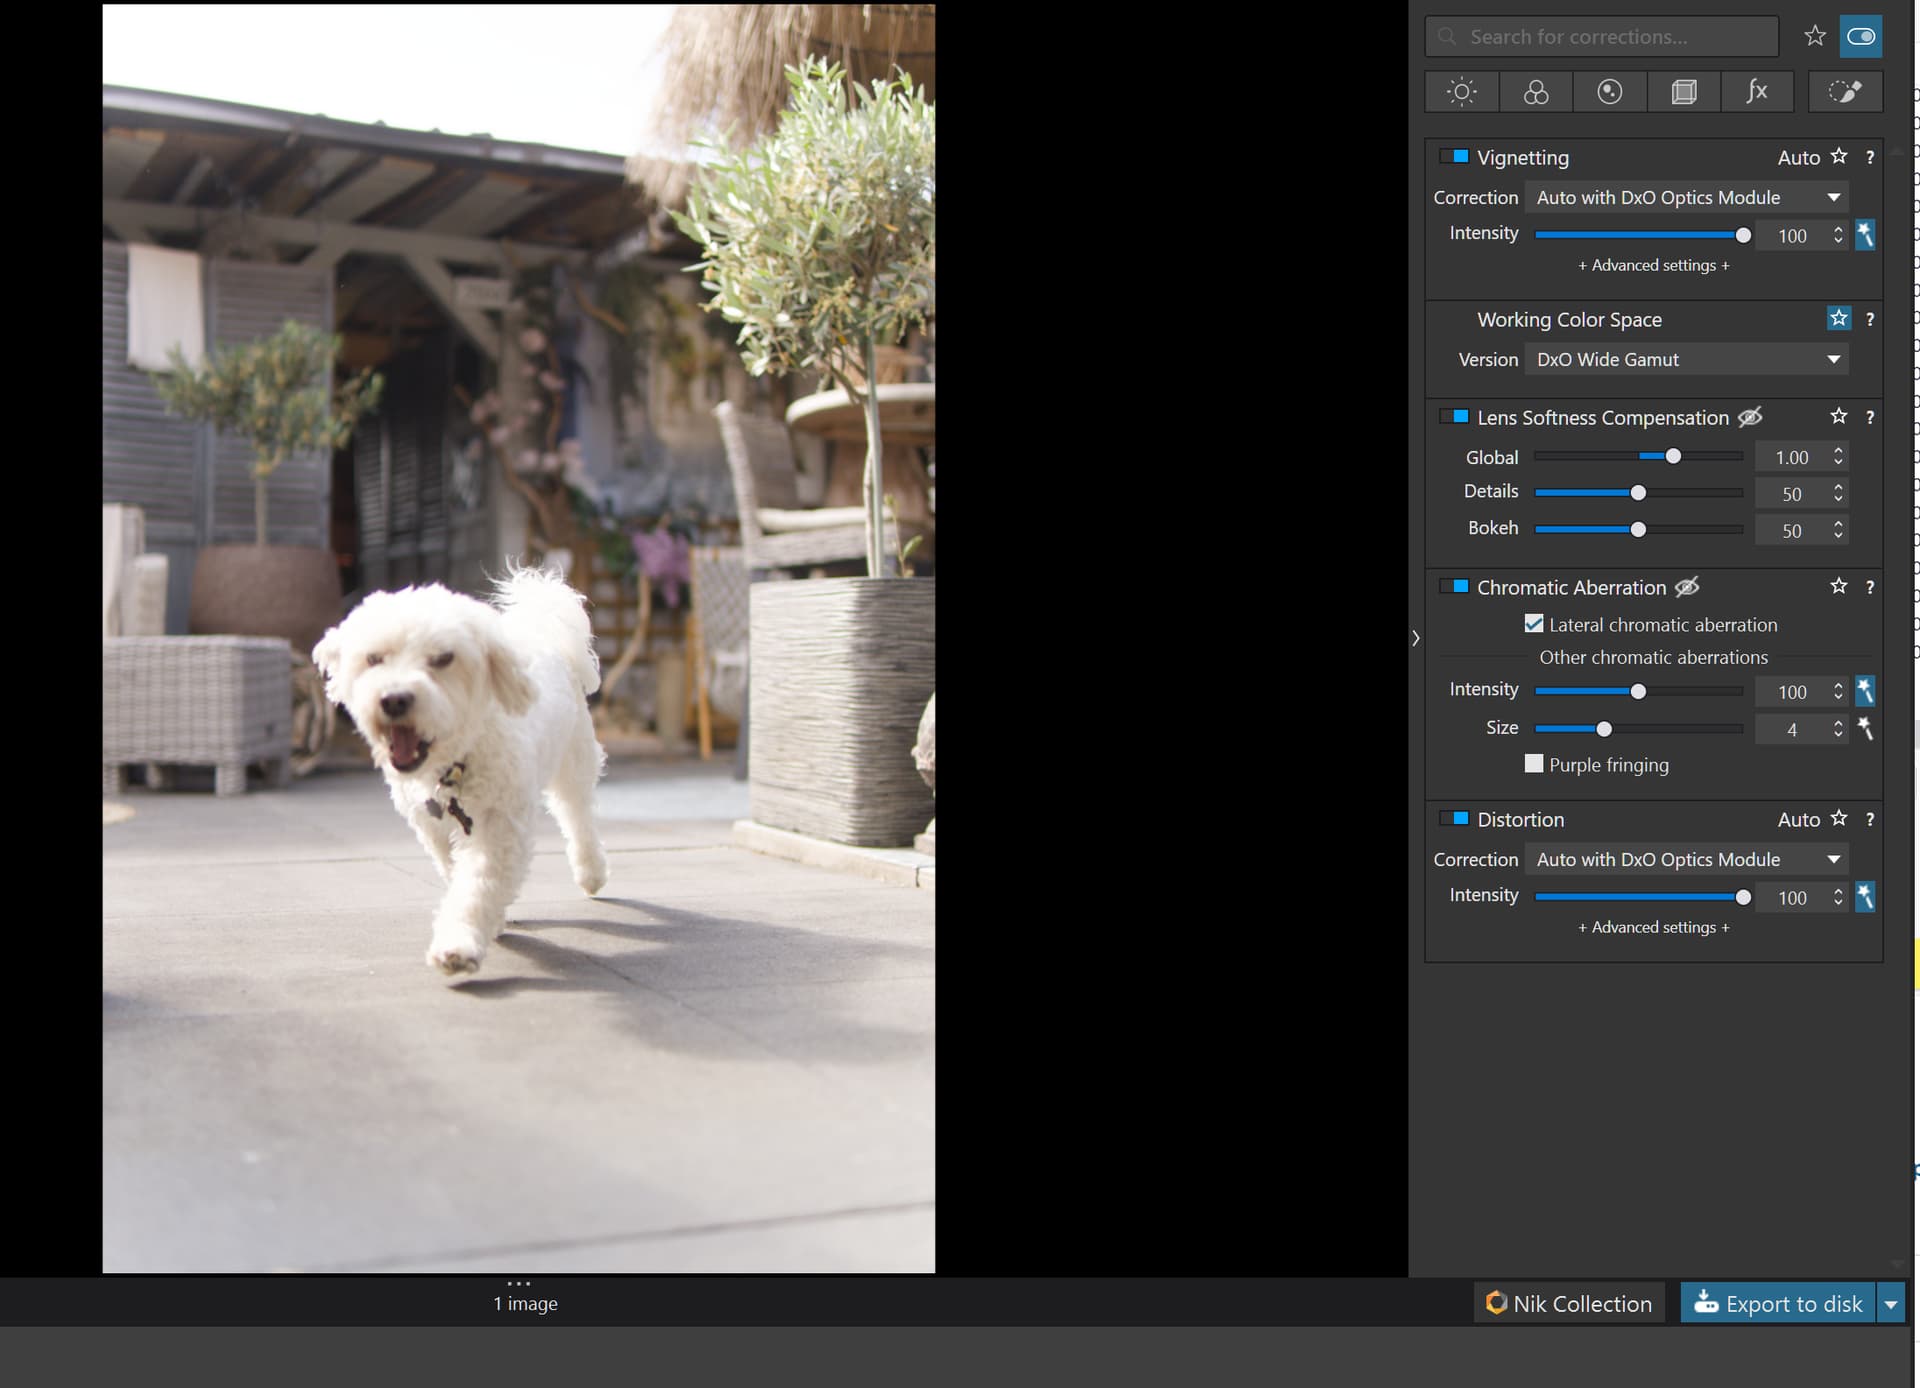
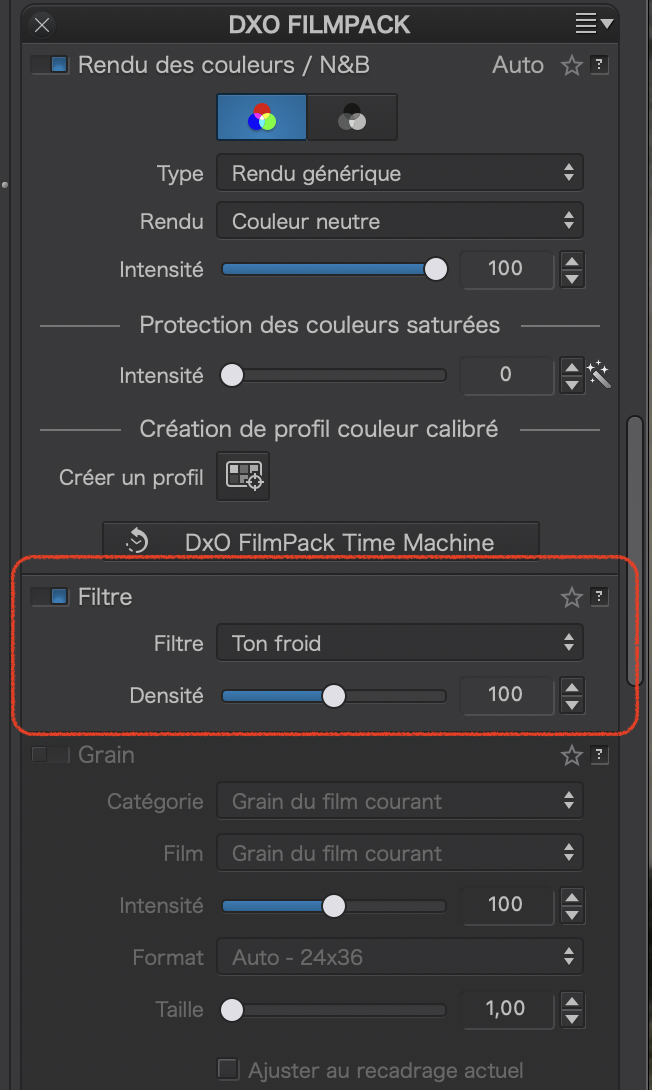
After downloading, I checked the DOP file and found that the FilmPack filter was set to Cool Tone, even though that tint wasn’t visible in the editing screen, which might explain the appearance of the first image in your post.
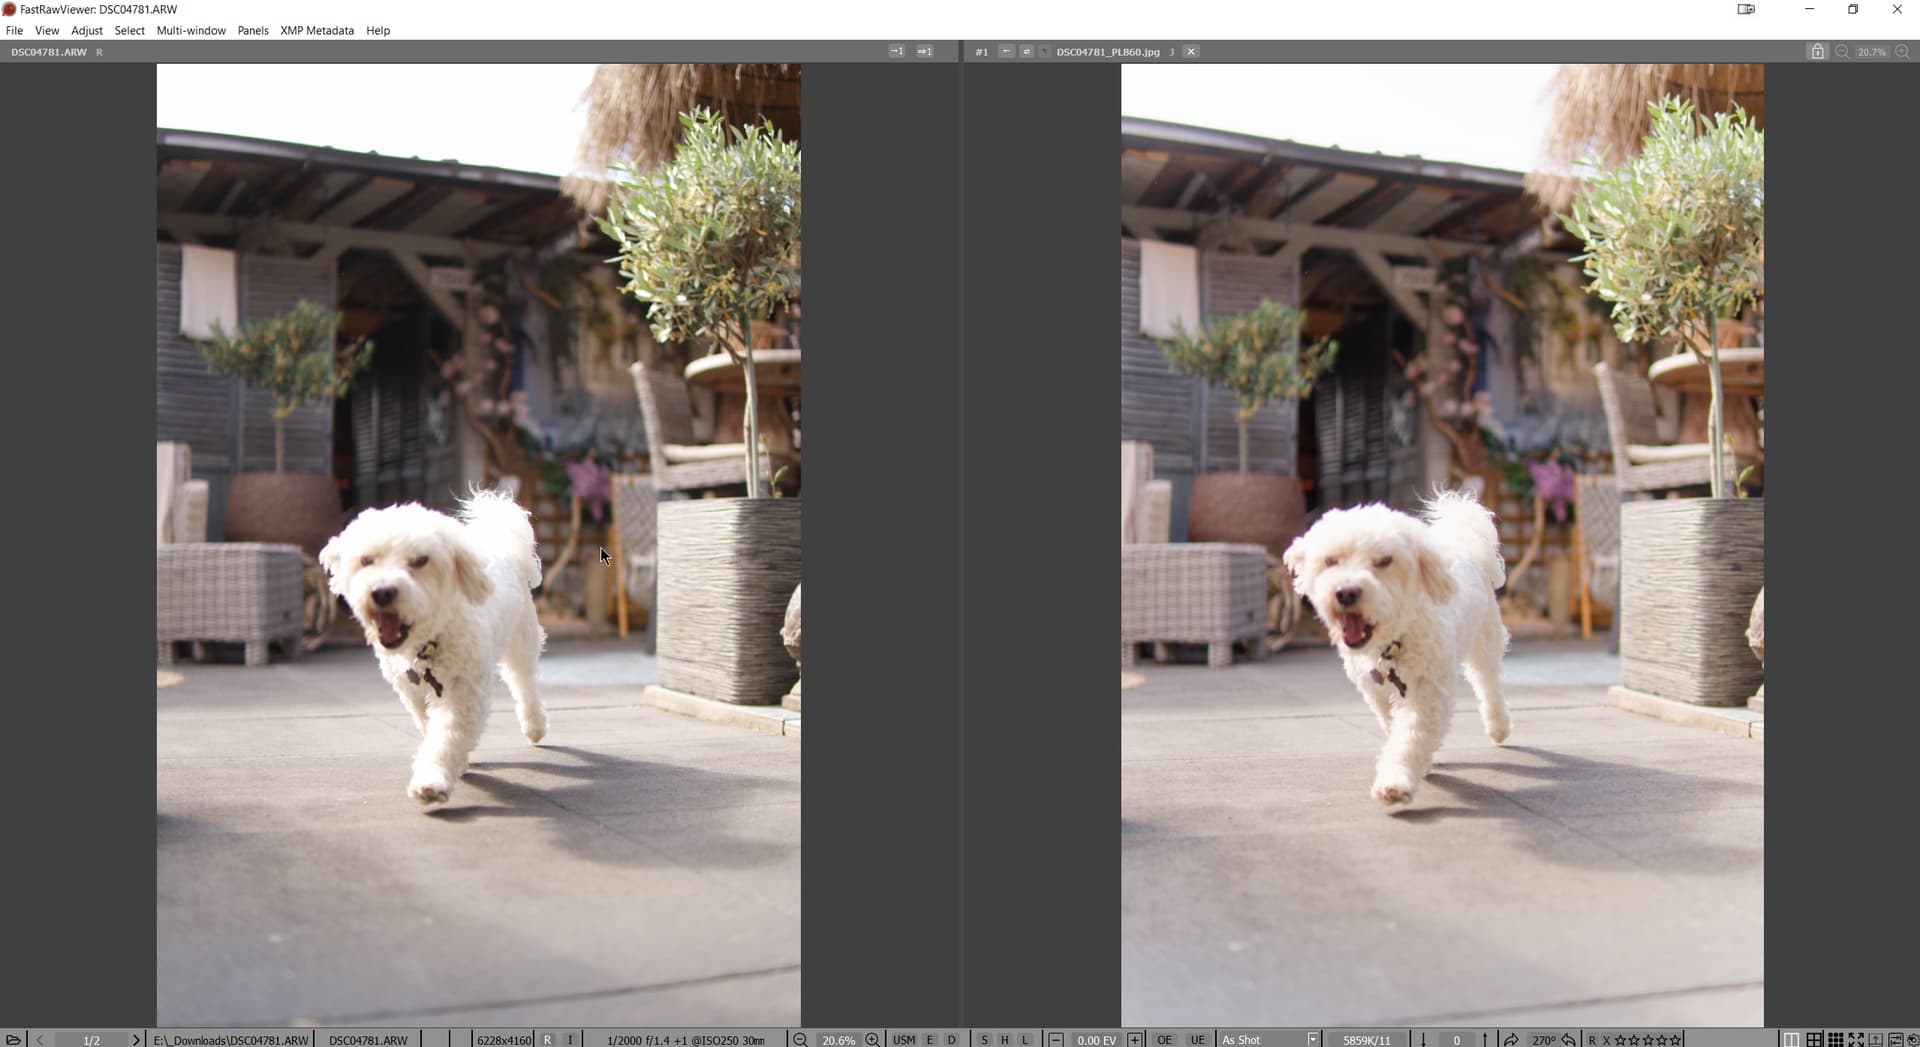
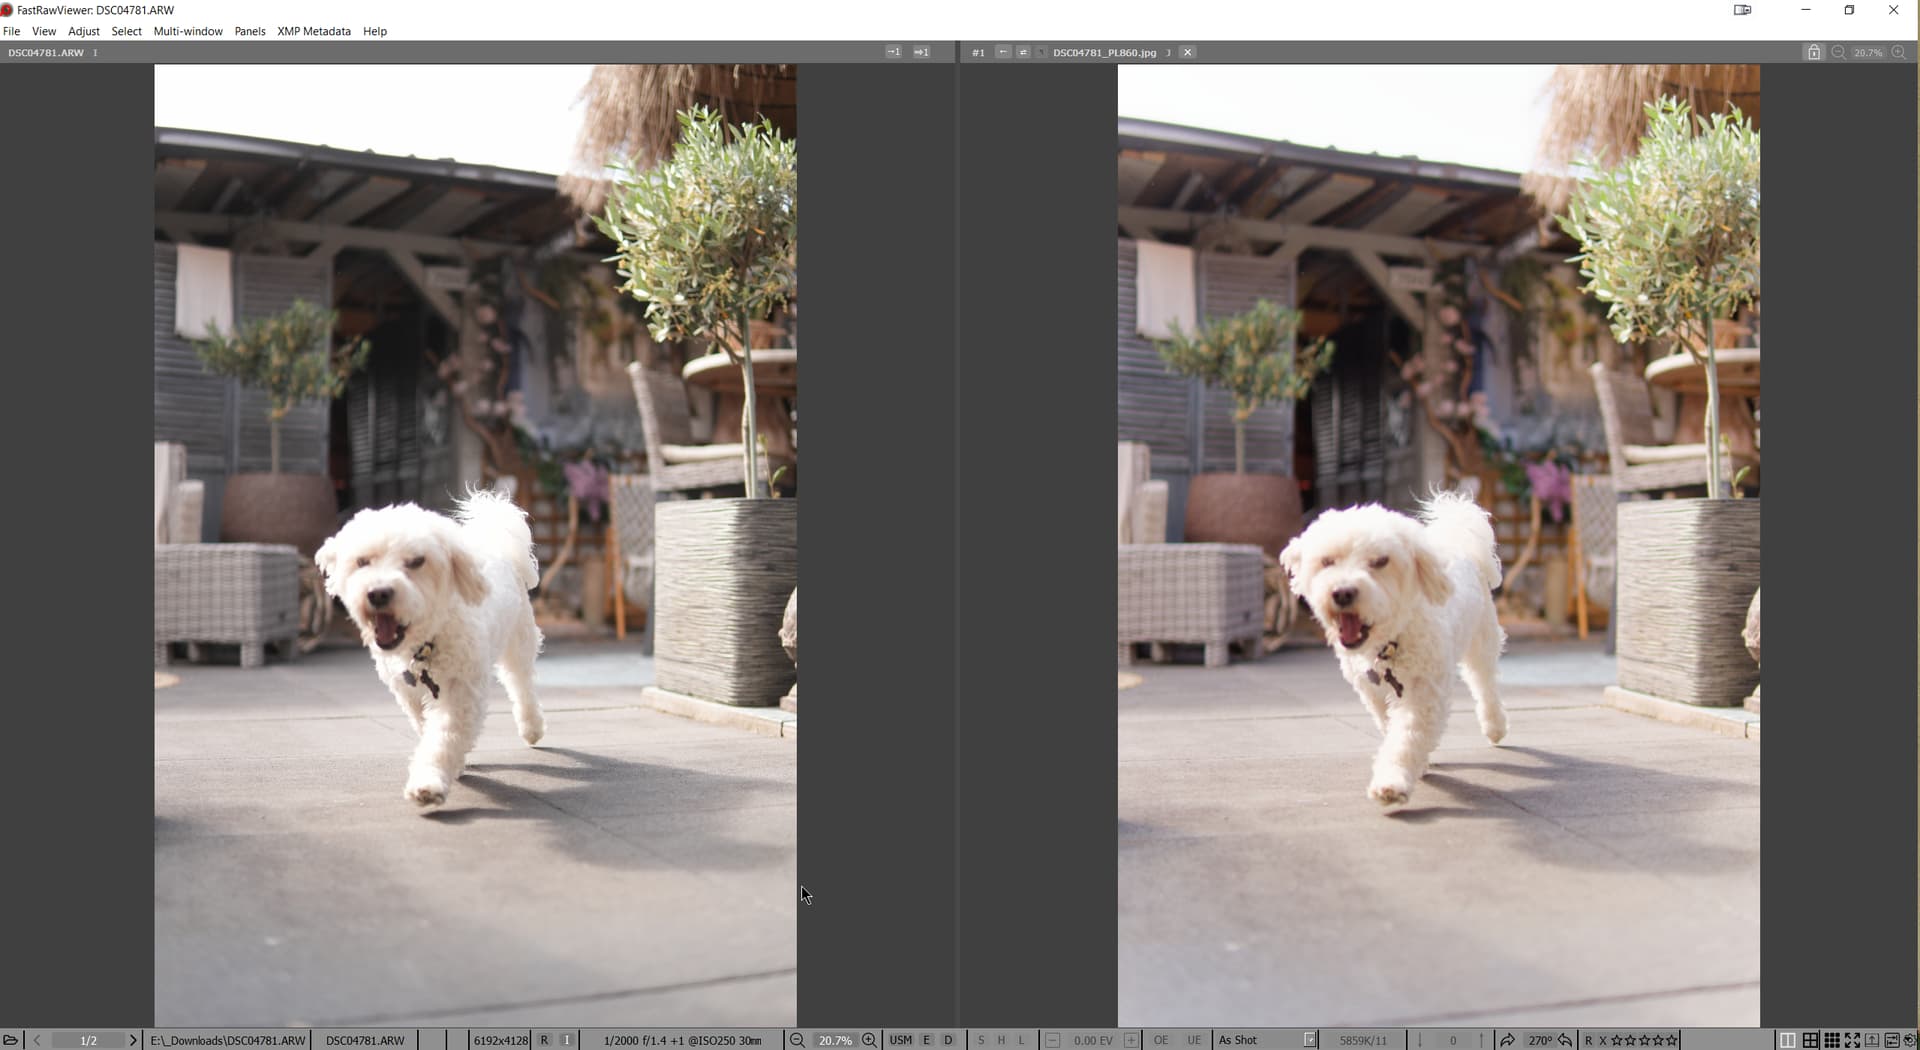
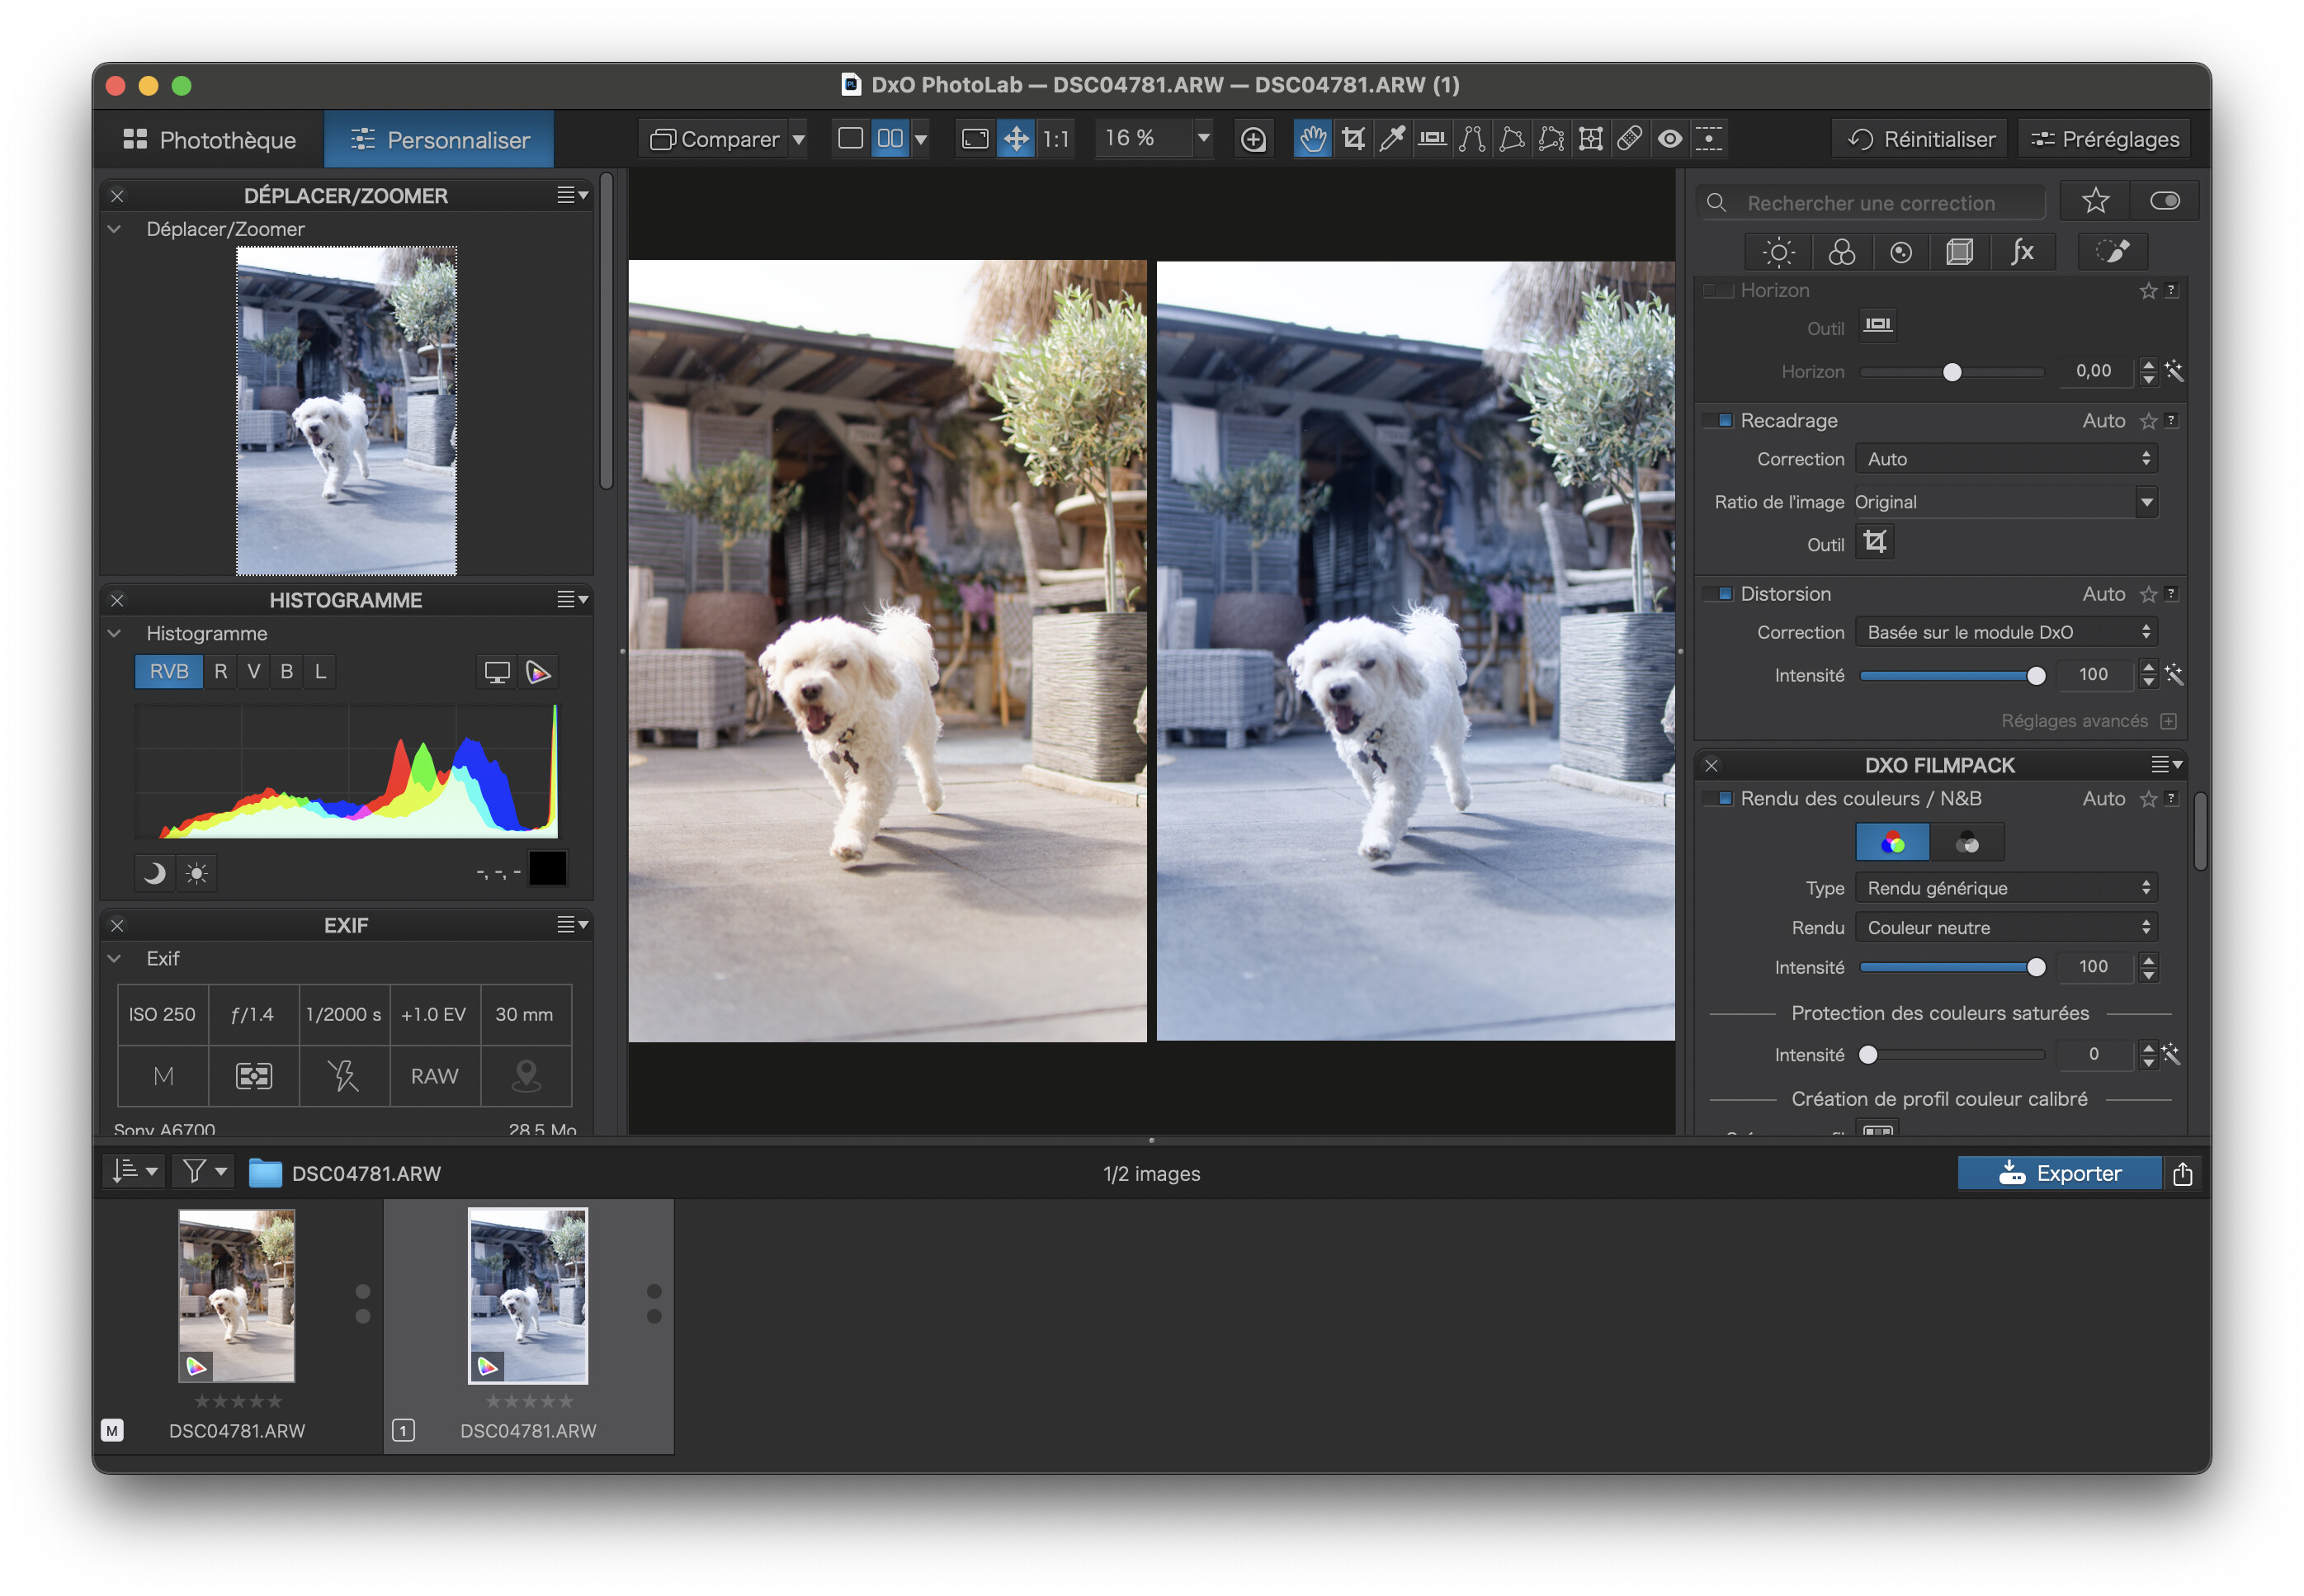
Like @Wolfgang and @George I have checked exporting your file with no adjustments and the JPG (on the left) looks fine…
Have been experimenting with your file/s and all I can guess it’s the external viewer you have used for your exported file …
.
more in detail
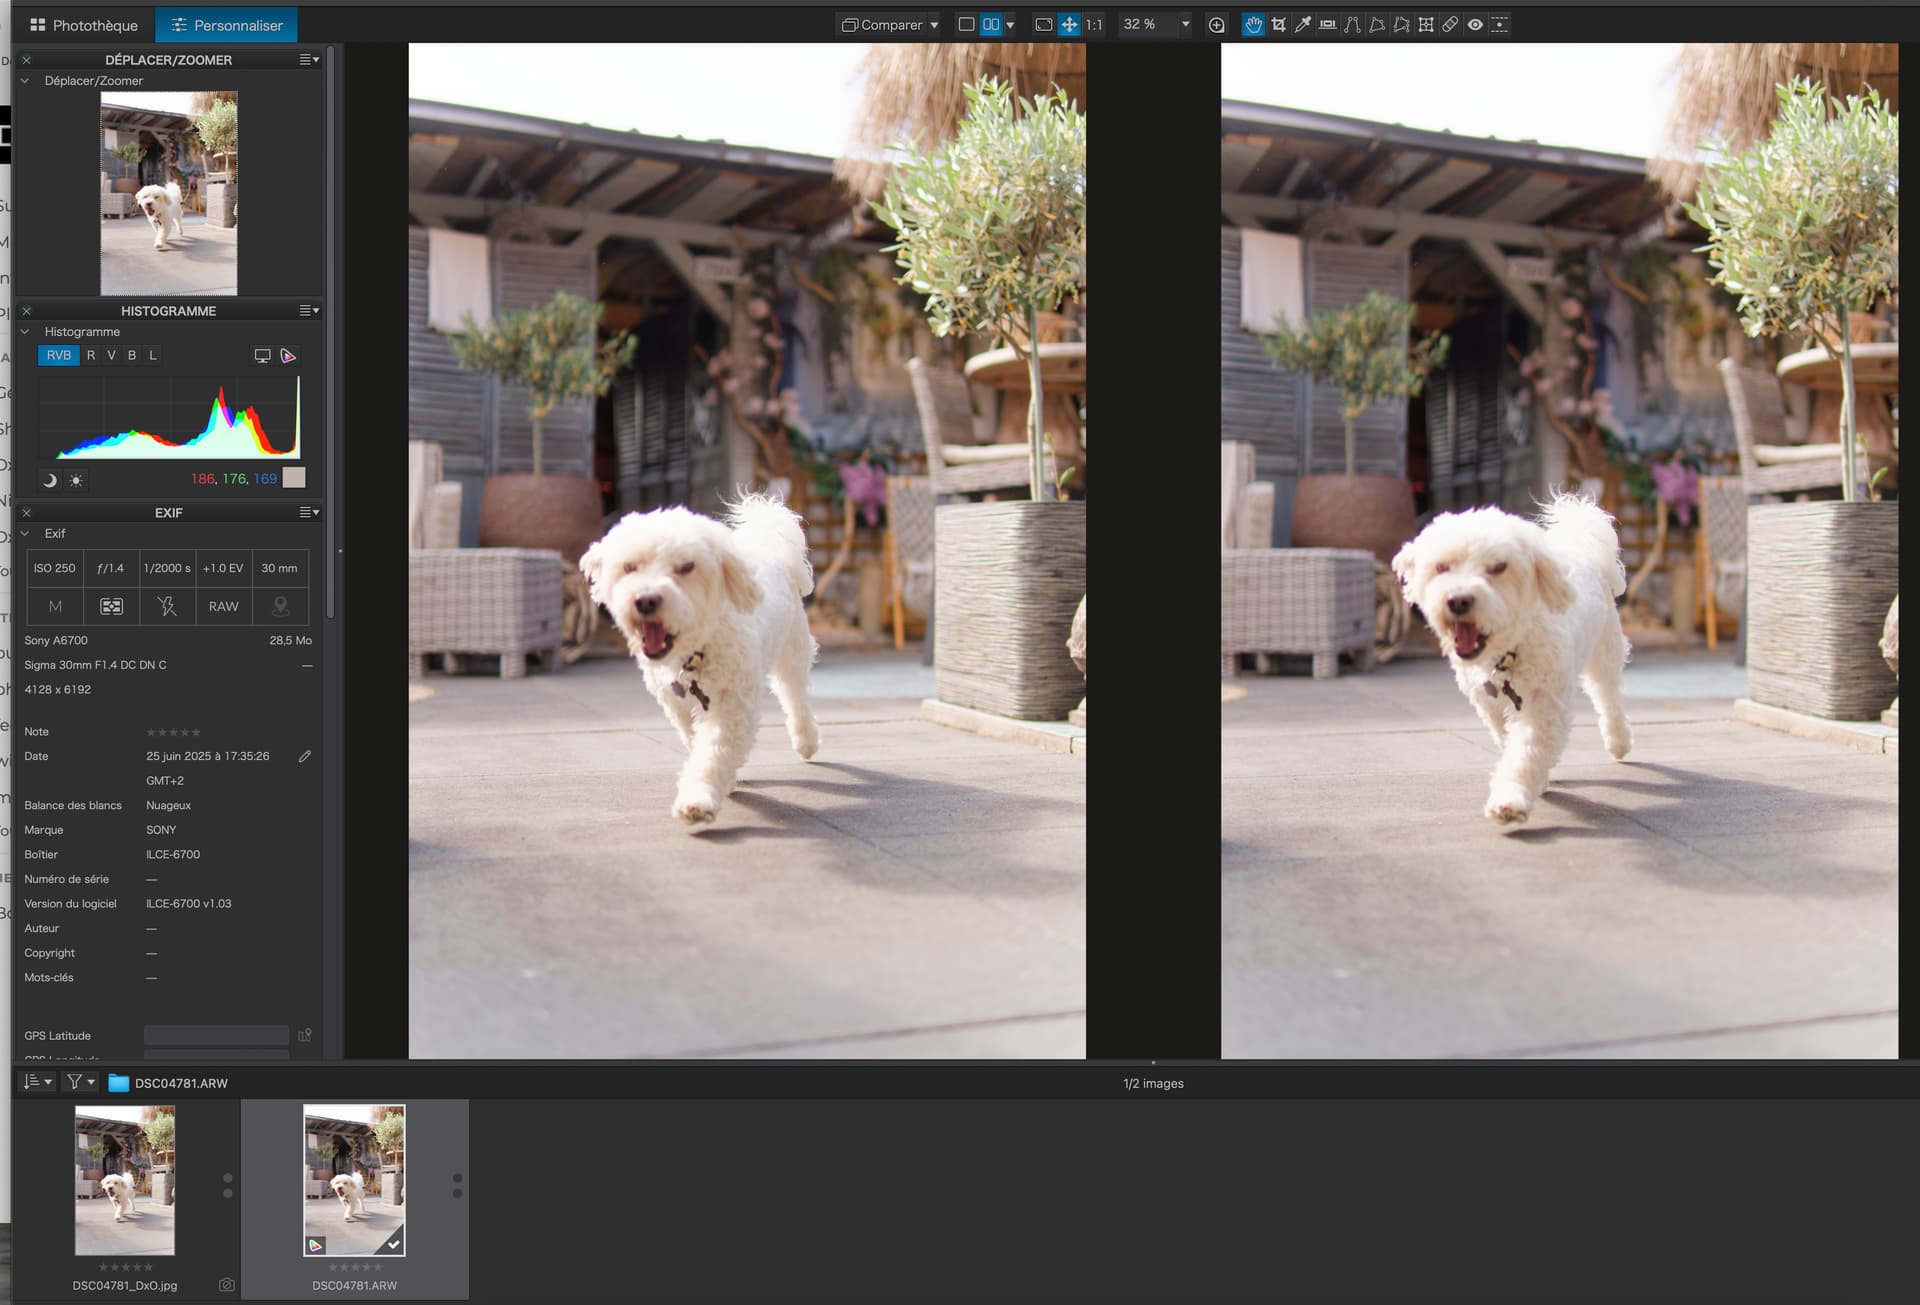
Normally, you have to set PhotoLab to at least 75% for accurate color reproduction. The Loupe tool will enhance the display even further. Comparing your master and the export file should look identical in PL … (I checked that).
To minimize color differences, I set my calibrated monitor to sRGB ( → the forum software doesn’t use ICC profiles and interprets screenshots as sRGB ) and even rebooted the machine. Then I placed PL and IrfanView carefully side by side to capture both renditions in one screenshot.
from left to right
. PL8 Master || PL8 VC 1 with SP to ARGB
. IrfanView JPEG (export from VC 1 = ARGB)
As you can see, IrfanView, set to use the monitor profile (in this case, sRGB), can handle JPEG exports using the AdobeRGB profile. – However, there are slight differences when rendering in PL, although not as strong a color cast as you describe.
@Cookiejar I had a mad thought and ran your file through ExifTool, which tells me that the colour space assigned by the camera is actually sRGB.
Which leads me to wonder why you are trying to mess around with soft proofing, since the image is already in sRGB and needs to be in sRGB unless you are exporting for printing.
I was just wondering where this green tint comes from and whether it has something to do with the user’s monitor settings. In this case, an AdobeRGB file combined with a poorly configured viewer or lack of color management would appear comparatively warm on an sRGB monitor, while the file doesn’t have out-of-gamut colors.
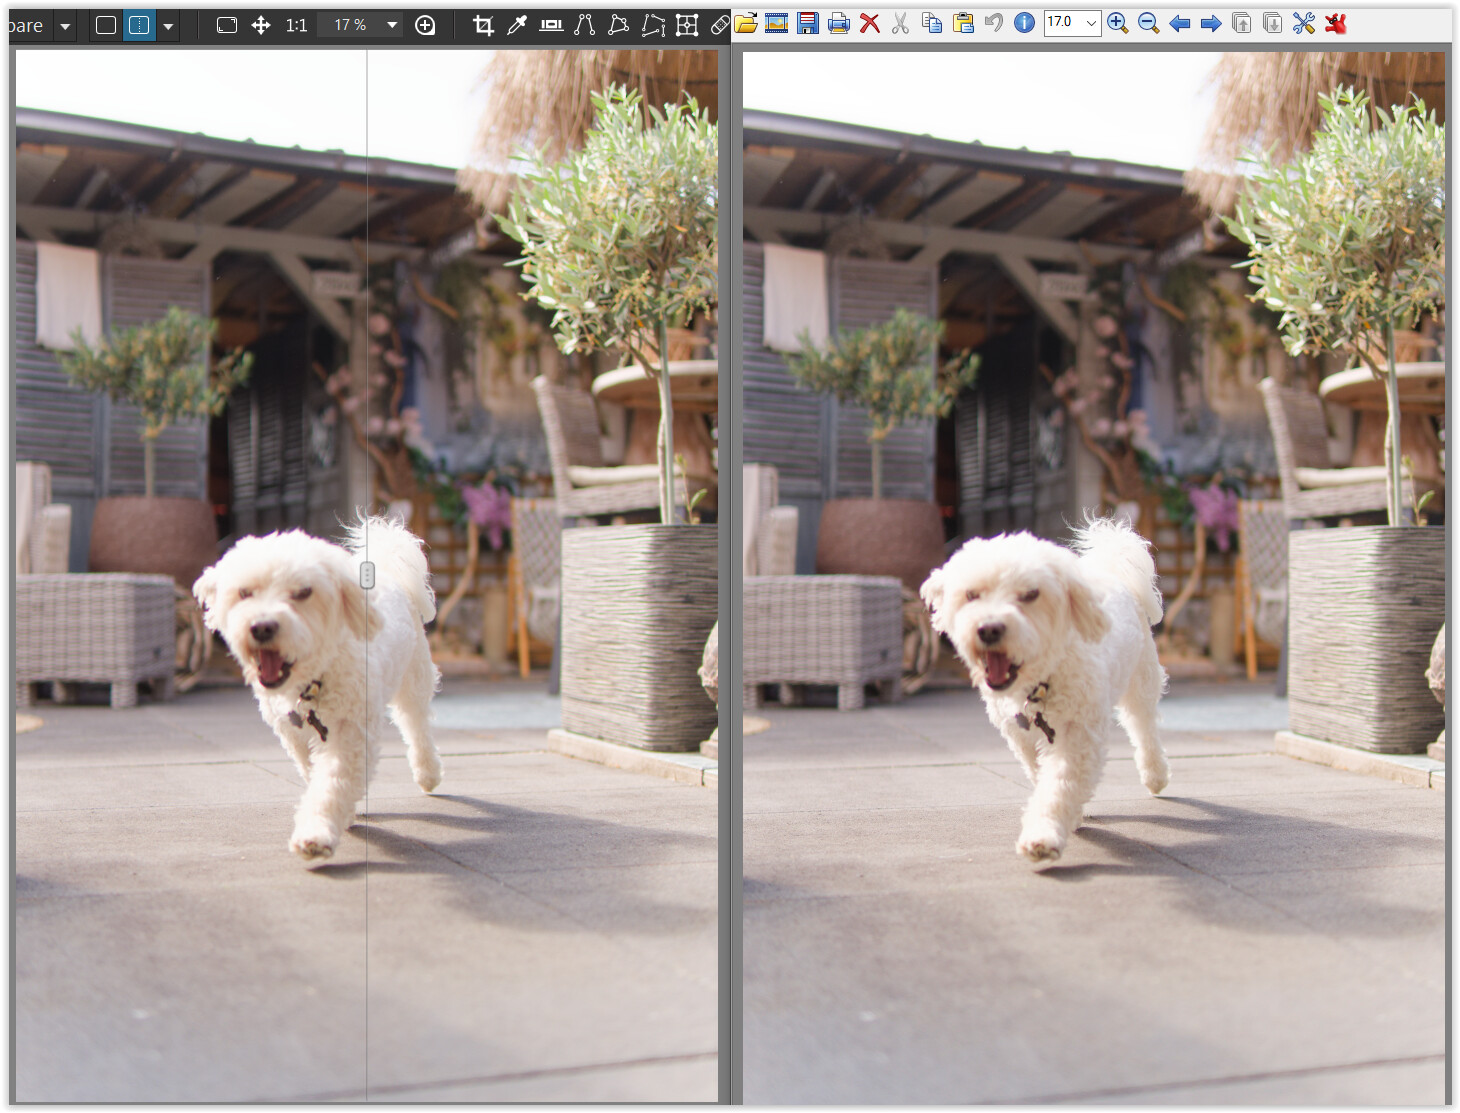
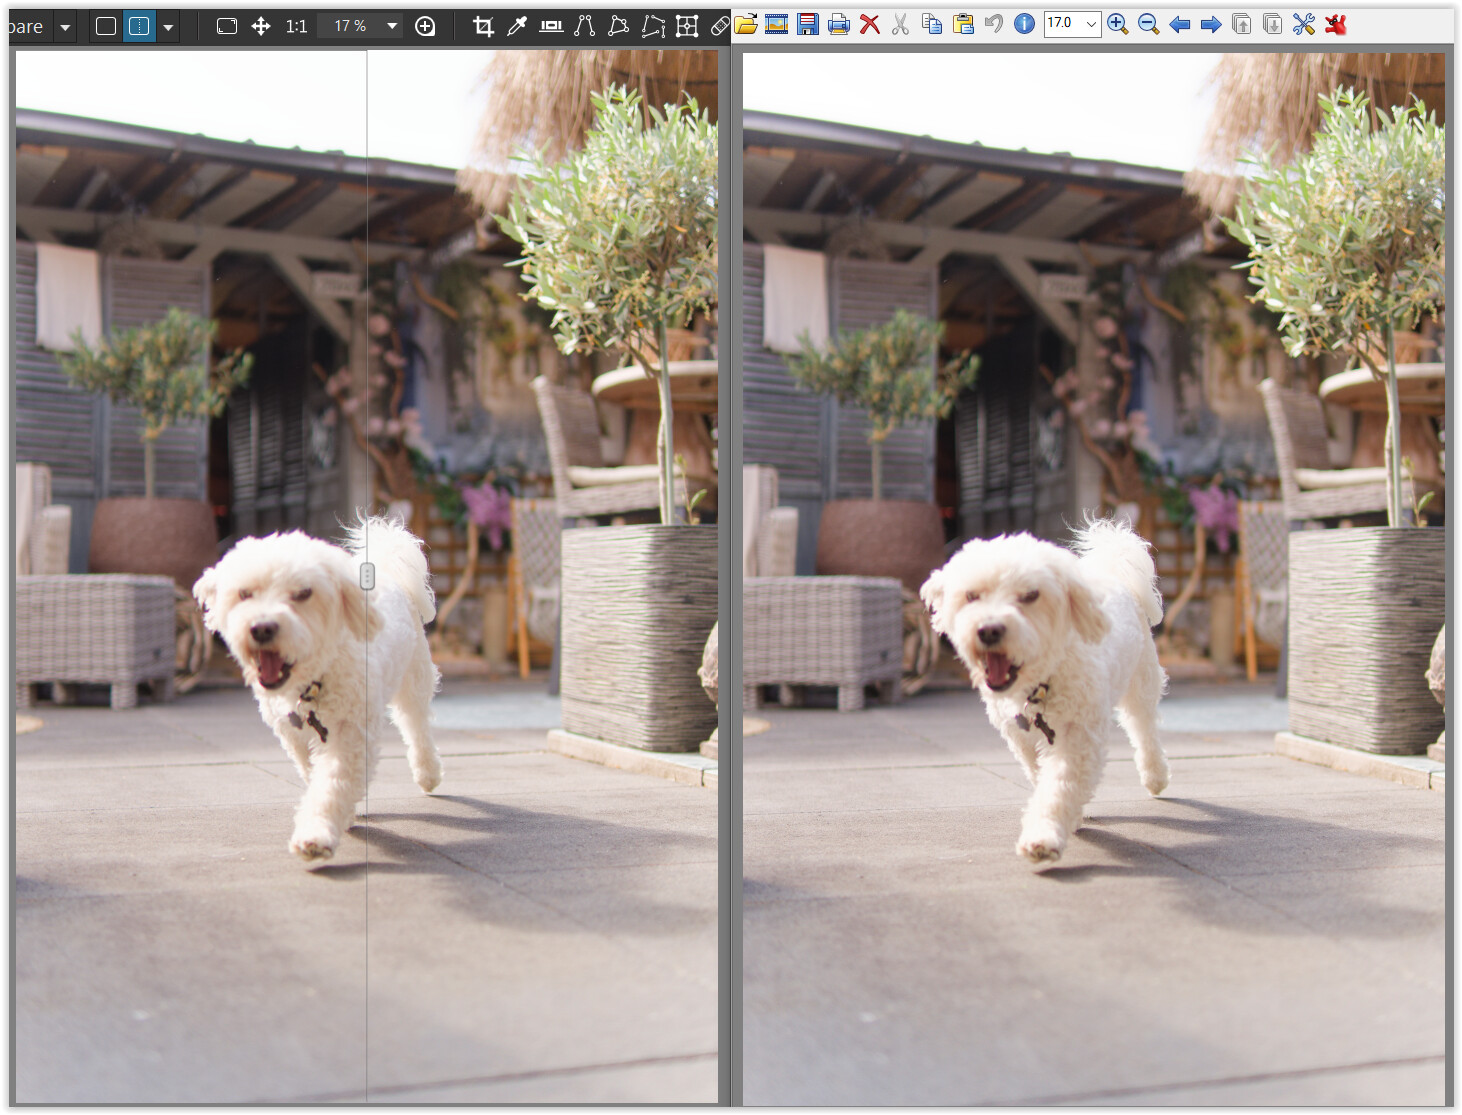
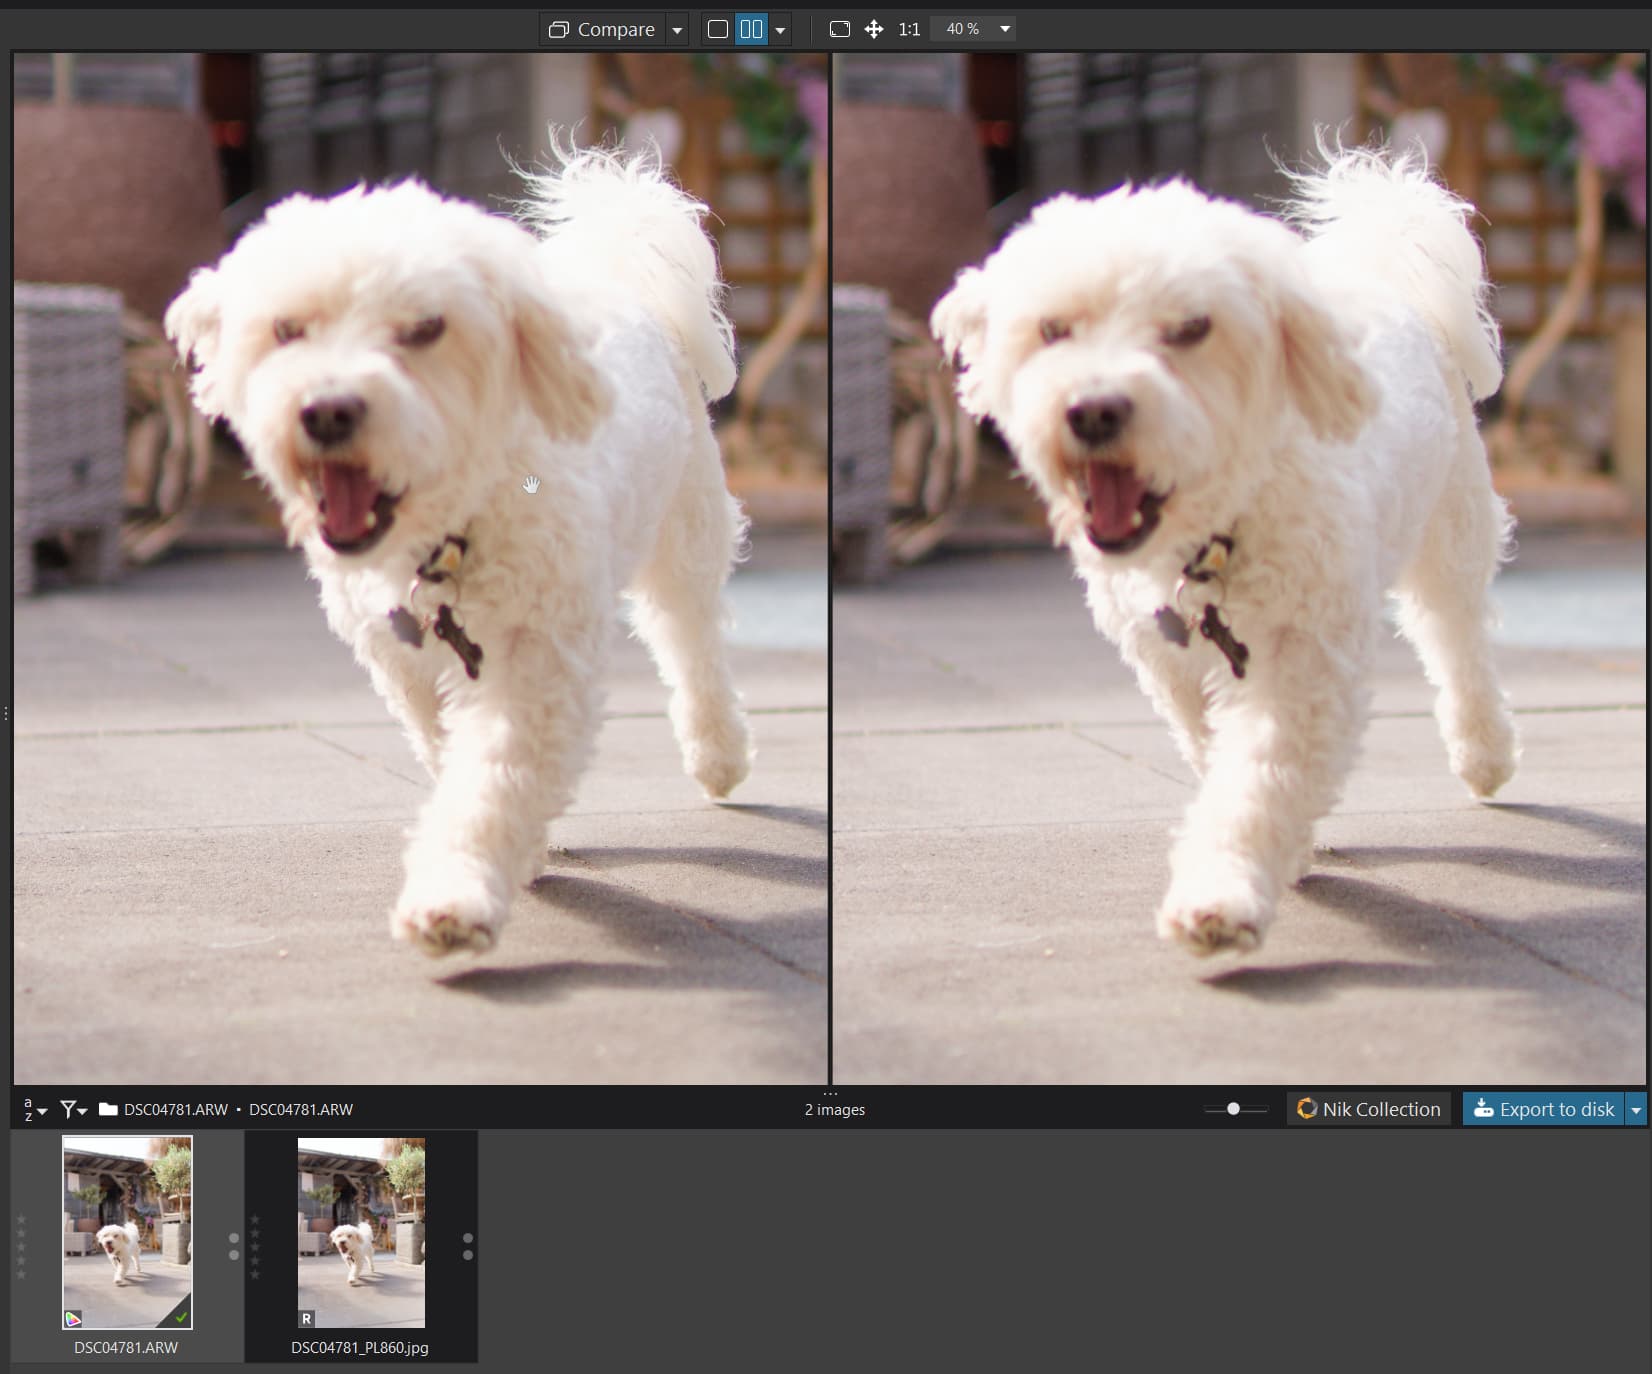
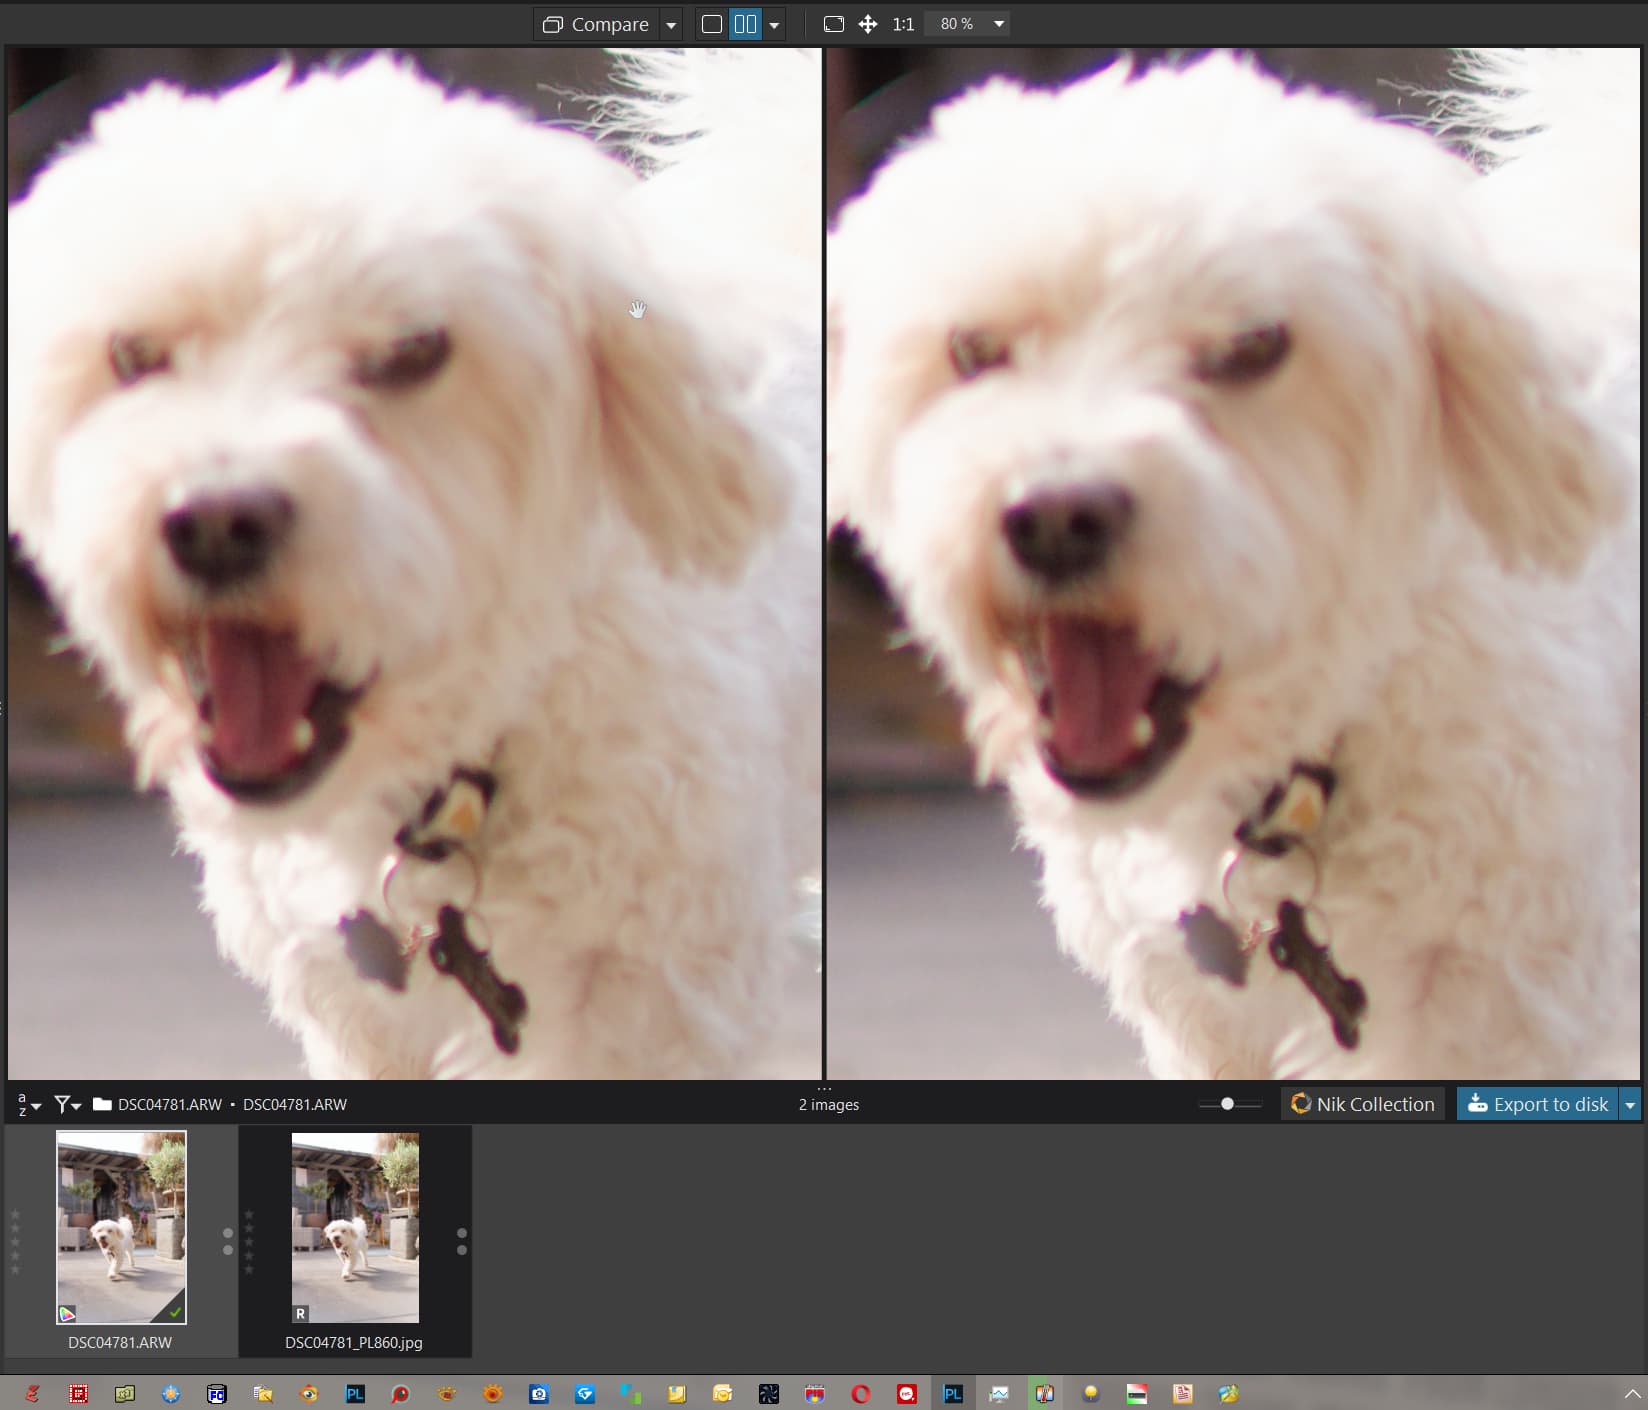
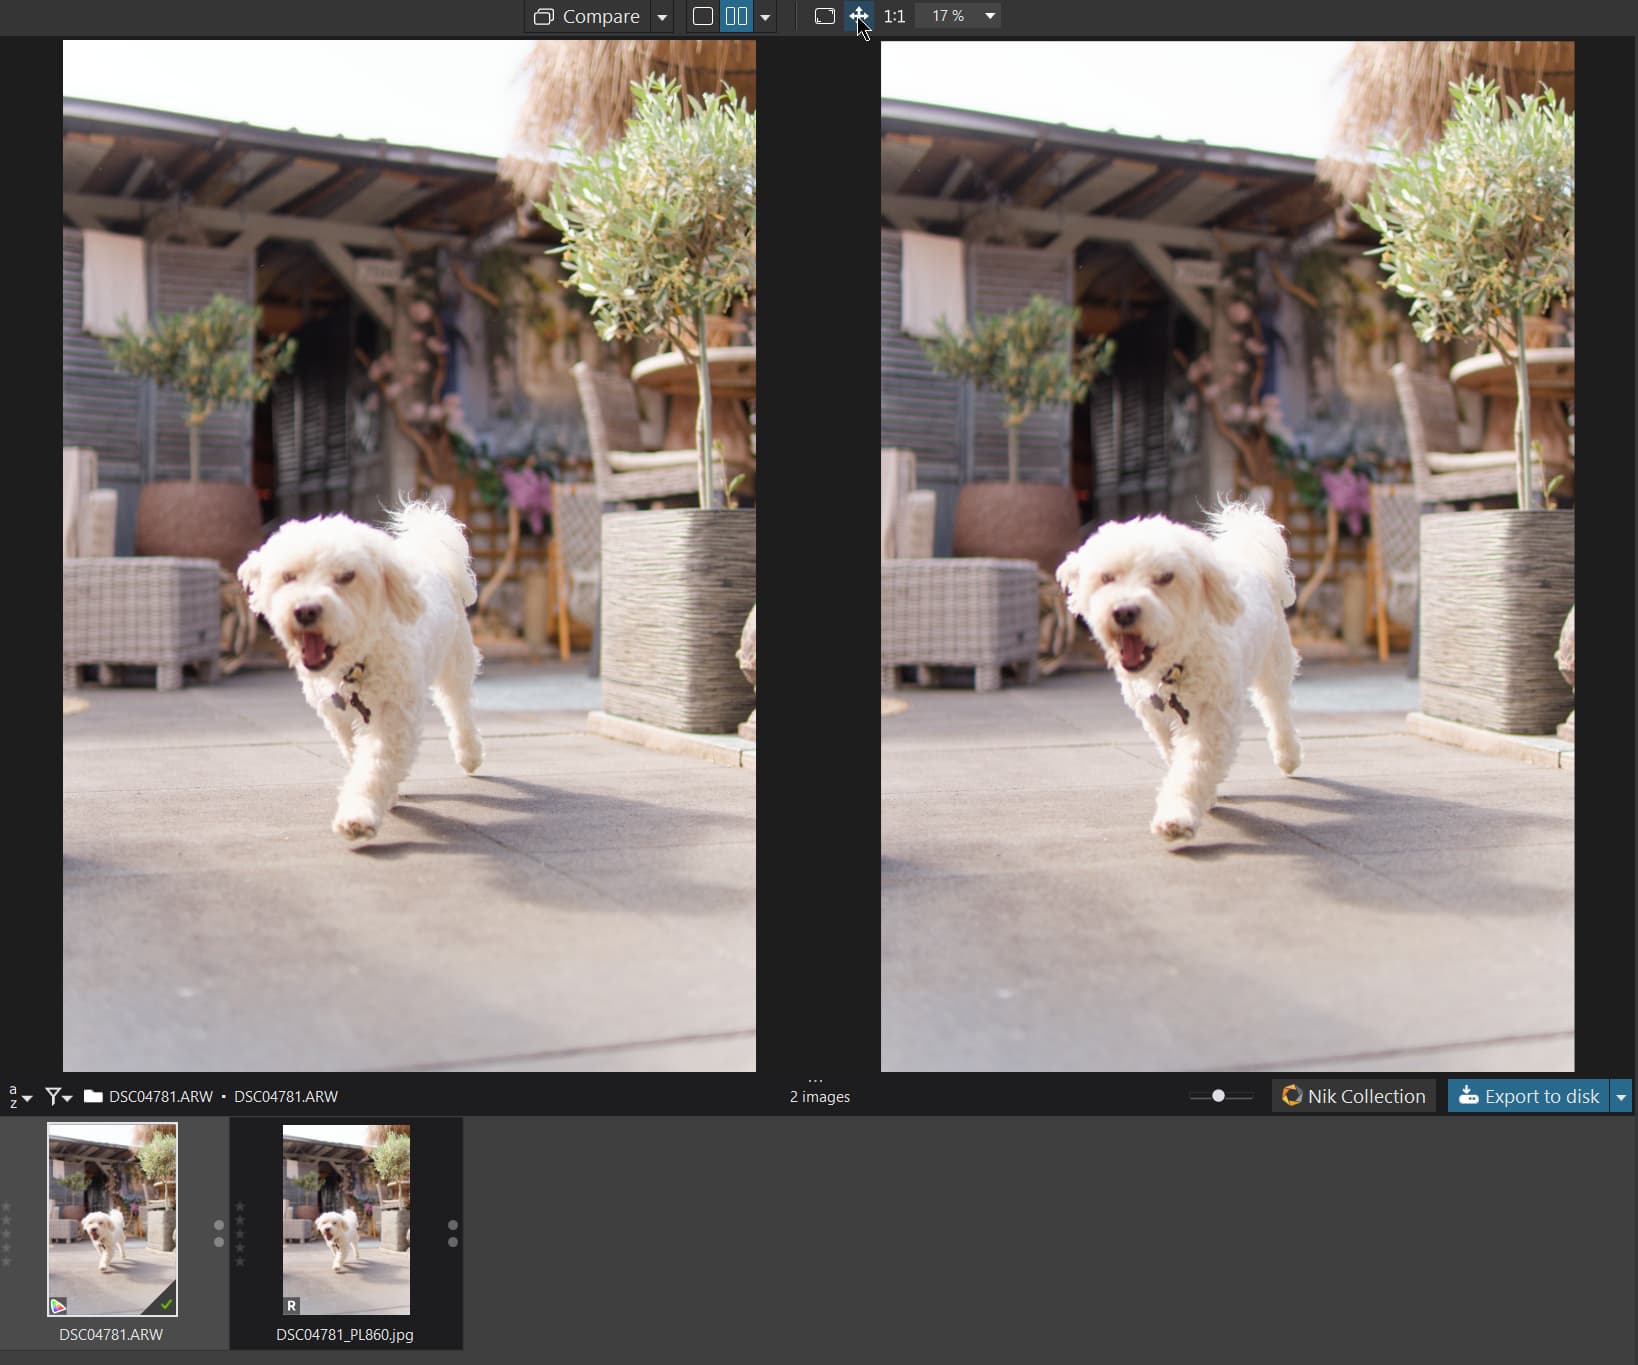
@Wolfgang As you know I am no master of colour but I can load an image successfully and export, to the same directory, not my usual strategy but in this case I wanted the output as a ‘Reference’ image and it is convenient if it is easily located!
So here is the comparison with edited RAW on the left and exported JPG as Reference on the right at 40%, 80% and 17% (fit to screen) and with all options off
PS:- @Cookiejar Please repeat the experiment of exporting the JPG and then making it the Reference image and doing the comparisons that I did. If they both show the same and as you showed in the left image of the snapshots in Post 1 then Colour gurus already posting to this topic may be able to help resolve your PhotoLab setup up issues!?
Thanks all for the responses! I tried to respond earlier but it said wait 24 hours before posting again.
@George My screen is calibrated but it isn’t my screen, other exports from RAW editing programs are fine in the same viewer.
@Joanna How do I change the FilmPack Filter? I don’t think I’ve actually done anything to tweak this. I just launched DXO for the first time.
And as for the soft proofing… I tried with and without soft proofing. I experimented with all the settings, couldn’t get it figured out.
Thanks for testing this through for me. I really don’t know… I might re-install DXO Photo Lab 8 and see if that fixes my issue. I just don’t think I’ve tweaked any settings at all. I just installed it and went to work in it.