Editing high dynamic range images in PhotoLab 5

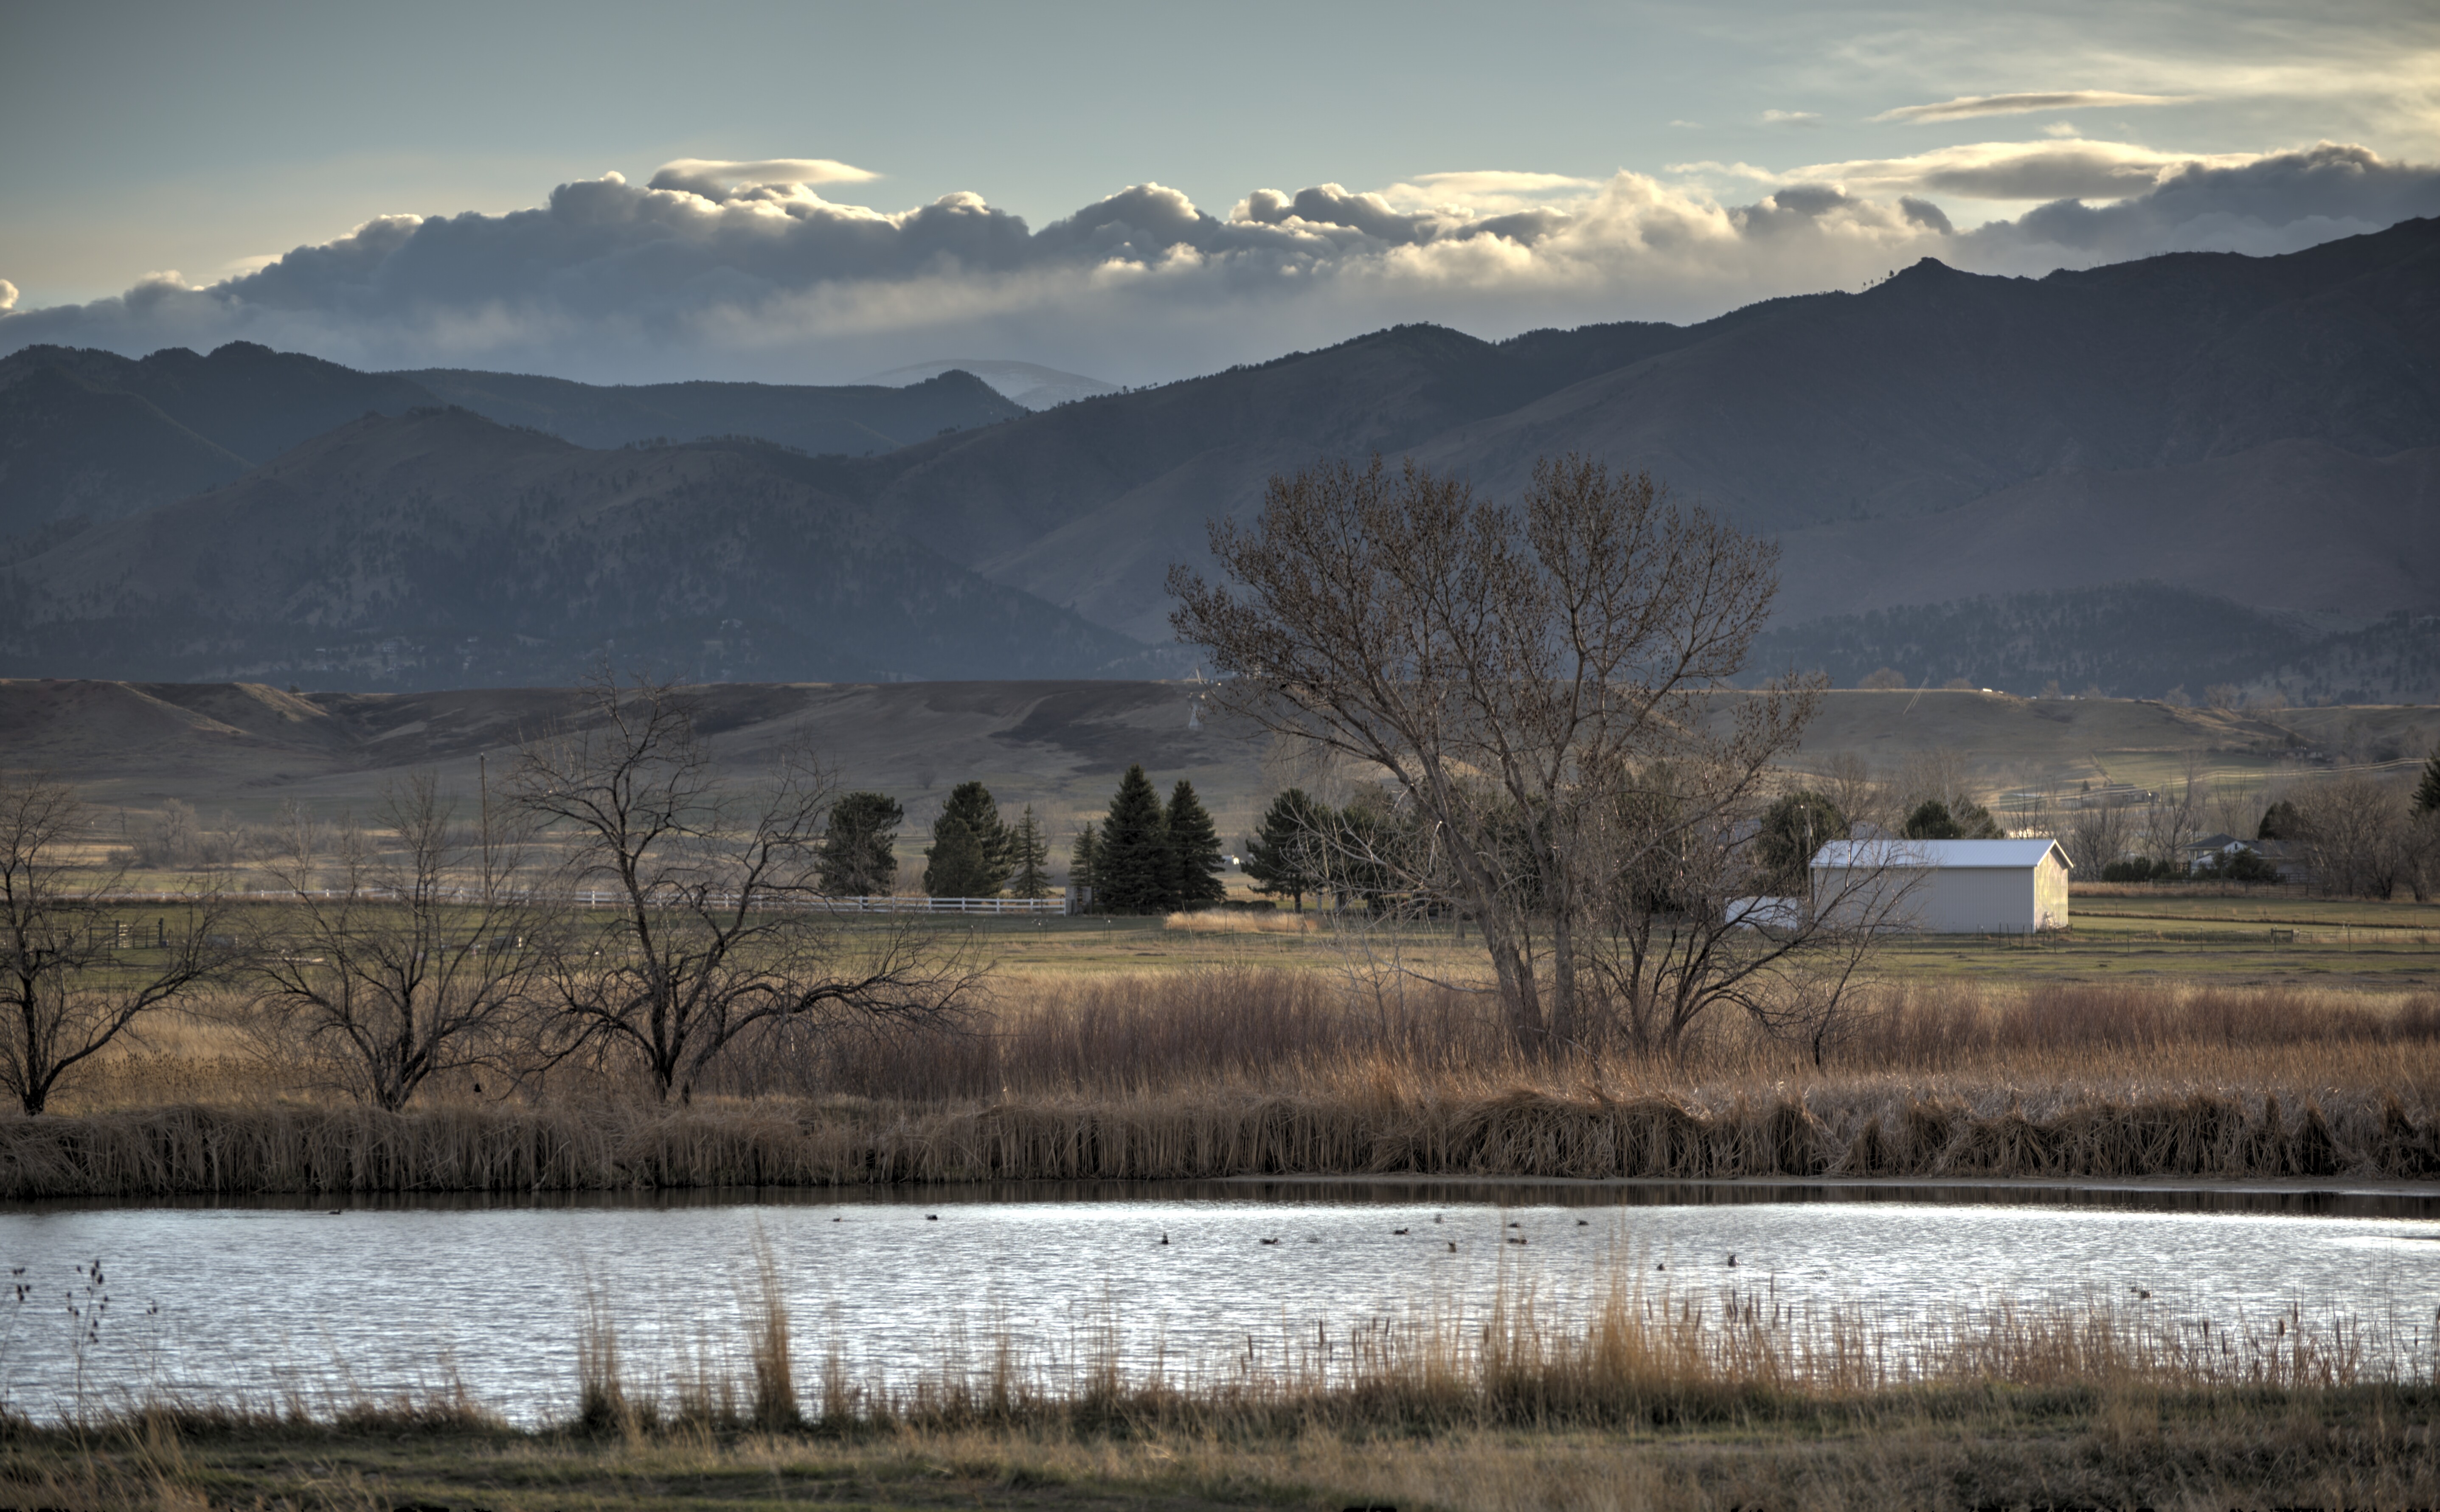
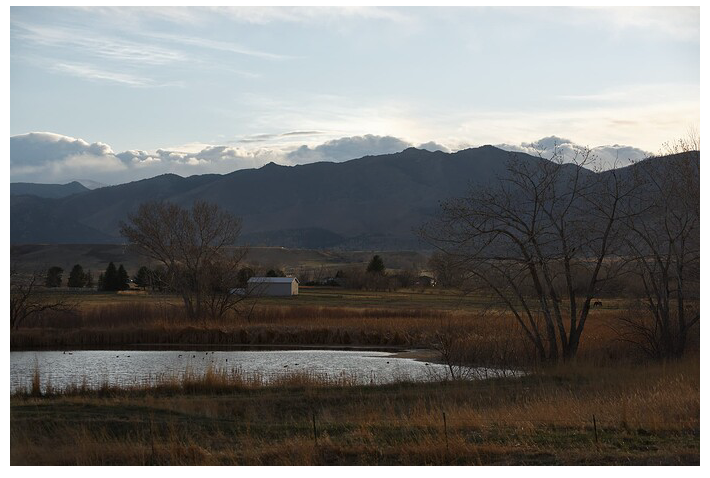
I’ll start with this one. Along with Susie VanSickle, we went to one end of their property about half an hour before sundown. We both were going to take photos of the sunset. I didn’t like what I saw, and got bored, as the sunset looked nothing like what I’m used to - hardly any color. I glanced to the left, and saw this beautiful scene.

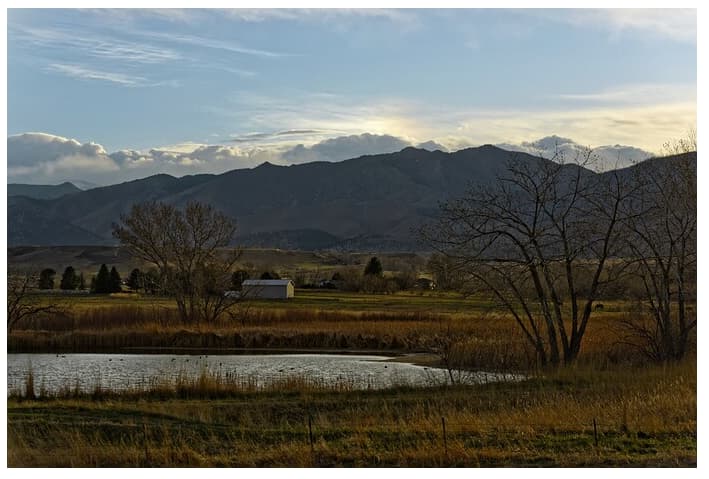
This was with the 300mm lens on my D750. It was taken from their tree house, hand-held. I zoomed it in and out until I got a nice composition, then started taking a series of bracketed photos, 7 images for each “shot”. Later, looking over the images, I didn’t like what I saw, but picked the best set of images and edited it in Photomatix Pro 6. The resulting image amazed me!! I never expected anything so nice. It isn’t razor sharp fully zoomed in - I’ve got lots more series of images to review, and maybe one of them will be sharper. I wish I had my own (newer) 300mm lens with me - I guess next visit I’ll bring it.

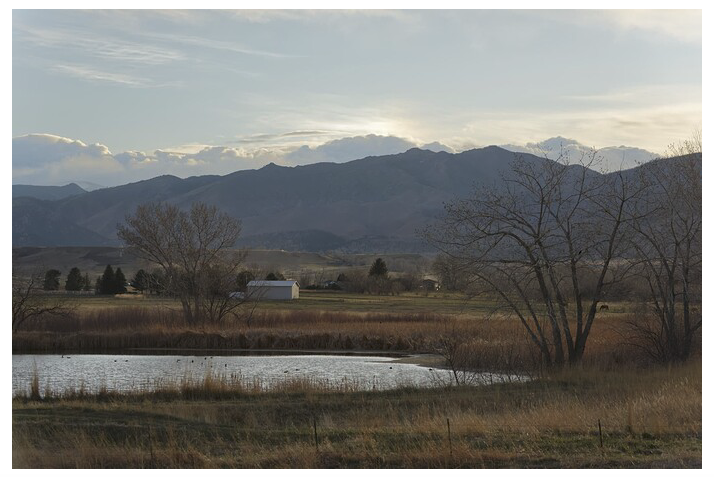
It’s no longer a ‘raw’ image, as Photomatix combined all my raw images and I let it create an HDR ‘jpg’ image for the final result. I intended to feed that image into PhotoLab, to fine tune it a little, but I liked it so much, I left it alone. I might still edit it a little, but to be honest, I don’t know where to start. Here’s the result.

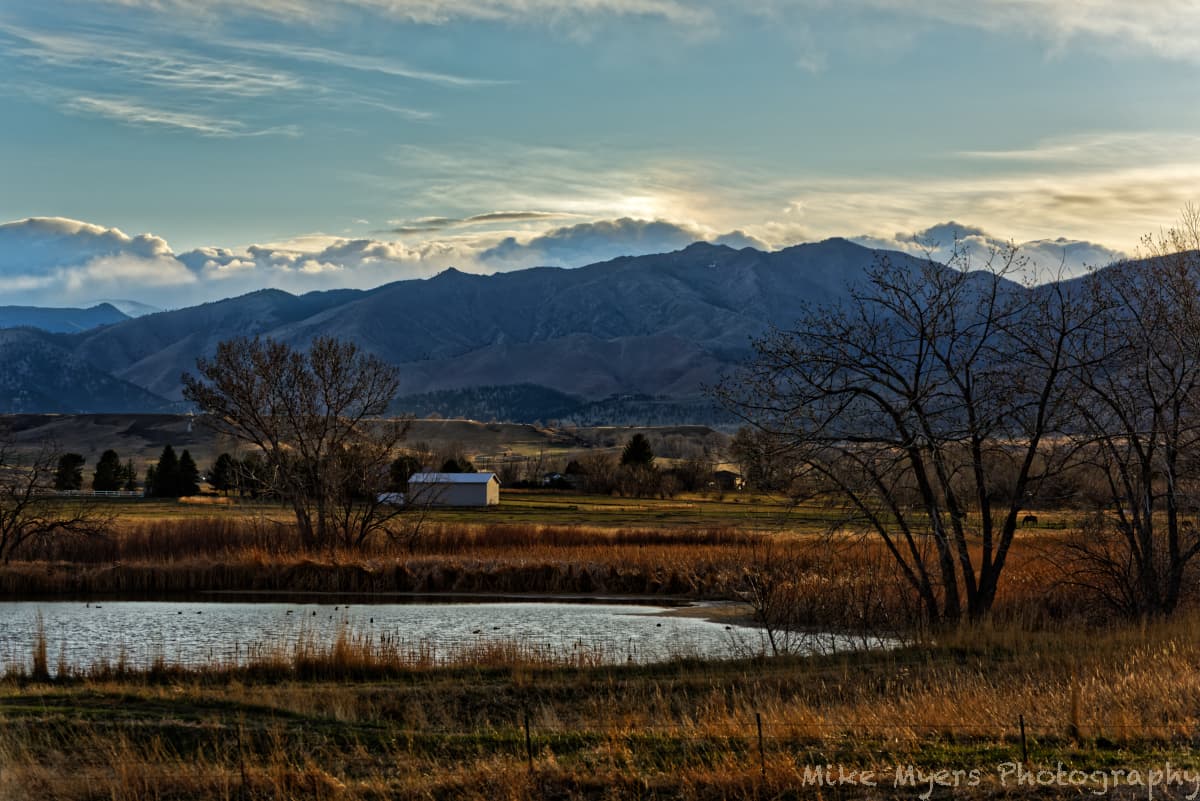
The long lens compressed it in a way that makes it look “un-real”. All that depth is compressed to what looks like a “flat” image. I think that is part of why I like it so much. I guess I ought to add my watermark, but haven’t even done that yet. PhotoLab has sharpening tools, that may help. People tell me how amazing this image is, and it might be my favorite image from the whole trip… until I view it at 100% size.

Mike, how about posting one of the RAWs, preferably one at about -1EV, so we can see what we can do with it.

Sure:

MM2_1089 | 2022-04-23.nef (26.9 MB)

Got it. Thanks. :smiley:

I will try to find a sharper image - they can’t all be this blurry…

MM2_1082 | 2022-04-23.nef (26.7 MB)

Similar, but zoomed out a bit, and perhaps a tad sharper - except for the weeds at the bottom which are out of focus.

I went back to the image I sent you, and tried to edit it in PL5 with the tools I know best. Not sure how to do things, as it was getting dark, so the image should be dark, at least a little. This is the best I could do. I actually do like it more than the HDR image, but it needs a bit more “punch”.

MM2_1089 | 2022-04-23.nef.dop (12.7 KB)

It’s more realistic than my HDR, but maybe it’s still too dark, especially if it’s surrounded by white on my display… The sky was quite bright, as I was shooting into the sun, and the reflection of the sky in the water is (and was) bright, and the dark areas are probably more “real” than if I lightened them up.

Nicely exposed shot, does not need much imo.
MM2_1082 | 2022-04-23.nef.dop (15.0 KB)

I’d not use too much micro/fine contrast or sharpening, it would ruin the mood. And while the foreground looks dark and felt brighter when you looked at it, I’d not overly brighten it.

Remember that our eyes automatically adjust to the brightness of whatever we look at, which will even out what we remember as overall dynamic range. Landscapes melt away in the distance, they loose detail and saturation. No need to counteract nature imo.

Here’s an export of my version…

Amongst other things, whilst applying a Control Line to the sky to increase the detail, I found a beautiful ice crystal type halo in the sky about ⅔ of the way across.

@platypus version plus mine in the same DOP…

MM2_1082 | 2022-04-23.nef.dop (31,6 Ko)

1 Like

Here is my take. I don’t think that the HDR treatment was needed.

I’m not including a DOP file because I always work from a DNG with NR and optical corrections already applied.

Totally agreed. with a well exposed RAW image with 14+stops range, I don’t see the point

1 Like

I’m a little confused, but that is a good thing. It’s now Monday morning, and I woke up thinking about this in the middle of the night…

My thoughts:

First, you are all correct - there was no need for the HDR, and while I liked that result, I prefer the images coming from PhotoLab. Photomatix did strange things, emphasizing the border between lighter and darker parts of the image, that were not real - the color of the mountains got lighter as I looked lower, to emphasize the difference between the next “lower” layer. I noticed this before and wondered about it, but starting with the photo from @rrblint it’s now obvious to me that the Photomatix result is not “real”, regardless of how nice it might look.

My version using PL5 may be closest to what I remember seeing, because of all the glare from the sun setting just a little to the right, but as a photo it looks far too dark. I far prefer Mark’s photo, where the foreground is “darker” but not “too dark”.

I uploaded two different “views”, taken at different times, and while I liked my original version, with the pond going all the way across the screen, I prefer what @rrblint did with the other image I uploaded, with the pond going only partly across. I apparently zoomed out a little, so there is more sky in the photo, and I love the way he made the sky so beautiful. (For that version, I uploaded the original image as recorded by the camera, no processing.)

@Joanna - I am confused. The hills in the background have much more detail in the version from @rrblint and I love the way his version has so much “gold” in the nearby grass. I like his clouds more too - maybe it was the contrast settings? I’m now searching for the ice crystal type halo in the sky - I may have found it, without recognizing anything special about it. Can you bring out the detail in the side of the mountain that is so much more clear in Mark’s photo?

I think I learned a lot. I think bracketing was a good thing, as I wasn’t sure of the exposure, but from now on I’ll forget about Photomatix. PL5 not only eliminates the need for the HDR software, but it created a better end result.

Time for me to re-do my own version.

1 Like

Nice. I was wondering aboutinclreasing the vibrance/saturation globally but I wanted to take it gently so as not to upset Mike too much :wink:

However, here’s a version without any saturation or vibrance, instead just using my favourite reversal film for landscape work, Fuji Velvia 100.

BTW, I see you also found the ice crystals :blush:

1 Like

Please DO upset me as much as you wish. I won’t jump out my window or anything. :slight_smile:

I just put your version next to Mark’s version, and why I don’t (yet) understand why, I greatly prefer his version. The front side of the mountain has more “texture”, the vegetation has a “golden” color, and while your clouds may be more realistic, his clouds remind me of what I actually saw as I was standing there.

Ive seen by pixa photo a stuning result of HDR artistic in presets.
So you could create presets to create instand HDR.
Make high key and low key settings in two partial presets and your in.

my take – trying to keep the soft light


VC3 → MM2_1082 2022-04-23.nef.dop (409,3 KB)

1 Like

Screen Captures:

@platypus

@Joanna

@rrblint

@Wolfgang

All of the above are beautiful in their own way, but my criteria for “best” includes a pretty sky, show all the detail on the front side of the mountains and make the grass/weeds look beautiful, as they are illuminated by this lovely yellowish/goldish light from the sunset. The only one that does this best, to my eyes, is the third image from the top created by Mark. I like the sky and grass/weeds by Joanna, but all the lovely detail in the mountain is gone.

Mark - can you please either post the .dop file, or explain how you did this?

I prefer this view to my original view, as the pond has an “end”, but I want the sky, mountains and “grass/weeds” (not sure what to call it…).

Using all the above ideas and images for a guide, here is my attempt at this, doing what I think I’ve learned, and making the end result look like a “postcard”.

MM2_1082 | 2022-04-23.nef (26.7 MB)
MM2_1082 | 2022-04-23.nef.dop (18.4 KB)

1 Like

Here you go Mike. I included two DOP files. If you want to reproduce the edit from scratch you must use the “.nef.dop” file with the original NEF file and export to DNG using the option “Export with lens corrections and NR only” then the other DOP file labelled “.nef.dng.dop” with the DNG file produced. That should get you there.

MM2_1082 _ 2022-04-23_DxO.dng.zip (6.6 KB)

…illustration?

1 Like