This “slowdown” is something I regularly experience and dislike intensely.
The lack of customisable radial gradients (ala LR) makes some simple tasks take longer.
Photolabs control points bizarrely do not stop at the border of their indicated circumference. This prompts issues with your image or a lengthy process of drawing in negative areas to block off the border of the gradient manually. The border of any mask should end where that mask ends. Or else, what’s the point of the border?!
The automask brush seldom works for me. It’s not nearly as intelligent as LRs subject selection, and (continuing the theme of frustration) I find myself deleting it when I try it, and using Control Points (with luma/chroma increased) instead.
Then there’s the lack of local curve control and various other tweaks that are available globally.
Sorry for the rant, but as much as Photolab has some powerful tools at its disposal - especially its sharpening and noise reduction - some functions lag behind or are set up counter-intuitively (and have been since around Photolab 5).
I suffered slowdowns and crashes when making many brush/erasure strokes to fix details on luminosity masks and on some auto masks. I submitted a service request documenting the issue(s) and after a few weeks received an unreleased “test version” that worked. Yesterday, I received an email stating the updates are now included in the latest version. (see above).
Ranting here may help let off steam, but submitting a ticket documenting your issue is the way to get support.
As for the quality of masking tools, I agree with Andy Hutchinson’s video.
I watched Andy’s video and I did learn some tips, but I also had some of my own photos in mind that would be much more difficult to manage in PhotoLab.
Honestly, the worst part of auto-masking, because it happens most often, is dealing with slender features on birds — single primary feathers jutting into the background or feet. The constant need to change zoom and brush sizes and the inability to set brush size by keyboard make it a chore.
In Lightroom, [ and ] change the size, even while you continue a brush stroke, and Shift-[ and Shift-] change the feathering. I also like the feature in LR when using manual brushing to augment a (in fact any) mask, you can hold Alt/Option to negate the brush and it only erases from the brush strokes in the mask component you’re working on. This makes it easy to brush in feathers that AI missed because you can go over the edges in one direction and instantly correct from the other (no need to progressively shrink the brush). Even if you completely stuff up, you only need to remove that small set of brushing.
What caught my attention:
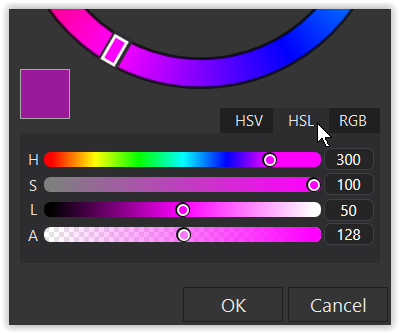
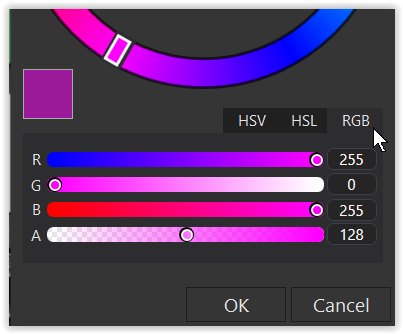
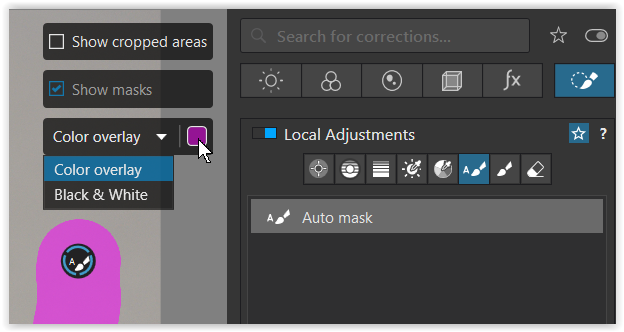
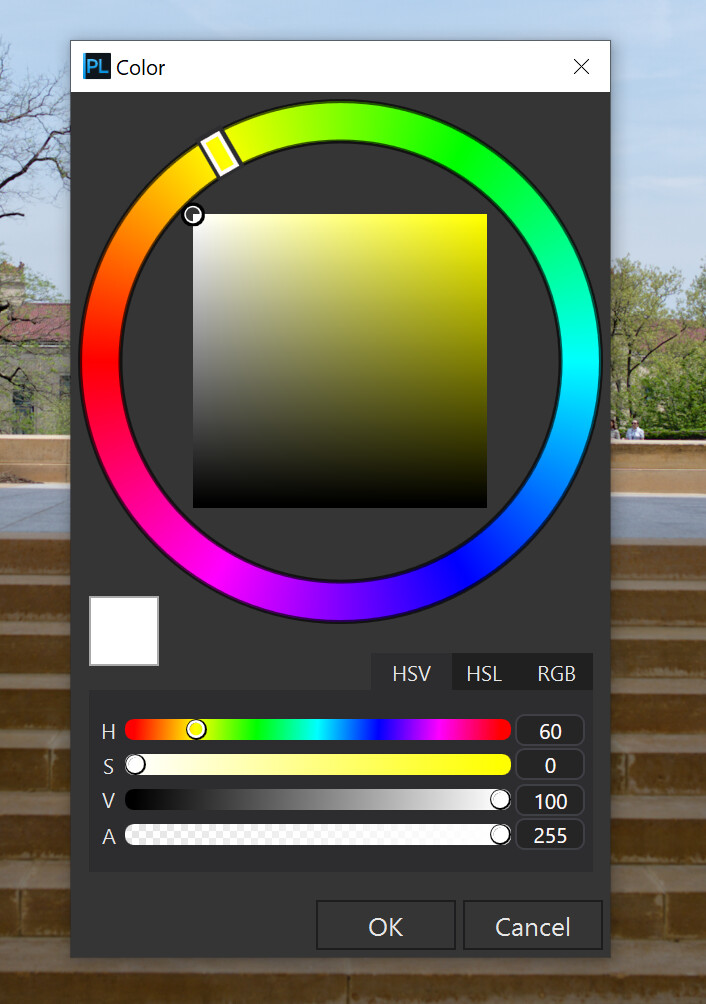
In his demonstration(s), he uses a solid color for masking (–> Auto Mask), which then naturally covers the object being masked. To make the object’s edges more visible, he reduces the masking color using the opacity slider, which then needs to be reset to, say, 100%.
Alternatively, one can try adjusting the mask’s opacity in advance.
Example:
My primary subject is birds too, so understand the mask cleanup required.
While struggling at first, PL’s method of 'Cmd-scroll" for mask size and “Opt-scroll” has become muscle memory for me with fewer keys to target with my opposite hand. I guess I’ve been “converted”.
And one other way to consider is to crank up/down the exposure to an excessive amount as an alternate to the mask. This helps me with Automask since the “edge” is not shown.
He points out problems in LR but you may come across them also in recent Affinity Photo or Capture One “AI masking” – speaking from my own practice. Sharp mask edges can make corrections look completely wrong and unnatural, e.g on the hair or cheeks boundaries. You have to soften those AI mask edges anyway, which takes time and defeats the speed rationale. The trees example in Andy’s video is also typical, perhaps even more driving you away from the current level of AI masking IQ.
Background: In general I do local corrections only in obvious cases and I’m somewhat against such interventions. If you spend too much time on editing the photo, which is usually the case with masking, you forget photo’s initial virtues and your primary goals, hunting for local details only (brain adaptation problem, or whatever is the proper name for that). On the next day your impression may be not that good.
EDIT: It might be a different story with some professional graphics editors, who managed to cope with that “adaptation problem” you get while editing for too long.
On the other hand, some AI-based tools, or rather tuned by Machine Learning are quite useful, like DxO DeepPRIME, or recent initial version of C1 Blemishes Removal, which can produce quite natural results. There should also be already some usable “AI” tools to tame various types of wrinkles, but what I’ve tried either required too much additional manual work, produced gelly-like images, or introduced too many other artifacts to be acceptable. Certainly things for DxO to consider. Any thoughts on that?
In his demonstrations, @andy_hutchinson used a solid color for masking and adjusted the mask’s opacity in the LA. However, you can adjust the mask’s opacity in advance, saving you the trouble of remembering to readjust the LA’s opacity (not a criticism – just another tip).
What exactly do you mean by ‘without notification’? Availability of new versions automatically pops up when you start the programs. Unless you are specifically using the stand-alone versions of FilmPack and ViewPoint you don’t have to update either of them. If you are using one or both of them only from within PhotoLab then all you need to do is update to the most current version of PhotoLab. The most current version of PhotoLab went from 8.7.0 to 8.7.1. Very minor updates rarely warrant a special announcement.
I’ve just launched the standalone version of VP5 and got an alert about a new version being available (which I’ve now installed). I also launched PL8.7.0 and didn’t get any alert about 8.7.1. The Help / Check for update… menu item did notify that 8.7.1 was available.
When I launched PhotoLab I got an update notification for 8.7.1. By any chance had it been a while since you last started PhotoLab? If so, could it have been 37 days or longer?
I meant exactly as what I said. I use both versions of the programs. Use them outside of photo lab and also within photo lab’s Jolie Joe Joe the. I had not been notified that they had been updated and I assumed that anybody else who uses them the same way would not have been notified. Both filmpack and viewpoint have both been registered within photo lab.