Why is everybody choosing for a rather underexposed image?
Just the saturiation=0.

George
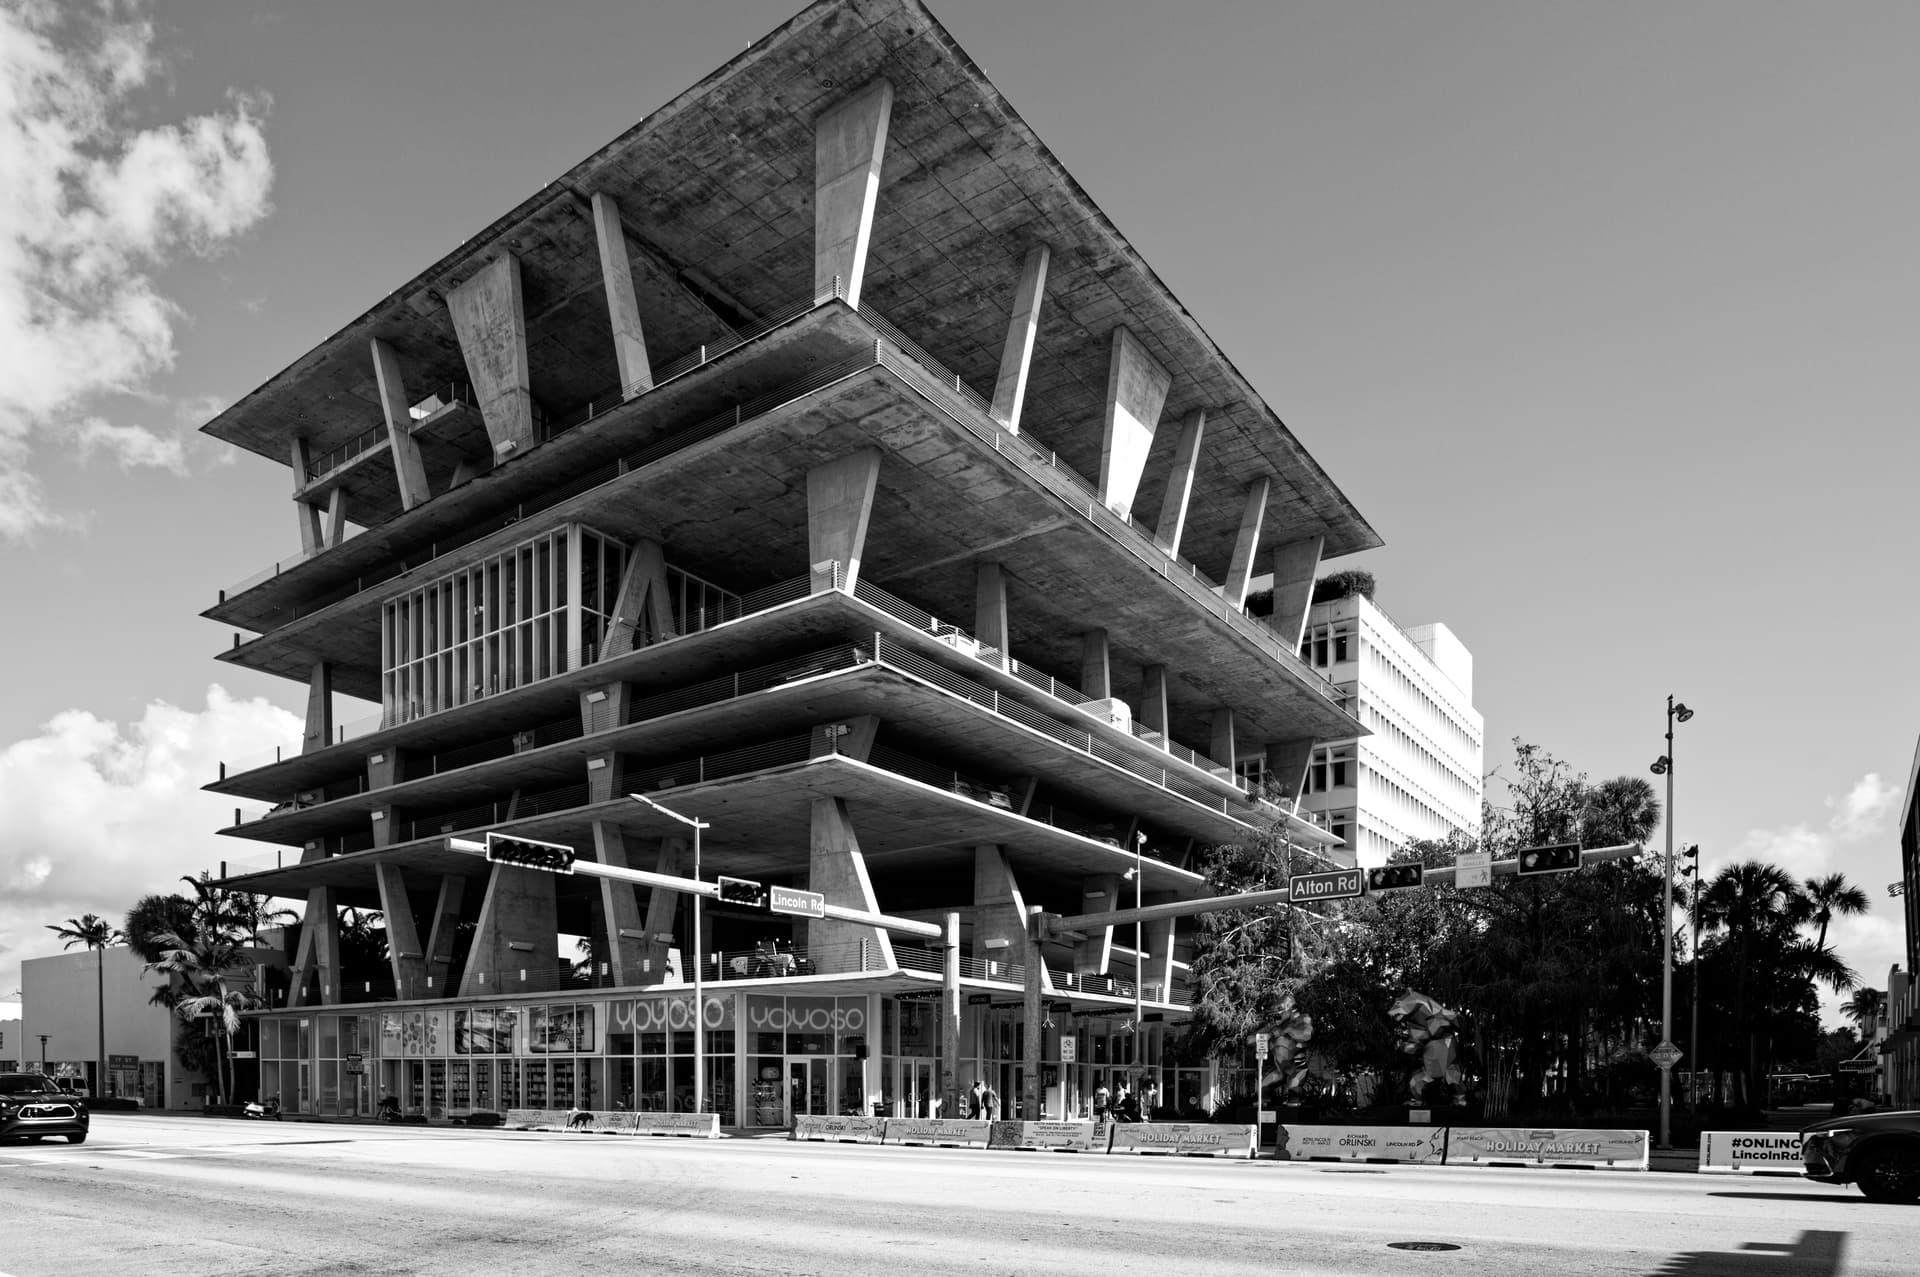
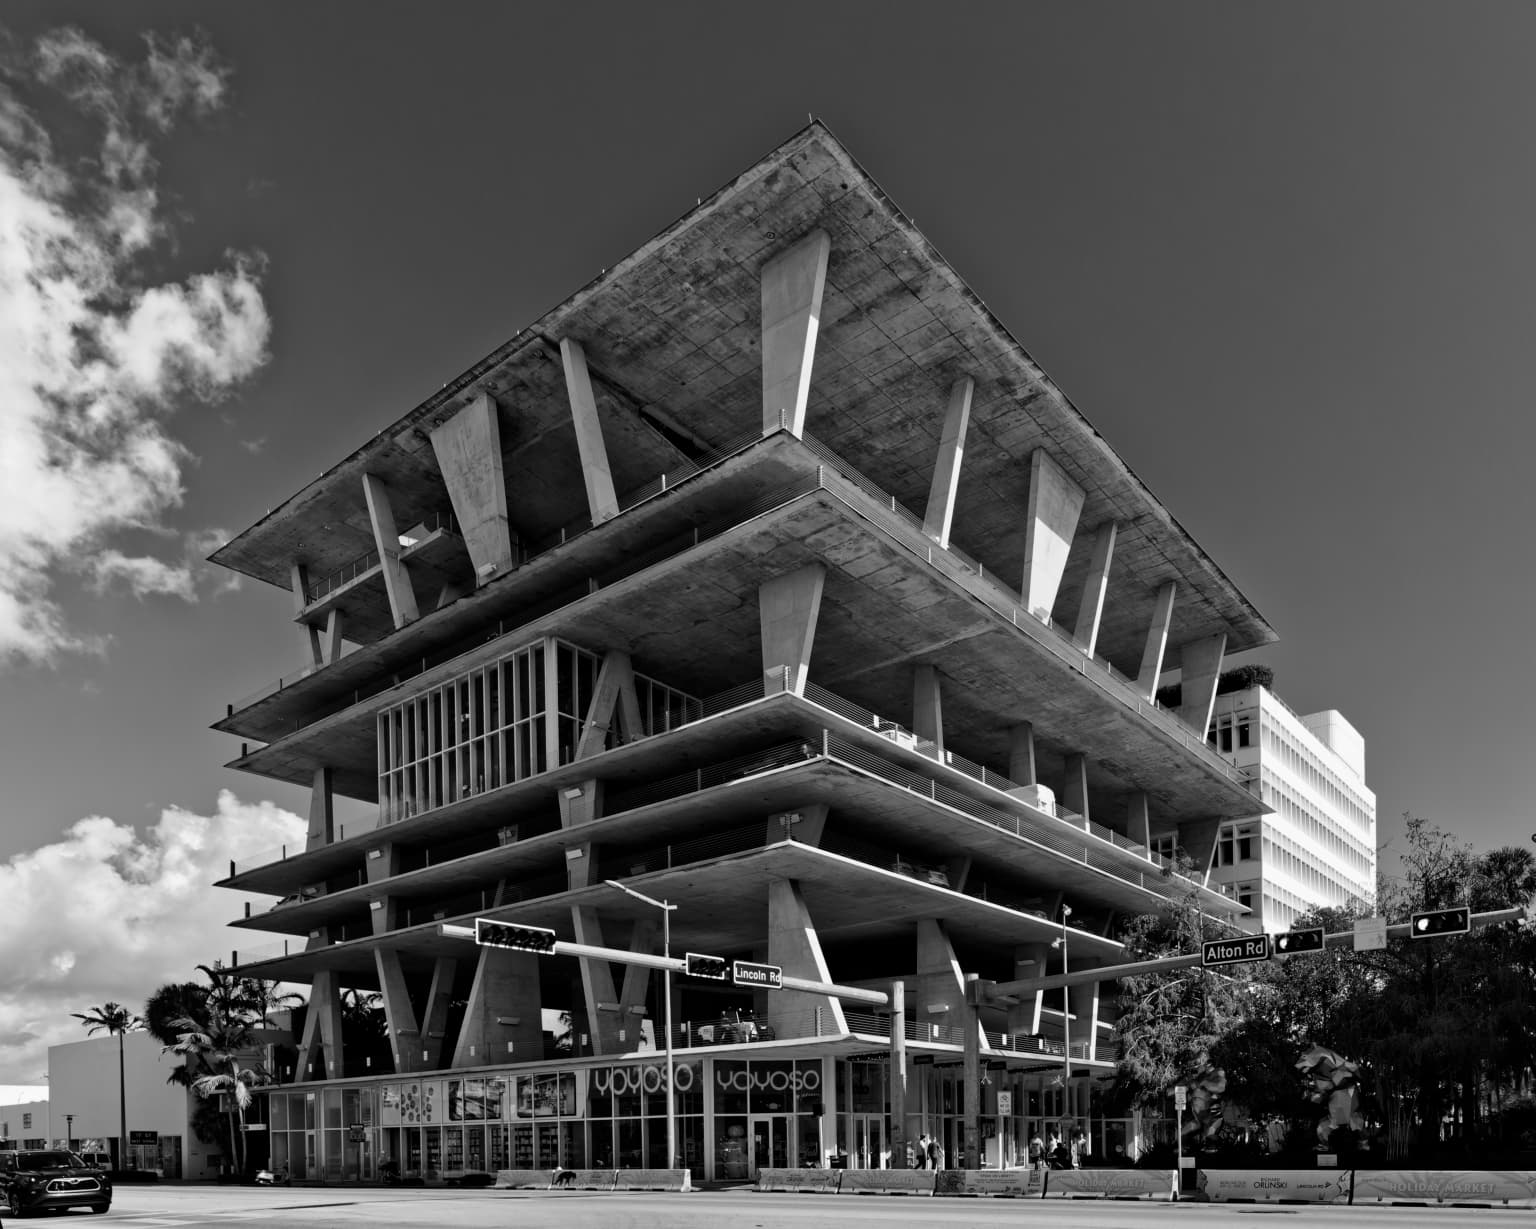
This is only my opinion of course, but my answer is that your version, although well exposed, is not as interesting to look at, in part because it lacks the essential balance of light and shadow of a good monochrome image. To me it seems more like a desaturated color image. As a side note you also didn’t correct for perspective distortion which is an important factor in the success of the earlier versions. The shape of the main subject is completely different and is no longer imposing or interesting.
Mark
I just wanted to say that I find the others, or most, much to dark.
A corrected one. I did no additional cropping.But it is essential still desaturating.
George
Hi, thanks for the excellent link ![]()
At the moment my favourite is the one with NIKSEP by Wolfgang, because I like the tonality, the visible details in the dark areas, and the cloud effect. there are a lot of photos, also mine, where the little clouds at the right sight are not visible.
And as so often, art is in the eye of the beholder ![]()
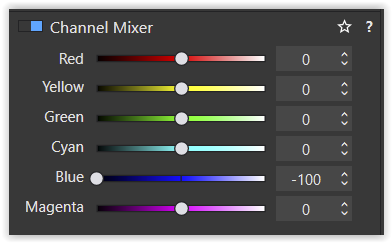
Mike, that is your misconception. – Apply the screenshot settings to check. The clouds on the LHS are about the same brightness.
But you applied
and affected the upper cloud disproportionately – instead to treat the road separately.
The colour version (screenshot) is more balanced than your attempt *)
to have a better starting point for the next step, the B&W conversion.

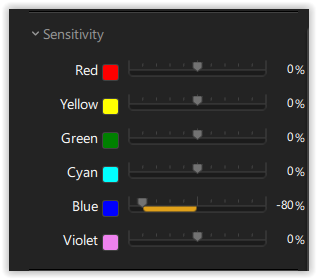
*) take out the B&W film rendering to see
**) or desaturate w/ HSL tool … → post #126 (Platypus)
… 
Anyway, I used the white clouds and the overly bright building on the RHS to ‘frame’ the garage.
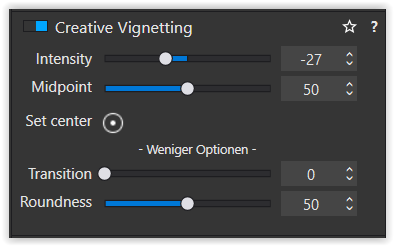
Got it!!! I hadn’t checked for creative vignetting in @mikemyers adjustments. No wonder those clouds were so flat.
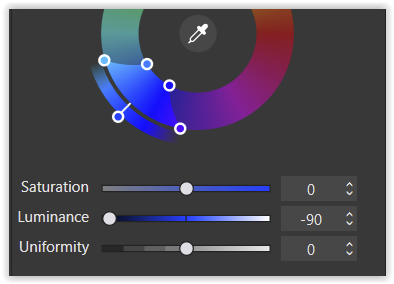
As I said earlier, I was trying to avoid doing anything outside of PL and, after your hint on that, I found a Control Point with a Luma selectivity of 65 gave me exactly what I was hoping for.
780_0250 | 2022-12-14.nef.dop (34,3 Ko)
Because a B&W image is not simply a desaturated colour image.
A good B&W image needs to be constructed differently, taking into account things like shadows, patterns, textures, and lines, not to mention that some tones of some colours can be rendered with exactly the same shade of grey as a different tone of another colour, thus removing any apparent distinction.
In a word - No! Much better to play with the excellent image you captured, to learn how to make it “perfect”
Lighting from behind will not only lighten the left side of the building, it will also remove a lot of the contrast which is so necessary to making a good B&W image “zing” like we have shown you.
When it comes to B&W, side lighting is definitely your friend.
that’s the point – not just looking at any version(s) and … pfff
To reinforce that, Helen has edited and re-edited her Moonrise over Tréduder image around a couple of dozen times, printing it at A3+, at least 9 times and sometimes leaving it for days before coming back and assessing whether it is right yet or not.
We think she has finally found what she wants, so we will be cranking up the Canon 1000 A2 printer and producing a larger print to hang on the wall.
correct… try to master a camera, to understand the basics of light, aperture, time, perspective, etc. and continuously improve, to be able to operate a program and not constantly hop like an excited frog after every hype.
The jumping I have at least since a few years discarded, the rest…I’m still practicing
![]()
![]()
![]()
to whom it may concern
I’m planning on going in the afternoon, when the sun will be lighting up the front of the building. The side should also be well lit. That might be technically better, but I rather like the side lighting I used.
I think this is now maybe my favorite image out of all the interpretations, but it loses something that the overly dark images show. I even like the things you put back in, that I had cropped out. Great, but the “impact” is less. It’s hard for me to explain. This exposure clearly shows off all the details better, but the “mystery” is gone.
Rightly or wrongly, I believe the camera doesn’t matter. Whether I used Nikon or Canon or Fuji or Leica or Sony, the camera SETTINGS are the most important. Or rephrased, I rarely use specialized camera specific settings. The other settings get me a good starting point (just like Ansel Adams) and what he did in his darkroom, I try to do in my computer.
Rephrased, @Joanna (to pick an example), once she was familiar with the camera, would probably end up with the same image here, as with any other camera. The camera just needs to have the necessary controls to achieve her goals.
Each camera has things it may do better, or easier, or with more control than other cameras. Some cameras can make larger prints than others (more megapixels?). Some lenses are “better” (read different) than others. Some have better/worse dynamic range, or more/less pixels, along with different viewfinders. Years ago, I thought this was all of extreme importance - not any longer.
In the Leica sites, they think the image “developer” is directly connected to the camera, and they should be considered together. I think that’s nuts. To me, the camera should simply create a raw image with all the necessary detail, so any good image processor, along with a person familiar with those tools, could create any desired effect.
For a perfect parking garage photo, I think a LF camera with the ability to raise the lens as needed, would have been an ideal starting point. I don’t think stretching the image in PhotoLab as if it was modeling clay is the right way to do this. I do have an old perspective control Nikon lens, and maybe I ought to try that - haven’t used it in decades.
With that one small change, I think what you wrote is the most important thing all of us need to do, especially myself.
Mastering a camera is just one small part of the whole.
…and even then, what do we need to “master” a camera?
exposure
focus
settings (some of them)
“film speed” (ISO or ASA)
My Nikon probably has hundreds of settings - and at the suggestion of Joanna, almost all of them are now set to do nothing, they are not allowed to change the image I am capturing. Everything is now set to MANUAL, and it is ME who needs to select the appropriate settings. …just like Ansel.
(What I just wrote is irrelevant if someone wants to capture a special type of photograph - then some of those settings I now ignore might be essential. Sports photographers, macro photography, sky photography, animal photography - they all benefit from modern technology.)
I completely agree, but I think many other people want “the latest and greatest”. I used to be that way too. I think most photographers think “I could do that too, if I only had…” until they eventually learn otherwise.
I understand this, but I still think the weakest thing in my photography is me, and with good feedback, I “want to do better next time”. Ansel was like Helen, or vice versa, as his images got re-edited over and over, changing to a new “style”. Sadly, I like his older edits more than the latest ones.
Sorry, it is NOT about your camera but how to in post
– and, you already left room for perspective corrections.
So, you feel it is just as good to correct the perspective in post processing, as it is to correct it in the camera by raising the lens?
What do you mean with “raising the lens”?
George
I didnn’t say THE Camara but a camera, and when you understand the basics then you are
with [quote=“mikemyers, post:135, topic:28492”]
the camera SETTINGS are the most important
[/quote], because you have to do this
But I think sometimes it’s better to be silent, which is what I’m going to do on this topic right now.
I believe that he means changing perspective by raising the angle of the lens.
Mark
View cameras have two standards. The rear standard contains the focusing screen and takes the film holder - the front standard holds the lens.
When both standards are vertical and aligned vertically centred, you get the same view as a “normal” camera.
But, because the camera is not vertically centred on the building, you tend to tilt the camera upwards and you get converging verticals, which is what the perspective control tools in PL can correct.
With a view camera, you can raise the centre of the lens standard above that of the rear standard and that then allows you to see the top of (some) buildings without tilting the camera.
Quick example…
http://licm.org.uk/livingImage/Lens_Movement-Rise_and_Fall.html