Camera Color Profiles in DxO PhotoLab8

In the last few years I have done very little photo editing; last used Lightroom Classic 6 and PhotoShop CS5. I need new software and I don’t want to go back to Adobe. I downloaded the trial and am about to purchase the DxO PhotoLab 8 for use with my Nikon D7500. It should work great for deNoising high ISO shots of the Aurora Borealis from an upcoming trip.

One thing I really liked with Lightroom was the ability to use the X-Rite ColorChecker and the software to generate a color profile for the camera in that lighting condition and apply it to the whole batch of photos. My version of ColorChecker includes the D7500.

A quick search indicates that DxO PhotoLab 8 can not use generated camera profiles. Is that true? Is there a work around?
Thanks for any help.
Allen

What kind of profile would that be??

George

If I understand your question correctly:
PhotoLab 8 Elite allows the creation of DCP profiles to apply a user-created color profile. Simply take a raw photo that includes one of the following color charts:

Calibrite ColorChecker Classic
Calibrite ColorChecker Passport Photo 2
Datacolor Spyder Checkr 24
Datacolor Spyder Checkr
Datacolor Spyder Checkr Photo 24
Datacolor Spyder Checkr Photo

The DCP profile created from the shot with the chart can be applied to all raw images taken under the same lighting conditions.

There’s no need to use external software; everything is done within PhotoLab. If you have an X-Rite chart, it is possible that it is identical to the Calibrite chart, and therefore directly usable.

1 Like

Thanks gerarto,
That is exactly what I wanted. X-Rite is now part of Calibrite . My X-Rite Passport looks exactly like yours except the name change and Classic added. It is nice that it is not an add-on purchase.

I see the dashed rectangle where PhotoLab identified the color chart. I assume that the small boxes within the individual color patches are what PhotoLab added to make the color match?

Thanks
Allen

I have an XRite Color Checker Passport and it works as described by @gerarto .

Because I am a newbie and for others like me; here are the steps I followed to use the DCP Profile from a ColorChecker:

  1. Open the Raw file in PhotoLab with Customize
  2. Make sure that NO Preset Corrections are used.
  3. In Color/B&W Rendering click the Icon next to Create Profile
  4. Chart Type window will pop up; then click the upper left corner of the color squares and drag to the lower right corner to release so that the small color squares are centered on the photo color patches…
  5. Click Save and apply; Name the DCP profile & save in a profiles folder.
  6. Under Color/B&W Rendering make sure that Type = DCP Profile is Selected and Rendering = Name you just saved.
  7. This profile can now be applied to one or many photos.

Extremely easy to do.

I would strongly suggest holding off purchasing PhotoLab 8 right now. PhotoLab 9 will probably be released in less than two months. if you purchase version 8 now you will have to spend a lot more money if you wish to upgrade to PhotoLab 9 when it is released. Of course, that assumes you will want any of the new features in PL 9, which is still an unknown.

Mark

1 Like

PhotoLab can create and apply DCP profiles. Find the respective instructions in the user guide. Read more about it here: Edit pictures with the Customize tab – PhotoLab

1 Like

@AllenCar heed @mwsilvers advice. Unless you intend to skip the upgrade to PL9, don’t buy PL8 now. DxO are notorious for being unsympathetic to users who buy the current version close to the release of the next version.

3 Likes

@mwsilvers & stuck, Thank you. It sounds like I should wait until I return in early October from my 25 day trip to Norway/Finland to make my DxO purchase. Before then I wont have anything new to edit except practice shots.

I have been putting in a lot of effort to understand the improvements in software tools; relearn my D7500 (bought a f2.8 11-16mm zoom) and learn my new S25Ultra for night sky video. Which ones do what better, etc. Comparing the strength/weaknesses of each. Evaluating which editing program to use.

@gerarto and Wolfgang corrected my misunderstanding about PhotoLab and color profiles (Google & ChatGPT were wrong or maybe I asked the question wrong). Their anaswer made me feel a lot better about DxO. So I should take my ColorChecker Passport with me on the trip and take a few shots of it each day. That way I can start with “correct” color and then try to make it look good.

This is a bucket list trip to see Auroras. I am spending 8 nights above the Arctic circle, so hopefully one night will be good for Auroras. DxO’s DeNoising is amazing. It has changed what I considered a high ISO limit; so I will take half my photos with my old habit high ISO limit and half with pushing it expecting the noise reduction to be a benefit.

I really appreciate the helpful responses to my query; especially since this is my first time here. I was slow to respond because the forum rules made me wait 18 hours.
Allen

If it’s “correct” but not looking “good” and want it “good”, you could save yourself the effort to make it “correct” in the first place…

Perception of what looks “good” changes over time and by influence of the images we see, most of which are too saturated etc. Computational enhancements are adding to the currently overcooked appearance of images.

@platypus , I agree with your last sentence completely.

When I first got the D7500 I would take 800-1K shots during a TKD BlackBelt test or a Korean DemoTeam show (multiple shots of a single board being broken, etc.) under florescent or gymnasium lighting which makes the white uniforms look off. The color profile generated with the X-Rite ColorChecker Passport for that specific lighting and processed in Lightroom allowed me to make blanket adjustments to the batch of photos and generally get the “correct” color.
For many of the parents that was good enough. For interesting shots or ones of my son; I would work more to make things better on those shots that justified the effort.

That’s a use case justifying the effort and PhotoLab’s DCP profiles are really intended to diminish ill effects of bad lighting, not to make camera profiles. Around the introduction of the feature, DxO had written something along those lines.

Having a custom camera profile helps to make colors truer to what they are under a certain lighting, but you’d also need a profile to correct the lighting, e.g. the black belt test location. To get such a profile, you’d need to take a few photos with a color target that then serves as a reference.

I took a series of photos in a venue with fluorescent light, but there were tubes of different character and manufacturers and some natural daylight. That lighting was difficult to compensate. I would have needed references all over the room and at different angles. Colours turned out okay-ish, but I used B&W in most cases.

2 Likes

If I may add my POV?

DCP profiles from ColorChecker targets are really only useful where you need an absolutely guaranteed colour match, for those times when you are producing artwork for product packaging and catalogue images where CMYK print matching is hyper-important.

But, as @platypus says, there is technically correct and there is visually correct. Especially when it comes to mixed or fluorescent lighting, you are going to be hard pressed to get it right every time, especially when such lighting can flicker imperceptibly and one frame in the camera can be taken at a different balance than the previous.

I use a Nikon D850, which allows me to measure and preset white balance before a shooting session. I place a translucent white lens cap on the lens and follow the procedure for measuring and saving the WB. Although the WB is only applied to JPEG files, it is also noted in the RAW and PL can pick this up.

If your camera doesn’t have this option, it’s a simple matter of photographing a grey card or a sheet of white paper to measure the ambient temperature and keeping that frame with the images from the shoot so that you can apply it afterwards.

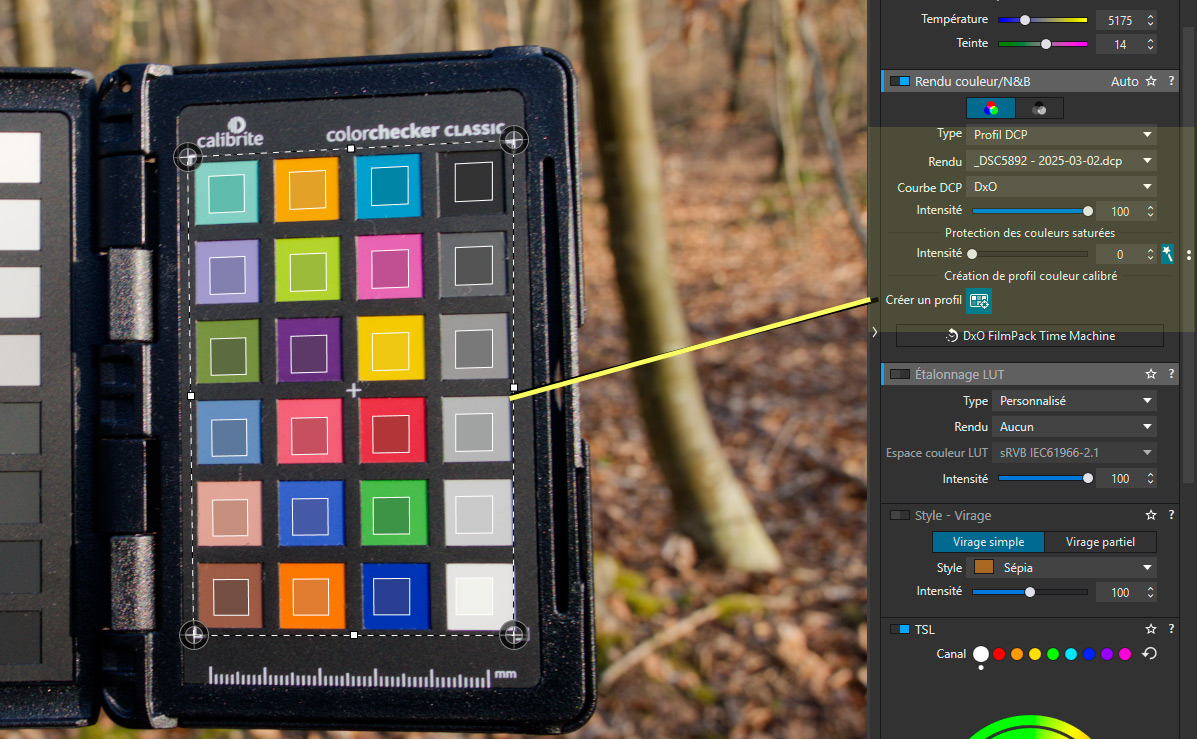
You could also use the ColorChecker but, most of the time, most people won’t notice the difference.

Really? Honestly, don’t bother. For the average daylight shots, just take everything at 5600°K manual WB and correct to suit your eye where necessary. You’ll be surprised how “right” most of them will look.

Absolutely don’t bother with shooting a target for this kind of photography. So much depends on who you “feel” looks right and what you remember when you were there.

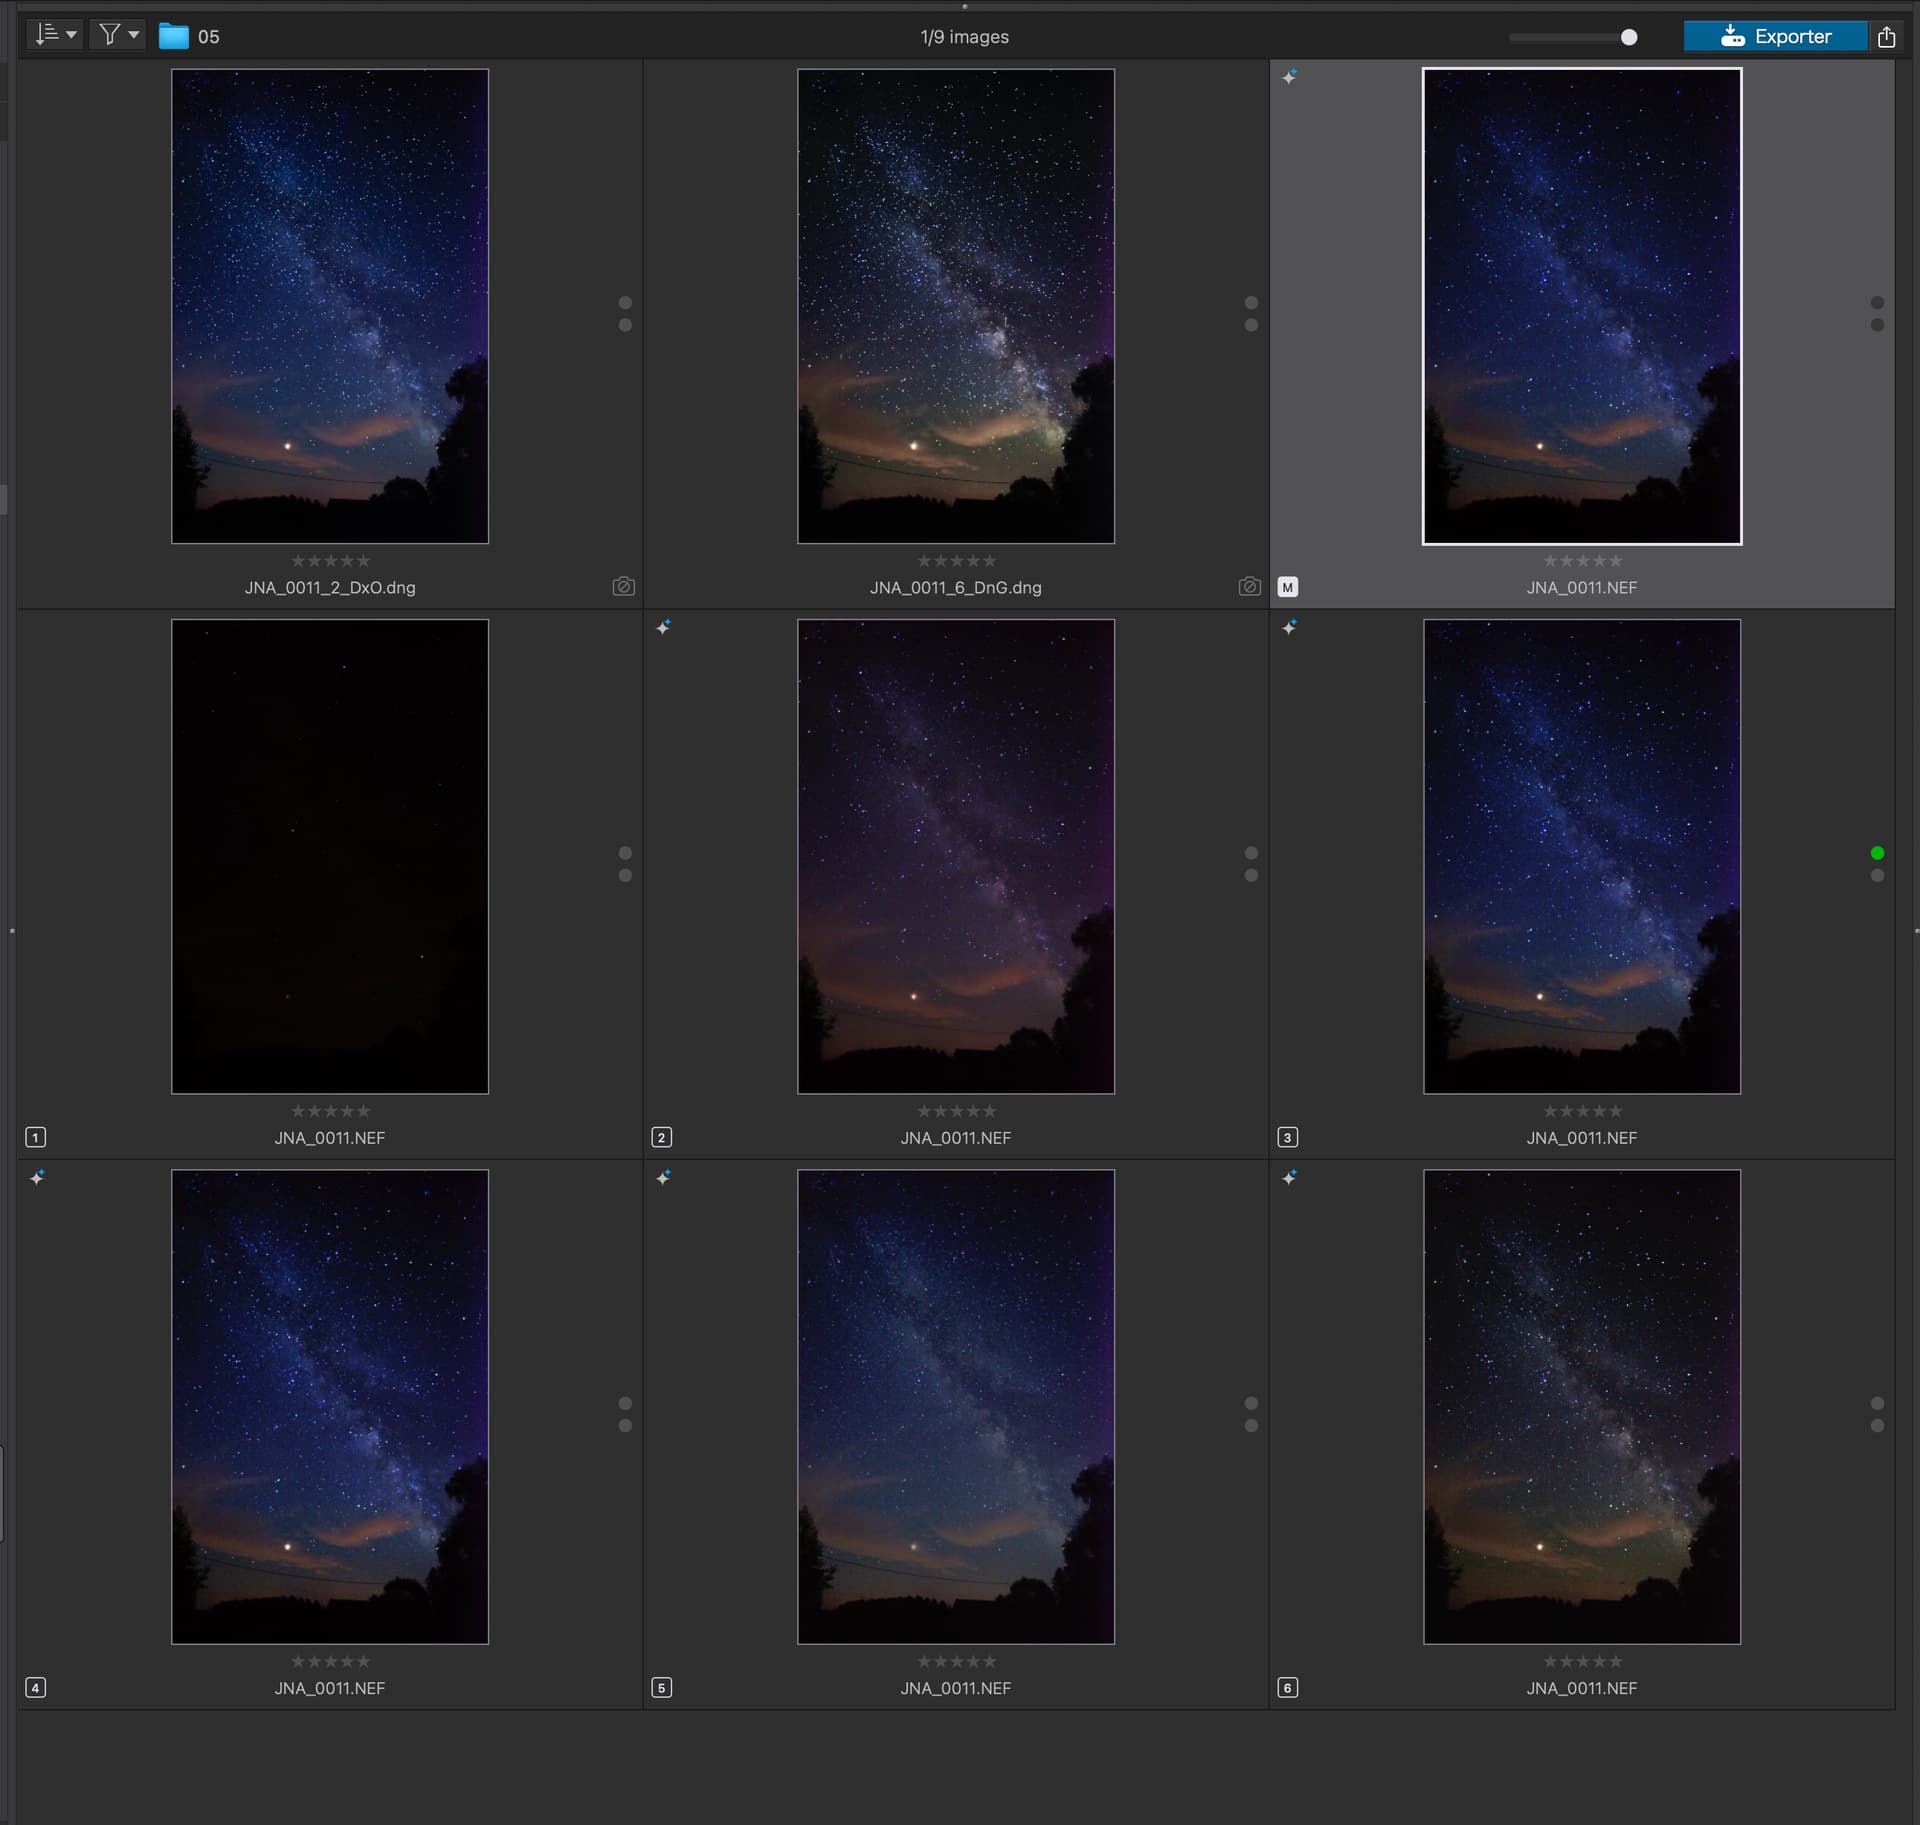
Here is a screenshot of several versions of the same image of the Milky Way…

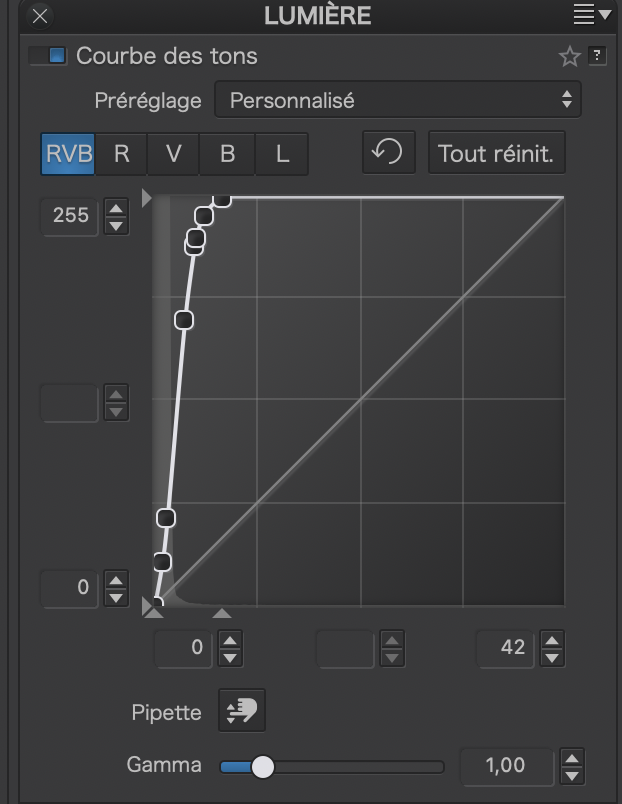
The original RAW shot (which looks totally black before processing) was taken at 5600°K and then I applied a curve something like this…

… made some virtual copies and experimented with two main temperatures…

  • 3125/0
  • 3977/48

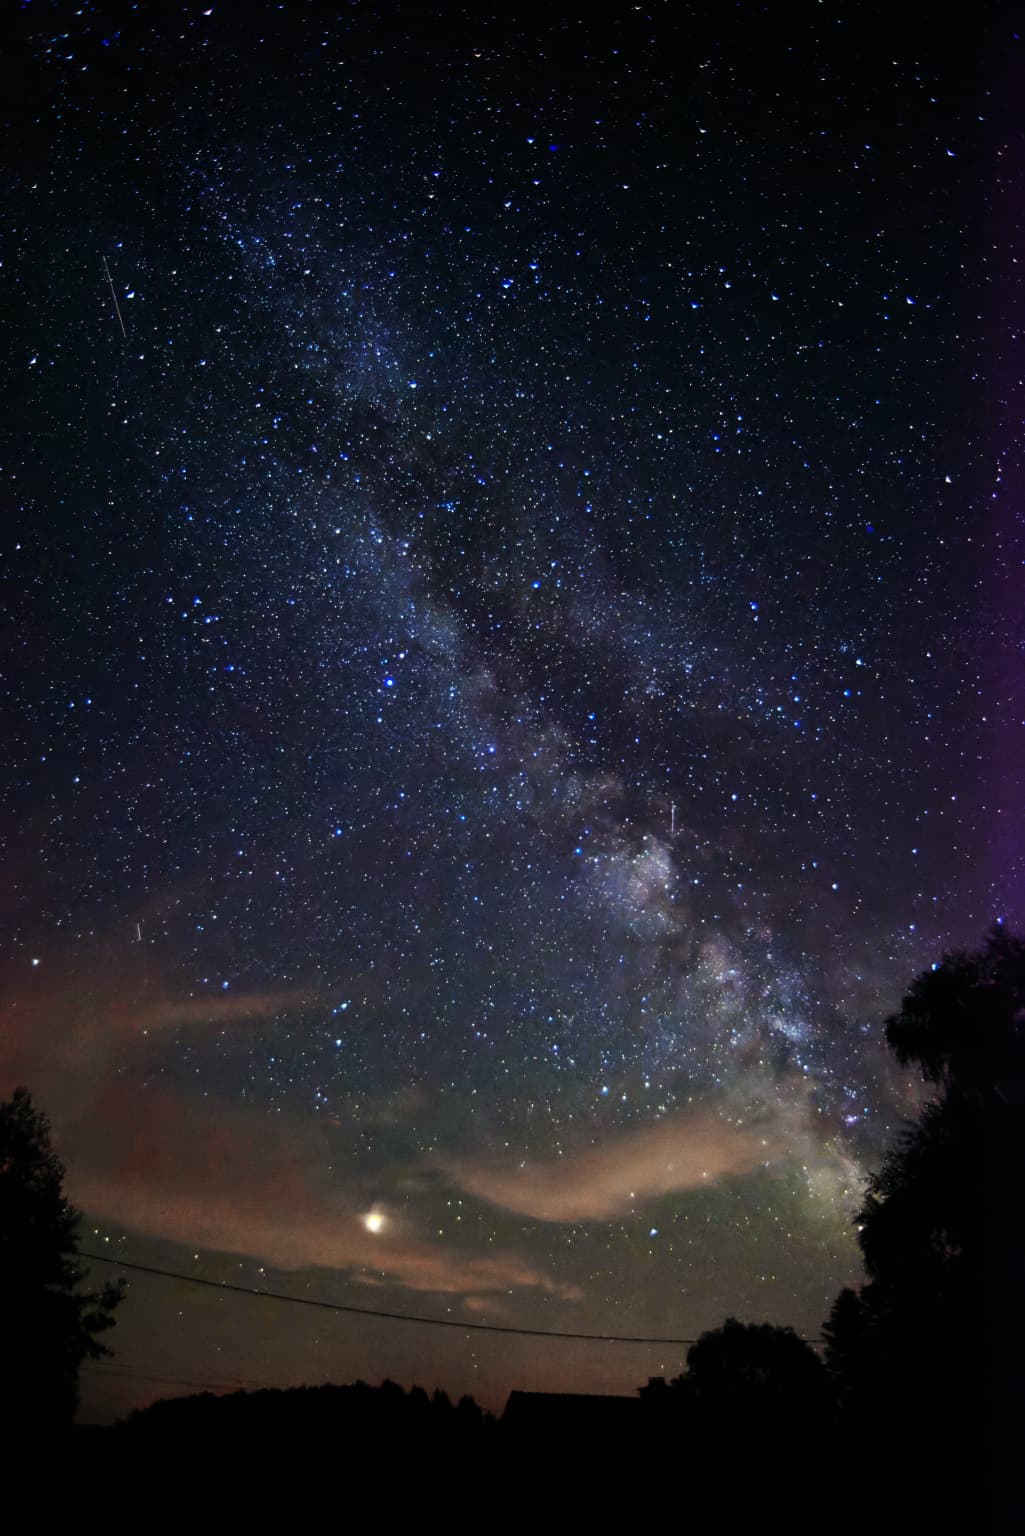
I also used the colour wheel in PL to adjust out some of the tint of pollution from street lighting in the distance.

At the moment, this has to be my favourite, but that is subject to change…

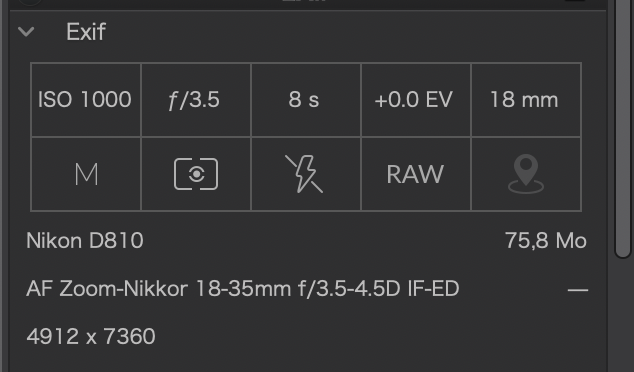
Here’s the basic camera EXIF…

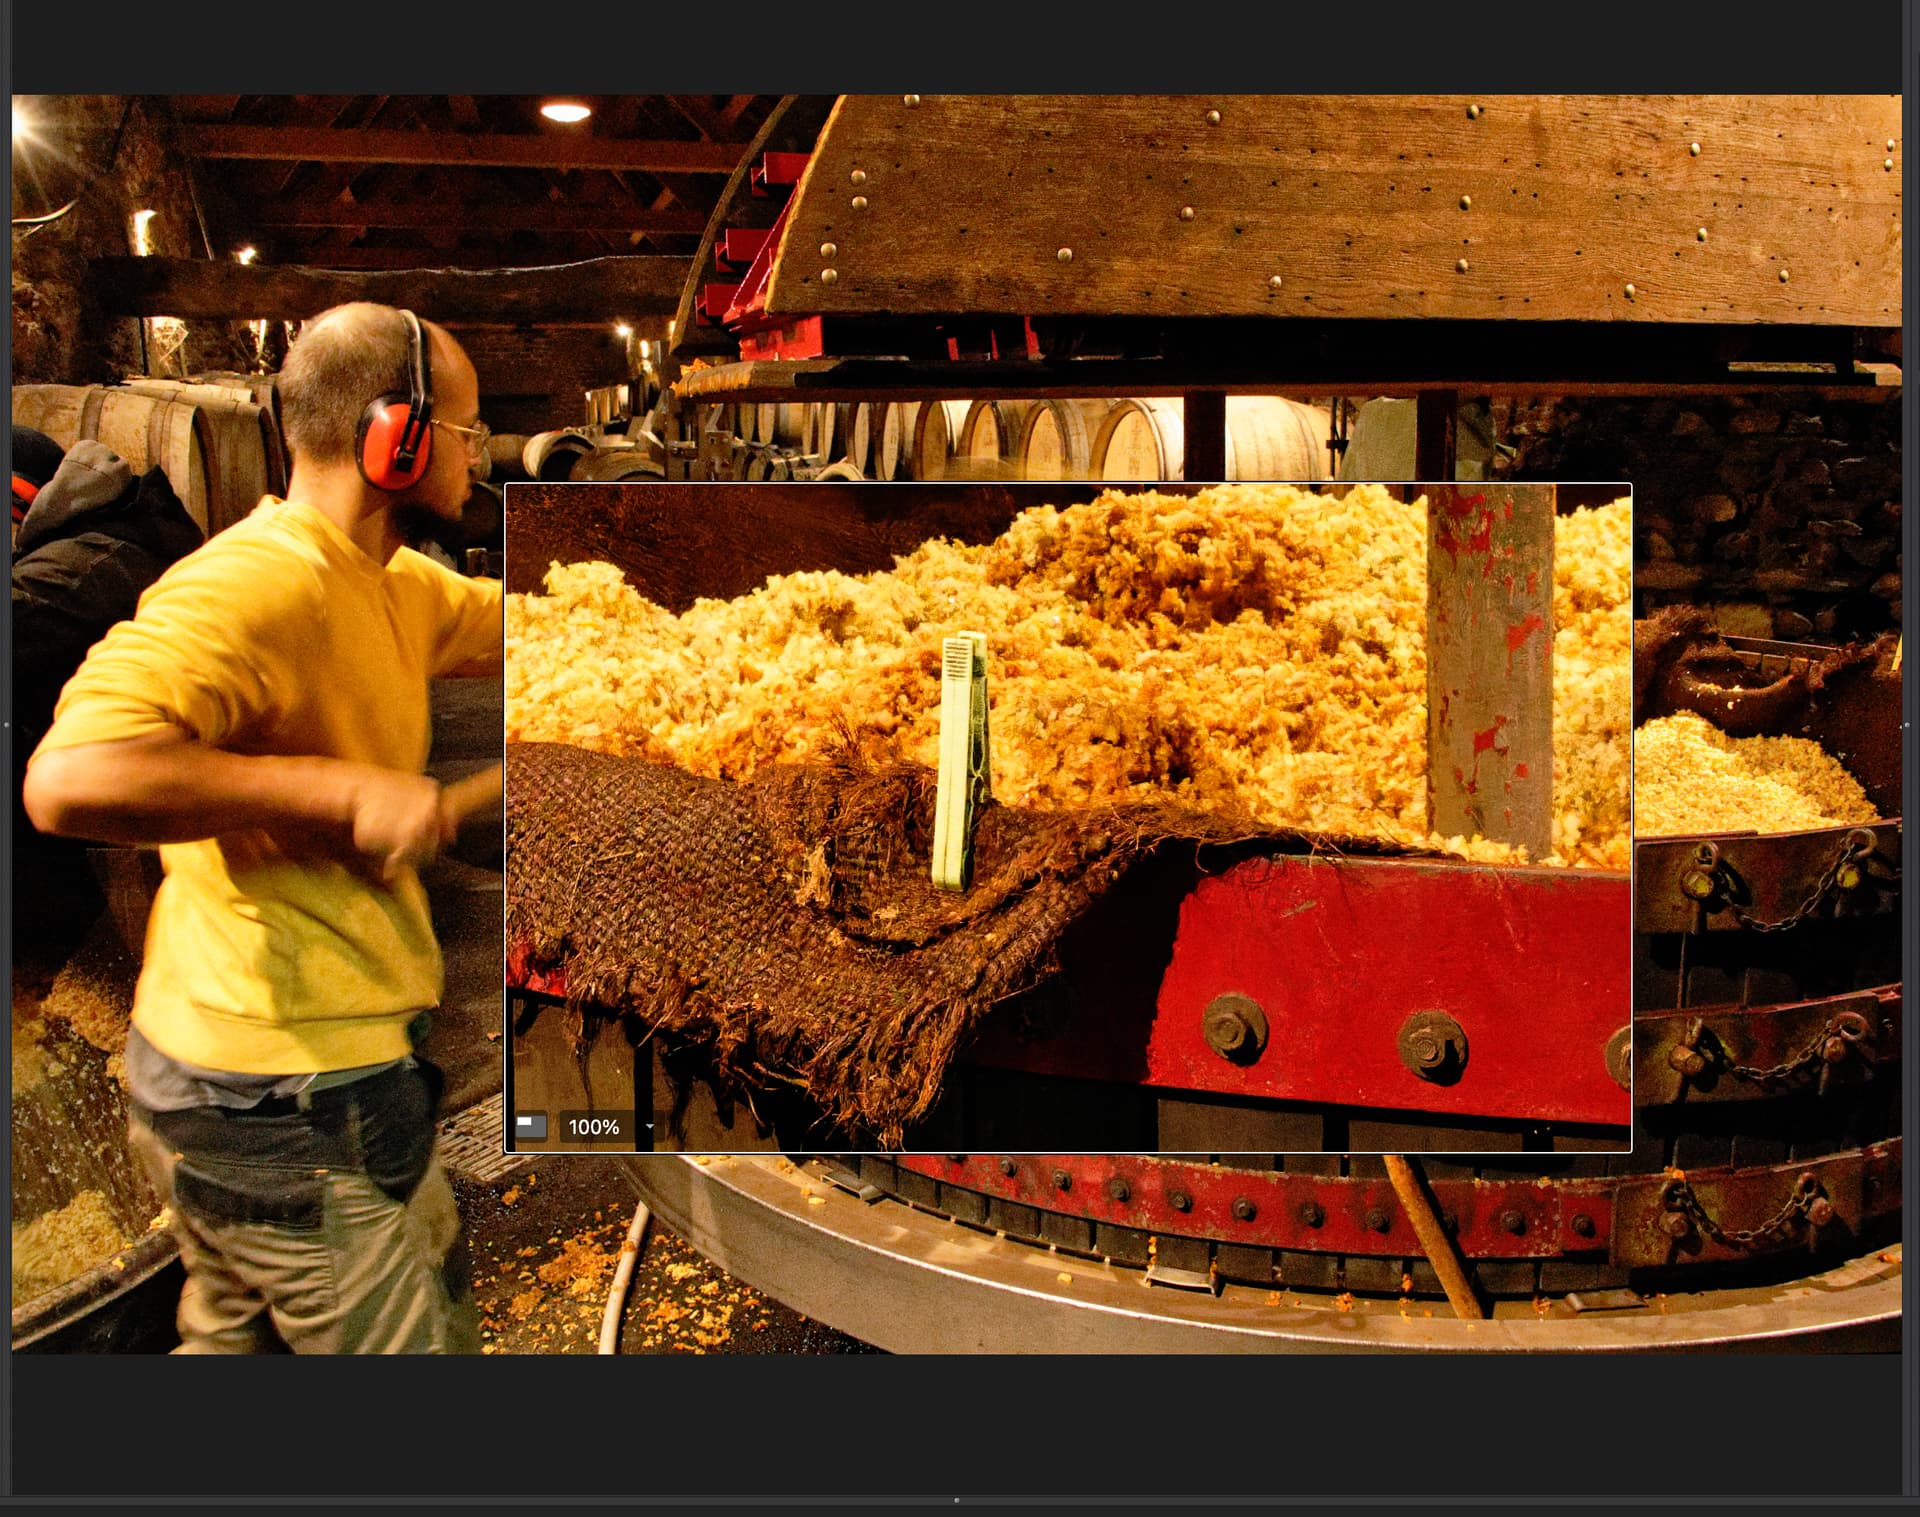
Here is a screenshot from a cider producer, shot at 25,000 ISO due to very low light…

But, for night skies, I tend to go somewhere between 1,000 and 4,000.

1 Like

@platypus @Joanna Thanks for helping me learn. Joanna, I welcome another Carter’s help. Most of my editing knowledge was obtained from a 2004 Alaska trip with 800plus negatives, a Nikon film scanner and Photoshop; but since then I have not put in the effort to keep current. Retirement gives me the chance to enjoy photography again.

I tend to overthink things. That is a habit developed from a career in designing improvements to chemical plants while trying to minimize the chance of things going really wrong.

I have 2 of the translucent white caps for setting the white balance, for my smallest and largest diameter lens.

I know that it would be a waste to use the ColorChecker for low light conditions. You are both correct that the ColorChecker DCP profile doesn’t help for outside shots. I made a DCP profile with PL8 yesterday (a bright, cloudy day) and I can barely see the difference with and without the correction. Both would provide about the same quality for a starting point to correct for the wide variety of lighting in the photos.

Joanna, thanks for the example information on your Milky Way shots; it helps as a starting point. My f2.8 11-16mm APS-C lens and less capable camera should be able to achieve similar results. Your results are amazing considering the “black” original. Did your past experience tell you that you could bring out those nice stars and colors once you got to the computer? Is there any way to know that while you were out taking the photos? I would have probably made the mistake of increasing the ISO until I could see something on the camera’s back screen. Now I will take shots with a variety of ISO choices.

If I get lucky and see some of the dancing shimmering Auroras; I now know that the DxO deNoising will handle ISO 10K for my camera and I can shoot at shutter speeds that will freeze the motion.

Final question; was the cider producer located in the Hardanger area of Norway? We are hoping to see and taste some of the cider produced in Norway.

DCP profile produced by PhotoLab using some color checker just sets the ColorMatrix1 table, in DNG specs language, which is more or less a linear map from the camera+lens native “RGB” to metameric XYZ coordinates. It carries more information than simple White Balance corrections, but is it really worth the effort (maybe there are some cases…)? To use it successfully, you must have exactly the same illuminant (including reflections, like those from nasty gym floors, grass, etc.), which is most often impossible to get. If the illuminant is bad enough, like some spiky (in terms of spectral illuminance) sodium vapor lamps, it’s hard to distinguish the colors anyway. You may use it, if it works for you for certain cases, but don’t be surprised if it doesn’t. In most cases I just use camera AWB and correct it in edit to my perception (check it next day!) – less than 10-50% require that in my case, depends on camera firmware, lighting and the subject.

Standard ACR DCP profiles contain also HSV mapping data (kind of LUTs in different coordinates and colorspace), which is another can of worms. Some variant of this is in DxO rendering profiles. The glory details of those are unknown to me.

For Milky Way and Aurora photos, please consult astrophotography forums, as this is a highly specialized topic. There are some great contributions there, but watch your wallet :slight_smile:

1 Like

For aurora and Milky Way photography, it is best to use daylight white balance. If you set this in the camera, use the ‘as shot’ white balance at Photolab.

For more information about aurora photography, see https://clarkvision.com/articles/aurora.photography/ .

For the basic principles of removing light pollution from Milky Way photos, it is best to use curves. This ensures that the left side of the histogram for the R, G, and B channels start at the same black point. See: https://clarkvision.com/articles/astrophotography.image.processing2/.

Or use the (free) application GraXpert when there is a gradient in the light pollution.

1 Like

I’m a little surprised by the posts questioning the usefulness of color management using a color chart.
Since the introduction of profile creation in PhotoLab, I use DCP profiles as often as possible. I mainly shoot landscapes, and I’m looking for the best color rendering, the one that matches what I’ve seen. And the chart allows me to best reproduce this rendering. I always get better results than with the generic rendering/camera profile in my case. And it’s perfectly verifiable anyway, since the chart can be used to control processing under the dual conditions of a calibrated screen display and illumination of the chart with a 5000°K illuminant.

With practice, I use specific DCP profiles for common cases: for example, sunny summer landscapes can be processed with the same “generic” profile as long as the conditions remain fairly similar. But, for example, a series of photos taken in a forest will require calibration using the chart because the influence of green hues filtering through the foliage by the sun can be highly variable.

Note: The case of nighttime photos (aurora borealis) is special.

@gerarto , Thank you for your insight.

My Create-Color-Profile icon is greyed out and I’m on Elite. Is there an additional plug-in for this?

Also …

That’s a lot of confidence.