Complete newly here in terms of DXO products.
I’m a long standing user of Adobe Lightroom but the way they process the RAW files from my Canon R5 has led me to look at alternatives.
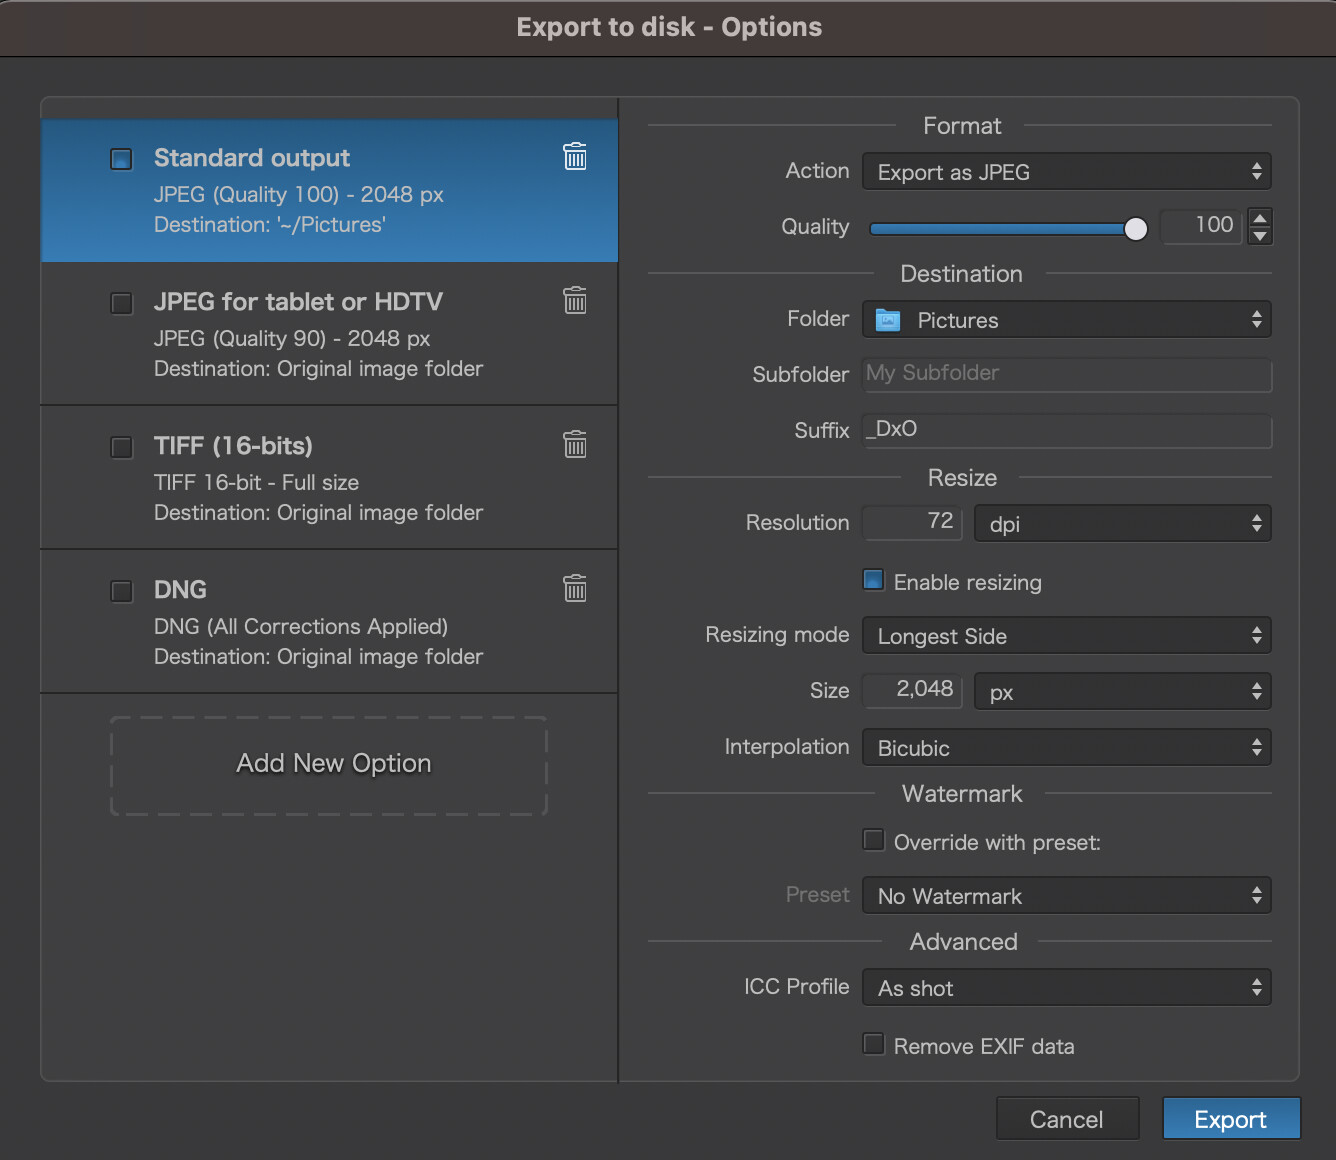
So I’m on a trial with DxO PhotoLab and it gives a much cleaner and sharper RAW file, much better than Lightroom, but when I export to a JPEG with settings I use for Facebook the images look blurred.
I export using the following:
JPEG
Quality 100%
Resize long edge to 2048
I’ve used these settings for years with Lightroom and I’ve found it allows me to post images on Facebook and it retains the quality.
So I tested with a RAW file today, put it into Lightroom and PhotoLab, exported using the exact same settings and the image from Lightroom is so much sharper, not sure if I’m missing something completely stupid but I can’t seem to figure it out.
I’ve uploaded them to my Flickr page so you can see what I mean.
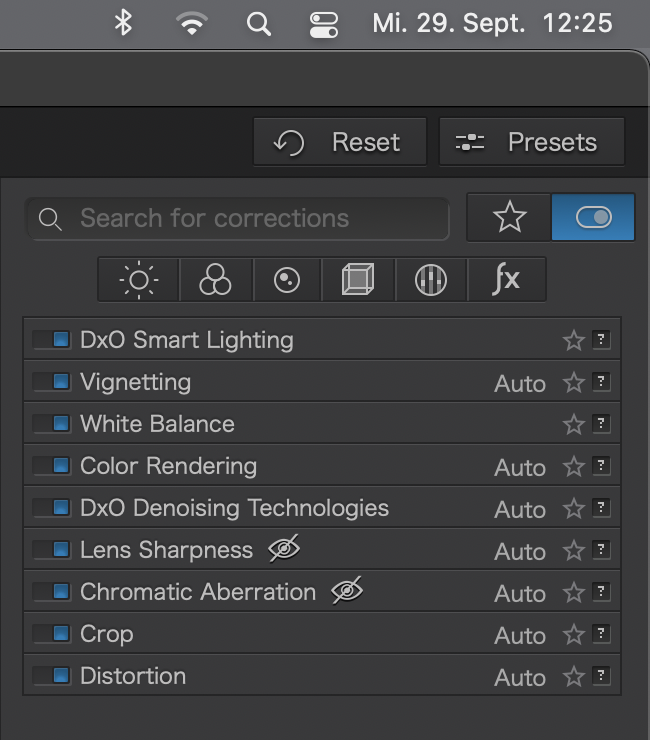
PhotoLab has many settings that can influence acutance. Look for PL’s active tools (blue switch near the lh upper corner indicates this) and check the slider positions. Also, exporting to a smaller format includes sharpening, which can make a difference.
Okay this may be a stupid question What’s a DOP file?
When I opened PL and browsed to the particular folder containing these images it asked me to download profiles for the Canon R5 and Rf 15-35mm f/2.8L so I selected download.
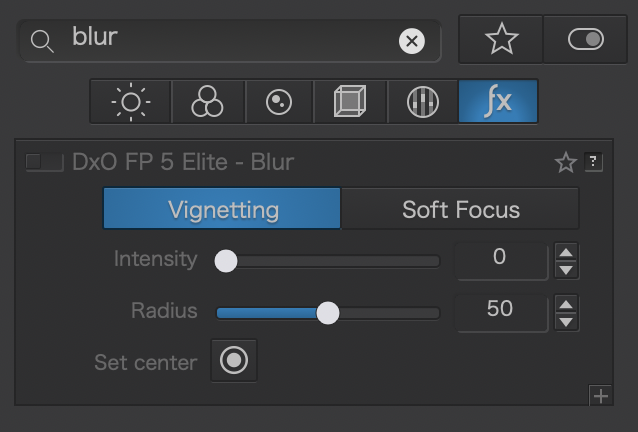
So I edited the DOP file and removed the items referencing BLUR.
Opened PL again and exported the image but it still seems the same to me.
I’ve uploaded the exported image file to Flickr again, and maybe it’s my eyes, but if you look at the text to the right that says ‘The Studios’ and ‘Media City UK’ and flick between Lightroom and PL picture, there definitely is a difference in either sharpness or something else making it look blurred.
I closed PL, deleted the DOP file, re-opened PL and then closed it again.
Looked at the newly created DOP file and it has the blur settings in again, but the blue switch to the left is definitely off in the panel.
I think it was the correct camera profile wasn’t attached.
It was set to default rendering, I changed this to R5 and it looks so much better.
I’ve also set the standard preset to be ‘optical corrections only’ (although when you look in the DOP file it still shows blur settings but they’re definitely not being applied)
Like Lightroom, Photolab uses a catalog that stores information about the images. The catalog, or “database” in DxO language, is the leading item. If you delete a .dop sidecar file, it is recreated by PhotoLab from the database’s information.
Like Lightroom, PhotoLab has an idea of how an image should look. The “DxO Standard” preset does that in PhotoLab. Other presets make the image look different.
(From left: DxO Standard, No Correction, Landscape - polarized postcard)
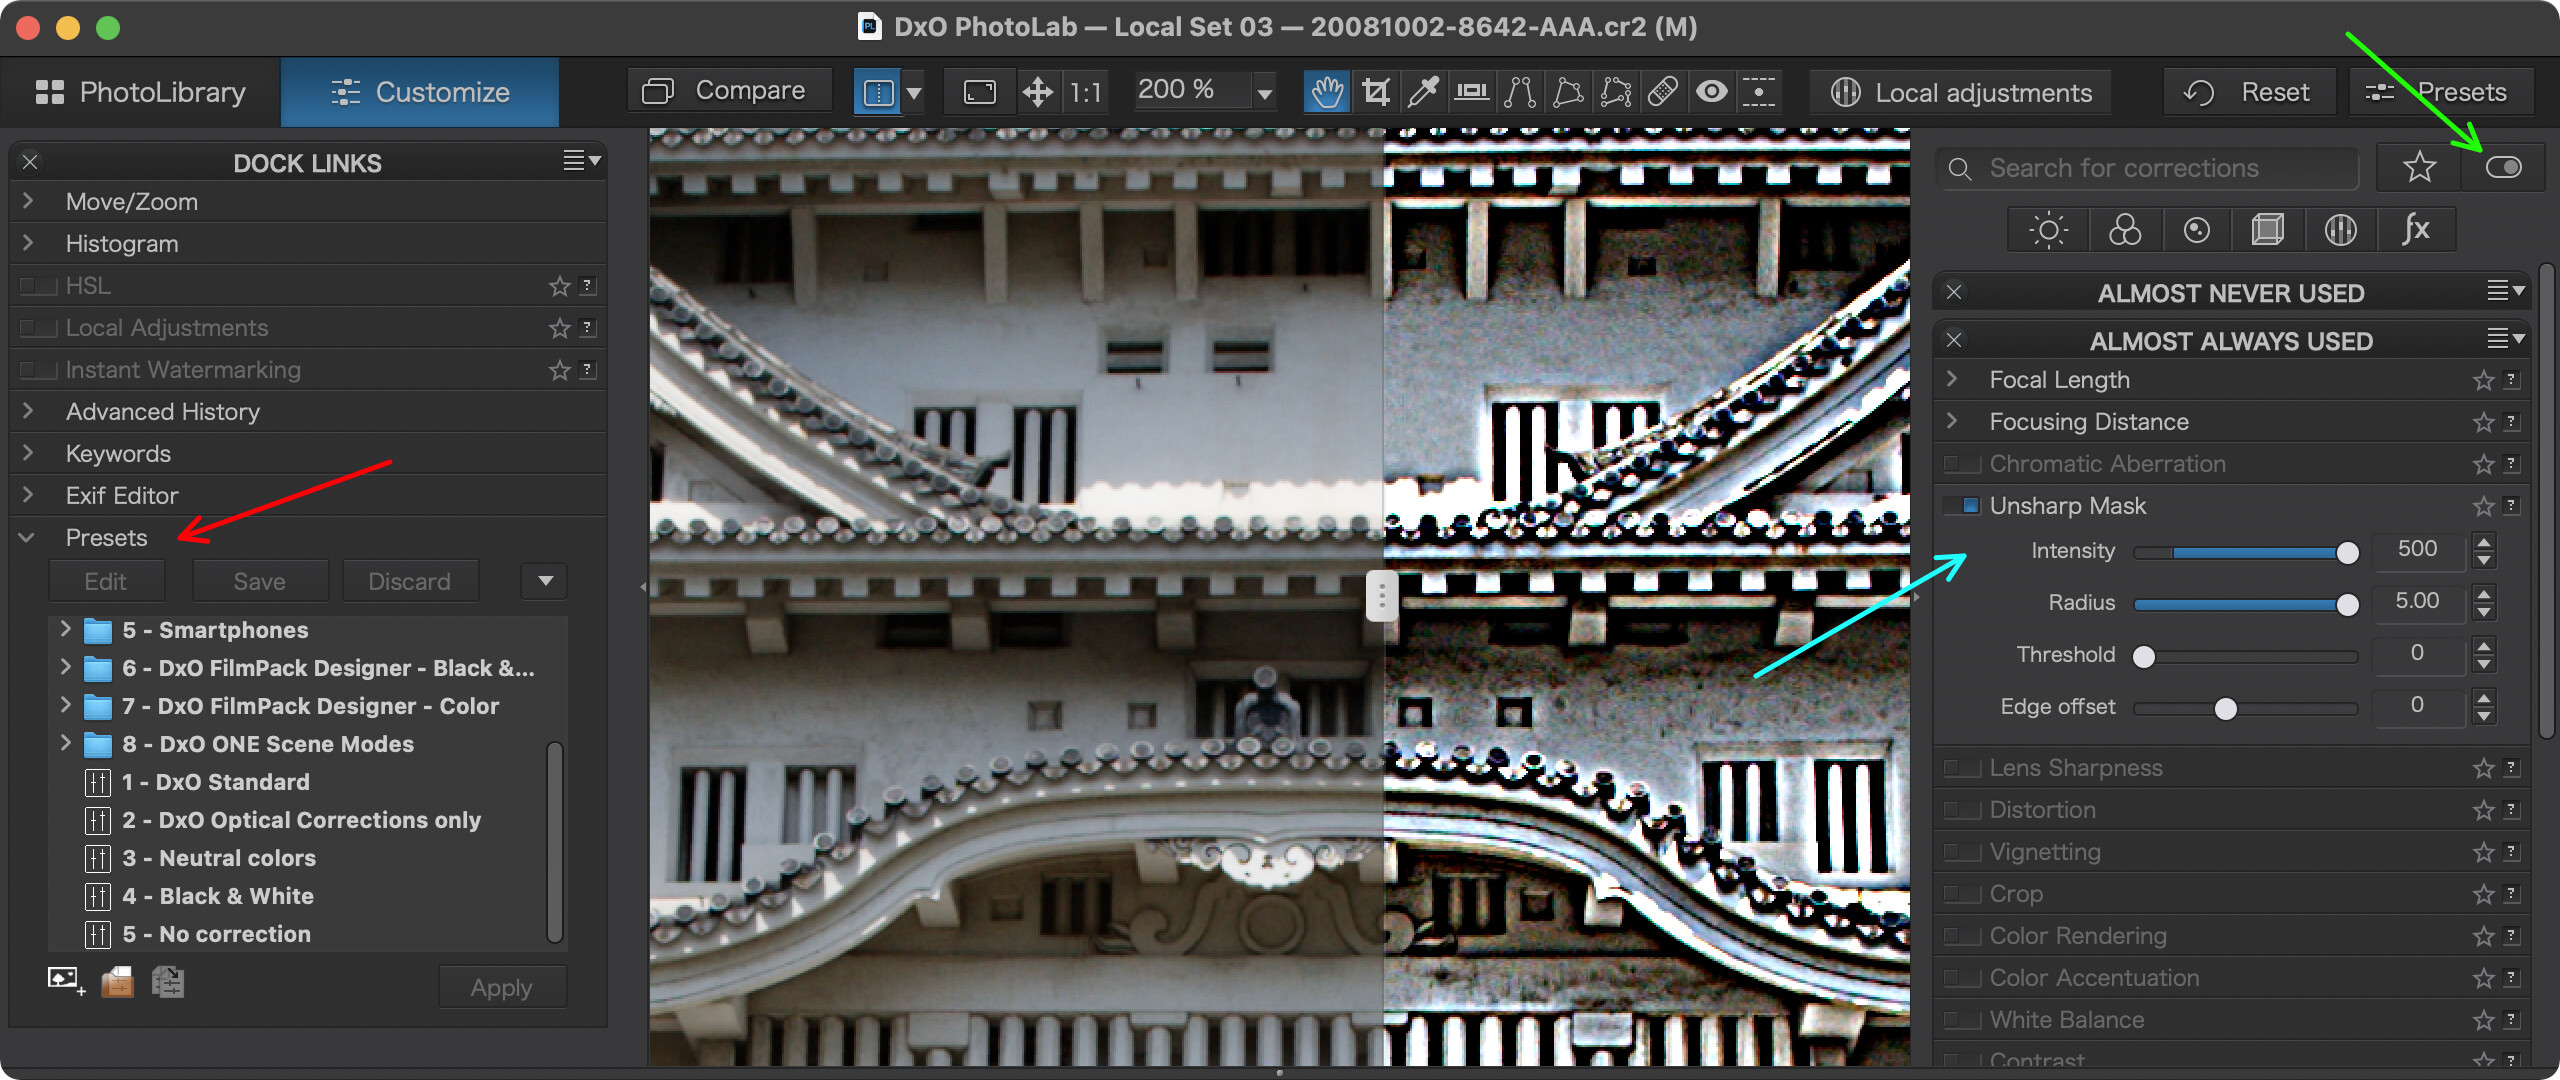
Presets contain instructions e.g. about how an image should be sharpened, in case of the “DxO Standard” preset, this sharpening is set in the “Lens Sharpness” tool, which corrects sharpness differences caused by the lens, which might not be equally sharp over the entire image.
Red arrow: Find included presets here, also used to modify presets…
Green arrow: Flick this switch to hide/show unused tools
Cyan arrow: Unsharp mask tool
Note: Try the “Unsharp Mask” tool to get sharper output. Check Lightroom’s settings. Most apps apply some sharpening, even if we don’t ask for it.
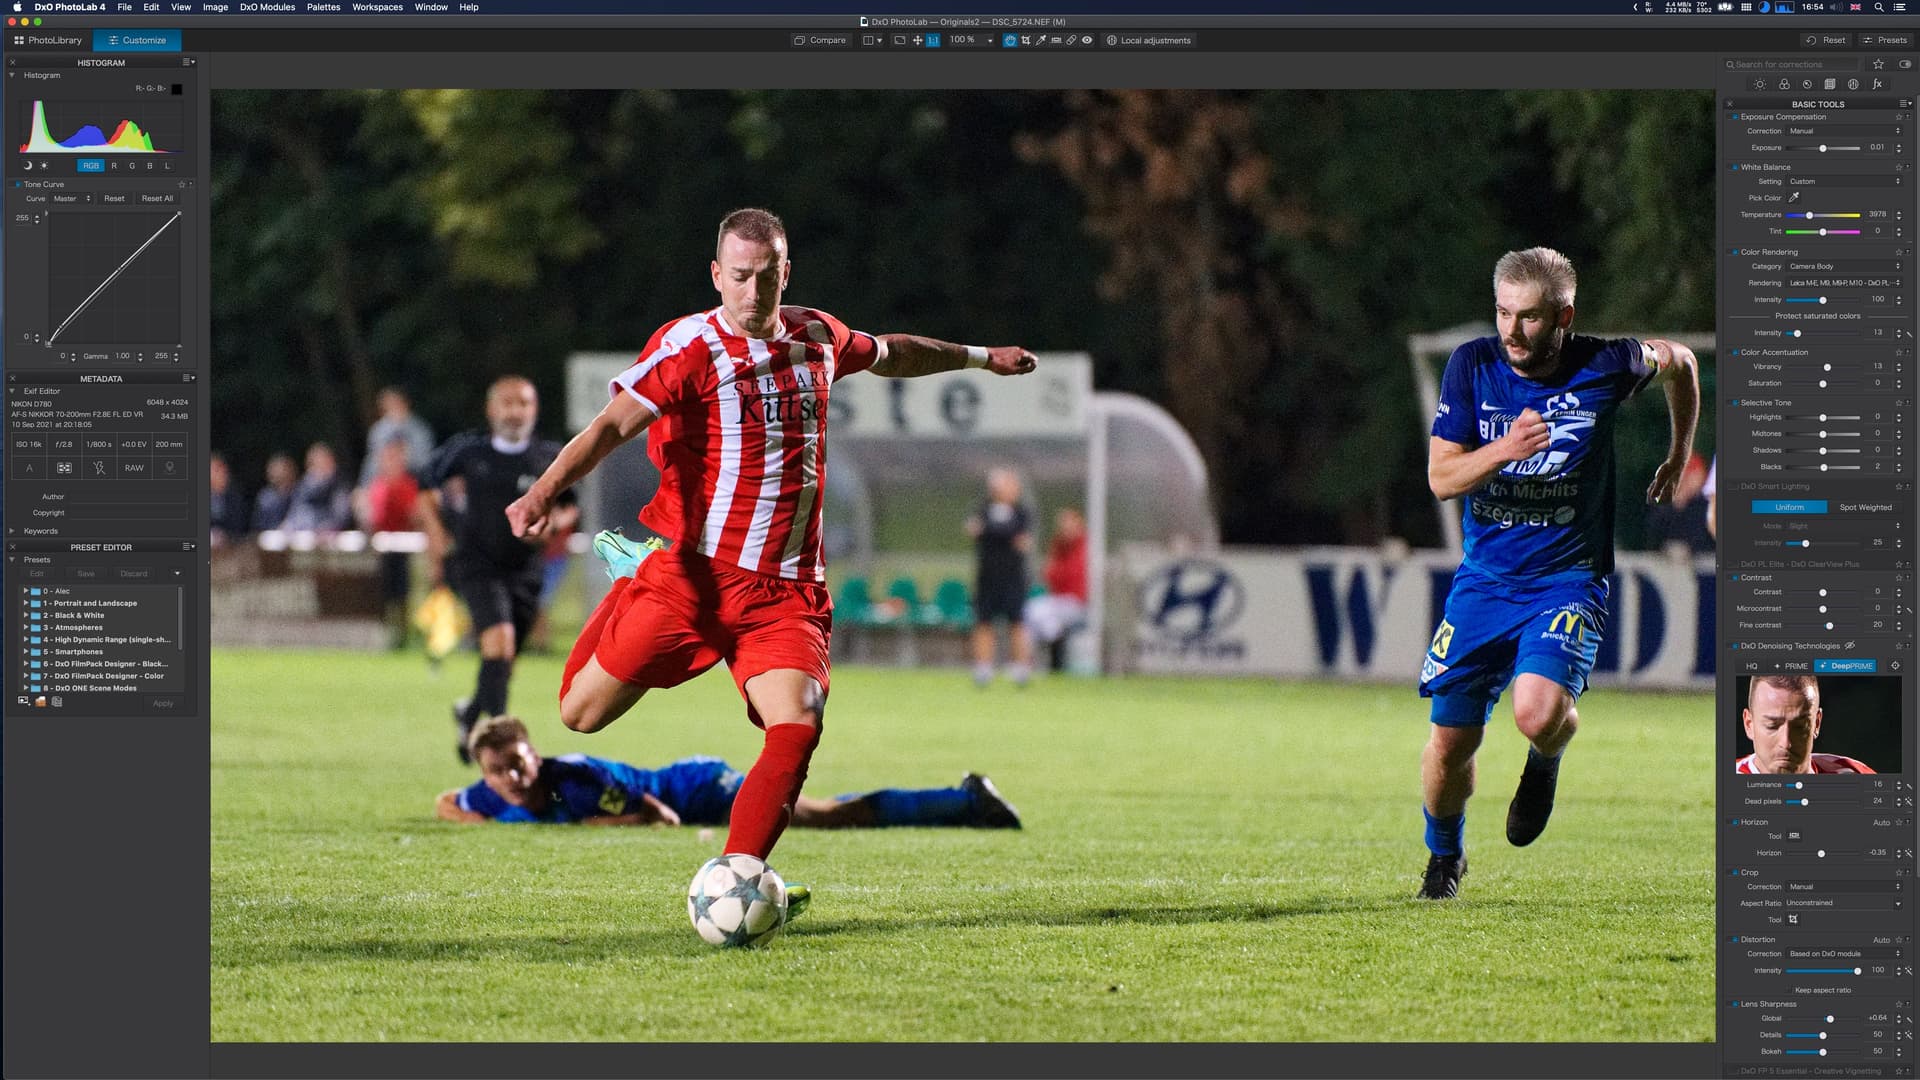
There’s many sharpness tools in Photolab. Conveniently DxO keeps them under the Detail tab.
Denoising
Lens Sharpness
Chromatic Aberration
Unsharp Mask
Moiré
The outliers:
Micro Contrast/Fine Contrast is under Light.
Distortion is under Geometry.
Local Adjustments are under Local Adjustments.
Grain and Blur are under FX.
There’s too many tabs but there’s a great solution for that. Disable all the tabs (it’s counterintuitive, but it’s done by pressing the enabled tab). At that point you’ll see Basic Tools.
I don’t change the set up of the Tab sections as they contain tools I might use rarely and are well-structured. Basic Tools is where I do most of my work and I carefully put the tools in the order in which I apply them. That way after applying a suitable preset, I go systematically down the list making changes as I go. The screenshot below shows the Basic Tools hidden tab and the palettes I’ve chosen as core.
This is what my setup looks like. Note the Histogram palette top left with the Tone Curve palette right below it. I was a big user of Curves in Photoshop and like to have curves ready at all times and where I can read the histogram where changing them.
PS. Forget all about how you processed photos in Lightroom. The workflow in Photolab is far superior (apply suitable preset to a set and then go through select photos one by one). What Photolab does need is a triage/culling tool in front of it to make sure you don’t have to try to rate all your photos in Photolab (switching between RAW files takes 1.5s to 3s depending on your computer, your GPU, your camera). The inexpensive and extremely robust cross-platform obvious choice is FastRawViewer at $25 (was $15 but you’re getting v2 now, paid updates come every five years). Switching between RAW files takes less than 0.5s. Most efficient workflow here is to open in Photolab either an already rated folder (small set) or a folder of selects only (large set).
In the worst case, if you still pay for access to Lightroom you could use Lightroom to rate your sets storing the ratings in XMP files and then open those folders in Photolab after rating them. As Lightroom is a mediocre RAW developer in comparison to Photolab, it’s a mediocre triage tool in comparison to FastRawViewer.
You could also try Photomechanic [6] for the triage. I’ve been using it for the past month or so and it really is excellent. A bit pricey but you can tell it is a finely honed tool and, once you get the hang of it, is apparent why many pros rely on it. It is excellent also for adding metadata in bulk to multiple photos so you know what the photo was about in 10 years’ time. Can also quickly do your rating in Photomechanic and then select photolab as the program in which to open and edit those tagged photos. I have bought a lot of photo software over the past few years, but I honestly wish I had found Photomechanic earlier. There are cheaper/free options available (I previously used Faststone Image Viewer, which is excellent) but in general terms those tools seem to lack the deep metadata capability of Photomechanic.
Good recommendation. I now own Photo Mechanic Plus for its amazing metadata tools but still find myself using FastRawViewer, which is much less expensive at $25 for a cross-platform perpetual license. Paid updates are five years apart and just $10.
The FastRawViewer interface (like Photo Mechanic) is not that elegant out of the box but can be cut back to a single full screen window with just essential photo info below the image in a single line.
But both Photo Mechanic and FastRawViewer are awesome and incredibly fast triage tools. Speed is no longer held back by the software but how quickly the photographer can evaluate images.
Do you have the lens sharpness panel activated as it is fundamental to how DXO operates?
Unlike LR the Lens Sharpness control applies sharpness according to the parameters established by DXO during lens calibration. These corrections apply a variable amount of sharpness across the frame to match the lens characteristics i.e. lenses are normally sharper in the middle of the frame. The USM controls you are familiar with are provided for lenses for which there is no DXO module and RGB images eg jpg and tif.
 What’s a DOP file?