Recently, I went on a group holiday, which involved visiting and photographing many historic sites. I have updated the headline, title and description metadata of each photo with the names of the places and some historically interesting information in the descriptions.
I will store the photos in Apple Photos, which can display the title and description of each photo. I plan to share the photos with all the people who went on the trip. Some of them have limited expertise with computers, so they may not understand how to display the titles and descriptions.
To help them, I would like to produce a document or spreadsheet with a table that has a column for: file name, date, title/headline, description and GPS location. This will give them a simple summary of all the photos they have, without having to do anything remotely technical.
There are hundreds of photos, so I want to avoid the pain of manual copy and paste of this information. Does anybody know an automatic batch process for extracting this data, using either DXO Photolab or some other product that runs on a Mac?
do you know the app GraphicConverter? I don’t know if it exactly meets your requirements, but it can do a lot, also in terms of metadata. You can try it for free:
ExifTool should be able to be used for such a purpose.
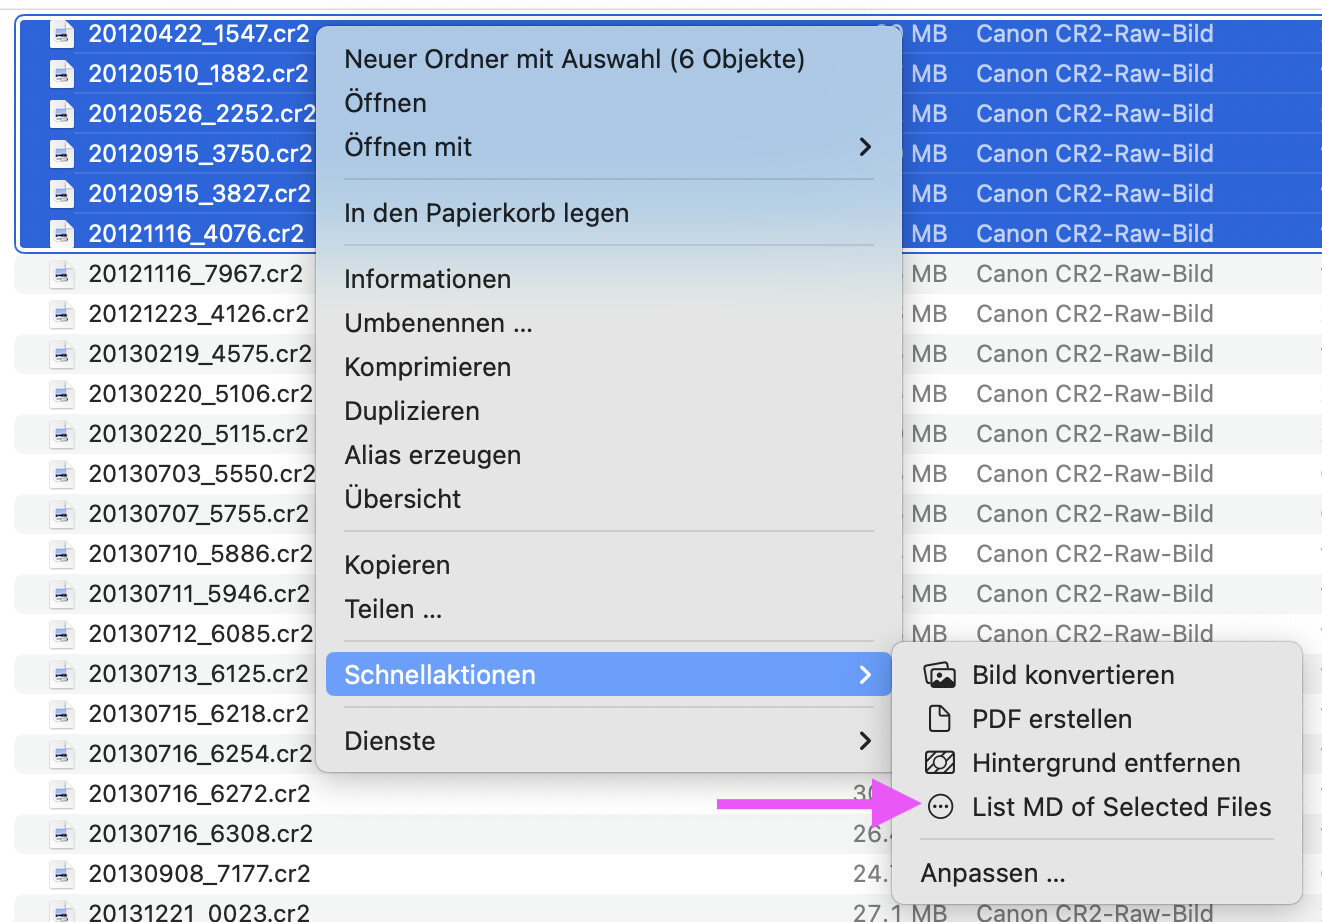
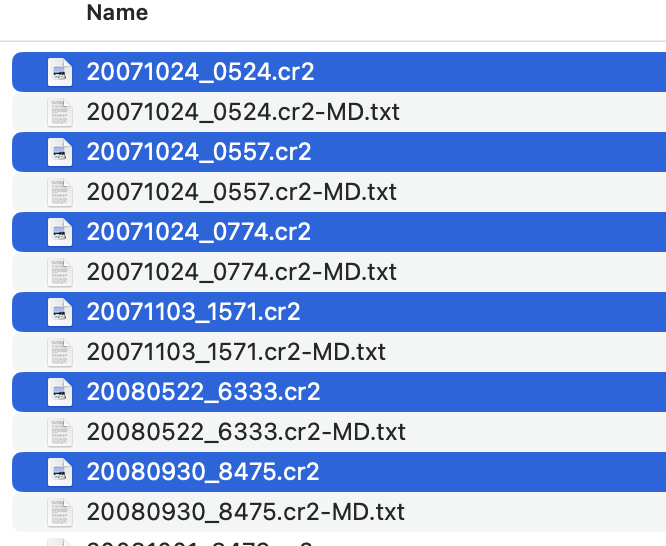
I have two quick actions on my Mac. The QA read metadata from files and writes it to a sidecar file (one for each file). It’s not quite what you want, but they might start you for your intended sheet. For modifications, start Automator.app and open the file(s) below. Note that ExifTool must be installed separately.
Thanks very much for this. I copied the files into ~Library/Services and rebooted my Mac. Unfortunately, the actions did not appear in my Quick Actions panel.
I enabled the extensions. This triggered some error messages, but now they are shown as ticked. Then, I tried to run the quick actions and got this error message:
The action “Run Shell Script” encountered an error: “zsh:3: no such file or directory: /usr/local/bin/exiftool
zsh:3: no such file or directory: /usr/local/bin/exiftool”
Yes, it works fine now. Thanks very much for your help. It shows the title, headline and description that I have put in.
Now, I just need to find a way to filter out all the rows that I am not interested in. I think I can probably drag and drop all the text files into Excel directly, or via Word. Then, I can probably use Excel filtering to pick out only the rows that I want. Then, Copy and Paste Transpose should give me the table.
I have tried the tool that Platypus suggested. As you will see from the comments below, I have the data from one photo in a text file now. I still, need to combine the data from all the files and then boil it down to what I need, but I think this is doable.
@GrahamF , if you are the kind of person for tinkering, you could modify the actions with the respective ExifTool filters/switches to only extract the info you like.
You can use this QA to write everything into one file, which simplifies the Excel import, specially if you replace the first lines per read file with something that makes Excel write to the next column. List MD of Folder Content in One File.workflow.zip (126.6 KB)
The QA works per folder and writes the output file to your home folder.
Beware: If you run this QA more than once per folder, you’ll get duplicate entries. There’s not much logic in the action, but you’re free to edit the action in Automator.app, test the result and post the modified action here.
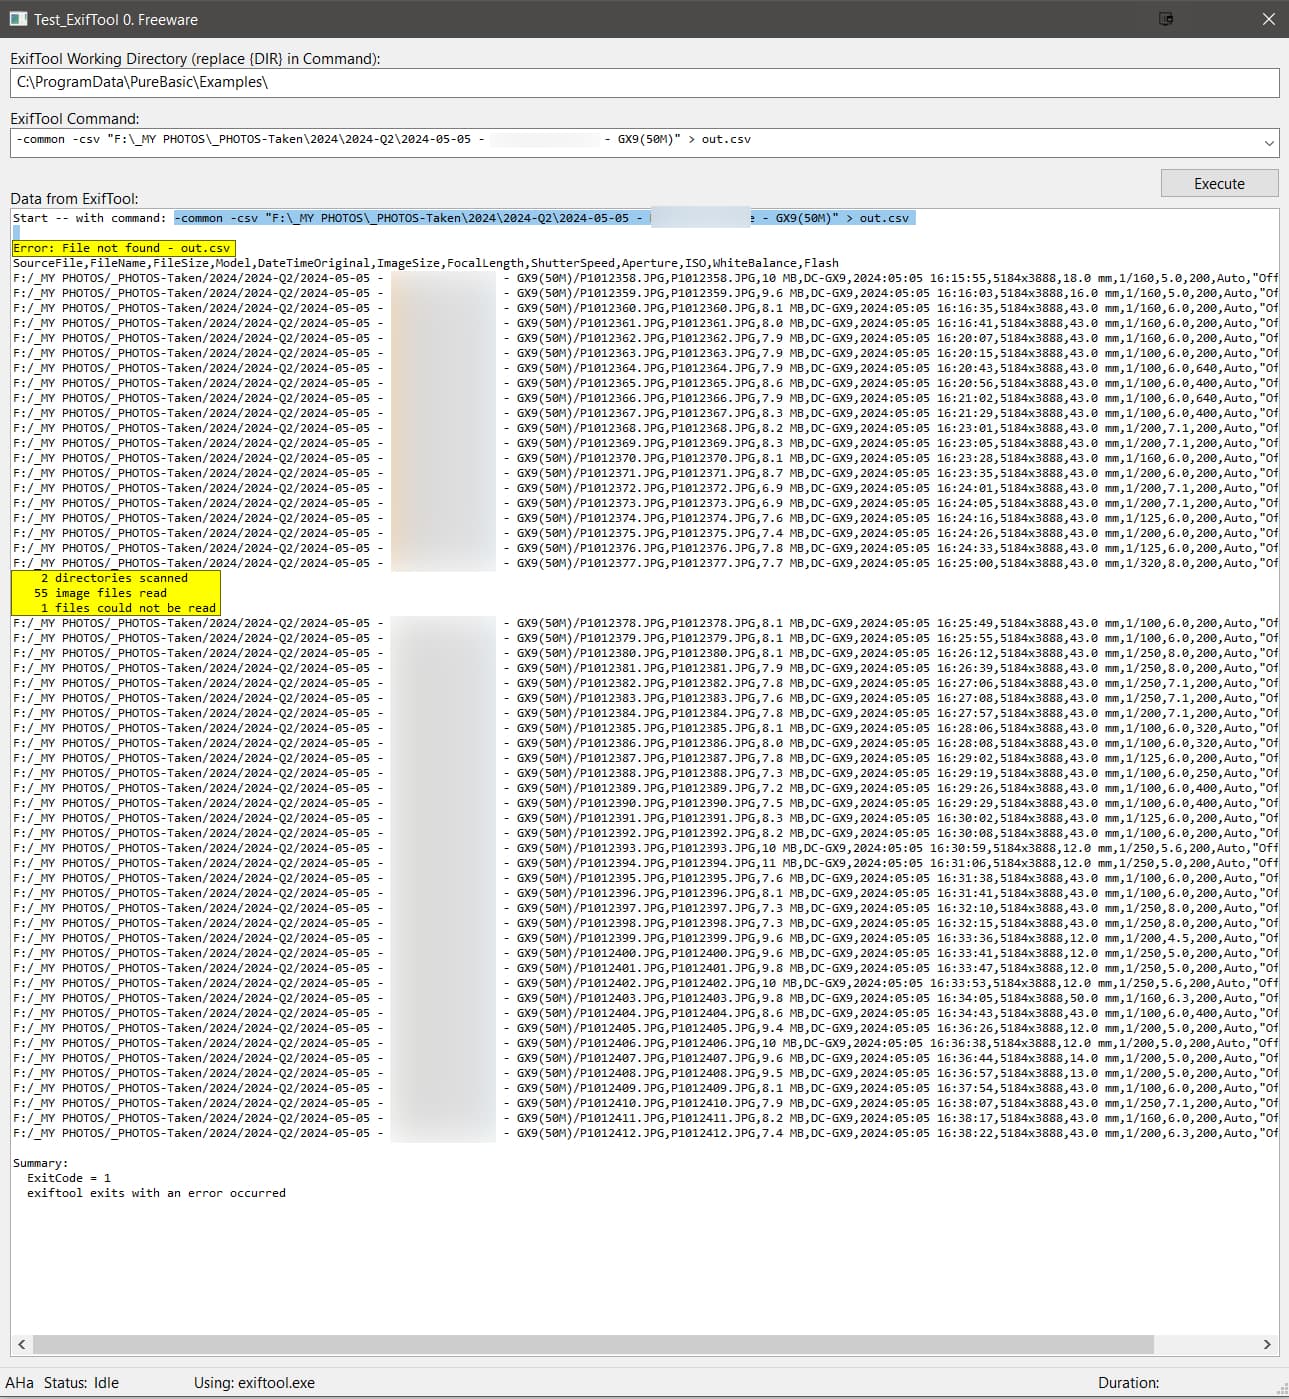
@GrahamF I believe Exiftool may offer what you require, i.e. I submitted a command via a PureBasic program I use from time to time and this is the output from submitting the command
I have blanked out my address to preserve some degree of anonymity.
Because I haven’t got the syntax quite right I have the items highlighted in the snapshot included in the results and the results were returned to the program and not written to a .csv file!!
I then cut and pasted into a text editor, removed the highlighted fields and anonymised my address and saved as a text file.
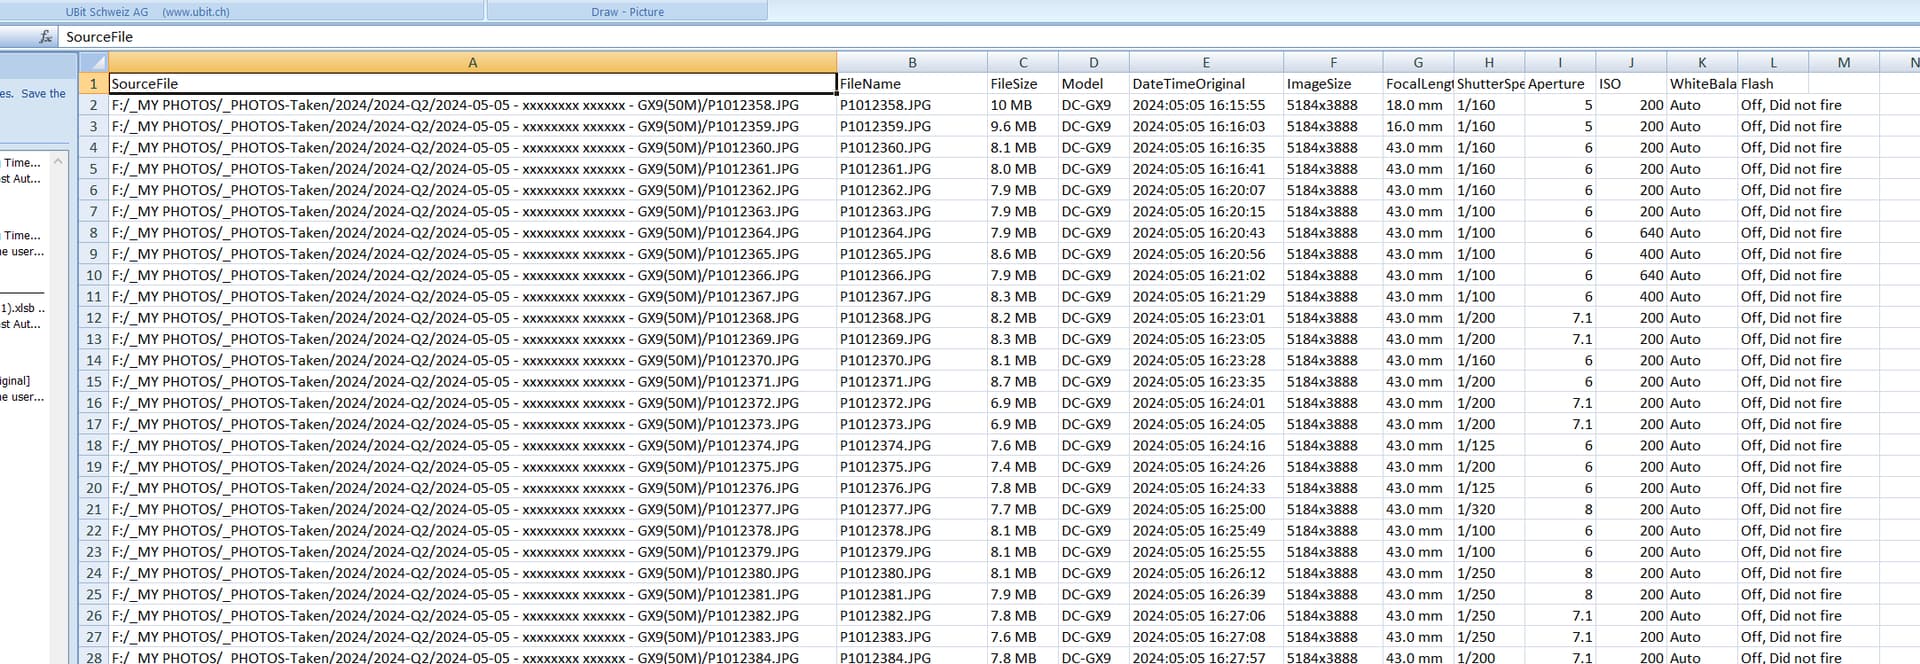
I then opened the text file in Word, responded to the questions and got this
Get the command string right for the fields you want to extract (to replace “-common”)
Correct the syntax so that it actually creates a .csv file where you want one created
and then use it whenever and wherever you want to extract data to put into a spreadsheet or any program that can handle a .csv file.
If you want to submit some candidate strings for me to test then I can do that.
The program I ran is open source (according to its author - which is not me) and Purebasic has a free copy of the compiler for Windows and the Mac, which is limited to a number of source lines.
The program is particularly useful for experimenting with exiftool syntax.
@John-M I was about to say that I had never come across BR Software until I discovered that I had BR Software Pixfiler installed and it showed me images of mine from 2021!
I certainly hadn’t tried BR EXIFextractor before and for the fields on offer it is an easy way to extract that data to a .csv file which is then just a step away from a spreadsheet.
The actions I posted are for Mac (which is this threads tag) and contains a fairly simple ExifTool command meant to provide a human readable target text file:
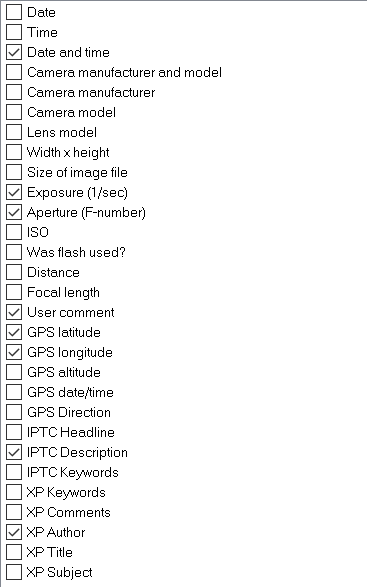
Having worked with ExifTool for some years now, I would advise not trying to retrieve all possible tags, as there are hundreds. Better to retrieve for a specific group.
Let me know exactly what you want to retrieve
Oh, and you don’t need a Basic script. I installed ExifTool and run it from the command line
@platypus I realise that this is a Mac topic but ExifTool is common to both operating systems and while part of the issue is to obtain the required fields as @GrahamF identified
the request included talk of a spreadsheet and while I was looking at ExifTool I stumbled upon the command I used, namely “exiftool -common -csv …” which uses the “common” fields designated by exiftool but arranges them in a suitable format for inputting to Excel or and Excel like product, i.e. as a .csv file
“common” still contains too many fields in this case but the .csv output works just fine, if a spreadsheet is what you are after!
@Joanna Sorry but I have never been a great fan of the command line. The Basic script is in need of some care and attention but works well and captures the output. The only real minus is that if you use a command with a verbose output and have lots of images in the file, exiftool is off and running and not listening for any commands from the originating program!
But Process Lasso is capable of terminating ExifTool!
Lady and gentlemen DxO-professors and Apple users you’re again thinking around the maximum number of corners Why?
@GrahamF if I were your viewer, I would delete the spreadsheet with all this confusing data. Title and heading belong to the photo, not in a spreadsheet. Why don’t you use Photo’s export settings to name the image and – in case you have a web-gallery – show the title and subheading? If you have hundreds of images, no one will use the spreadsheet and look up the image number. KISS…
I must say, I’m mildly shocked by all this ado with EXIF-tool, scripts and whatever recommended by Apple users , I guess you’re overly conditioned by all the workarounds needed by DxO.
Btw., export recipes in C1 include the ability to name the export with tokens, so no one has to fiddle around with extra files-
Neither am I for everyday use but, ExifTool is a metadata engine which, according to the documentation, is capable of a lot more than you might imagine.
ExifTool Tag Names
The tables listed below give the names of all tags recognized by ExifTool. They contain a total of 27855 tags, with 17441 unique tag names.
make sure to read the whole command, which needs scrolling
I simply type this into the Terminal app to give me the following output, which doesn’t contain all tags because they don’t exist in the files I was scanning…