Maybe I’m misunderstanding something but could you not achieve the same intersection mask effect by applying the same steps to each submask? Effectively you have to do the same thing 4 times, rather than once as in the tutorial.
It’s not ideal or intuitive, but this should achieve what you want?
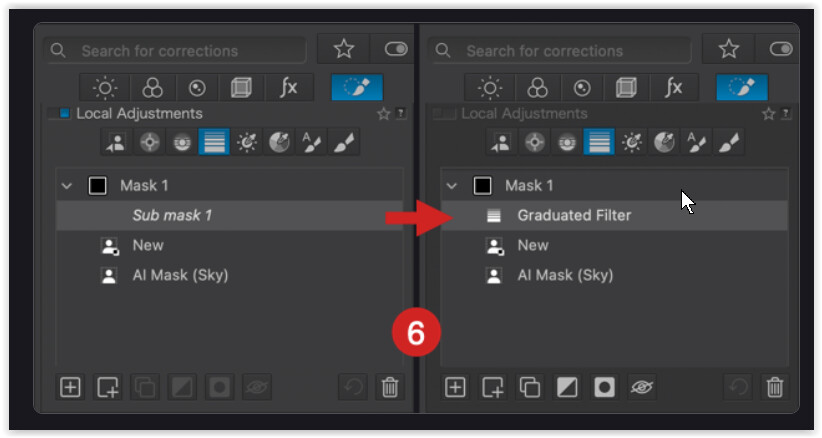
In DxO’s quite specific example, this ‘upside’ Graduated Filter “reflects” the sky’s coloration onto the foreground. – Since this happens within the sameMask, the same tonal corrections are applied (a property of the Mask, so to speak).
But different to the user guide:
To integrate the Graduated Filter in the sameMask 1 … now use e.g. < Shift + GF >.
( Or move the GF from Mask 2 back into Mask 1. )
Well, I could only figure it out by trial and error…
And btw, DxO’s example with the Intersection method is “from another world”. Due to a user’s question I had checked that before, but had to repeat the test to get it!
Perhaps you missed some “exercises” due to the AI debacle. If so, look here …
Although this was before the DxO changes, I also used the GF, but to exclude the blurring of Mask 1…
I understand how to make an intersection of submasks and can read the guide myself.
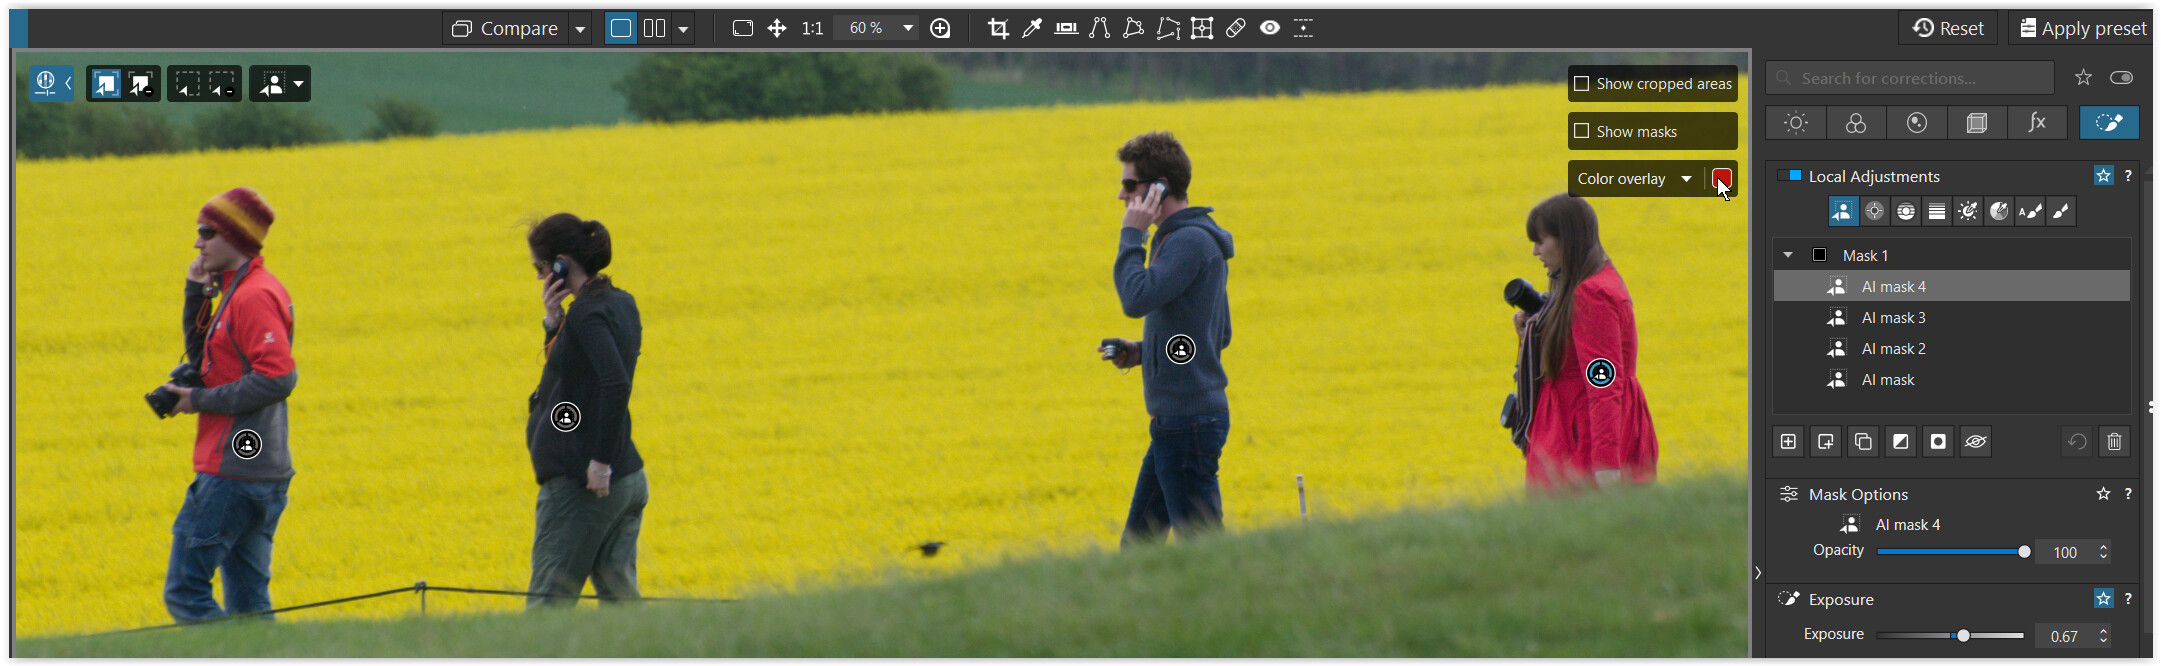
Your example of masking 4 people creates 4 individual submasks, not a single submask as shown in PhotoJoseph’s video. Therefore, the mask intersection technique as shown in the user’s guide must be applied separately 4 times, using 4 separate masks. This works, but it’s a workaround when the goal would be to apply and use as a group.
Photolab’s new tools to intersect masks is a positive development, but still lags other software options for usability and “intuitiveness”
… is somewhat outdated. They do show the GF in the same Mask, but their description (if I understood it correctly) reflects the old state, when, you didn’t have to use e.g. Shift + … (before PL 9.2).
My example with the four individual sub-masks was about to use / hold Shift + …, how to collect the separate selections. The video and subsequent discussion is in the ANNEX.
@swmurray
I completely agree that the handling of masks/layers is not “self-explanatory” and could be improved. – But what worries me much more is …
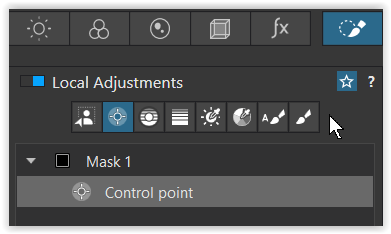
I’m still missing a clearly visible icon in the top menu bar indicating the active Local Adjustment editing mode – and to turn it off.
Why? You can work on an image globally while LA editing mode is active. To deactivate it, however, you have to go to the LA TAB and scroll up until you see the “drifted away” LA mask/layer, and then select the small active LA icon to deactivate it … it couldn’t be more complicated. *)
Furthermore, the size of the LA window should be adjustable for users with large or additional monitors. A fixed window size wastes unnecessary time and effort in making efficient local adjustments. With multiple masks/sublayers, these constantly disappear and become “invisible”.
*) In the Mac version, there are several buttons located below the preview window that are clearly visible. They indicate that the LA editing mode is still active and allow you to close it!
I’m all in for an elegant, user-friendly interface !!
The Escape key or the “close button” close the active tool regardless of which palette is open. This behavior and action are the same of the other tools on other palettes such as the hue picker, the tone curve picker, the smart lighting spot picker, etc.
Doesn’t this tool bar continue to display when any of the LA tools are active? (Specific tool modifiers depend on the specific LA tool). This tells you that a LA tool is “active”. The other tools have their own toolbar icons and also the reset/close button.
I use the close button because I swear I used to use keys all the time — either Enter or Escape — and many stopped working. Or at least stopped working consistently.
Besides, I’ve been using computers long enough that I treat Escape literally — convention was it would abandon an action. Not simply exit it.
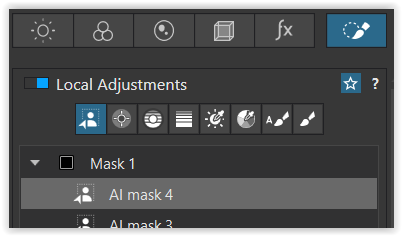
( for the screenshot I positioned the cursor over the other overlay to avoid “triggering” the coloured mask overlay from the AI Add a selection )
.
That’s different to the Mac version, where you have that kind of stuff below the preview and you see until you close the LA edit mode.
Then any of these tools switch off the LA edit mode …
( which is why @Wlodek proposed e.g. to hit the N key twice if avoiding ESC )
.
or the said ESC button.
Being in any global mode ( the LA TAB is disabled ) I don’t see that the LA edit mode is still active, I have to activate the LA TAB and – most of the time – have to scroll all the way to the top to see the “drifted away” LA tool window.
So out of curiosity now…
-Does the Smart Lighting Spot-weighted selection tool stay active when switching palettes also? Do the hue eyedropper or tone curve eyedropper selection tools stay active when switching palettes? If so, how do you close them?
In general, doesn’t the “window” with the tool “Reset / Close” buttons stay on screen whenever the user switches palettes? I ask, since on the Mac, this stays on screen and the tool must be purposefully reset/closed, or a different tool must be selected.
Seemed like the same behavior when using a Windows machine on previous versions. I don’t recall.
None of them are deactivated by switching the palettes ( TABs ) .
They all remain active until you click each one individually.
(The WB and the HSL picker deactivate each other; only one can be active at a time.)
you have to unclick the corresponding tool, unless you are switching to another one.
These tools
also deactivate the LA edit mode … or the said ESC button.
.
In general, doesn’t the “window” with the tool “Reset / Close” buttons stay on screen whenever the user switches palettes? I ask, since on the Mac, this stays on screen and the tool must be purposefully reset/closed, or a different tool must be selected.
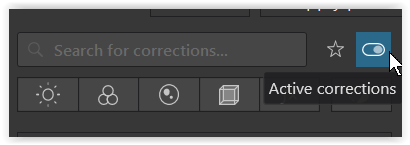
To see which individual tools are active, you must call them up one after the other,
if not using → Active corrections.


 .
.