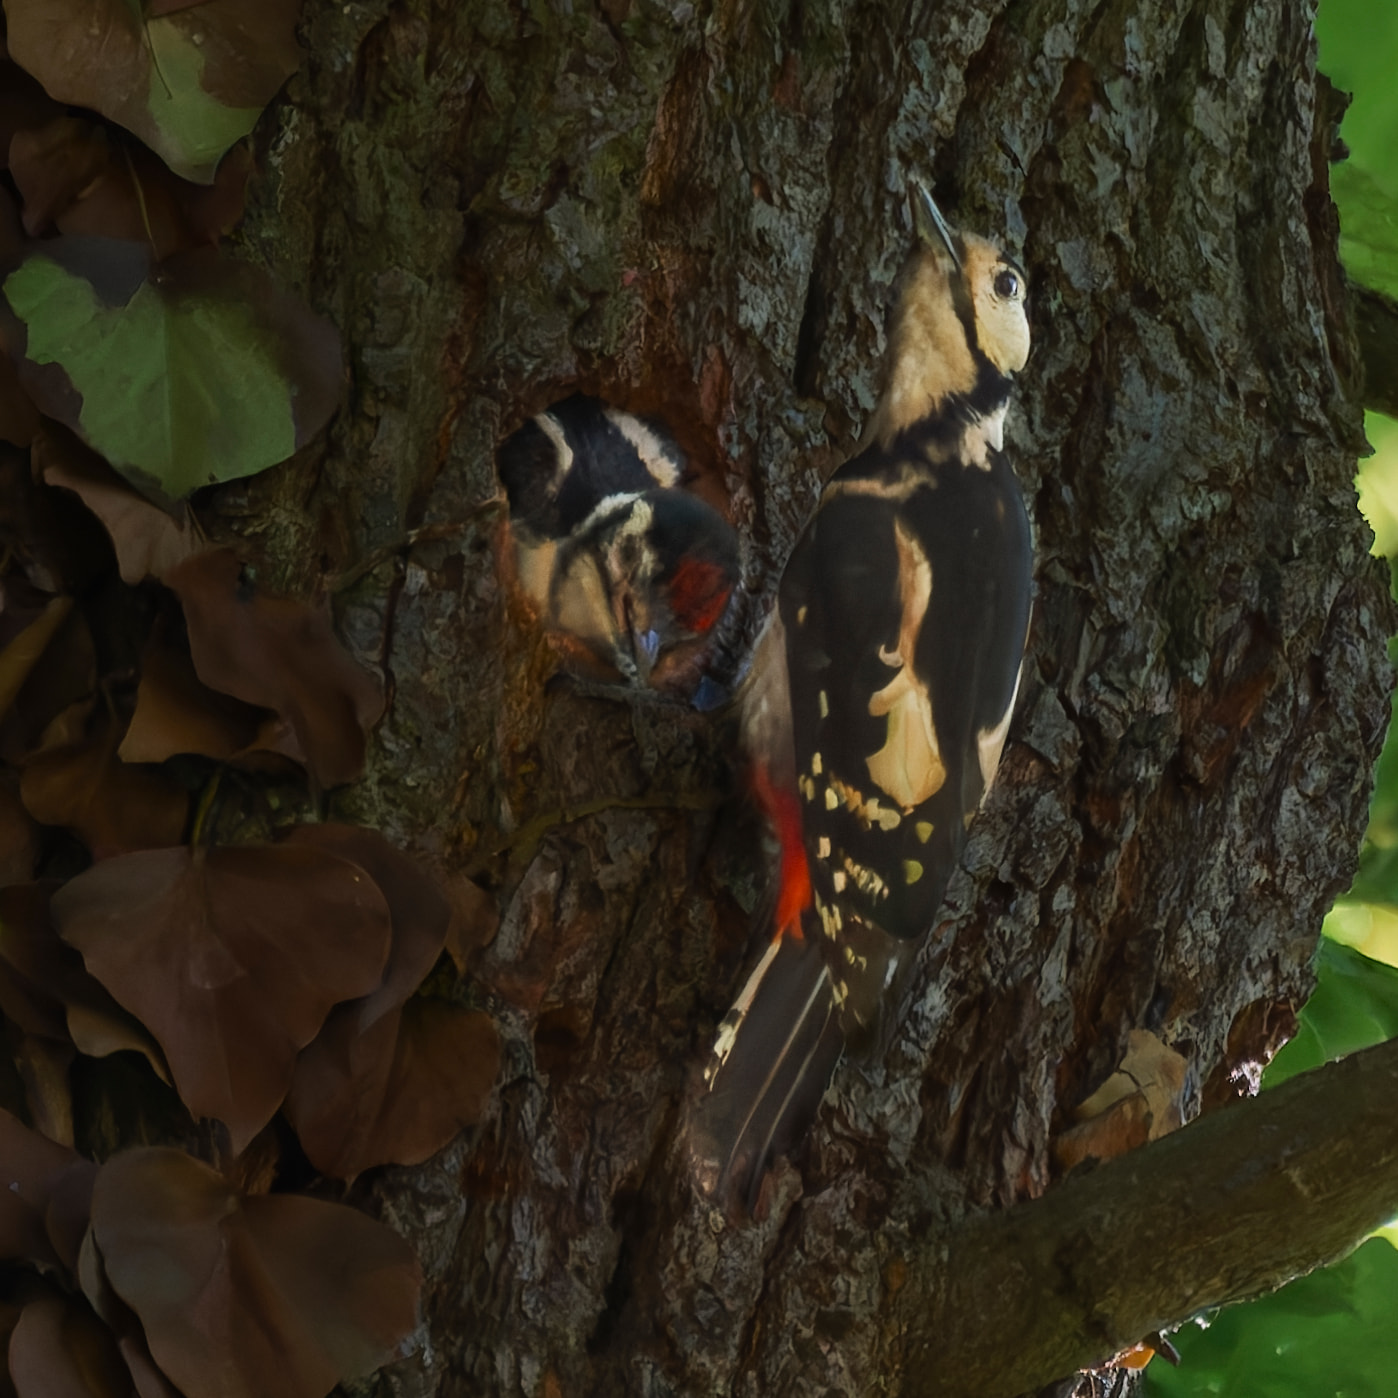
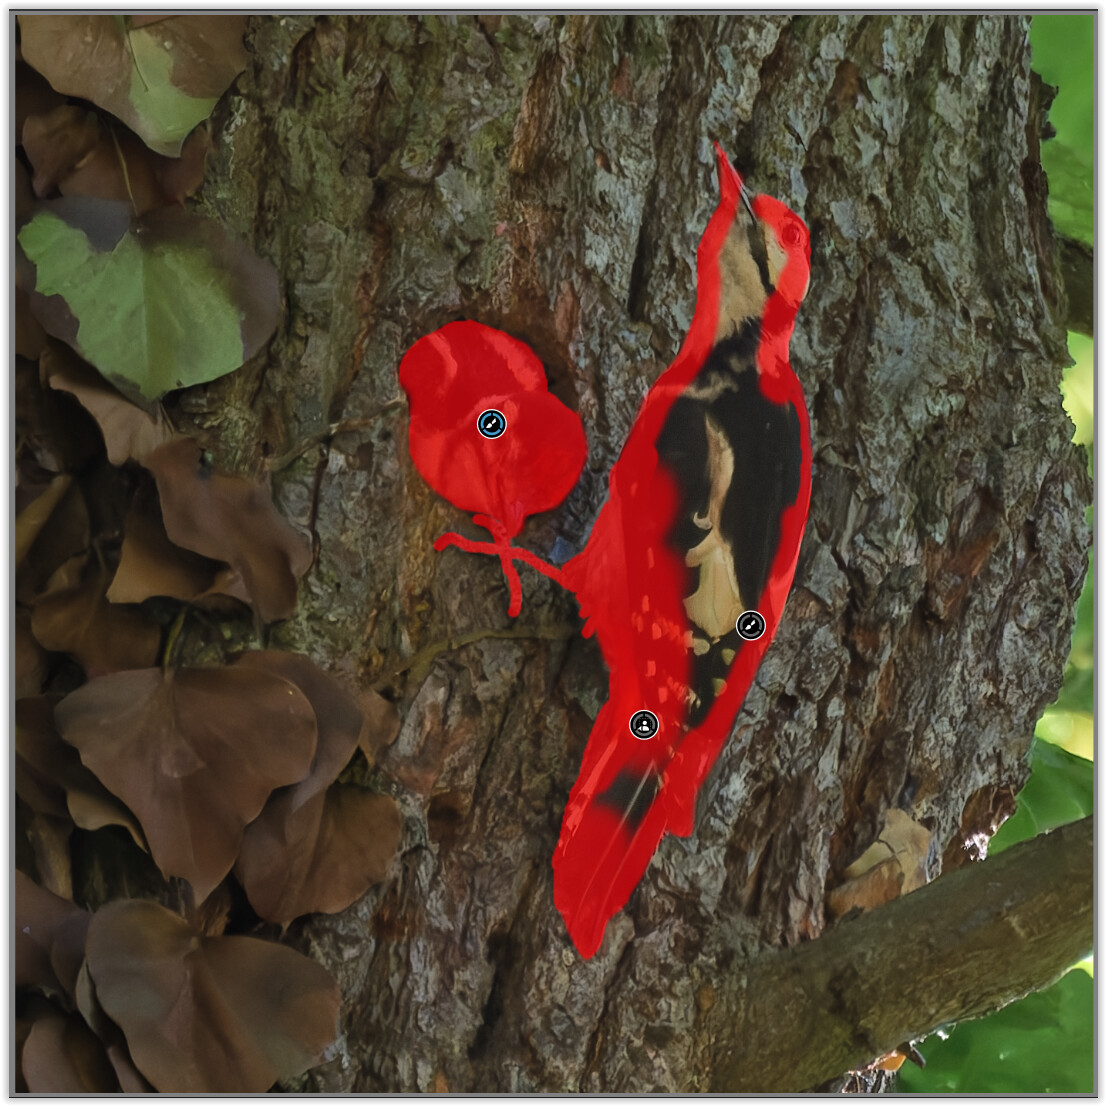
I took an image of a woodpecker and a young. Unfortunately it was in a tree (what is usual) and it was dark. My setup: Sony alpha 77II, lens sony sal 70400G2, ISO 1600, f5,6, speed 1/1000, 400mm.
Using PL 9.8.1 I did some exercises with crop, KI masking etc. For me the result is not satisfactory.
Any idea what to do for a better result? All ideas are very welcome.
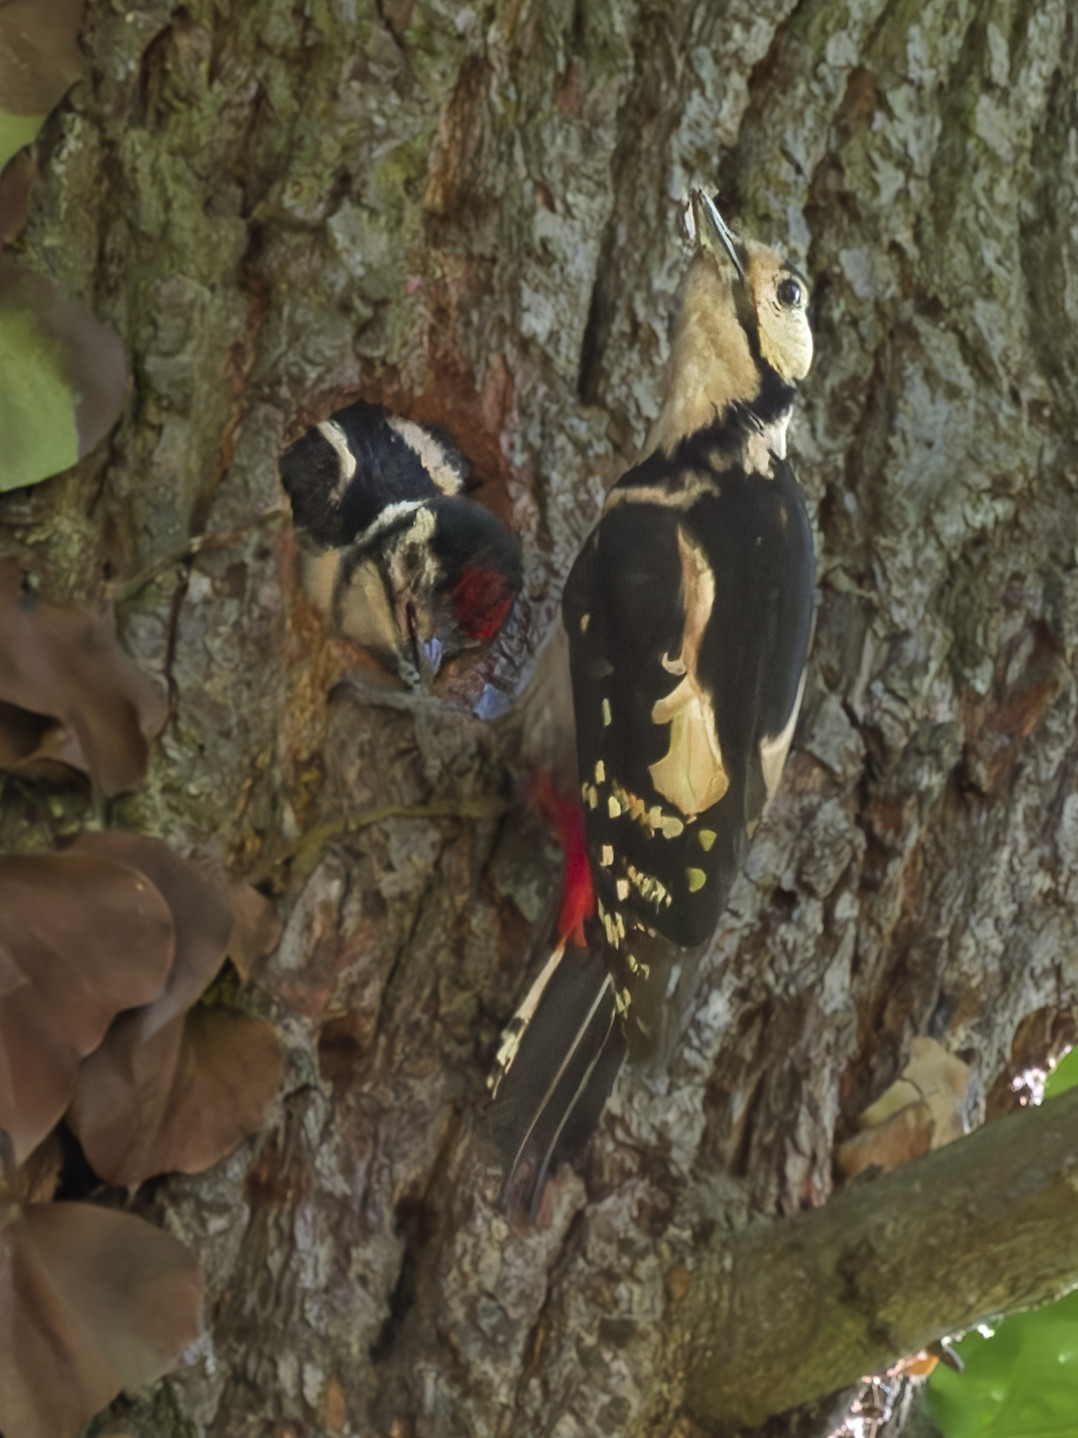
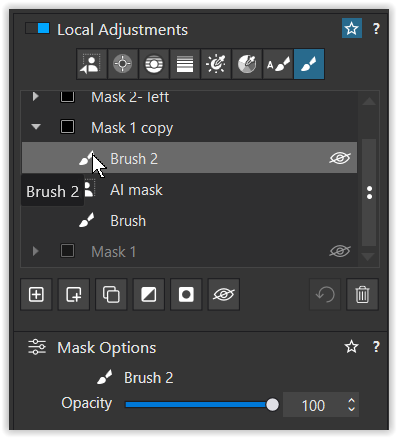
@Wolfgang , understood, you started with the Tone Curve. Then you hide my KI masks and created a copy to continue with your settings. Your settings deliver a much better result than mine. I’m wondering, how you got this precise mask. Just with the brush?
My idea was to make the background darker and highlight the birds. You version is different but looks better!
First of all, there is no right or wrong. It all depends on what you want to show.
.
tried something like …
copied your version to stick with the same crop, but hid your Mask 1 (and settings)
Tone curve: roughly adjusted the white point ( → clipping warning) and boosted Gamma in the Luminance channel
added some ClearView+ as well as midtone / shadow Contrast to improve “sharpness”
the colours still appeared too flat however
tried some overall Vibrancy … but didn’t like it
decided to replace the Luminance channel & settings with RGB
the colors now serve as a better starting point
.
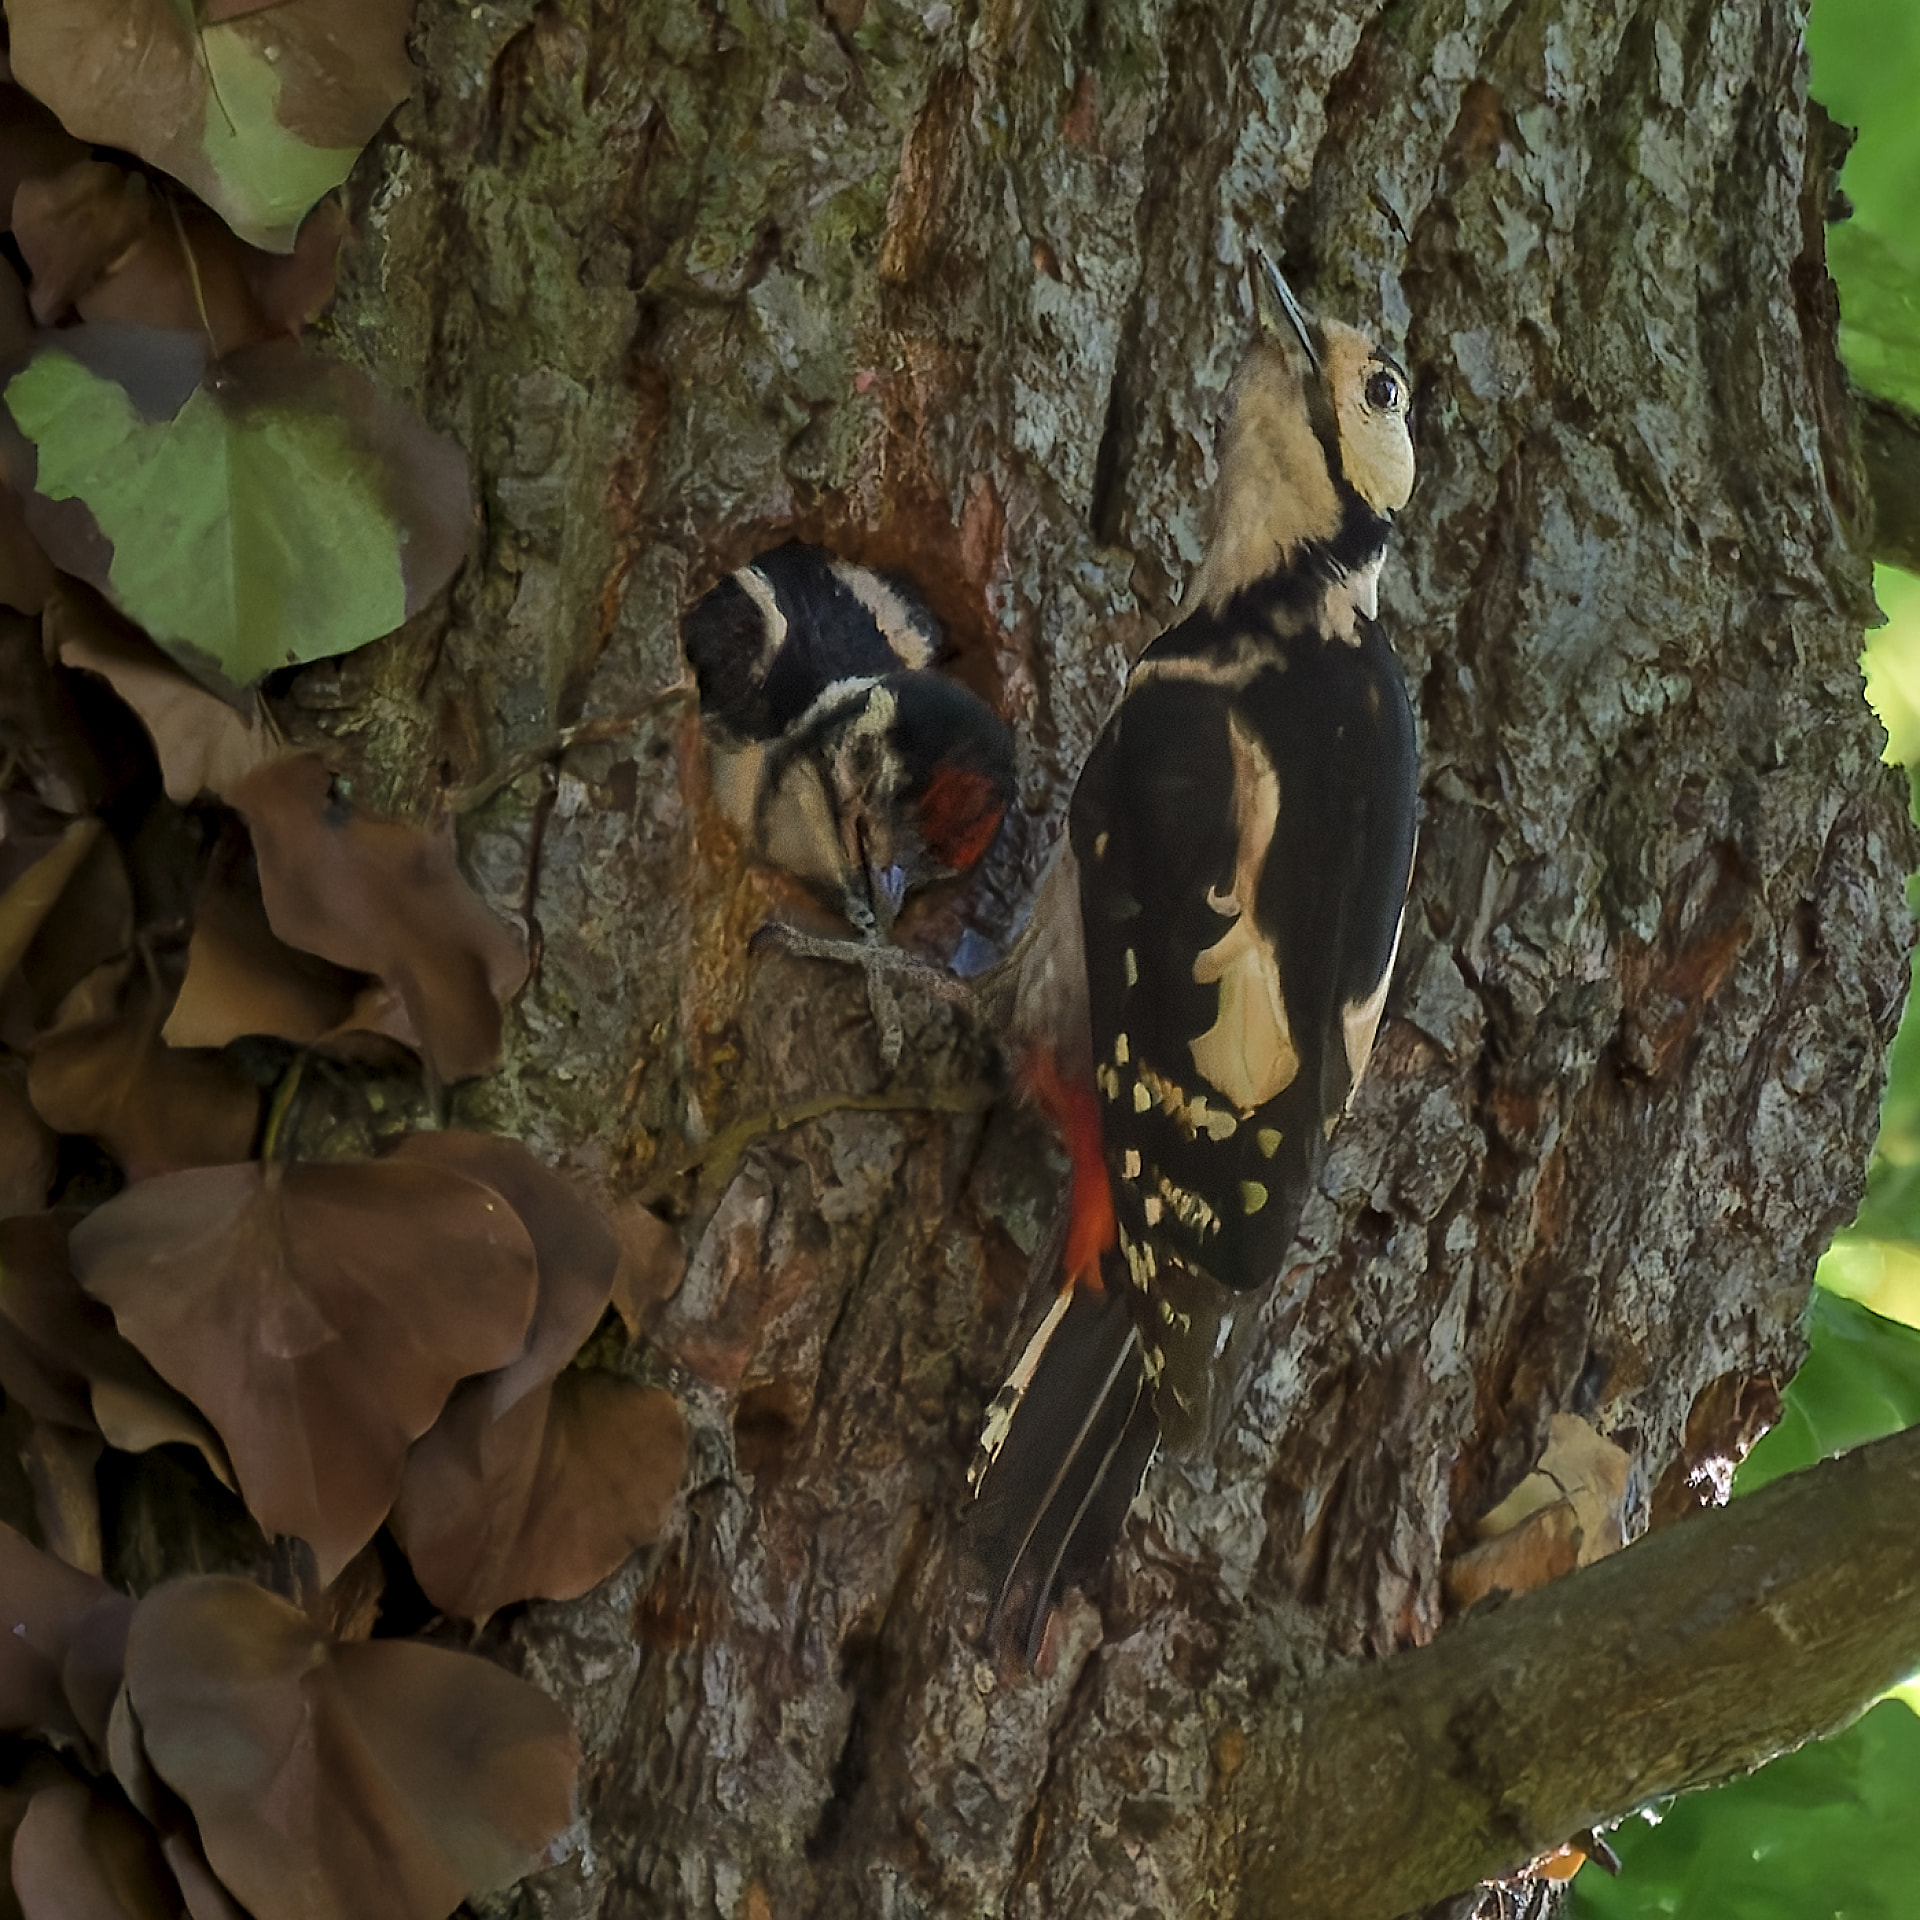
copied your Mask 1 to reuse it, but reset your adjustments
noticed you had trouble with the “AI mask” and tried myself
added a new Mask and tried “AI Animals” … little success, most properly due to dark scene & low contrast … deleted it
repeated with “AI Add an area” … better but not sufficient … deleted it
Mask 1 copy: left “Brush” and “AI Mask” unchanged, but refined “Brush 2”
the submask selection gets visible with mouse pointer over the symbol
.
note
You can add to the selection with the brush and – while simultaneously holding down the Alt key – subtract from it.
You get the same correction as when using “Invert Shape,” but without an extra layer, meaning you can switch immediately from addition to subtraction mode (very practical). Simply zoom in closely and use a small brush with a bit of feathering.
.
Instead of cropping the image like @stuck, I darkened both sides and reduced some sharpness to direct the focus onto the subject.
( hopefully not boring, but rather to give you ideas )
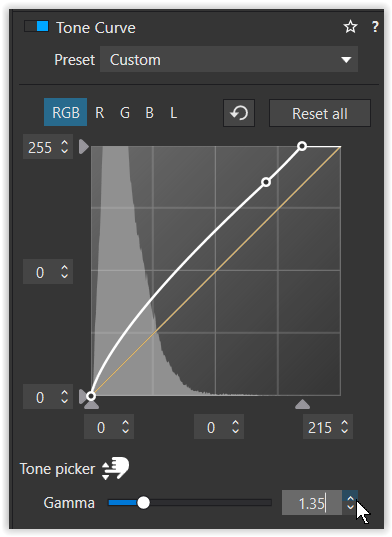
In such tricky situations, the usual approach I take is as follows:
Boost exposure until the histogram is “believable” (not bunched way left).
If the background takes over the viewer’s attention, then lower exposure to where it’s less obvious, then…
Create a subject mask (whether that’s AI, Control Point, Autobrush or even just a brush) and boost its exposure to ‘break out’ from the background.
Ensure the subject has bright brights and dark darks*.
Optionally…
Reduce contrast on the background, or…
Change white balance on the background, or…
Do both.
All of this is about making the subject stand out from the background. Occasionally, you may need to admit that the scene just doesn’t work if you can’t do this without making any part of it look bad.
*One of the tips I learned from a professional wildlife photographer is “if the bird has blacks and whites, make sure they are actually black and white and not just shades of grey.”
@Wolfgang , good morning, your explanations are giving me definetely more good ideas. I guess I need to become more experienced with creating masks. Thanks again HG