White fringe "halo"

DSC_6653.NEF.dop (11.6 KB)

Please find two crops from an image of a house finch (Haemorhous mexicanus). Nikon Z9, FTZII, Sigma 60-600 Sport at 600, manual exposure, rather backlit. One crop is a direct view of the NEF in a non-DxO raw viewer; the second is post PL7 Elite complete latest production release MS Win JPEG export using DeepPRIME XD. Note the white halo around the subject; a hint of this is visible in the NEF. Other than the halo, the image of the complete finch is quite acceptable (foot, scales, and claw detail in the to-be-submitted image is very good) and will be submitted to clients. I have attach the DOP file produced by PL for inspection by PL experts. I seem, to be doing something suboptimal and have not noticed this issue before.


1 Like

and the raw file ? if you apply the same settings in DxO to other raw files and you do not see any ill effects then may be the matter is with the raw ? or the same settings will result in the same effect with your other raw files ?

Having inspected the DOP file, it would appear that you have used ClearView Plus at quite a high value. This is guaranteed to produce this kind of effect. And it looks like you have pushed the exposure and contrast as well.

There is also the question of the compression you set for the export, which can also aggravate this kind of artefact.

I notice that you haven’t shown a screen shot of the RAW as seen in PL, so it is hard to compare and there was no need to export to JPEG just to show us the results.

Would you please put the original RAW file, along with the DOP file, to a file sharing site and send us the link here, so we can really see what is going on?

2 Likes

Thank you for that offer; I assume that my copyright (present in the EXIF) will be respected. Do you have a file sharing site that does not require my “personal” information, that does not cost money, and will provide a public URL that does not compromise those who access it (eg, demanding the use of spyware/tracking cookies)? I used to have one but that service has been discontinued.

I will redo with less ClearviewPlus and report upon the result. Using the preview function of PL along with the loupe (that only operates on the original not cropped image – when the image is cropped, the loupe on the image is a much larger fraction of the image area), I do my best judgement – after the custom presets I have “developed” – as to what the intended clients “prefer”.

Google Drive will do that!

Thank you for the suggestion. In the USA, the relevant URL for Google Drive is Share files from Google Drive - Computer - Google Drive Help that contains Abuse Program Policies & Enforcement - Google Docs Editors Help that states:
Google may take action on accounts that go above storage quota limits. For example, we may reject new uploads, compress content that exists, or delete content if you exceed your storage quota or fail to obtain sufficient additional storage. End excerpt. Note that Google and other trans-national service providers have to adapt the services and policies to the local national laws and regulations and thus are not uniform world-wide.

I pay for Google Drive in the USA for my gmail account as I have gone over my “free” quota a long time ago. Thus, I prefer NOT to use Google Drive for the purpose you mention, although I have used it to distribute high resolution JPEGs to clients.

Having inspected the DOP file, it would appear that you have use ClearView Plus at quite a high value. This is guaranteed to produce this kind of effect. And it looks like you have pushed the exposure and contrast as well. End excerpt.

I have been experimenting; the exposure and contrast are equivalent to pushing during emulsion development and burning on an enlarger during the exposure of paper for a print, necessitated by the backlit subject.

I have observed that most of problem is gone by decreasing the ClearView Plus slider value and decreasing the Lens Softness Correction Global slider (much less dependence upon the Details slider). Is this congruent with your experience?

FYI: The “Exposure” tool is not the best one to start with, when using PL 
 Instead, try using Smart Lighting (eg. place a Spot Weighted “rectangle” over the dark-middle of the bird’s face) 
 and you’ll probably find it produces a much better-balanced result (than applying Exposure adjustment globally).

That is, like this, for example;

  • image

  • image

1 Like

IMHO, it’s a typical artifact for high ‘Microcontrast’ setting - 80 in this case.
ClearView might have added a bit too.

Similar artifact can also be produced by chromatic aberration corrections,
but it seems it’s not the case for this picture.
The same goes for ‘Unsharp Mask’, which wasn’t used here.

The original has little noise, so probably DP XD had no visible impact.

ClearView usually produces much wider halo, but it might also produce
some 1-pixel halos like this. Together with the Microcontrast setting,
it is probably responsible for making the background busy.

No RAW => no definitive answers.

1 Like

A safe way to apply Microcontrast is via the “magic wand” setting - so that PL automatically determines an appropriate setting according to attributes of the image.

If there’s an Optics Module for the {body + lens} combo used to capture the image then there’s no reason to use Unsharp Mask 
 it’s provided only for those cases where an OM is not available.

DeepPrime XD is best reserved for images shot with very high ISO settings and/or for heavily cropped images 
 Otherwise, “plain” DeepPrime is the best option (with less chance of artefacts or over-smoothing of sections of the image).

1 Like

John,

In my experience, that depends. If I’m cropping, an image with lots of fine detail, captured indoors in lower light with one of my fast lenses , I often get much cleaner better results with far more very fine detail retention using DeepPRIME XD rather than DeepPRIME regardless of the ISO.

I shoot mostly indoors in lower natural light In museums and historical sites. Generally, my aperture is set between f/2 to f/4. However, depending on the amount of ambient light and my goals for an image. I may use apertures ranging from f/1.2 to f/ 5.6. My ISO levels are rarely particularly high. DeepPRIME XD is my preferred choice in low light. I will also use it in other situations depending . . .

Mark

1 Like

with a decently saturated ( good exposure ) shots and with moderation in terms what you dial slider-values-wise in the NR tool DPXD does not produce a lot of artefacts that are objectionable for many people 
 of course when the situation (exposure, sliders) is opposite DPXD can/will produce much more artefacts that are objectionable for many people 
 I use DPXD as a default setting with NR amount dialed down ( not “40” ) and if I happen to have poorly exposed shots then I can/will switch if needed to plain DP 
 also DxO code pays certain attention to a nominal ISO value recorded in raw when applying its NR ( can be illustrated by changing ISO values in the same raw file ), so same exposure with higher nominal ISO values might result in a different strength of NR applied

in any case the moral is that every user shall test pronoun use cases before deciding between DPXD vs DP and decide for proun-self

1 Like

Right. I have received your NEF file, along with a second DOP.

The problem is definitely way too much ClearView Plus and Microcontrast, along with a completely wrong use of Smart Lighting.

Here is the DOP you posted here, which now contains three versions - the untouched original, your edit and my edit.

DSC_6653.NEF.dop (40,9 Ko)

And here is a screenshot of the same portion of the original heavily cropped image that you posted, magnified from PL7


But I took things a little further and ran a TIFF export through Topaz PhotoAI, to give a finished image of 4704px x 5880px. Then took a screenshot of the same area from Topaz PhotoAI.

I am sending you the resulting TIFF by WeTransfer, so you can see it for yourself.

Absolutely agreed

1 Like

Topaz PhotoAI – I have used Topaz essentially since the beginning of the application suite, now being merged into PhotoAI. For aesthetic purposes. Gigapixel often can be satisfactory; however, the interpolated and extrapolated pixels that were NOT in the actual raw image invalidate the use for any actual measurement purposes (eg, an image of a bird for some types of ornithological research). At one time, technical support from Topaz indicated that the Topaz denoising/sharpening AI training/algorithms/implementation did not do well on feather detail. That evidently has been improved. The experimental evidence that DxO PL DeepPrime XD produces unwanted artifacts (such as the white fringing I observed) means DxO has more work to do on XD or the successor thereto. However, to the best of my knowledge, the DxO optics modules (as available – the Sigma 60-600 Sport plus Sigma TC-1401 or Sigma TC-2001 is NOT supported) provide image improvements/corrections not readily available in “competitor” applications.

not sure that really affect the bird picture showing above from your original post, sure there can be some improvement but to a certain degree. I think @Joanna did a nice work, but not seeing the original picture doesn’t really show the starting point.

The original was a backlit (dark) image of a bird of interest in which the bird occupied roughly 5 percent of the image area. I append a screenshot of the image from FastRawViewer that provides minimal “misrepresentation” of the NEF.

Note that I used the Sigma 60-600 Sport with a Sigma TC-1401 because there is no DxO optics module for the TC with the primary. Without an optics module, the details slider evidently does not appear in PL7 Elite Complete. The details slider often enhances an image for a client – but unlike Topaz “increased resolution” does not seem to invent pixels, but rather functions like DxO dark recovery that effectively does the digital equivalent of burning when making an emulsion print on an enlarger – “recovery” not “addition”. I could get no closer to my subject without risking the subject immediately flying under the assumption that I was a threat (“predator”).

If I may restate something I said to @Caradoc in this message.

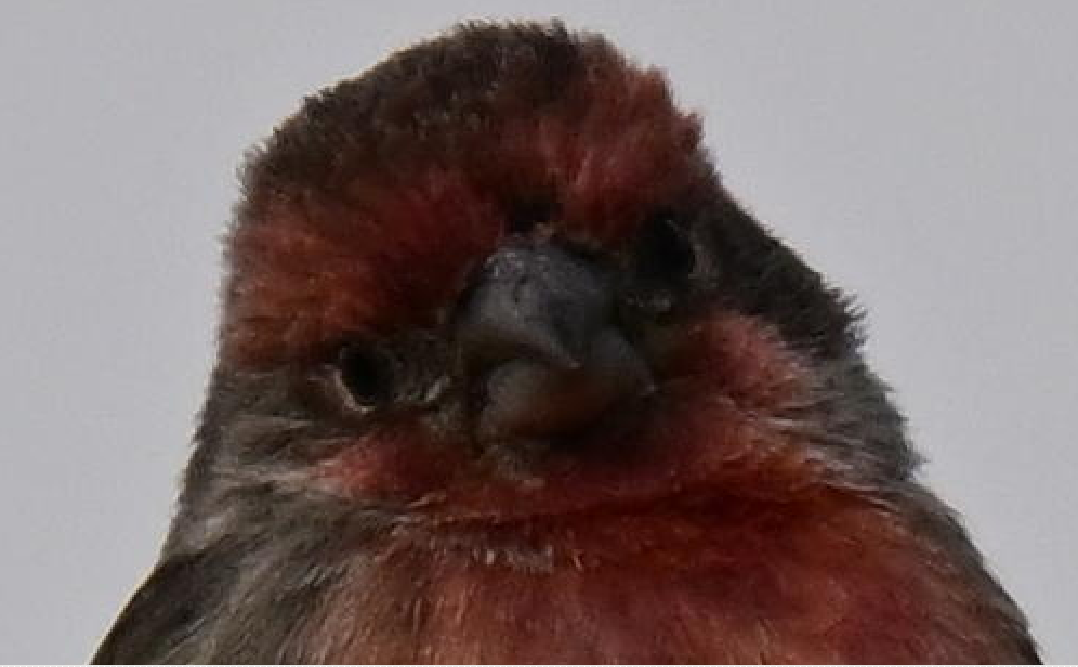
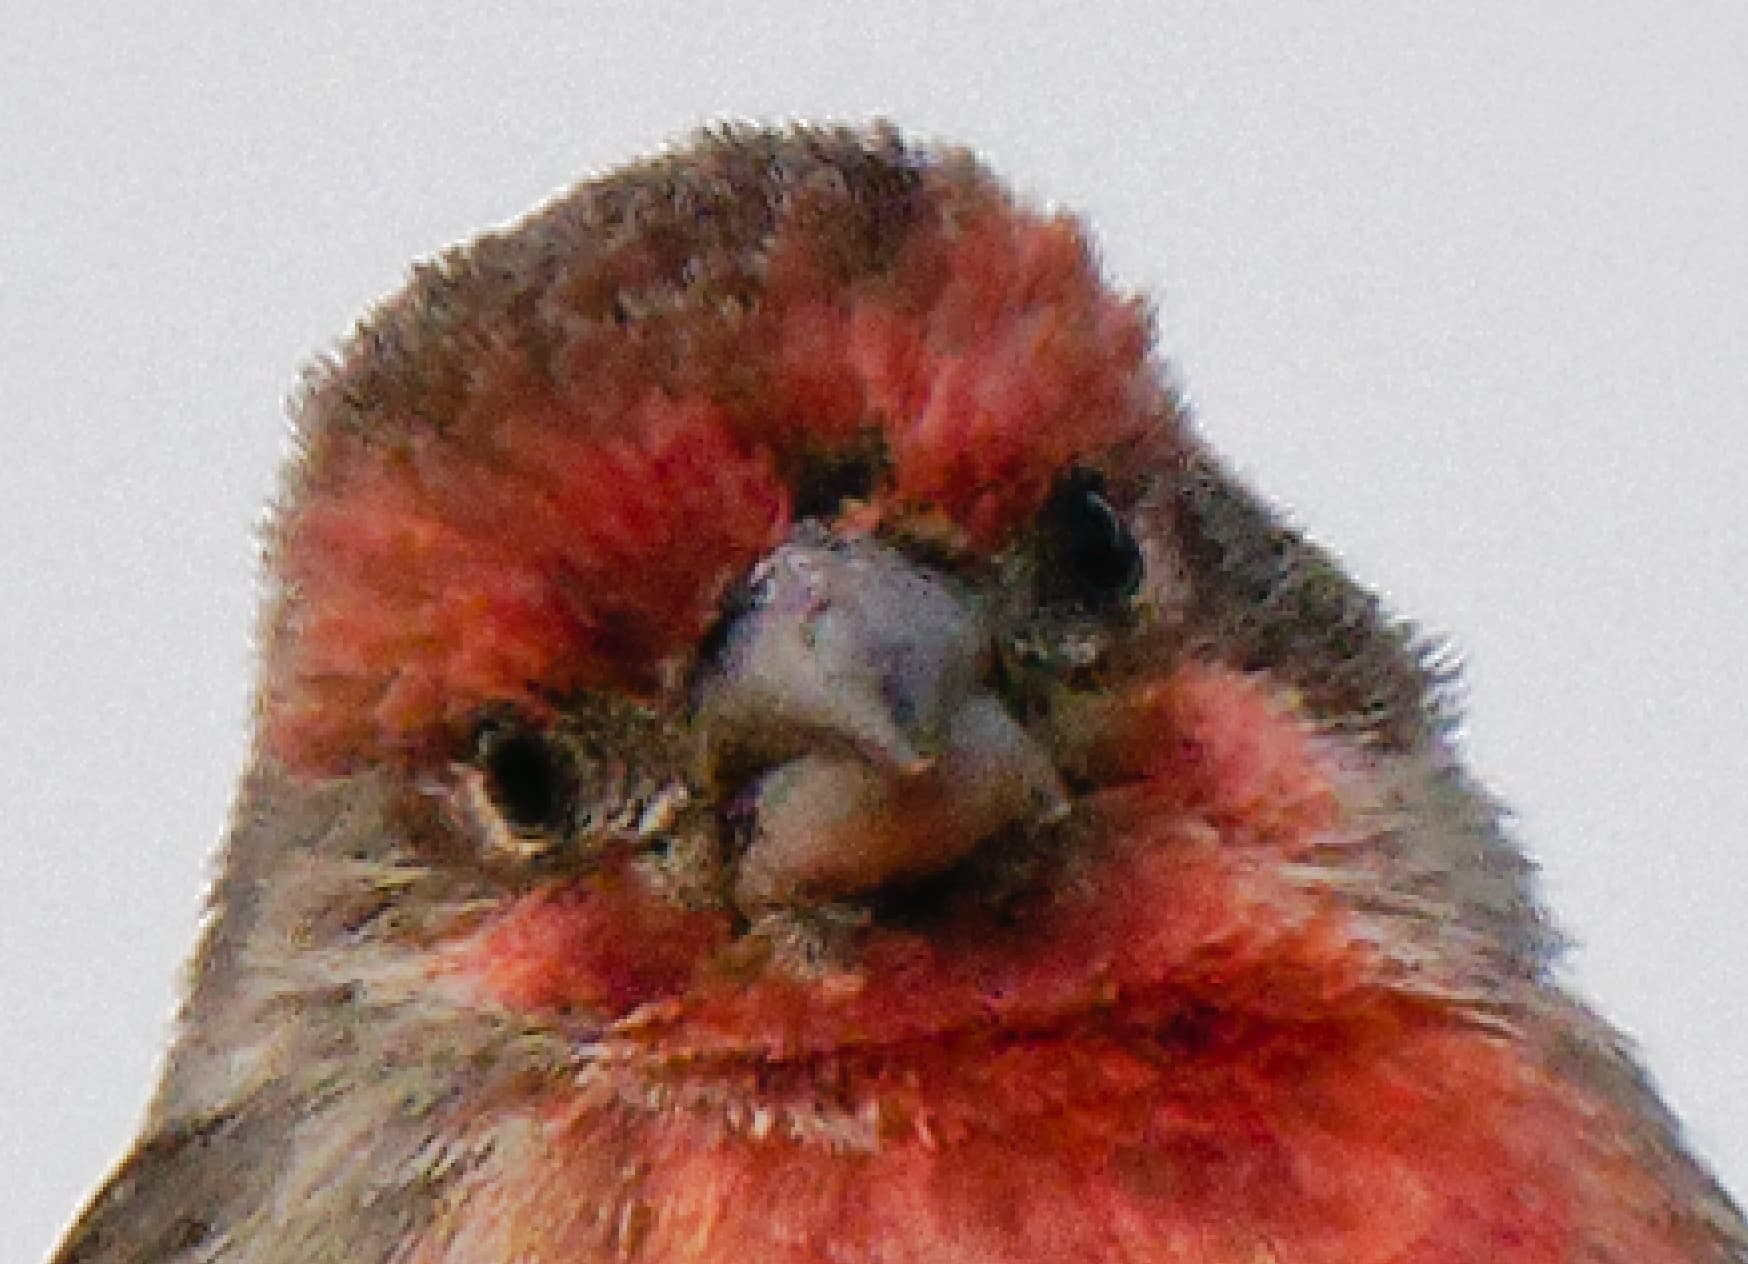
The part of the image that you were trying to improve only amounts to less than a 2Mpx image. At least, Peter managed just under 4 Mpx.

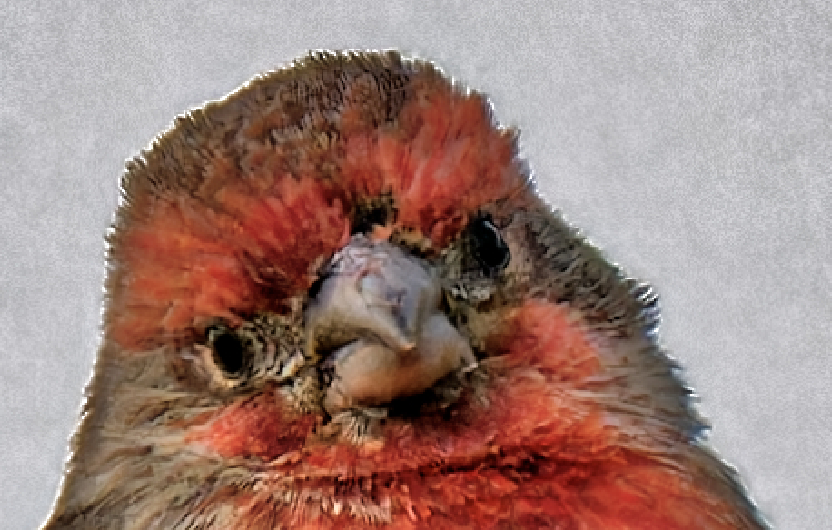
Is it any wonder that you are getting processing artefacts? Where is the detail going to be recorded? A lot of the “lines” that represent feather parts are only 1 pixel wide, so you are never going to get true texture.

In my work as a professional printer, I often come across photographers who want me to make large prints of small parts of images and, sometimes, I have to tell them that it is simply not possible - at least at the kind of size and quality that they are hoping for.

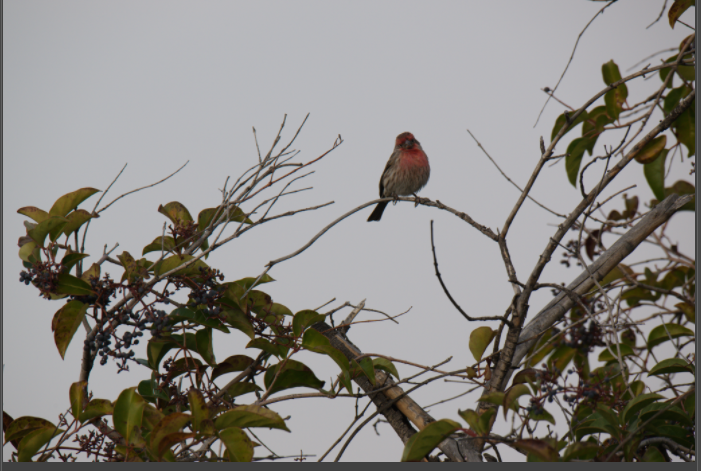
And the vast majority of such images are of birds, photographed on a 5-600mm lens that, in the photographer’s mind has a focal length of around 2metres or longer. Whereas, in fact, it is only the photographer’s eye that has zoomed in to that kind of focal length.

Maybe some of the latest software can “invent” texture, rather than just “making pixels larger” but, at the moment, your best bet is Topaz PhotoAI for “adding zoom” when you just can’t approach any closer.

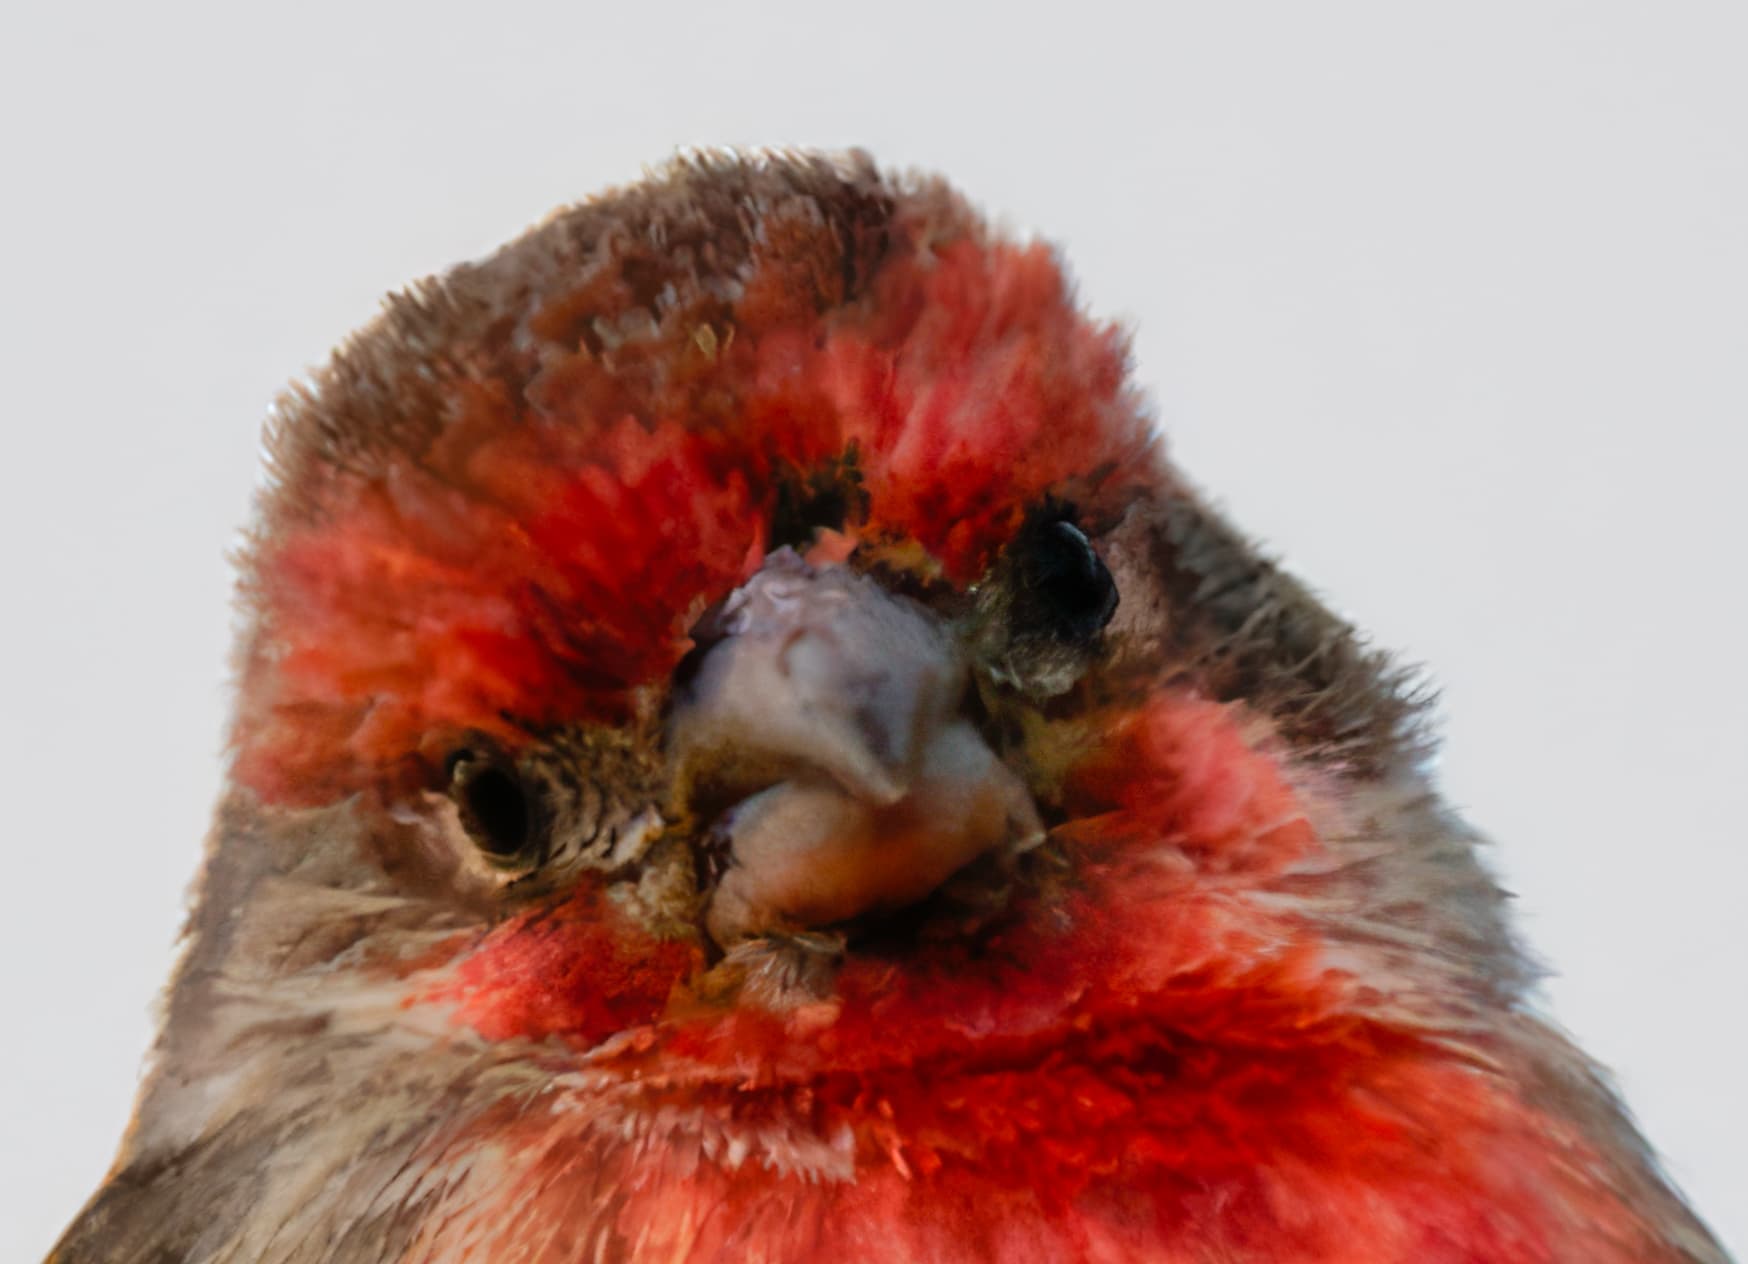
As for the fringing that is the original subject of this thread, I can assure you that is nothing to do with DeepPRIME XD. In fact, with a Nikon sensor like yours at 500 ISO, you really don’t need to use the XD - the regular DeepPRIME will be fine. I have used it up to 10,000 ISO on my D850 with no problems.

The cause of the problem was simply using ClearView Plus, which should only ever be used on images of fog or mist, along with Microcontrast, which is far too aggressive for this kind of subject. As soon as you push local contrast like this, you will get fringing. I hope you have FilmPack installed in PL7, because judicious use of its four fine contrast sliders is by far the best way to bring out such detail without these kind of problems.

By the way, you never said what you thought of the large TIFF I sent you. What do you think?

1 Like

Imaging with DX (APS-C) format on a FX (“standard” 35 mm) format sensor is a crop of the full FX image number of pixels and possibly the number of images per unit time that can be done (in the high imaging rate modes), nothing more. I “waste” some storage by not cropping in the FX body rather than cropping in post. I still prefer to crop in post, as on an enlarger with film. The issue with using a TC is that DxO does not support the TC-1401 or TC-2001 with this lens, whereas, eg, Nikon Z 800mm F6.3 S With Z TC-2.0x does have a DxO optics module. Note that this Nikon is “slow” as is the Sigma, and at an equivalent of F12 with the 2x, often will have AF issues even with a Z9. I have read on this forum that the optics modules do not make much difference but having looked at images submitted to clients, I respectfully disagree. DxO optics modules are one of the strong points of the DxO approach.

The problem is, if you’re using tele-converters and you still have to crop, in camera or in post, you’re never going to get good image detail, for the simple reason there are simply not enough pixels.

You absolutely are correct. The pixel count increase applications (such as Topaz Gigapixel AI now part of the Topaz Photo AI “all in one”) increase the aesthetic pixel count but install synthetic information (evidently, now good enough for bird feathers). This is not the same as duplicating, modifying, and then inserting the sub-image into the total image (the Art Wolfe “animals as art” approach in which individuals not present in the actual scene being viewed were inserted for aesthetic and marketing/sales purposes), but adding bogus detail. My understanding is that the DxO optics modules do not add bogus detail per se, but attempt to correct In computation (software) optical “defects” in the imaging system, restoring closer to what an “ideal” optical system would have displayed with the same sensor resolution (“pixel count”). I have compared until difficult imaging conditions the Sigma 60-600 at 600 post-PL7 Elite Complete with the same lens at 600 with the Sigma TC-1401 (under difficult conditions) that does not have a DxO optics module, and although there are fewer pixels, the DxO optics module does make enough of a difference that the 600 without the TC is the “better” image. Obviously, unlike in the world of fiction, when one runs out of pixels, nothing can be done. As for the use of Sigma over Nikon, etc, the current Sigma lenses I use produce images as good or better than Nikon at significantly less cost with a build quality (field durability) as good as Nikon. Sigma does not make all of the lenses that I need, and the Nikon restriction on the Z mount further reduces what Sigma is allowed by Nikon to produce for Z mount. For example, I retired my F mount Nikon 24-120 4 VR lens from my kit with the advent of the D850, and used a Sigma 24-70 2.8 Art as my “travel” lens. I recently acquired a Z mount Nikon 24-120 4 S that is “much sharper” than the F mount lens, and is in fact satisfactory on a Z8/Z9 as a travel lens in FX format. Thus, I use more than one marque of lens.