Personally, I have never used curves to “correct” WB, since it doesn’t apply such a correction to the entire range of colour tones.
And I cannot, for the life of me, comprehend why you would use the histogram. I never use the histogram for anything - my eyes and brain are far more capable of interpreting the rendering of an image…
As far as I can tell, the only really useful part of the histogram display is the shadow and highlight clipping indicators. Above all, on the back of the camera, the rest of it serves no useful purpose, apart from telling you that you didn’t measure your exposure correctly and need to “take another guess” and retake it.
Film
Go back to the “good old film days”. You either got it right first time or you ended up wasting film “bracketing”.
Now, as you are well aware, I also shoot LF 5" x 4" film, which costs around €5 for negative, to €15 per sheet for colour transparency. So, I had to learn how to get it right or go poor.
Exposure was/is calculated by knowing the dynamic range of the film and spot metering…
-
for B&W negative film, spot metering for Zone 3 shadows with barely perceptible details and letting the highlights fall where they will, controlling excessive exposure with graduated ND filters or by adjusting the exposure to expand or contract the dynamic range on film and in anticipation of the range of a printing paper.
It was/is a complicated process, which requires knowledge, thought and planning.
Here is an image that I made years ago…
The brightest highlight is 14 stops higher than the detail in the fire surround at ground level…
So, I had to start by calculating by how much I would have to over-expose and under-develop to squeeze these 14 stops into the 10 stops of the film and, thence, to the 8 stops of the printing paper.
How would a histogram display the 4 stops of over-exposure necessary in order to arrive at a correctly exposed negative, that could then be further compressed into the, even more restricted, range of the printing paper?
No, it all comes down to knowledge and patience, calculating before shooting.
-
Colour transparency film is both easier and more difficult at the same time.
Something like Fuji Velvia 100 has a dynamic range of only 5 stops and, if you are not accurate in where you place the spot exposure, you are almost guaranteed to have parts of the image that are outside of the dynamic range. Velvia 100 requires that you expose for 2 stops less than the brightest part, which leaves only 3 stops for anything less into the shadows.
This image…
… required a 2 stop ND grad filter over the foreground sand to bring the range to within the 5 stops available - bearing in mind it is not possible to change the dynamic range in post-processing.
In addition to correct exposure, I also needed to take a colour temperature reading and put colour correction filters in front of the lens to ensure that it was exposed at its box WB temperature of 5600°K.
Digital
Nowadays, you could say that we are more fortunate, in that we no longer need to use colour correction filters but that doesn’t mean we can “machine gun” and then choose the best of a bad bunch after the fact.
In fact, what digital photography has “encouraged” us to do is to become lazy when capturing images - but at the cost of hours spent in front of a computer, trying to fix everything to make up for that lack of attention and effort behind the camera.
Exposure can be accurately measured and calculated - but only if you take the time and effort to get intimately acquainted.
How can I know exactly the right exposure for a given image?
Because I researched and found that my sensor has a dynamic range of 14.6 stops at 100 ISO and that the most I can over-expose past the 0EV level is +2 to +3 stops without blowing the highlights. This leaves me with 11 to 12 stops available range for shadow detail.
With this knowledge, I can confidently expose for the highlights and let the shadows fall where they will - to be recovered in post-processing.
I will repeat my image (SOOC) of Morlaix station at night…
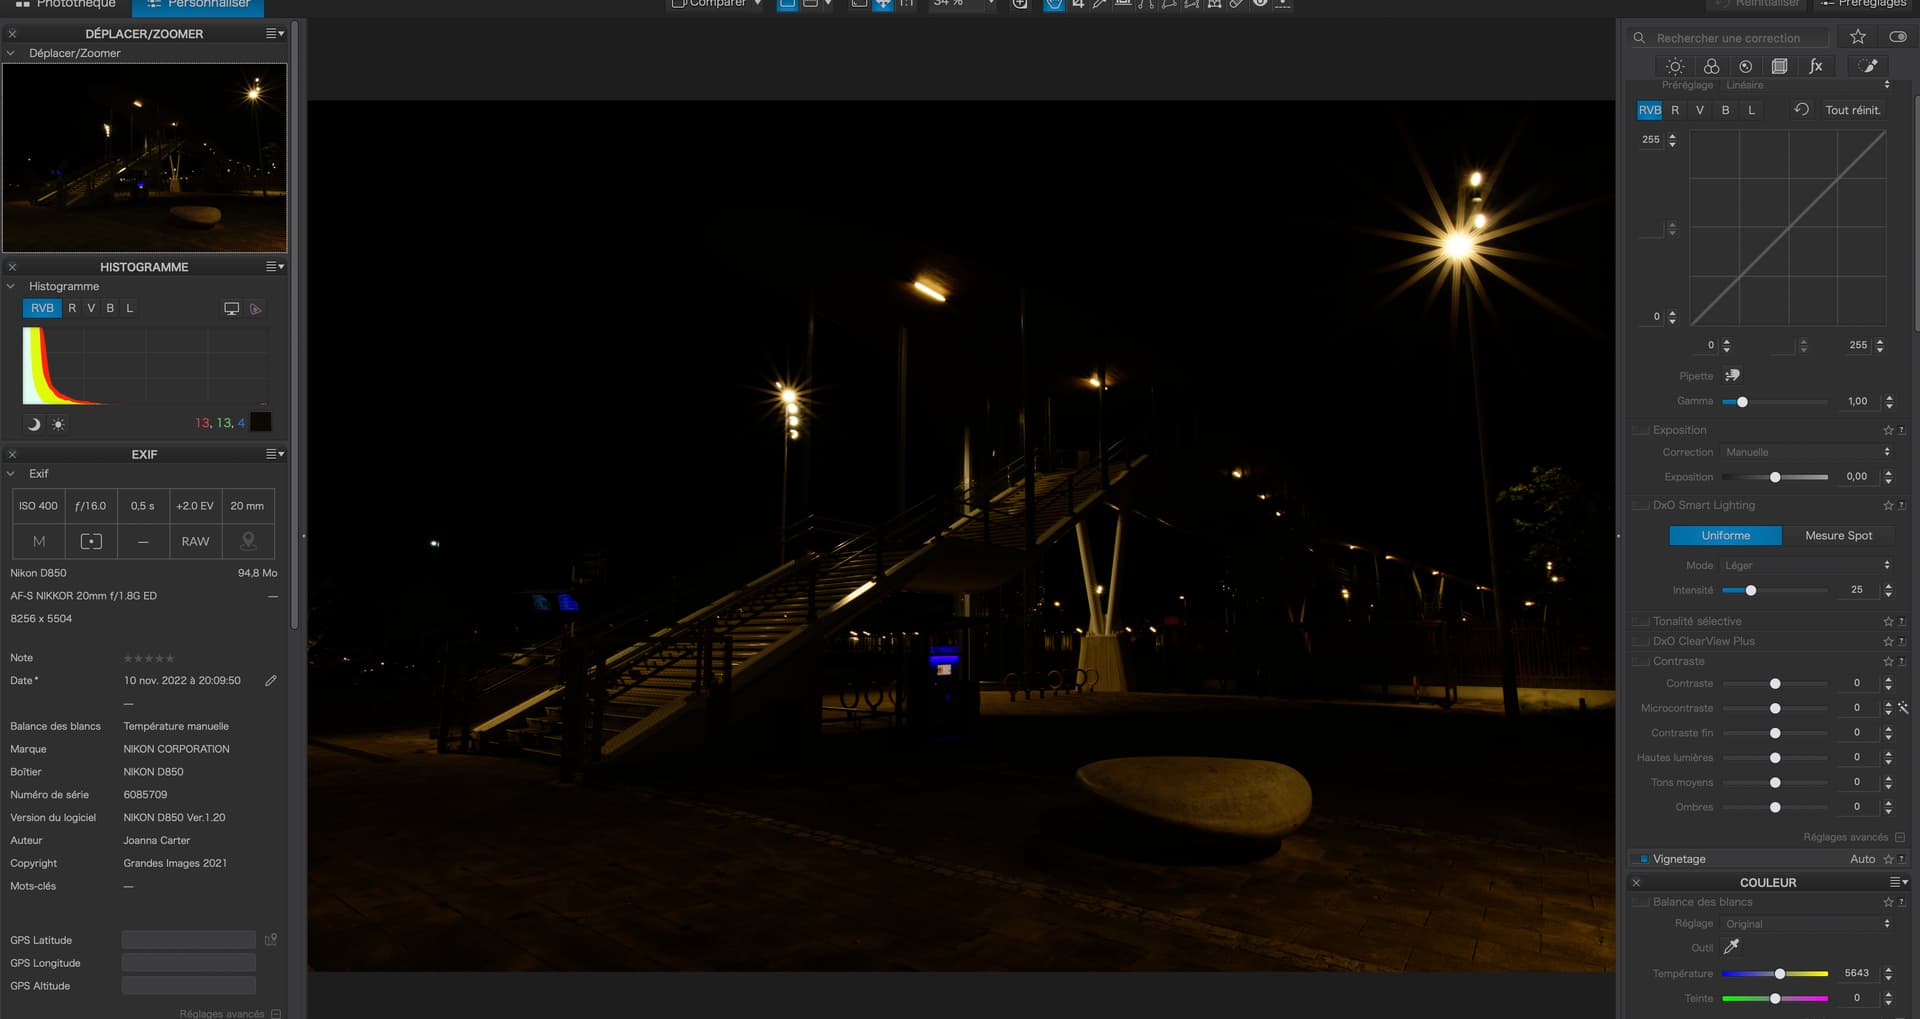
If I had relied on the histogram, you see here, on the back of the camera, you would say that it is severely under-exposed, except for the lights, which barely show up in the histogram.
But you have to realise that, whether on the back of the camera or in post-processing, this is a JPEG histogram, with very limited dynamic range.
Using FastRawViewer, we can easily see the RAW histogram and it becomes apparent that we have plenty of detail all the way down to -12EV - which we can recover in PL.
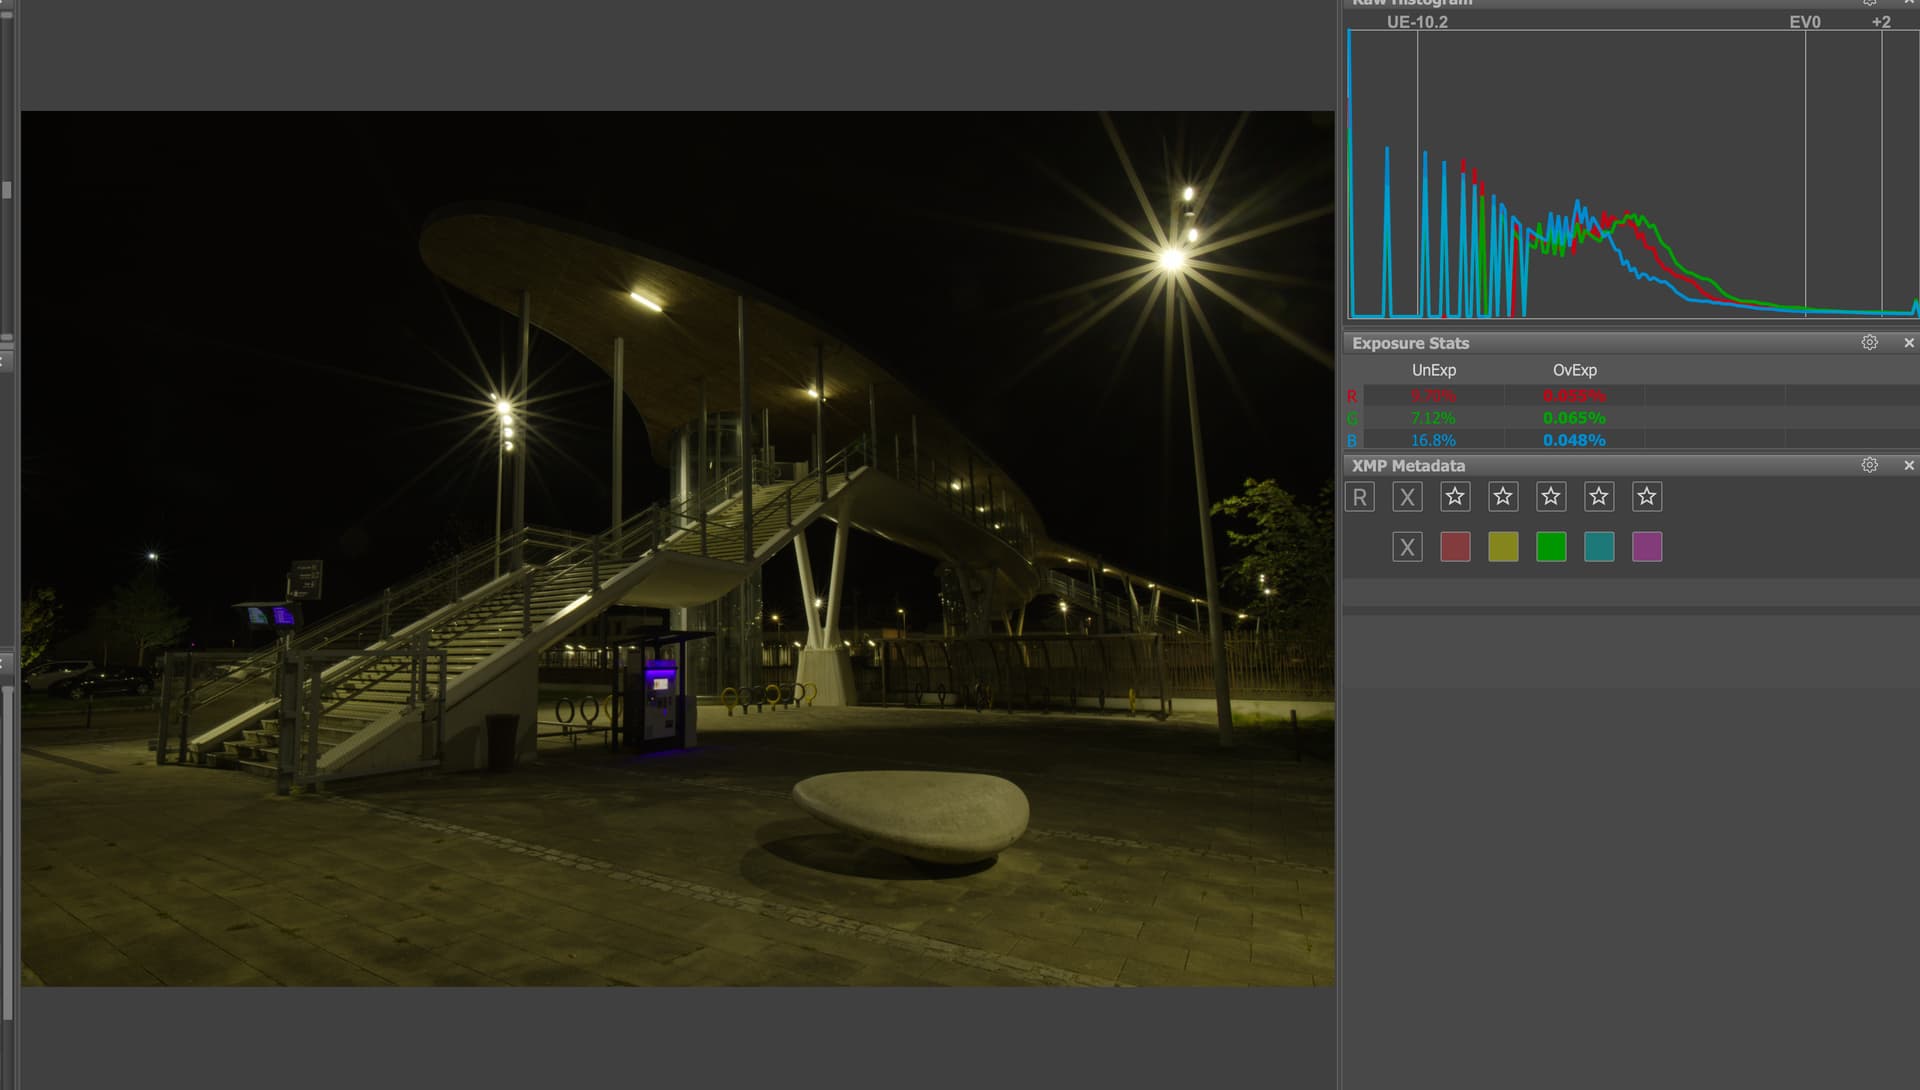
It is for this reason that I completely ignore the histogram, especially when shooting. Why? Because it is next to useless. See the finished result…

As for white balance, there is nothing that can determine the right temperature. That is down to the photographer to decide the “feeling” they want to evoke.
-
Exposed for the street lighting, spot measured on the zinc above the shop sign…
- Exposed for the interior shop lighting, spot measured on the white of one of the posters in the shop…
- Compromise of daylight (5600°K)…
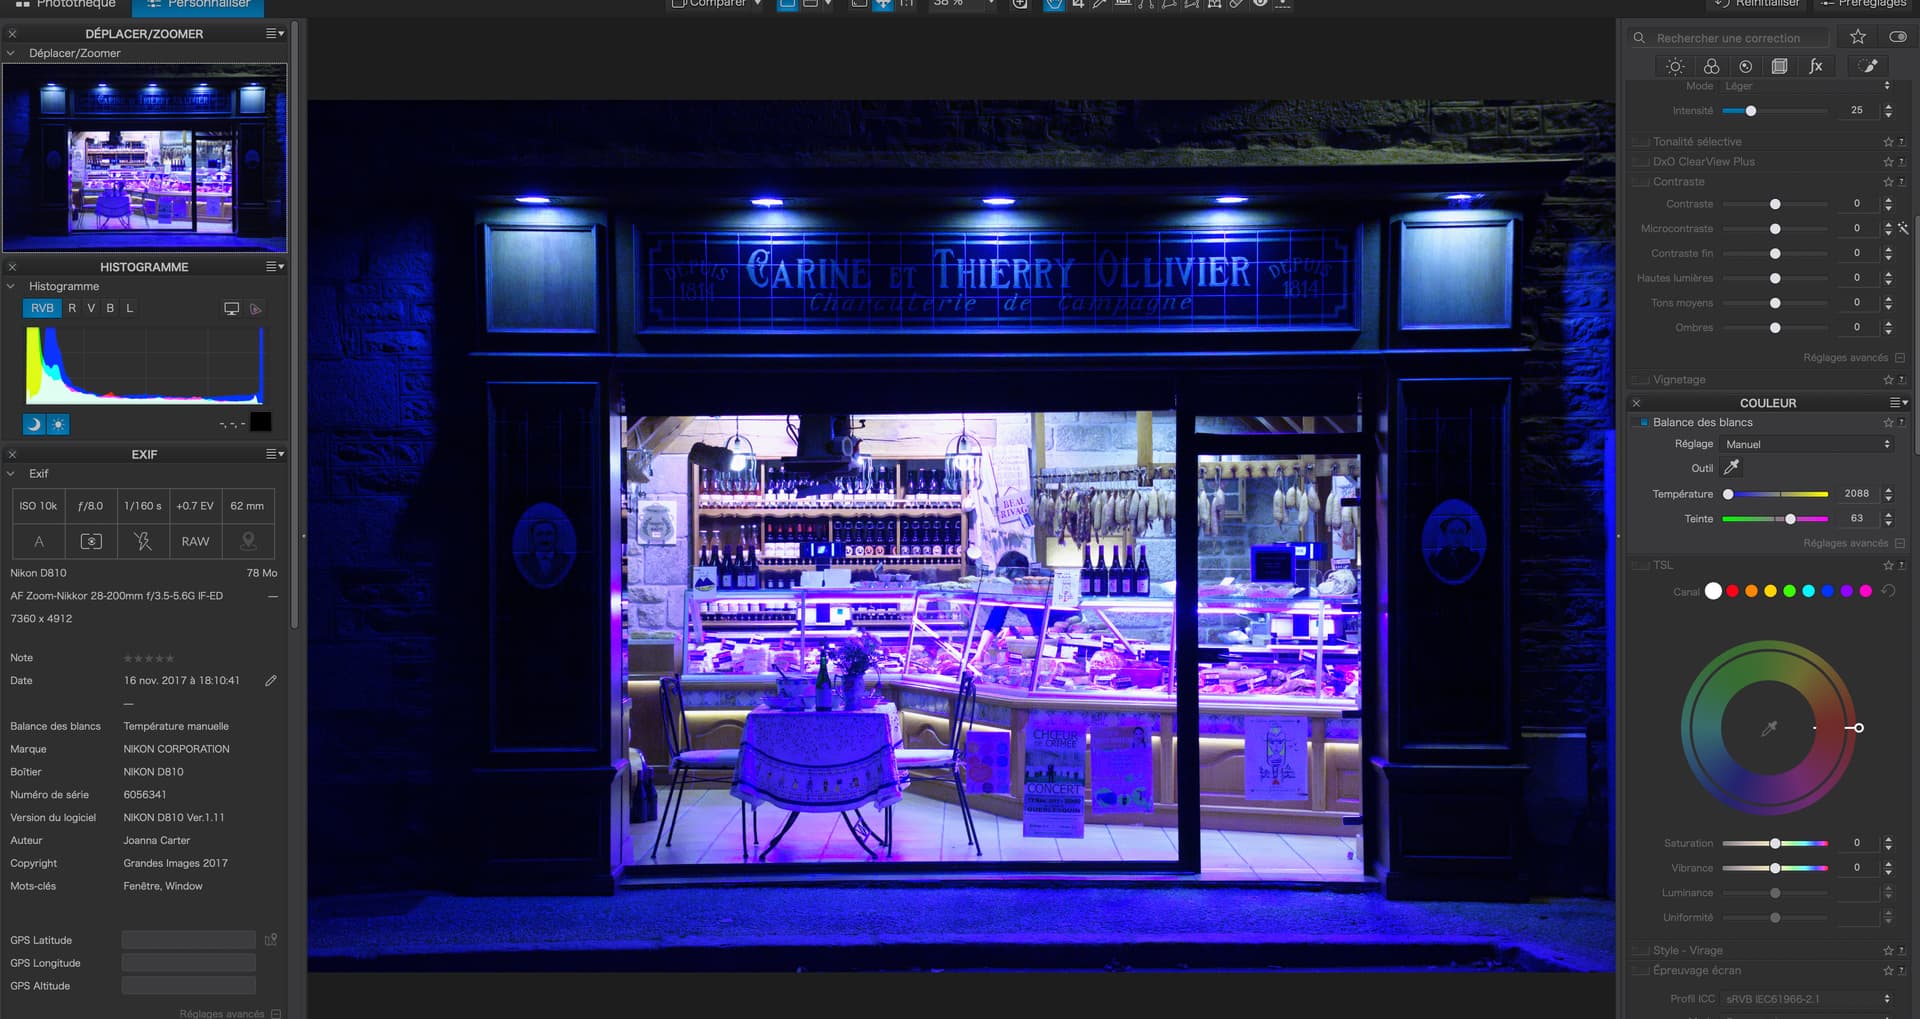

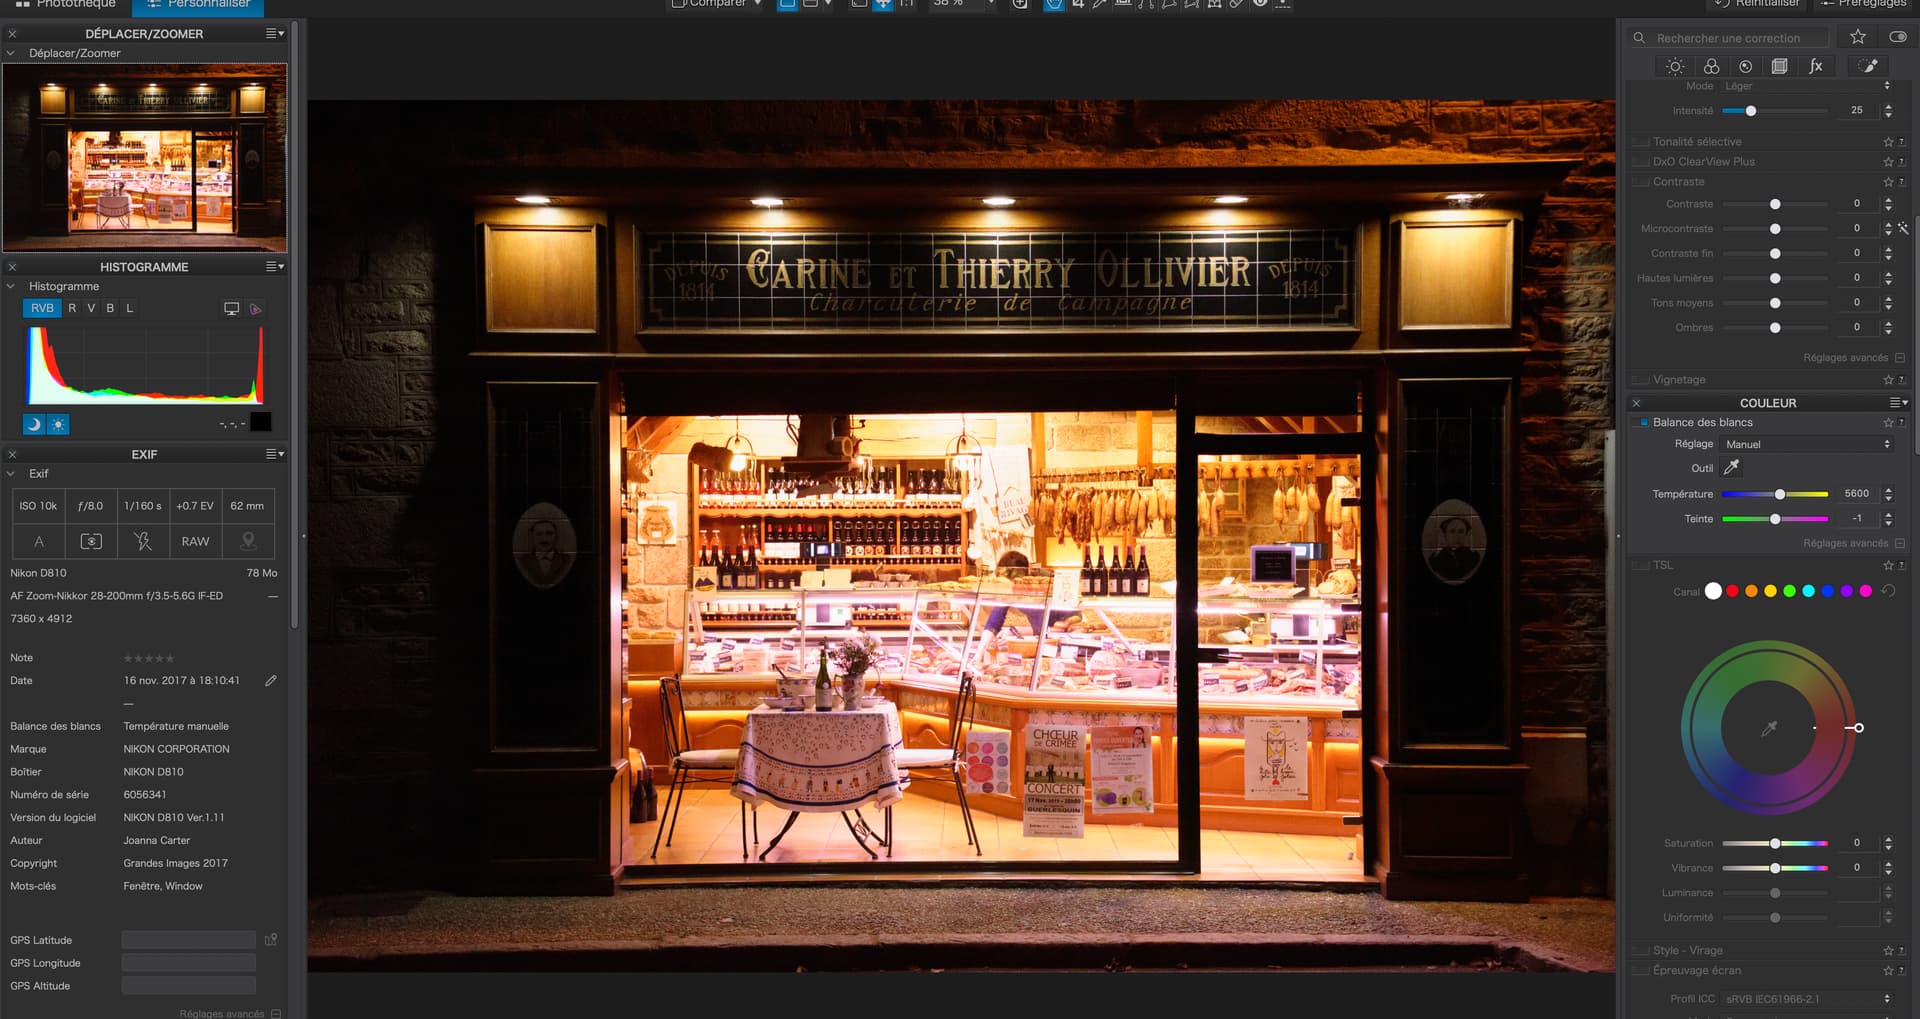
Which do you prefer? And how on earth would you use the histogram to achieve it?