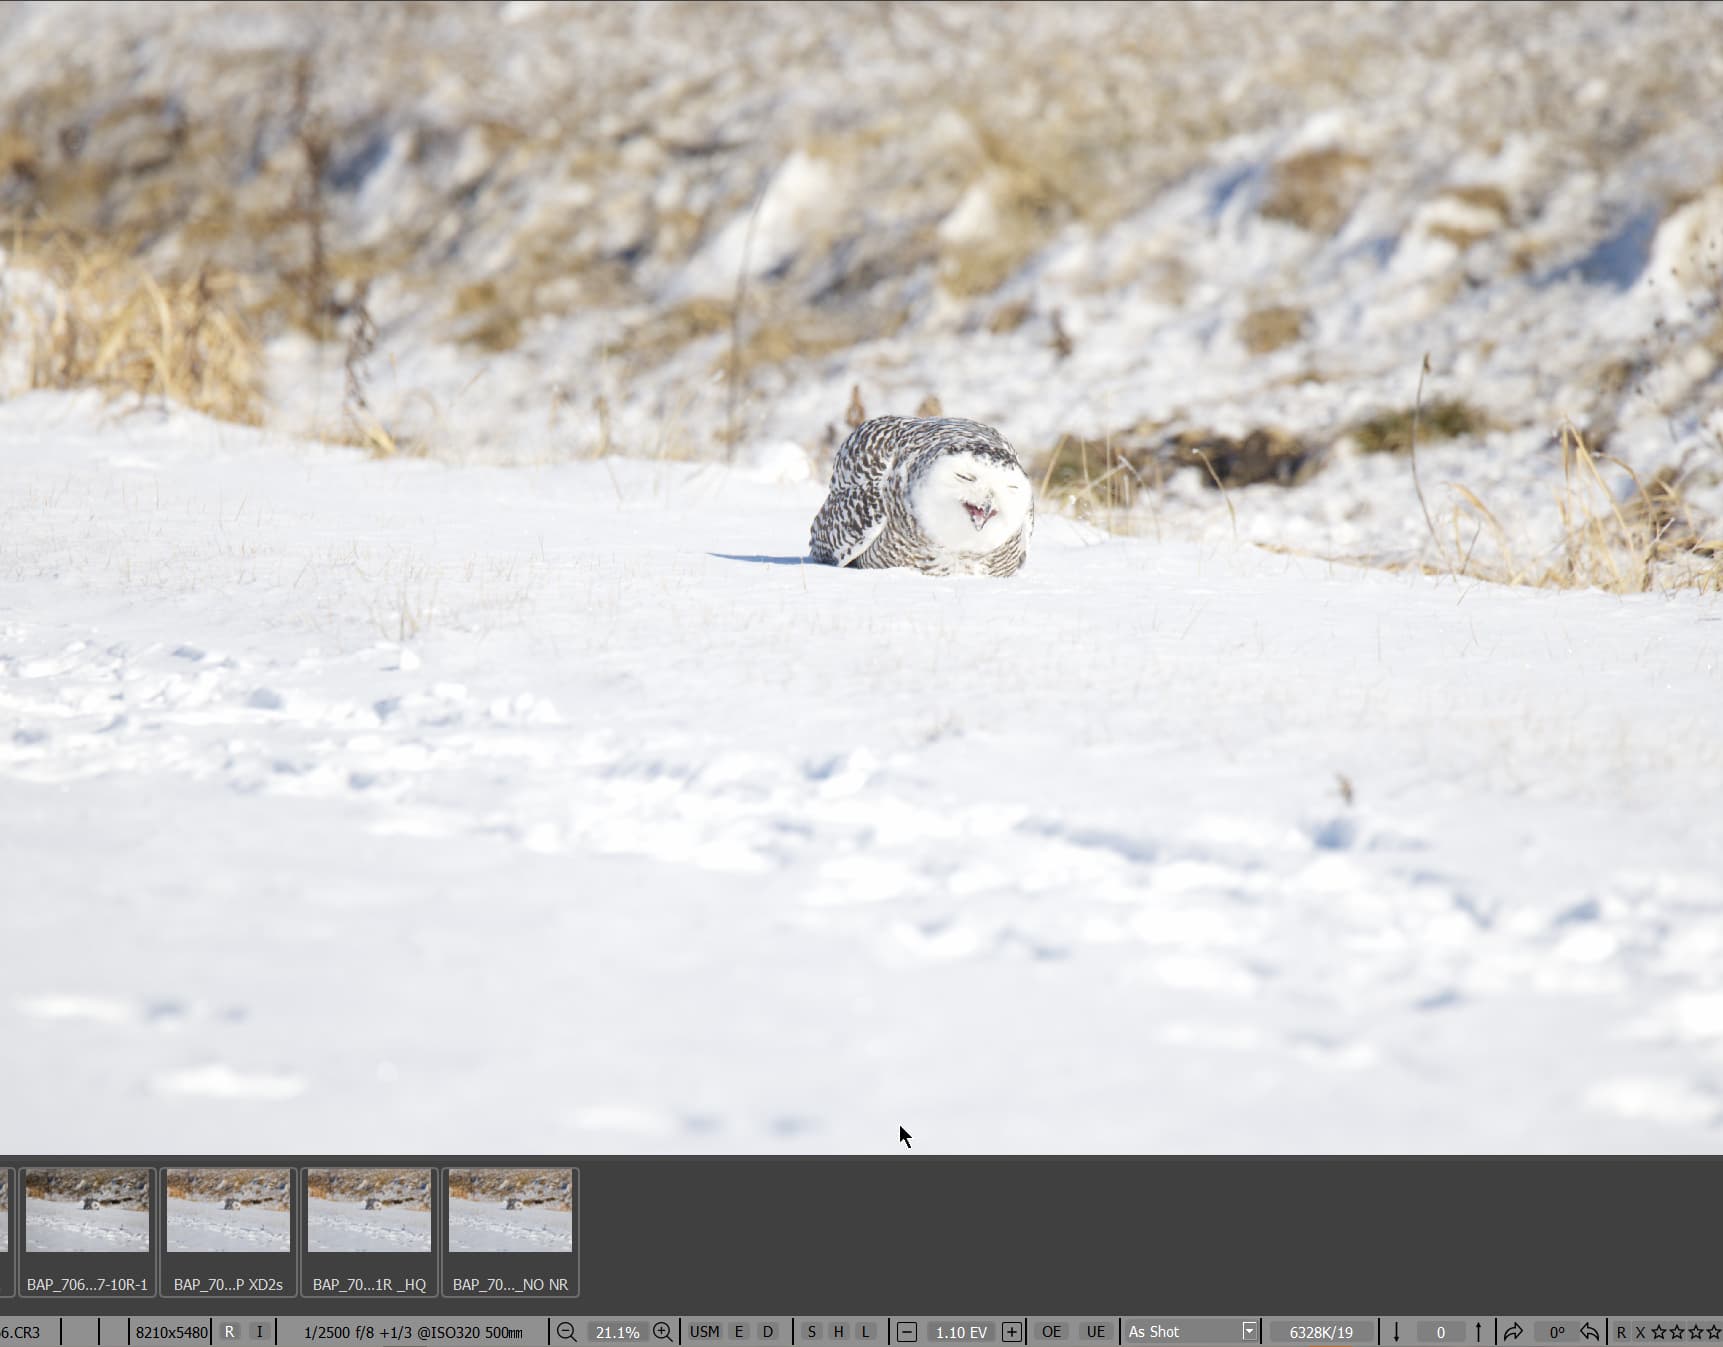
…which is, as far as I’ve understood until now, the one selected automatically by PhotoLab set to import new images with “No Corrections”.
Joanna and platypus - thank you for your insight. All of you are very helpful on this forum and have much more knowledge than me. I realize that different programs will render the view of RAW files differently, and that I can’t compare apples to oranges. I just find it strange that in DXO I now have to crank the lens softness correction almost to the max when I never had to do that before to get tack sharp images. It’s always on ongoing learning experience.
Hmmm. In that case, let’s take a little look at that preset and see why it might be different.
No Correction…
			ColorRenderingActive = false,
			ColorRenderingICCProfile = "",
			ColorRenderingIntensity = 100,
			ColorRenderingIntent = 0,
			ColorRenderingType = "Original",
Edited to include automatic camera rendering…
			ColorRenderingActive = true,
			ColorRenderingDCPMode = "DxO",
			ColorRenderingDCPProfile = "",
			ColorRenderingICCProfile = "",
			ColorRenderingIntensity = 100,
			ColorRenderingIntent = 25,
			ColorRenderingType = "Original",
Bearing in mind that this preset was more than likely installed in an older version of PL and might not have been updated, although the version is shown as 19.
Here is a preset that takes into account the default rendering and, also, the lens corrections…
Starting Point.preset (10,4 Ko)
If you want to compare the influence of your camera settings you can change them in the Canon converter, export the image and compare again. So the differences might be explained.
George
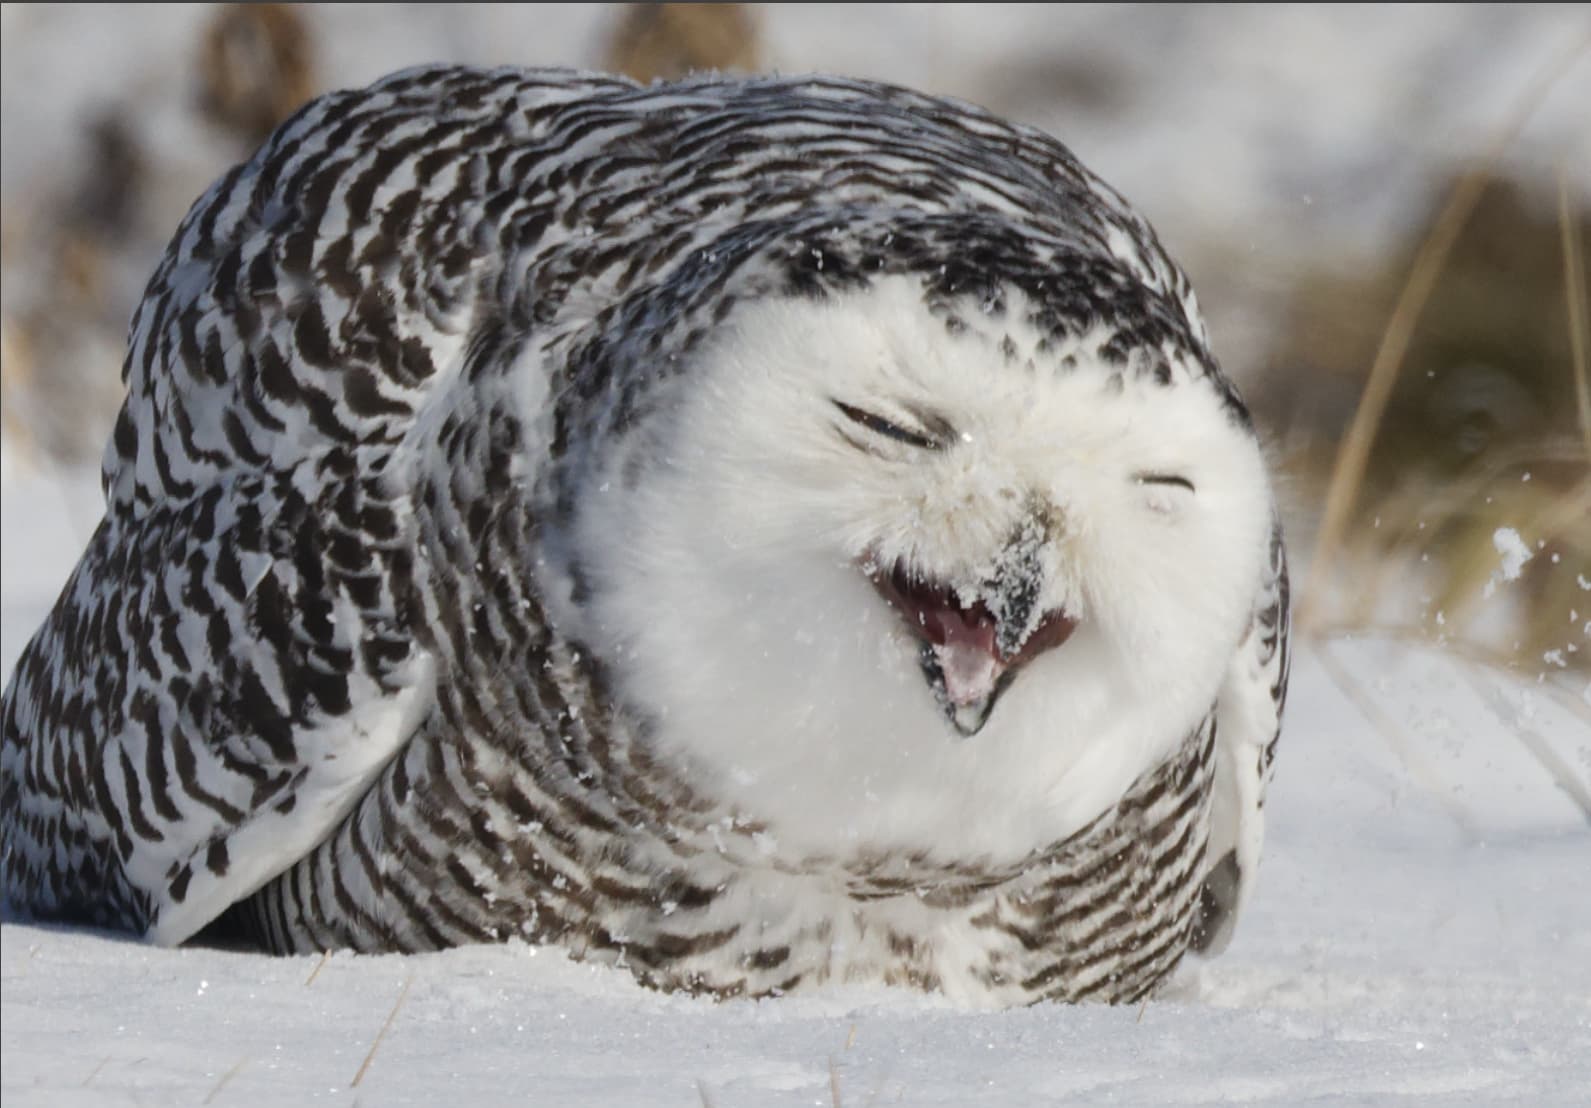
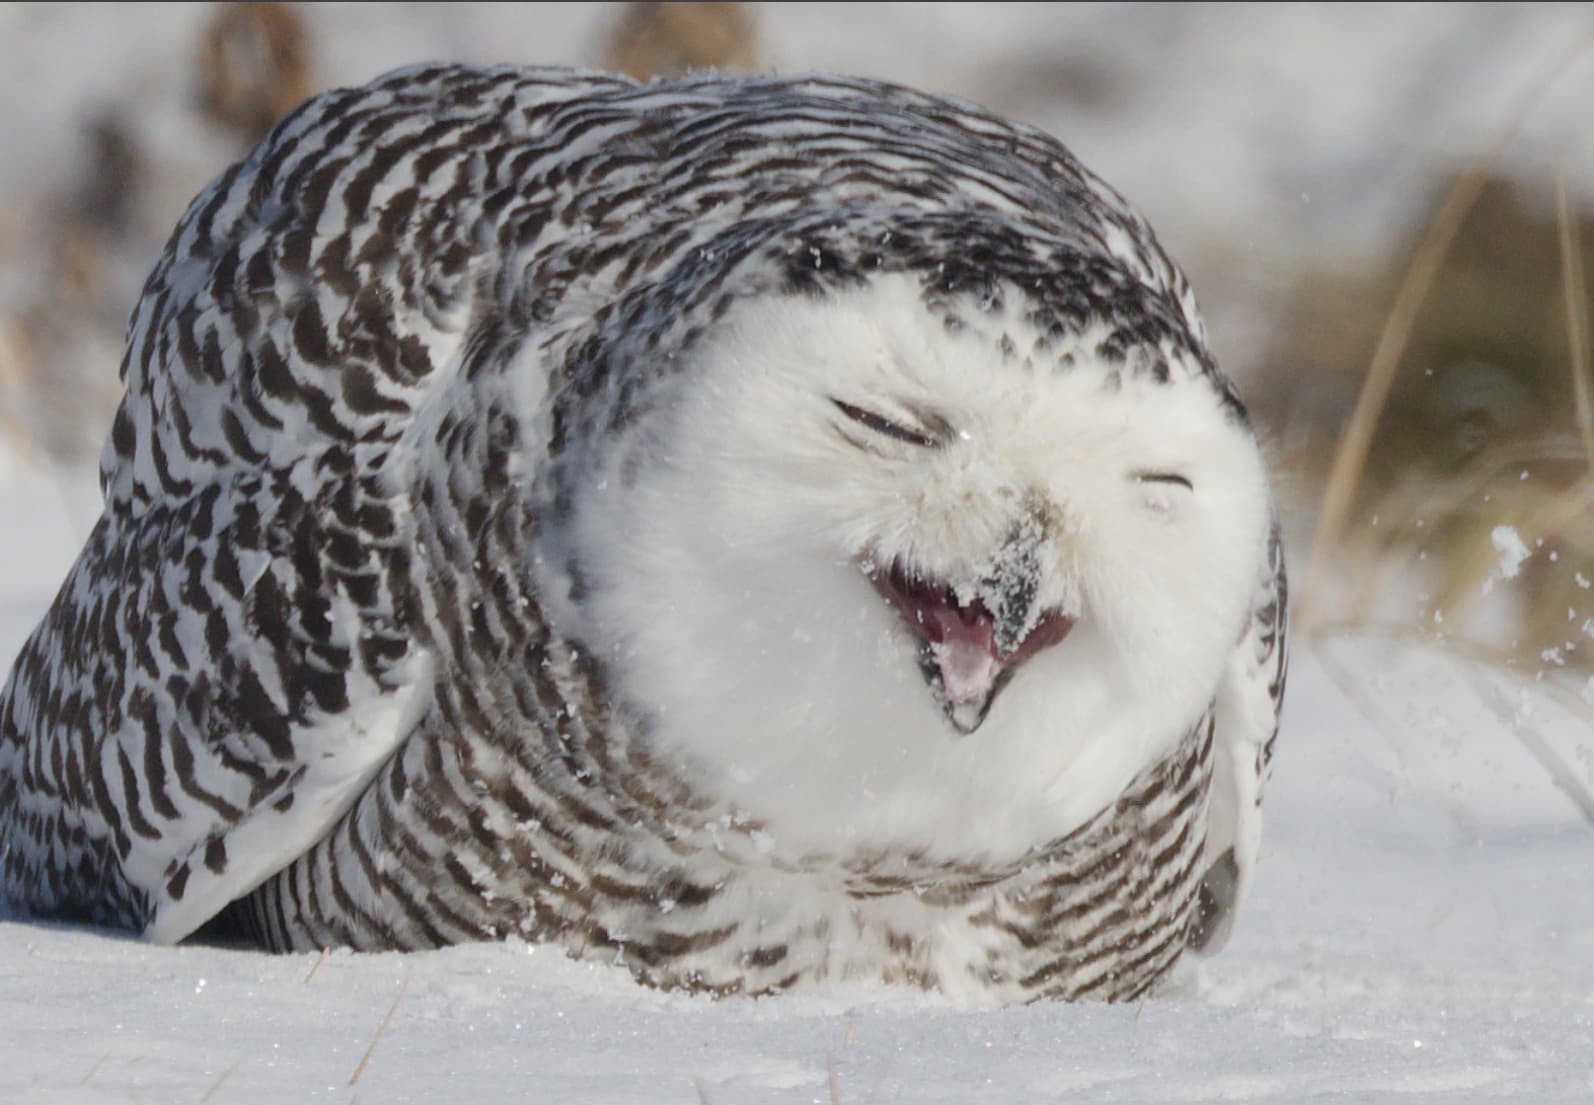
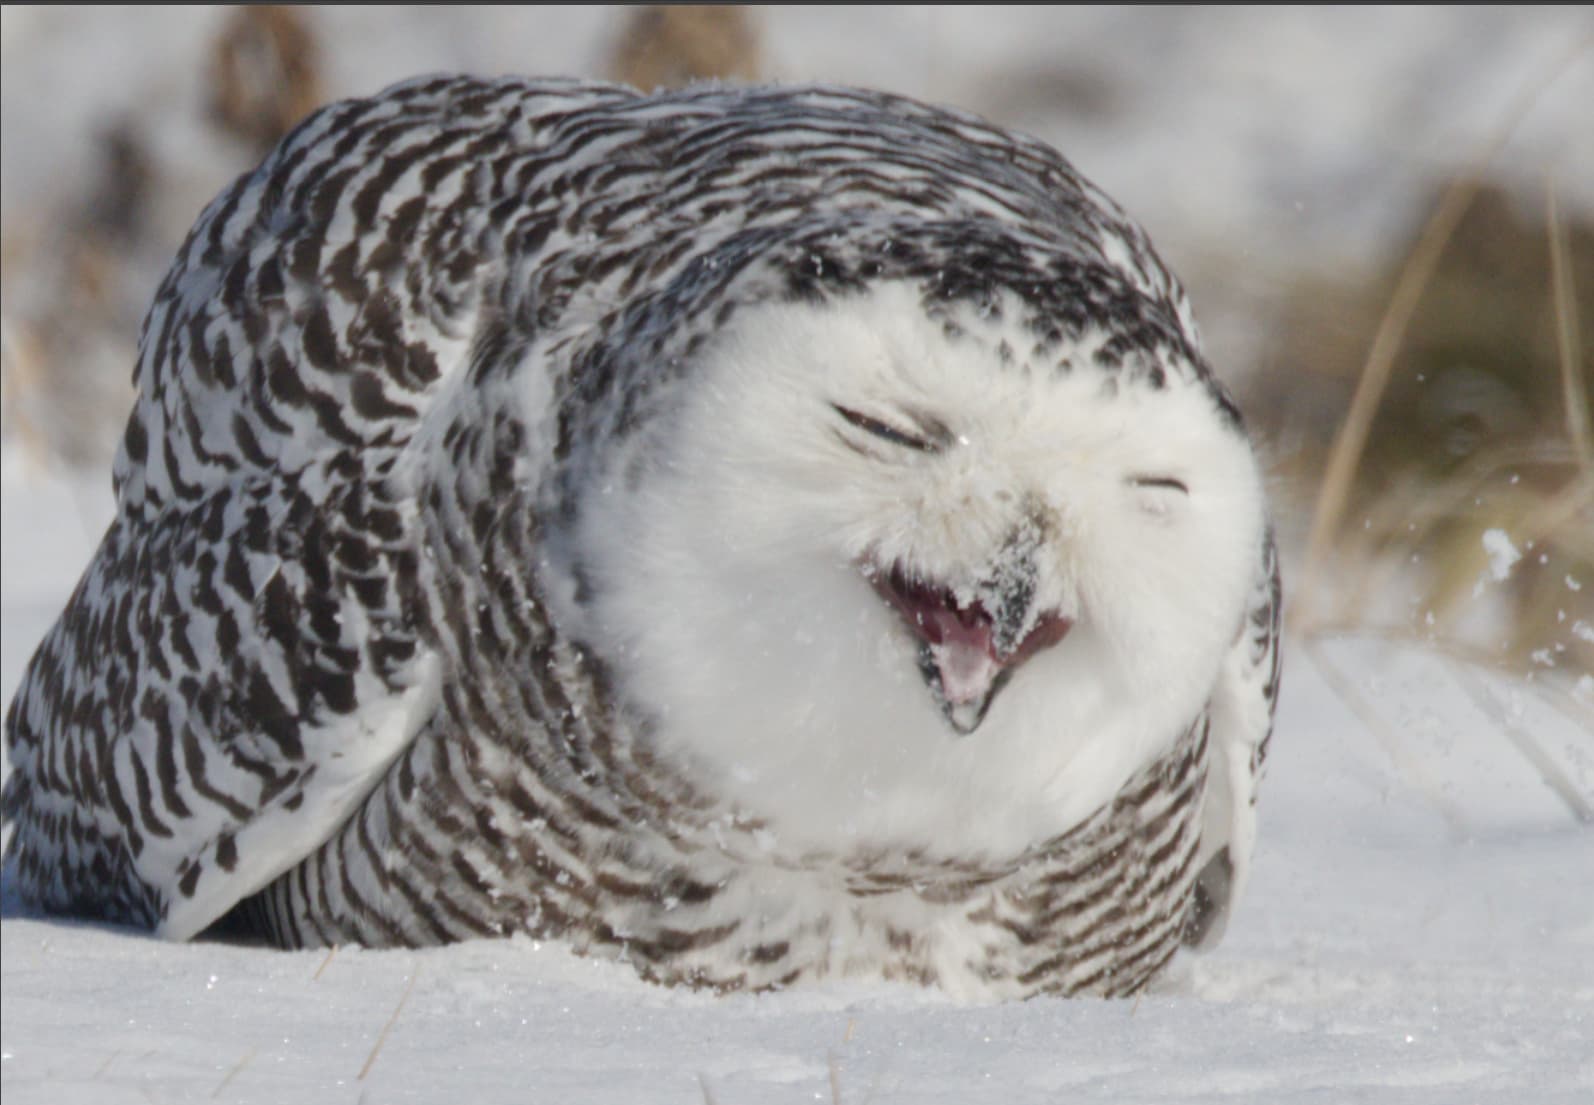
Thanks Joanna. First screenshot is with the Starting Point preset. The second one is DXO Optical Corrections Only preset. The third is No Corrections Preset.
I know on this photo I didn’t nail the focus as much as I would like. I guess I just have to realize that I need to crank the Lens Softness Compensation.

Thanks George. I will look into the Canon converter - not sure what it is or how to use it, but I will research it.
I think @George means Canon Digital Professional 4
A couple of observations:
- Cool photo!
- Why are you comparing? Particularly to an unprocessed version of the image.
What happens if you ignore FastStone and use all of the tools at your disposal in PhotoLab and see if you like the result?
I use Lightroom to catalog all of my images. I have it copy my photos off the memory card to a standard location, then I add keywords (soo many keywords), and later I will mark those I published and link them up (via a plugin) with their Flickr instances.
But I select, edit, and export exclusively in PhotoLab. If I care to look, Lightroom makes all my images look significantly softer. It doesn’t matter, though, because PhotoLab is my editor.
That is certainly worth a try, but:
The default: “ColorRenderingActive = false” just says that whatever DPL does behind the scenes is not to be overruled by this (part of the) preset.
We could test the “behind the scene” part, if we e.g. took an image and modified a copy to make it look like some other camera’s image. PhotoLab should then adapt (or not) its “No Correction” rendering to make that file look related to the respective body. While this test certainly has some geeky charm, its outcome is probably of more academic interest than of practical value.
This is what the User Guide says about “No Correction”:
No correction deactivates all of the corrections in DxO PhotoLab, so images are displayed “as shot.” In the case of RAW files, DxO PhotoLab still performs demosaicing using all of the basic settings that are optimal for your camera.
…optimal for your camera? This would mean that PL reads metadata and selects respective settings. Whether those are the same as in the camera specific preset is left to be explored. Judging from your owl examples above, the settings aren’t identical (e.g. a slight difference in WB) ![]()
I just find it very odd, that all of a sudden, I have to crank Lens Softness Compensation up to extreme levels. In the past, my default for Lens Softness Compensation was 0.10 and I wouldn’t have to change it much from that. Now it seems I have to up it to 2.5 - 3.0.
Thanks for your help and input Joanna. I always learn from the people on this forum. Not sure if I will figure out why I have to drastically increase the Lens Softness Compensation from before, but will do that.
I reckon George’s observation may have merit … but perhaps it needs some elaboration.
-
Your camera’s sharpness settings will not affect the RAW file - but they will be applied to the JPG that’s embedded within the RAW file.
-
If you’re examining your RAW image with a viewer that simply presents the embedded JPG - then you’ll be seeing a sharpened image (at “degree of 4”, according to George).
-
When you compare that image with the image you see in PhotoLab (which does not have the same degree of sharpness applied to it as does the JPG) then you’re NOT comparing apples-to-apples.
-
You’ll probably need to add additional sharpening in PL (via the Lens Softness Compensation tool) to get a result in PL closer to what you see in the JPG … if that’s what you want.
I got the sharpness from exiftool.
I looked in the Canon manual. There it’s called Picture Style. With Nikon it’s called Picture Controle. It acts as a kind of preset added to your raw image. When you use the raw converter from Canon it’s using these settings, but you can alter them. Set everything to 0 and export as jpg. Now compare the image with the one from PL. When I’m right they look alike now.
If that’s so, then the differences are explained. Now find a way to edit the pictures in PL so they have the same look you like.
George
2 Likes
@mwsilvers , @bphillips With respect to the sharpness issue I have no more idea than other contributors but with respect to the image I am seeing in FastStone with the RAW image settings I posted earlier then I am almost sure we are not seeing the RAW but we are seeing the embedded JPG!
This is FastRawViewer showing the RAW image
and this is the embedded JPG (FastRawViewer defaults to showing the RAW image but provides an option to view the embedded or imbedded JPG)

and it is almost certain that the comparisons are being done with this embedded image.
That does not change the fact that the sharpness of that image is better than the DxPL exports but the speed of display of the image in FastStone is instant, while the time it takes for my image RAWs to be displayed is considerable (even on my 5900X), i.e. FastStone is not displaying the RAW in this case it is displaying the embedded JPG.
Beth. what you are seeing when you are viewing the image in most viewers is the embedded JPEG inside your RAW file. As has been said, it looks like you have set the in-camera’s Picture Style settings to a sharpness of 4.
There is absolutely no need to use Canon’s software as the Picture Style settings are only applied to the rear screen of the camera and the embedded JPEG, which PhotoLab ignores.
I used ExifTool to extract the embedded JPEG and opened the RAW and JPEG images in PhotoLab’s comparison window at 160%…
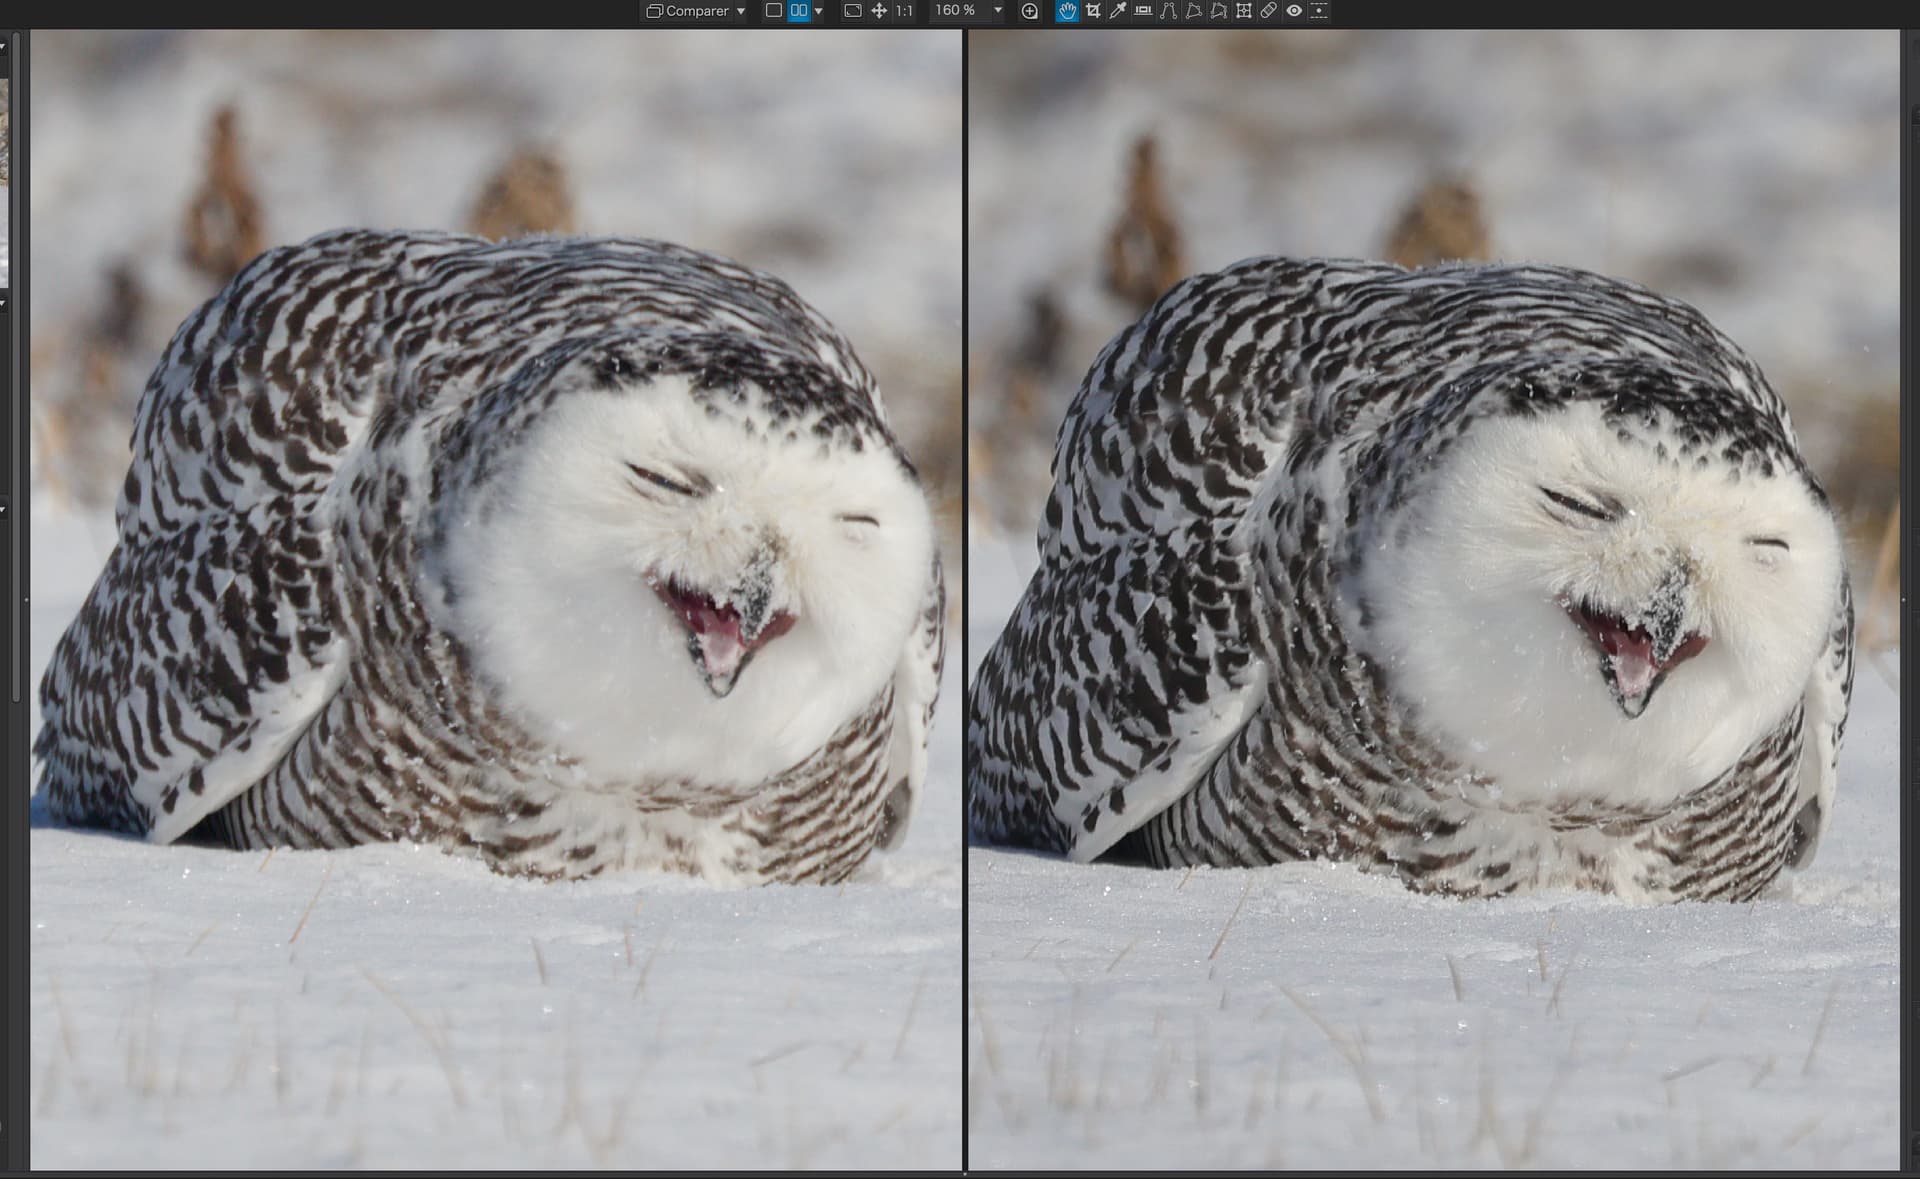
As you can see, the JPEG (on the right) appears significantly sharper than the RAW file. This is to be expected as the JPEG has been significantly processed in camera. Personally, I would say too much sharpness.
Then I took your RAW file, reset it and passed it through this preset…
Starting Point.preset (10,4 Ko)
Then I changed the top end of the curve to give a tad more contrast in the highlights and added some Fine Contrast, mostly on the highlights…
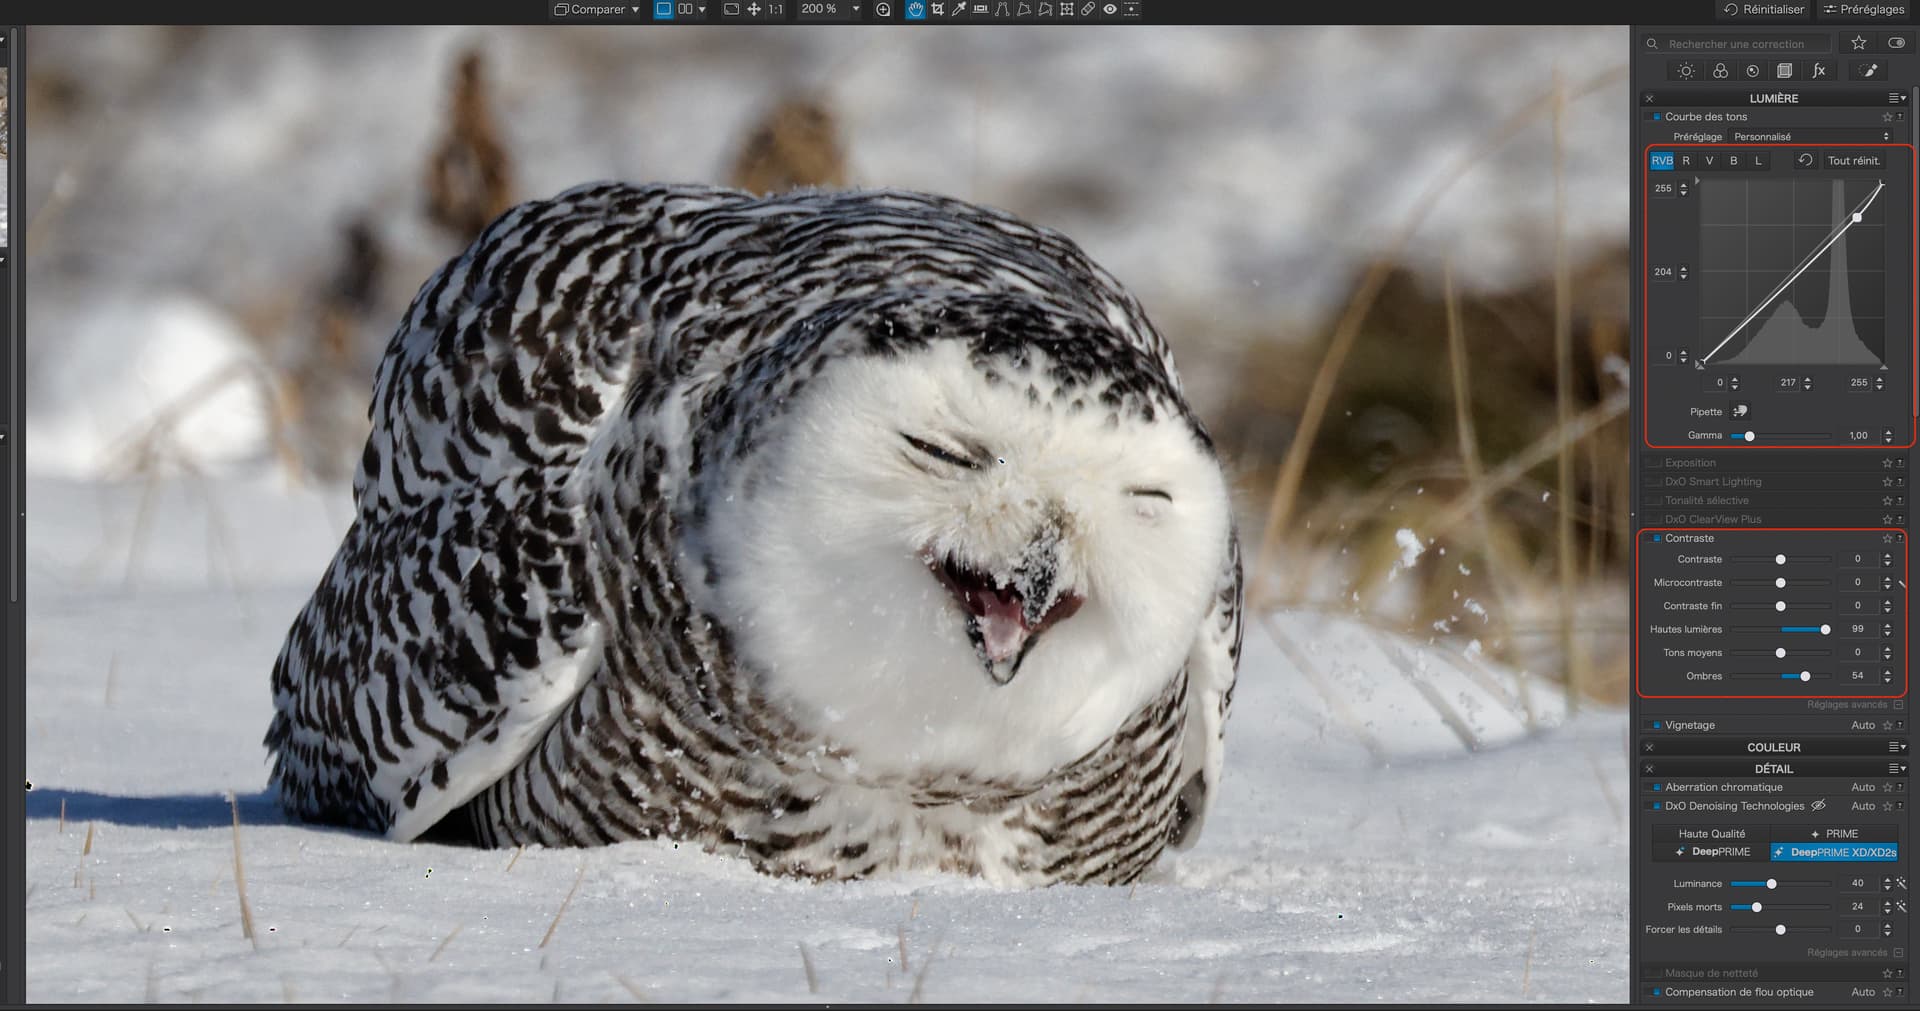
This does require FilmPack for the Fine Contrast sliders and, if you don’t have it already, I would highly recommend you get it - the difference the Fine Contrast sliders make is worth every penny, just for that feature alone.
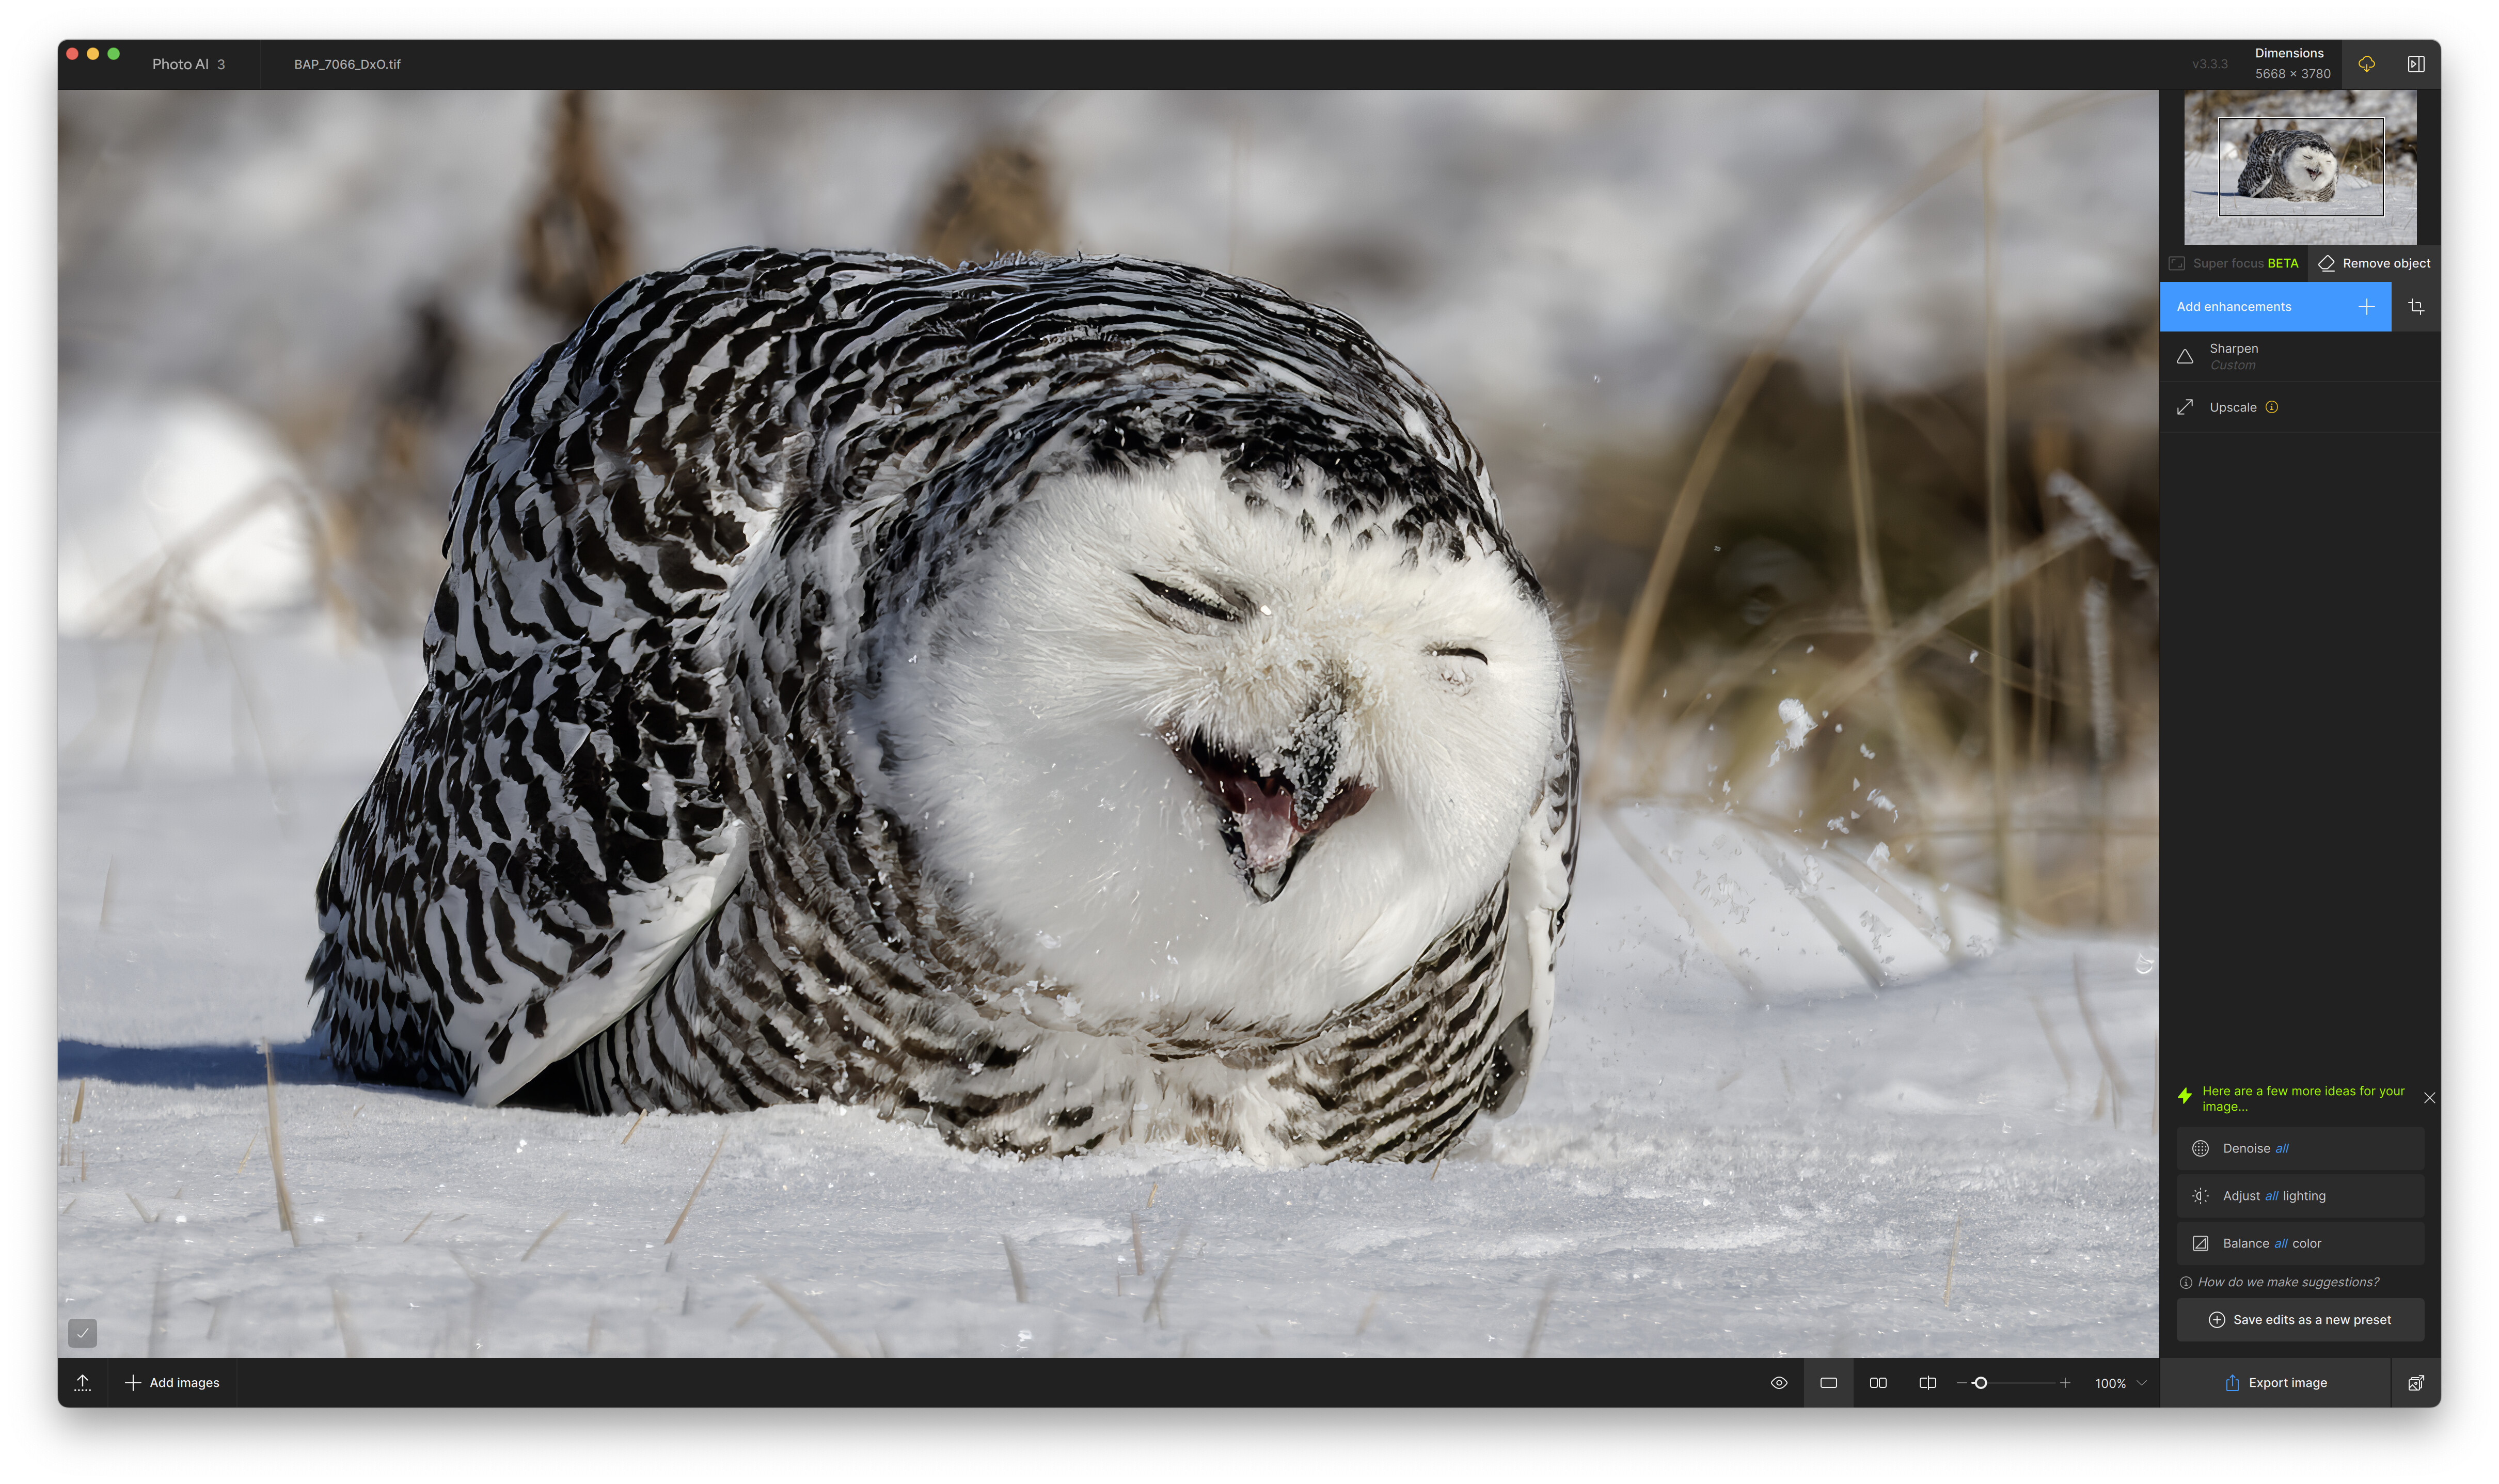
If you want truly sharp images (e.g. for large prints) then you need to take a look at Topaz Photo AI. Here I have cropped the image and enlarged it to print at A2 (420mm x 594mm), with appropriate sharpening, just on the bird. What you are seeing is the 100% zoom in Photo AI…
By the way, I really love the picture ![]()
1 Like
Thank you, that makes sense.
Thanks for your help and input George.
Thank you Joanna. I have only seen a Snowy Owl twice before, so I was thrilled to see one again.
This is the image,cropped, generated by the Canon converter and picture style set to neutral. The original picture style was set to Fine Detail.
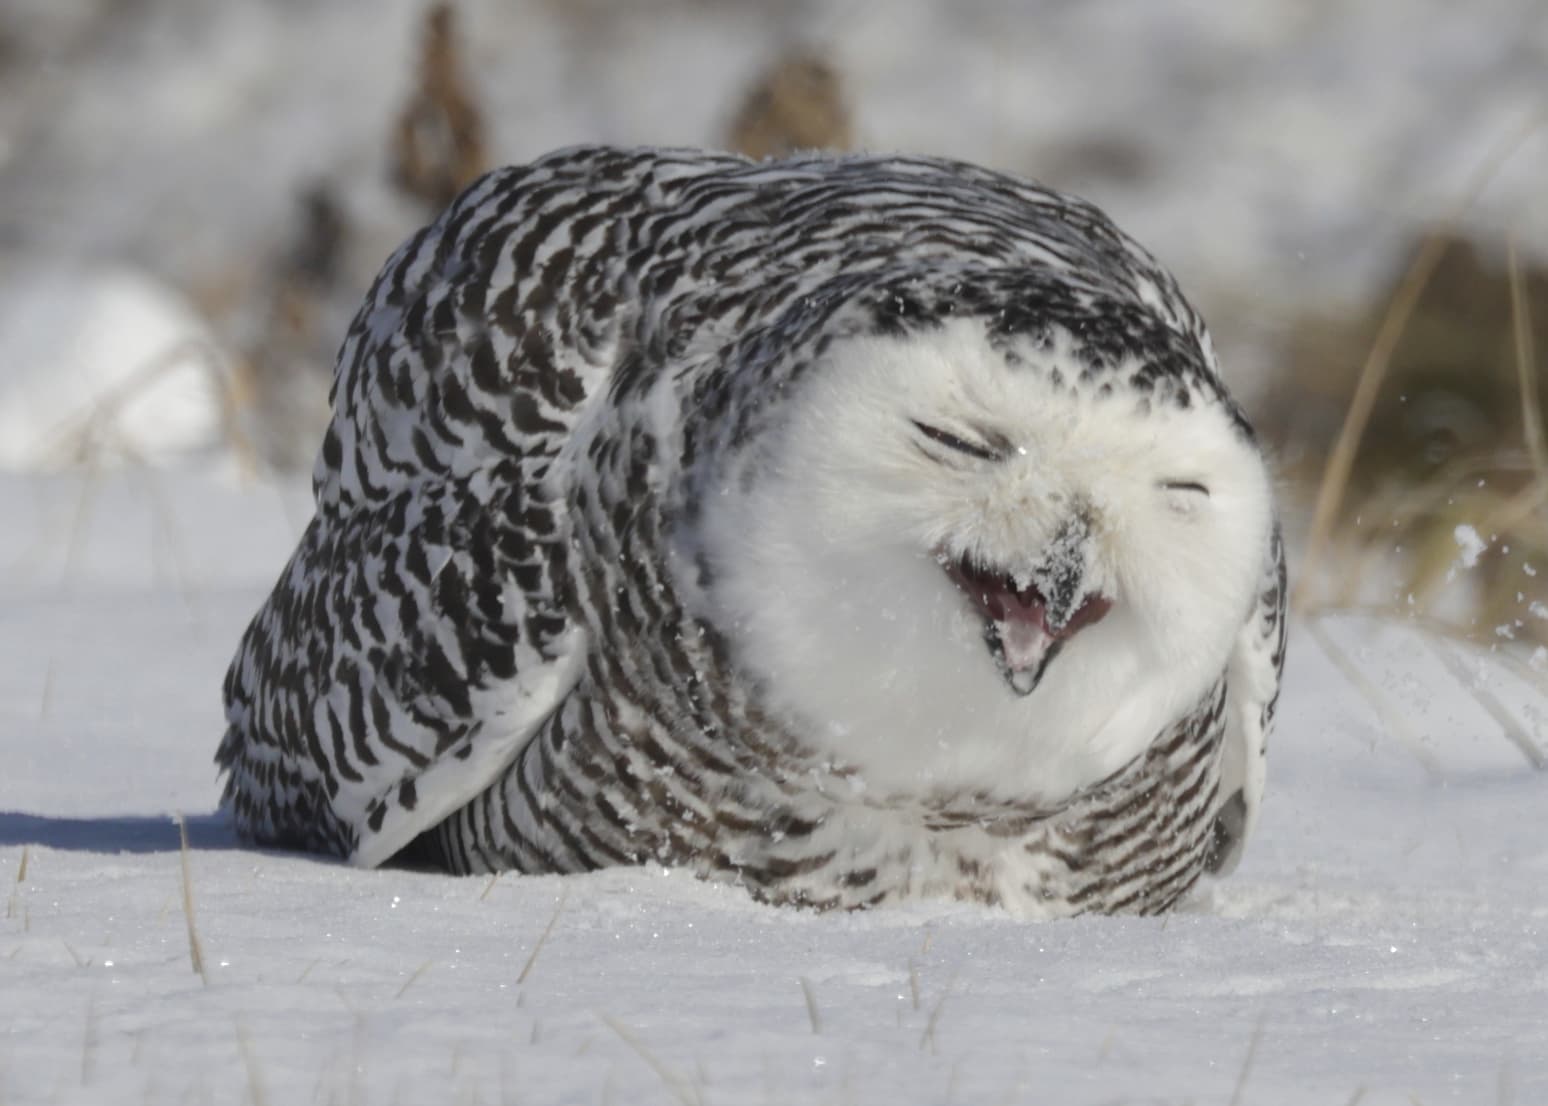
George
Fine contrast is really great for feather detail. I just wish we could use it in local adjustments.
1 Like