Vissual Consistency within a Photo Series

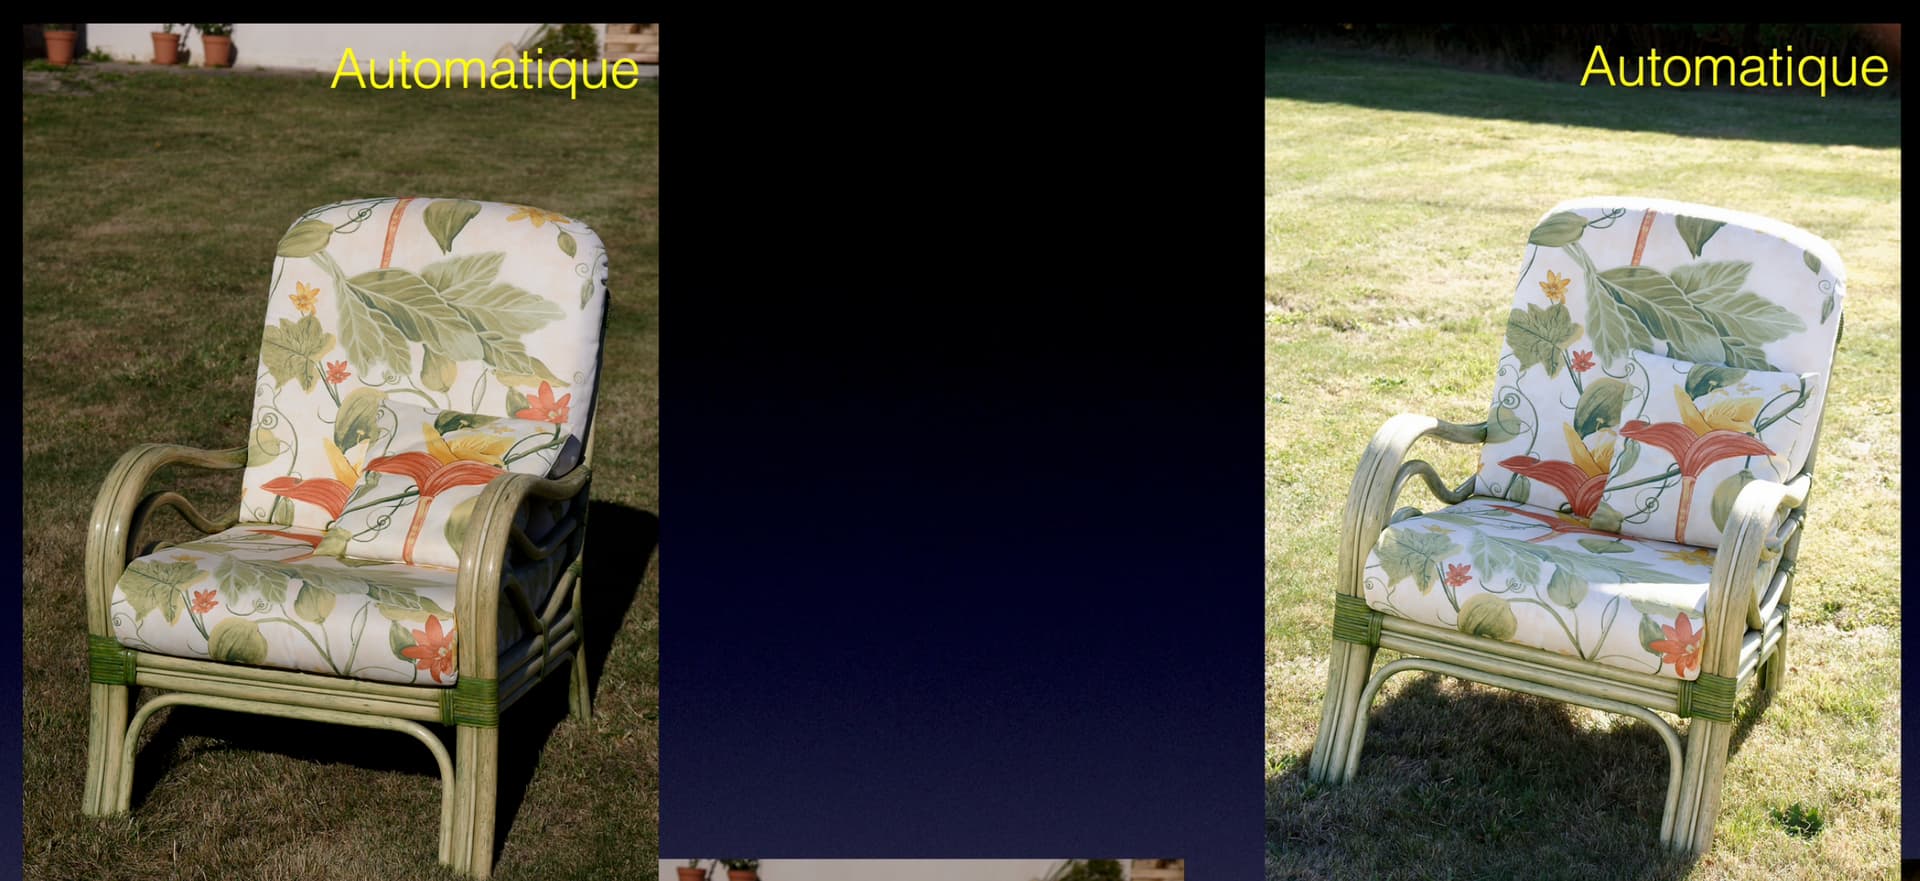
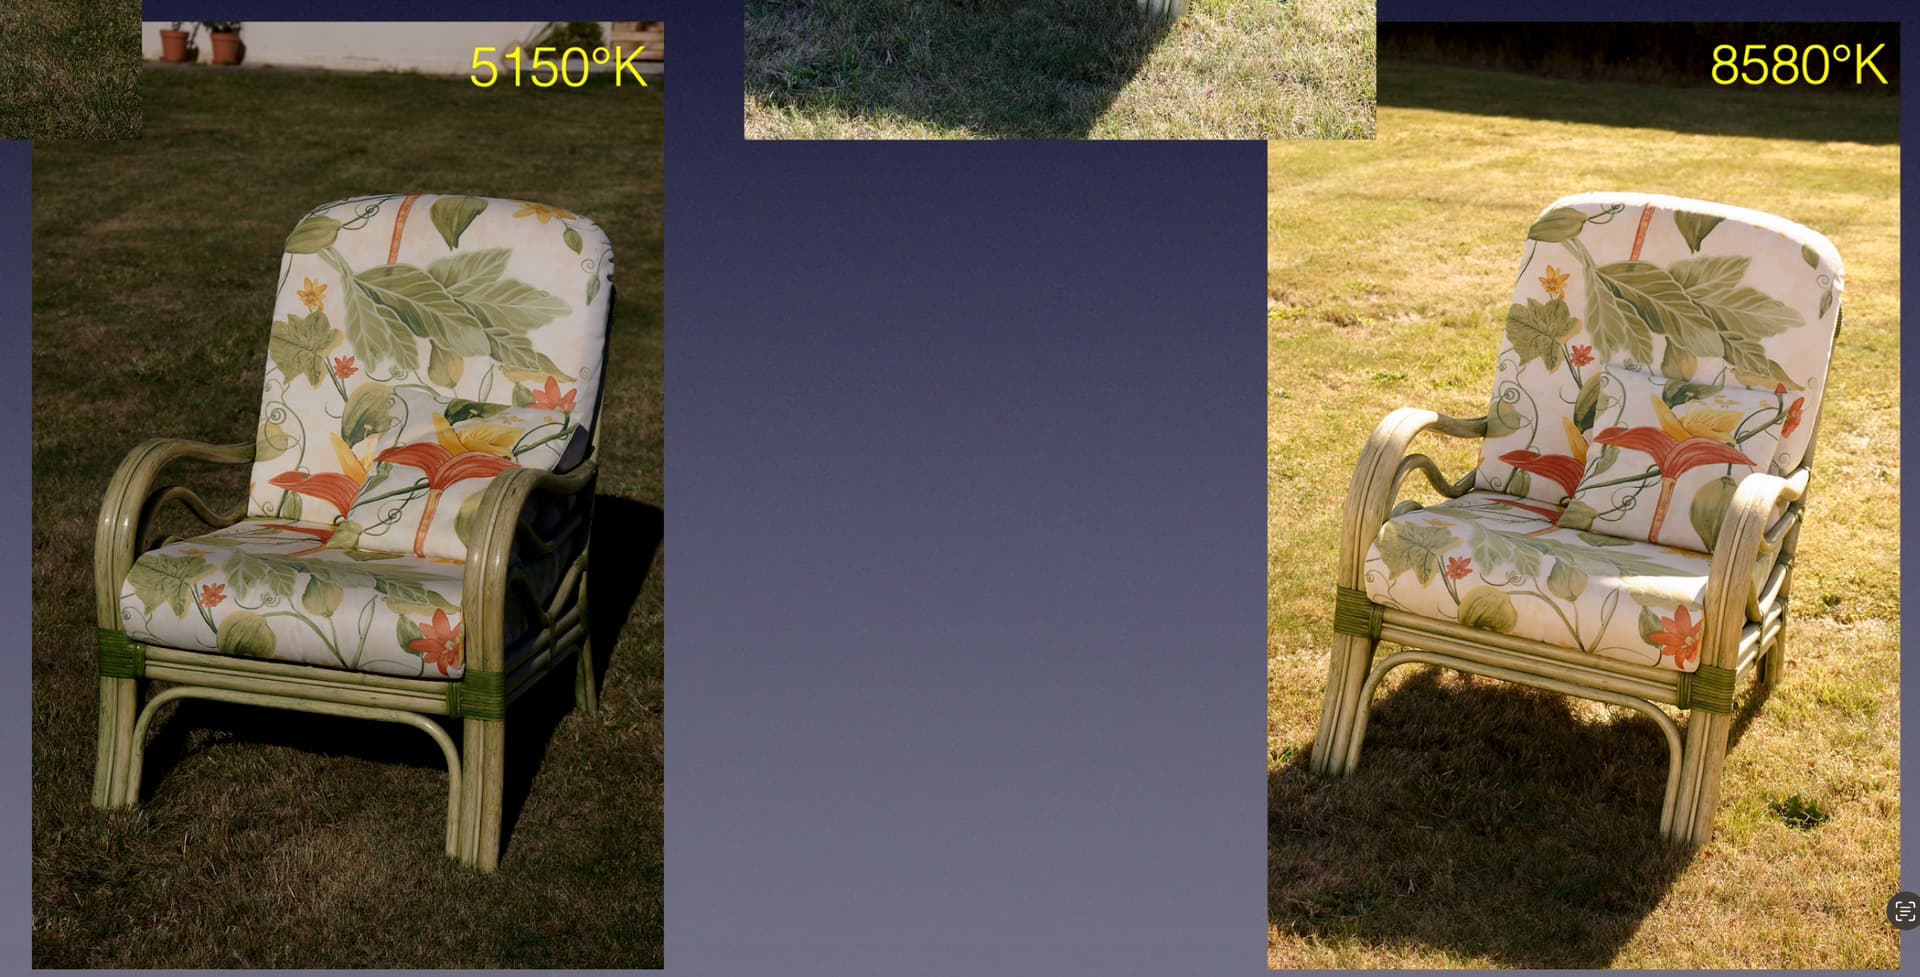
Lately, I’ve been enjoying shooting photo series. These photos show the same subject from different perspectives, some times with a moving sky and only light cloud cover. As a result, the exposure triangle of aperture, shutter speed, and ISO is heavily stressed, and the color temperature (cloudy/sunny) also affects the RAW image.

I want these photos to have similar looks. Just aplying a preset changes the general style of those photos, but the detail of e.g. darker/lighter images remains.

For now, I manually use the sliders of Gamma, Temperature and Brightness for each and every photo individually. Unfortunately, this is very time-consuming.

Are there other options (sliders) that I have overlooked so far which might help? Is there a feature to adjust exposure over a photo series or somtheing like that?

Take photos with and without a colour chart each time, develop the image with the colour chart and copy the corrections into the image without the colour chart.

Welp, as most of my photos do live in the moment, I can rarely take double shots. :smiley:

Have you explored the options in the ‘LUT Grading’ panel?

Did you try Smart Lighting


in Uniform and / or Spot Weighted mode?
This can help you quickly adjust the exposure (to compensate for it to a certain extent). Check the → manual for some more info.

To achieve a more uniform color temperature, select a photo from the series that you like and apply this setting to all selected photos. I assume this works as long as the color temperature captured by your camera hasn’t changed significantly during the series.

Good luck :slight_smile:

OK, that doesn’t make sense. That would be a typical task for Photolab’s AI department. Describe your requirements and get some suggestions. There’s still a blank spot in Photolab’s range of functions.

Maybe the best way I can explain what I want to say is to show you a clip from a demonstration video I made for a lecture…

This shows what happens if I set the camera to auto-WB…

The left shot is taken with the light coming from behind the camera and the right taken against the light.

So, you can’t rely on auto-WB at the time of taking for matching


Next, I used a colorimeter to measure the temperature and set the camera to that temperature for each shot…

You can see that, with the light from behind, it measured 5150°K and against the light, it measured 8580°K. This is due to the blue of the sky “cooling down” the colours but, when you take against the light the lack of blue in the sky behind you warms things up.


Then, if you watch this short video…

… you will see that the two bottom shots might not appear the same to start with but, as you eliminate the surrounding areas, a patch of the chair back actually looks identical, because I compensated for the changed WB at the time of taking.

I’m not sure if @gserim’s colour chart idea would work but it might be worth a try. At least, to get the WB close.

Maybe a grey card might be a better option, as that should change the exposure as well?

My personal view is that you need to compensate at the time of shooting like I did, as you say the lighting is affected by the changing sky and that will affect both dynamic range and colour balance.

Unless the new AI tools can pull something out of the bag, I’m not sure if I can be of any more help.

1 Like

Maybe it is Capture One you should look at in that case because they have that solution I would like Photolab also to have. It is called “Match Look”.

Match Look lets you transfer the look from reference images to your raw files in a few seconds.

Capture One will automatically apply adjustments using existing tools to get as close as possible to the look in one click.

Learn how to -

  • Add reference images

  • Apply to single or batches of images

  • Fine tune the look

  • Save a Match Look Style

For now there is nothing like this is Photolab

I want this feature from Capture One within PL! :smiley:

Yes, I do use SmartLighting. Photos do look better with it - no doubt. Anyhow I think, that e.g. a (quite simple) modification of the aperture on the camera and the associated shift in brightness in the image is not fully compensated by Smart Lightning.

Well, SmartLighting works very well to (manually) control e.g. contrast. – If you need consistent exposure for continuous shooting, set your camera to manual mode.

The video above shows how to match color grading in C1.

If there is something that really guarantees inconsistent exposure it is manual settings and workflows. That is a fact that motivated the developers at Capture One to design Match Look. Match Look was designed especially to solve these problems and substantially speed up the workflows for many C1 ueers.

I played around a bit with this but found it difficult to get the same levels of colour and detail out of Capture One as I did in PhotoLab.

I imagine this is partly because I’ve been using PL for years and don’t fully know my way around C1, but I found that there were limited contrast/sharpening tools in C1 and my best recourse of increasing sharpening ended up with over-sharpening but still a lack of overall detail vs. PL.

If there’s something I’m missing I’d love to know about it!

Like @Flrbb I’m now interested in improving consistency in my shoots but also in saving time.

I come across editing tutorials for Lightroom on social media and feel like they have so many recipes (if that’s the term) and processes they can apply to very quickly make all their images consistent. If I were editing a wedding for example, I could create a universal look very quickly.

I don’t feel that’s so possible with PhotoLab, where each image needs to be treated and tweaked somewhat independently.

I know it’s possible to save presets in PhotoLab but you can only apply one preset at a time, rather than having a selection of presets for contrast, a selection of presets for colour, and a selection of presets for other key edits (sharpening, noise reduction, moire, CA, curves).

It’d be very useful to be able to pick one preset for each of the above to mix and match key edits very quickly while keeping an overall “look”.

I guess we might get a few of these functions in coming versions of Photolab. I can understand if they did not manage to fix that too in this release. Just to implement the AI-functions and the adaptions of the older Local Adjustment-tools to the new functions must have been a very extensive task.

To be fair my hopes of a “pick ‘n mix” preset selector is more of a “hope” than a complaint!

I’ve spent some more time with Capture One and have found:

  • Its approach to colour is really pleasing - far better than PhotoLab “out of the box”. I spend less time fighting for the right colours in C1.
  • It CAN get some good detail out of images, but PhotoLab makes this process much easier, especially with the contrast fine tuning controls.
  • Batch editing in C1 is pretty straightforward.
  • C1 is FAST. I don’t know what it’s doing compared with PhotoLab but I was able to navigate between images and apply edits in real time, consistently. Generating some masks took a little time but compared to PhotoLab it’s another world.
  • However, PhotoLab wipes the floor in terms of noise reduction and overall image quality. If I consistently had enough light then C1 would be a clear winner, but some of the events I shoot don’t have that - and PL can make great images out of low light situations where I feel C1 can merely make “OK” images.

If C1 were to gain PhotoLab’s fine contrast controls and noise reduction, it’d be no contest.

If PL were able to run as quickly and smoothly as C1, and ideally provide some better colour control, it’d be no contest.

Such a shame there’s no clear winner here.

Just for fun, here’s a shoot from previous years with a Canon R6 at ISO 1250. Granted there’s some different approaches to the edit meaning lighter shadows and blacks in the C1 edit, but the introduction of noise in that file is all too clear.

Incidentally, the PL file is 958kb, C1’s is 10.2mb!

Edited in DXO PhotoLab:

Edited in C1:

For clarity: PhotoLab lets you create partial presets that will only affect certain adjustments while leaving others alone. So while presets can only be chosen one at a time, they can be applied cumulatively to an image. Possibly organized the way you want, too - but I’ve never tried this.

That’s interesting… so I could spend some time creating a batch of (for example) contrast presets, then a further batch of colour presets…

…and as long as my contrast presets don’t overwrite anything in the colour ones, I can mix/match both to my satisfaction without creating some corrupted mess?

That would be pretty handy, once the initial leg-work is done!

That is correct, you can do that.

2 Likes

Like @Fineus pointed out: you can create partial presets.

Click on “edit” to your Preset, then a blue vertical line appears right infront of your area where your sliders are located. If you uncheck there, that particular option will not be modified.

1 Like