Firstly, let me say - the results that I see for my high D800 ISO images with PRIME are FANTASTIC. I feel like it breaths new life into my D800s. I shoot live music almost exclusively, and that Noise Reduction is UNREAL. So great. Thanks DxO.
BUT, lemme ask the group here - other than the additional processing time when I export my photos, is there any negative ramifications to using PRIME for ALL of my photos? Even my low ISO ones? I haven’t done too much experimentation yet - and I suppose I can make this decision on my own, but maybe someone can educate me on if PRIME has any kind of negative ramifications if used on low ISO images so that I don’t have to…
Some people on the French forum use it.
They say that PRIME has a nice rendering of the shadows.
It gives more details.
I do not use it and I think you have all the tools with DPL classic.
Especially if you have FilmPack which offers the fine contrast according to the tone.
I found that with high ISO pictures of my Canon 400D (means: ISO 1600, which is the max for this 11 years old camera) I have to watch out for very dark areas getting sprinkled with white dots when I use Prime noise reduction. I found it is easy to avoid that by increasing the “Dead Pixel” slider from the automatically chosen value to something like 80.
I think in low light situations and with an ISO of 1600 the Canon 400D performs extremely bad with alot of chroma noise. But with DxO PhotoLab and Prime I still can use some pictures that otherwise wouldn’t have been possible. I even have no issues using ISO 800, which I completely avoided before.
So I can fully agree to your statement: DxO breathes new life into my old camera.
i have Prime on default “on” all the time. It brings a nice detailed rendering along with the denoising of the image.
It is selective in its reduction so no harm done when you use it for low iso values. (As far as i understand its algorithm.)
You can lower luminance correction on the base iso versions if you like.
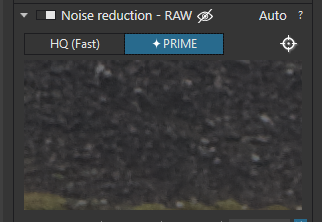
You can see the effect of noise reduction in the Preview window of the Prime tool without needing to export. I usually select an area I know will benefit from NR and see how it compares with doing nothing. Use the white target tool in the top right to select the area you want to check.
To set it as default, create a preset and set that as default.
75% and more zooming value shows you HQ(fast) NR rendering.
I would add to my colleagues remarks that the permanent display of this preview may slow down the system.
Create a preset to define PRIME as NR default (maximum 30 value).
That’s right - zooming to 100% won’t show the effects of PRIME NR. Only the small preview window shows that - the full-image effect is on the exported image. Zooming in at least 75% will show the effects of regular HQ noise reduction, though, as well as chromatic aberration corrections, lens sharpening, etc.
HQ is regulair noise reduction after demosiacing and by zoom to 75%or higher will show all corrections in CA , sharpening and HQ denoising.
PRIME however is done befóre demosiacing on the rawdata and is only visible after export. The small window is a pre export view. ( it processes a small area as is it a jpeg.)
A preview of a image with PRIME would be the same delay time as a export of a jpeg.
He can also edit his current starting preset to make PRIME the default. A lot of folks don’t understand the preset editing process, and I suspect Tony is one of them since he probably wouldn’t have asked the question if he understood how to do it. Additionally, while editing a preset he can change the PRIME starting value to anything he wants but must ensure the default flag is unselected before saving the preset. However, turning PRIME on by default is probably not a good idea.
If Tony needs a primer on editing presets, that’s a separate question.
I use PRIME on all images that I’ve shot above 1600 ISO. I feel like it is one of the best reasons to use PhotoLab.
Mark -> Why do you say turning it on by default is a bad idea? If I shoot something at low ISO, I just highlight all of my images and turn it off… But since I normally shoot live music in dark venues, I like having it on by default…
Also, what do you mean by default flag? You mean the luminance setting?
I didn’t understood why feeding different iso value’s didn’t changed the preset in automode like other denoise things.
And a wile ago i read some comment about that prime is doing it’s thing before “iso-value in the raw exifdata” is used to “set” the brightness of you preview. Normal denoising is “attacking” noise caused by setting brightness value’s according to the ISO-value on the actual exposure value’s.
So with the actual “amplifying” is also amplified the noise on the imagedata which causes by removal smutch and smear. Thus los of detail.
( iso is kind of a ruler which defines the steps of measuring a signal and the smaller the measuringsteps, higher isovalue, the more the noise is measured with it as “signal” and became part of your image.)
By remove most of the (shot) noise reqocnised by the PRIME algorithm before adding the iso value on the exposuredata of the image you have less “noise” enlarged by isovalue to get the “taken image” in brightnes and thus less smutching and smearing in the jpeg.
So that’s why a preset of PRIME is no problem on multi iso images. The aggresion the PRIME is targetting the noise is done by setting the slider. I am not sure but i think it’s also using the HQ algoritm at the same time when you ramp up the slider to maximise denoising.
When i used normal after demosiacing denoising and nik define2 after that on a 6400iso i equaled this with 70% PRIME to let the jpeg looked the same.
40% is default and by preset 30% you leave some noise in the image which wil be not damage the lower iso value shots.
I used NIK define2 to get a feeling of agression in the slider of PRIME. Define2 is targeting left over noise in a tiff. So export a iso value type, well exposed, with as low PRIME % you think look good in the preview window, export a tiff to define2 and see if it’s sees more. Proces tif to jpeg and a direct prime to jpeg wile ramp up the slider. When they look the same you have reached the maximum level of usefullnes of PRIME. Go a tad back from this level and your fine. This can make some iso valued preset’s.
Me i don’t care some noise, so i only ramp up PRIME when it shows too much in the jpeg and i need to lose some detail to gain some cleaner look.
At least i think it works like this.(they don’t tell there kitchen secret. )
PRIME exports are very slow and not every image needs PRIME. I was a new user of Photolab when version 1 was first released in late 2017. I too used PRIME with its default automatic value of 40 for everything. With experience I realized that PRIME is not necessary for every image and have it turned off by default. I also think the default value of 40 is too high for most images and have set it to 30 in my startup preset. To do that you must deselect the automatic flag which defaujts to 40 before you save the preset.
I have it set to 30 by default, but I will increase or decrease that amount depending on the image I’m working on. I believe @uncoy in his tests last year thought the ideal default was lower than 20 so he may be the person to whom you are referring.
I sometimes use a 40 setting and will occasionally increase well above 40 if I think the image will benefit from it and there are no obvious artifacts. One of the great things about PRIME is that, unlike most other noise reduction systems I’ve used, even higher settings don’t create that extremely artificial smoothed over plastic look, although it can reduce/soften fine detail.


 )
)