Using PhotoLab 4 to process sunset photos

You can just drag and drop it like I did with the attached NEF. Not sure what it hasto do with PL4. Can’t your drag and drop it from Finder?

500_0115.NEF (22.8 MB)

Mark

1 Like

I meant the one you labeled “NEF”… and I don’t really mind the spread highlights. They are due to a lens property. I’d not try to make them go away because the overall impression of the image is much more important imo.

Side-note: Movies often exhibit effects of lenses that are less than perfect. Does it matter? No, as long as the story is good and well told… Does it matter if the story was :nauseated_face:? No.

_MJM8947 | 2021-09-27-Biscayne Bay Night.nef (26.6 MB)

Thank you! No idea why my doing it through PL4 confused the software, but “drag and drop” was effortless.

I think from now on I’ll do it this way for uploading! Again, thanks!
I’m too confused even when things are mostly working - but I knew last night that something was broken when I saw “jpg” on the screen, and I don’t have an jpg images in this folder.

They do bother me, as they shouldn’t be there. If it’s a nice effect, I want to create it on purpose. I have my newest 24mm lens on the same camera - I’ll repeat this tonight or tomorrow.

So, I’m trying to remove what I see as a problem, but you’re suggesting it makes the photo better?

Now, what were you saying about red fringing?

All it took was to apply the four optical corrections for your lens module (you did download the module for your lens?) and up the Chromatic Aberration a bit more than the default. As for the flare on the white lights, that is partly due to what looks like uncorrectable grinding marks on the lens combined with over-exposure or too much dynamic range.

As for Jupiter, it’s amazing what a couple of touches with the repair tool can do…

Here’s a screenshot of the just the things I did differently (apart from adding in the lens corrections)…

Here is the DOP with my VC added…

_MJM8947 | 2021-09-27-Biscayne Bay Night.nef.dop (46,8 Ko)

And here is an export…

I did that a year or two ago - can I force PL4 to do it again, in case it is confused?

How can I check if PL4 thinks it is using them? How would I search for them in my PL4 window?

I love your improvement - maybe that old lens still has life left in it…

So if I look at your .dop file, I will see where you did it, and then need to figure out how to add it permanently for when ever I use this lens? I need to stop for lunch, and then figure out how to see what modules PL4 has downloaded…

@mikemyers,

thank you for sharing the *.nef file with us!

from the Metadata:

your exposure time was much too long for when scrutinizing sharpness

Screen Shot 09-28-21 at 06.36 PM

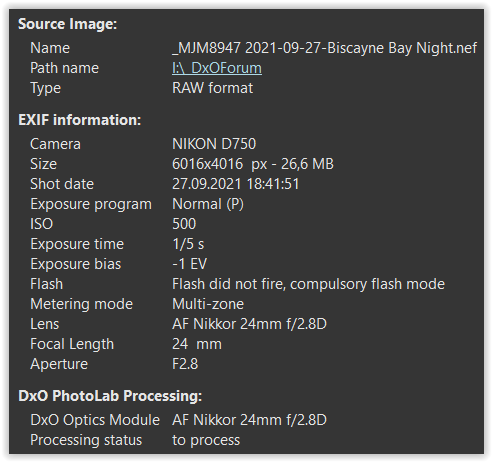
So I suggest, to repeat the photo with your D750 and AF Nikkor 24mm f/2.8D,
then change the lens to your recent zoom and take another photo … :slight_smile:

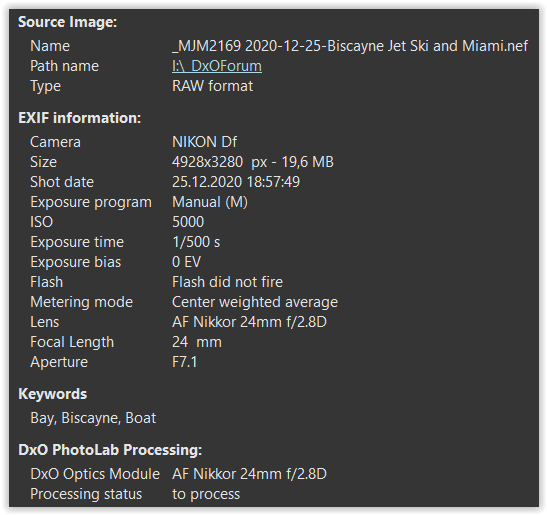
Yes, I remembered that the very same subject (and lens) had been discussed last year – and it all started with DxO PhotoLab 4 and Candid Photos - #180 by mikemyers
You took the former photo with a Nikon DF and I suppose the very same AF Nikkor 24mm f/2.8D.

Following the old thread further down to DxO PhotoLab 4 and Candid Photos - #215 by Wolfgang
you can see, that your lens is prone to some degree of Chromatic Aberation – as well the problem got solved.

As both combinations are supported by DxO, download the corresponding correction file to make use of, activate ‘Chromatic Aberations’ and play with the settings – see comment / screenshot from @Joanna (which saves me … :slight_smile: )

That old lens is far from dead, it just needs a little help :nerd_face:

Out of interest, I went on to Ken Rockwell’s review of it and found a sharpness comparison page.

Here’s the corner sharpness at f/2.8, which is what you used…

D3L_0966-z28

… and here it is at f/8…

D3L_0969-z8

Next time, up the ISO and stop down :kissing_heart:

1 Like

… and the same with the AF-S 24-85mm Zoom, which is better towards the long end.

[ I have a copy of that lens and for critical 24mm shots, I stop down to f8 ! ]

I saw the scene, grabbed the D750, removed the new lens and mounted the old 24, and rushed out to the dark balcony to take a photo, resting the camera on the balcony railing. I forgot how to set the ISO, as I have to do that from inside the menu system, so left things on auto and set the bracketing control to give me 5 choices. I did this twice

It wasn’t until this morning whe I figured out where the ISO control was, and yes, tonight I’ll bump it way up, 800 or 1600, and I’ll bracket again.

If the camera was stable, I wouldn’t have expected any issue with 1/5th of a second. I’ll see what I end up with tonight, as long as it isn’t cloudy.

This is confusing to me - so PL4 DID know the lens, as it’s listed in the DxO PhotoLab Processing. So to answer Joanna’s question, I have downloaded the modules - but maybe something got turned off in my settings unintentionally? I’ll go through the settings again. Maybe that is my fault?

That matches - so I need to check that they are turned “on”, and not “off”. I don’t recall ever turning them off, but this is a different Workspace, and maybe I just didn’t pay enough attention to what ALL the settings are.

I have always used this lens when I need more wide angle than a 35. I guess I don’t usually shoot with it wide open. If I would have been thinking about this, I’d have set it to f/5.6 (but tonight I’ll try f/8). The reason I like this lens is that it is small, and light, and easily fits in my pocket. The VR zoom is big, and heavy, but my thought was it might be better than walking around with multiple lenses.

Joanna - yep, I did read Ken Rockwell’s article, and enjoyed it, but I forgot about those details.

By the way, before I started trying to get rid of the halo’s, my histogram looked good to me. By the time I finished, the histogram was way off to the left. I thought the halo’s were ugly, but I suspect I was wrong. That was part of the picture, and that’s what I saw with my eyes. One more lesson learned.

Yes, I should have boosted the color a little, but had I taken the photo 15 minutes earlier, there was lots of color. By the time I took the photo the color was rapidly going away, as it got darker. I guess it took me way too long to get the camera ready.

(The D750 has 24 megapixels, and my Df has 16. I’m mostly using the Df, and when I pick up the D750 some controls are difficult for me to remember how to get to them. My favorite is the Df, but I figured I ought to use the one with more pixels. …just for the heck of it, I should try the same photo with my Leica and one of my wide angle Voigtlander lenses I bought for it. I’ve got an old Leica 35mm, but I like to see the shoreline on both sides of this image, and I need more than the 35 for that.)

I will also take a photo with this lens, and stop it down to f/8. I found a used one at KEH and the price was reasonable, and I wanted a single “walkabout” lens for my Df. After a lot of reading and arguing with myself, I bought it.

Yikes! You all must have taught me a LOT since February. For many, many reasons I like this newer photo more, much more. Same lens, correct.

Oh my gosh!!! All that beauty was hiding in plain sight, and you brought it out!!! I downloaded your .dop file, and am looking at my new #2 virtual copy, and it’s hard to believe this is the same photo!

I see what you did to the tone curve, and when I click “Compare” I can see that you applied the optics information. You turned on Chromatic Aberration - is that what activated everything? You also turned on Lens Sharpness and Distortion, which are set to “Auto”. I fell asleep last night wanting more “punch”, and you’ve added punch, on steroids! Your version just jumps off the screen at me!

I doubt if I will ever reach your level, but my goal now is to get closer!

Stunning!!!

1 Like

If you are going from f/2.8 to f/8, that’s 3 stops down.

If you go from 500 ISO to 2000 ISO, that’s 2 stops up (don’t be afraid of high ISO with DeepPRIME; I regularly use 10,000 for concert photography)

Take off the -1 stop exposure compensation you used and you end up with 1/5 sec, just like this shot.


If you didn’t mind the water being smoother and possible movement on any boats, you could always use a polarising filter, which will intensify colours and possibly remove some of the haloing around point light sources. But you will need to allow for another 1½ - 2 stops.


If the module wasn’t loaded, you would see this on the thumbnail…

Capture d’écran 2021-09-28 à 21.04.47

If they are part of your default preset for RAW images (they should be), then there’s nothing else you need to do to have them there automatically. If not, go to preferences and make your default RAW preset “2 - Optical Corrections only”.

If that preset wasn’t your default, simply double click on it in the preset panel…

Capture d’écran 2021-09-28 à 21.04.02

Unless a lens is scrupulously clean, it is virtually impossible to get rid of some “bleed” from point light sources, which is why I suggested a polarising filter. It might help but it isn’t something I’ve actually tested yet.

Do you have a tripod and cable release? It can help more than trying to hold the camera against a rail, where even pressing the shutter can be enough to cause blur.

Nope, it was the combination of those three plus Vignetting, all of which are in the Optical Corrections only preset. But I did have to up the Chromatic Aberration settings to full tilt with Lateral and Purple both switched on. Your lens behaves very much like an old Nikon 28-200 zoom that I used to have and it needed the same “help”.

Most of the punch was from simply straightening out the tone curve, plus carefully applied fine contrast.

Hey, why not. I’ve only been using PL for three versions. And I’m still learning almost every time I use it. Also, helping other people is a great way of finding the stuff out to help them.

I am pretty certain I did this some time ago, selecting 2 - Optical Corrections only… but looking at my DxO PL4 screen on my display, no place doe it confirm what preset is in use. I selected it again, and clicked on it. Now it is highlighted with a white background, and the lettering is in black. If I quit PL4 and re-start, let’s see if it looks the same…

Nope. So do I need to do this every time, or is there a way for me to confirm what Preset is actually in use? If necessary, I’ll get in the habit of clicking on it every time I start PL4.

Yikes again, it also un-did your changes. I need to download your .dop file again… one minute…

Hmm, I need to delete my #2 virtual copy, leaving only the Master and my own virtual copy. Now download your .dop file again. Finally, everything is back to normal.

That was foolish. So, if I opened my computer again six months from now, and opened an image, how would I know what Preset was in use for that image? Or can’t it be done.

Hmm, catching up with you is like catching up with Einstein, and while it’s not possible, for me, I can keep getting better. I’m happy to read that your helping me is helping you too! (…and I bet a lot of others are following along with these discussions, learning while doing so. Maybe more of them will jump in to say hello!)

Ok, stop reading / writing now and get you camera ready for tonight, if you want to take pics. :slight_smile:

Get out of the P(rogram mode) and set it to Manual (or Aperture mode), so that you can choose f8.

[ Not arguing with you, but you better up the ISO to avoid slow shutter speed – except when your intention is to ‘calm’ the sea → and then you have to take care for the mirror slap → more settings … ]

2 Likes

I watched it yesterday and… I guess you are just one step away from this on this thread :grin:

Bravo to all of you teaching and learning :+1:t4:

Lunch is finished, email is finished, and I will be ready if the weather cooperates. My tripod is set up, memory card formatted, and front and rear of the lens are clean and shiny. For a starter, ISO is set to 2500, camera to (M)anual mode, Aperture to f/8, and shutter - still to be determined. I will likely shoot in “bracketing”, same settings as yesterday. Cable release - good question. I needed to find out how to attach one to my D750, and it’s not going to happen:
https://kylefalconer.com/blog/2016/4/26/quirks-of-the-nikon-d750
Why would such a well known company as Nikon deliberately omit a way to use a cable release?

Next time I’ll use my Df which uses a normal cable release like what’s been available for maybe 100 years now. But for fewer megapixels, which probably doesn’t matter, I’d be using the Df.

Show time is a little after 7pm. Dinner time is 6pm, like in 10 minutes!

If you can, set the exposure compensation to + 1⅔ and spot meter the brightest part of the subject. This will ensure that you will not blow highlights and you will be able to recover shadows in PL.

Then progressively add ⅓ stop of shutter opening time every so many minutes as the light fades.

https://www.bhphotovideo.com/c/product/580879-REG/Nikon_25395_MC_DC2_Remote_Release_Cord.html/overview

You need to set the default preset in preferences…


But don’t apply this preset to an image once it has been edited.

See, I just said it would :crazy_face:

I have a non-lethal version of that preset, which will not blitz any previous changes.

Optical Corrections only.preset (1,4 Ko)

Once this is installed, you can even set this as your default instead of the DxO version, or you can use it after the fact without fear of losing previous edits.

I’m saying that these lights don’t bother me. The image lives by the colour of the sky and the clouds against the skyline. Better rendering of the light sources in the foreground will not improve the impression of the sky and clouds.

2 Likes

Tonight was useful as a dry-run, but that beautiful colored sky, and all those clouds that you noted never happened. Jupiter was still there and I took several shots, each one bracketed. I’ll try Joanna’s way next time. For a great photo, without the clouds and sky, tonight was a waste - but I’ll pick one of the images and upload it anyway,

I don’t think I’ll do that any more - If anything, I’ll click the Preset I want “DxO Optical Corrections Only” before I open any image, and try to get in the habit of doing that.

For today, I tried to guess at the right exposure from a few test shots, then set the bracketing to take 5 shots at a time. I slowed down the shutter speed as it started to get darker.

I also took two quick shots with my Df, to get a feel for how it works with a shot like this.

I’m not too excited about even more electronic gadgets - one more reason to use the Df, that accepts the standard cable releases I already have. Thanks for finding this though - I might change my mind, if I had a good reason.