Chris who posts on here a little has put together another useful video.
About sharpening on PR PL and Nik
I liked it anyway as a learner
2 Likes
Thanks for posting the link – I’ll look into it more.
Some years ago, when I was running a local photoclub’s homepage
and got all sorts of pics to publish, I resized the pics to the exact output size
and then used
OutputSharpener → Display → Adaptive Sharpening → …

- That way one one can see (at 100%) how much sharpening is appropriate.
.
For my printing I export my pics exactly to their final size and use
OutputSharpener → Inkjet → …
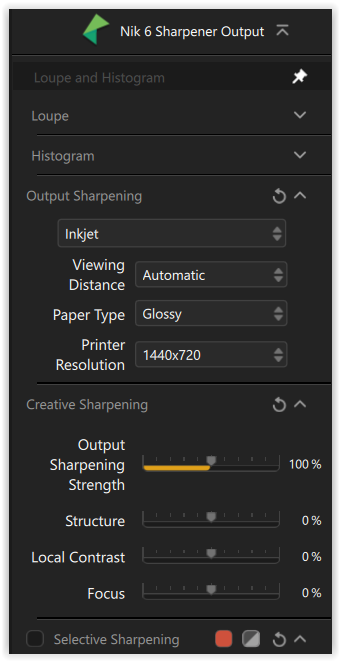
- Viewing distance set to Auto provides proper sharpening to counteract the spread of these tiny ink droplets.
- “Glossy” paper type usually provides the best/finest result
( e.g. Matte paper requires a coarser/heavier application ). - The printer resolution corresponds to my printer setting.
I’ve never used Nik’s PreSharpener. – When you process your files in PhotoLab and can apply the appropriate camera-lens profile, there should be no need to use the PreSharpener modul.
greetings, Wolfgang
Currently I am reprocessing a series of portraits taken with the Nikon D5000/35f1.8. It’s truly amazing how much more Dxo can make of it, but at the same time it’s also a challenge to achieve the same ambience Nikon puts in it, only better.
I find it hard to find the balance in sharpness, I want details like hair, jewellery and textile sharp, but the skin to be nice and smooth.
PL7.6 on W10, no Nik
The best result I find come with the four Fine Contrast (global, highlights, mid-tones and shadows) sliders that come with FilmPack. For skin, you can apply a negative amount to the highlight and/or mid-tone sliders to soften things, whilst using shadow to boost detail in hair, etc.
5 Likes
I’m not a portrait guy but recently had a couple of friends in front of a landscape. I wanted ClearView on the landscape - but not on their faces. I turned off CV globally, used a control point to pick out all the exposed skin, inverted the selection, turned CV on in that selection.
Just a thought.
1 Like