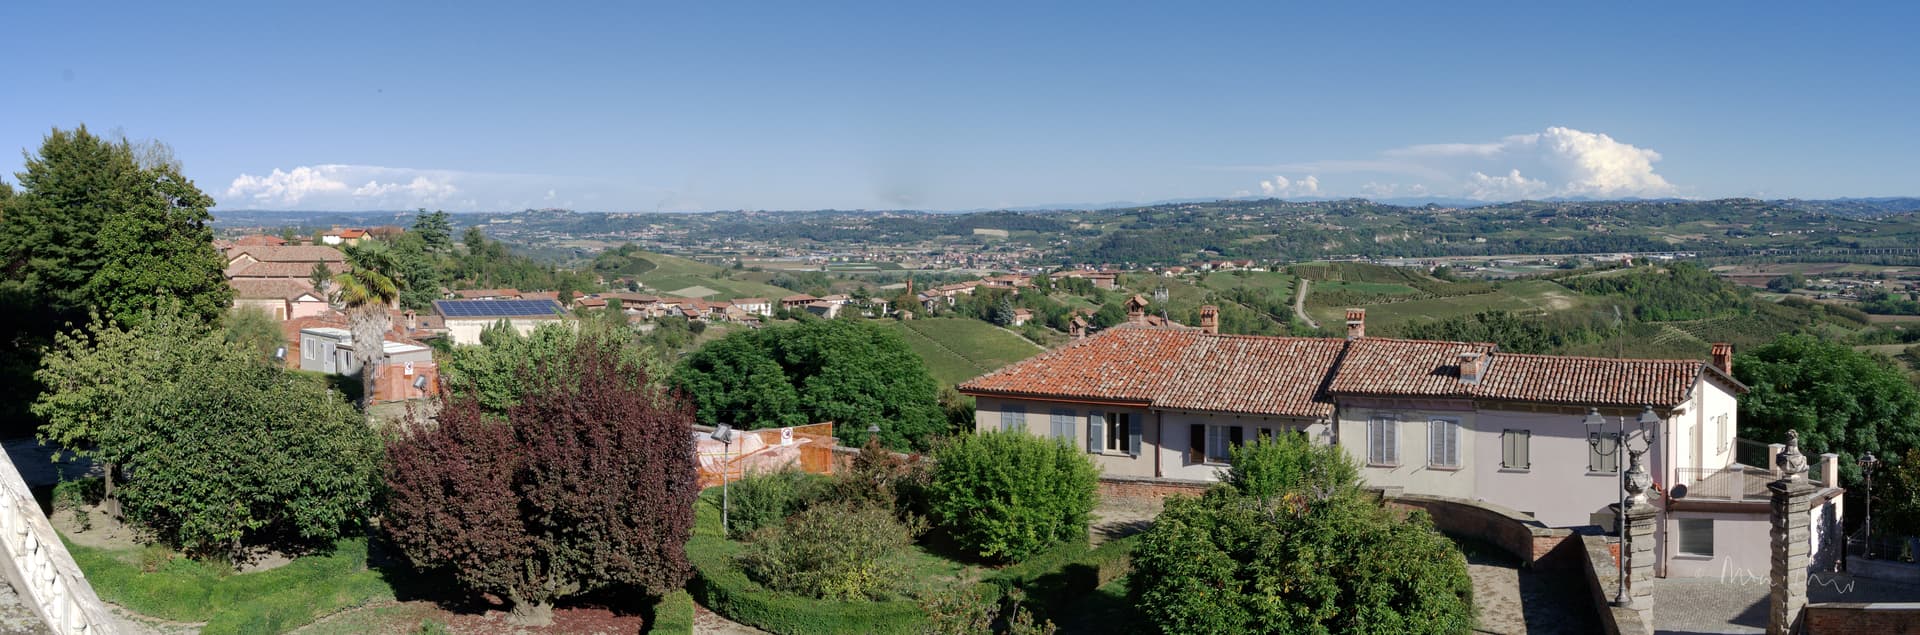
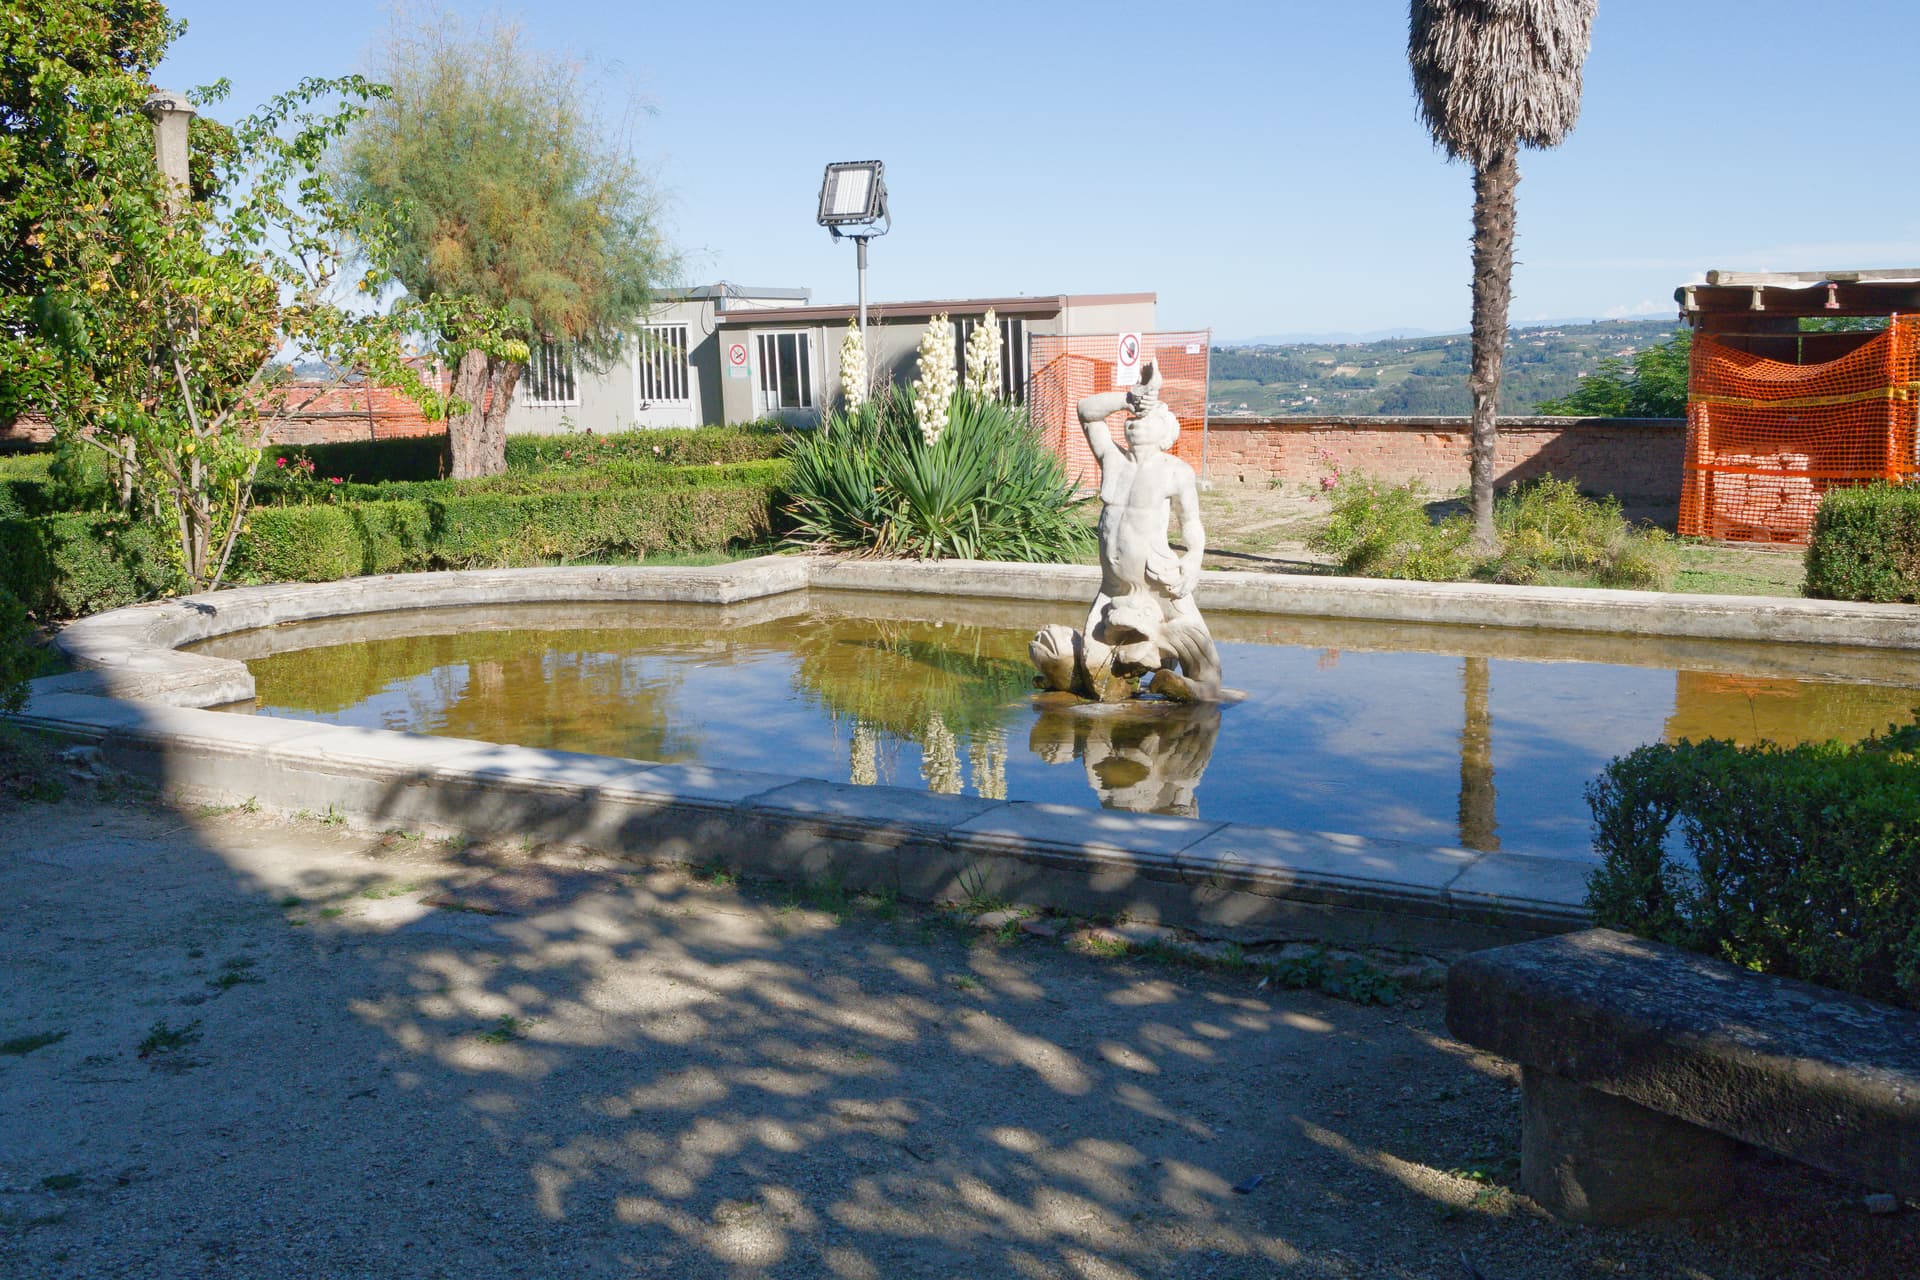
Saturday afternoon we visited the Savoy residence at Govone, on the East bank of the Tanaro, between Alba and Asti. Here is the panorama I took looking SE from the castle terrace.
Each frame was run through PL8, for optical correction only. The panorama is stitched in Affinity Photo 2, and the resulting (enormous) TIFF corrected very slightly to reduce the exposure time half a stop.
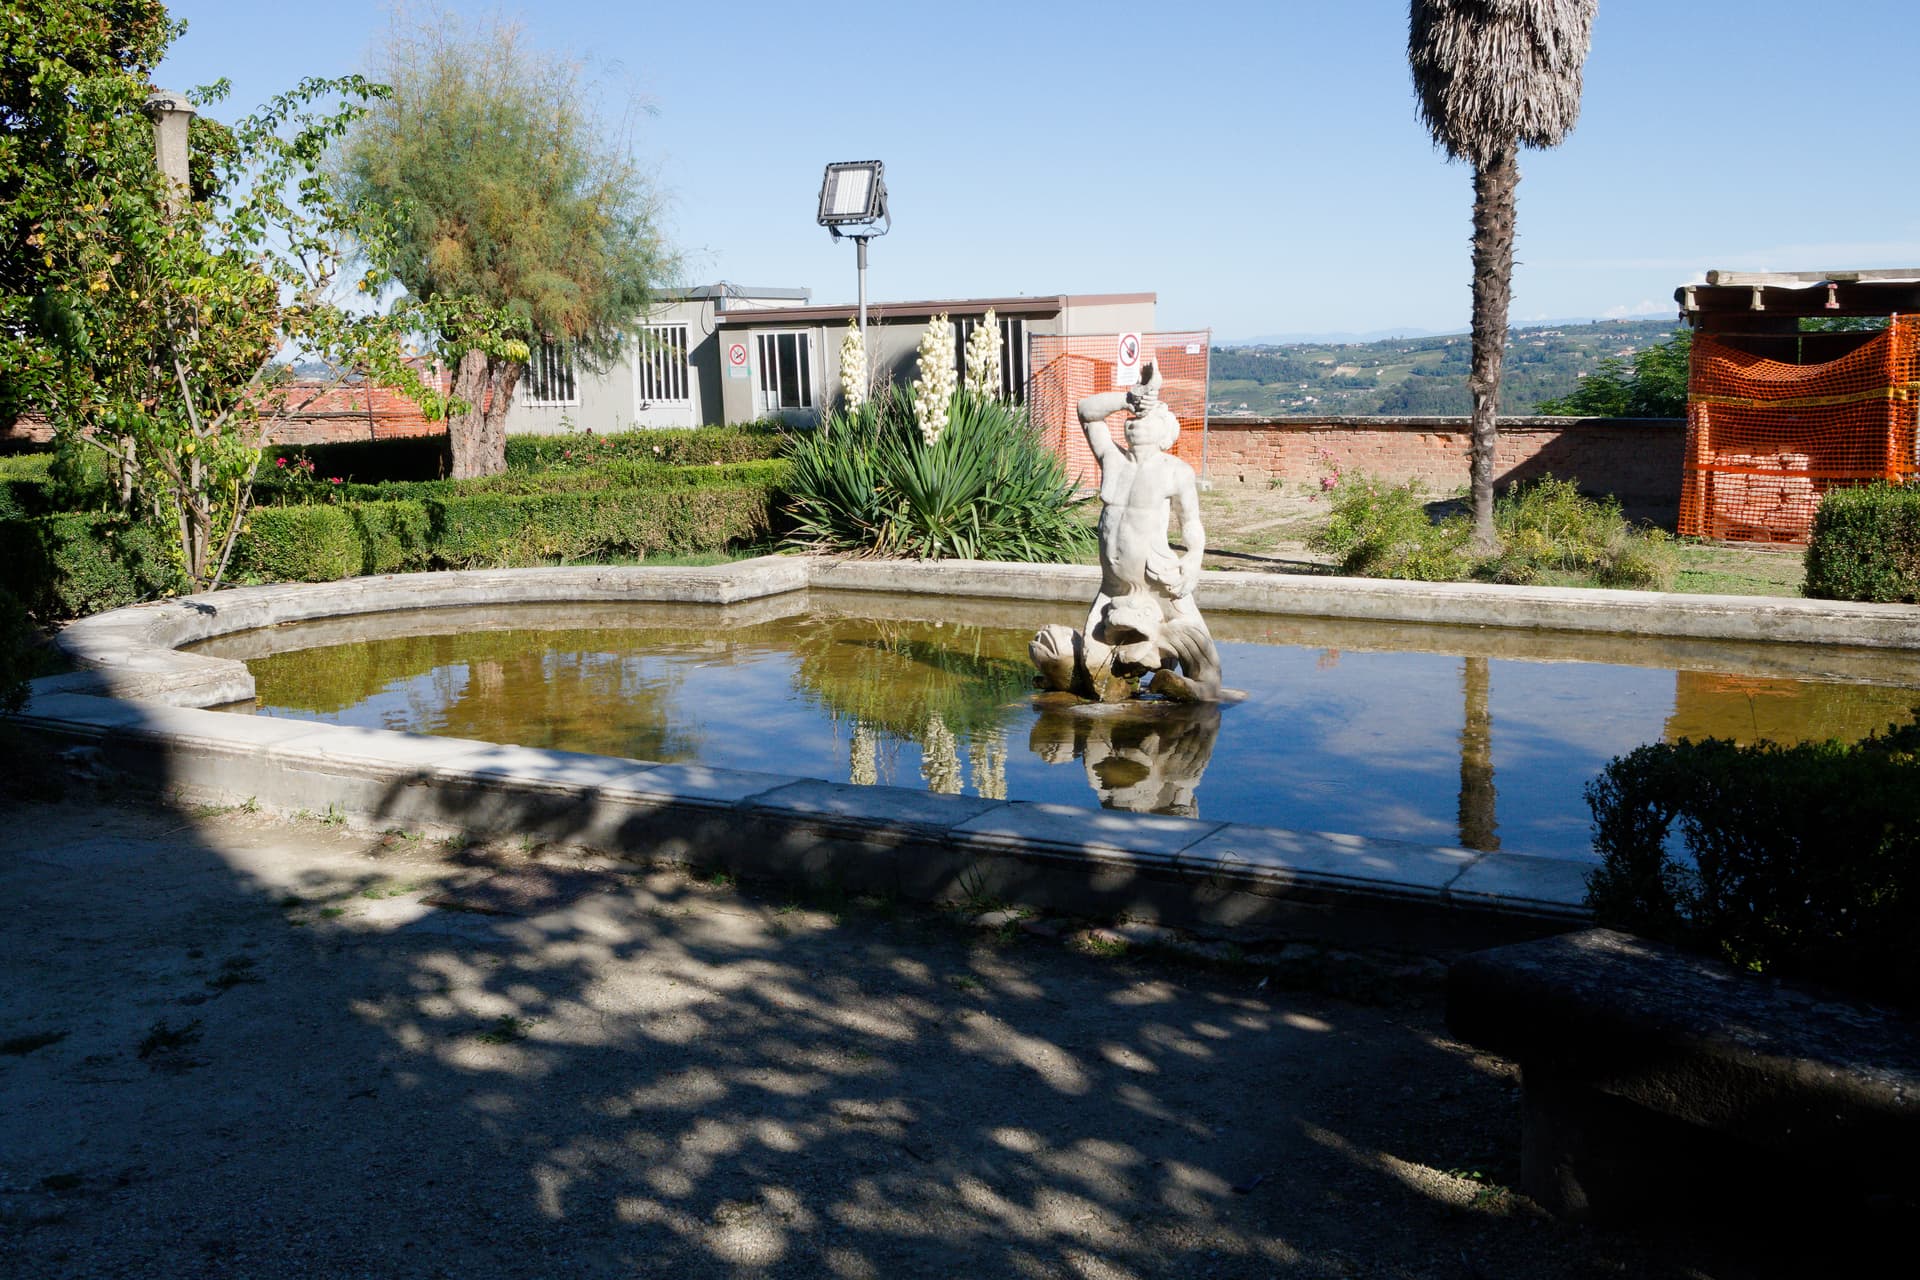
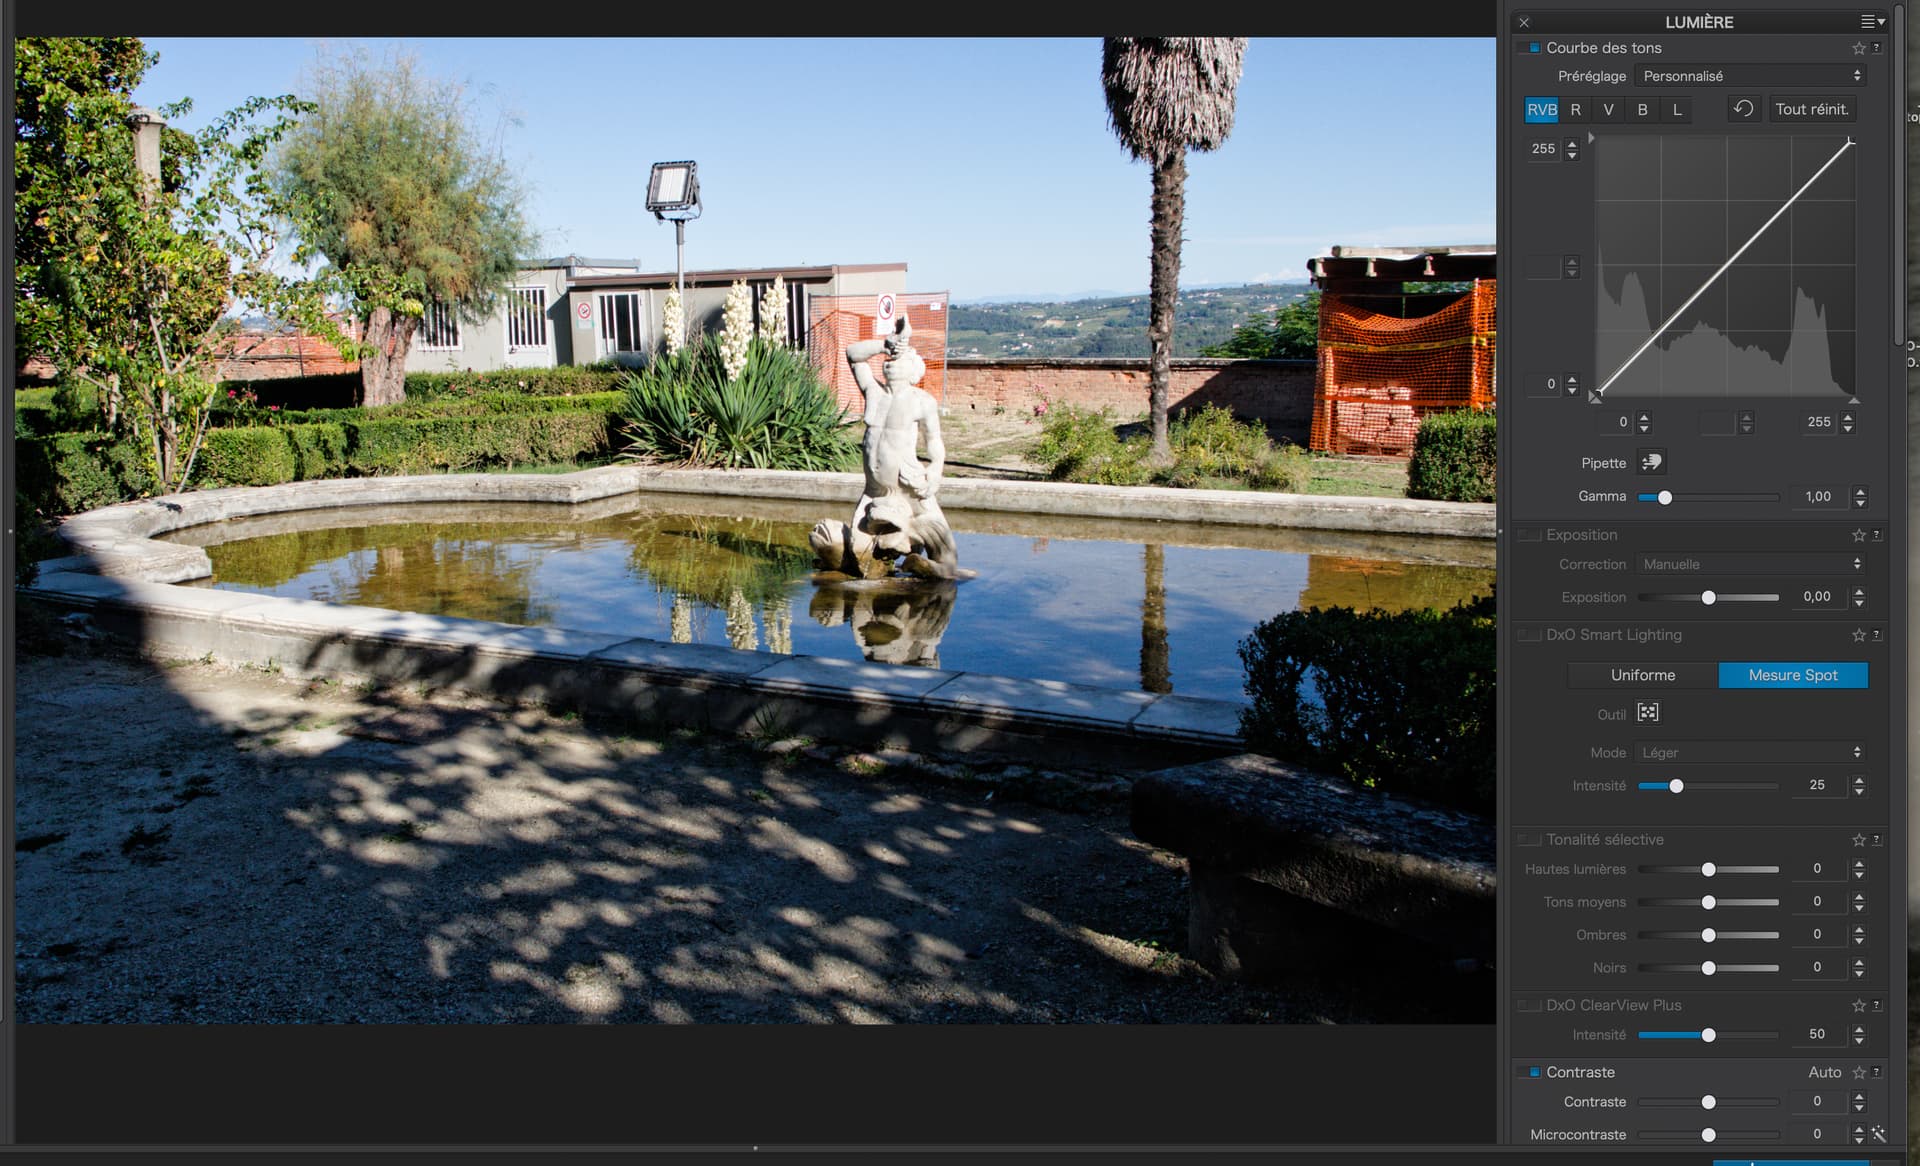
To see whether I understand @Joanna’s comments on the Collioure thread, I took another shot from the visit:
This is the SOOC (well, with optical correction) , and it is obvious that the shadow areas are too dark to give any detail at all.
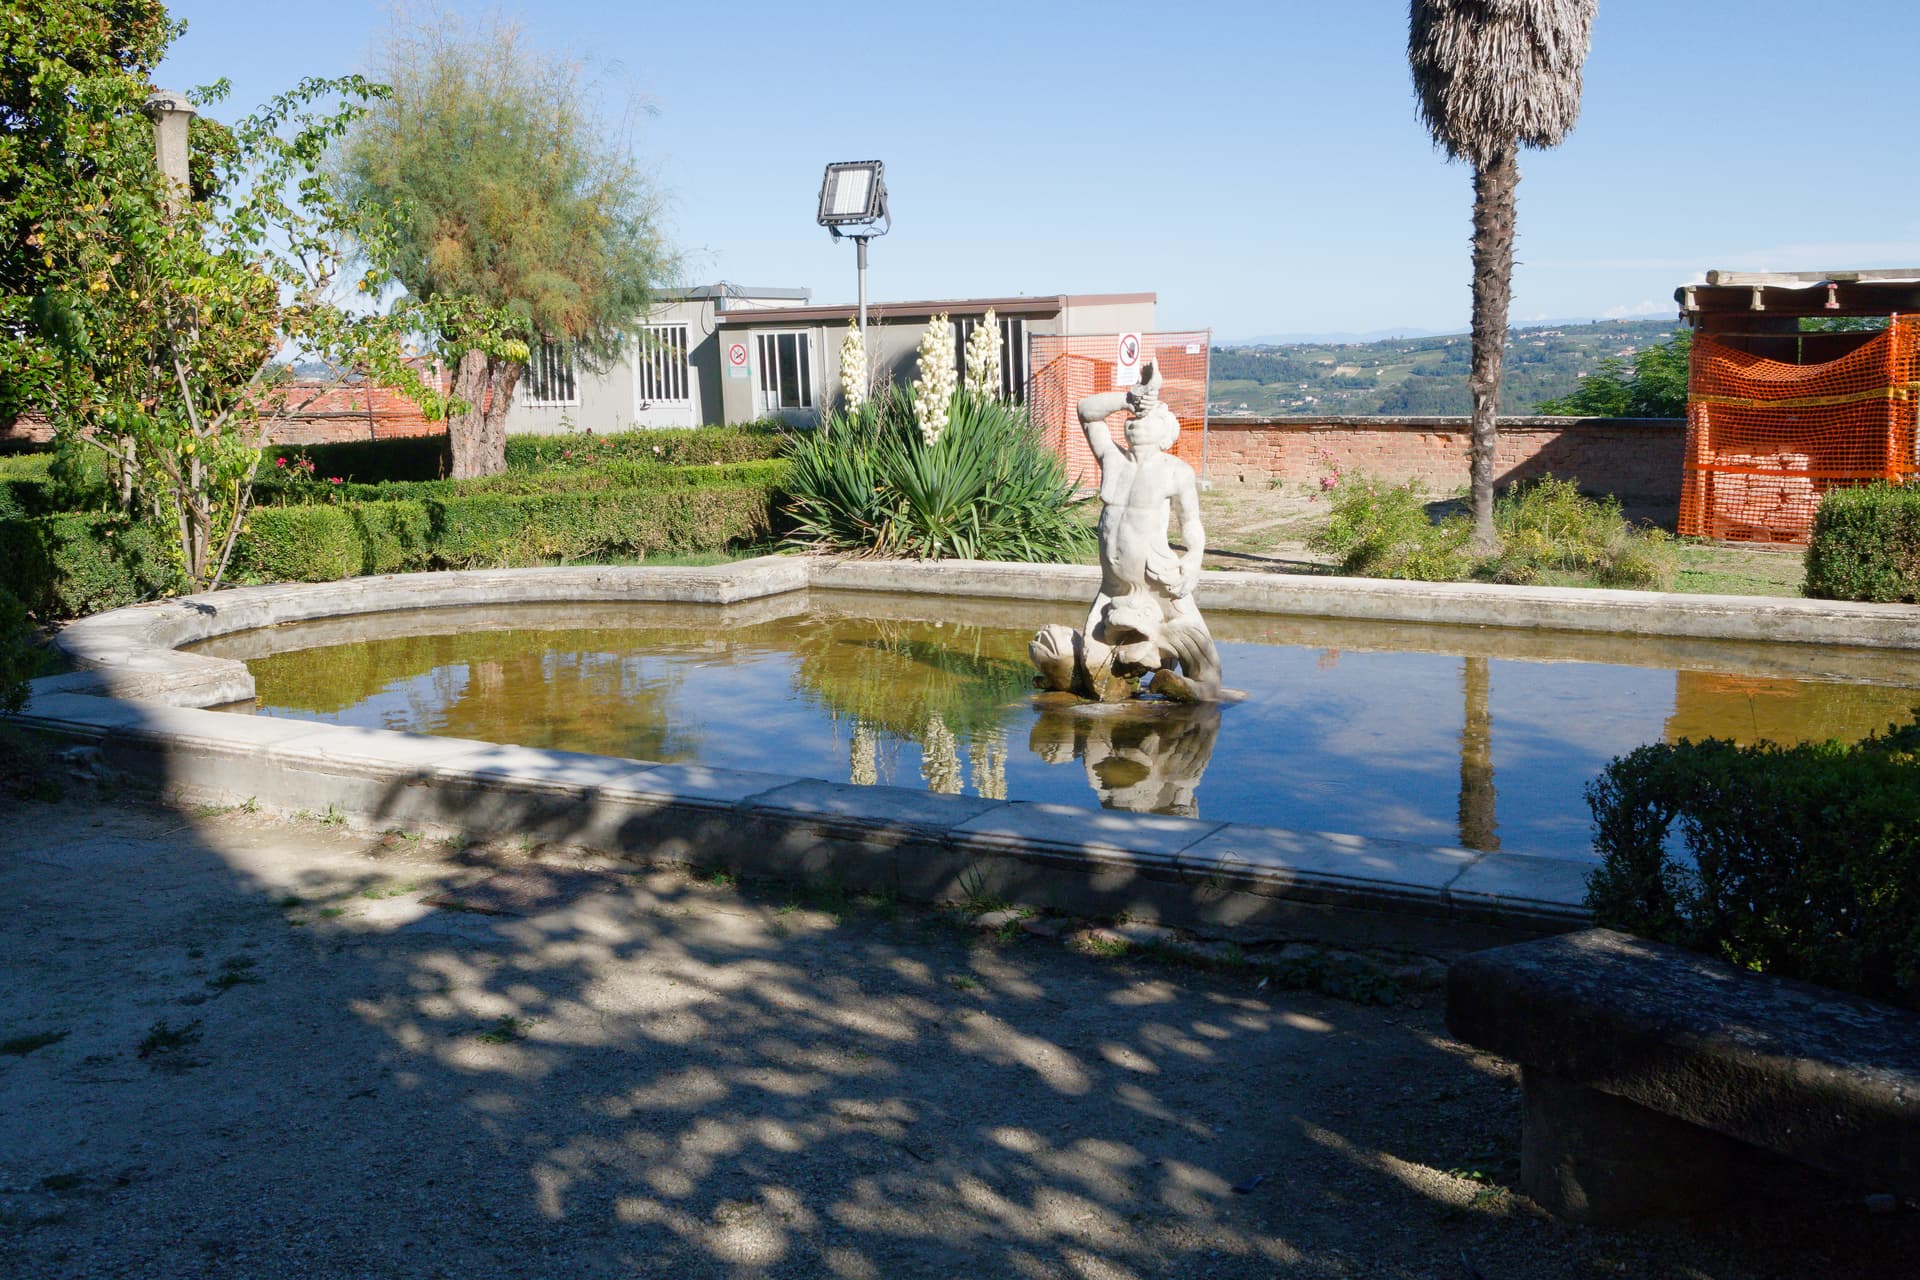
So I started “frobbing” the shadows and blacks, without touching the exposure.
kgLuRZmaltRw5CRAj0fkbaXfc7.jpeg)
There is more detail, and the foreground is dark, but there isn’t enough detail in the really dark areas. So next attempt (Shadow +16, Black +24)
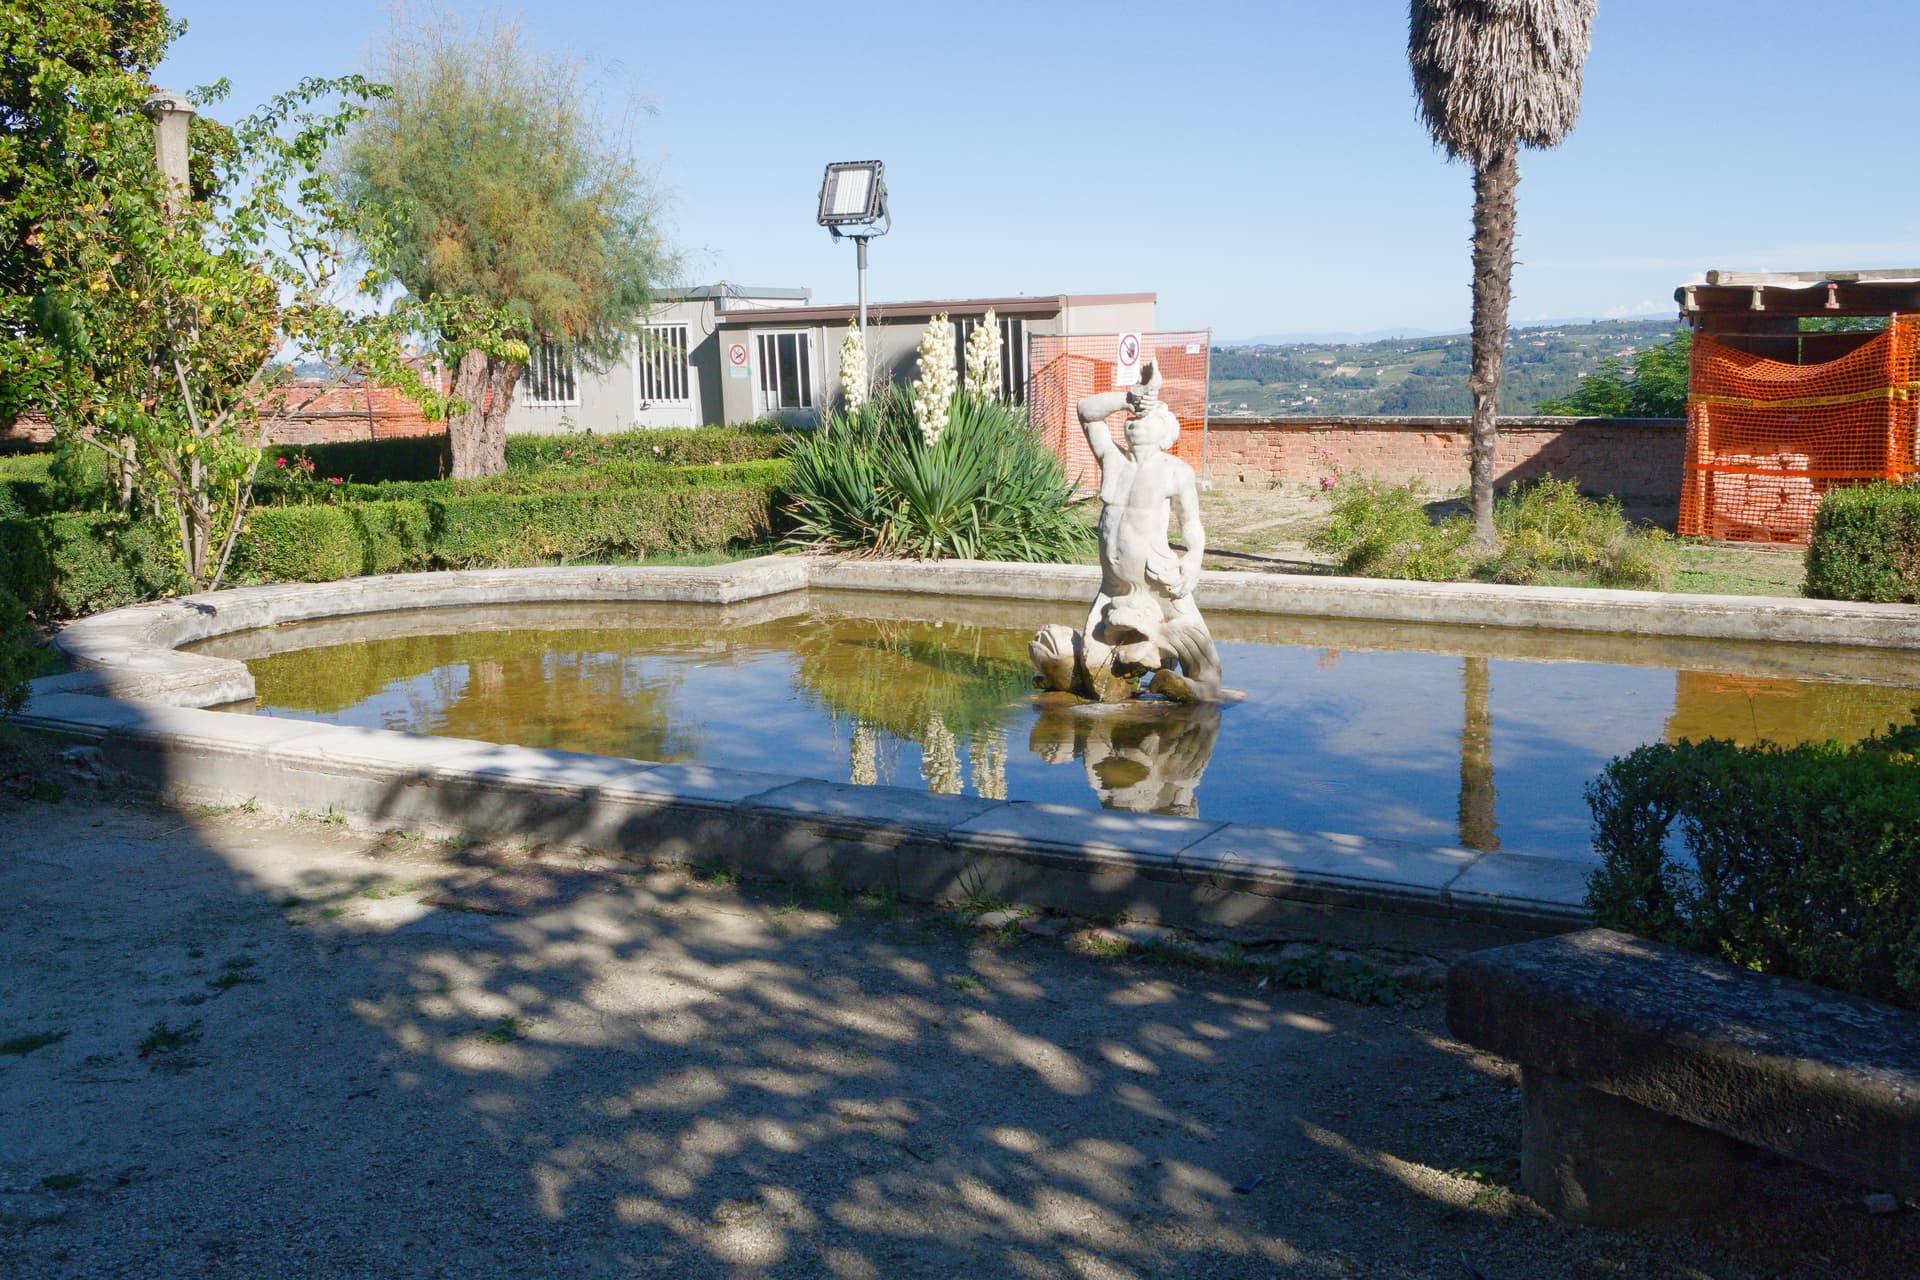
Here is the final .DOP file and the RAW capture. D6700685.ARW (36.9 MB) D6700685.ARW.dop (53.0 KB)
Please ignore the Portakabin and the safety netting. I couldn’t find a path that could exclude them from the frame! All other C&C welcome.
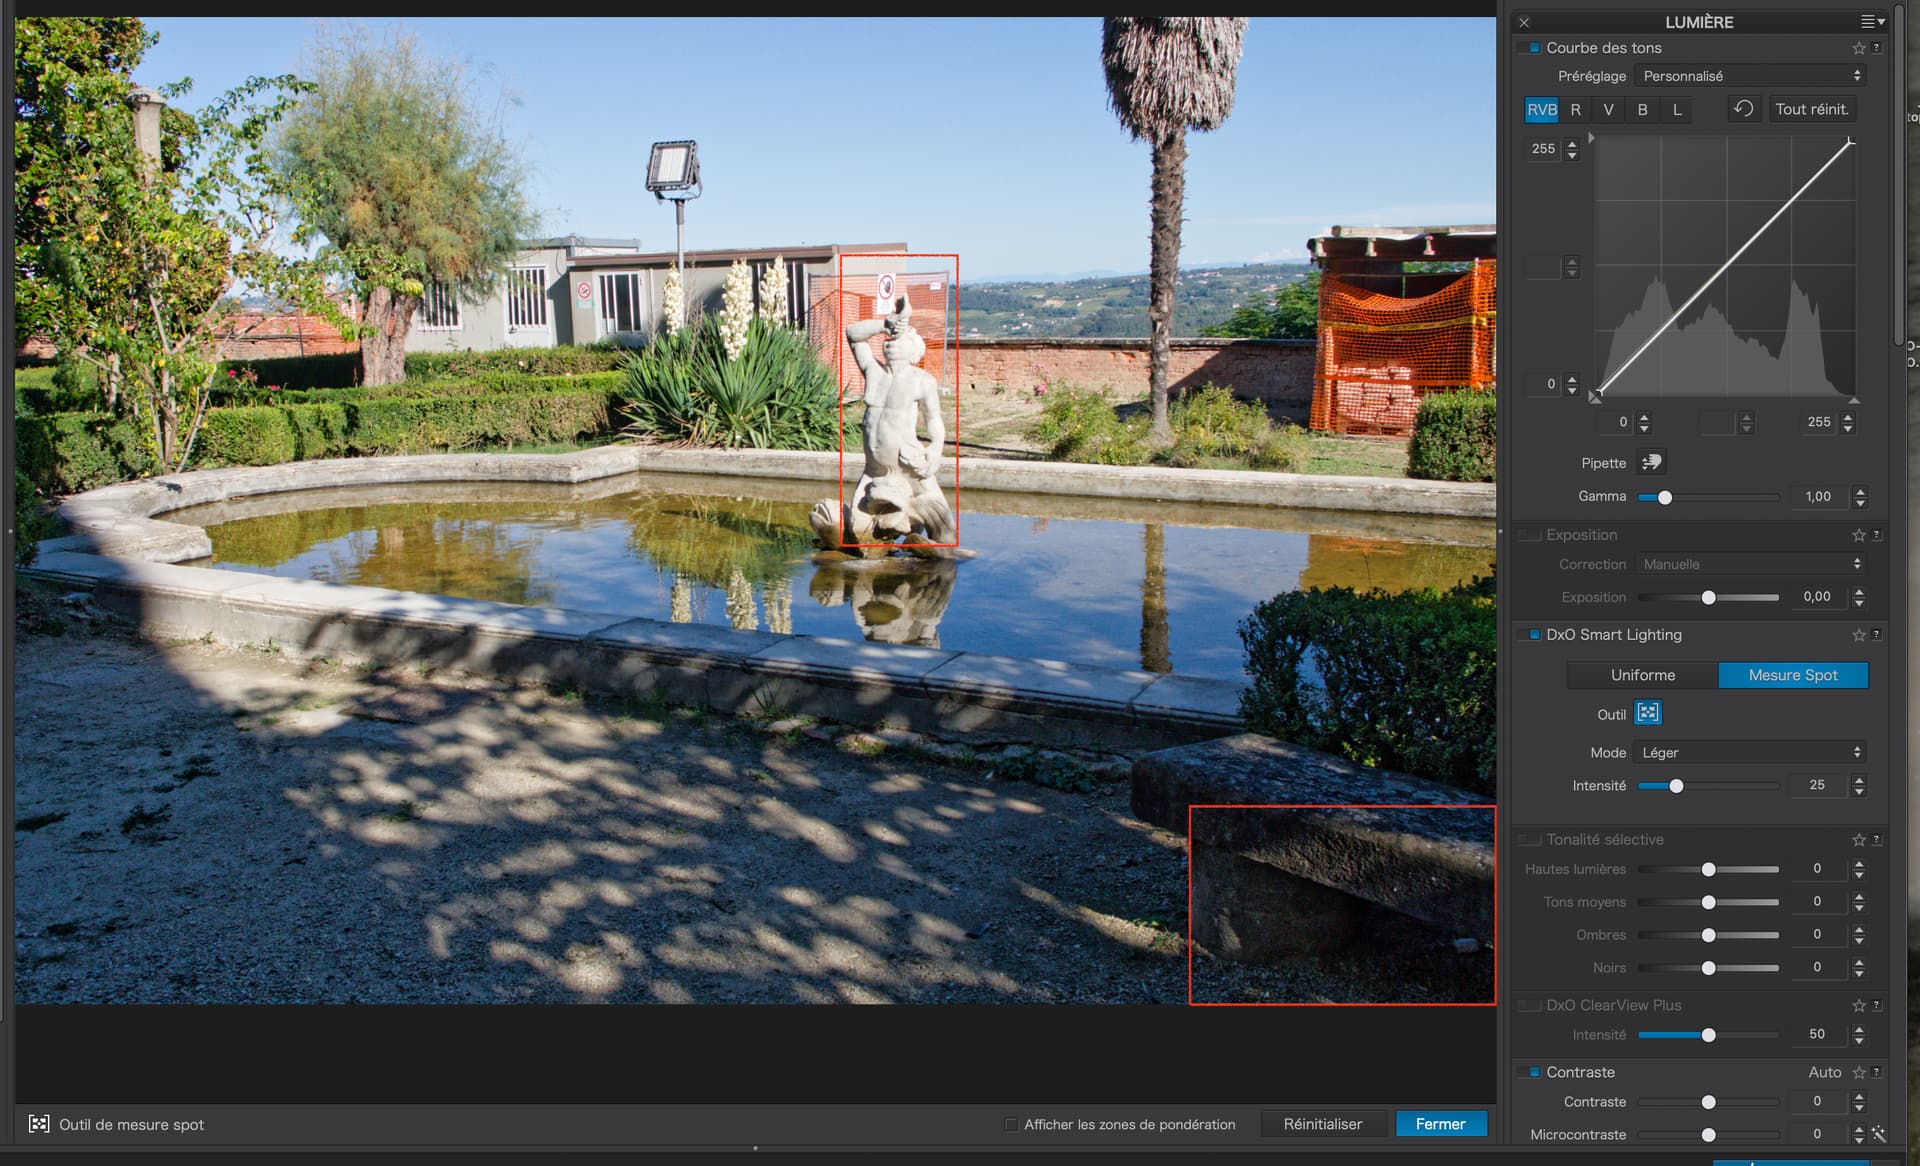
Thank you, Joanna! Yes, “frobbing” is playing with the tonal sliders in the “Selective Tone” tool. Google searching suggests that your reference to the “Spot Measure Smart Lighting tool” is to “DXO Smart Lighting”, but I don’t understand how this helps find the black and white points. If I check it on, and click on “Spot” it simply tells me it can’t find a face. Nor does drawing an area I want to represent the white seem to help. You’ll have to be patient with me; I’ve only been using DxO for about 10 years. And I only learn how to use a tool when it is the answer to a “how to” question. I had enough of reading manuals from page 1 to page 4095 when I was writing code… Wouldn’t buy a book in Blackwells unless the index contained a reference to the topic I wanted to learn about.
I am waiting for Black Friday to see whether the kitty will support buying FP. For the moment, perhaps you remember a poem about the naming of the parts. “Which in your case you have not got”?
What - actually - is the point of back button focus? When the AF-point is correctly selected my Sony camera shows me whether it is focusing on my target. If the camera is not pre-focusing, how am I to know whether AF will select the correct target?
I realise the answer may depend on the AF characteristics of different brands. At least one of my past Sony bodies (the A77ii) had a kind of Word-Perfect button combination with which you could limit the AF-able range - this enabled one to override the Sony tendency to focus on the closest object within the AF-area. Never used it much because there was no room in my bag for a Wang keyboard.
And digging myself further into the hole, why use AF-S (where the AF stops re-focusing) after you tell the camera you have found focus? Yes, this is one way of ensuring the subject stays (nearly) in focus while you point the lens somewhere else; but because in the 21st century there is no need to go through the focus and recompose tango …
(/Rant)
@Joanna
Now I can see the “spot” boxes on the preview screen; as long as I have the DxO Smart Lighting tool active. Am I right in understanding that this will now have set the appropriate White and Black points on the Tone Curve tool? Do I need to turn this tool on before I do the spot selection?
No, there is no interaction between the Smart lighting tool and the Tone curve tool. They work independently from each other, at least on the Windows version. Try it for yourself.
Yes, but having clicked on the ‘Tool’ and created the boxes, you can click again on the ‘Tool’ to hide the boxes. That makes it easier to do other edits (e.g. changing the Tone Curve) without the Smart Lighting boxes getting in the way. Toggling the ‘Tool’ like this doesn’t disable the Smart Lighting defined be the boxes., whereas deactivating the Smart Lighting palette will disable the Smart Lighting defined by the boxes.
Thanks @joanna, @mwsilvers, and @stuck! I think I finally get it. It makes me wonder what other killer features of PL I have been missing all these years.
I suppose the best way I know to explain it is “assisted” manual focus.
I don’t know about you but, when I want to focus on something that is not necessarily behind one of the focus points, you switch to manual focus and, with the passing of the years, it gets more difficult to adjust the focus precisely in the viewfinder. But, if you use auto focus, you have to ensure that the correct little box in the viewfinder is over the part of the subject you want to have sharp at the time of shooting.
Back button focusing sort of squares that circle.
You set up BBF by putting the camera in auto focus mode but disabling autofocus via the shutter button. This means that you don’t change the button whilst actually pressing the shutter.
Zoom in on the part you want sharpest and press the back button to set the focus. Now, whatever else you adjust (apart from the focus ring) the focus will not change, even if the focus point is no longer over the subject.
Having set the focus, you can now reframe your shot, knowing that the focus will not change when you press the shutter release, because you have released the focus button. This is the equivalent of single shot AF.
If you want continuous AF, simply position the focus point over the moving subject and hold the rear button whilst following the subject, pressing the shutter as and when needed. Either that or enable the shutter release focusing to avoid having to hold the back button at the same time.
I hope you understand this. Let me know if I’ve not been clear enough.
I use back button focusing with my Nikon D7200 - with only a single focus point active (as I’m usually shooting static things). If the thing I want to be main focus is off centre, rather than moving the focus point I just reframe the image so the focus is on the desired item, reframe back to how I want the overall image then shoot. Without back-button focusing, pressing the shutter button after reframing would refocus on wherever the focus point is located. So, for static object images, it ensures the focus is on the item I’ve chosen. Having switched to this some time ago I’m really keen on it. But obviously it’s not the answer for moving surjects where you’re relying on the camera to track the subject.
My shutter button lets me half-press it to focus and then press it all the way in to take the photo (usually after recomposing the shot). I find this to be efficient and easy, but have nevertheless heard arguments in favor of back button focusing instead of this. I’ve yet to try it. One of these days…
True and my camera does the same. It’s just that in “reframing” after pointing my one focus point where I want it I have to keep the shutter button half-depressed. If I’m clumsy I either fully press it too early, getting an image I didn’t want, or release it which then refocuses when I do fully press it. The back button focus avoids either of these.
My camera has several hundred (I haven’t counted them) AF sensors. Setting the AF target area to the smallest size, there are about 19 selectable columns and 18 selectable rows. Oh, and the AF-sensors that have obtained focus show up on the EVF or monitor. With a graphic around them if they have recognised the kind of subject I happen to be shooting. So if I have all these options configured on, I have no need to disable focus on half press.
I guess we have found another expansion of YMMV - Your Manufacturer May Vary!
Eh? I don’t think any one of my m4/3 zoom lenses is parfocal. There are a few alternatives which are (typically the Leica-branded zooms or cine lenses), but they happen to not be as well aligned with my needs.