I post some of my photos as parts of my messages in online Garden-related forums. I have been using the JPG format because that works. I have recently looked for a “lossless” way to save images. The only lossless photos I have saved from PhotoLab have been TIFF and the forums do not accept TIFF. I haven’t tried yet, but I doubt that the forums accept DNG. That leaves JPG. I understand that JPG files can have a varying amount of compression, varying over a wide range, so I want to know how I can save “high quality” “nearly lossless” JPG files. I did some reading on the JPG file format, and I was amazed at how complicated that was. I want to know how nearly lossless my JPG files can be. I will also carefully read the manual.
Hello there.
Do you shoot your photos in raw?
All you need to do is to click the Export button in the lower right corner and chose or setup an option to export jpeg with 100% quality and in sRGB color space if you are exporting to be published on a web forum.
Set to which folder you want it exported.
Set if any additional suffix to the file.
Set any size restrictions.
And then press Export again.
That will give you a jpeg with the highest quality.
https://userguides.dxo.com/photolab/en/exporting-images/#export_to_disk

1 Like
The JPEG designed its format in a way to balance file size vs. image quality and it had to cut a few corners to reduce file size.
The Quality slider shown in the screen capture above is the one way to shift the balance. High quality means large files, smaller files can be achieved by pushing the slider to its left. The price one pays for smaller files is reduced quality, but whether the quality loss is visible or not also depends on the image’s content.
For best quality, shift the slider to its max, but the file might get too large and therefore rejected. In order to find the best compromise, you could create a few virtual copies of a file and export each with different quality settings…check exported files visually and select the one that satisfies a) your quality expectations as well as b) the recipient’s conditions for file size.
1 Like
To reduce multi-megabit files to a more web-friendly size I use RIOT:
https://riot-optimizer.com/
It’s impressive, e.g. the TIFF of this simple two frame panorama is 140 MB, but the version you see here is only 248 KB
1 Like
Hi
If these images are destined for social networks, JPEG is the only solution displayed by browsers.
If they are too large, they will be reduced by the site server without any control on your part.
Downsizing is more effective at reducing file size and qualitatively better than high compression for broadcast images.
1440 x 810 is maximum sufficient.
Pascal
@photon as @Required has indicated if you shoot in RAW and, given your comments about TIFF and DNG, I believe that you do, then use the the export options to control accuracy versus file size, as also suggested by @platypus
@Pieloe That is what I always thought so I would welcome your comments on the following
@photon you didn’t say what type of garden-related images you create but as I am a keen gardener and garden visitor I included an image taken on my Lumix G9 with the zoom lens at maximum of a hardy geranium in our garden, i.e.
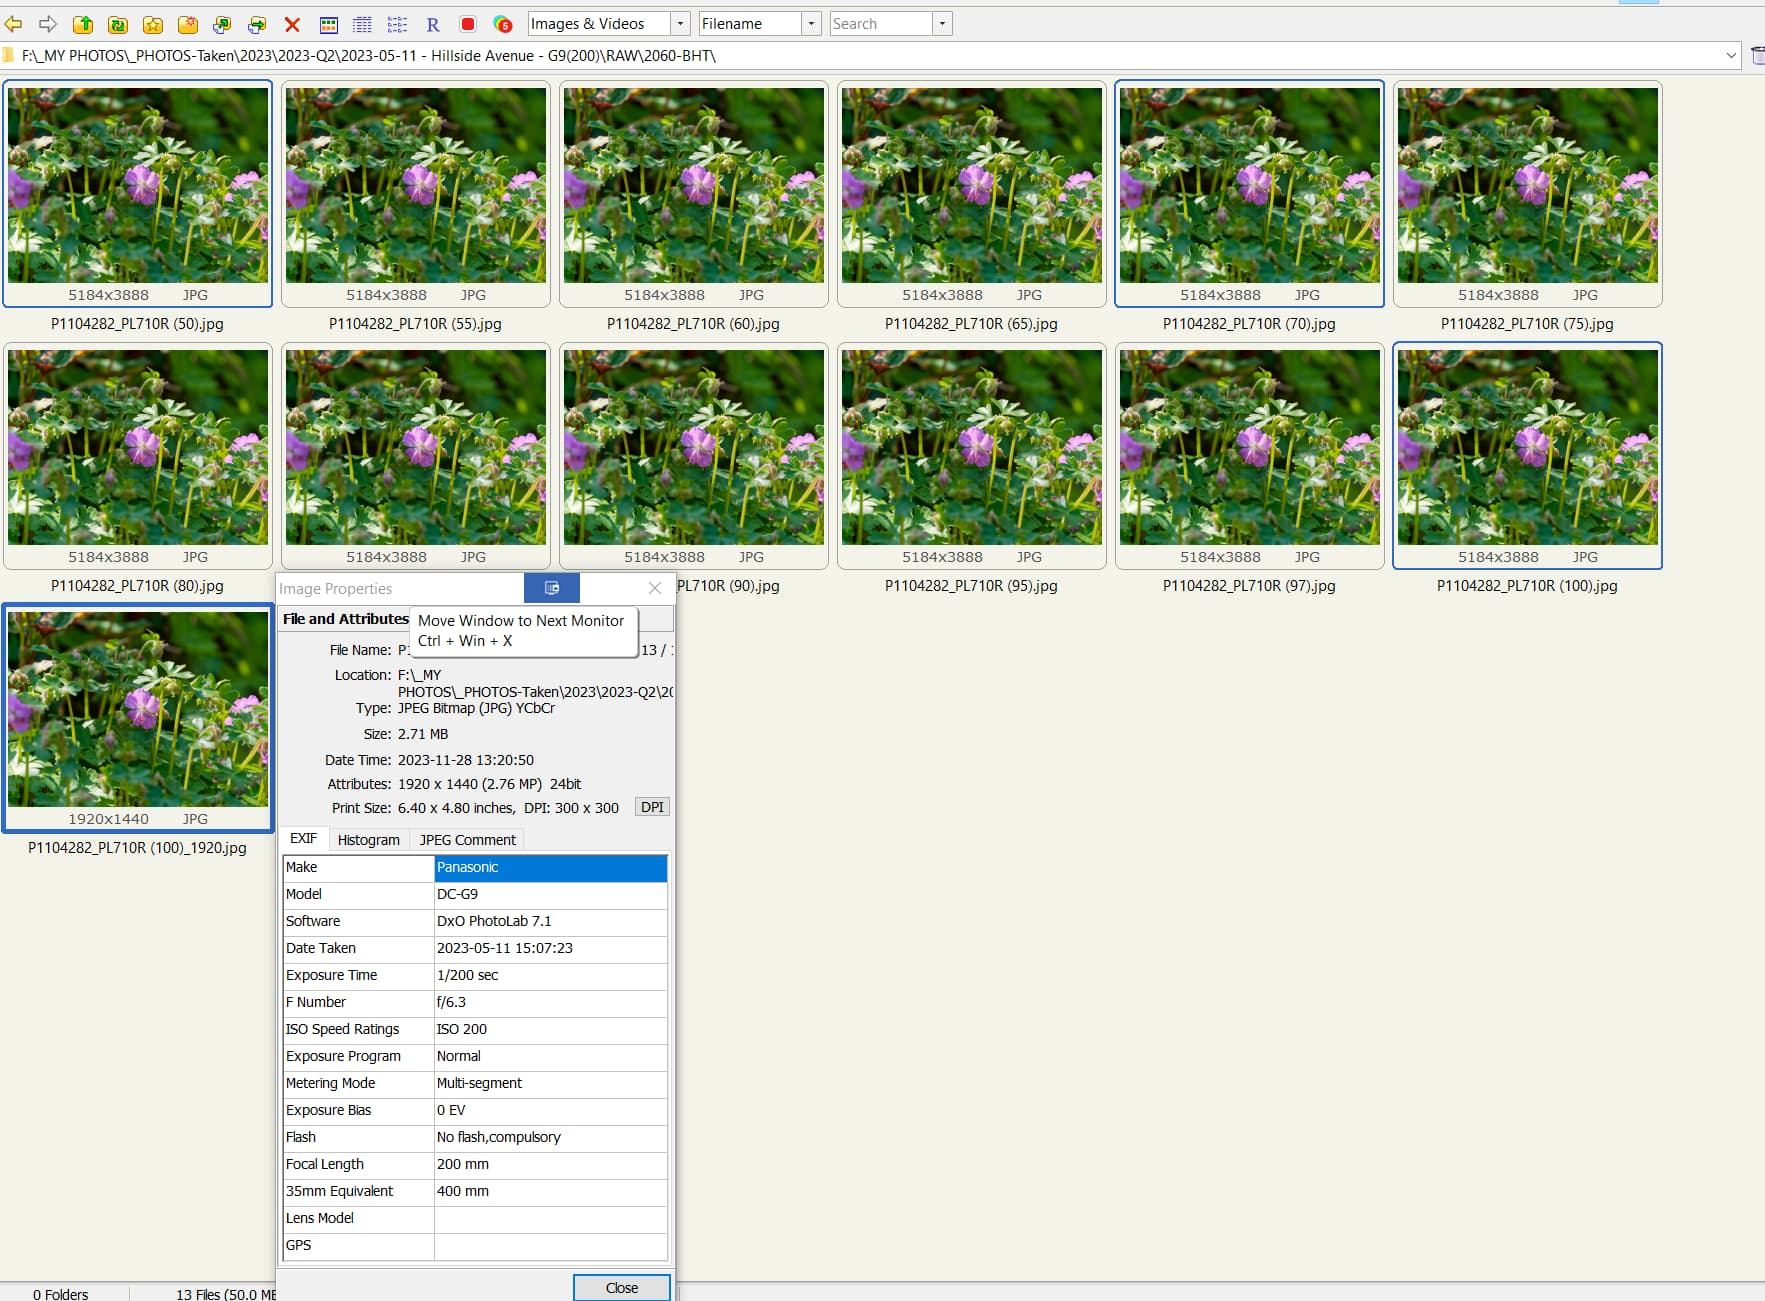
and exported at 100%, 97%, 95%, 90%, 85%, 80%, 75%, 70%, 65%, 60%, 55%% and 50% because it is easy to do with DxPL! Given that the image I selected at random may not be representative of anything you might find repeating the exercise with your images useful.
I also took the 100% JPG export and put that through another program and created a 1920 x 1440 image using Lanczos 3 and later found my old copy of JPEGMini and put the 100% export through that program and finally used RIOT as @stuck suggested and we then have the following!
The first 3 values chosen are what I use for testing (100%), what has become my normal setting (97%) and what I used to use (95%).
Here are some comparisons but please note that what this image looks like with different settings may or may not be typical!
50% versus 70% versus 90% versus 100%:-
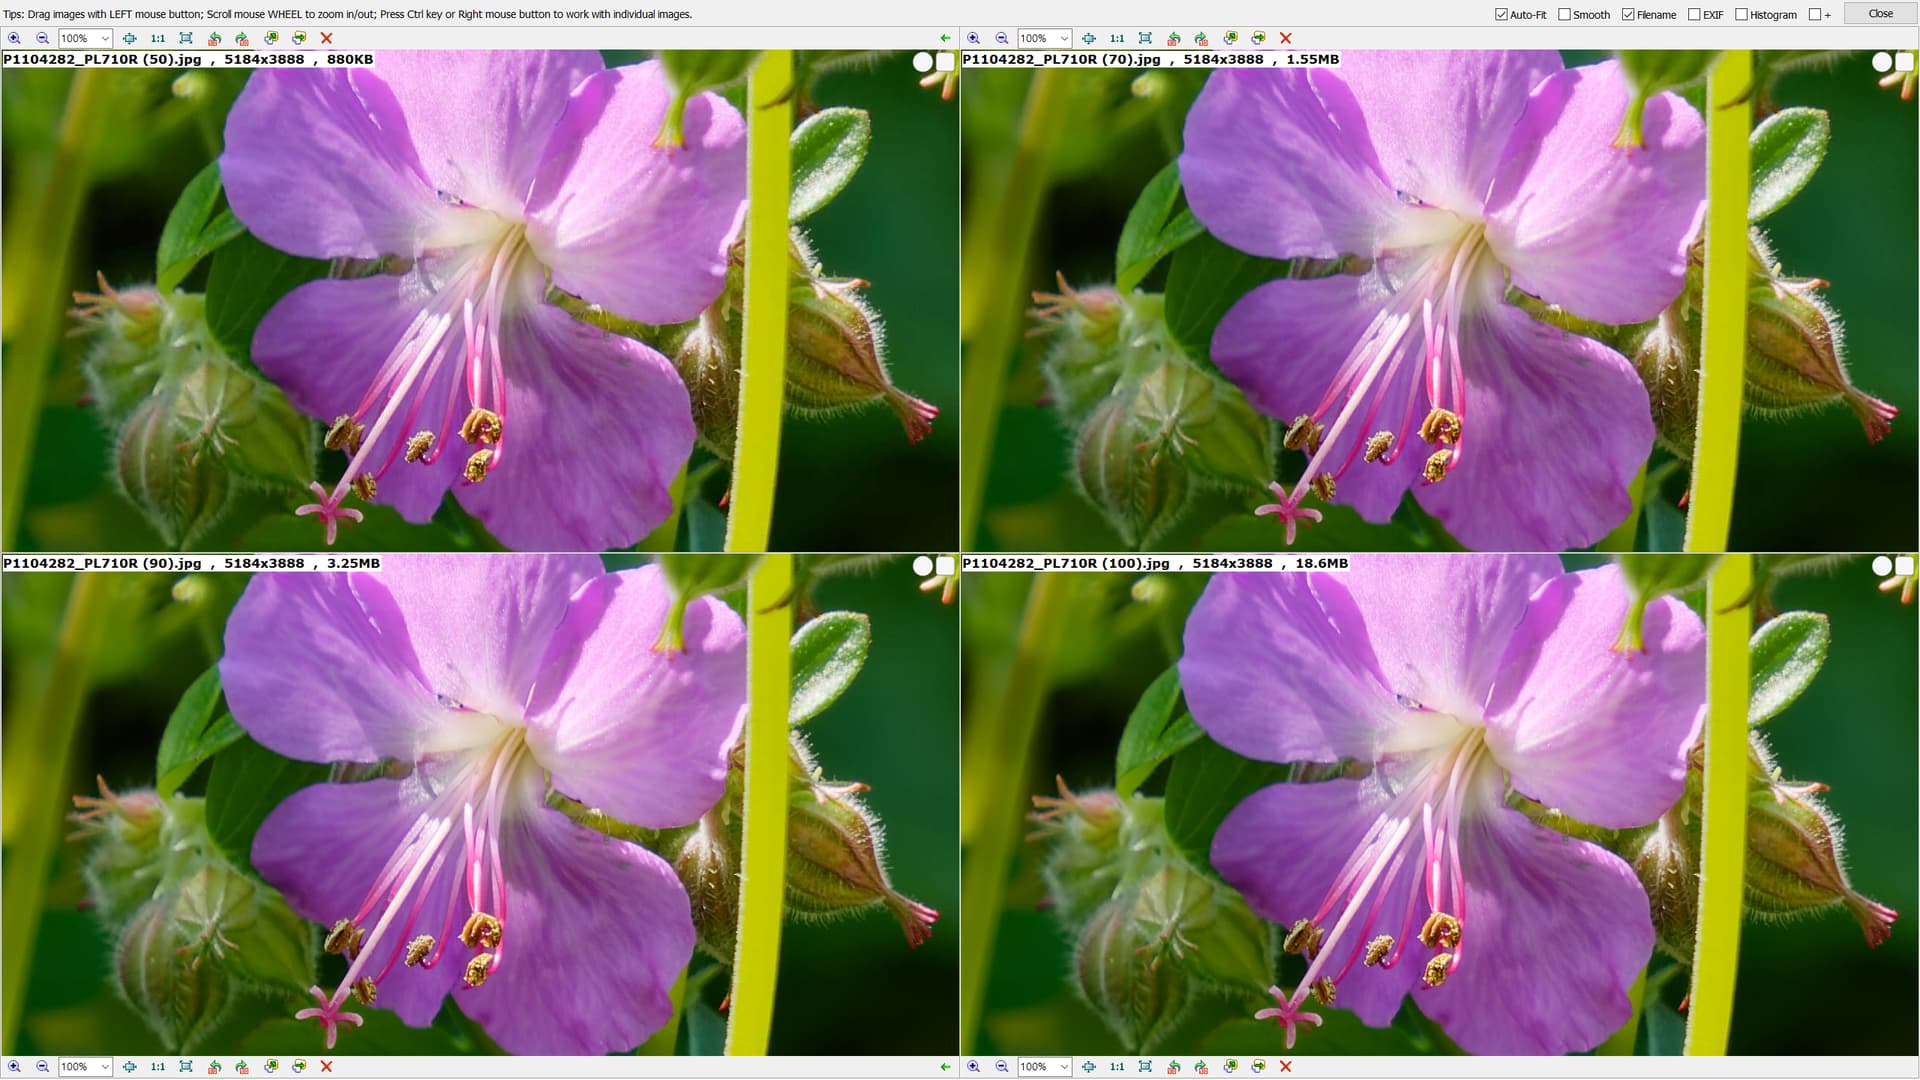
50% versus 70% versus 100% versus 100% resized:-
JPEGMini sell a product aimed at reducing the size of JPGs while retaining as much “quality” as possible.
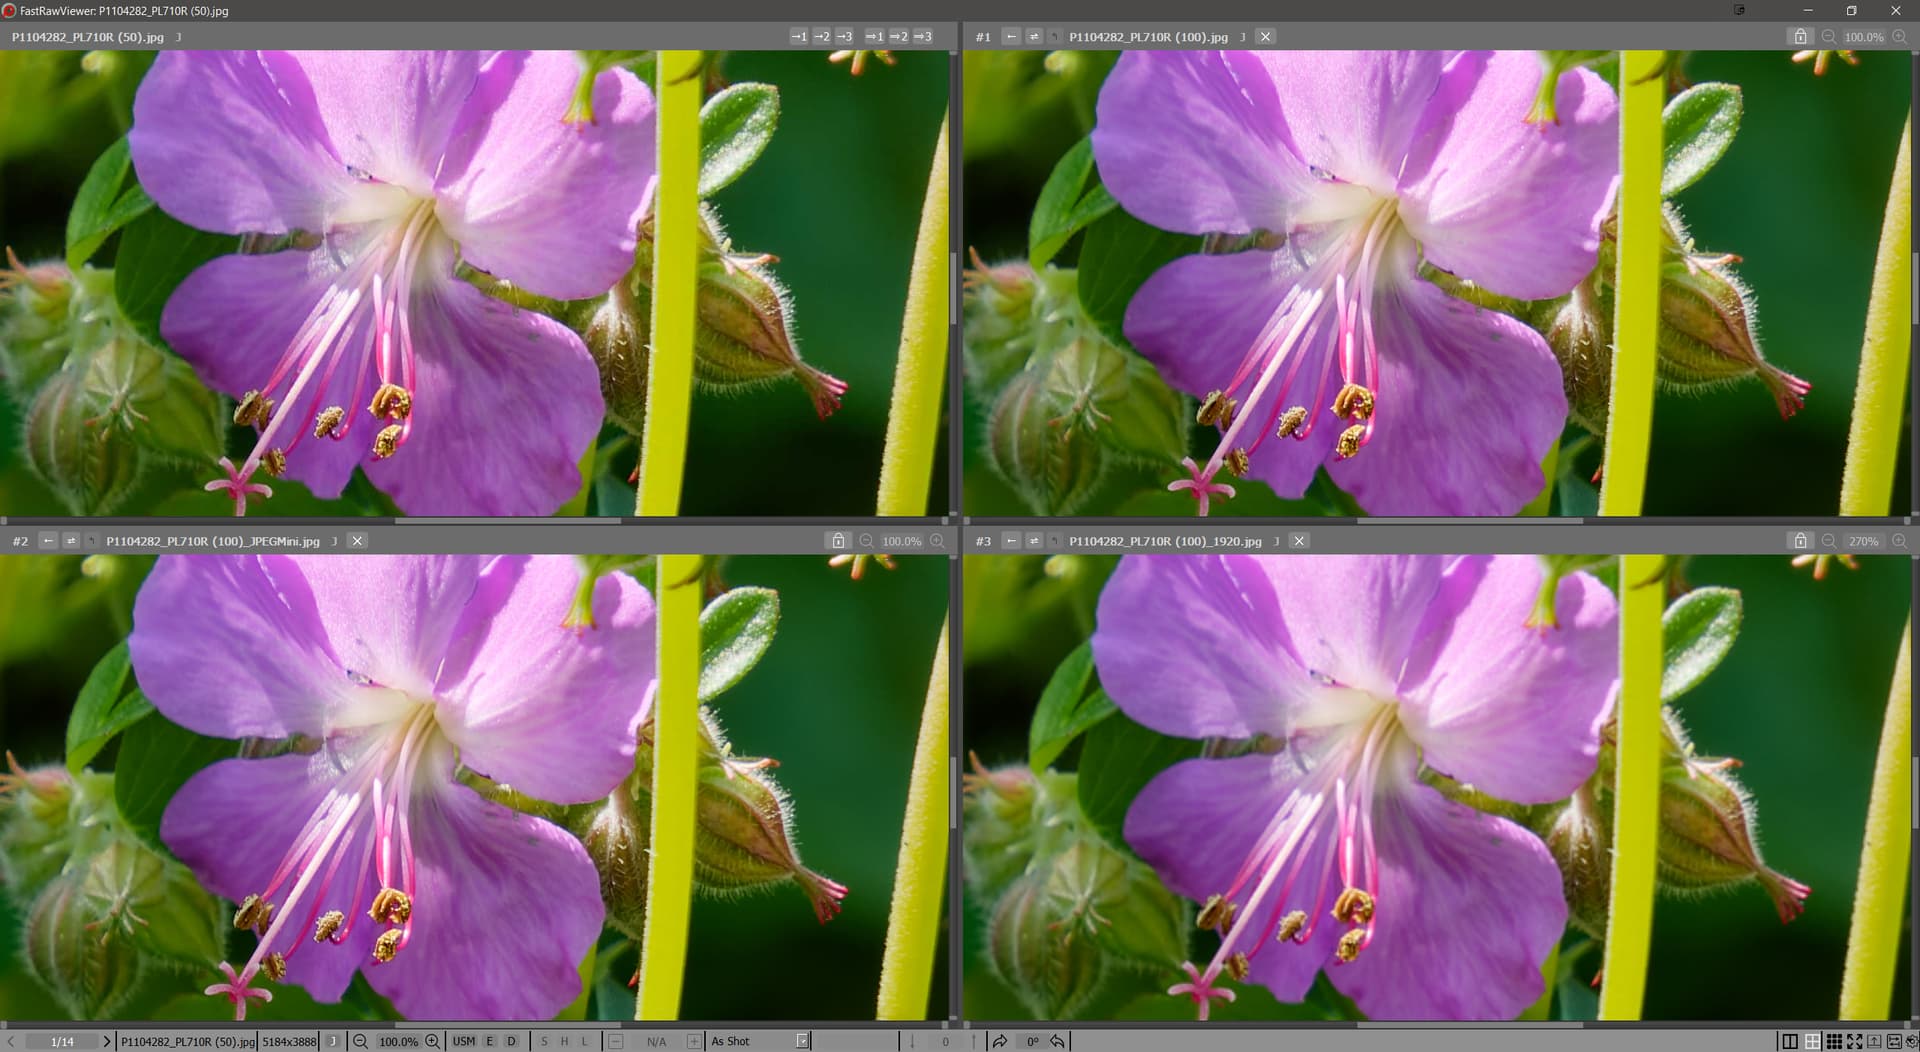
50% versus 100% versus 100% RIOT:-
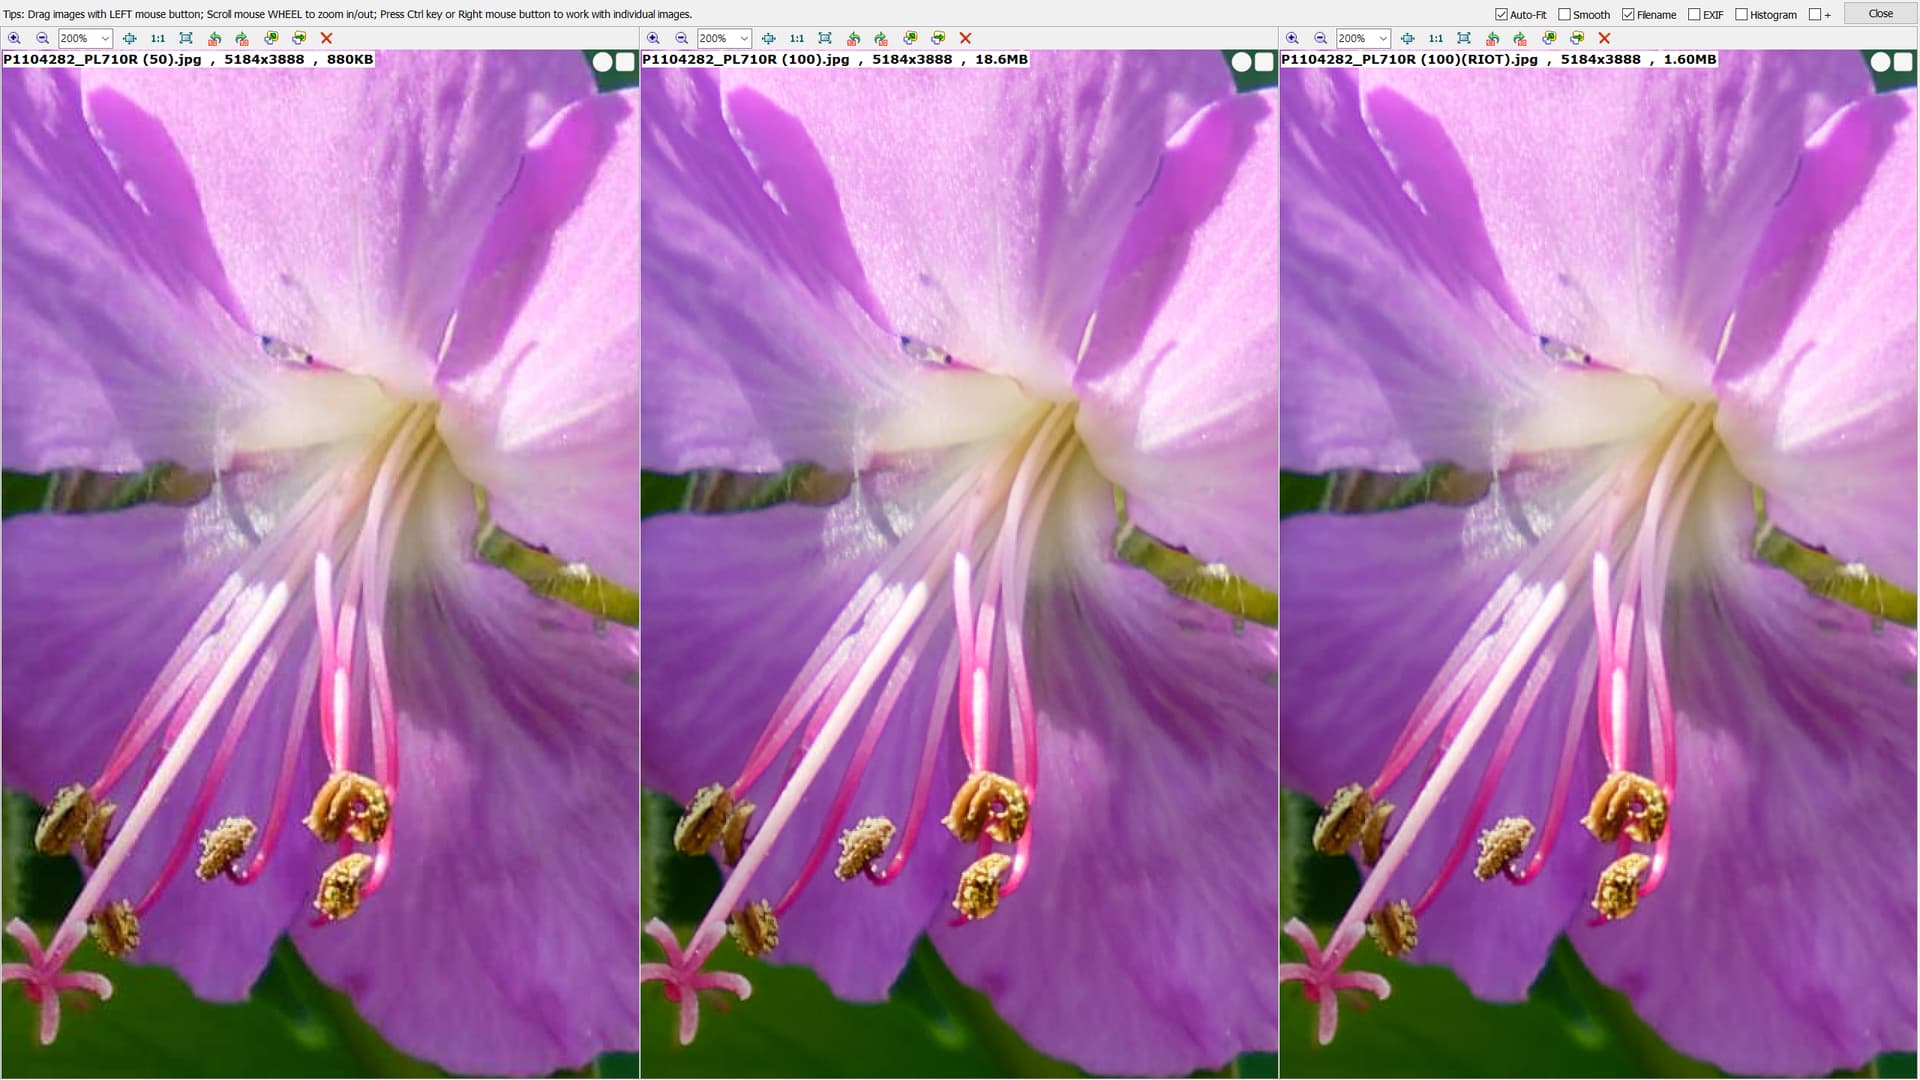
The biggest risk to photos are taking them badly in the first place and then “overdoing” the editing.
From this comparison it looks as if the 50% export holds up well against the 100% and the JPEGmini image but the 1920 image “looks” to have lost sharpness., the important word is “looks” because the image that has smaller resolution (and size) is being compared with the larger images at different levels of JPG quality.
The file sizes are

and it looks like I need to experiment with different algorithms to reduce the size and see what resized exports from DxPL look like.
2 Likes
Wow!! That is a fantastic post. I will study it at length. I was able to download a copy of Riot after a battle with a Manuals software download. I plan to use Riot to help me convert a large number of TIFF files to JPEG files for posting on a garden forum. I wasn’t planning to recover any small details from my photos, but you have done some fantastic things in that regard. I have a lot to learn here.
photon
1 Like
I’m not sure if I ever read about this before. I did get a performance warning dragging in large tiffs, but it processed them really fast and I need to have another look at the results when not tired. But I think I’ll be paying for it.
No need to part with money, RIOT is completely free!
Sometimes I donate if I use a free tool a lot.
@Chakonari I suspect you’ll have figured this out / know already but:
- When resizing an image, set the resampling filter to ‘Lanczos 3’
- In the JPEG options, change the chroma sub-sampling to ‘None’
1 Like
@photon Thank you, the bill will be in the post shortly!
I felt that the tests were useful to me and hopefully to you as well but still puzzling? The 50% image seems extraordinarily good compared with the 100%!
I was lucky that the image I picked had that particular flower (“hardy” geranium) head in focus because it was good to be able to see how well the stamens stood up to various ways of reducing files size (compression versus resizing versus special software) and that flower head was actually only part of a larger image.
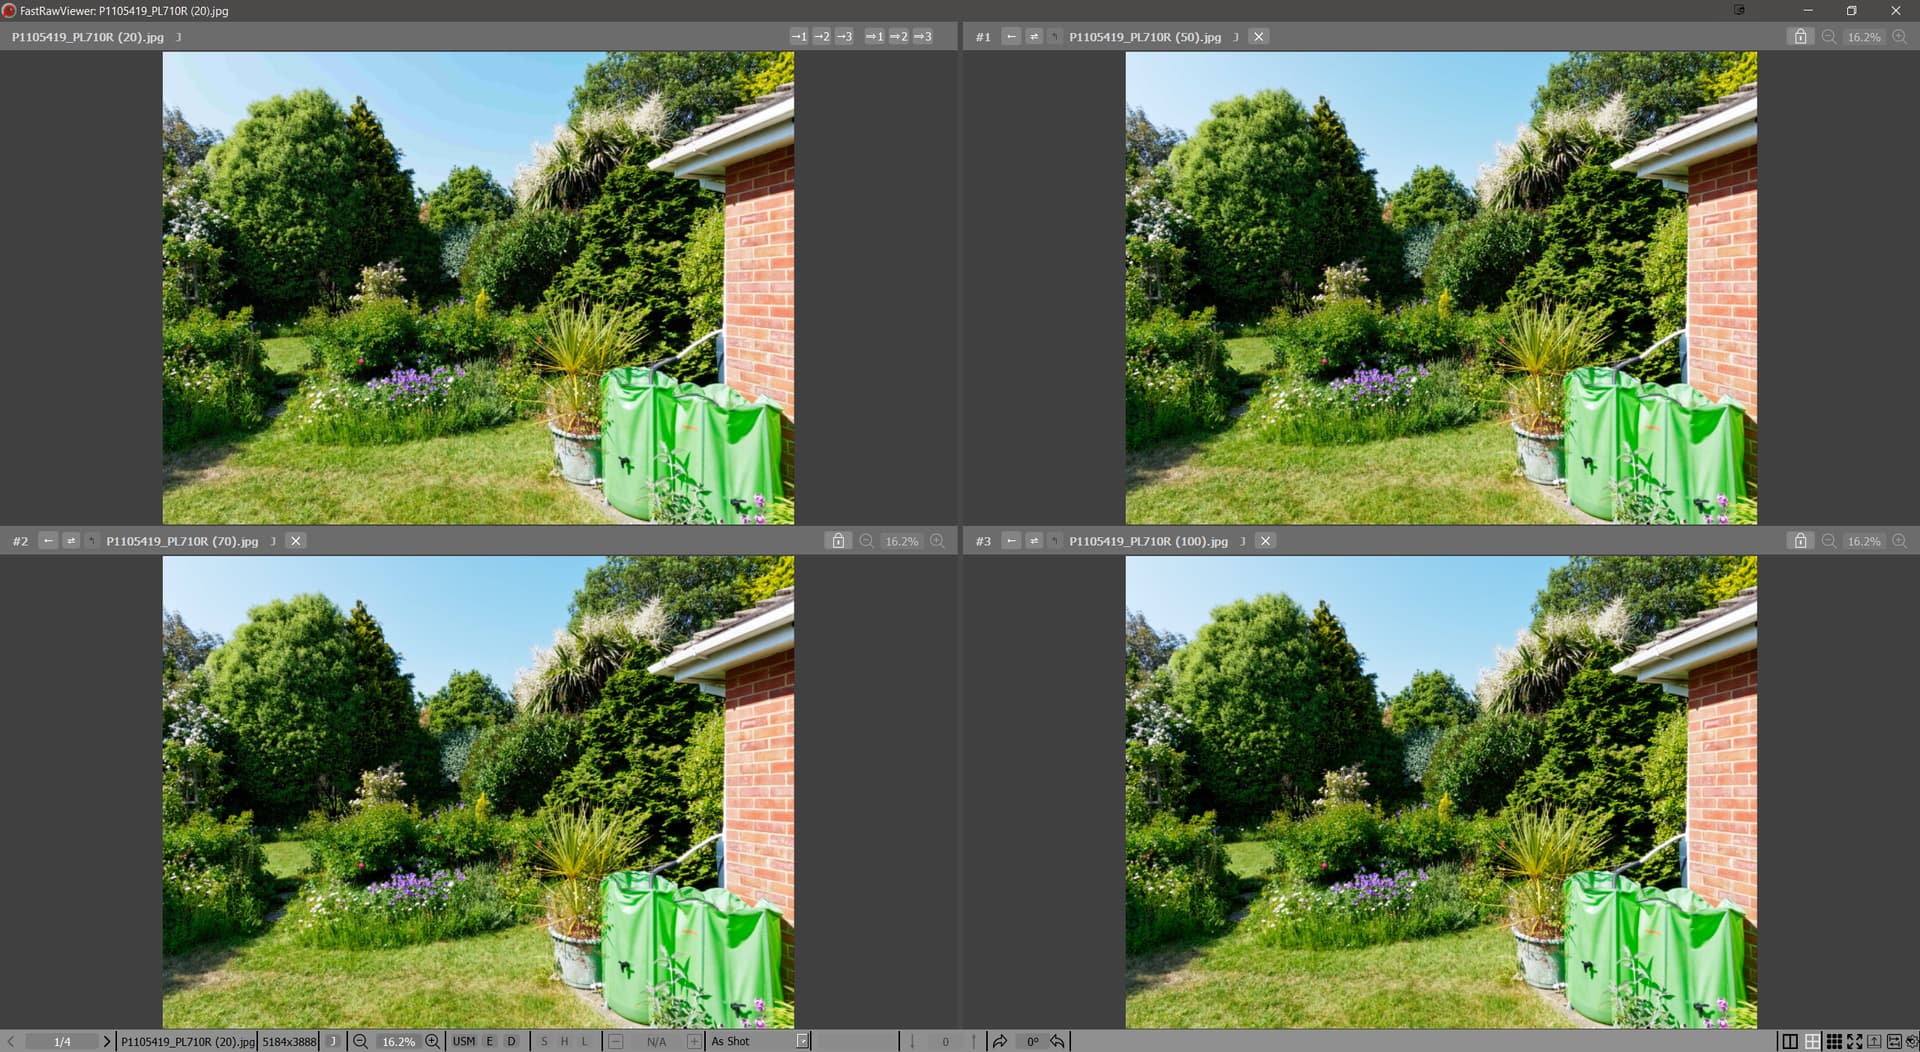
But I was intrigued about how other types of (garden) image might stand-up to the different JPG sizes and went down to 20% on a much “busier” image. I also showed my wife the images and file size and she suggested that 70% looked like it might be a good compromise.
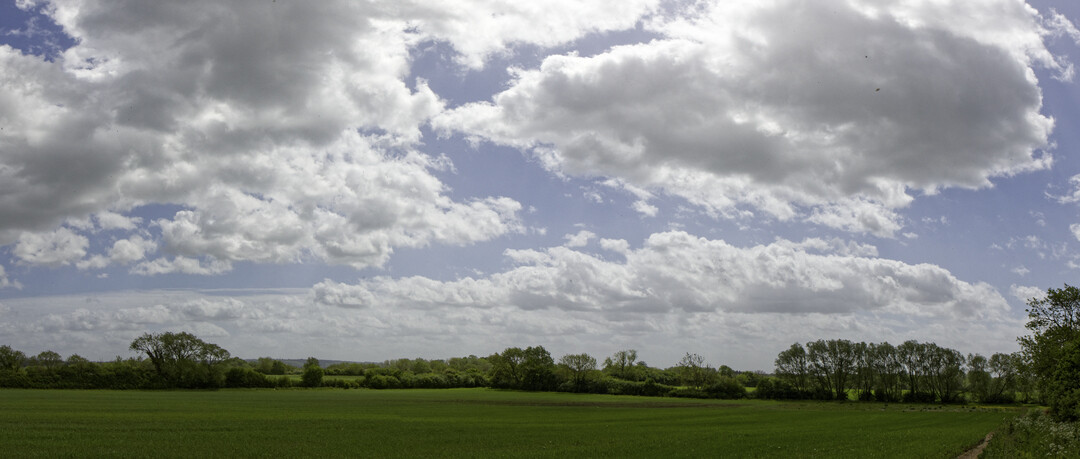
This image may well be testing the limits of my 20 megapixel sensor on my Micro Four Thirds (and my ability) but ignoring the quality of the image the 20% vs 50% vs 70% vs 100% looks like this (sorry about the “portable” water butts but we can get long periods of dry weather and that particular location is the best spot for collecting rain water).
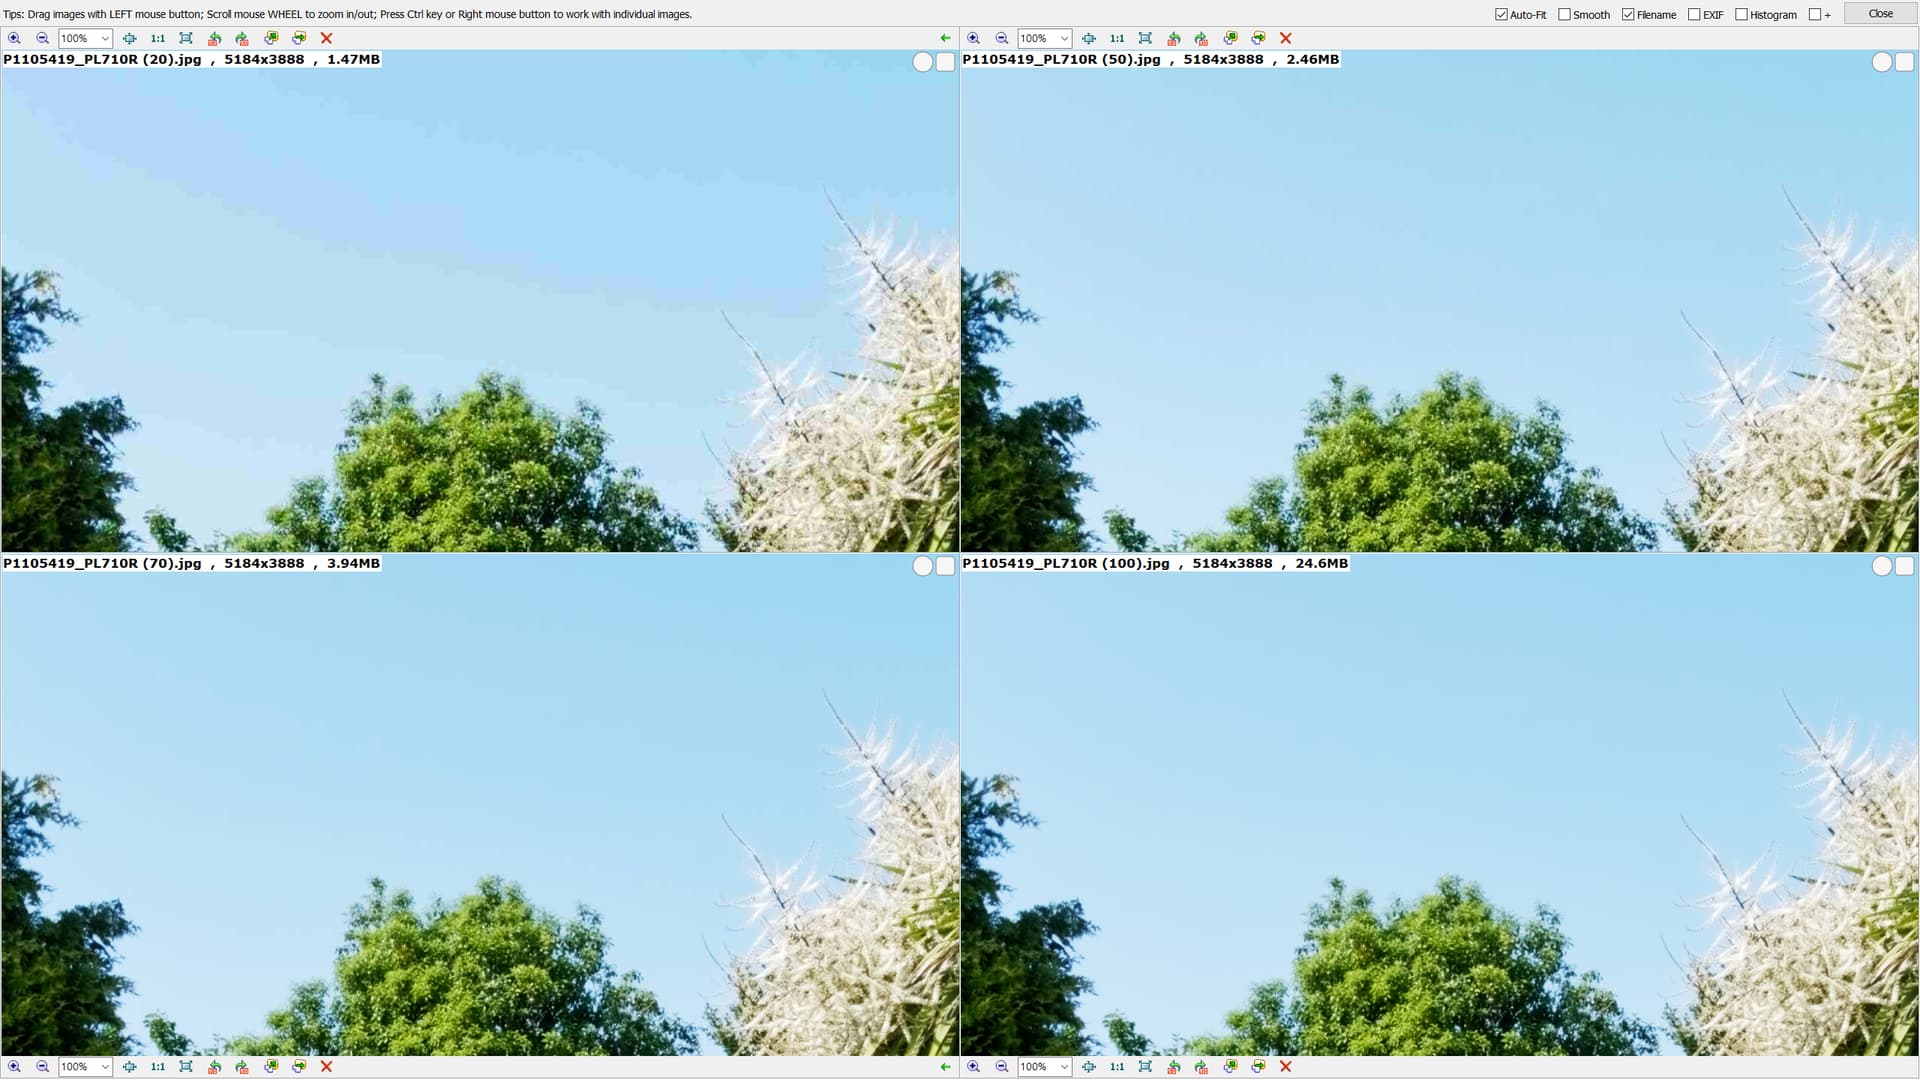
This image exposes the problem with what the software does with the sky and the artefacts that rapidly creep in. In fact my Olympus EM 1 Mk ii does this to the embedded JPG thumbnails! It keeps the thumbnail pixel count up but reduces the size by altering the compression while the Lumix does the reverse which I prefer!
Skies on my Olympus embedded thumbnails are useless!!
the sky in the 20% image is the giveaway and is present to a lesser extent in other sizes of image.
This image contains a lot of sky (deliberately), Pittosporum, Cordyline in flower and a bit of conifer
Zoomed in on the foliage we have
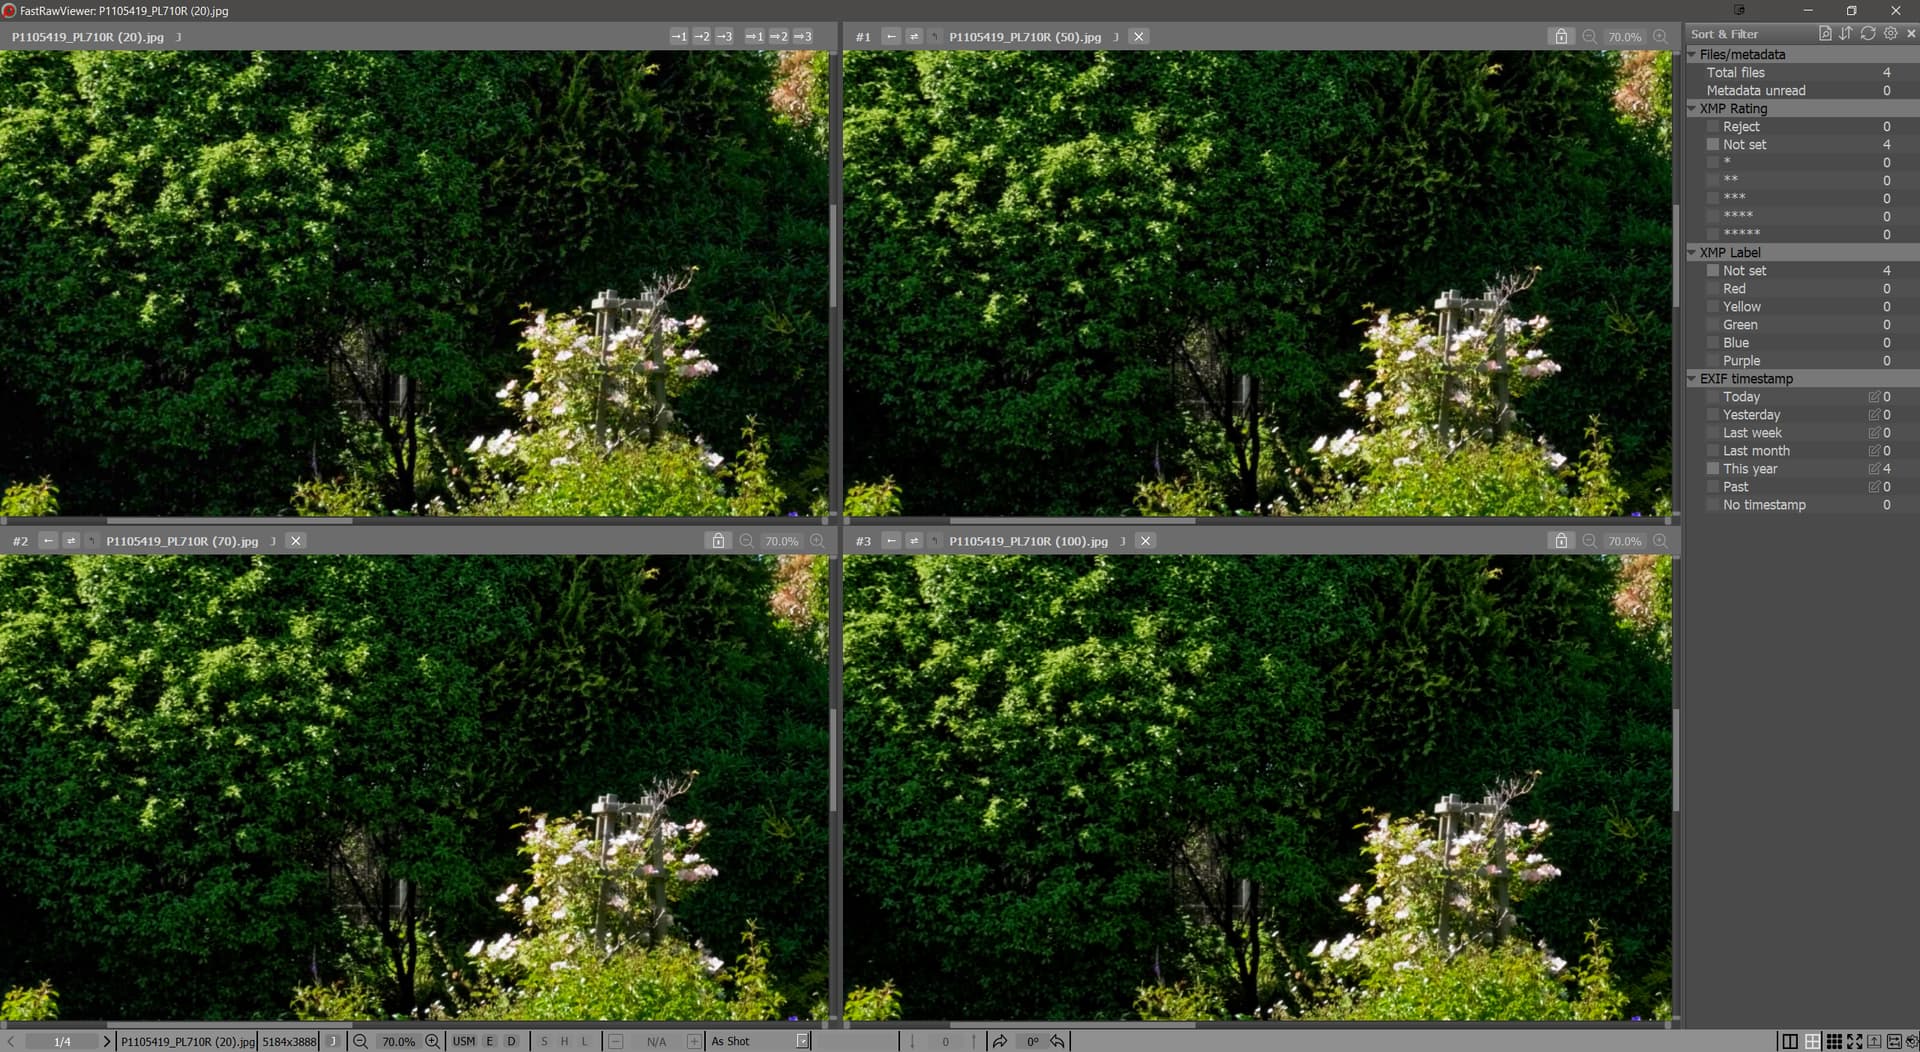
So arguably you need to be mindful of what is in the image before selecting too small a size and 70% might be too small. The default with certain software I use is 80%.