I am using a YouTube video from the TakeBetterPhotos channel to help me understand how repair/clone work. I am using PL8 but I think the video is using an older version for their tutorial. In the video the refer to a “handle” that is linked to the source for the pixels that will repair the area I highlighted. They use the handle to manipulate the repair operation so that it is more effective.
I will include screenshots of the video and my repair tool to show the differences I am talking about. Is there some setting I have missed to make the handle appear during the repair? I noticed a few options in the repair tool for the video don’t appear on my screeen also.
The video is using the Windows version of PhotoLab 7.5, but the Retouch feature is identical in PhotoLab 8.6. The Mac version may have a slightly different tool layout and may look a bit different.
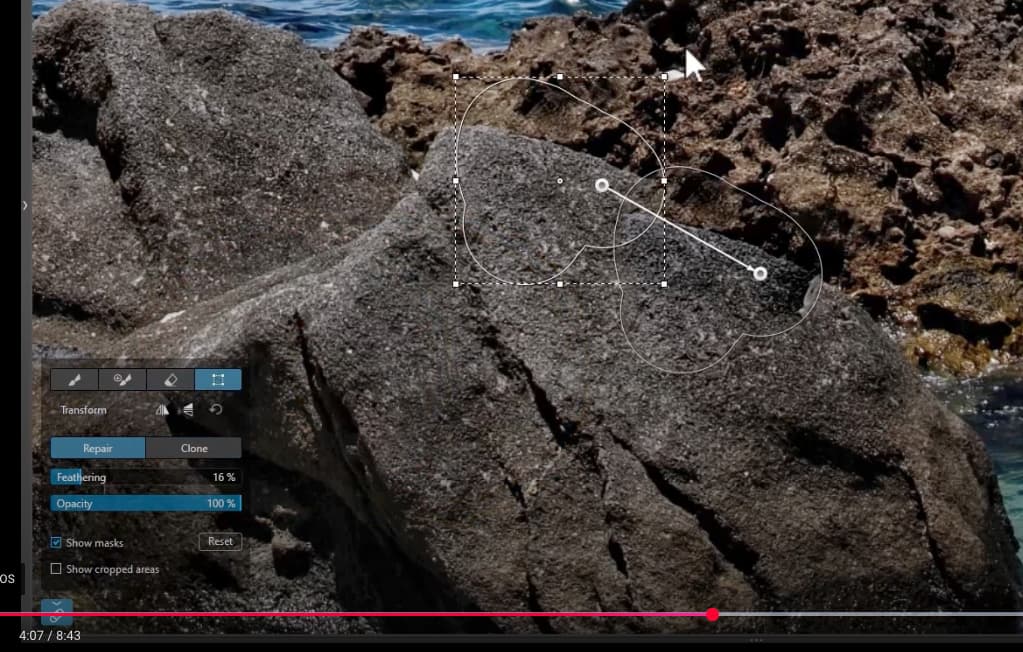
First you need to draw a mask using the leftmost brush icon. Once done, all the other icons are available. If you select the rightmost icon, the square with 4 dots on the corners, the selected replacement area will then have a dashed rectangle around it with 8 dots on the corners and in the middle of each line.
Each of those 8 dots is a handle. If you put your mouse pointer over them a double headed straight arrow will appear and you can click on it and drag and reshape the rectangle and the mask it controls. If you put you mouse pointer near the handles on the outside of the rectangle you will see a curved double headed arrow appear. If you click on one of them you can rotate the rectangle and the mask it controls.