Most of the time Photolab works well when I try to recover some light spots on my photos. But recently I had an image where no standard intervention seems to work, some less intuitive methods seem to work to an extent but none of them are quite satisfactory. Of course there will be images which have been so incorrectly exposed that you’ll never be able to recover the highlights. This may be a bordeline case and it may not be fully recoverable, I am not sure but as a comparison I was able to make it look fairly pleasing just with minor tweaks of the 4 main sliders in LR. I am placing here screenshots from PL’s interface, these are not from the final exported images.
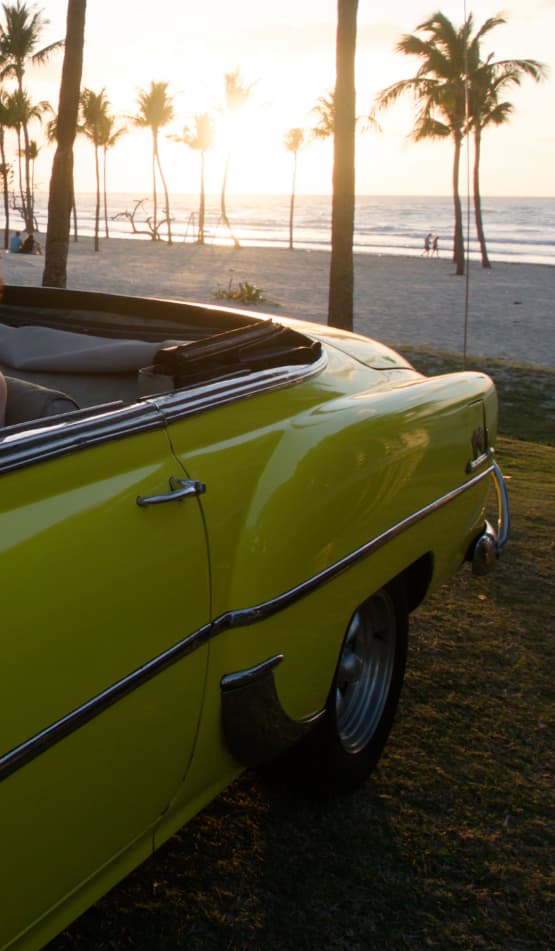
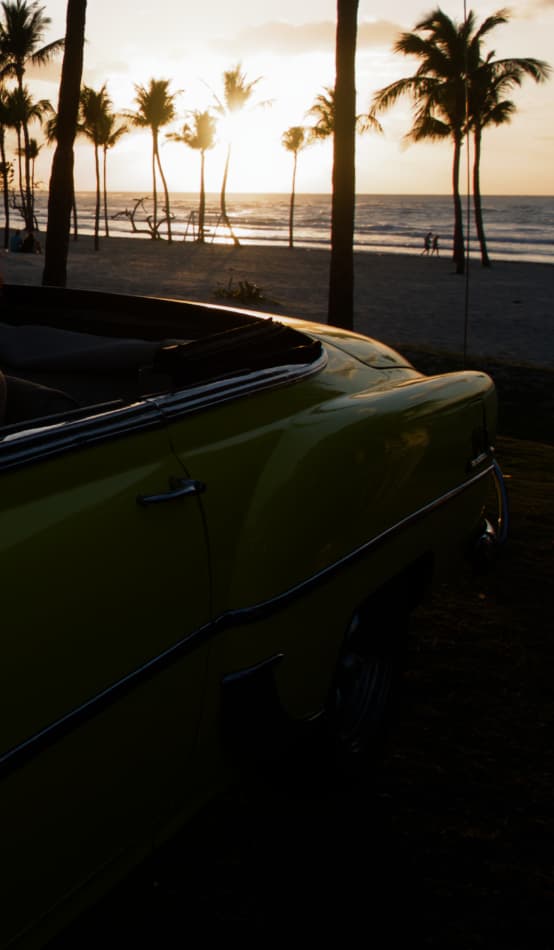
Here is a crop of the image. No corrections other than PL’s lens distortion and sharpness ones.
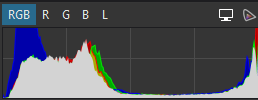
Obviously it has some extreme highlights and some heavy shadows. I will not include a screenshot here but take my word that the highlight clipping warning lights up in the background sky when I turn it on. Here is the histogram:
The first method I tried was to pull back the Highlights slider all the way down. The result looks horrible and worst of all I still got my highlights clipping warning for the lightest part!
Then it became interesting. I had heard on youtube that bringing the entire exposure down may work in cases like this. So I pulled it back a lot. I had to go down to -2.20 for the highlights warning to disappear entirely. The sky in not exacly pleasing and there is the obvious problem of having to pull back the shadows later but this method at least got rid of the highlight warning.
Then I tried something even more unexpected: I pulled the highlights contrast (Advanced settings under Contrast tab) all the way down. That by itself almost got rid of the highlights warning. The rest I managed to remove with slight pulling back of the highlights or applying a moderate Smart Lighting. The sky now looked a bit better that in the previous example.
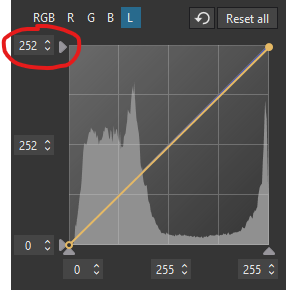
Finally, I tried to work with the Tone Curve. No amount of stretching and pulling down worked to recover the highlights. However, when I pulled the top right end of the luminance line down by only 3 point, the highlight warning magically disappeared!
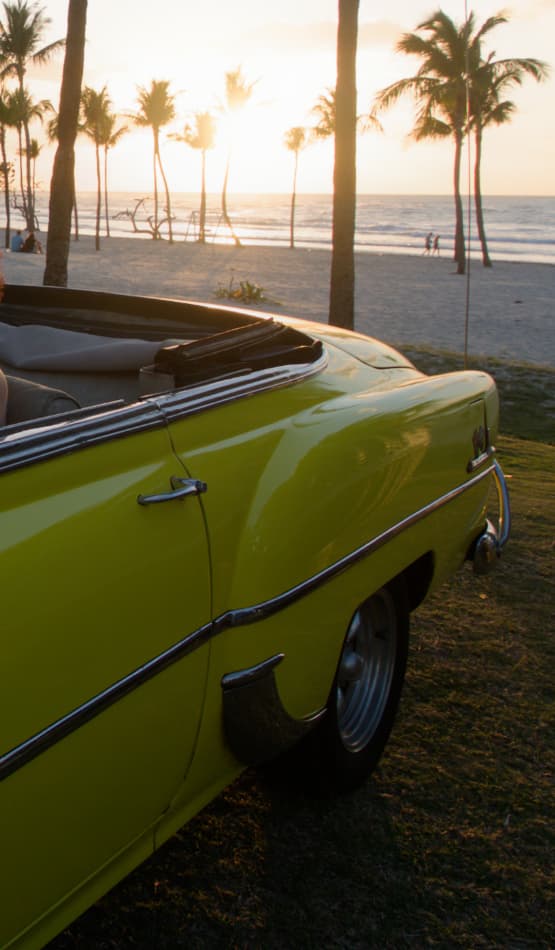
And finally as a comparison, here is a crop of the same area of the image in Lightroom with Highlights: -100; Shadows: +70; Whites: +35; Blacks: -5 - note that the highlights warning disappeared in LR after this intervention.
Not a scientific comparison by any stretch of the imagination but a few observations:
The LR image looks most pleasing to me - even given the extreme use case
In LR I only had to work with the main 4 sliders. In PL I had to experiment a lot and even with some satisfactory results in the sky I was never able to put the shadows in order and make it not look like a terrible HDR poster. In LR it came out with fairly natural look (not including here the entire image)
Why does it need to be so hard in Photolab? Shouldn’t the various methods of bringing back highlights have similar limitations close to the edges of their abilities, e.g. why can’t the Highlights slider get rid of the highlights warning alone?
I understand that PL is a different tool than PL and each tool is different blah… blah… But in the end of the day who cares? Hence my overall question: is there a “correct” way to recover blown highlights in Photolab?
You are absolutely right. It’s impossible to meaningfully recover highlights in areas where there’s simply no data. But undoubtedly, there are situations where such areas can occur even in correctly exposed photos. And here, LR really just performs better. Photolab is simply weak in this regard. You either have to use complex “tricks” or just give up. In LR, you often just need to move a single slider, and the result is at least decent…
That much is clear. When there is no information, there is no information. But in the cases then there is precious little it seems that PL does not have clear path of dealing with it.
I agree. If ONE RGB channel reaches 255, recovery is very well possible. If two channels reach 255, some minor recovery still is possible. If all thre channels… well, no recovery: the result is simply a less bright area than pure white, but still no detail.
Pulling down the upper edge of the tone curve can open a window to some fake recovery. You might want to try
changing white balance in a local correction containing the recovered areas
pasting in some cloud or haze from a different part of the image
combinations of the above
Burnt highlights are gone like firework. Whether the highlights are really gone is easy to find out with apps like Fast Raw Viewer or Raw Digger. Trials can be found here.
All important info, but the OP’s interest seems to be how to best deal with truly blown highlights (where further recovery isn’t possible) in PhotoLab:
-100 Highlights isn’t a minor tweak. But it does tend to look better in LR than in PL.
While I like that Lightroom’s tonal adjustments don’t overlap like PhotoLab’s, the Selective Tone adjustments in PhotoLab can give good results, along with other tools. IMO, while the Lightroom result (adjusting only the four tone sliders) has good tonal balance (decent contrast, nothing too flat or too dark or too bright) the saturation is too high for my tastes. PhotoLab result #1 and #2 look like good starting points to me even though clipping warnings haven’t been completely eliminated. I suppose what’s happening here is that Smart Lighting is recovering what can be recovered but still keeping the white point high - in this case, at 255 or 254, which means clipping warnings will still occur. You’d need a better-exposed image with recoverable highlights to avoid the clipping warning altogether.
#3 is another approach. Yes, that means you now have to boost the midtones, shadows, and blacks to make the image pleasing - but that’s four sliders, the same number that was used in Lightroom. Same with #1 and #2: do you want to do with just one slider what could only be done in Lightroom with four? I would expect to have to adjust exposure or Smart Lighting, some of the Selective Tone sliders, Contrast, and Saturation to reach the goal. It might also be desirable to play with the Color Rendering settings to find a starting point that lets you minimize the rest of the adjustments.
note
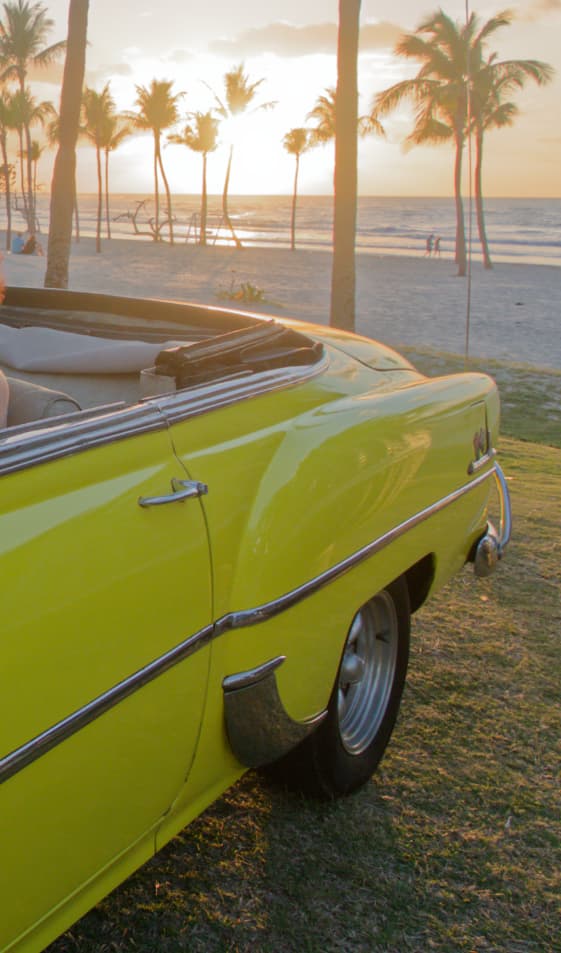
Colors are always very subjective, but you have to pay attention to contrast. The upper section with the burnt-out sun initially draws the eye. However, because it’s out of focus, it doesn’t feel like the subject itself, but rather describes the location. At the same time, it creates a (pleasant) atmosphere and evokes memories.
Following this idea, I tried to focus on the car …
ADDENDUM
You may want to watch this video, which deals with the differences between LR and PL and the successful transitioning. → check e.g. at 40, 42, 45:55 minutes.
There is no “right way” (i.e. no golden rule), but it helps to experiment and explore so that you can convey / express what you want in your images – and have fun.
I have to disagree. Your definition of “performs better” seems to be that the highlight clipping indicator reduces. If you reduce solid white to solid grey your highlight clipping indicator reduces but you have not recovered any extra detail. All you’re doing in all these tests is to see which final look you prefer - and your choice seems skewed by seeing that highlight clipping indicator reduced. What’s blown is blown. You can’t recover detail when detail is not there to be recovered.
Absolutely, yes. Using AI, you can “recover” anything from areas lacking data, essentially by “inventing” what might have been there. I just think that LR deals with such areas better (and is easier for the user), especially considering how easy it is to achieve good-looking results. That’s simply it.
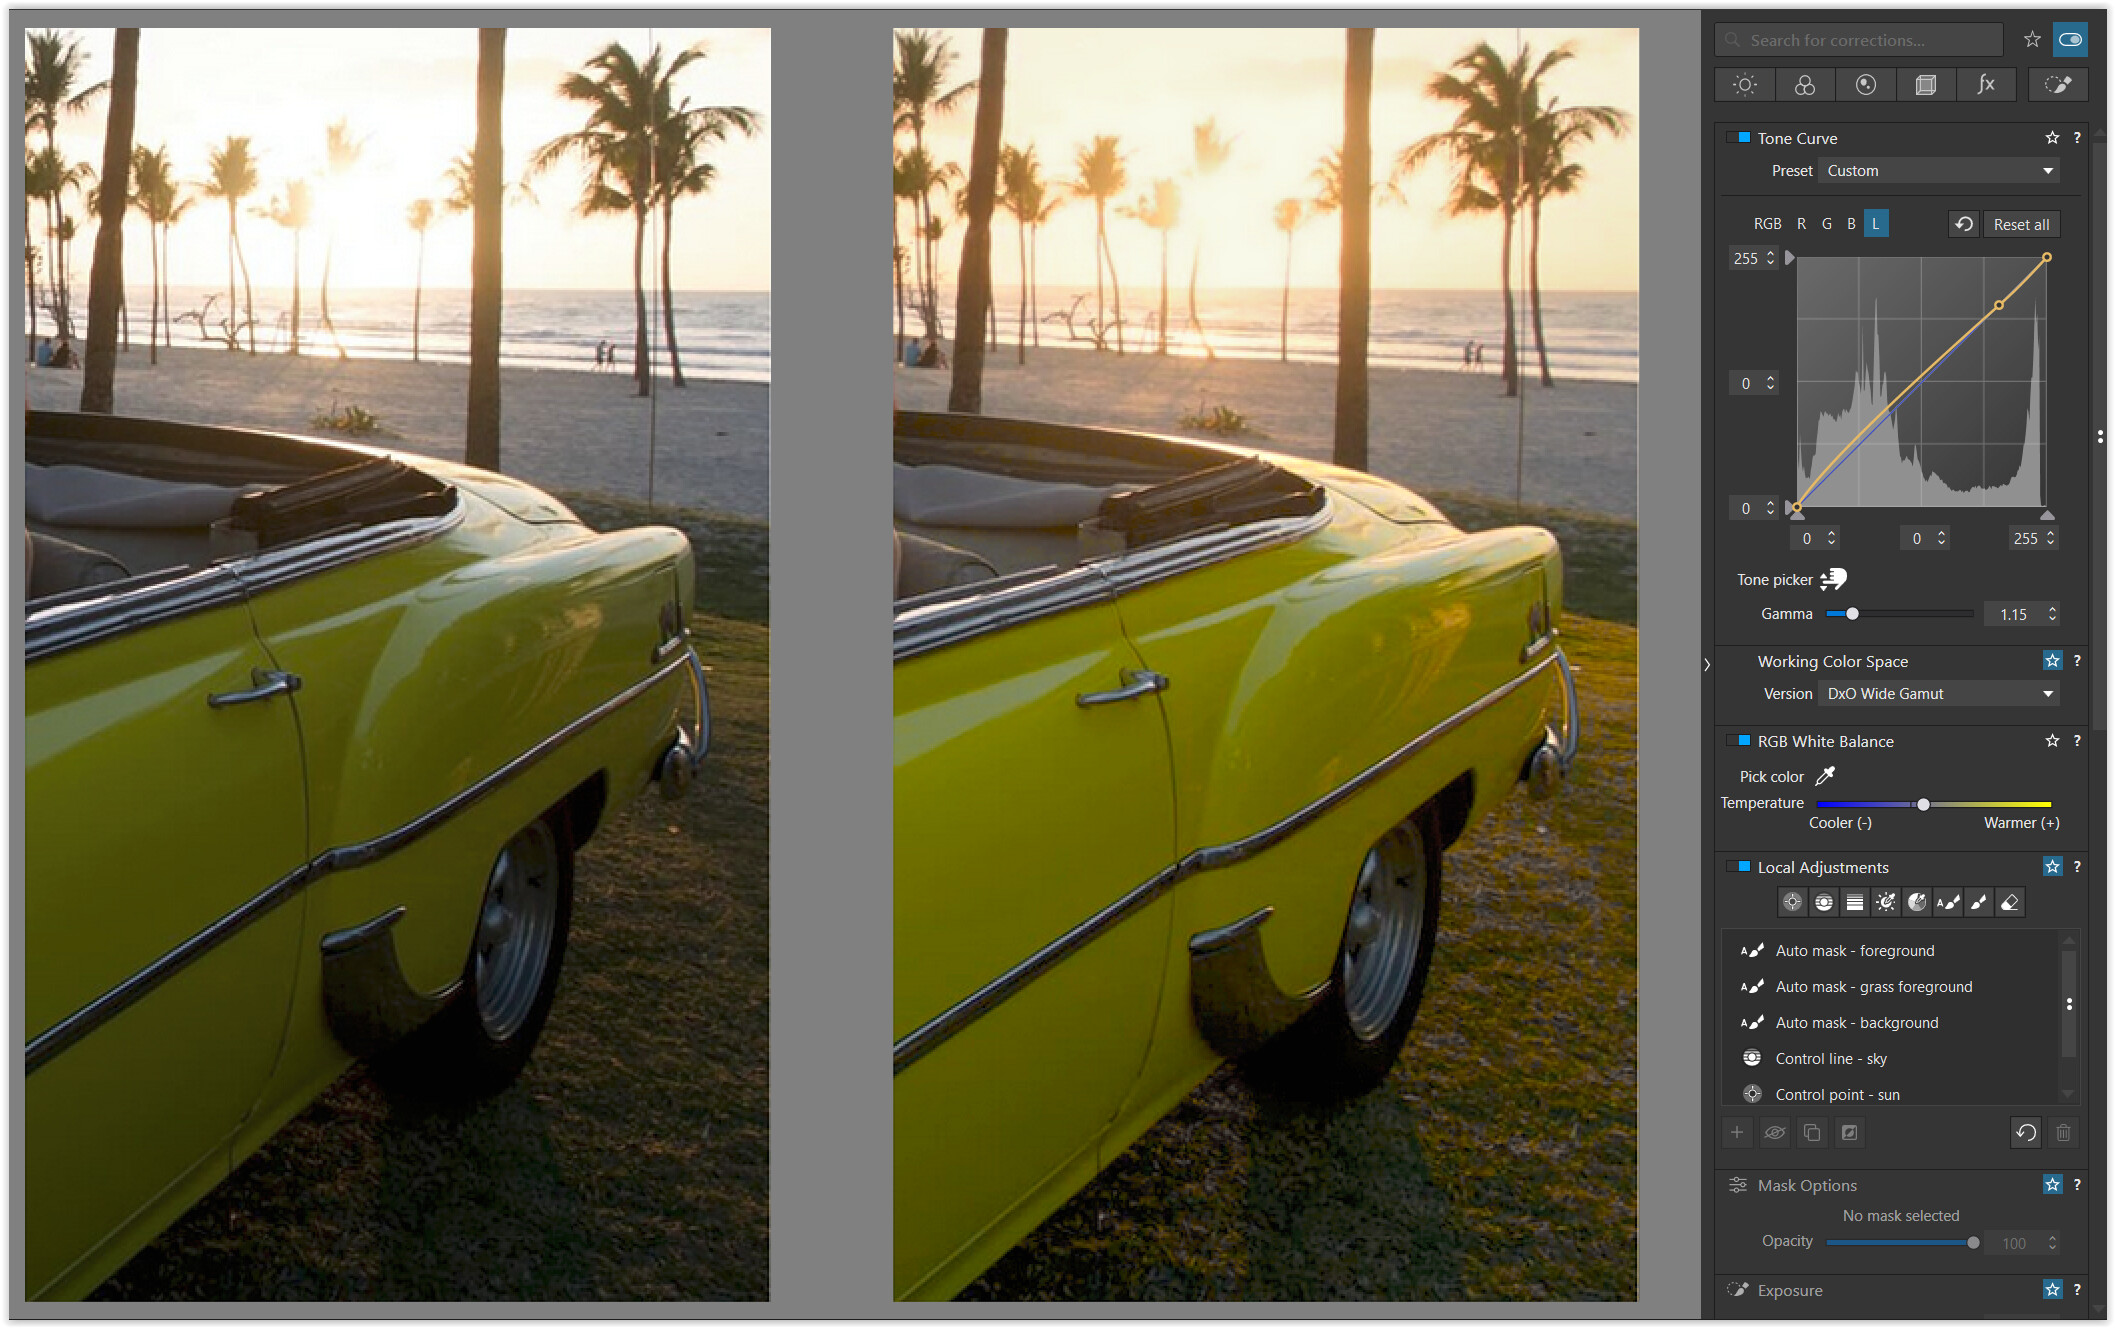
I did the same as Wolfgang, but used the “local adjustments” in PL Elite: Control line at the top, gradient filter at the bottom and Auto mask across the water and the beach. However, this is all just a makeshift solution - and does not replace thinking about the result while taking the photo.