In a few animal portraits I have used the Radial Mask in Capture One but that tool is abscent in Photolab and from what I recall is suggested as a feature request in Photolab.
Do you think a postive outer and a negative inner Control Point can be a substitute for the “real thing” some times?
The trouble (a trouble?) is, I don’t think gradients are limited to the supposed edge of the mask.
I’ve certainly found that - when using a single Control Point - image outside the line of the mask is impacted by the change made with that mask. It’s not a hard border (though I think it should be).
Stenis
(Sten-Åke Sändh (Sony, Win 11, PL 6, CO 16, PM Plus 6, XnView))
3
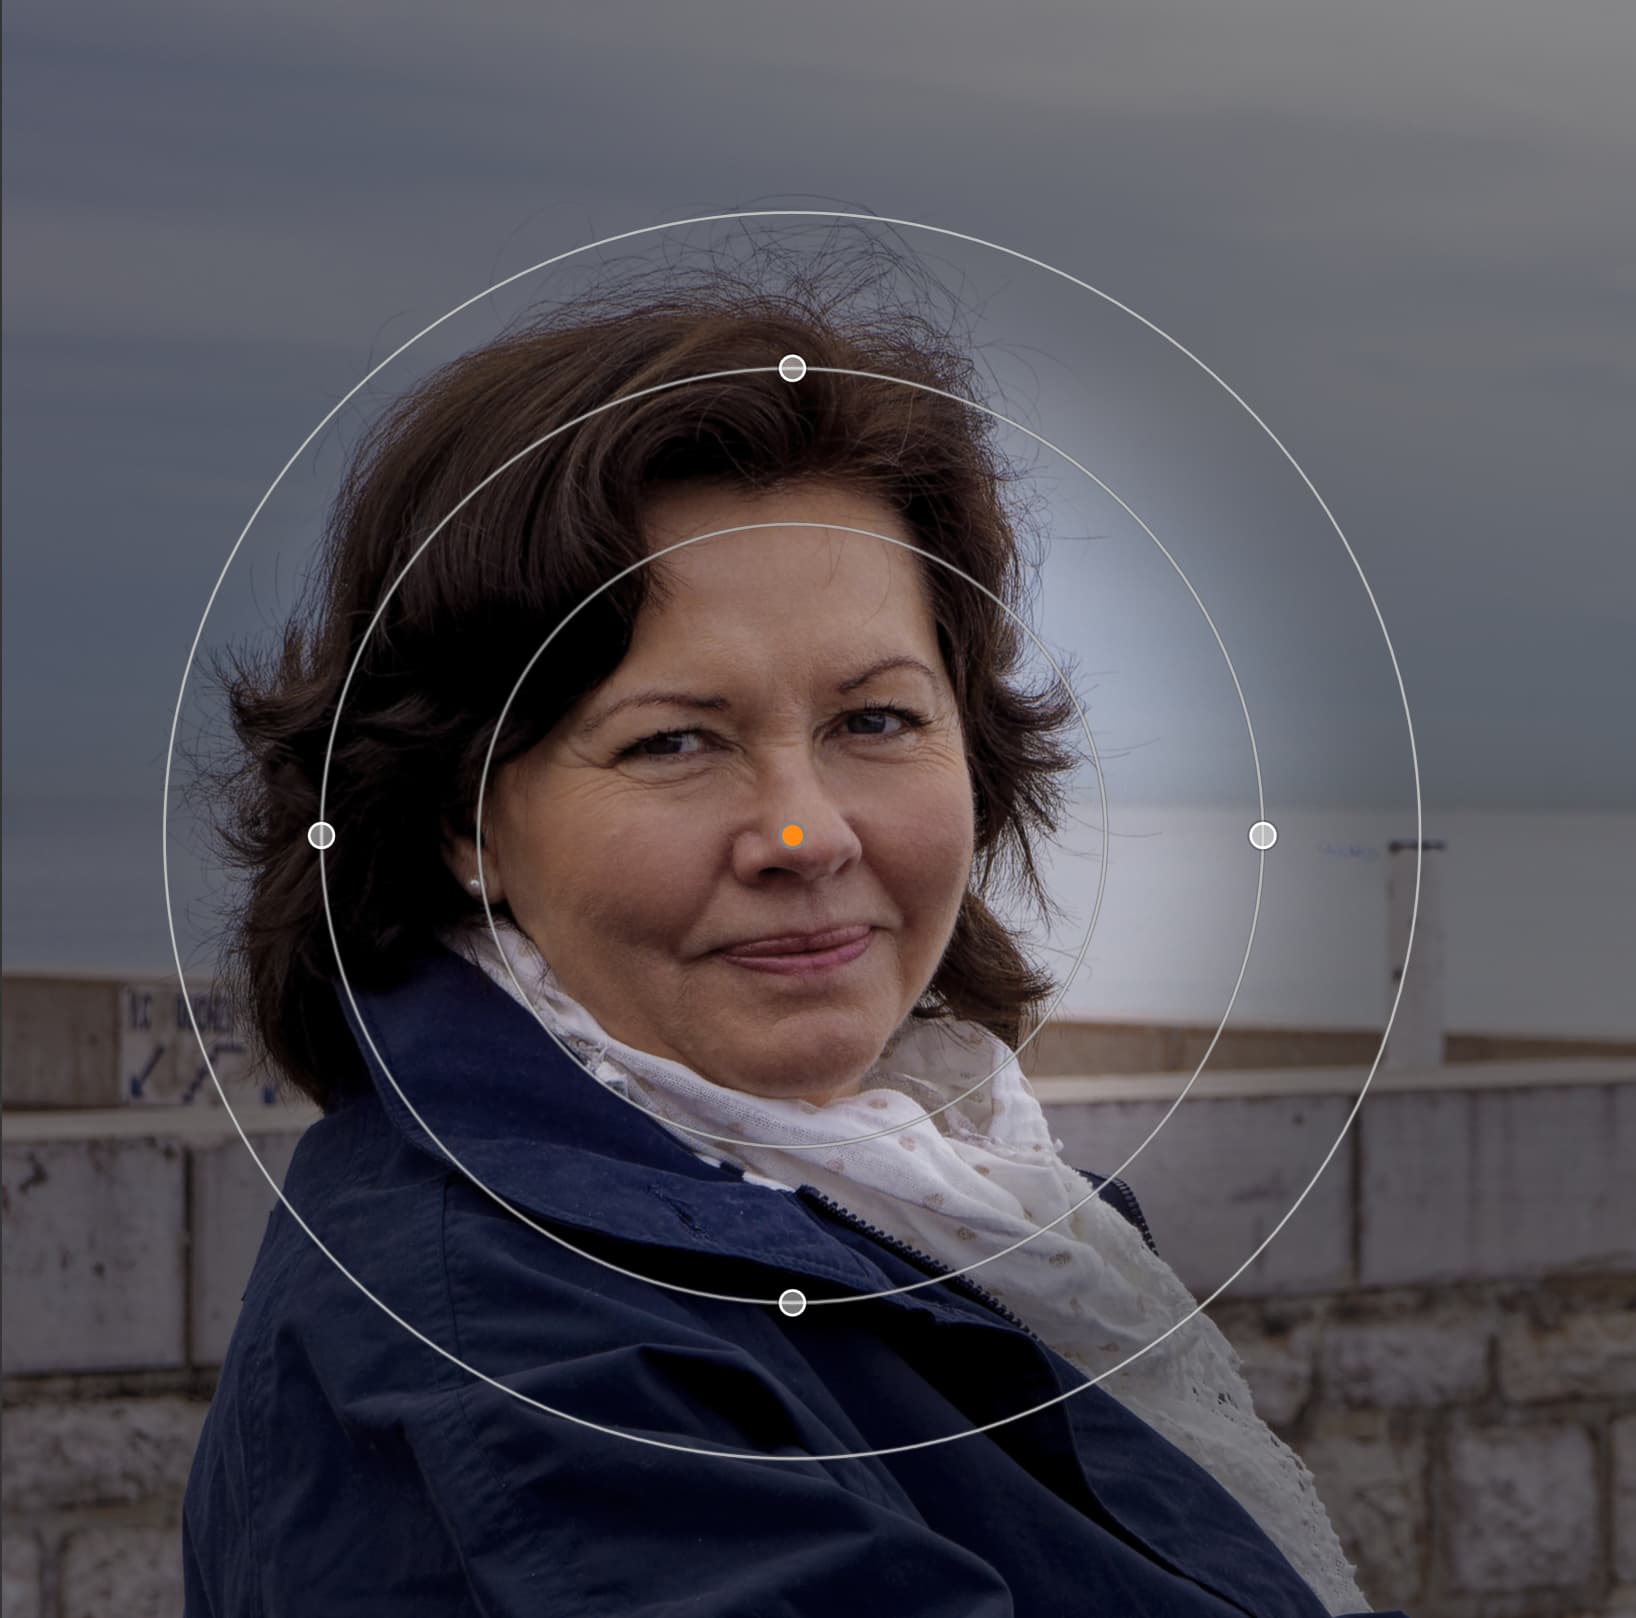
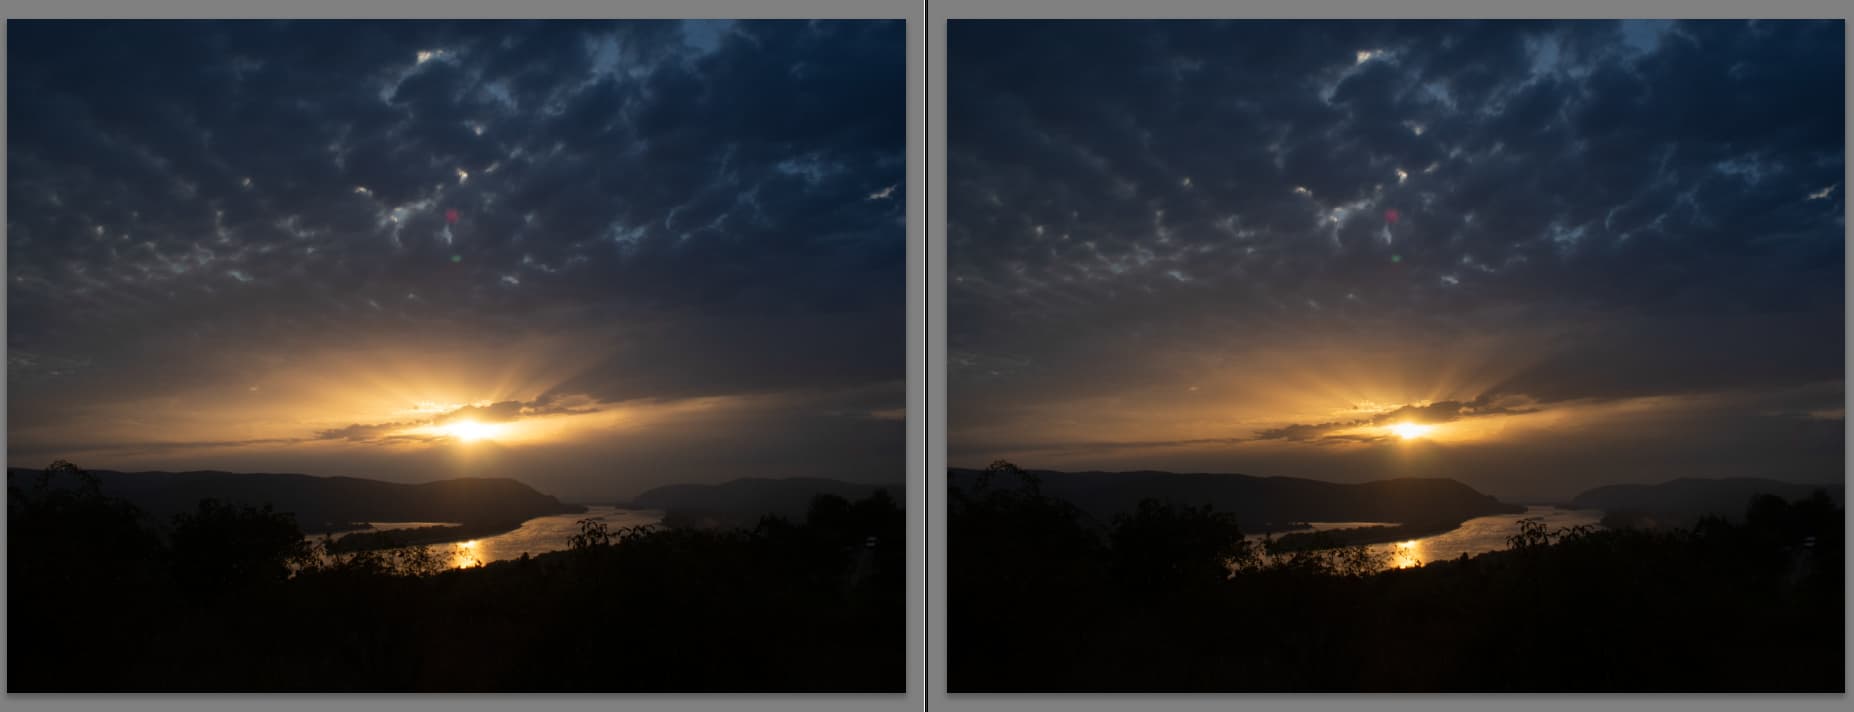
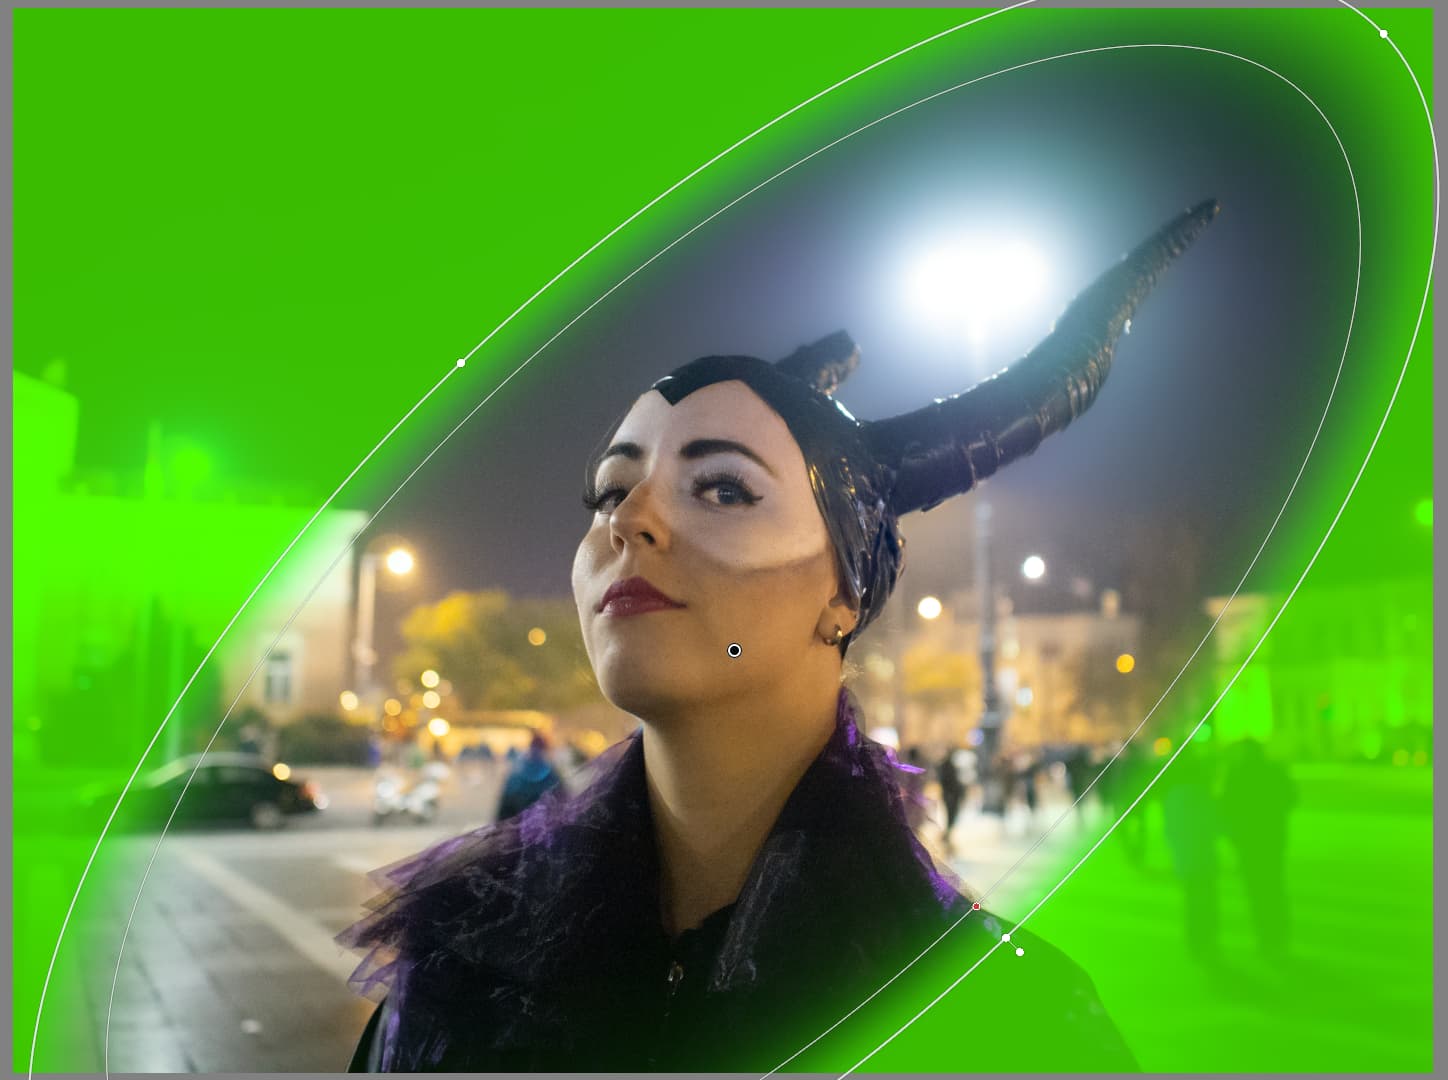
Here an example with Radient Mask from Capture One.
It is absolutely a difference. The Control Point mask is fading radially towards the edges and the Radial Mask is not. That was why the Radial Mask was very useful for animal portraits with a darkened background. I would not achieve that with Control Points that easy so I guess it would be nice to get a Radial Mask even in Photolab. If we get one I bet it will come in the next version of Filmpack :-).
Radial masks are already there.
Just put a CP and set chroma/luma to zero (and since PL9 we also have control on the diffusion…)
The only thing left is elliptical radial masks…
Ian.
4 Likes
Stenis
(Sten-Åke Sändh (Sony, Win 11, PL 6, CO 16, PM Plus 6, XnView))
5
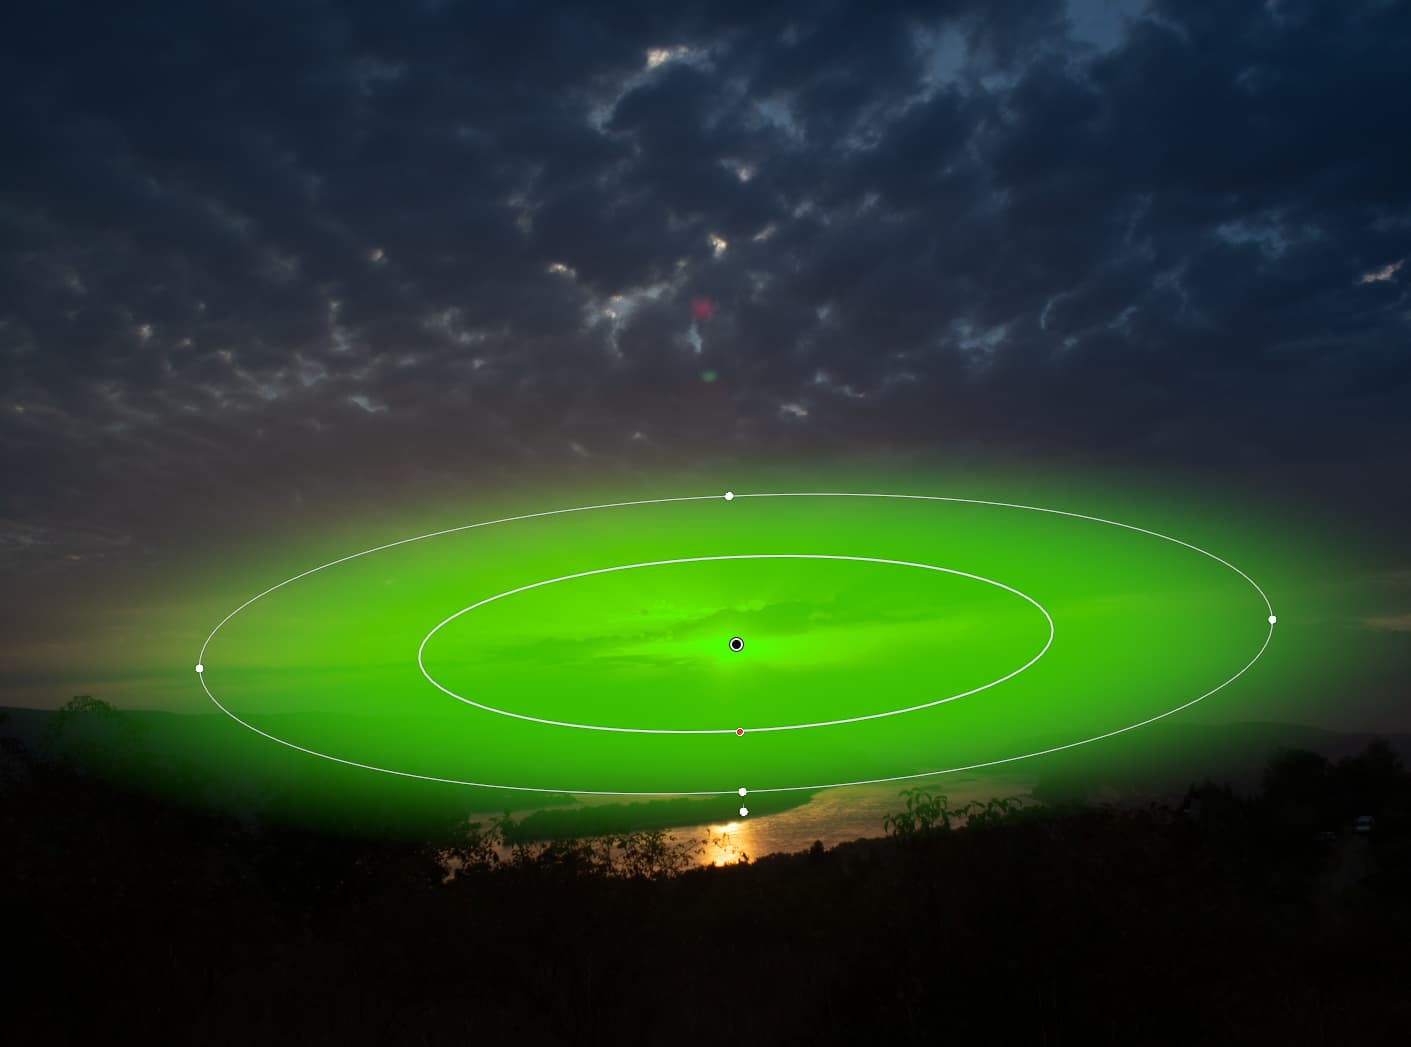
And exactly there the problems started. I use elliptical radial mask 100% of cases . That’s one of the reason (among many others) i still use other software’s - however lot of us in here use few additional app like C1, PS, etc.
Ofcourse with CP some similar can be archivable like this, but not perfectly like this.
Some software also include in the radial mask also the hue, saturation, luminance, etc. )(what we can do now in PL9 with submask, inverts shape, etc., buit may result is vary) One example for my way of use some radial with hue, sat, lumi:
Control over the radial mask to make it elliptic would be incredibly useful - I’ve said it before - it’s recommended often in tutorials for drawing light and shadow into a scene.
It might be possible to do some approximation of this with control points or even brush strokes but the control and ease-of-use just isn’t the same.
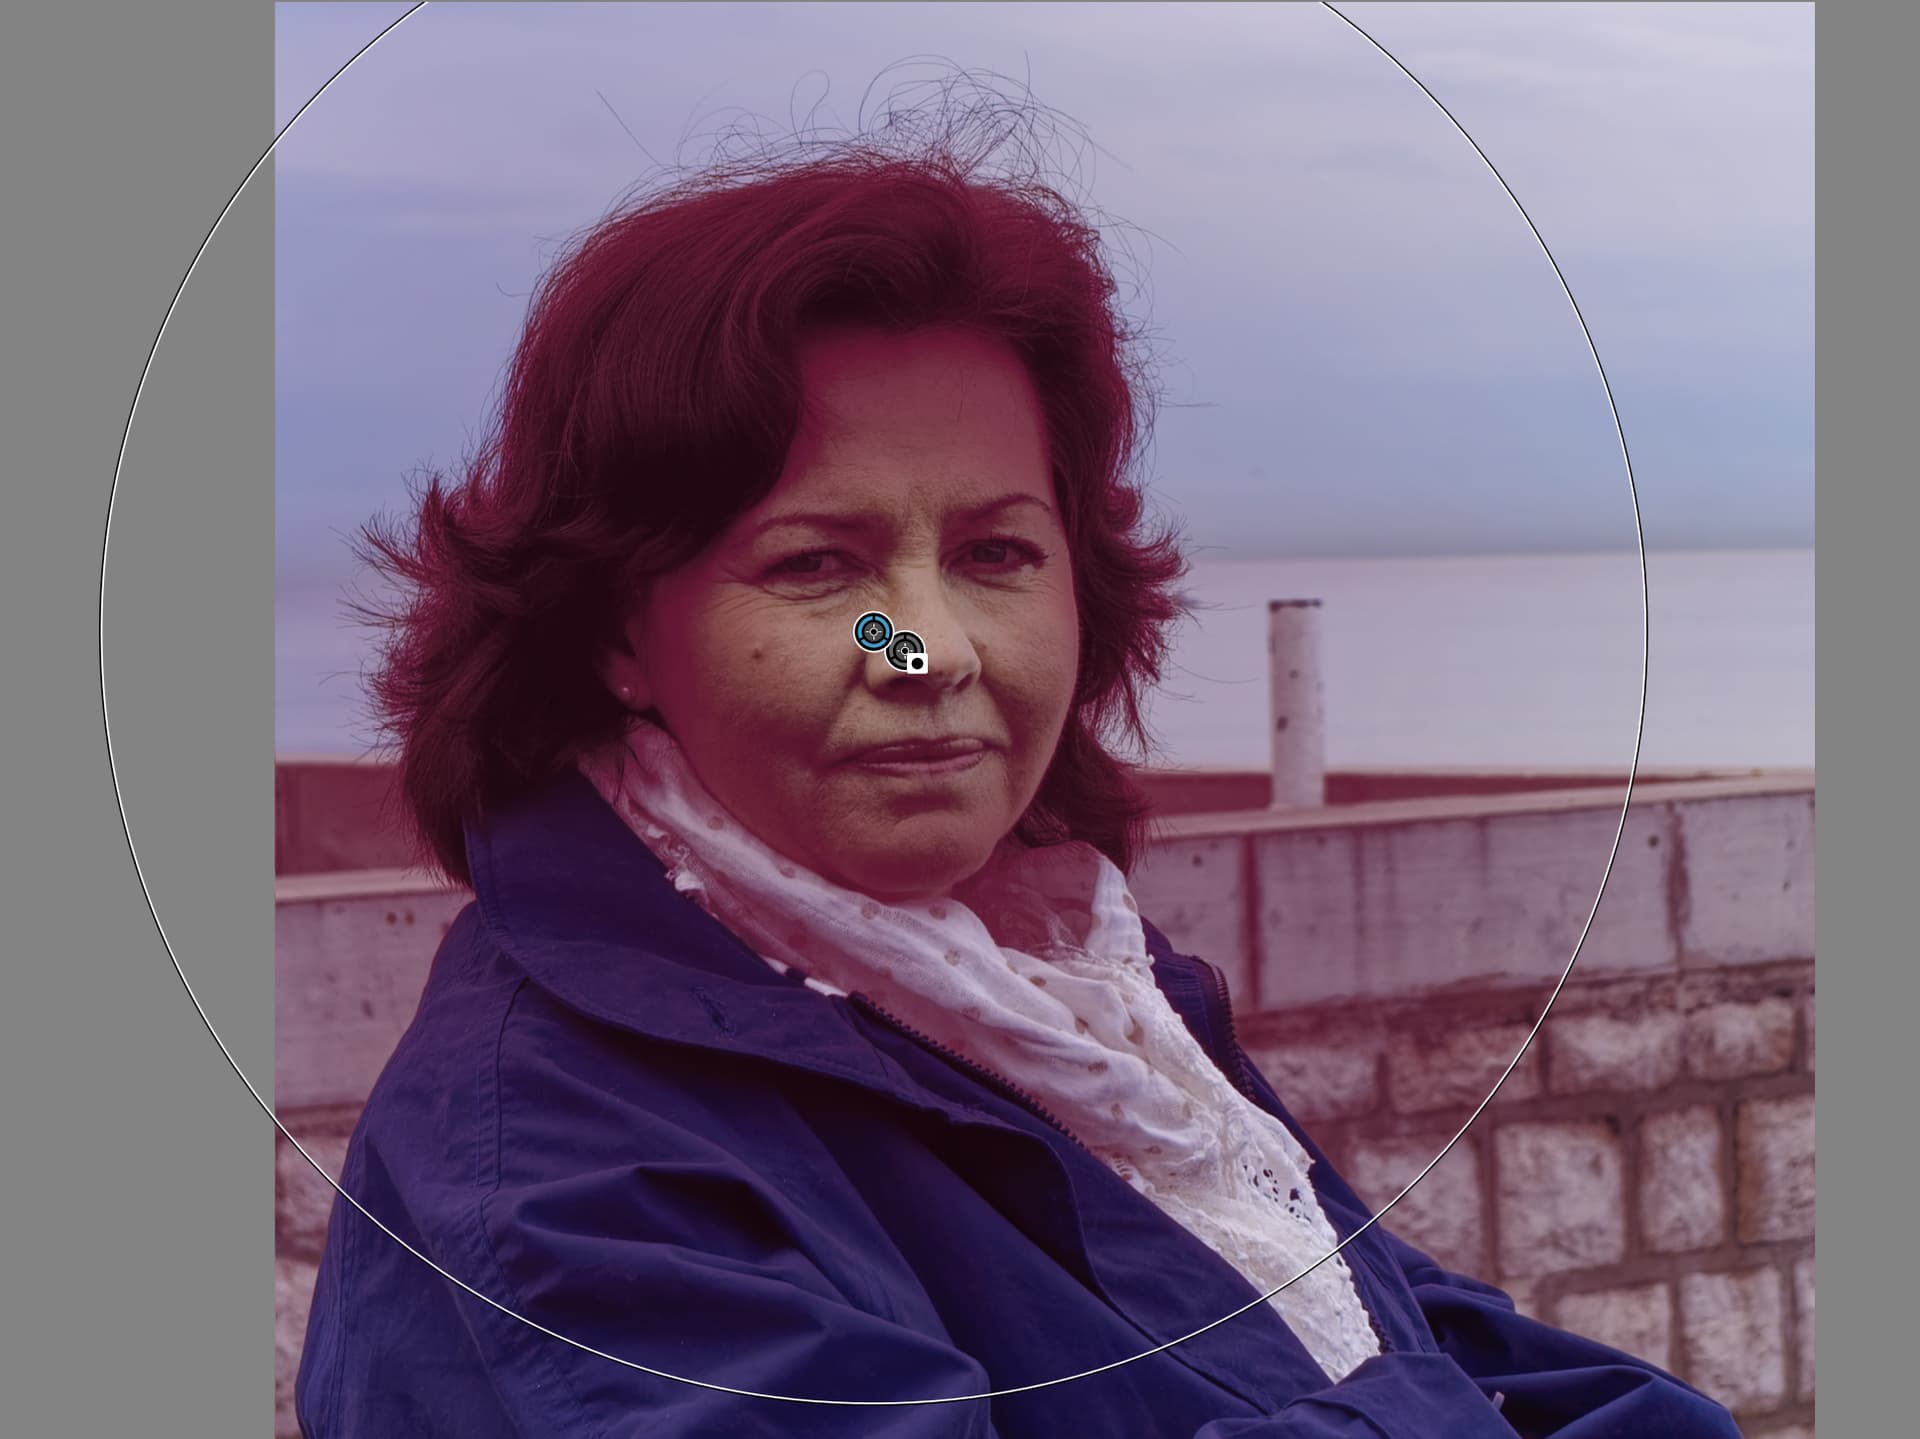
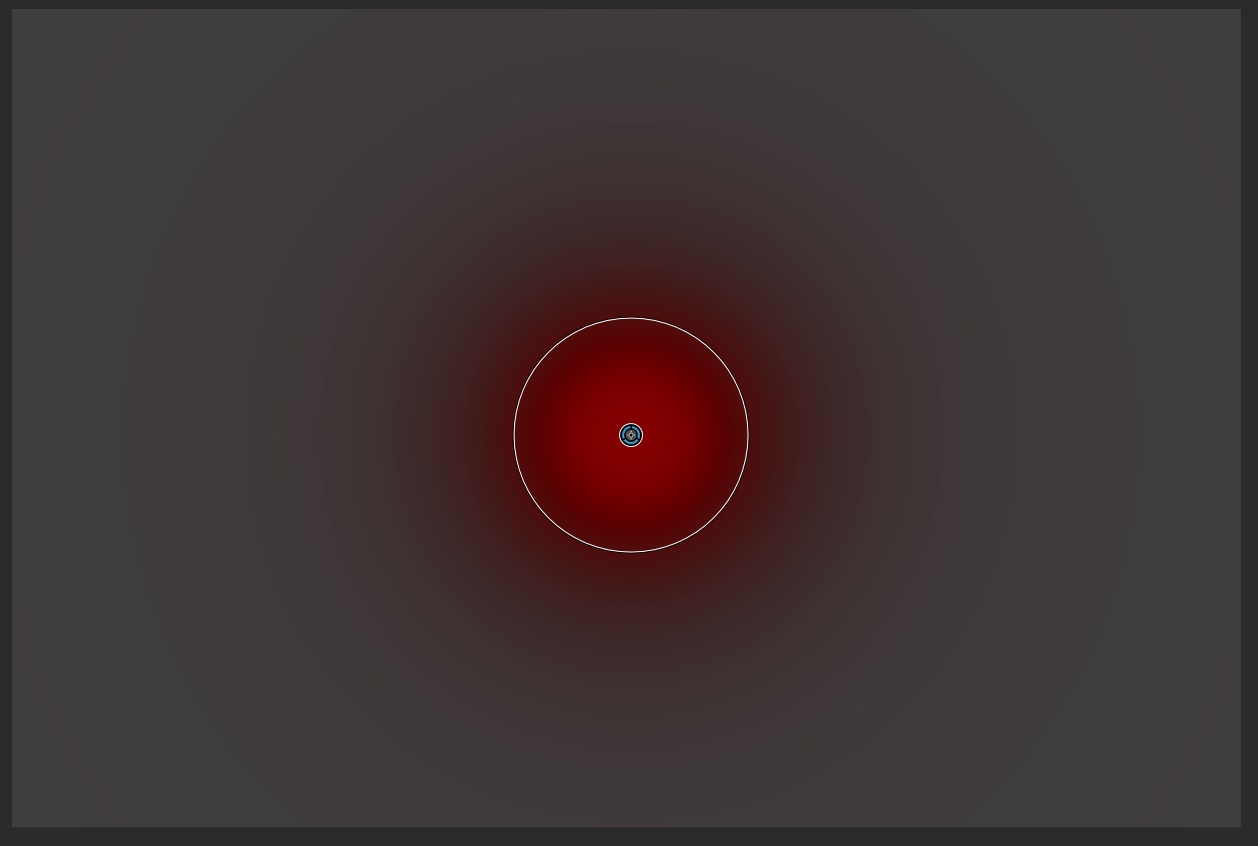
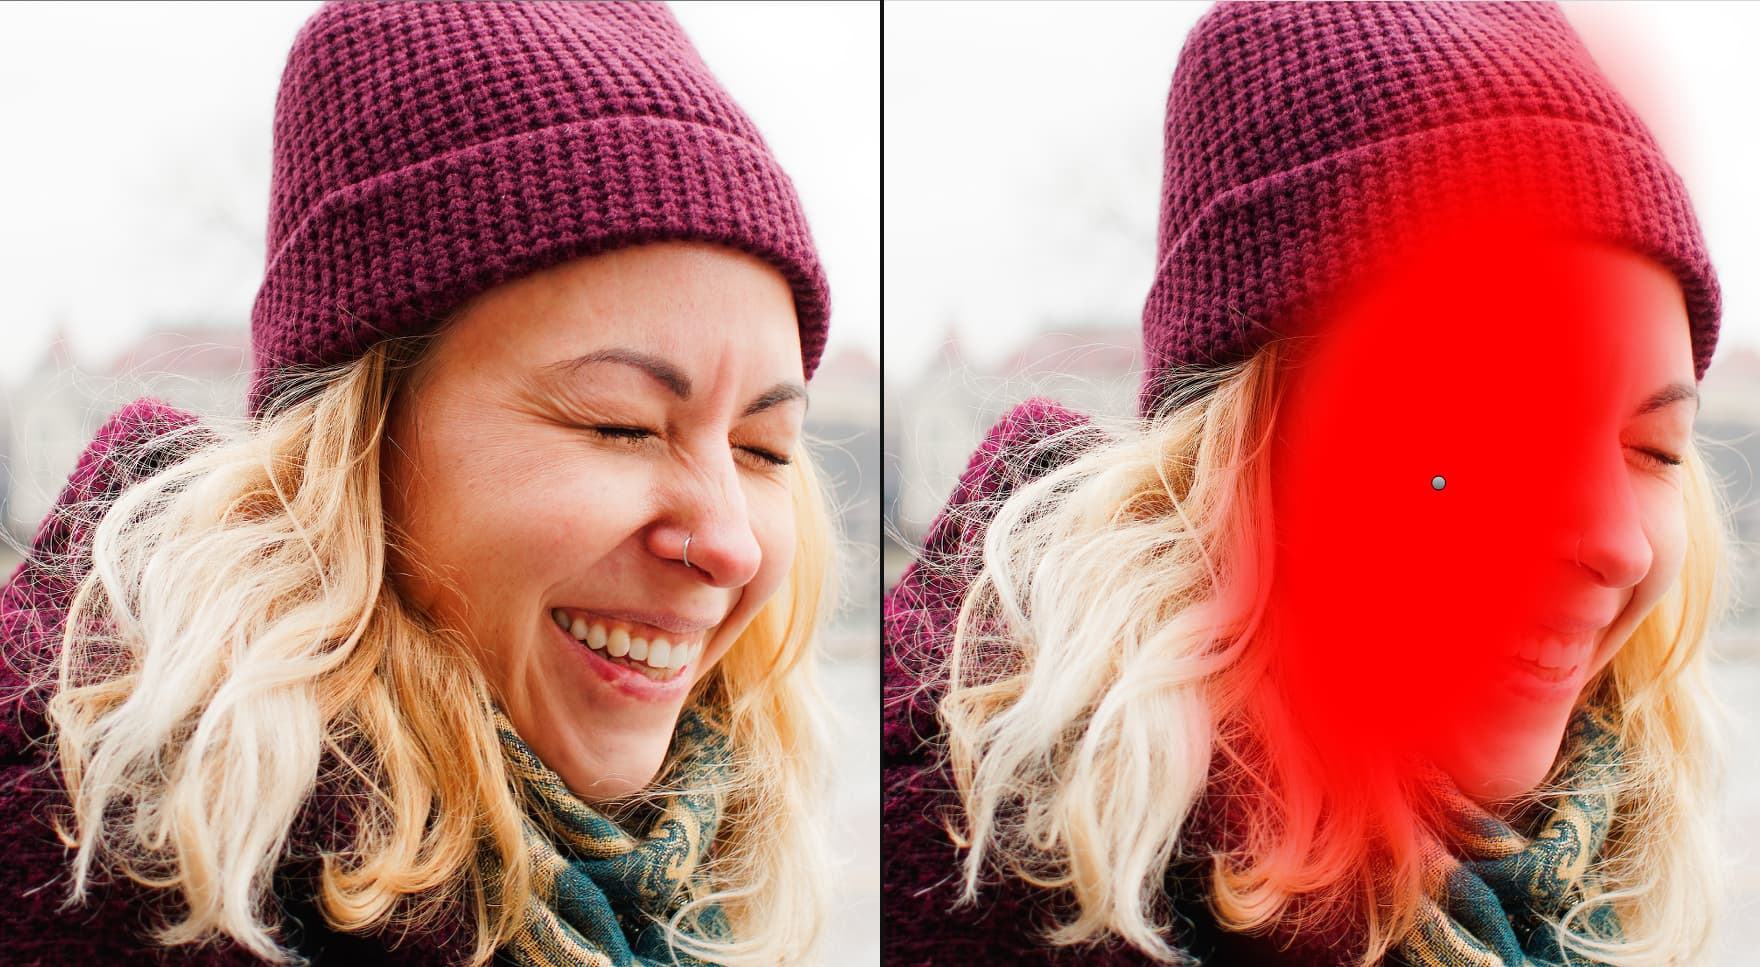
Also, I did a very quick rough-n-ready test of control point masking. Starting with a pure white background which I dropped (via exposure tool) to dark grey for better visibility. I then placed a single Control Point around the middle of the image, dropped its Chroma/Luma selectivity to “0” and dropped that mask’s exposure etc. I’ve kept it highlighted and screenshotted the result.
You can clearly see the supposed border of the Control Point and how it seems to have nothing to do with how it actually impacts the image.
The overall border of the gradient extends way outside that line. However the start of the gradient drop-off also seems to start inside that line.
In a real-world use case, I wouldn’t use “0” Chroma/Luma selectivity so that would dictate further control over where the mask actually applies itself, but it’s still very odd that the base gradient reach seems to have little to do with the mask size itself.
1 Like
Stenis
(Sten-Åke Sändh (Sony, Win 11, PL 6, CO 16, PM Plus 6, XnView))
8
Me too I also have C1 as some sort of backup and this is one of the reasons.
Not to speak for Stenis’ needs, but a popular thing to do in wildlife/pet photography edits is to insert a background light behind the subject to brighten the background and add potential interest.
Radial masks are really useful for that (especially coupled with something like Lightroom’s AI masking to remove the subject so it’s not affected by the background light).
I suppose you could do similar in Photolab using Control Points and mask out the subject so that they’re not impacted, but again the CP masks don’t behave quite as predictably as I’d hoped…
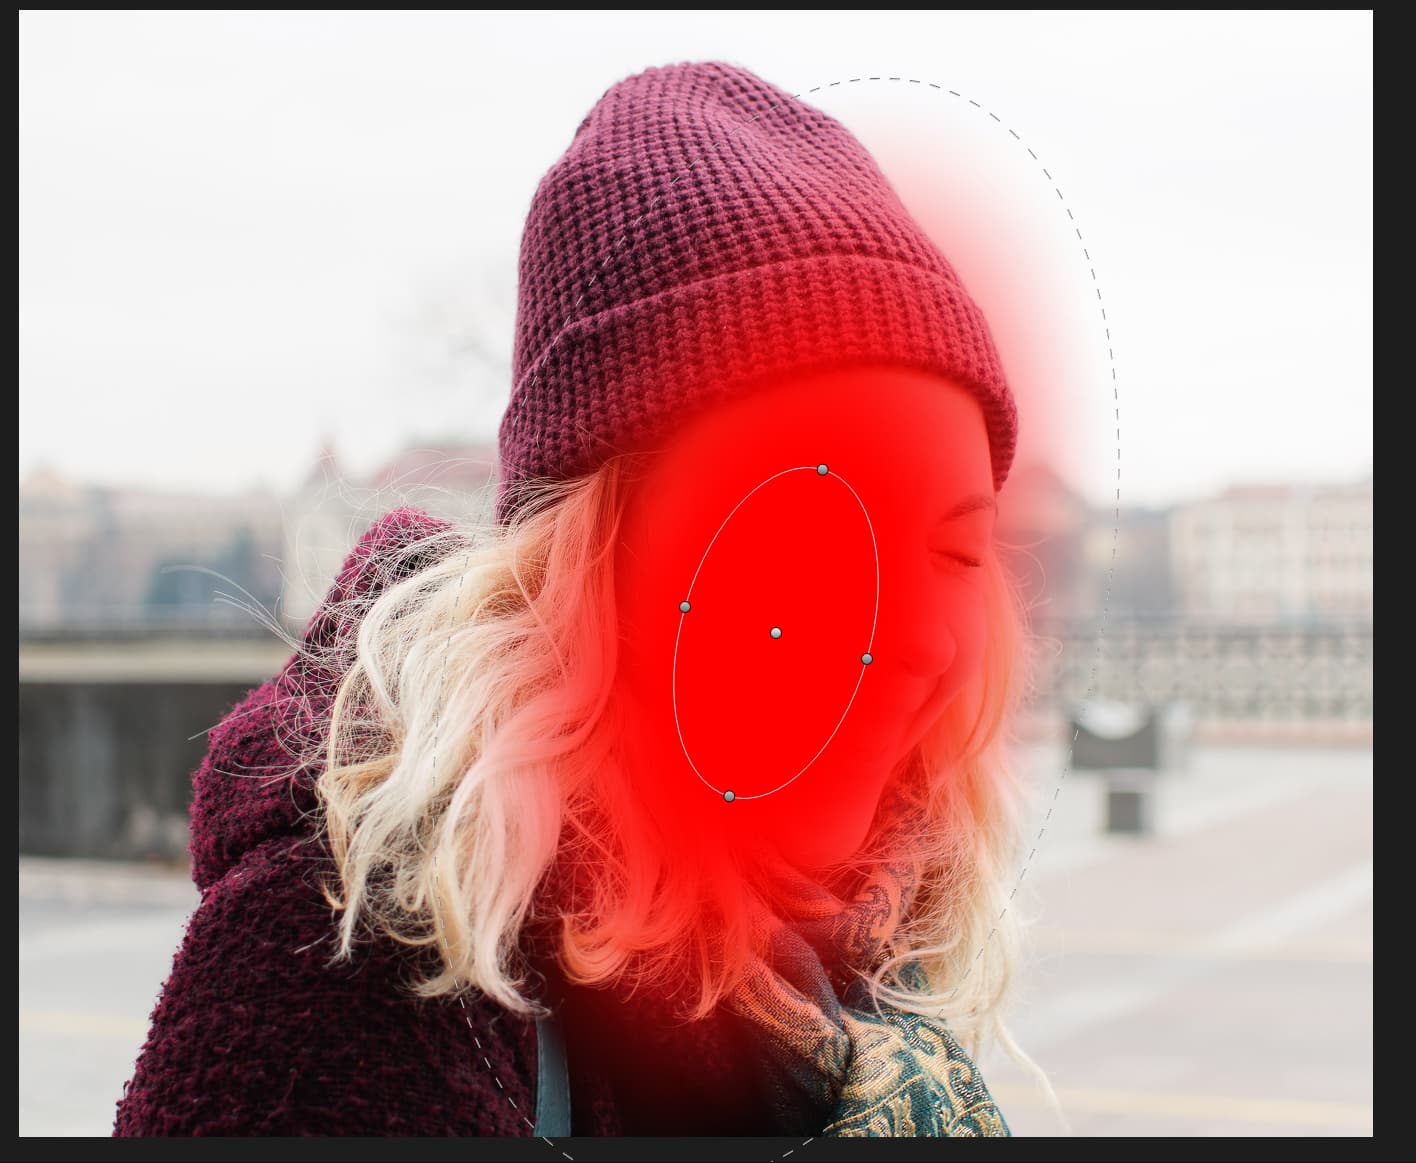
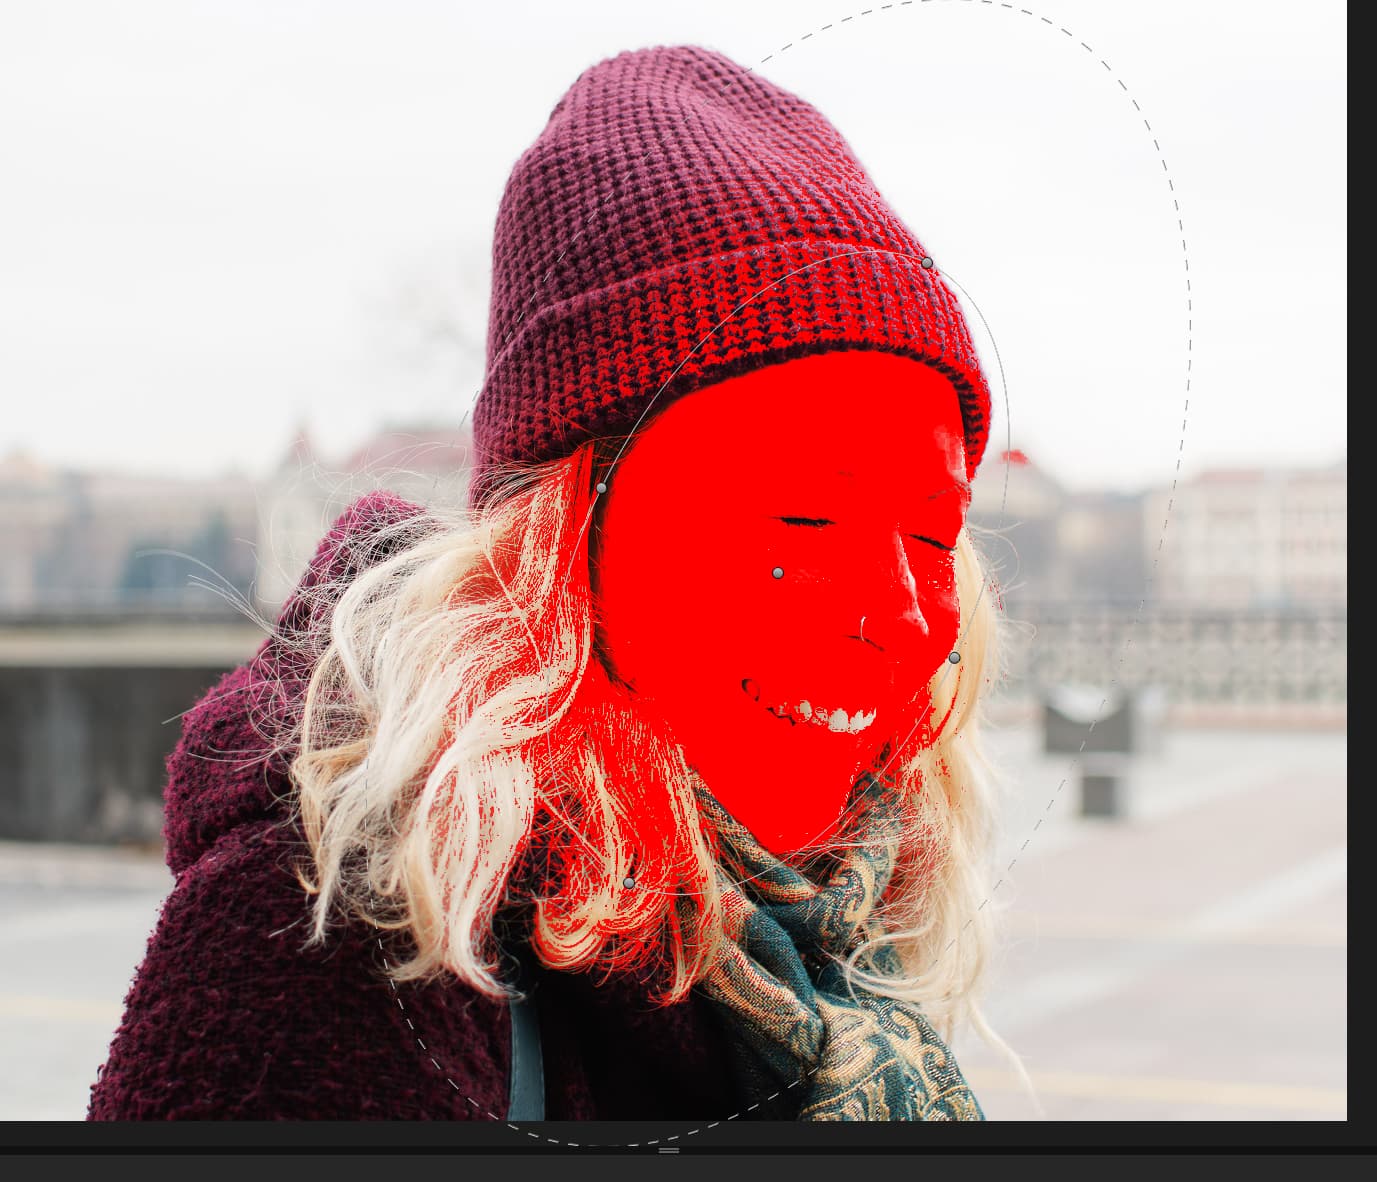
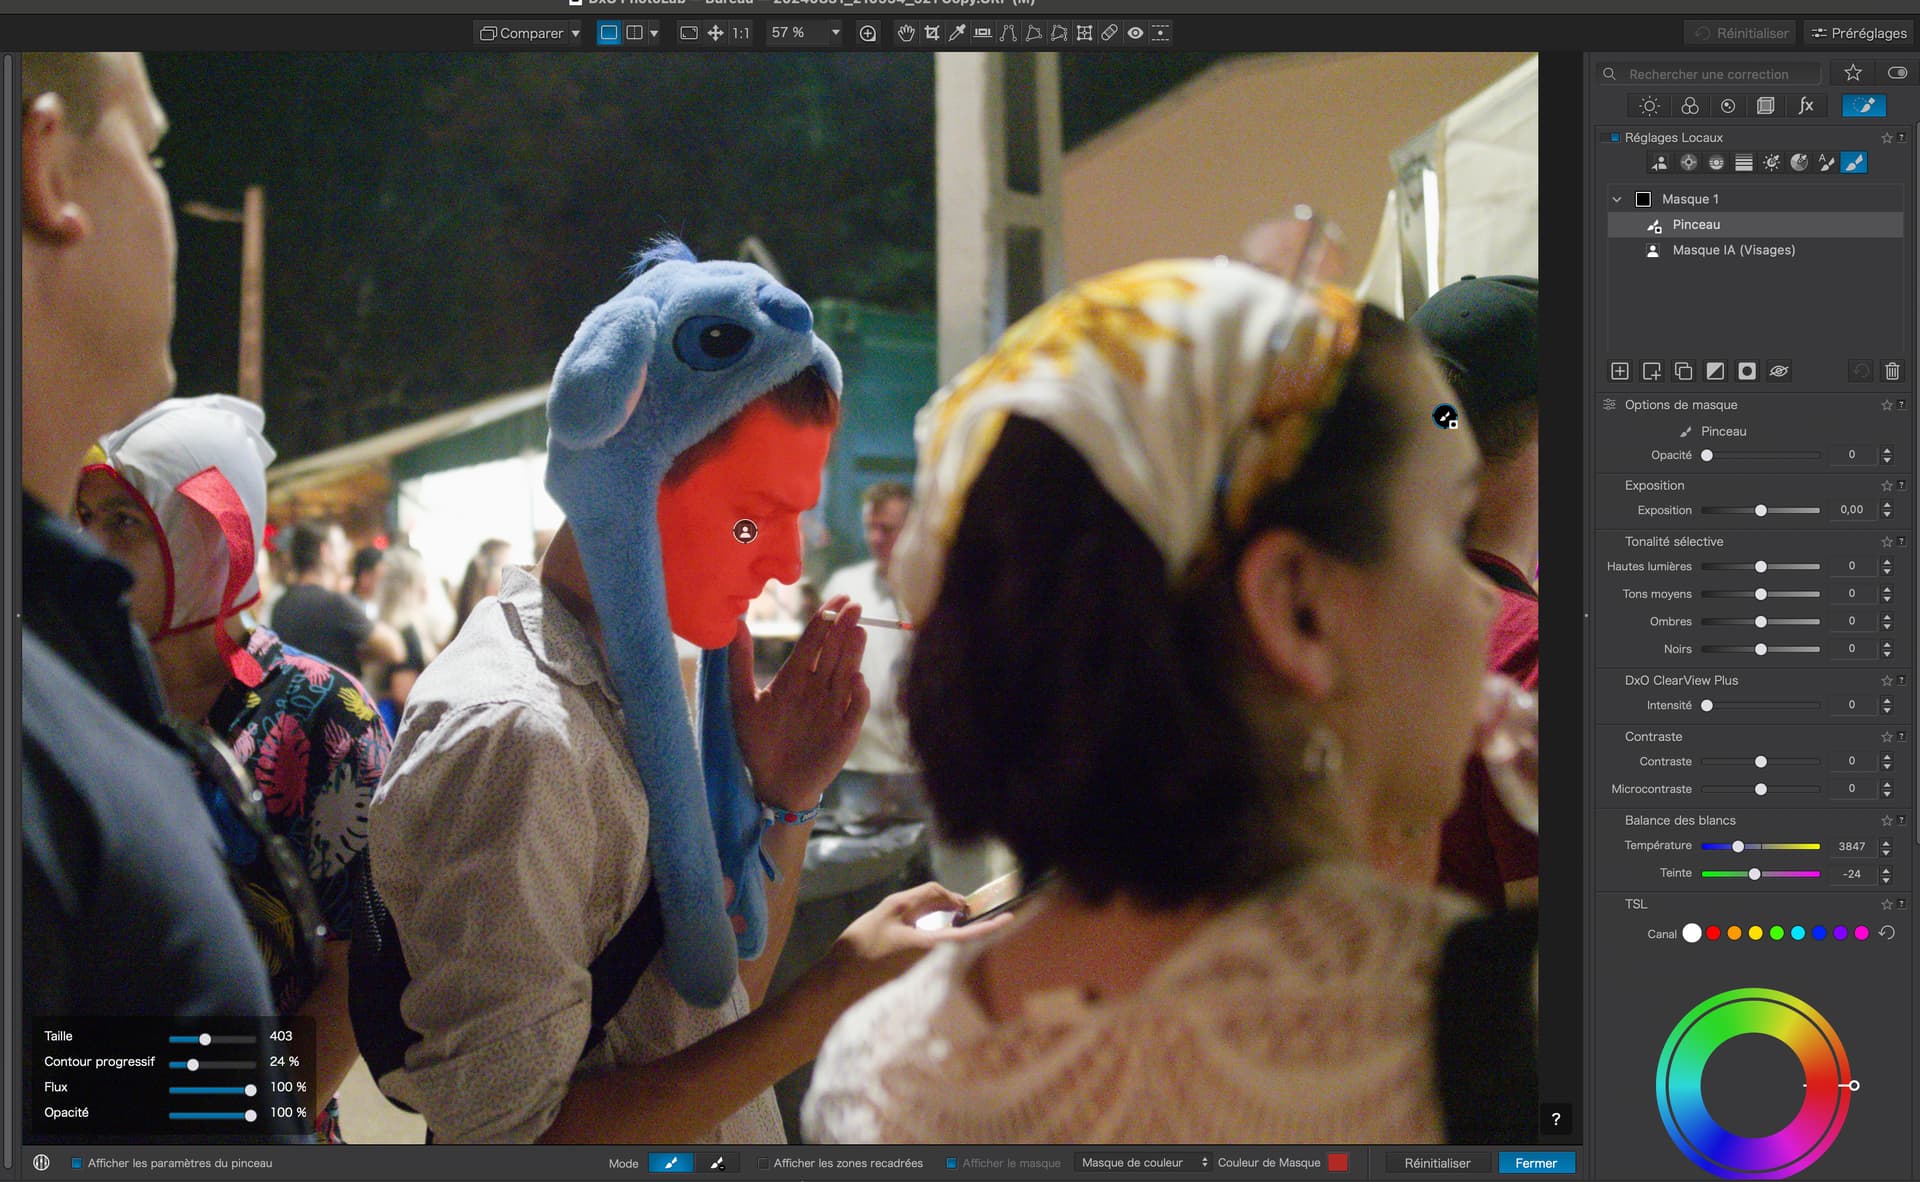
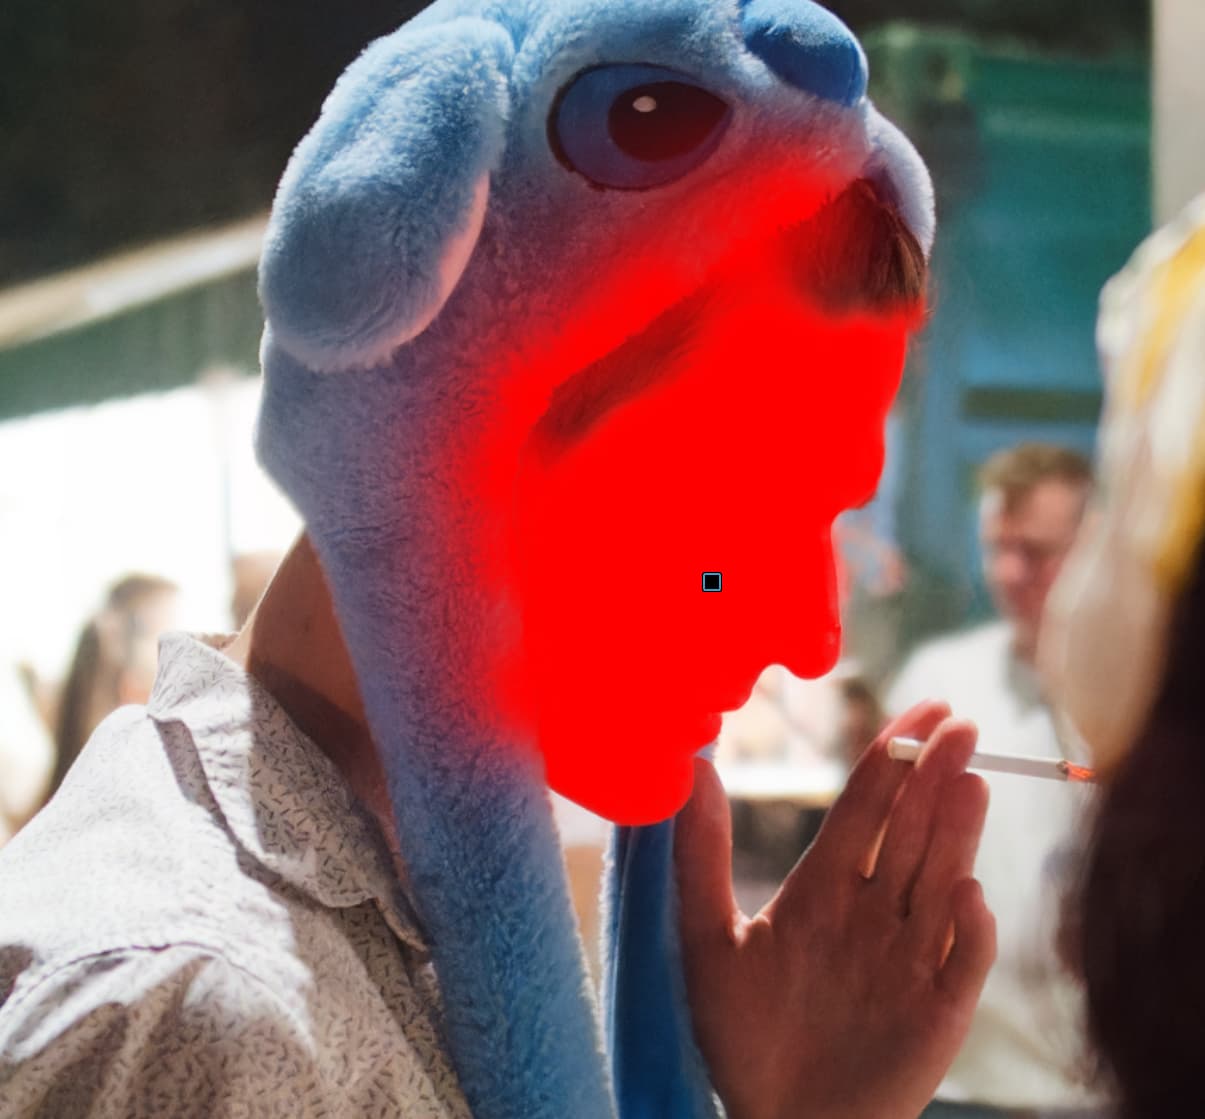
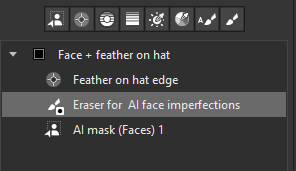
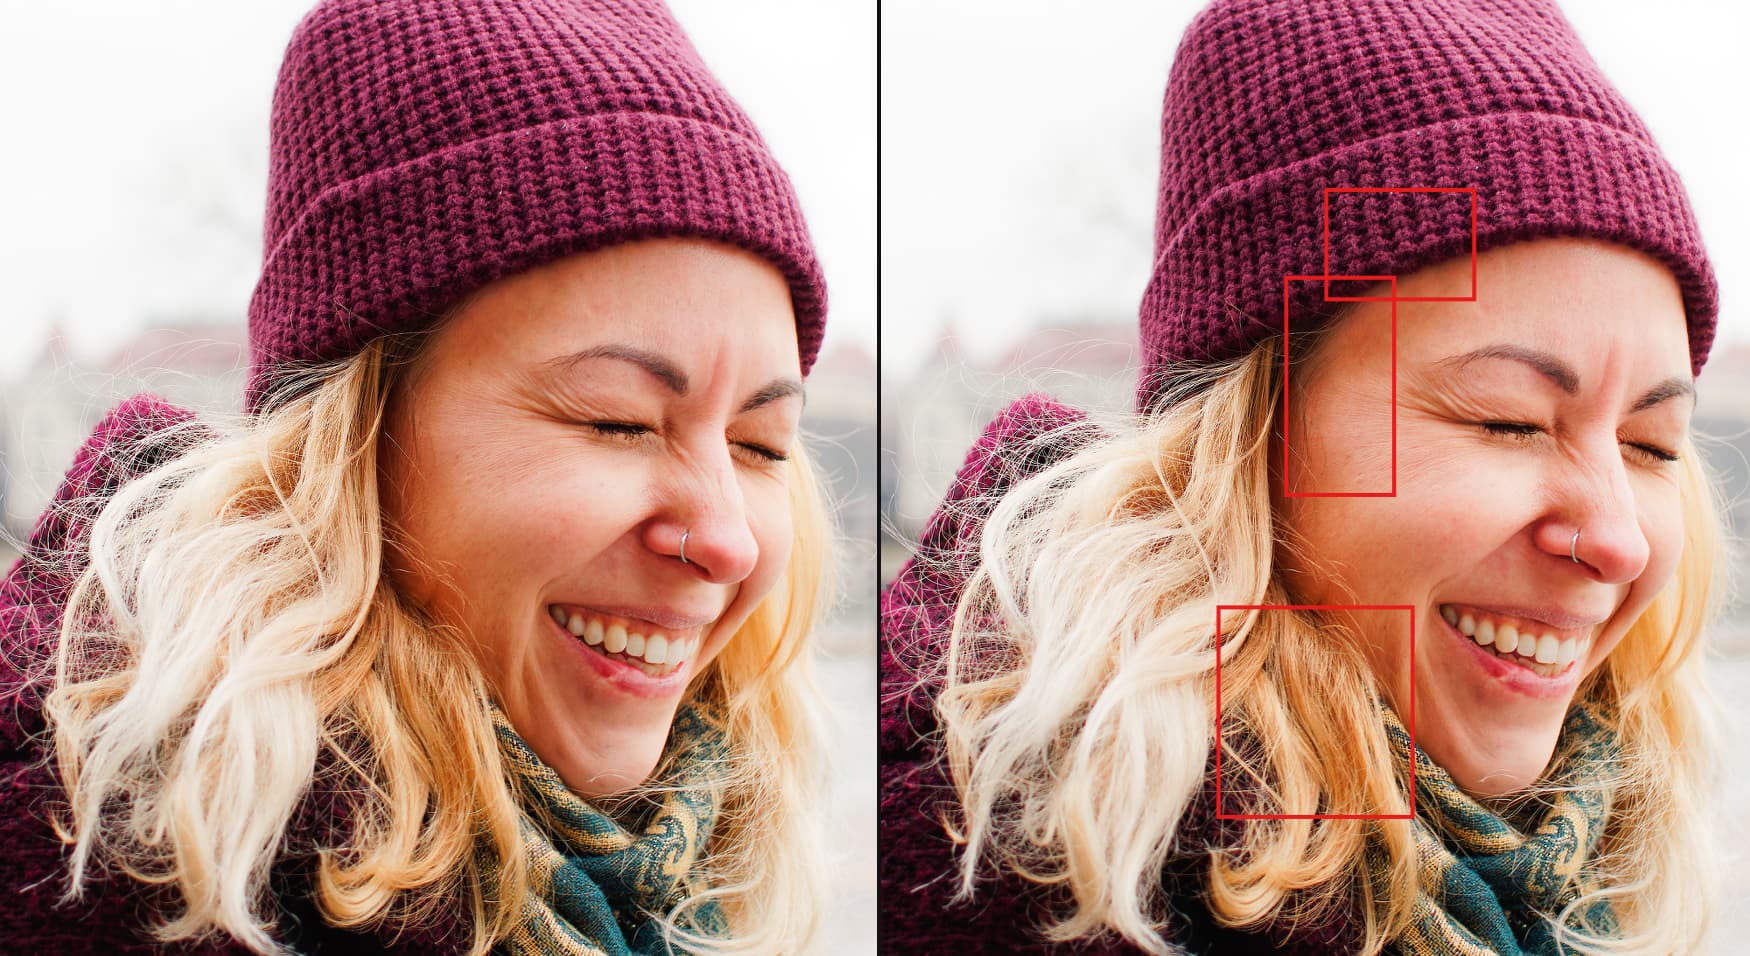
Yes and No. For face itself off course it perfect.
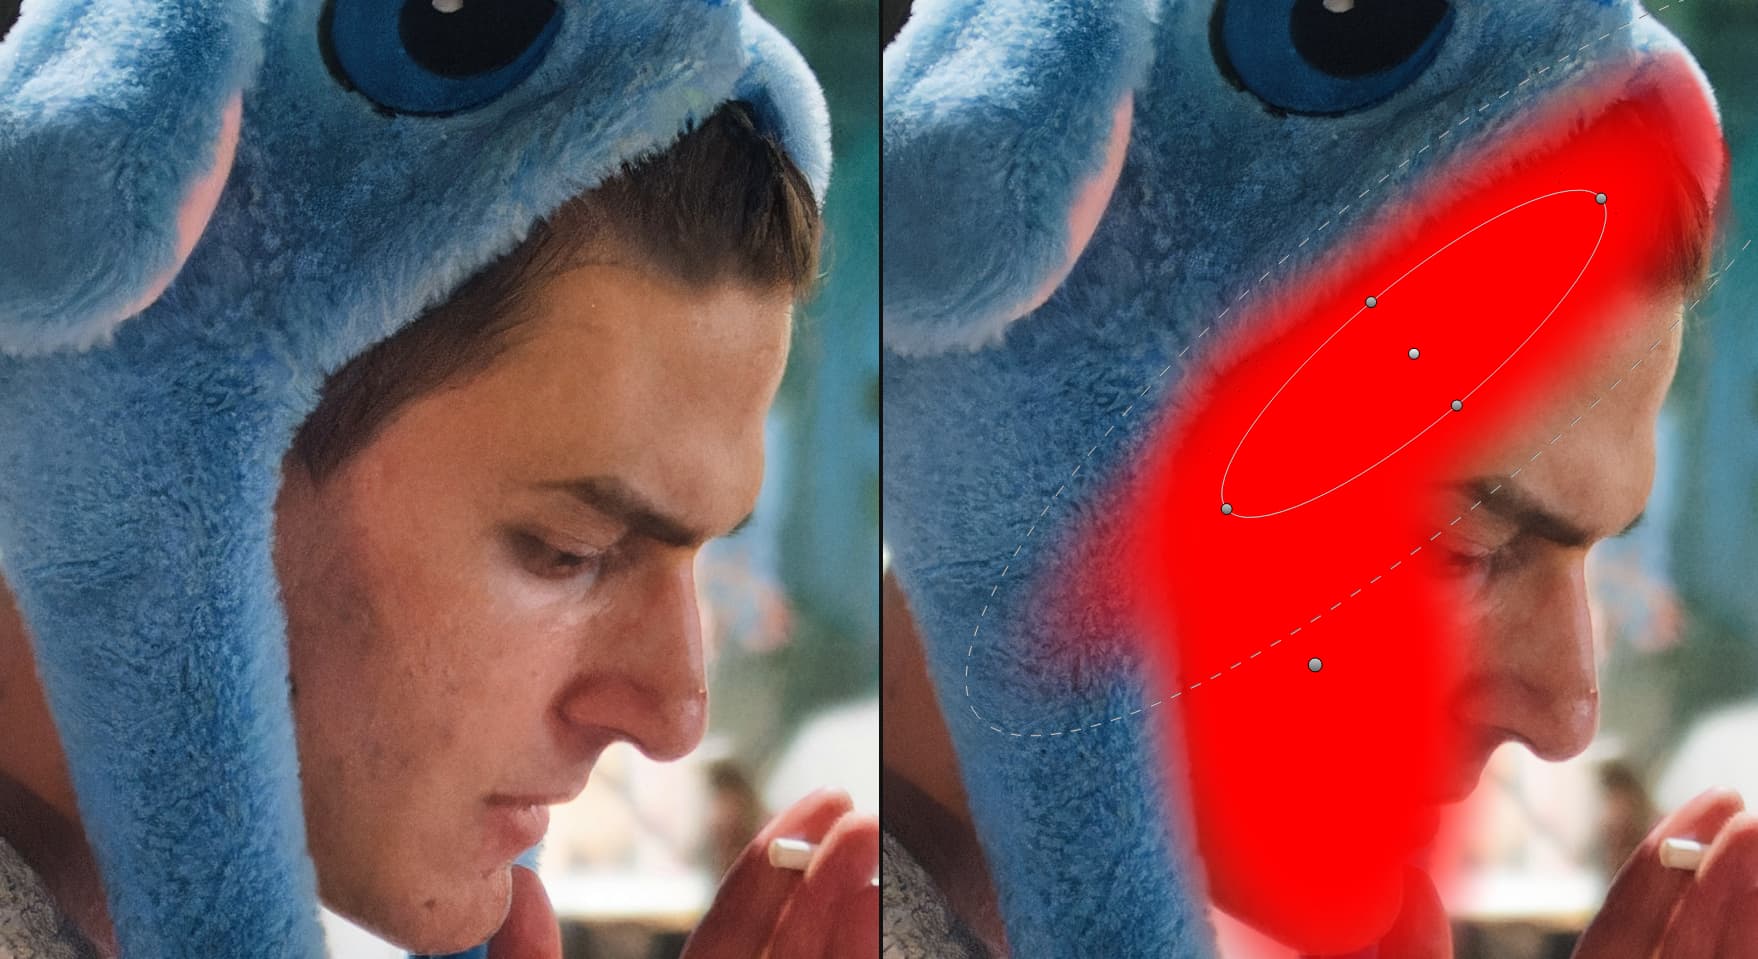
Sometimes i like add a bit of exposure around the face edge → in here may add a bit (just a bit) feathered exposure to the edge of the hat. And for that, small radiant (or two) can be nice.
In this photo (many thanks to get my photo!!! )
Stenis
(Sten-Åke Sändh (Sony, Win 11, PL 6, CO 16, PM Plus 6, XnView))
13
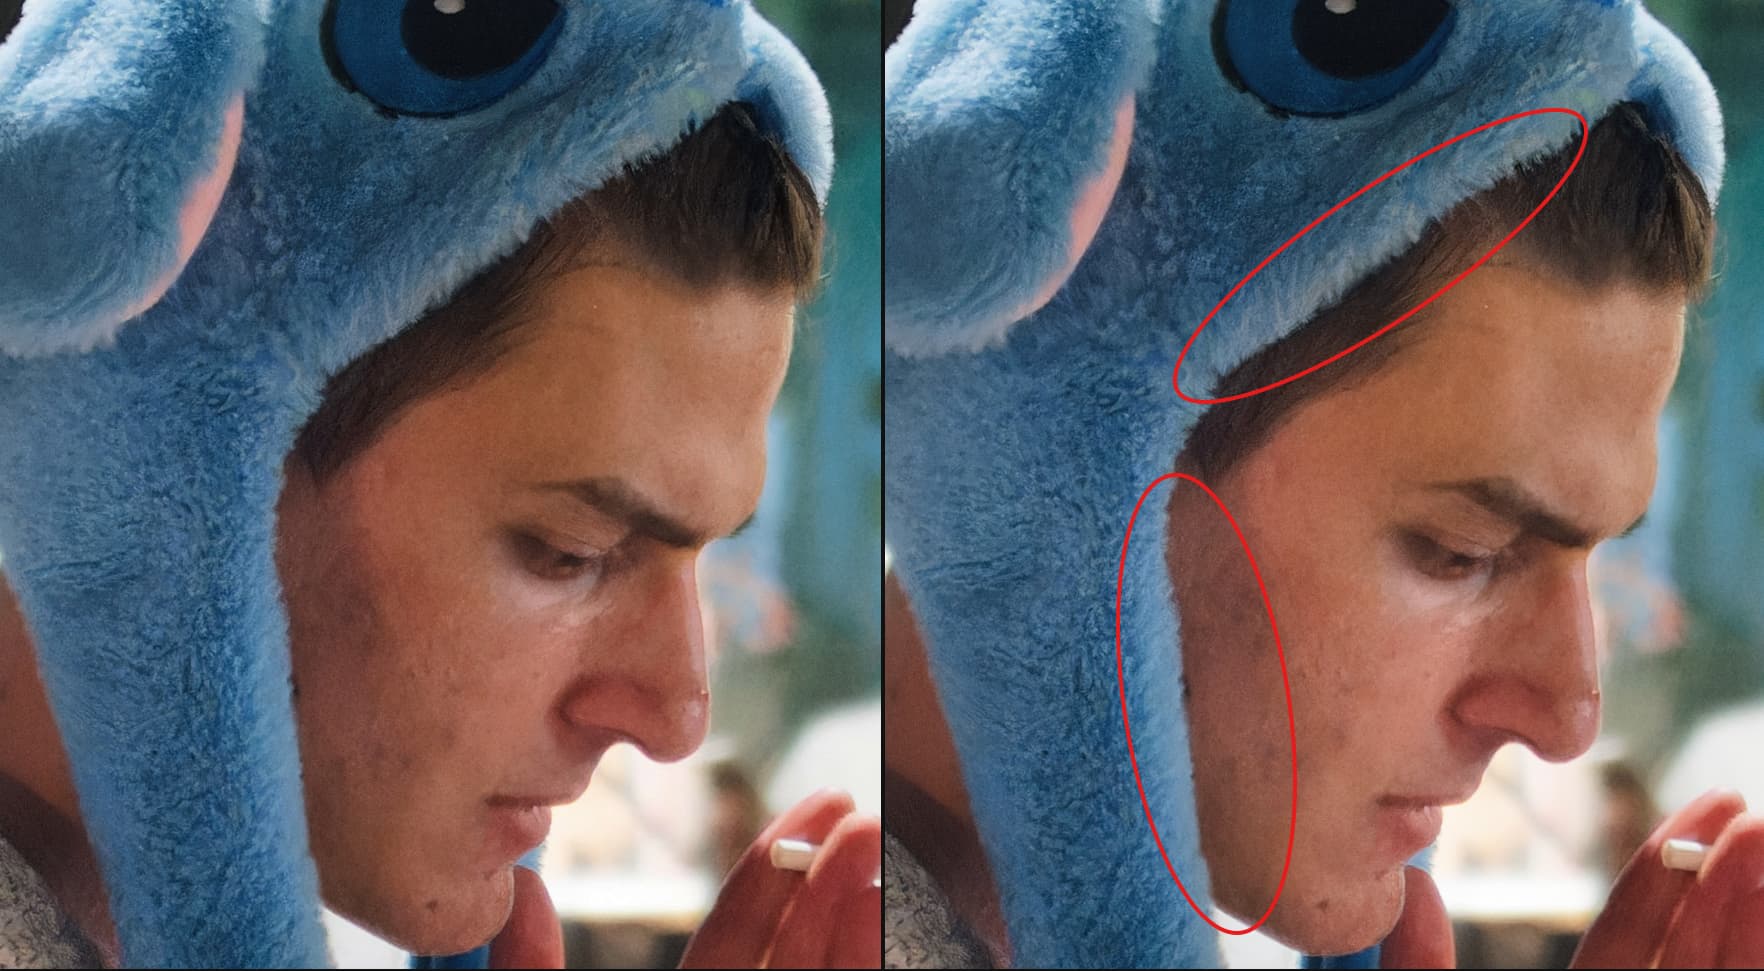
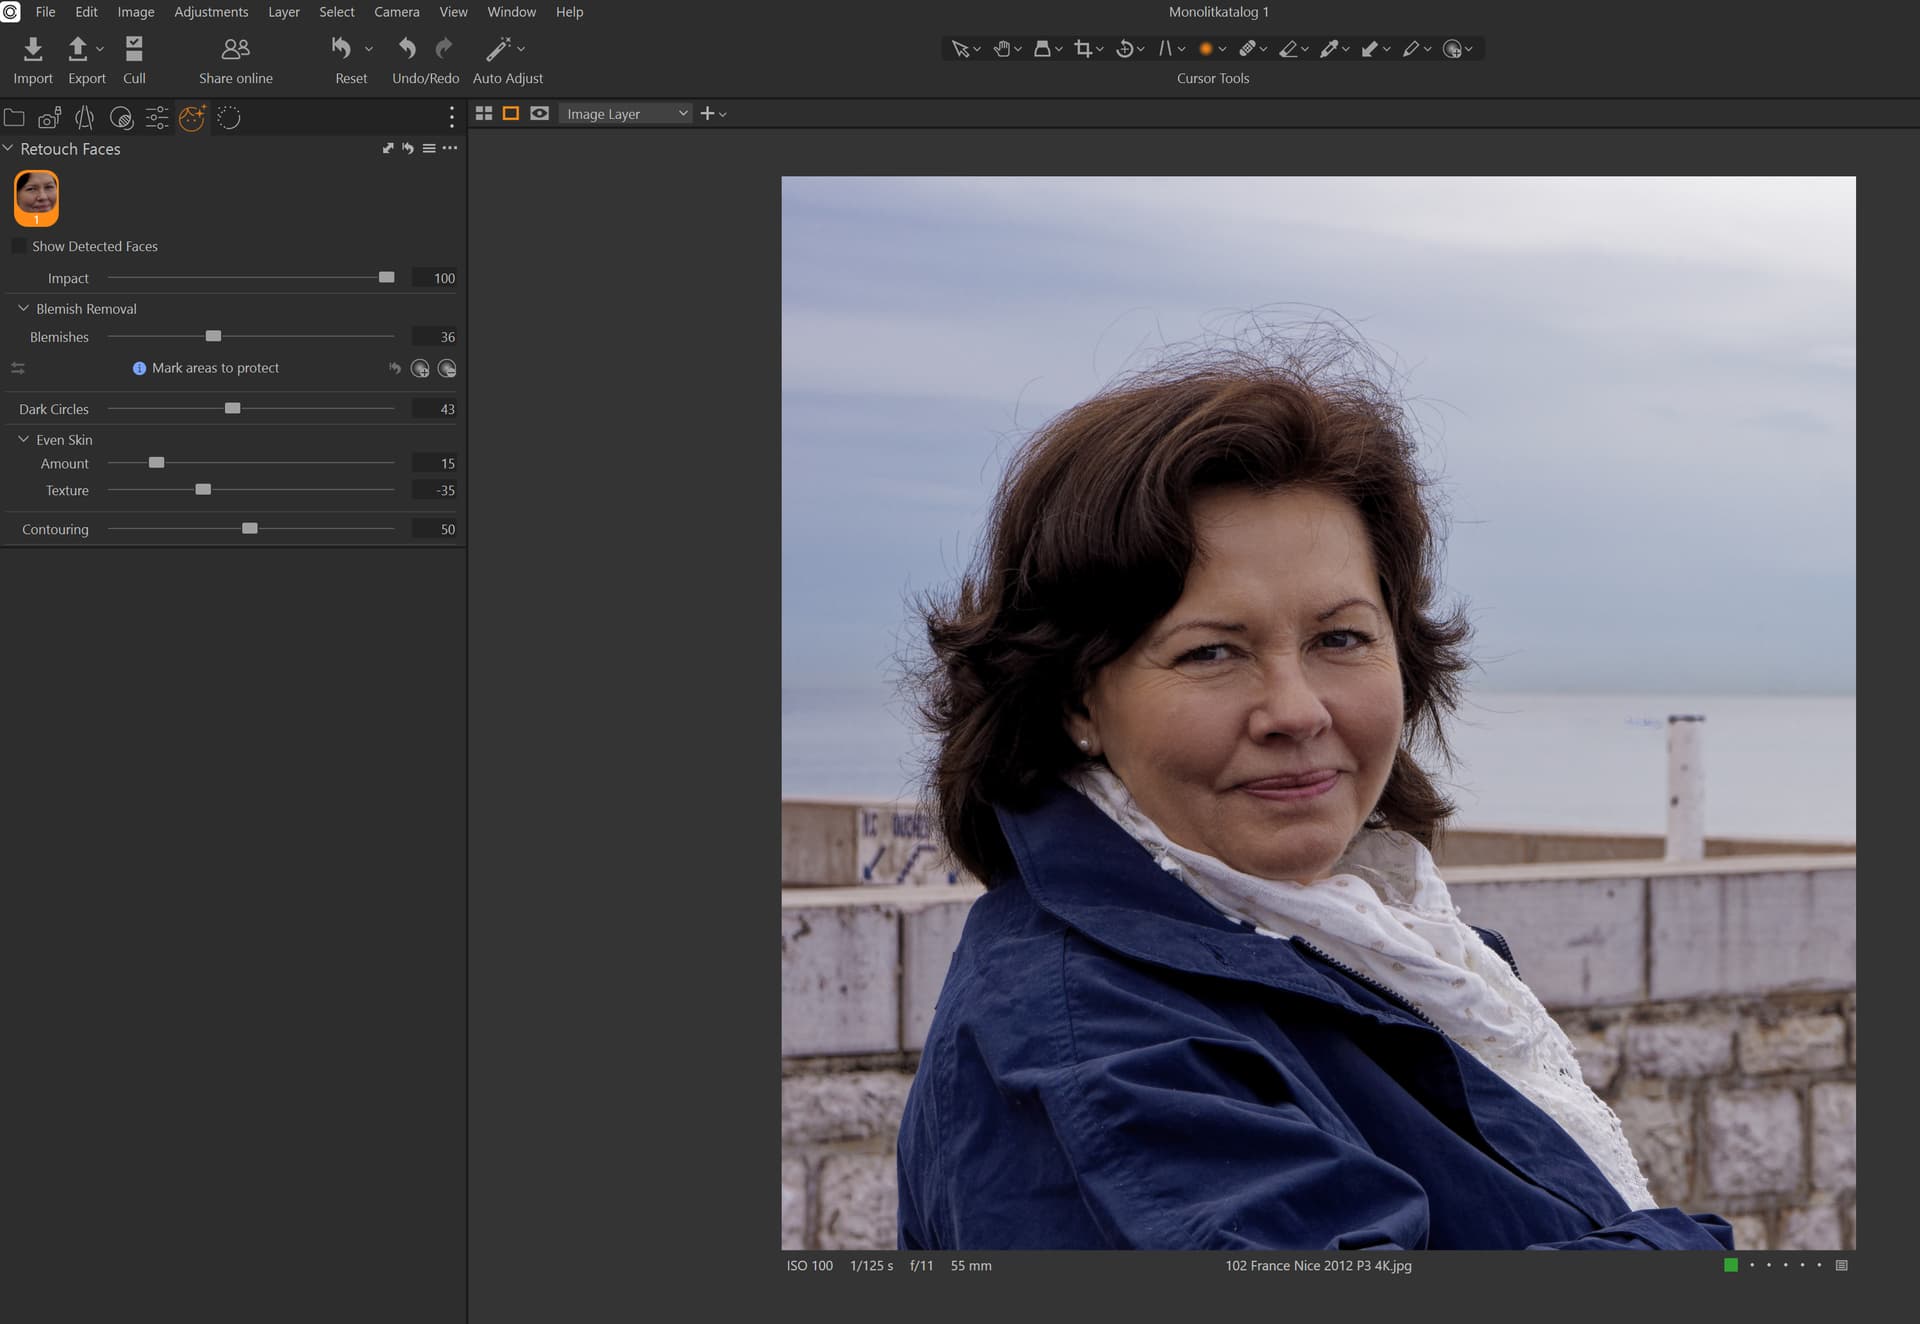
@Joanna, Nothing entirely wrong with that but there can be a problem even with those masks that they get very sharp edges. I guess that´s why we recently got a new menu in Capture One that is totally dedicated to Retouch of Faces. It is in fact like an own little applet that makes it very effective and gives better results than I can achieve with a Face AI Mask in Photolab. Really good professionals will probably get better results spending some more time but that tool suits me fine and gives a more natural look through more generic like transitions that the pretty harsh AI-Mask in Photolab will not give us right away. The AI-interfaces were pretty coarse and harsh even in C1 a couple of years ago and it took a while to “sanding them” softer and smoother.
It is more than 10 years since I first started to retouch faces in Lightroom 5 with a plugin that was called SLR Lounge that added a set of preset tools for retouch of faces to Lightroom Local Brushes along vid a lot of ordinary general presets. I have had access to Photoshop for many decades but never felt it was my kind of tool for photographs.
I prefer a solution like the one in C1 where it is part of the RAW-converter. I hate intermediate files like TIFF (that is also why I prefer Filmpack before NIC Collection) and try to avoid them as far as I can, so when Retouch Faces was released maybe half a year ago, I was really pleasantly surprised. Until DXO comes up with something similar I will stick with C1 for portraits that I want to edit a little extra. As a quick and dirty solution, I´m really fine mostly with the Control Points in Photolab.
This applet is pretty smart and can even handle pictures with two or several faces that automatically are detected by AI. Switching between the faces is just to click on respective face in the top - very effective. This is just one of all examples of how Capture One have been equipped with very effective tools to improve the productivity of our workflows so in that respect it is really oriented to the professional market.
I´m pretty sure we will see a lot of smart AI-driven workflows even in Photolab in a year or two. Photlab 9 is already a VERY good AI-platform architecture with a lot of tools and features that are pretty unique today and that is a very good start.