Processing "dull", gray-sky images in PhotoLab 5

Same camera and same lens and same settings must give the same result under the same circumstances.
Check them again, the combination with the D750.

George

Checking them again I found that #2 doesn’t have the possibility in PL to check the color temperature. Like it is a non RAW image.
And why is there such a difference in size?

George

No problem. :grin:

Yes, i started to use clearview at 15 for all image because it looked sharper.
But it also caused moiré on small bricks or detailed grass got noisy.
Clearview plus does a better job but stil for more then 15 it’s overpowering fast.
So i used Silkypix as counterbalance. The blacklevel, the contrastbalance, the clarity en the dehaze slider. Tonecurve of both.
And used images which needed dehazing or sharpening or both or much more dehaze but not so much sharpening.
i found out that fine contrast makes dxopl just a tad better in the dehaze clarity control IF you understand how it builds the image.

Fun part of local adjustment is you can mask a part of the image which has too much clearview by local and a negative clearview action.
So you can “paint” with a sharpening tool.
Front grass softer? Select the chroma and luma of the grass and undo the global sharpening. Use fine contrast to dehaze and some local vibrance to blend it in.

I have a topic here where i posted some fish in water examples there i exagerated the effects to show the differences.

I need to go.
If you have questions i will answer in the weekend.
Regards

Peter

Screen Shot 2022-02-03 at 14.00.53

Screen Shot 2022-02-03 at 14.01.22

I noticed the difference in size - not sure what setting might have created that. Both are “new” (raw).

I’m trying to think of what settings might cause this? Maybe there is something being recorded in the first image that is not yet turned on in my second D750?

I’ll need to check if the copyright information, and other things are turned on in the second 750. As to PL5 not being able to change the color temperature, I see this for all my Nikons:

Screen Shot 2022-02-03 at 14.12.38

I don’t understand - how do I open up the full window for “White Balance”, to see what the temperature setting was used for each image? In not sure what to click on. Is something broken in my PL5 ? If this is what you’re seeing, it can’t be my computer - or is there something else that’s set incorrectly?

Mike. Just a little something. There are a couple of minor differences in how the auto-focus is setup on the two Nikon cameras…

#1

[MakerNotes]    AF Area Mode                    : Single Area
[MakerNotes]    Phase Detect AF                 : On (51-point)
[MakerNotes]    Primary AF Point                : C6 (Center)
[MakerNotes]    AF Points Used                  : C6
[MakerNotes]    Contrast Detect AF In Focus     : No
[MakerNotes]    AF Fine Tune                    : Off
[MakerNotes]    AF Fine Tune Index              : n/a
[MakerNotes]    AF Fine Tune Adj                : 0
[MakerNotes]    AF Fine Tune Adj Tele           : 0

#2

[MakerNotes]    AF Area Mode                    : Auto-area
[MakerNotes]    Phase Detect AF                 : On (51-point)
[MakerNotes]    Primary AF Point                : (none)
[MakerNotes]    AF Points Used                  : (none)
[MakerNotes]    Contrast Detect AF In Focus     : No
[MakerNotes]    AF Fine Tune                    : On (1)
[MakerNotes]    AF Fine Tune Index              : n/a
[MakerNotes]    AF Fine Tune Adj                : -2
[MakerNotes]    AF Fine Tune Adj Tele           : 0

This might explain differences in sharpness.

So far, I haven’t seen anything in the EXIF that explains why there is such a strong exposure difference and I am guessing that one or both might need calibrating.

One thing at a time.

I searched for why my white balance didn’t appear correctly, and found this:
https://forum.dxo.com/t/white-balance-panel/9159

Did that, then switched back to my previous workspace, and now I see this:

Screen Shot 2022-02-03 at 14.24.41

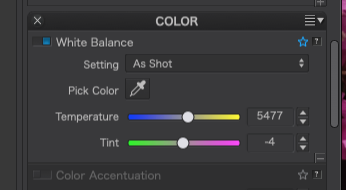
I guess there’s a bug in PL5. I have no idea how this happened, or why, or what, if anything I need to do. I haven’t change workspaces in a long time.

When I tried to make the second D750 the same as my first, I obviously didn’t go through all the auto focus configuration. I can either make the second camera the same as my first camera, or maybe I should try out whatever settings you prefer on your D850? Or perhaps I should see if there is something to click on to bring both cameras back to the default setting for a starting point.

As to the exposure, I suspect the repair technician never calibrated the meter. Is this something we can do ourselves, or is it best done by a shop? I’ll test this again, setting both cameras to “sunny 16” as soon as I have a pretty sunny day again.

Also:
calibrate exposure metering on D750

Calibration

I tried to match the exposure and colour balance on the two D750s, in order to minimise any visual bias and then I took a 200% screenshot of the foliage on the memorial island…

#1

#2

From what I can see, #2 is out of kilter and this might be down to the AF settings, although, at those kind of distances, I wouldn’t have thought so.


Addenda

The AF fine tune is not 0 on #2. this could be the difference.

What would I do without you?

I went through both cameras a couple of hours ago, making all the FOCUS settings on 750-2 the same as what I have on 750-1. I need to figure out how to replicate the comparison images you posted earlier, but I think (hope) they are now both the same.

AF Fine Tune… I didn’t know it even existed, let alone how to use it. I did find this page:
focus fine tune
…and manually set camera #2 to zero. I’ll take another set of comparison images now that this is done.

After going through the settings for focus and making #2 just like #1, I took two photos of a building opposite my building with the 50 f/1.8 lens. I couldn’t see any difference between them. Both meters pretty much agreed. In my test tomorrow, I will put both cameras on manual, and f/10, and use the same shutter speed.

How do I get the same data as you show up above? Is it off the back of the camera, or from PL5 ? As I said, you were right, they weren’t set up the same, and I think that’s been fixed, but how do I get to see the above information to confirm it?

Exiftool. Has been mentioned many times.
There’re more differences between the two D750 files but I don’t know how to interpret them.
I’m still wondering why PL deals with file #2 as being a non raw file: no color temperature and no denoising. Maybe somebody from the staff can give us a hint?

George

Just opened PL again and now it’s right.

Georg

I had checked those test files from Mike, but no problem to open them, to colour correct …

That looks like a very well explained article. It will be interesting to see what a difference it makes.

Due to my heavy involvement in reading and writing metadata for creating my own keywording app, I use ExifTool written by the amazing Phil Harvey (download link).

It is a command line tool so you would need to use Terminal and learn what commands to type, so it’s not a particularly easy thing to get to grips with. If you do want to have a go, once it is installed, you can type…

cd theDirectoryWhereYouKeepYour File (Enter)
exiftool -G  -nikon:all yourfilename.NEF

…which will give you a list of all the metadata written by Nikon

If you don’t fancy messing around with the command line, it could be easier to pop the file here :slightly_smiling_face:

to quote an important snippet from the linked article

Fine tuning settings are specific to the lens/camera combination and once you tune a lens, the camera saves the setting, which it reverts to anytime you mount that lens.

specific means → per camera


Using two D750 with a couple of AF-S lenses, I’ve done that per camera.

[ To ‘synchronize’ the cams (except this individual cam-lens-adjustment !) I use → My Menu → save settings, insert the card in the other cam and load the settings from the card. ]

1 Like

If you make it

exiftool -G -nikon:all yourfilename.NEF > /Users/MIKE/Desktop/filename.txt

you’ll get output in a file on your desktop. Make sure to replace the bold text with your actual account name and a filename you like.

Hint: You can start to type e.g. “/Use” and press the tab key and terminal will complement your entry to “/Users”

1 Like

I’ve created a quick action (Mac only) that extracts metadata from files and writes them to text files. It works as designed. If someone (@Joanna hint hint) can improve it and post it here, all the better…
List Metadata.workflow.zip (118.7 KB)

How to prepare:

  1. download the file and unzip it
  2. open it with Automator (double-click should do it)
  3. Convert it to quick action and give it a name you like

Prerequisite

  • exiftool installed in /usr/local/bin/

How to use (also see screenshots below):

  1. select a folder with a few image files (don’t start with thousands of images!)
  2. ctrl-click on the folder icon and select the quick action
    → for each source-file, a file containing (all) tags and values is created

CAVEAT

  • Use at your own risk and your risk alone
  • Delivered as-is and works as designed
  • Feel free to modify and improve it

2 Likes

For the window users ExifToolGUI
I downloaded it some years ago but it didn’t work well with win10. But not long ago I saw a print screen of that program and downloaded it. It’s still working.

George

yes – and simply put it in the root folder
grafik

This is the wrong approach, @mikemyers . As Wolfang pointed out, AF fineadjustment is between one lens and one body.

  • Same body, different lens = different AF adjustment value.
  • Same lens, different body = different AF adjustment value.
    If you want to play with this, be prepared to spend a lot of time for not that much improvement. It’s opening a can of worms. Why?
  1. DSLR Phase AF is always done indirectly. There’s a mirror behind the main mirror, directing the light to an AF module which at the very best is well aligned and true and parallel to the sensor. If the module is not aligned in the tiniest tolerances, there will only a small amount of AF points be able to catch focus precisely. I had that once in a D810 or D850: Using the outer left AF point had backfocus, the outer right had frontfocus. If it was not the lens which could have been decenterred.
  2. Not only is the body/lens combination unique to the AF fineadjustment - this is also valid for only the same distance you were (hopefully) testing the AF.
  3. To make things more complicated: With zoom lenses there’s only one focal length giving the precise result.
  4. With certain lenses from 3rd party manufacturers like Sigma and Tamron you can adjust the lens instead of the AF of the camera, at more than one focus distance and for more than one focal length (for zooms). But trying to find out the precise settings for 4 distances at 4 focal lengths is time consuming. And afterwards running a reliability test to find out if the AF is ALWAYS precise spot on is usually disappointing.

But don’t worry, all this is splitting hairs. Necessary for rather fast lenses like 200/2 ,135/1.8, 105/1.4 and so on to use these lenses with wide open aperture. Not so necessary for people using f/8 or smaller apertures as there’s more leeway for front- and backfocus.

… or manual focus to ‘infinity’, which is not … (no more hardstop)
Who Killed Infinity Focus? | B&H Explora@mikemyers

( just wonder, as with f10 that shouldn’t be a problem )