tpytlarz
(Olympus, Mac mini M1, PL6 Elite, Nik4)
1
I print fine to my Canon Pro 300 from PL6. However, no matter how many prints I make one after the other and that I created a preset including cell sizing…the cell size changes back to 8in x 7in. That’s not even a standard size. I have to change it every single time I print. It ignores my preset with the correct cell size. Am I missing something?
Hi Terry,
in the Windows version I can select several pics for printing, hit Ctrl + P and all get ‘registered’ in the print modul waiting there to be printed. Of course this only works on the same size paper, same cell size, rotate to fit … but you set these parameters once for the print job. – Check it out.
No, you are not missing anything. The PhotoLab print module, at least on Mac, is something I gave up on at my first attempt.
I used to export to TIFF and then use either Preview or ColorSync Utility. But then, when I got my Canon Pro-1000, I switched to their Professional Print & Layout software, which I find very useful, once you get the hang of it. You can certainly create presets and it seems to remember the last preset you used.
tpytlarz
(Olympus, Mac mini M1, PL6 Elite, Nik4)
4
Thanks, Joanna. I have and used Canon Professional Print and Layout. Maybe I’ll try it again.
Terry
Stenis
(Sten-Åke Sändh (Sony, Win 11, PL 6, CO 16, PM Plus 6, XnView))
5
Can you develop this a little Joanna. What in particular were you unsatisfied with?
I don´t like it either so I´m interested in knowing if we saw the same.
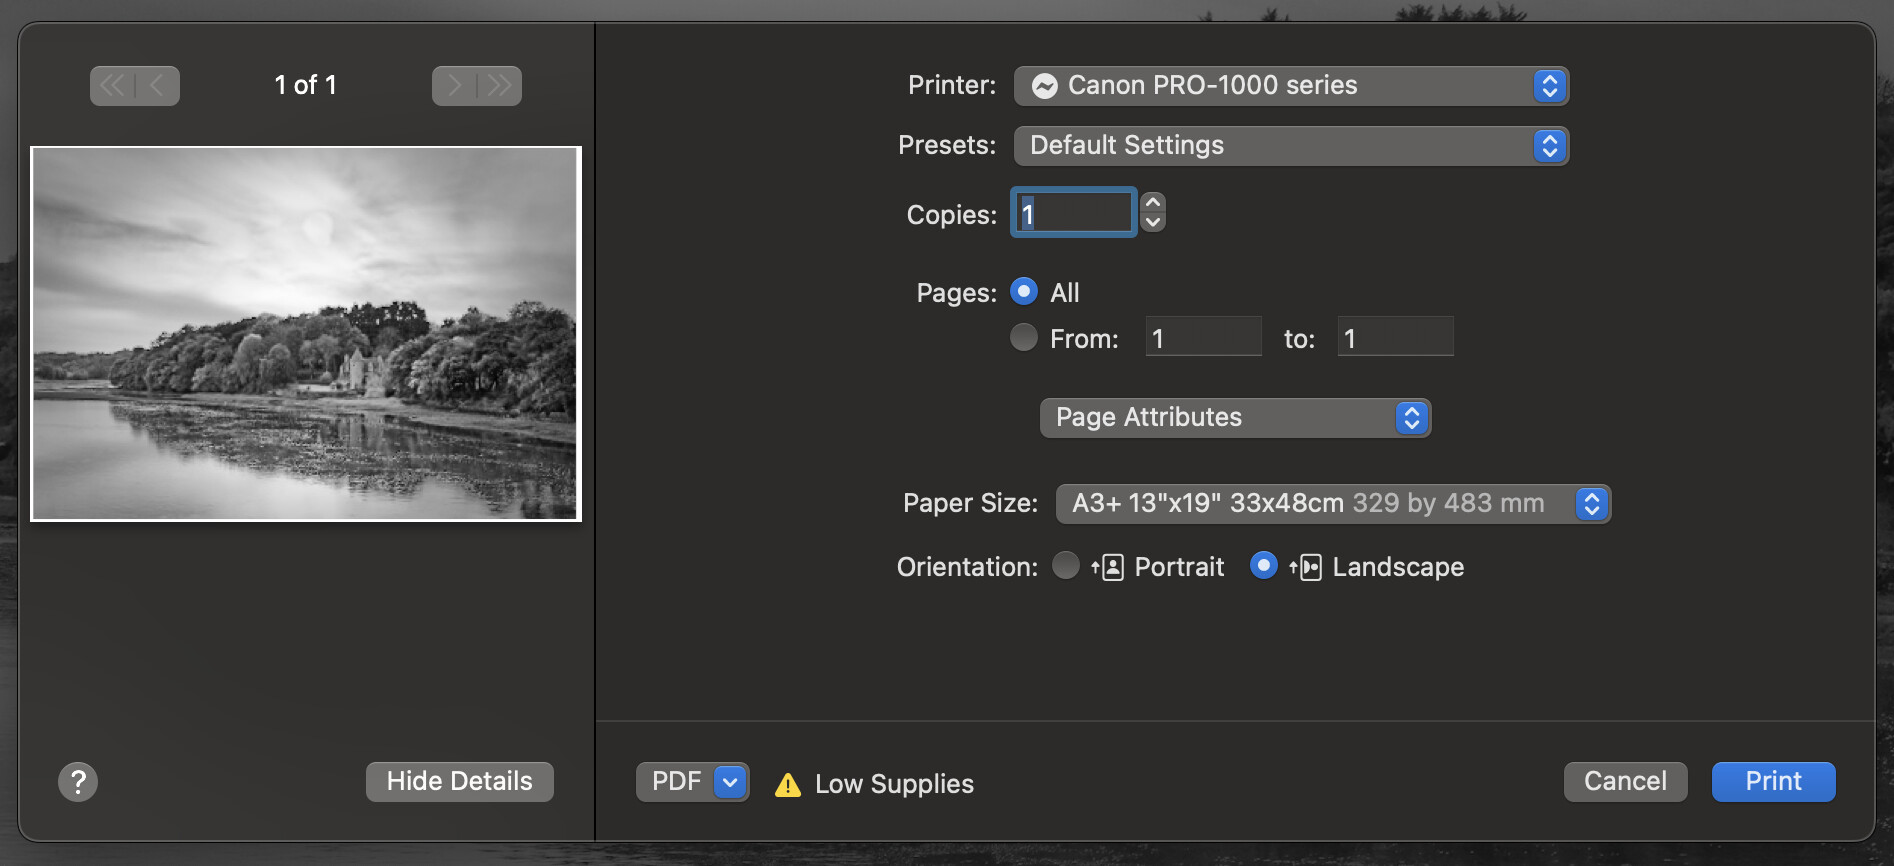
Here is a screenshot of the PL print dialog, where you can see that, although the image size is exactly the same size as the paper, there is an uneven margin in the preview window…
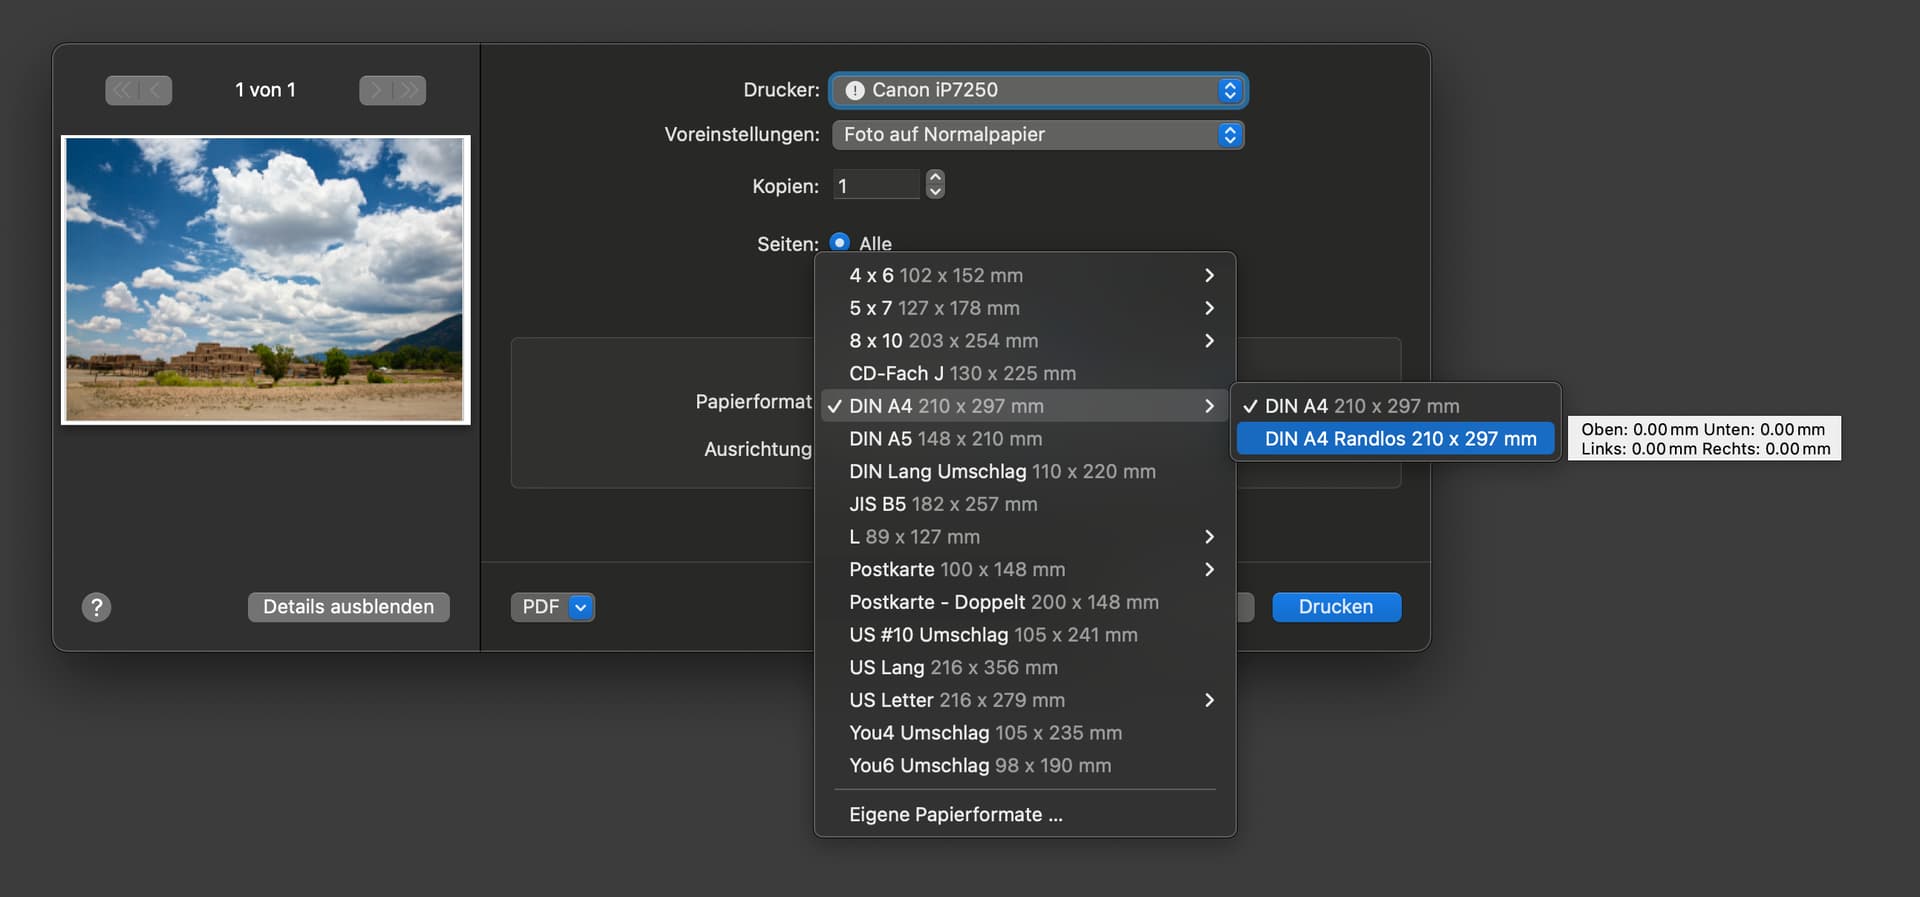
In fact, I either print to a specific white margin, ready for putting behind a matt board, or I print borderless for mounting on foam board. If I choose the borderless paper size in the system dialog, the preview no longer shows the margins but it also doesn’t show the overlap like the Canon Utility does.
The Canon Utility allows me to place image(s) that are smaller than the paper wherever I want, but the dialog used by PL insists on arranging them in “cells”, which make life very difficult as cells are arranged in a grid, can have margins, and the cells can be placed on margins on the paper as well. Too complicated compared to the Canon Utility, which allows freehand placement on a much larger preview.
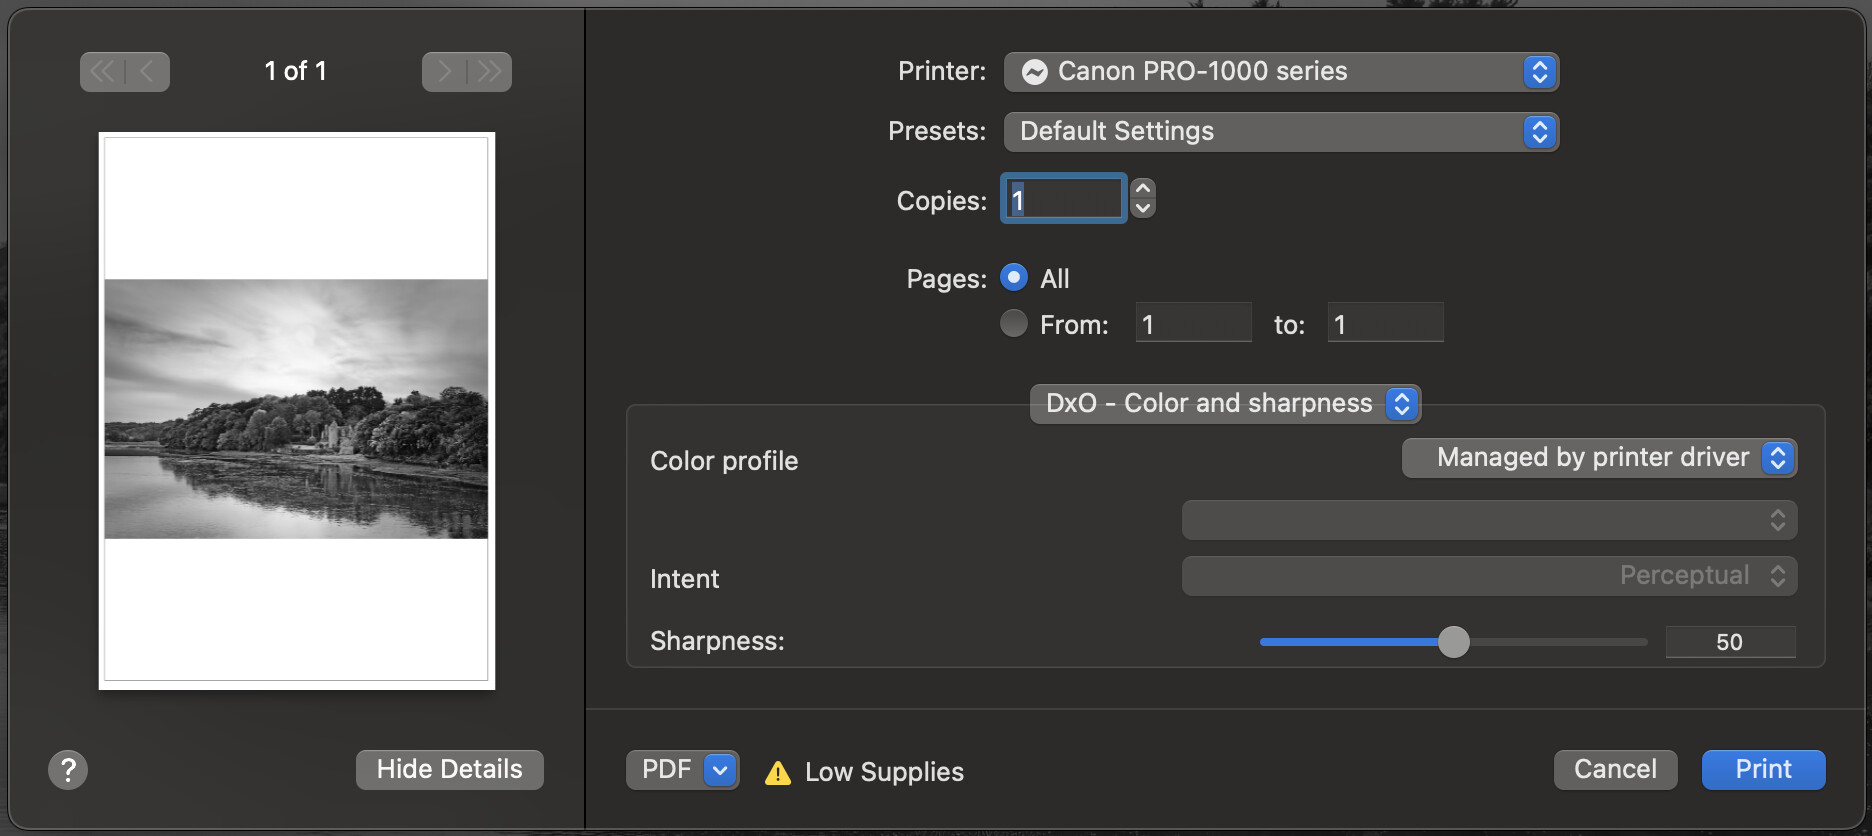
Yes. And the sharpening applied depends on the size. But I would prefer not to print from an output file; I’d rather print from within PhotoLab.
tpytlarz
(Olympus, Mac mini M1, PL6 Elite, Nik4)
10
Bob, can you explain your last sentence? It seems to say you don’t want to print from an output file but rather print from within PL. Are you saying to Export the image to Canon PPL for printing?
I can rotate to fit but it gives me an uneven margin around an image that is precisely sized to fill the paper with no margin
I can only crop to fill but I still haven’t been able to specify the paper size and orientation
I have the option to add a caption but I still can’t get a preview in the right orientation and paper size. Adding a caption changes margin sizes by shifting the image away from the caption but I cannot specify anything other than file name plus either exposure metadata or date.
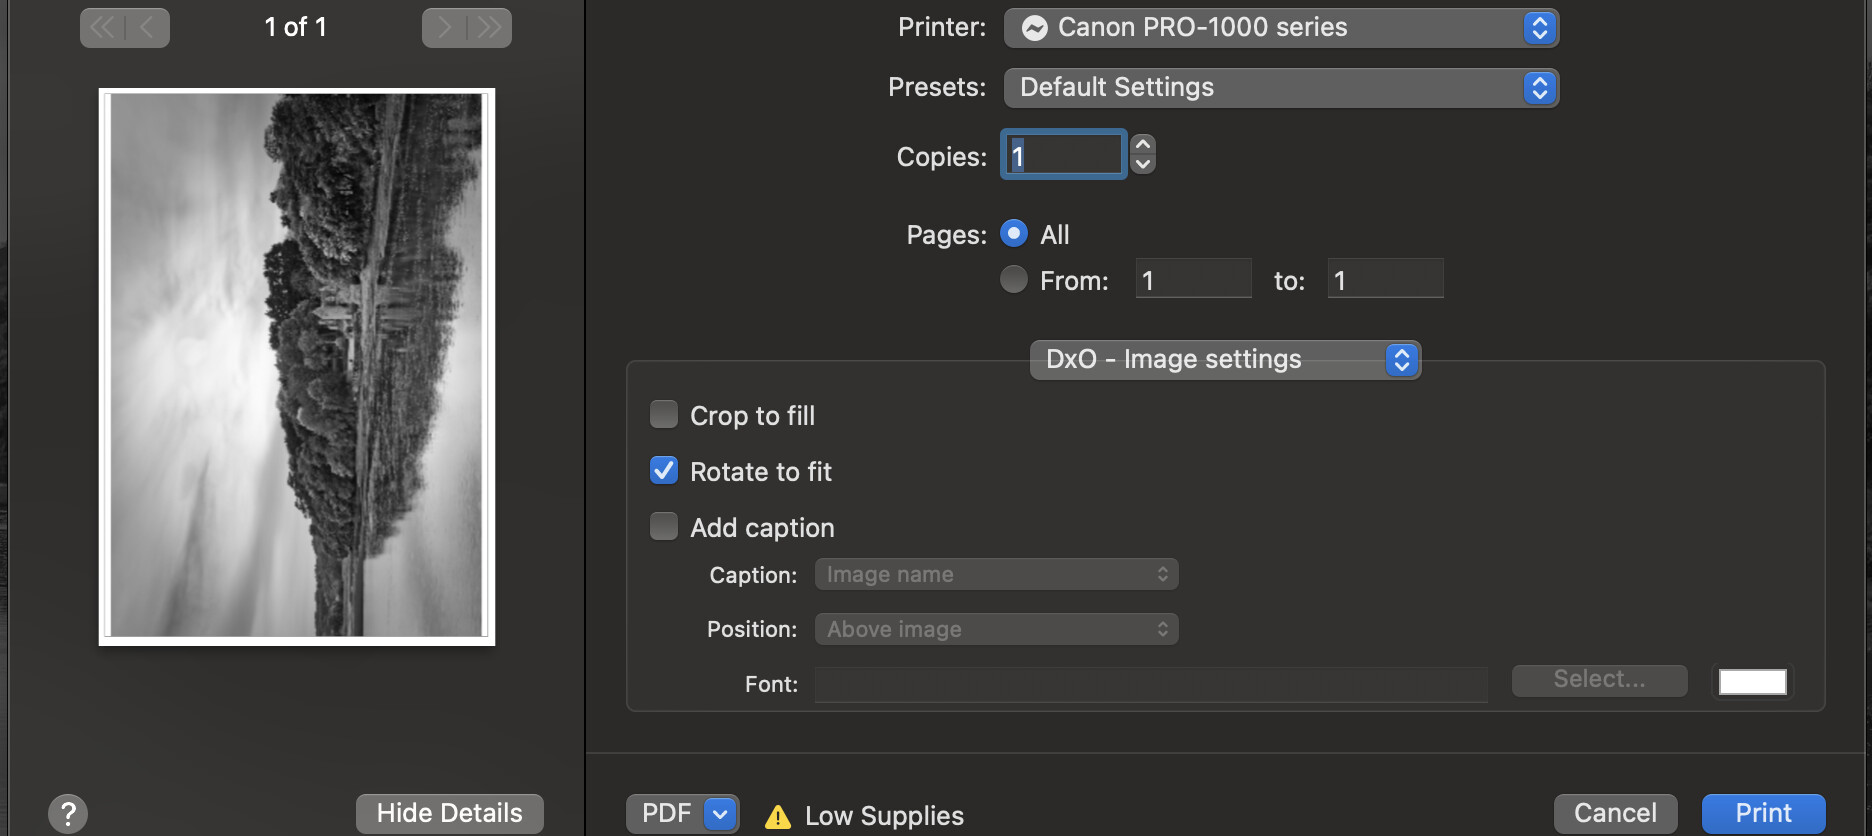
I still can’t set the paper size or orientation and yet I am given the choice of setting “cell” size and and margins. Now, if I look carefully, the margins actually refer to the space around the cell layout, not the margin within a cell.
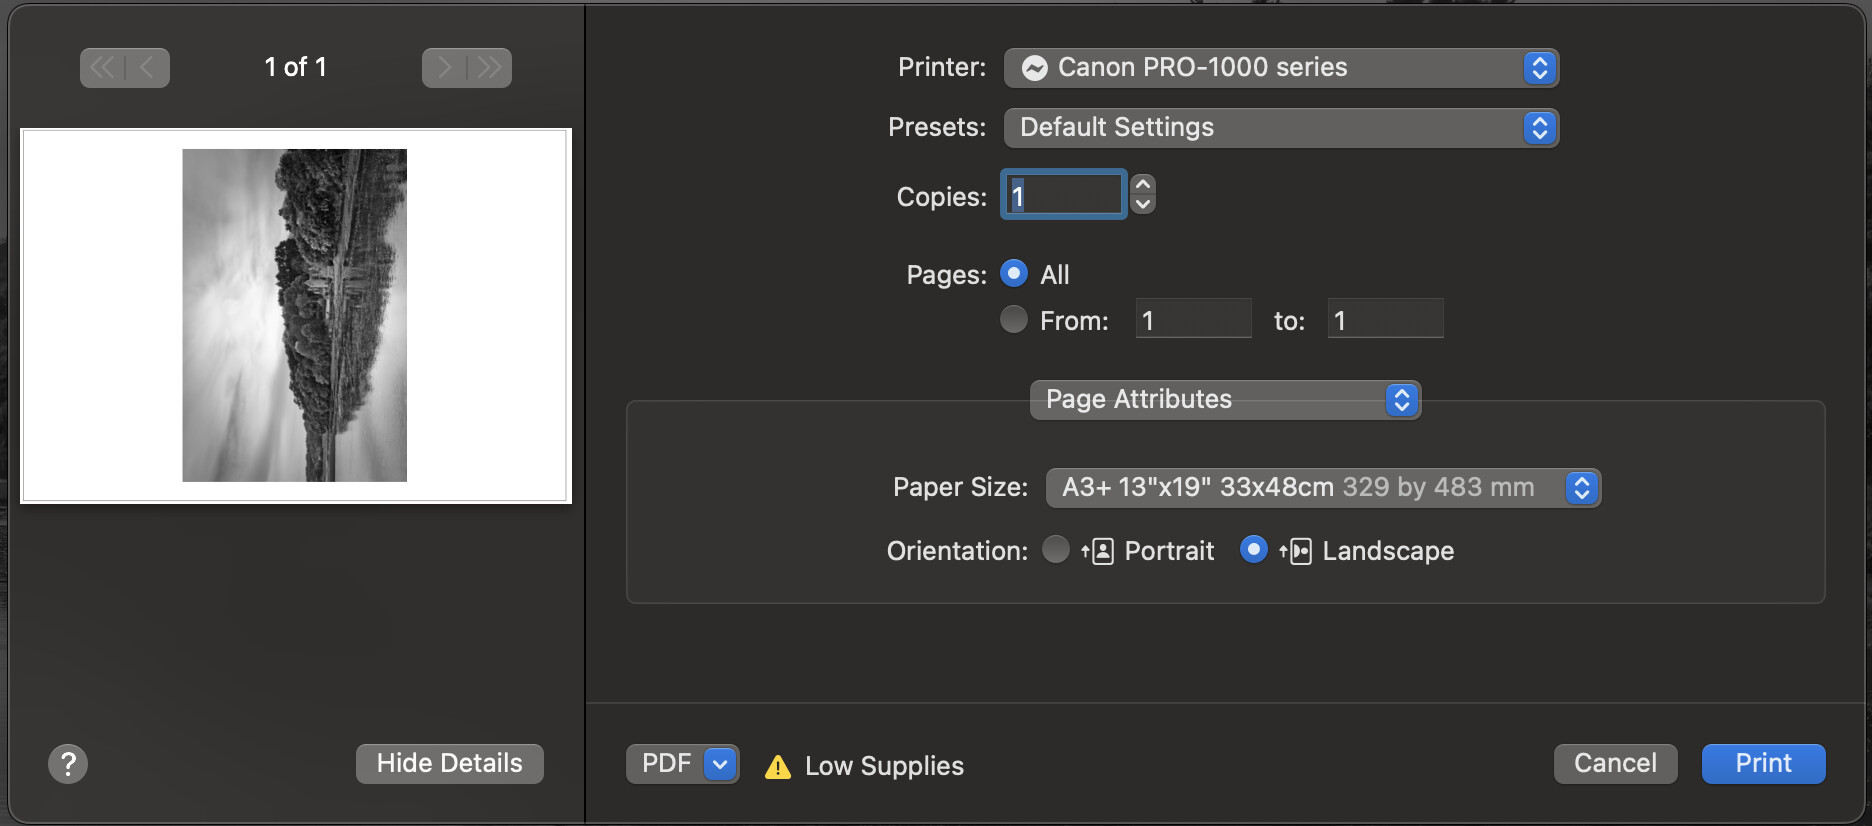
I am trying to print an A3+ sized image and, if I try to specify that size for the single cell, I can’t because that paper size isn’t large enough.
Finally! I can specify the paper size and orientation. Except, if I specify “Landscape”, the preview paper is rotated but so is the image. There is no provision for rotating the image within the paper. Maybe it’s on another tab?
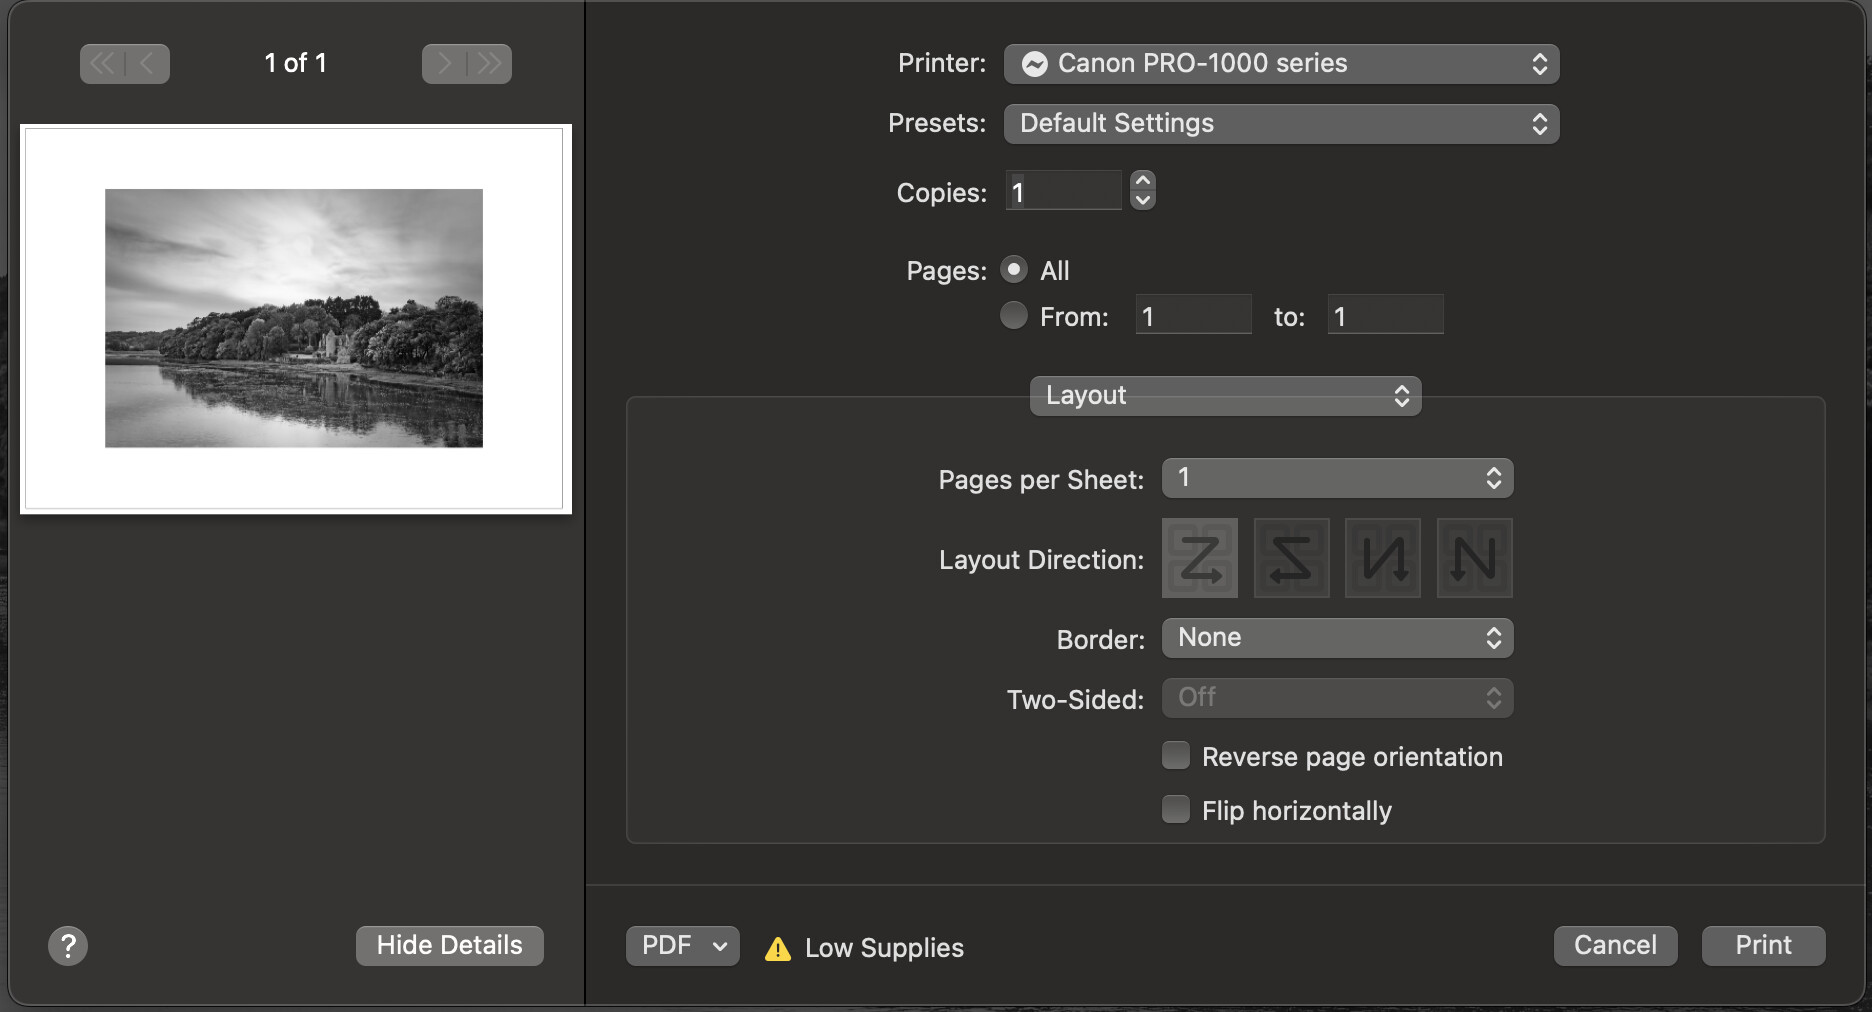
Still no means of rotating the image within the page.
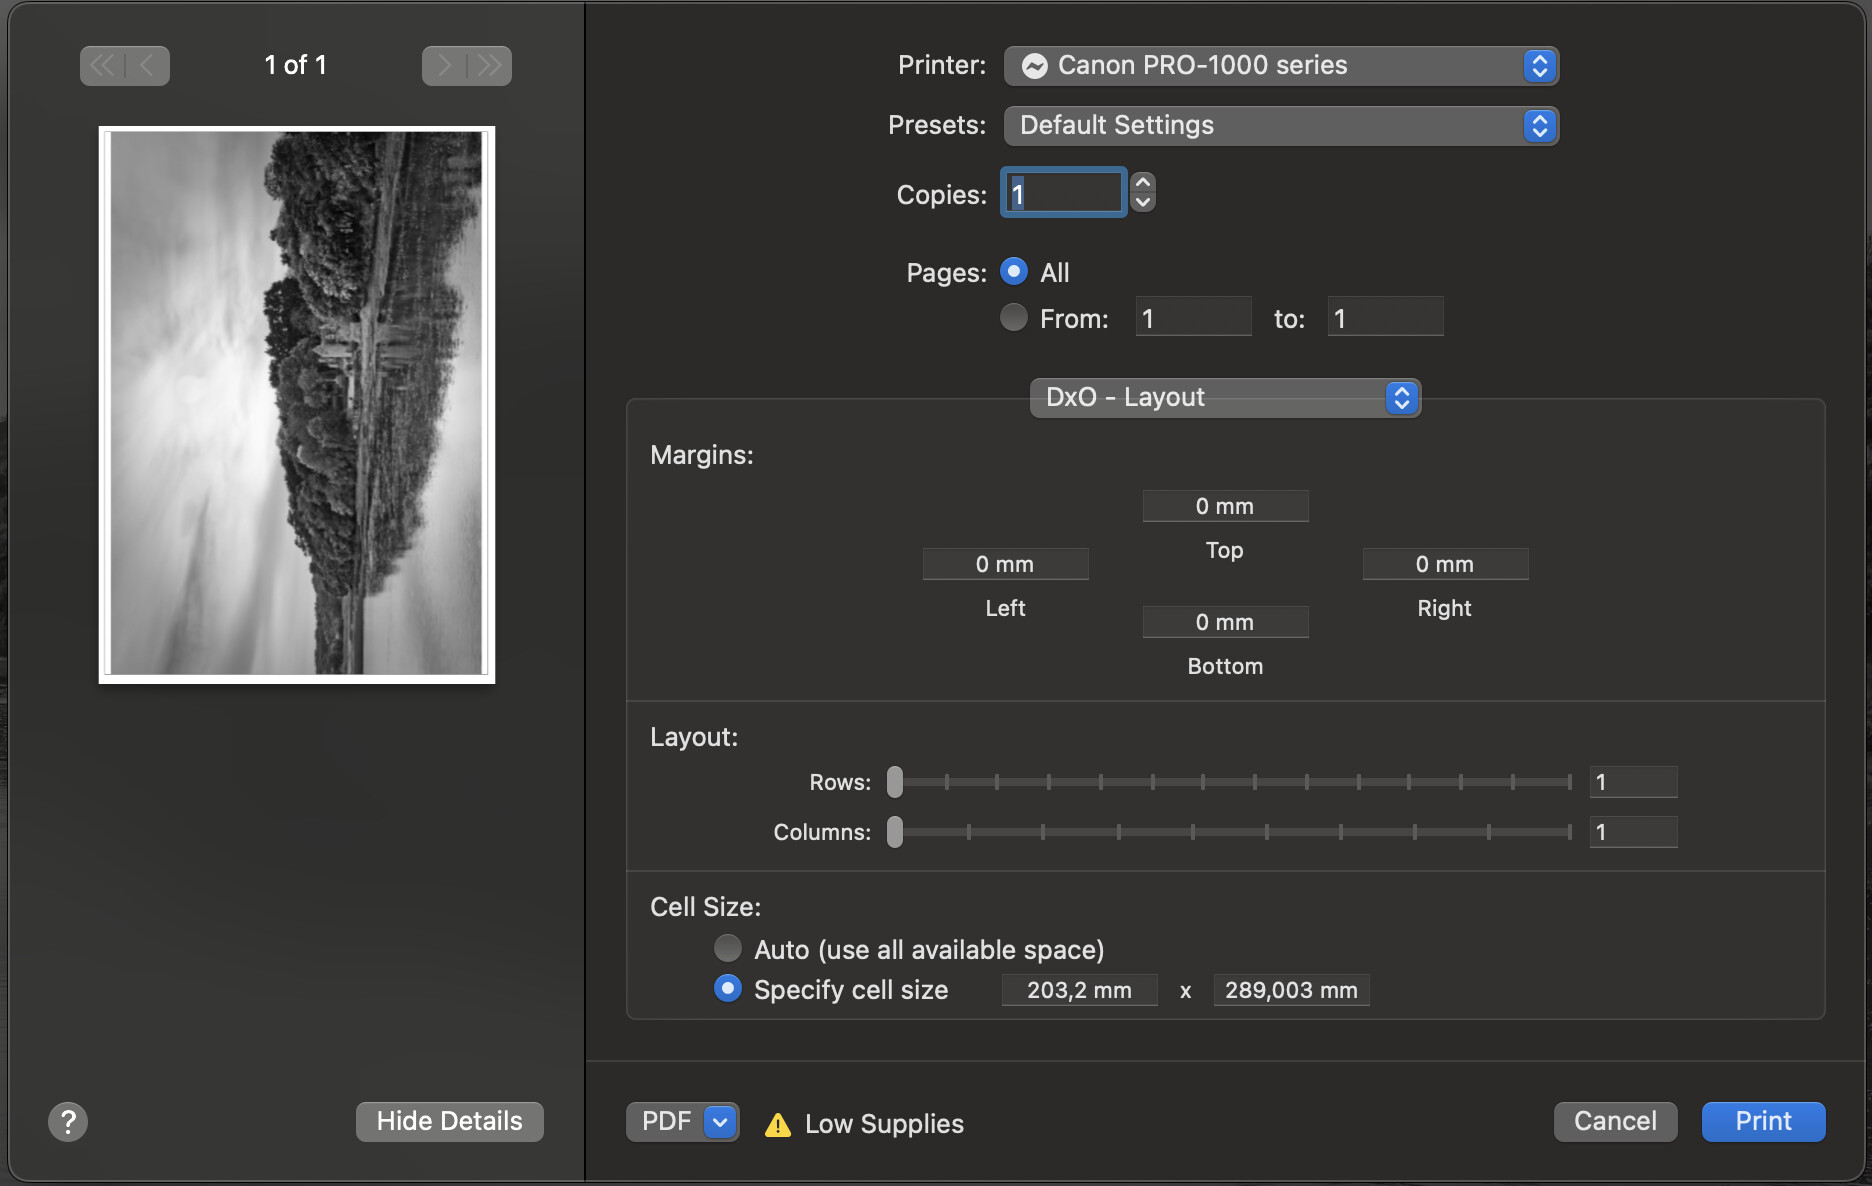
Even though the Border dropdown specifies “None”, there is clearly space around the image. But then, dropping down the selector, I realise that this refers to a printed border line. But, a border around what? The image in the cell? No, it refers to a border drawn around the outside of a cell layout, which can contain multiple cells.
Having experimented with the Border settings, including a multi-cell layout, on returning to the Layout tab, I now notice that the image is now rotated to match the paper orientation, although it has not been resized to fit as it was previously in the DxO - Image settings tab…
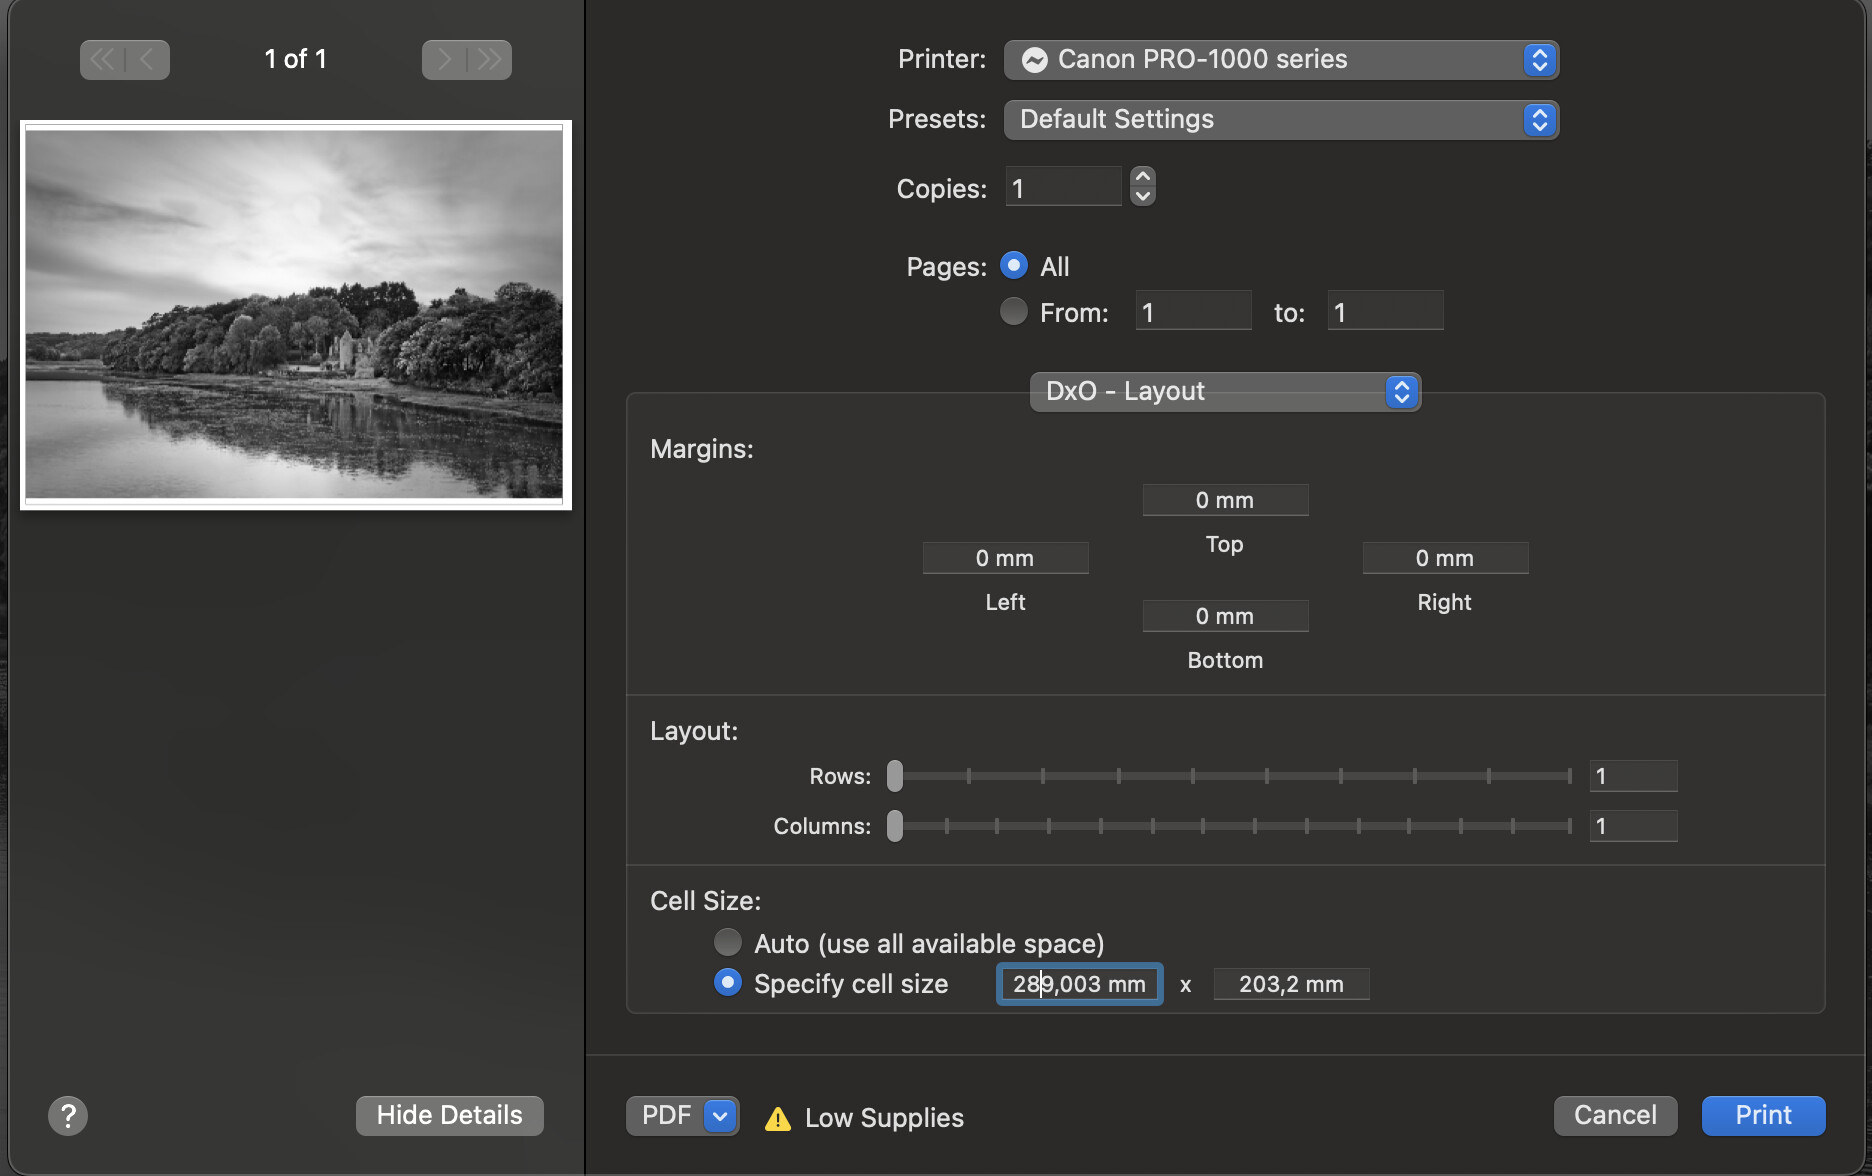
So, I return to the DxO Layout tab, type the A3+ paper size dimensions into the “Specify Cell Size” fields and, after a couple of attempts, the preview now shows a narrow margin but the entered dimensions have not been accepted and remain as they were…
Now I feel like I am starting to go round in circles with no logical progression in the order of the tabs in the dialog and side effects from one tab affecting another.
And I still haven’t set the paper type and the B&W printing mode. It is only when I get down to the Quality and Media tab that I find how to do that.
Finally, throughout all these machinations, I still can’t get the image to print at the same size as the paper with no margins - something I can do with the Canon Utility.
So, now do you see why I won’t touch the PL print dialog with the proverbial ten foot barge pole?
If the image is smaller than I want to print it, I export as a TIFF, at the original size, with a resolution of 240ppi, which is ideal for normal print viewing. I then pass this TIFF through Topaz Photo AI, which allows me to accurately resize it and do any output sharpening in a decent sized preview window. This creates the resized and sharpened TIFF, which I will then hand off to the Canon utility.
If the image is larger than the desired print size, I export to TIFF, at the desired size, with a resolution of 240ppi. Usually, the sharpness is good but, if I want, I can pass that through Topaz Photo AI at the same size to fine tune it.
Either way, I now have an image that has been “tuned” at the desired output size, ready for printing.
Since apps like Preview and ColorSync utility still use the system print dialog, with its pitifully small preview, I then open the final TIFF in the Canon Utility, which gives me a far more accurate idea of what the finished print is going to look like, zooming in if necessary to verify fine detail.
All in all, I guess the biggest advantage to using something like a separate print layout utility is the ability to see a preview larger than a postage stamp.
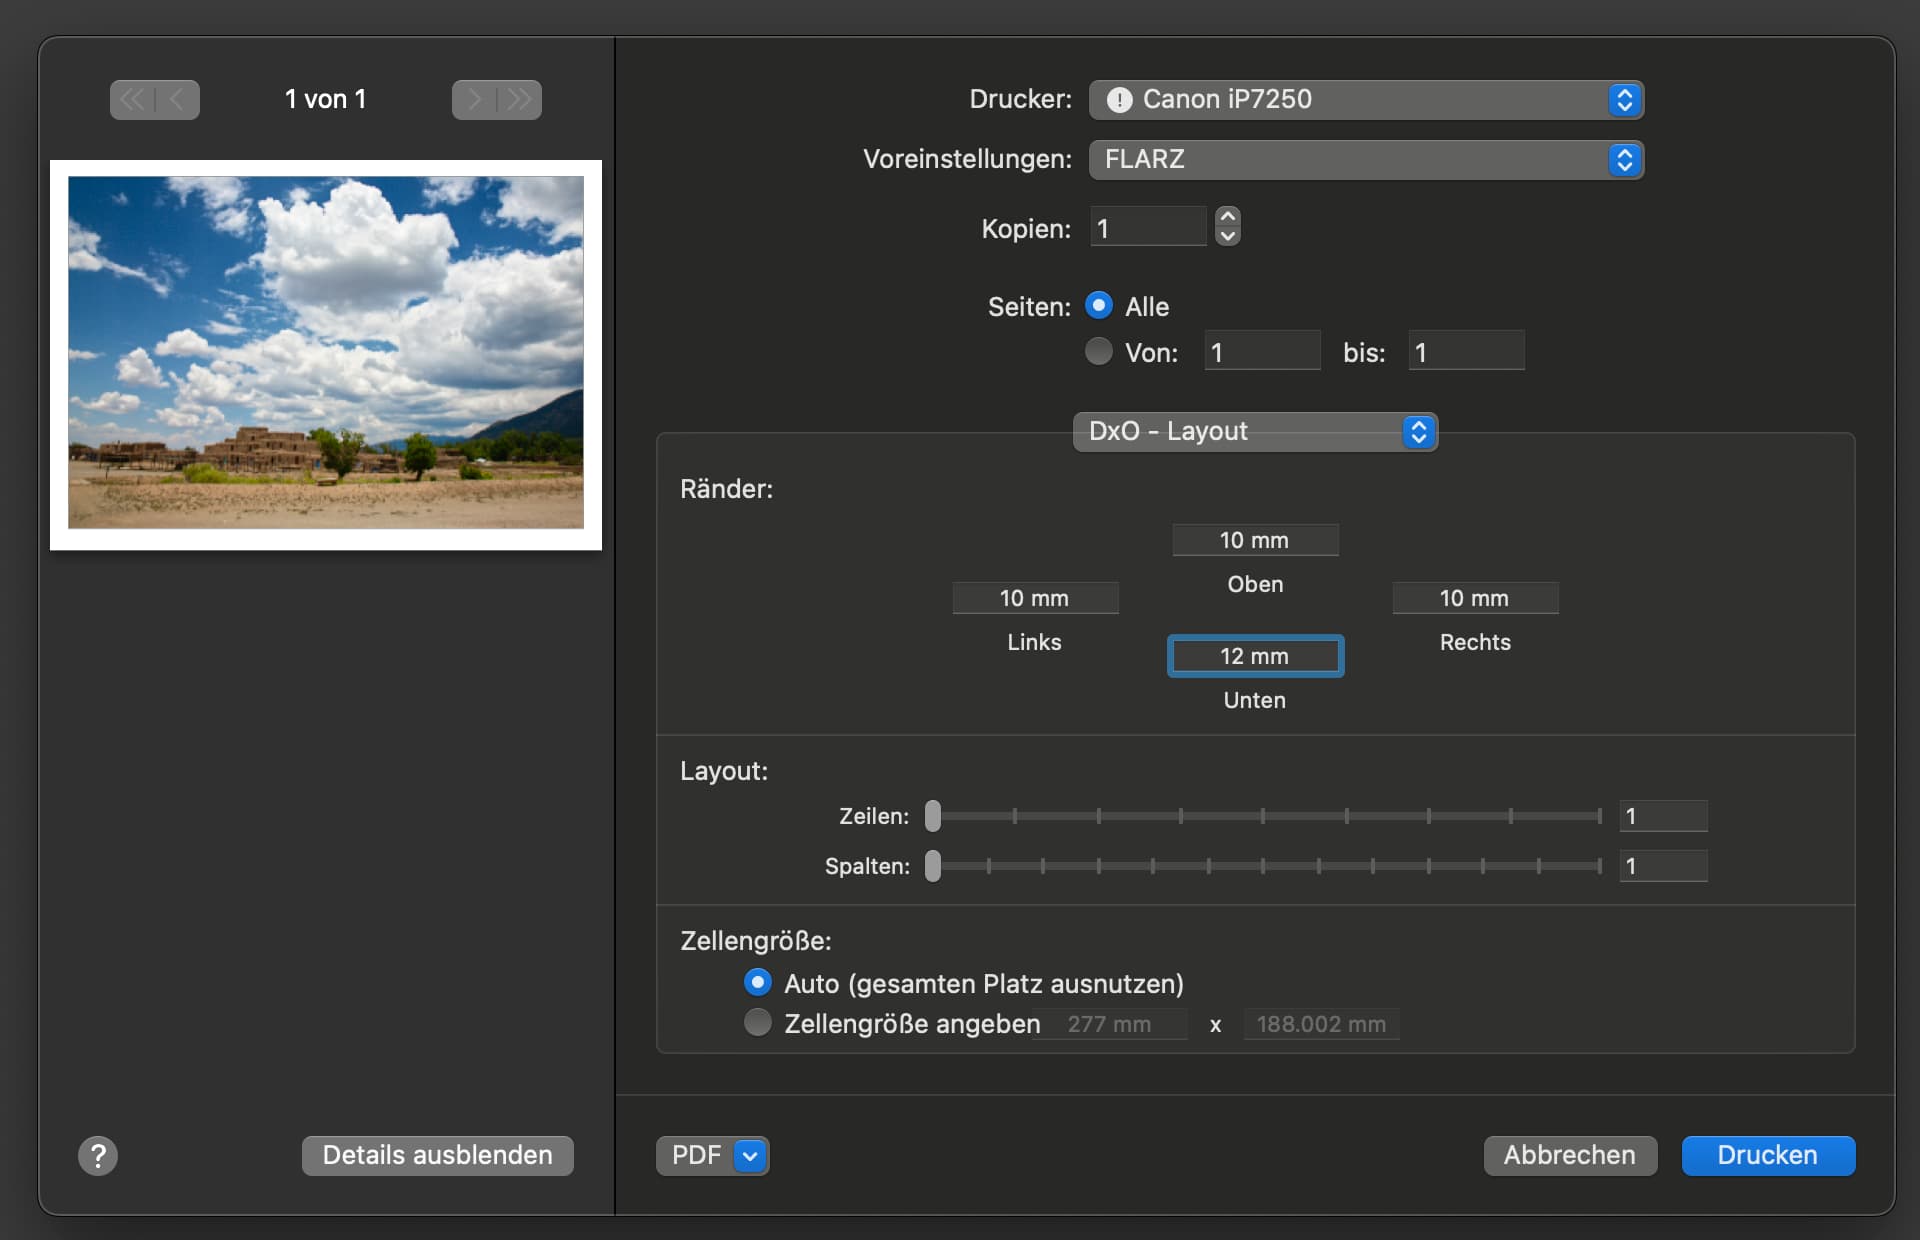
For the selected 10mm margins (the bottom margin is wider for better optical balance), I crop the image to 277x188 for A4 (or paper width minus 20 x paper hight minus 22)
The sequence of the steps is a bit quirky, but once you have set things up, you can save the layout.
(I’ve called it “FLARZ”, which is the name I use for temporary things that I’ll delete later.)
Not saving the layout means that you’ll have to go through all the steps again.
Other than that, the preview is small (45mm x 60mm on my screen) …and my current printer is for documents rather than Photos. Nevertheless, it can print photos in decent quality, but I have anything bigger than postcard size mostly printed by a printing service. Needless to say that I print most things from Lightroom and only occasionally print from DPL.
Well, you could always put in a feature request but there is no telling how long you would have to wait. Sorry, Lightroom has a complete layout module, PL only has a standard ptint dialog.
Yes. I hold out little hope. I’m not sure of what DxO plans for PhotoLab as its place in the photo workflow. It might be perfectly happy as a raw converter/editor between a DAM app and a printing app.
1 Like
tpytlarz
(Olympus, Mac mini M1, PL6 Elite, Nik4)
17
This is the primary reason I gave up using Canon Pro Print and Layout. But seeing the PL6 workflow and its limitations, I will be returning to Canon utility regardless of having to create an output file. Thanks for your input.
All personal taste, of course. I value the integration, consistency, and lack of drama by having one application and one developer. Lightroom Classic, as much as I don’t enjoy using it, offers a DAM that does more than I need (I don’t find the need to search for all the different possible “orange” keywords ), excellent raw conversion/editing, and an excellent print module.
I can totally understand that but, personally, I don’t like Adobe’s subscription model, where I never own the software and can lose access to my edited work if I stop paying.
My DAM needs are basic but PL’s search mechanism is, shall we say, minimal. I can get more flexibility and power using Finder and the Spotlight engine.
All I have to do to move from my DAM to editing in PL is double-click on a thumbnail.
PL’s printing facilities are totally inadequate for my needs.
Which just leaves me with using PL for RAW image editing, for which it is, in my opinion, best in class, especially given the beauty of its DeepPRIME noise reduction. It may miss some of the AI stuff from Lightroom but, so far, it more than suits my needs. And, I get to keep on editing my images, even if I choose not to upgrade every year.
Don’t forget that, without something like Topaz Photo AI, I would also be waiting a long time for DxO to introduce the stupendous image enlargement that first saw the light of day as Genuine Fractals and has now evolved into part of the Gigapixel part of the Topaz package. To say nothing of the excellent sharpening tool it brings that even helps remove JPEG compression artefacts.
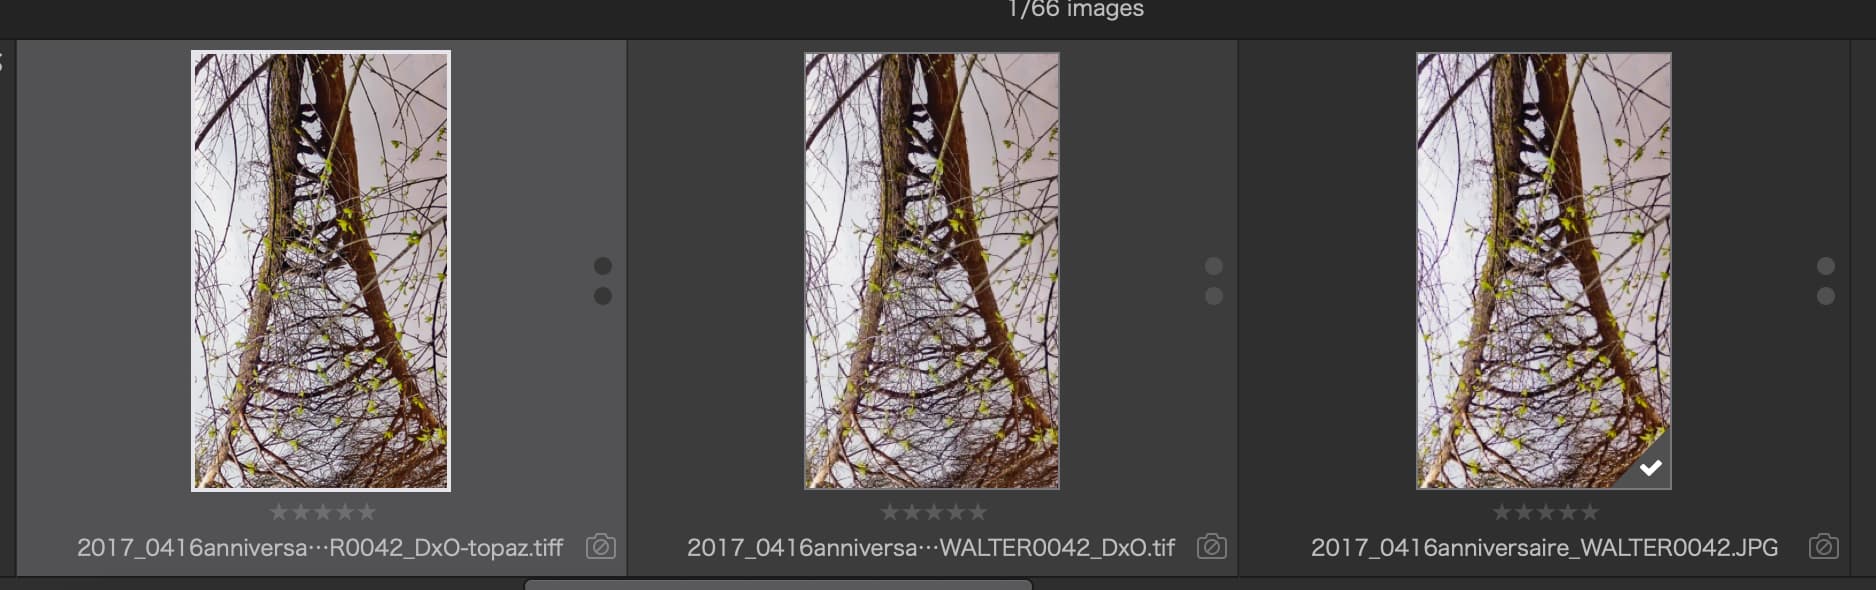
I just had a client who sent me a JPEG file for printing. Unfortunately, it had already been cropped down to 1350 x 2606 px - far too small for the A3+ size print he wanted out of it.
Fortunately, he still had the uncropped original at 3456 x 4608 px - adequate if it hadn’t been cropped, but requiring a print height of 4564 px from the 2606 px cropped height.
I started by using PL to adjust the cropped part of the full image to perfection and then exported as a TIFF file with the 2606 px height. In theory, I could have resized the JPEG on export, or even on printing direct, but I wouldn’t have had the same degree of control over the quality of the enlargement process that Topaz gives.
That gave me a beautiful full sized TIFF file with no artefacts that was totally ready to print, with the fully assurance that the print driver wasn’t going to give me interpolation or other artefacts. Don’t forget that the most expensive part of printing is the paper, at around €1-2 per sheet and inks, which cost over €500 for a set of 12 cartridges. I would rather spend time and effort getting it right than waste money on paper and ink for. prints that aren’t quite right.
The editing took me half an hour and then the client came round and I printed and mounted it while he waited.
Yes, you might have to generate an intermediate TIFF file using PL and Topaz but you would still have to move to the print module in Lightroom, for printing, which takes as much time as using a separate layout manager.
I end up with three files (Topaz output, PL export and original…