TLDR; I have turned on DeepPRIME and created a preset with it, that is my default preset, but my images are only denoised with “high quality” denoiser. How can I include it?
Hello, I am currently testing out DXO Photolab (again) and as my Adobe subscription is running out and Capture One still does not have denoising, I am considering switching, as the images look soo much sharper with lens sharpness correction in DXO PL and the denoiser is really good.
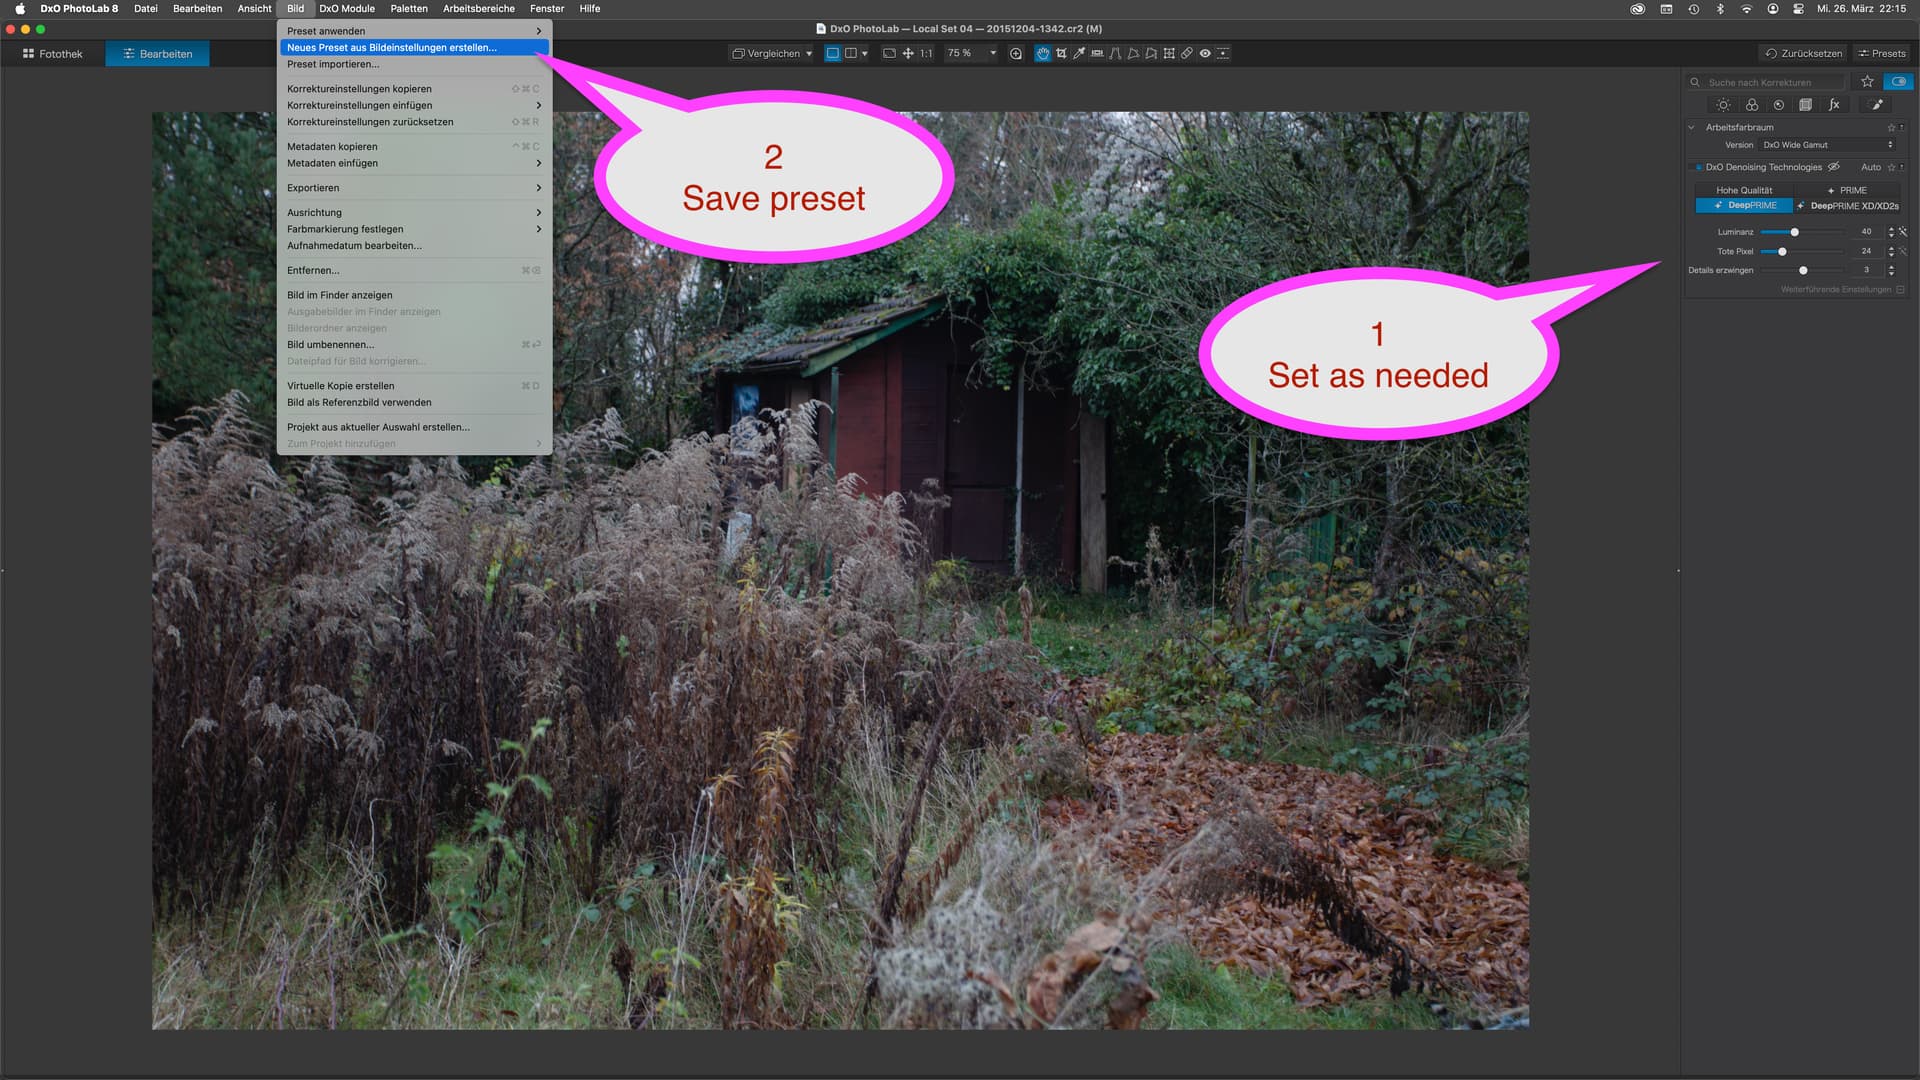
So, it annoys me to turn on the denoiser and smart lighting every time I edit a new image. This is why I created a preset including these two settings. However, every time I open a new image, when I navigate to the Denoising panel, it is set to High quality.
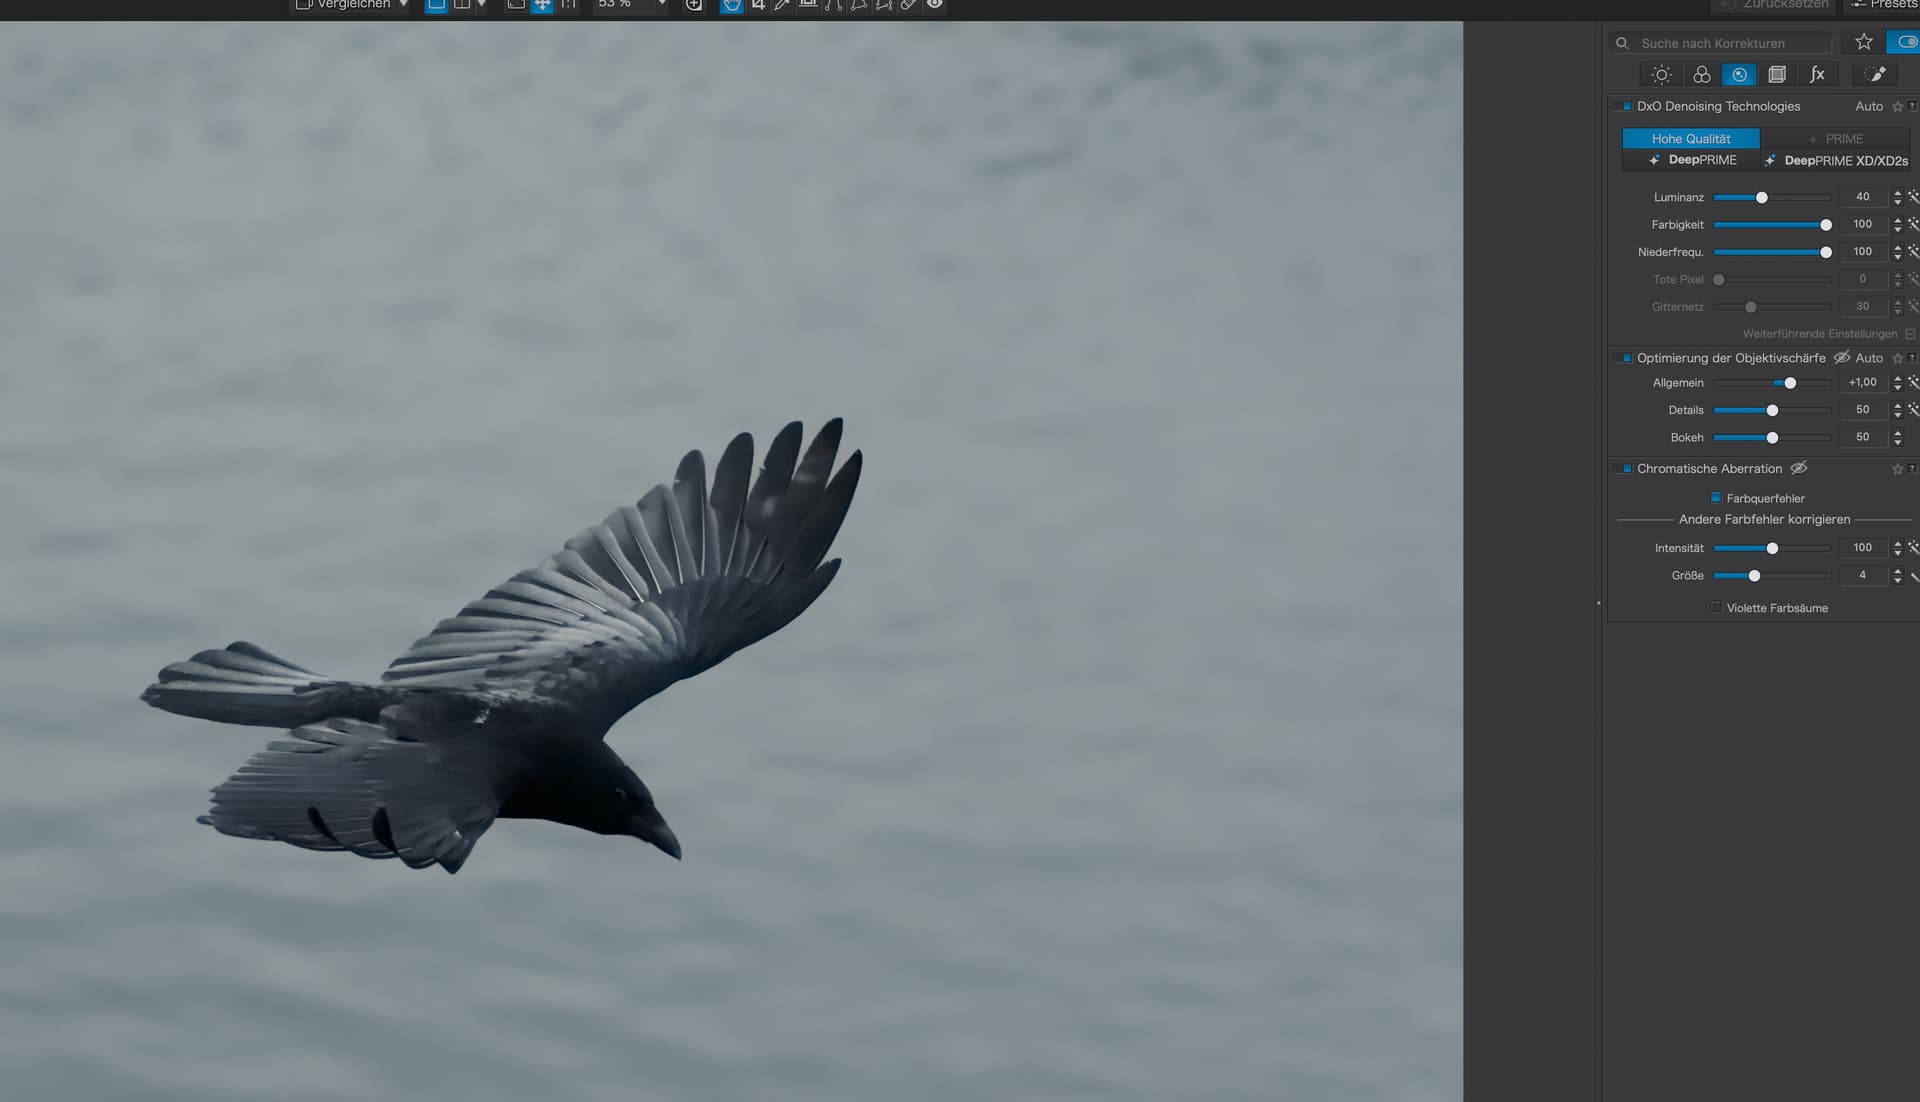
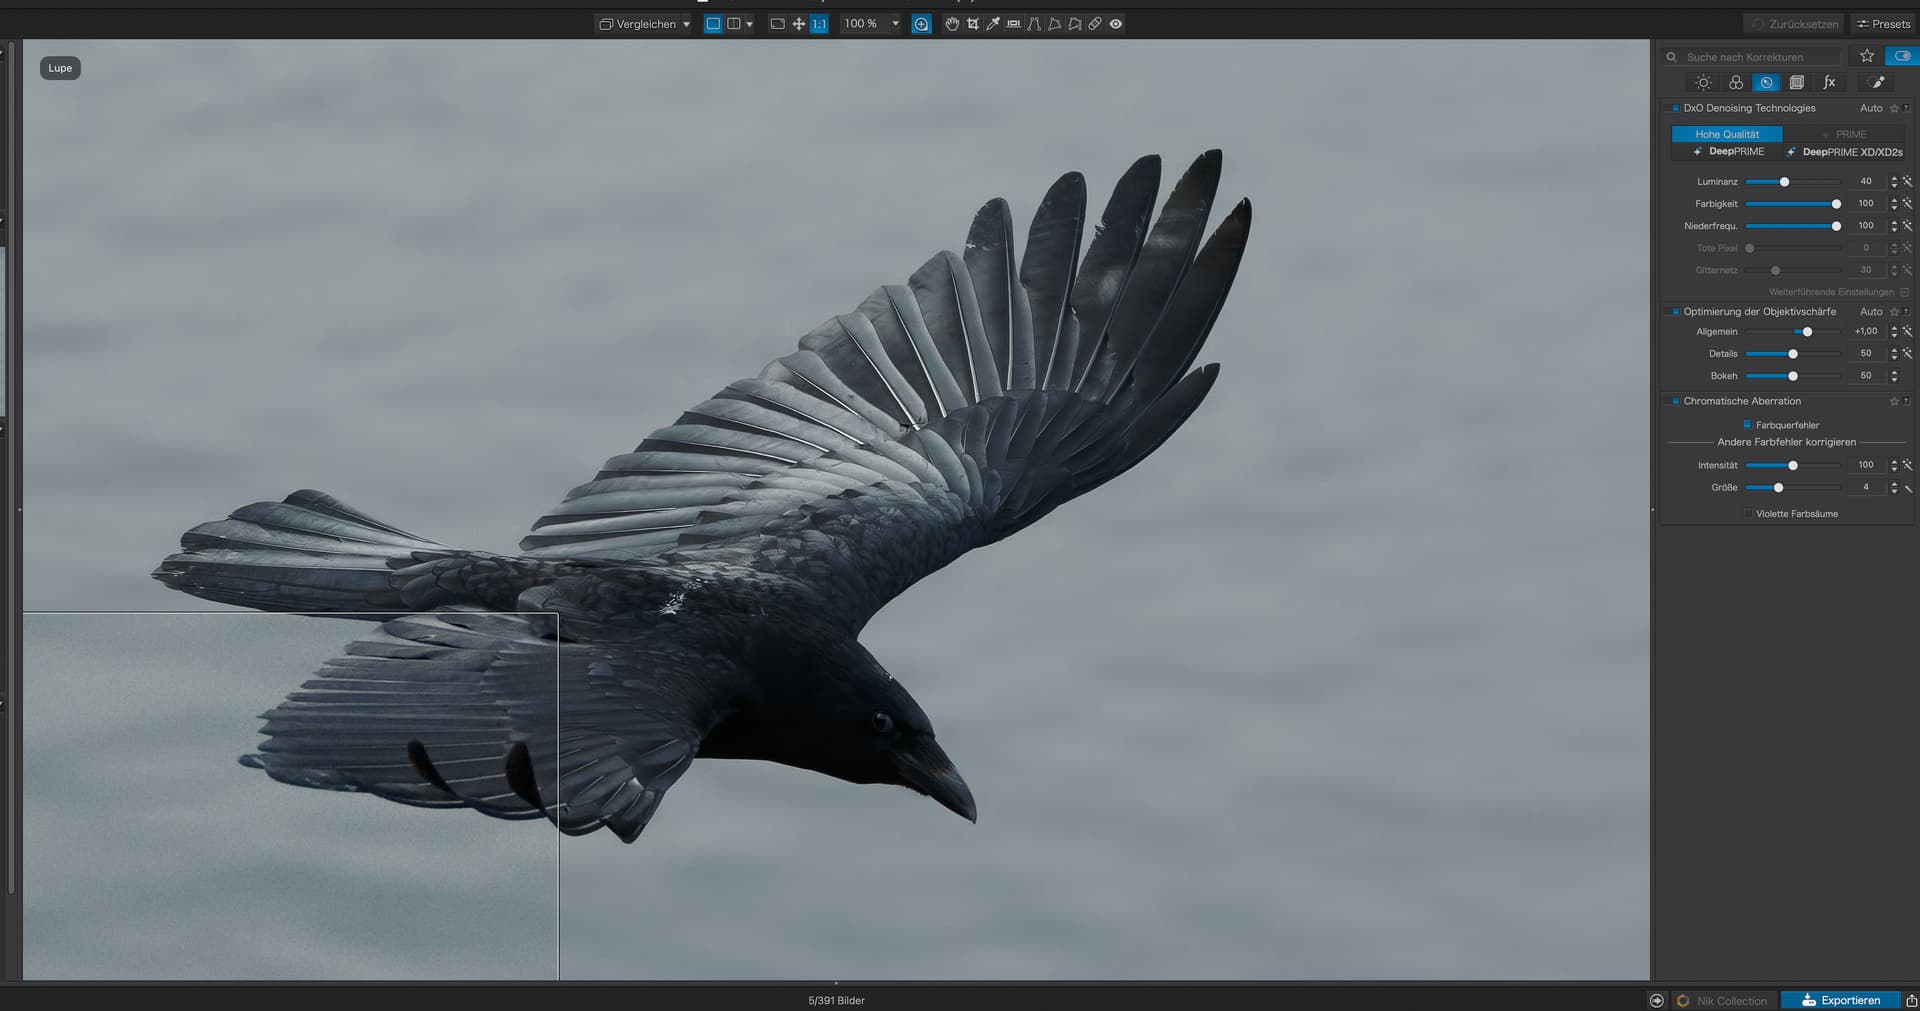
What is also weird: the image looks really crisp, possibly denoised already. If I enable the magnifier, the part looks worse! When I then enable DeepPRIME, it switches and now the magnified part looks better but the rest of the image worse.
If this is unrelated, I will open another post for the second one.
Can anyone tell me if this is intentional or how I can include it in the preset? Atm I do mostly bird photography and DeepPRIME won’t hurt those images ;).
Just tested with a preset made from “No Correction” and “DeepPRIME” and it worked as expected with DPL 8.3 on macOS 14.7.4. Nevertheless, differences are hard to see depending on zoom settings and overall quality of noise and detail in an image.
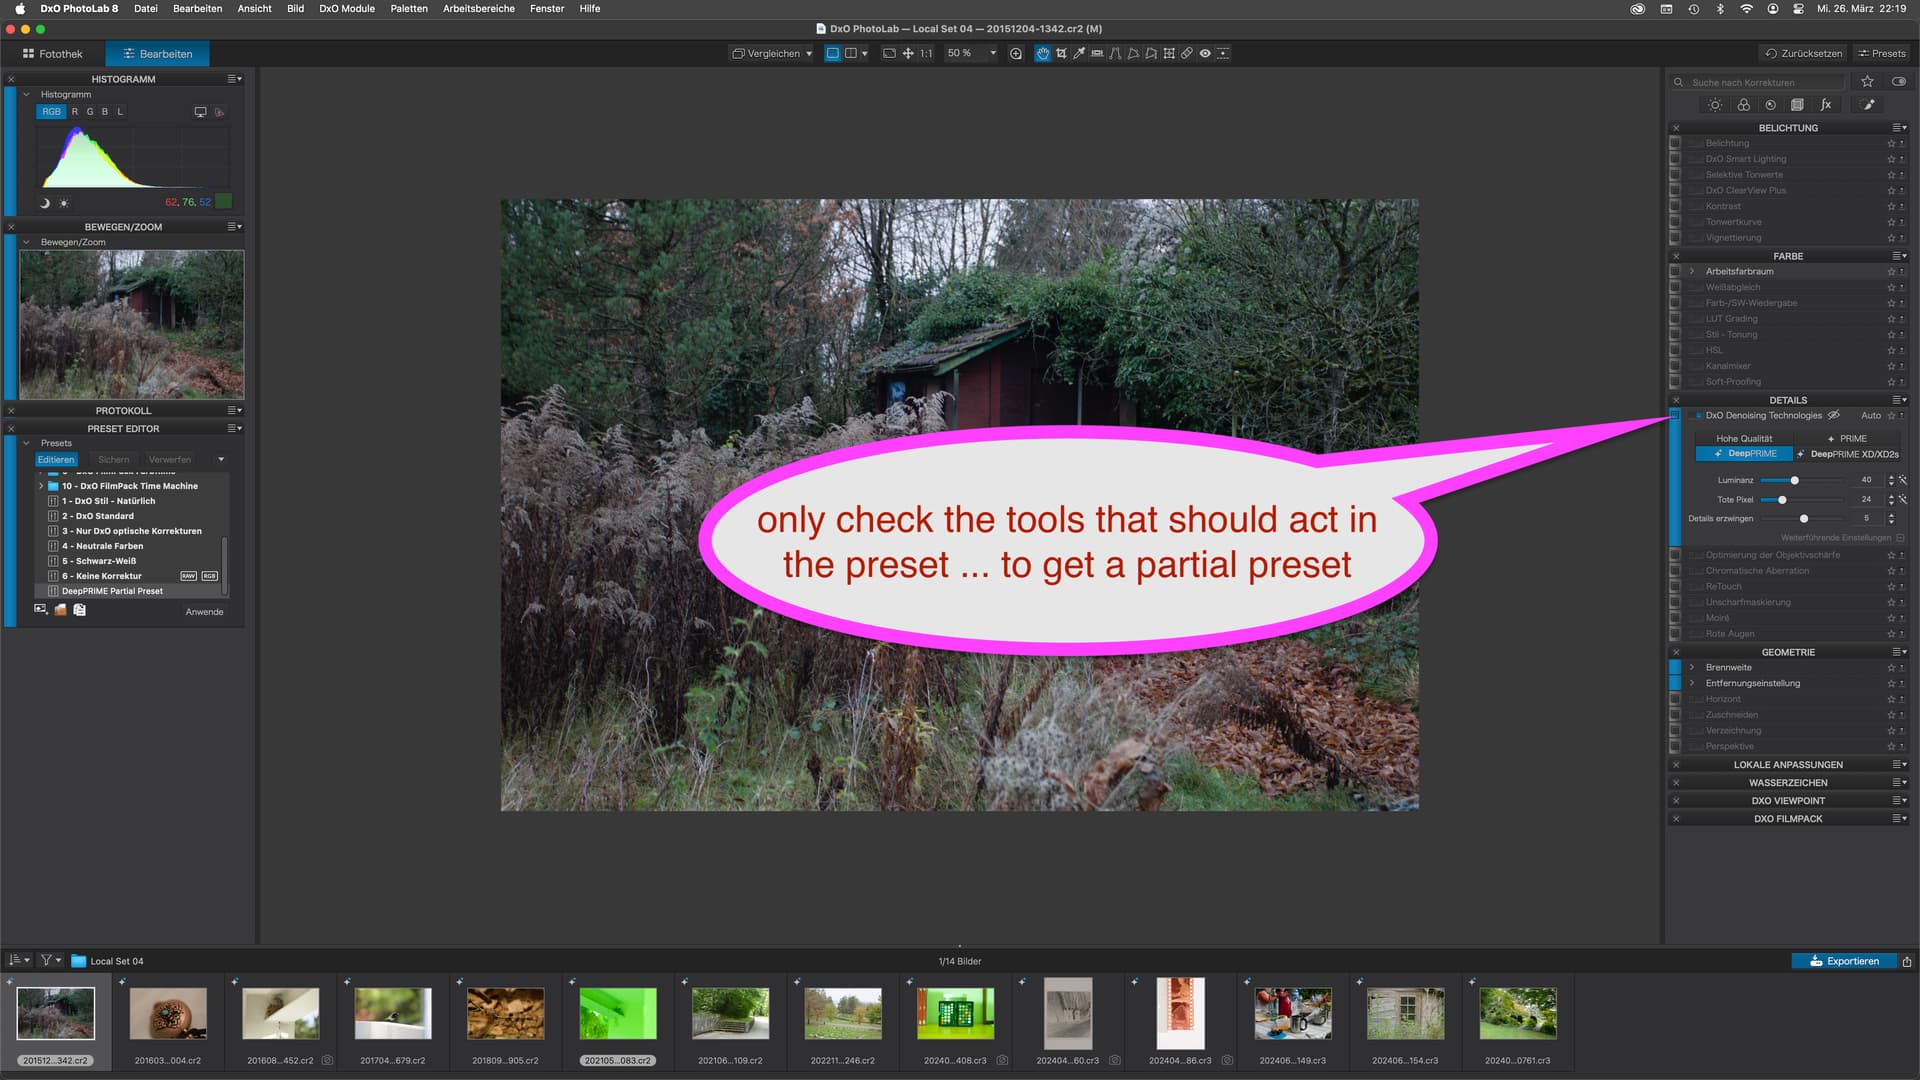
Sometimes, removing noise causes an impression of reduced sharpness which might contribute to the weirdness. Whether the preset works or not can be checked, by e.g. switching off unselected tools with the switch (hlighted in the capture below)
Hi @platypus
The problem is that it shows the wrong denoiser on my preset. With yours it works, after applying it is using the DeepPRIME and there is no CA correction.
but if I save a preset with DPXD and apply it to another image, it is not used.
We see that PRIME denoise is grayed out.
We’re missing one piece of information, Is your raw file an X-Trans?
Only DeepPRIME XD is compatible.
There would be a bug that doesn’t register this compatibility in your preset.
Which PhotoLab release do you use?
Also, if you create a new preset and make it the default preset for images, it won’t be applied automatically to images in a folder that’s already been read by PhotoLab. You will need to rename the folder (or delete the database, which I don’t recommend unless you are certain that you don’t need the database).
Yes, this is for Fuji RAW files. But I am not selecting PRIME. I created the preset on a Fuji file, and I chose DeepPRIMEXD.
I just tried on my Canon Raw files and it is using my preset and applying DeepPrimeXD(2s), unlike on Fuji.
It makes sense it is not applying it to already loaded images, but when applying the preset, it is still showing the wrong denoiser.
(But using it for the whole image). I am pretty certain now, that this is a bug simply in what is shown in the dialogue.
So basically after trying a bit more:
The preset is applied correctly on Canon raw files, not on Fuji files, where it is not shown but still works.
The preview of DeepPRIMEXD is shown for the whole image, even though usually that is not the case.
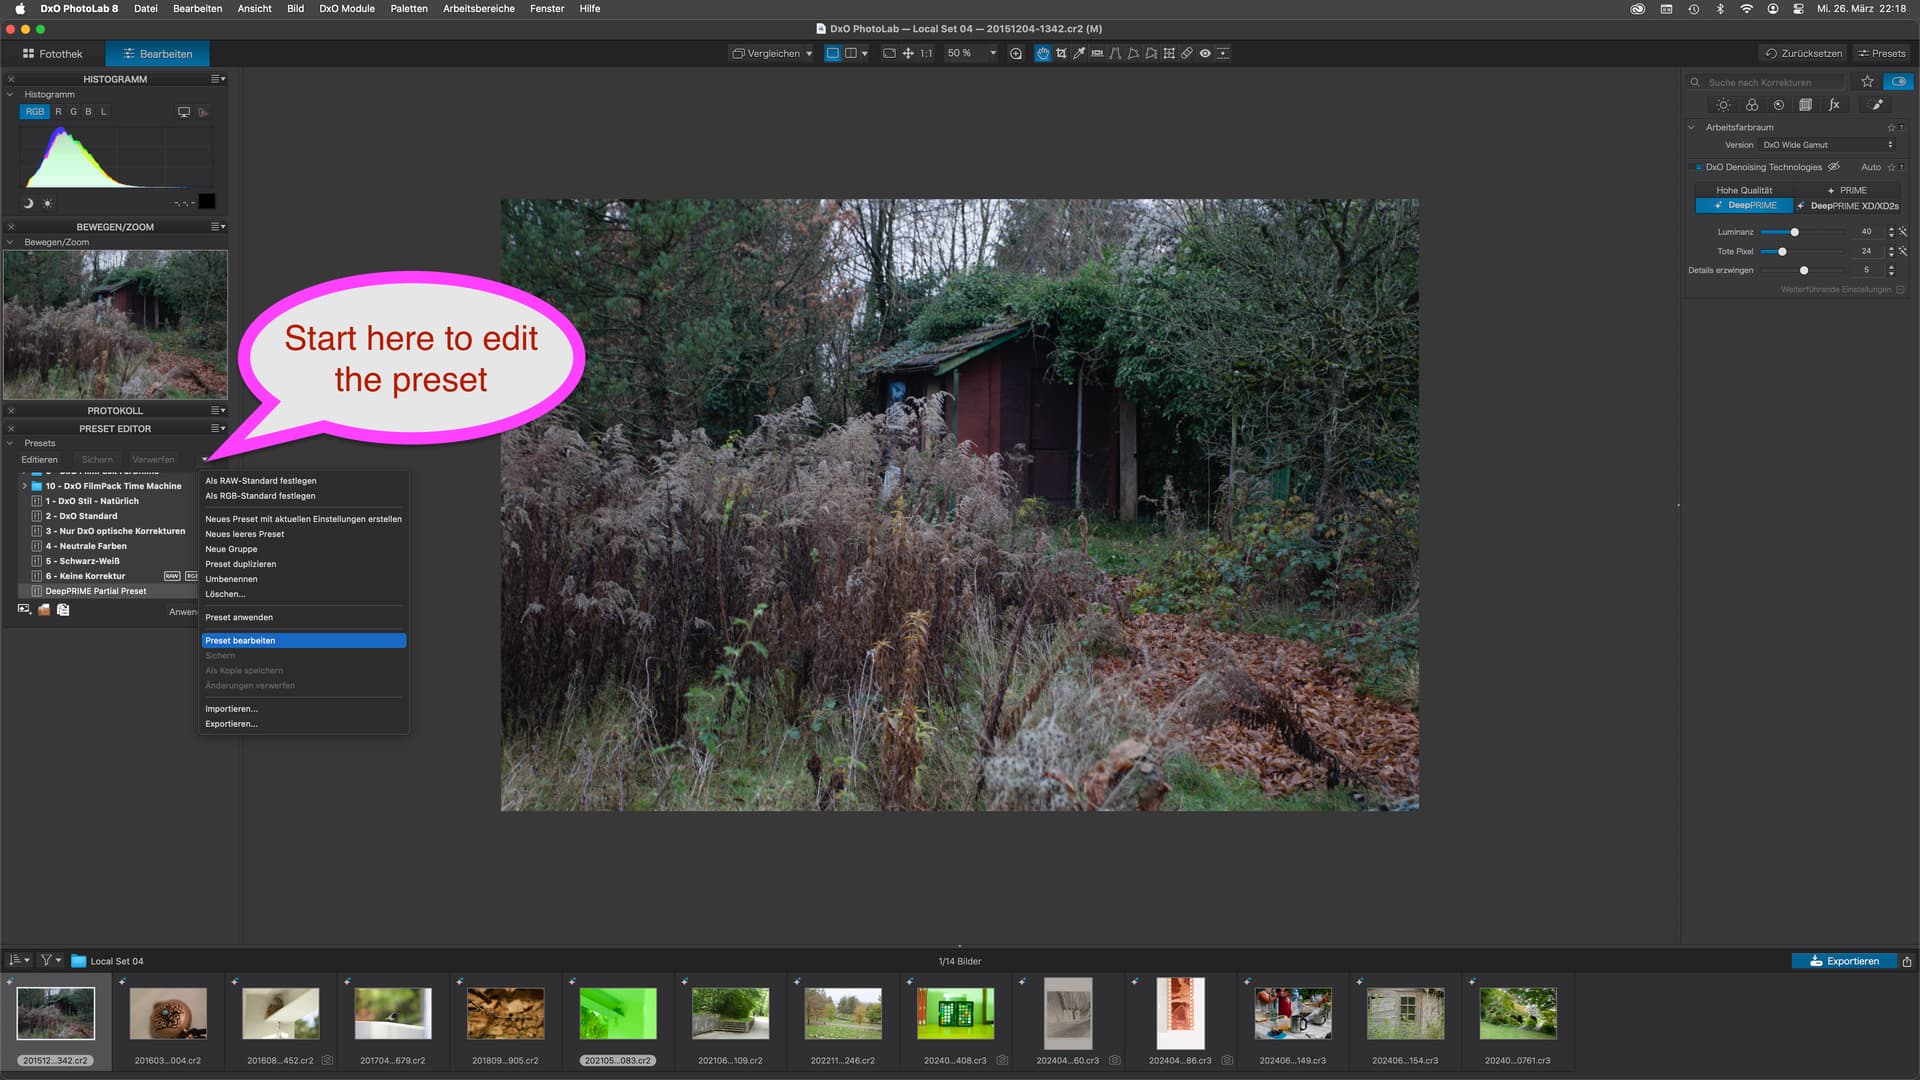
No, but thank you for showing I can edit it. I have checked in the mean time and I know it’s not my fault. I simply checked a few options and saved it, and I see that is how it is inteded to work.
I had to wait 23 hours to type this response Oh my god…
Thanks for the responses!
I can confirm the supposed ‘bug’ of Panoramic1422 100%, with Fuji RAW files exactly the behaviour described by him occurs:
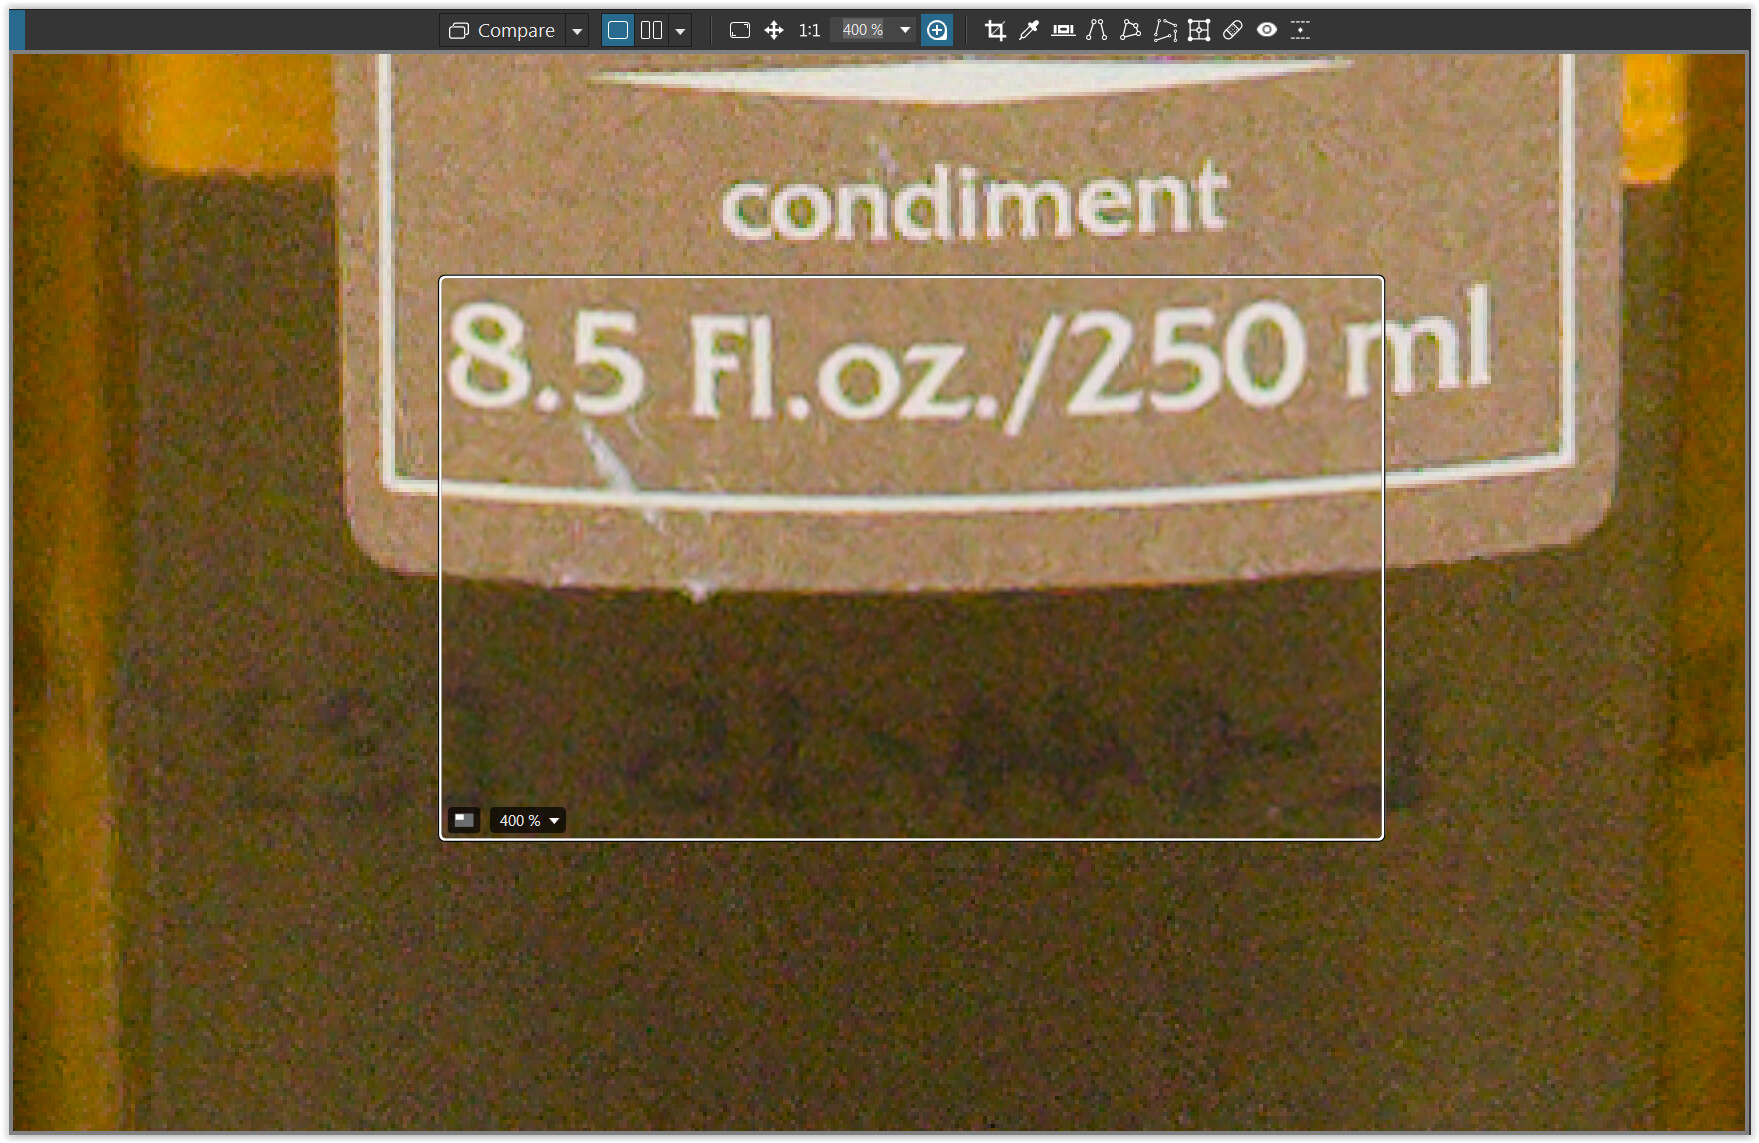
If DeepPrimeXD is added via a preset, the effect of DeepPrimeXD is displayed throughout the image from a zoom level of 75%. However, ‘High quality’ is selected in the settings for ‘DxO Denoising Technologies’. The magnifying glass shows the setting for ‘High quality’.
For me, this is a great feature and not a bug. That’s why I didn’t report it to DxO or mention it here in the forum. I wish the ticket would be deleted very quickly before DxO gets the bad idea to fix this ‘bug’.
It’s ‘great’ because by using different presets I can now see the effect of DeepPrimeXD in my Fuji RAWs in the complete image and not just in a small section that I have to select separately.
This is exactly the requirement that is always mentioned here in the forum: Full screen display of DeepPrimeXD (in this case only at 75% zoom level, but that’s already a big step forward).
I can live with the fact that the display in the settings is not correct when using a preset. Of course, it would be nice if I could change the settings under ‘DxO Denoising Technologies’ and the full-screen display would remain: but that’s not the case, at that moment it’s only possible via the magnifying glass or by using a preset with special settings for DeepPrimeXD.
As already written: my hope is that this supposed misbehaviour will be maintained and thus become a long-awaited feature.
It was mentioned that there will be more refined denoising tools for Fuji X-Trans files. These will be implemented in Pure Raw and presumably then in PhotoLab — just wait and see.
note
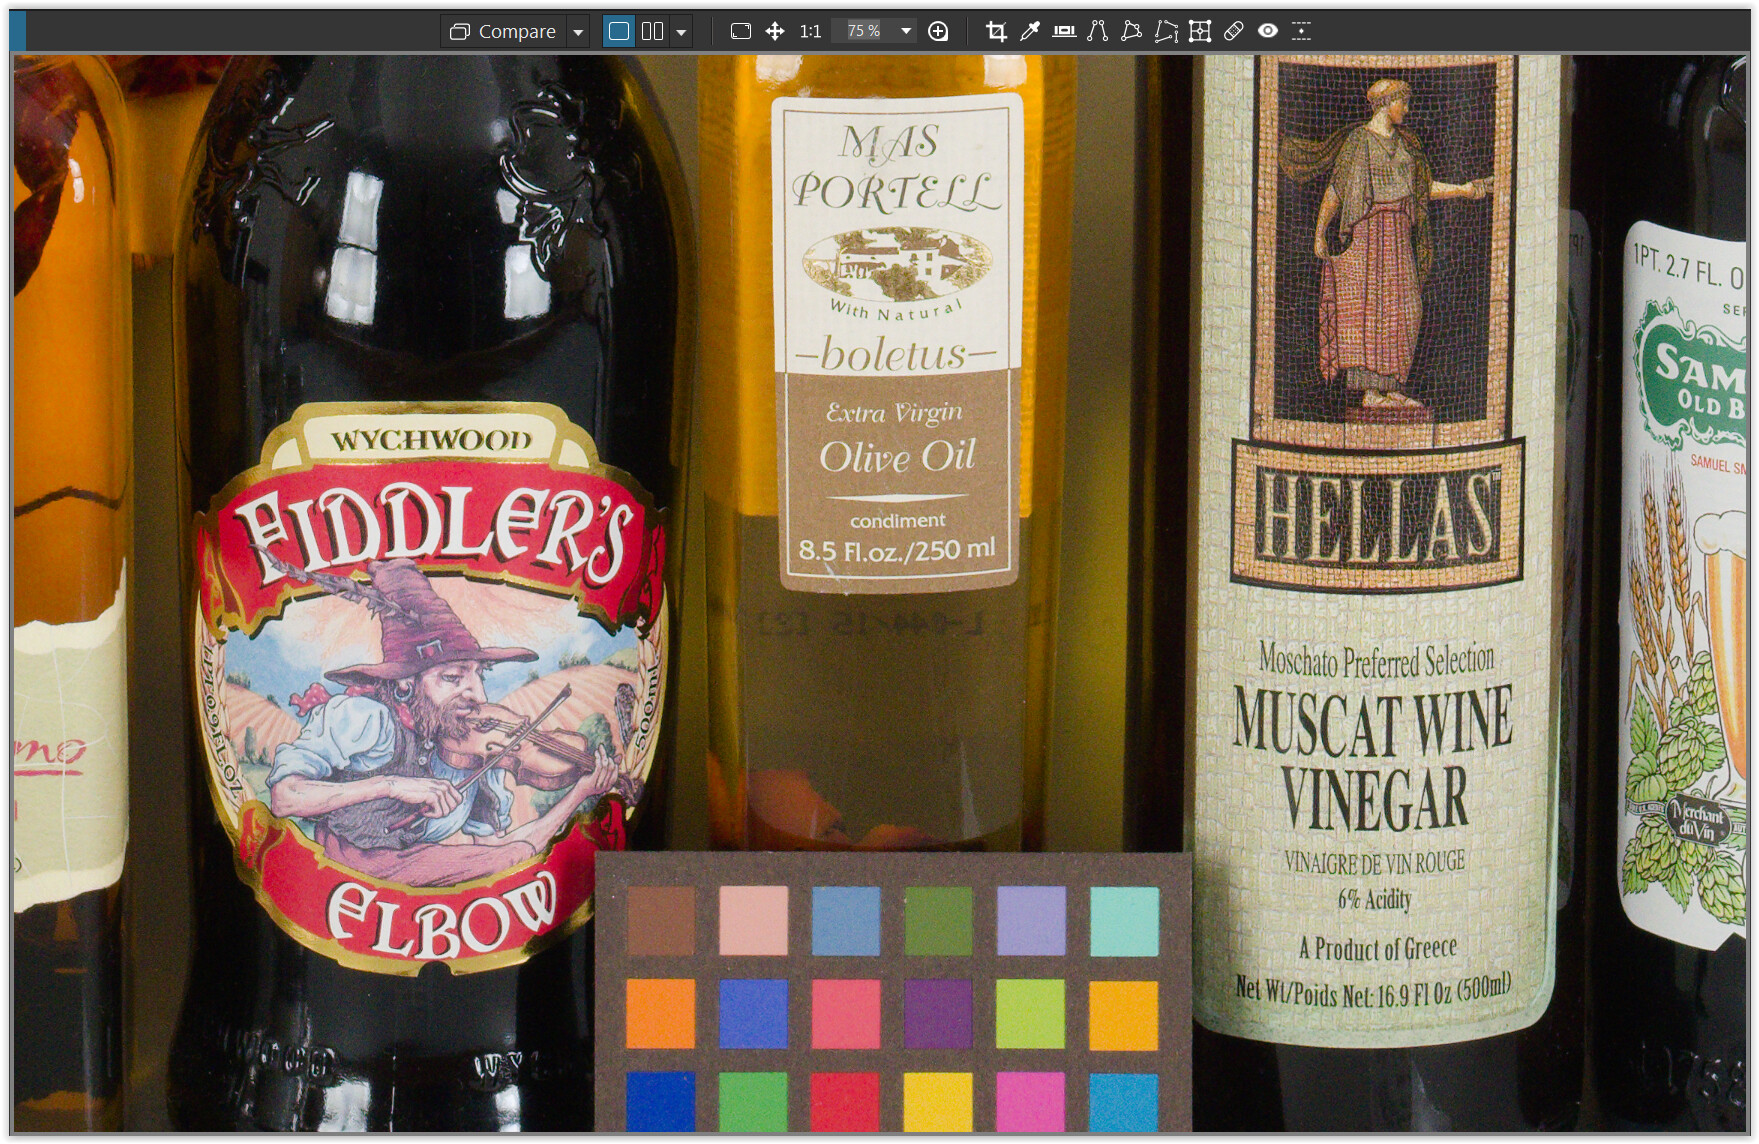
To see an image in the “correct” color (including the treatment of chromatic aberrations…), set the preview to at least 75%, but for noise reduction use the magnifying glass.
I see! Yeah, well it’s indeed a little bit annoying to use the magnifying glass all the time and the preview interestingly doesn’t even take that long to render, when applied to the whole image!
Now that I know how it works, I also hope they leave this, maybe only fix the checked option to show correctly.
It’s probably still good this post stays up for other people who realize this issue. For beginners like me, it is very intimidating.
IF you haven’t tried (are comfortable with) check out to the magnifying glass with Virtual Copies. However, depending on your hardware it can take a moment to see the “result”.
Of course it does not replace the check on the output, but allows to have a glance while experimenting with different settings.