@John-M, thanks for this example: op vs pl
going true the settings:
exposure compensation: -0.36 vs 0.00.
protect saturated colors 38 vs 30
about 150 vs 75 that maybe just a ruler number and not different.
Chandelier: coper disk: op is more darker yellow and the surrounding also, the coper arms are more separated/distinguished. Same to see lower left cornerstones bright spot in PL.
dark area behind the arces top and bottom: strainge that the chandelier is brighter (because of no exposure comp?) but those dark area’s are closed shadows and the centre dome is less detailed in lines and color.
natural light part in the dome : OP is more (darker?)blue-ish vs PL, same as the structure which way the beams radiate.
About the details can’t say, to low resolution.
But in general i agree with you, the new (PL) isn’t better. (can’t say if its more natural/realworld looking, in color temp and such i mean, wasn’t there.)
So it is fair to say the backwards compatibility isn’t 100%. ( maybe it isn’t possible?)
(DxO staff?)
i would be having a go, can you provide the raw file? (i don’t use it other then for this purpose.)
I did some testing to see if i grasp the tool and how i can use it. and the first results are promising. (it is some different of the NIKcollection v2 of the free ones. Nik vivenza2 is about color management in hue, saturation, contrast, brightnes, and dxo’s upoint does have more control, sharpening exposure and such. So it should be doing better because it is raw instead of tiff.)
About using Smart lighting along with other correction tools i popped that question here about which tool influence the other if i manual correct a image part (upoint) or hole (exposure, sliders of selective tone and contrast) That said, lots to learn before i can say yess ive gott it.
About blown colors/white bleached area’s ive bin searching for the perfect steps to follow without the use of upoint. This is what i came up with:
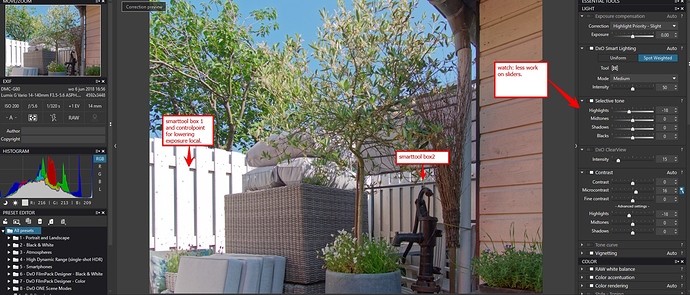
- SmartLighting Spotweighted mode slight on default.
- use box tool to mark bright and shadowspots of interest. (this would close the histogram more down/ away from black and full white) so i raise shadow and lower blown area’s.
- selective tone and contrast highlight equaly turn down to avoid gray-isch lost detail. same in shadow raising by turning up blacks/shadows. (if need to much (highnumbers) and the details suffer i turn on exposure compensation even it was advised not to. (“smart lighting behaves independently from exposure setting, and we advise using smart lighting only, as it already includes a mechanism aiming at using whole dynamic range. If you use exposure in center weighted average mode, it should adjust exposure so that the center of the picture is well exposed”. quote from benoit.
Some times i need to push the low end(left side) down of the histogram towards “0” to avoid loss of brightparts. - now i can add one extra and that is controlpoints
BUT! how does Smartlighting react on controlpoints in the image? does it counter react and change the changed section in a controlpoint?
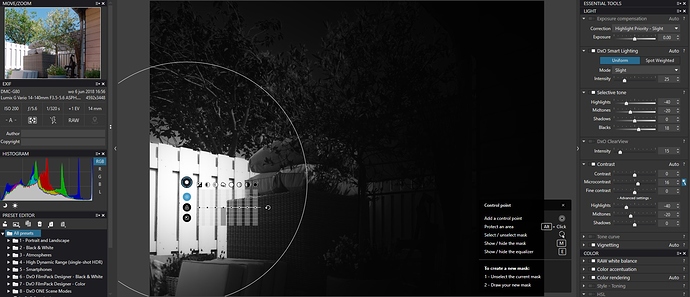
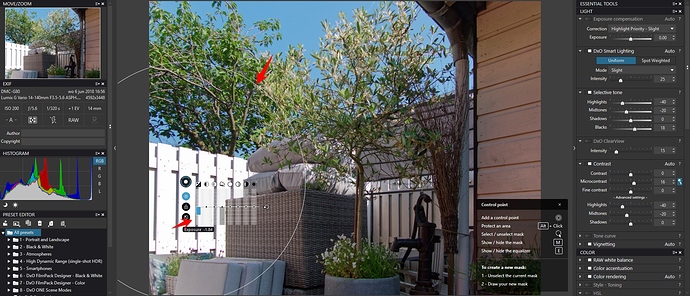
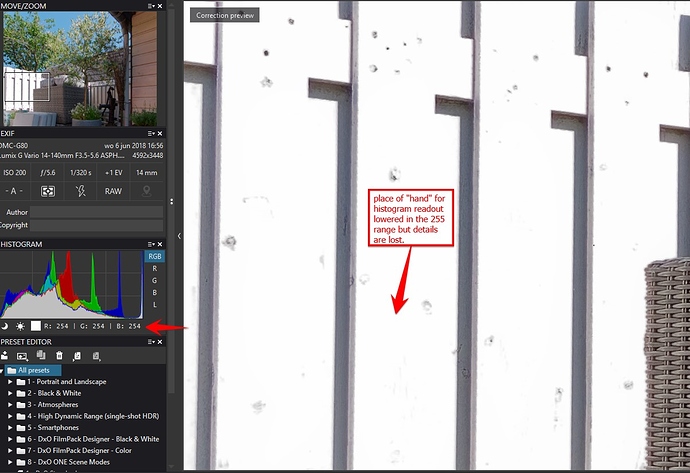
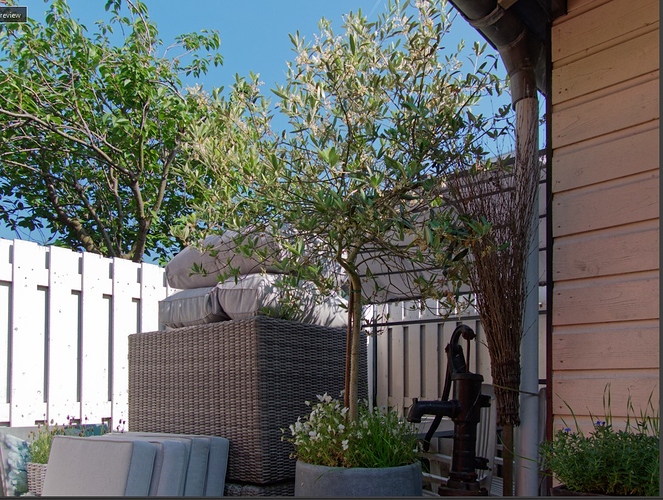
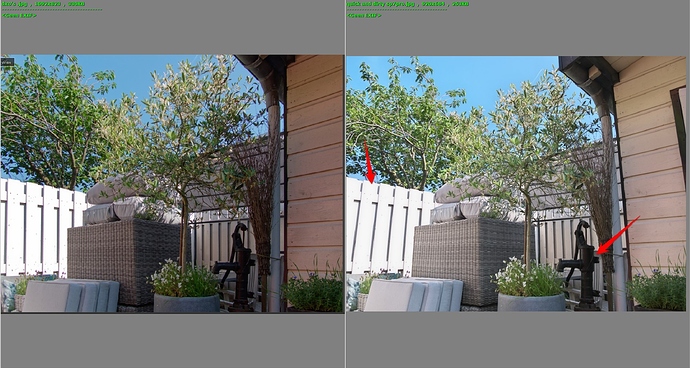
See a influence of a control point pinned on a bright spot:
This is on default only select the size of the circle.)
here i lowered by -1.84 exposure in that controlpoint.
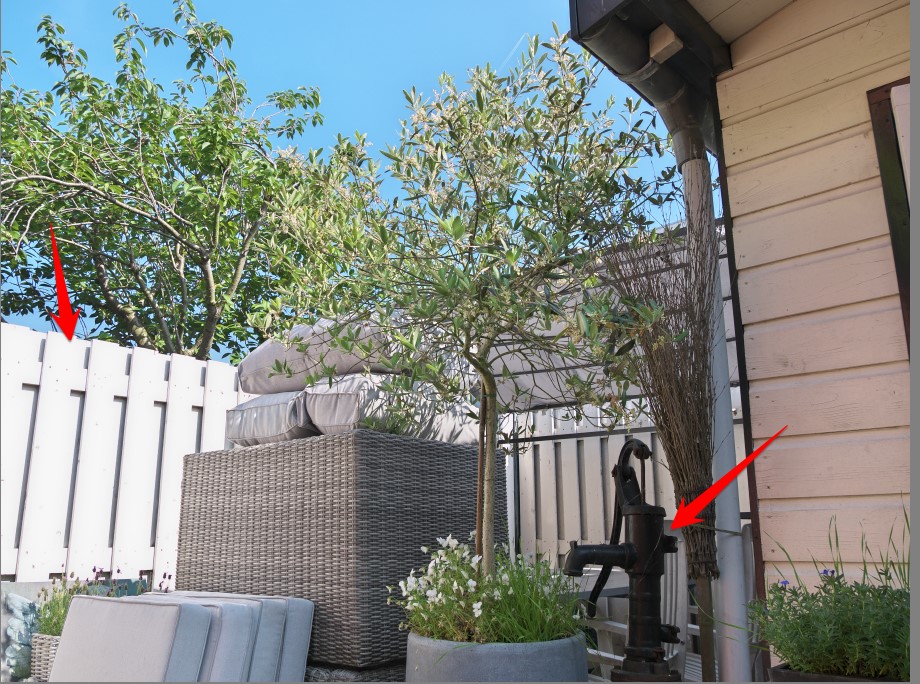
So i did a quick and dirty in SP7pro, no local adjustment. only exposure things.
to see even better:
What i did in SP7pro:
- dodge/color burn 100%
- highlight controler:
chroma- lumiance 100% to chroma.
Saturation-hue 100% to saturation
luminance restoration: 100% to the left (lowers brightpart of histogram)
dr expansion: 1.53EV to shift upper histogram inside the 0-255.
this was 1 minute work.
Last thing about color control:
The right part (shed) there is a orange sail/sheet reflecting on the white paint.
and much more visible in dxo’s version because of the fact it has a darker shedcolor and it goes redisch :
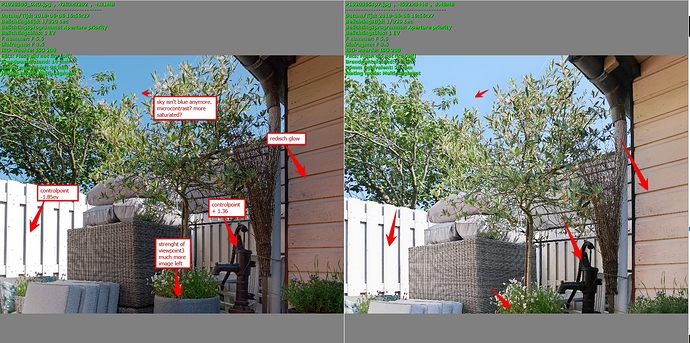
This is a full edit dxo vs sp7:
Sp7 wins on exposure control if i don’t use those local controlpoints in dxo.(smartlighting boxes and controlpoint)
DxO wins on details lenssharpening (i didn’t manual adjusted sp7pro so maybe i could gain something there.) and dxo wins on viewpoint correction image prevation.(more image left)
Overal PL does have the upperhand but as far as there Smartlighting stuff? in uniform mode it loses.
last attemped started from scratch (just quick perspective isn’t 100%) did wonders in the exposurecontrol:
So yes use the boxes of smartlighting on the darkest part and brightest part to set your dynamic range.(this way i can turn the intensity-slider higher without losing natural look.) And use controlpoints after that to stretch even further if needed. After that fiddle with the selective tone and contrast and colorvibrancy to finish the imagelook.But this was all about overexposure correction in normal exposure.
underexposed and lifting should be working the same in choosing the boxes of interest.
But still i would like to give that church image a go in both apps. ![]()
