Photolab briefly shows a different image edit on opening to both the RAW AND my edit?

I’ve noticed something odd about the way Photolab behaves and wondered if I could have help with what’s happening?

  1. This is the RAW of the image I’m working with (viewed by holding down “No corrections (with geometry)”. It’s understandably lacking in any editing:

  1. However this edit of the image flashes briefly when I click into it (it disappears shortly after and is replaced by the correction settings I’ve added, seen in the third and final picture.

  1. Here’s the final image that displays when I click into it, showing my own correction settings applied.

My question is how the second image (the middle of the three I’ve posted here) is generated. Where’s it pulling that information from? My best guess is it’s a generated JPEG from the RAW image but what’s generating that?

Is it possible to get that image as a starting point, since it’s quite bright and pleasing for my purposes here?

Without standing over your shoulder to see what you actually did, I can only assume that what you were seeing was the internal JPG preview in your raw file. And no, It is not possible to use the JPEG preview as a starting point. Proprietary software from Canon and Nikon, (DPP and NX Studio, respectively) allows you to begin your raw editing with the in-camera JPEG settings applied. Third party software like PhotoLab and Lightroom does that have the ability to do that.

Mark

1 Like

Hi Mark, thanks for the speedy reply.

I honestly didn’t “do” much besides screenshot what first briefly displays (picture 2), what the unedited raw looks like (picture 1) and what my edit looks like (picture 3).

Is there a reason we can’t ‘have’ the internal JPG previews as a starting point? For batch editing ~270 shots it’d be a real time saver. It can display the image, so I’m assuming the settings applied are in there somewhere in order to generate what’s shown…

For atarters the internal preview is not a high resolution image, it’s just a preview. Secondly, this jpg preview does not contain raw data which means that things like white balance and DxO DeepPRIME and XD can’t be applied to it. If you want to use your camera’s internal JPEG settings as a starting point, you should either use camera specific proprietary software to do that or shoot raw and JPEG in your camera and edit the JPEGs in your editor of choice.

In camera JPEGs are basically the result of your camera applying user settings for sharpness, contrast, color tone, etc to raw files. Third party raw software does the same thing only you’re driving the specific edits for each image instead of the camera applying a standard set of edits for every image. How you want to proceed is your choice.

Mark

2 Likes

You can have JPEG preview as a starting point, or at least close to it, but I would not recommend it.

JPEG preview is already processed raw data and saved as JPEG inside the camera, according to the propitiatory settings that camera brand has decided to use. Since DXO to my knowlage does not read JPEG preview but RAW data its going to display its own rendering which is neither wrong or correct, its just a starting point. However you can do few things if you really wanted to.

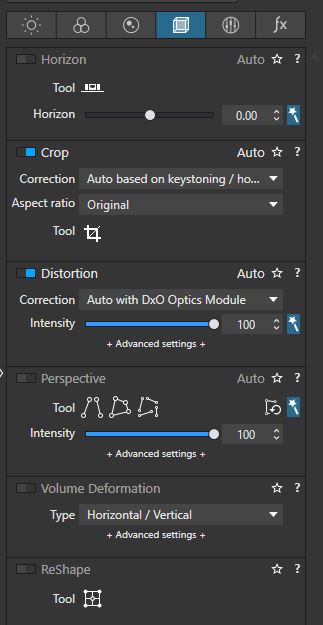
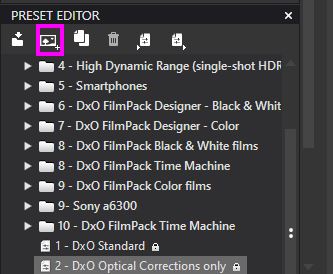
If you choose a preset that comes with DXO called “DXO optical corrections only” in the preset panel. It will give you base rendering with only optical corrections applied. Basically it will turn off color rendering.

sshot-3319

If you wanted to match the JPEG preview exactly as it is in camera you will need to import DCP profile

"Camera Profiles define how a raw image is rendered by image processing software. Specifically, they contain a definition of exactly what the color of a particular pixel should be, relative to the raw data in the original image. Previous generations are Adobe’s image processing software (Photoshop/Camera Raw and Lightroom), had camera profiles for a wide variety of camera embedded within them. The latest generation of this software however has separated out theses profiles into DNG Camera Profiles. Although called DNG Camera Profiles, actually they apply to any raw file that an Adobe product loads.

DNG Camera Profiles in effect provide a recipe for getting from raw data in a file to real colors on a screen or printer. Note: this is based on my interpretation of the DNG 1.2 specification. Your interpretation and/or mileage may vary.

In very simplified form, what they contain is: The ColorMatrix tables, The HueSatDeltas tables and other data. "

Source: DCP FIles

These are recorded as either ICC or DCP profiles. You can make your own or use already made profiles, since DXO PhotoLab allows you to import them and render your image using this profile.

ICC - These are matrix profiles, tailored only to daylight, not so good in incandescent light. This is the old kind of profile.

DCP - These are the new types of profiles.

  • DCP single-illuminant - These are tailored only to daylight.
  • DCP dual-illuminant - These are tailored both to daylight and to incandescent light, so they perform great in most lighting situations.

Adobe Camera Raw and Lightroom are likley to ship with DCP profiles that match the rendering of most cameras and look like JPEG that comes out of camera. All you have to do is use the correct DCP profile in DXO and the color rendering should match JPEG out of camera. Specific camera and color profile chosen in the camera.

Here is how to do it.

First you will need to have either Adobe Camera RAW that comes with Photoshop or Bridge already installed, or you will need Lightroom installed. If you don’t have any of these and you don’t want to buy them, there is DNG converter that is free to download and it contains the profiles we need.

"The Adobe DNG Converter enables you to easily convert camera-specific raw files from supported cameras to a more universal DNG raw file. Another benefit of using the DNG Converter is backward compatibility. … For conceptual information about raw files and the DNG format, and to understand why you should convert your files to DNG, see the Appendix. "

What we need is only the DCP profiles that will be installed along with the DNG converter. We don’t really need to convert RAW files into DNG.

Go here and download the DNG covnerter from Adobe website: Adobe Digital Negative Converter

Once you have installed it you will need to find the specific location where DCP profiles are installed on your hard drive.

How to Get LCP and DCP profiles

A large collection of LCP (Adobe Lens Correction Profiles - for correcting lens distortion, vignetting and chromatic aberration) and DCP (DNG Color Profiles - camera input color profiles) come bundled with Adobe DNG Converter.

This section explains how to install Adobe DNG Converter and where to find the DCP and LCP profiles.

Find LCP profiles for your camera under:

%ALLUSERSPROFILE%\Adobe\CameraRaw\LensProfiles\1.0"

Find standard DCP profiles under:

%ALLUSERSPROFILE%\Adobe\CameraRaw\CameraProfiles\Adobe Standard

Find camera 'style' DCP profiles (portrait, landscape, vivid, etc) under:

%ALLUSERSPROFILE%\Adobe\CameraRaw\CameraProfiles\Camera

Copy the relevant profiles to a different folder for easy access if you like or use them from location they are already in.

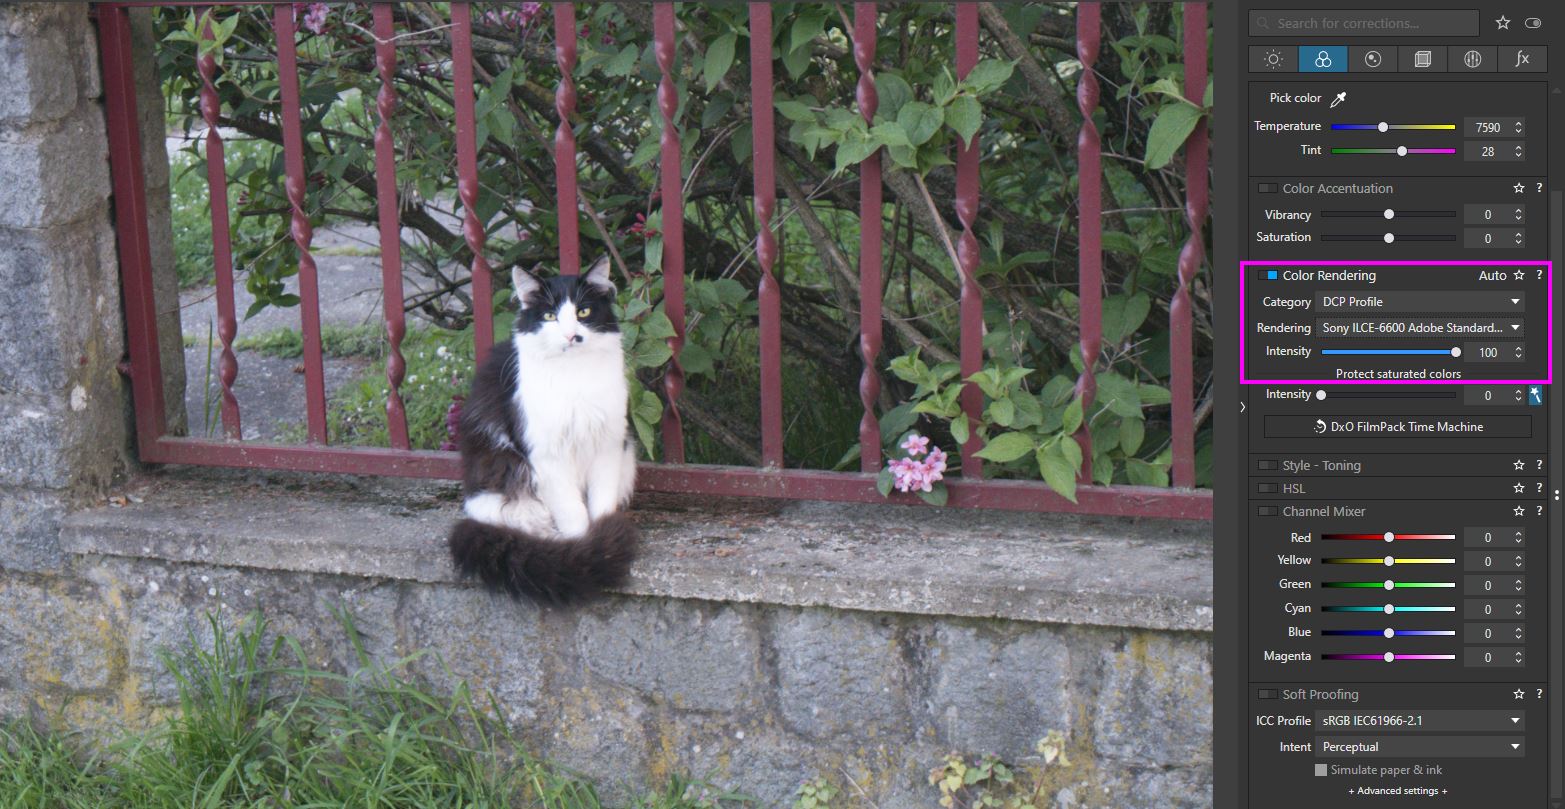
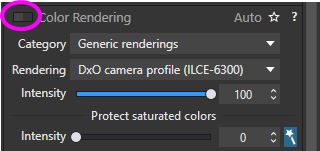
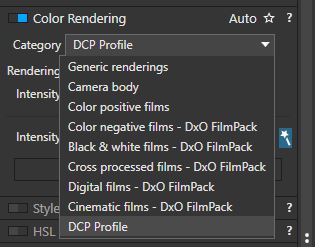
Next go to DXO PhotoLab and under “color rendering” panel choose DCP category.

sshot-3321

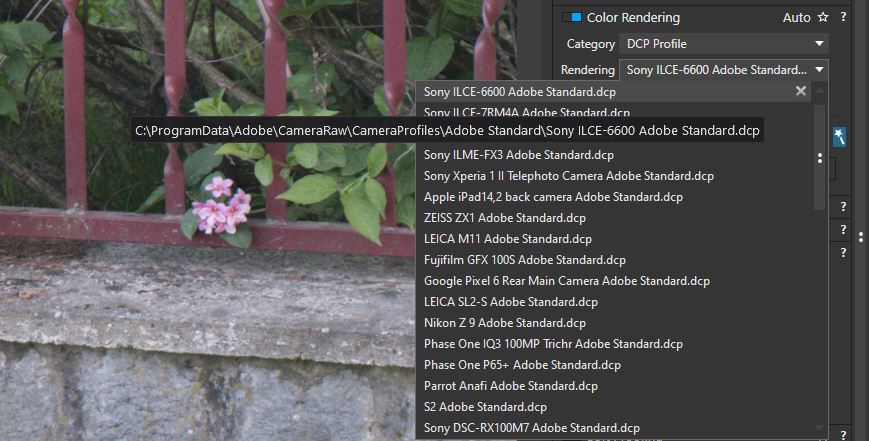
…and under “rendering” choose import DCP profile…

sshot-3323

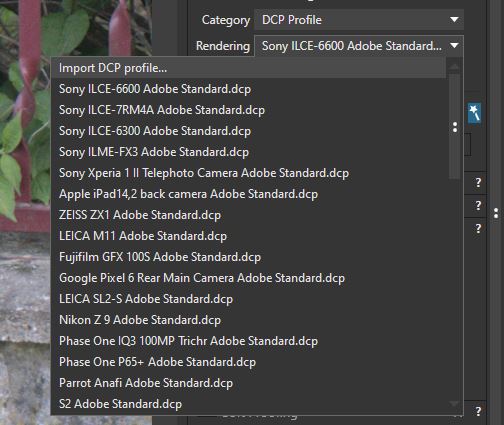
And find the profile that matches the camera and setting of your camera when you shoot.

Mine is this one.

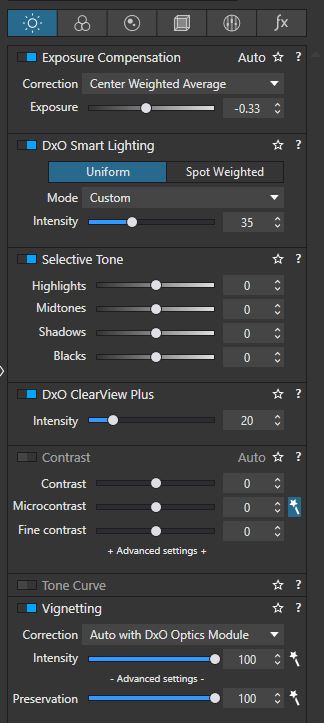
And than if you like you can set up DXO PhotoLab to apply this rendering to all images upon import and they should look like JPEG’s straight out of camera, plus or minus the other tonal corrections you choose.

Once you are satisfied. You will need to create a preset of your current settings. And save it as a preset.

sshot-3324

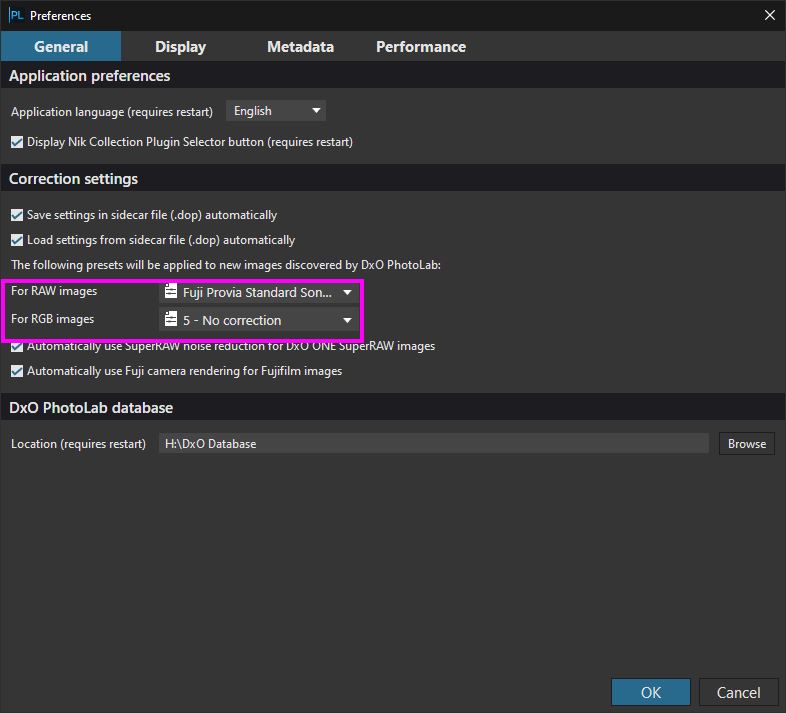
And if you want to to be applied on each import of images. Go to preferences and set it there.

And that is it. Now your camera JPEG rendering will match the one in DXO PhotoLab.

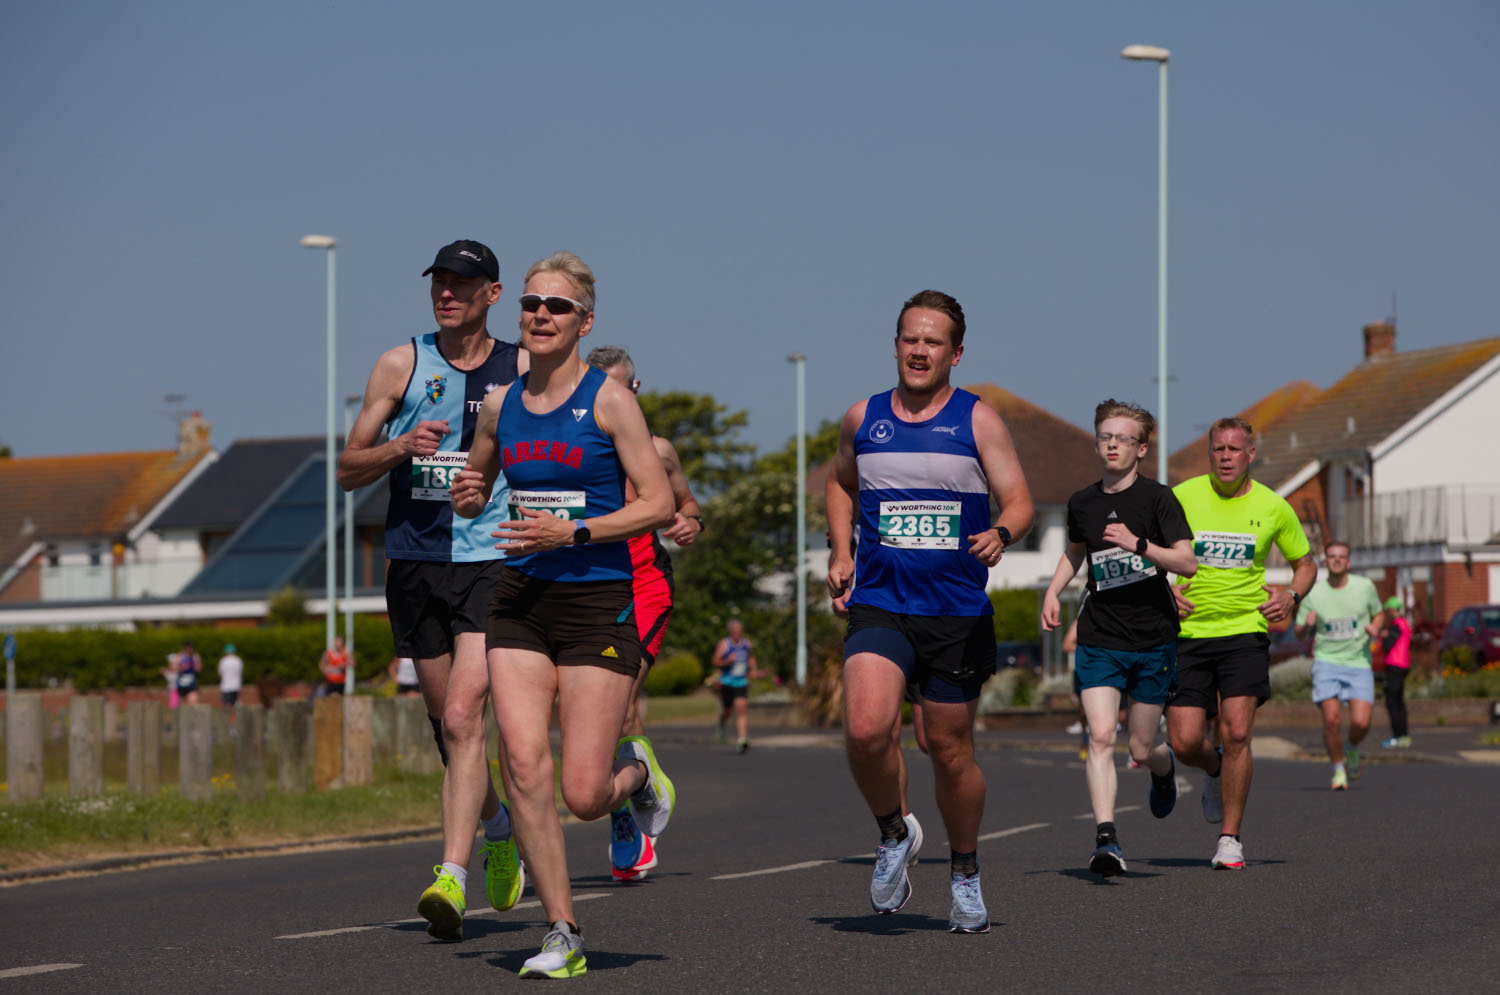
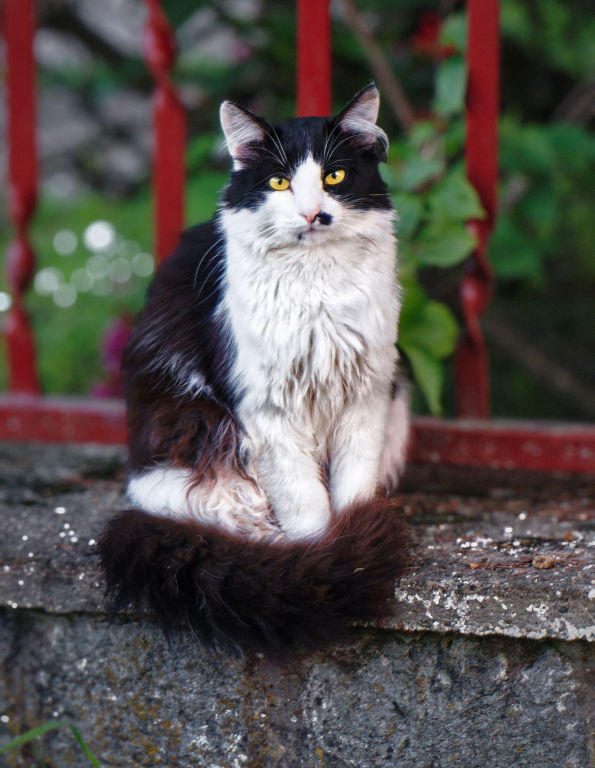
Here is out of camera embedded JPEG preview of the RAW file.

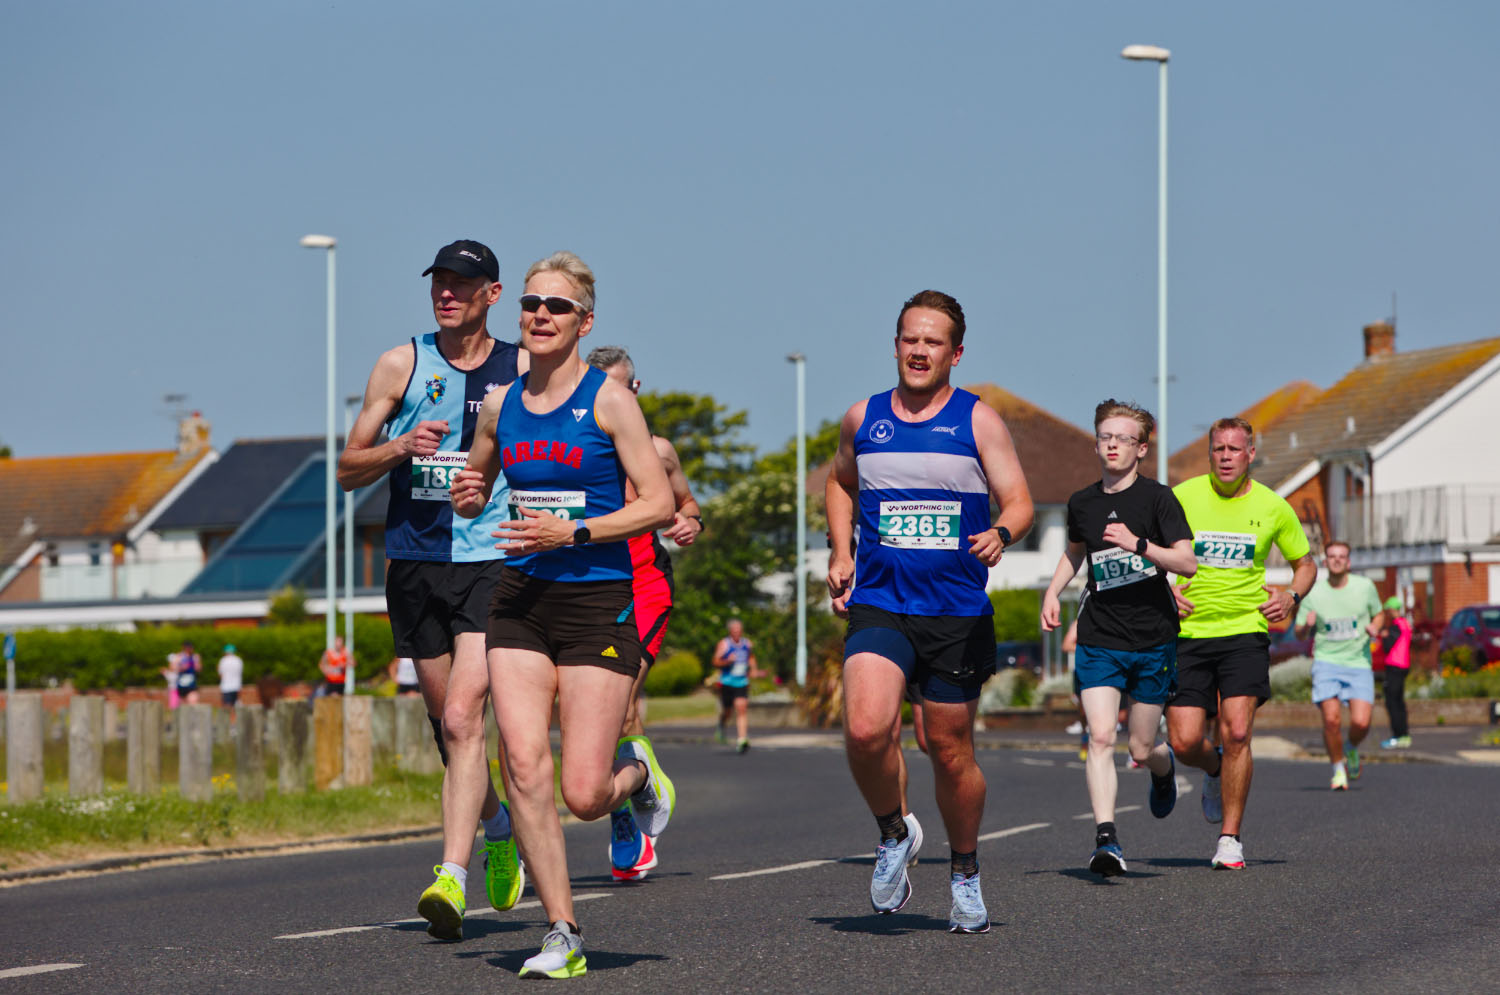
And here is with the DCP profile applied.

As you can see they look almost identical.

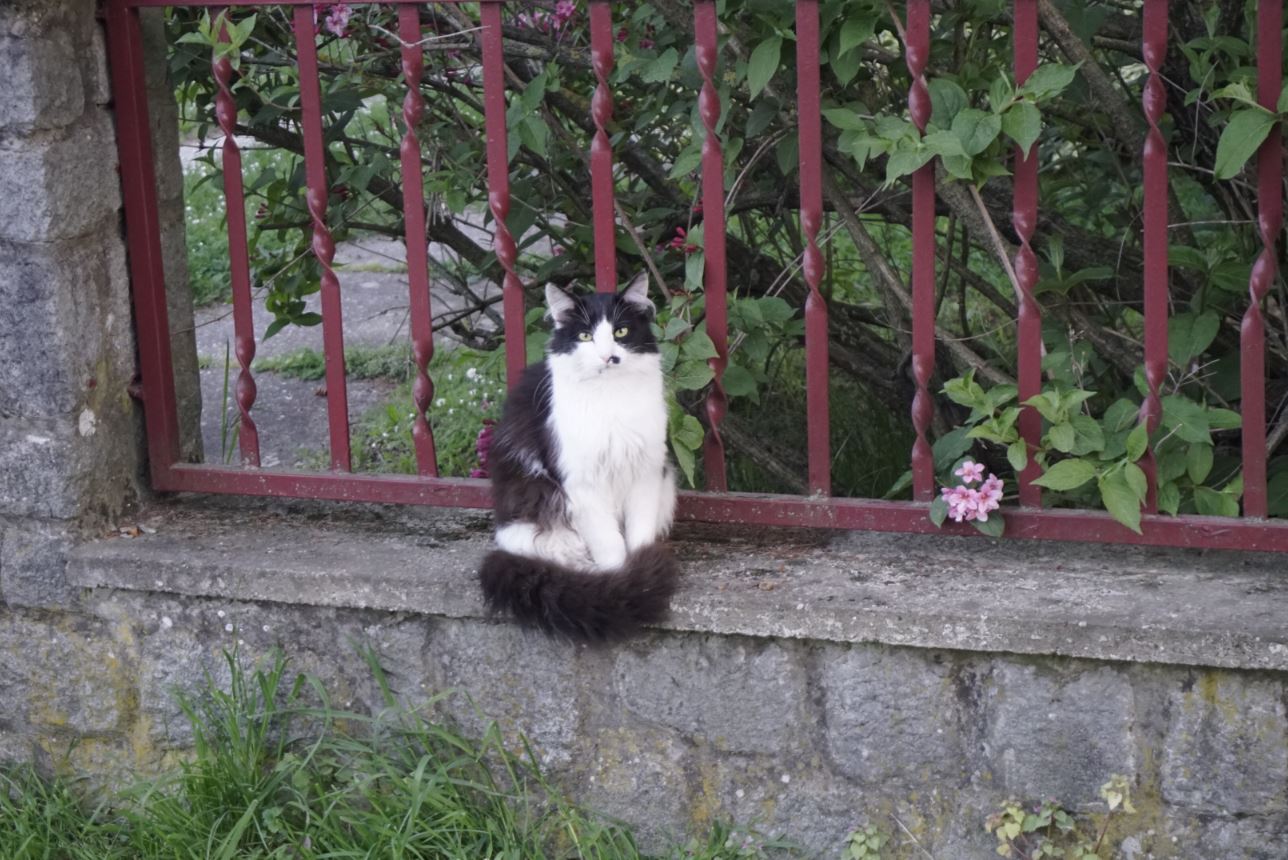
And here is final version of this image.

Personally I would not do all this, I would simply choose the best visually appealing settings among many color profiles and rendering versions offered by DXO. But if you wanted to match the JPEG look from the camera, this is how you would do it.

4 Likes

The image is generated based on preset that is applied when you import images. You can create custom look using any number of DXO settings you like and than create a preset from that. After it you can choose in DXO preferences to load that preset, meaning those settings you like, every time you import or open a new image.

sshot-3324

You can have many many different color rendering profiles and they can be used to get the good starting point for what your taste is. If you have one color rendering profile you like to use the most, simply make a preset and use preferences to set it up so it opens by default for all new images.

If you want to match the look of the JPEG than follow my mini tutorial I posted in my previous reply in this threat.

2 Likes

I’ve got this too.
A brief flash before getting photolab starting point image.
Even without correction applied as preset , this happens (happened ?).
I never succeeded to record it (too much brief). How did you do ?

I really don’t know what this is.
It is not jpg recorded in raw (only photolab is able to show those colors during this brief flash. I should be able to see it other way if recorded in raw).
It is not preset I have in camera to create jpg (I generally shot RAW + JPEG and it should look like the camera jpeg).
It is not no corrected image (I could get the same with a preset. And this is what I generally use as starting point).

Maybe a kind of first raw conversion before photolab full demosaicing and color management process applied ? Can’t figure out this.

I shoot nikon in case this is relevant.

Before wide gamut those colors where far more natural than what I could get with photolab with nature photography, and even when trying very hard I couldn’t get this in photolab (sometime close, sometime less, but never it).
Since wide gamut I didn’t take that much attention to it because starting point is way better now.

I’ll have to look at it again to see if I still would prefer this as starting point now wide gamut exists.

3 Likes

Hi again Mark, thanks for explaining - that does make sense.

I guess I was thinking “since it must take the RAW data to make the JPEG, in theory it’s possible to take the same settings to apply to the RAW as well.”

It’s not a big deal to not have access to that, but would’ve been a handy starting point! (I’d sooner not move over to another software just to do that).

Hi Milan,

Thanks so much for the detailed walkthrough! Happily I do have a copy of Lightroom from work, so was able to snag the DCP profiles from that.

I could only find the one folder of DCP profiles, no sign of whether they’re single-illuminant or dual? Any way to check or make sure I’m getting dual (as they sound… better)?

Having had a very brief play with this, I do agree it doesn’t look like I can apply them to every image and expect great results constantly. But it’s a useful alternate starting point.

I previously had Photolab set up to apply no corrections at all on import, in order to start with a blank canvas. I might re-assess this.

1 Like

Glad it’s not just me, JoPoV! :grin:

I recorded using nVidia’s printscreen function and some careful timing. The ‘pop up’ was slow enough for me to grab the JPEG preview and then I could grab the RAW and my own edits at my own pace.

I shoot 100% RAW so there simply is no secondary JPEG to draw info from. I assume the camera packages a JPEG preview within the RAW?

My shots are with Canon so I don’t think it’s brand-specific.

Like you I do use wide-gamut and that’s a great help, I think ultimately there’s a lot to play with here (colour profiles, edits applied on import etc.) and I’m trying to find a good starting point that isn’t aggressively altering exposure / tone on all images, because different images will have different settings and I’d wind up wasting time correcting super-overexposed or underexposed shots due to my import settings.

But the actual colour and ‘pop’ of the brief JPEG preview is pleasing and would make a good starting point, vs. the ‘flat’ RAW.

All RAW files contain a JPEG preview, so that you can see the image without having to de-mosaïc it every time.

This is down to any picture settings you have set in your camera’s menus. Personally, my camera is set to as flat as I can get it, so it is easier to judge what has really been captured in the RAW file when looking at the back of the camera, rather than having the camera manufacturer’s idea imposed on me.

No problem. Great.

I am not quite sure if they are single or dual illuminate, but I would not worry about it too much. If it looks good and works, no worries.

Well, here is what I do and I would recommend the same. I have created a custom preset of settings that are universal and provide a very good starting point on almost all cameras I’ve tried. They are easy to tweak if you need to be usually provide a very good, semi automatic, eye pleasing starting point.

Fuji Provia Standard - Center Weighted Average.preset (8.6 KB)
Fuji Provia Standard - custom.preset (8.7 KB)

I’ve uploaded the presets here, all you have to do is download them and save them somewhere on hard drive and import them from DXO PhotoLab.

I typically use the one I call Fuji Provia Standard - custom, which does everything I need to start working on a file and most of the time, I’ve 80% there. I typically use this preset where noise reduction, sharpness, optical corrections, smart lighting all that is ready to go, but I leave perspective and horizon corrections and that kind of things blank, because every image is different.

The second preset I made is the same as first one, with one added settings. Which is Fuji Provia Standard - Center Weighted Average . This will ensure you have good exposure even if you work with overexposed or underexposed images. Hence the setting for “Center Weighted Average” which is similar to how camera does exposure metering and uses exposure compensation. This is pretty much the same thing internally.

In case you have a trouble loading up the presets , here are screenshots so you can see what I use and you can replicate it manually if you like to.

P.S.

If you like the preset as good starting point for your images you can set up in Preferences to always load it up on import of the images.

Also this was made with APS-C sensor and older lenses in mind, so “details” slider in lens sharpness category is set to 65 instead of 50. If you find it too aggressive, just adjust it to your taste. With a larger sensor and sharp lenses, probably this could be 50 or lower value, since most of it done by the lens already. Other than that, it should work with most images and camera and its easy to tweak if you want to / need to.

Also I chose Fuji Provia standard for color rendering profile because I find it to be a nice life like but still vibrant in color rendition.

Cheers!

1 Like

You can download Canon Digital Photo Professional (Free). When you open your Raw files it will display them by default with your in camera settings applied. You can tweak the settings and apply to all or whichever photos you desire. At the very least you can save the original image that you briefly see in Photolab as a full resolution jpeg or tiff to compare when working in Photolab.

1 Like